Ain’t half bad!
Better get a free Latte for that fine work!
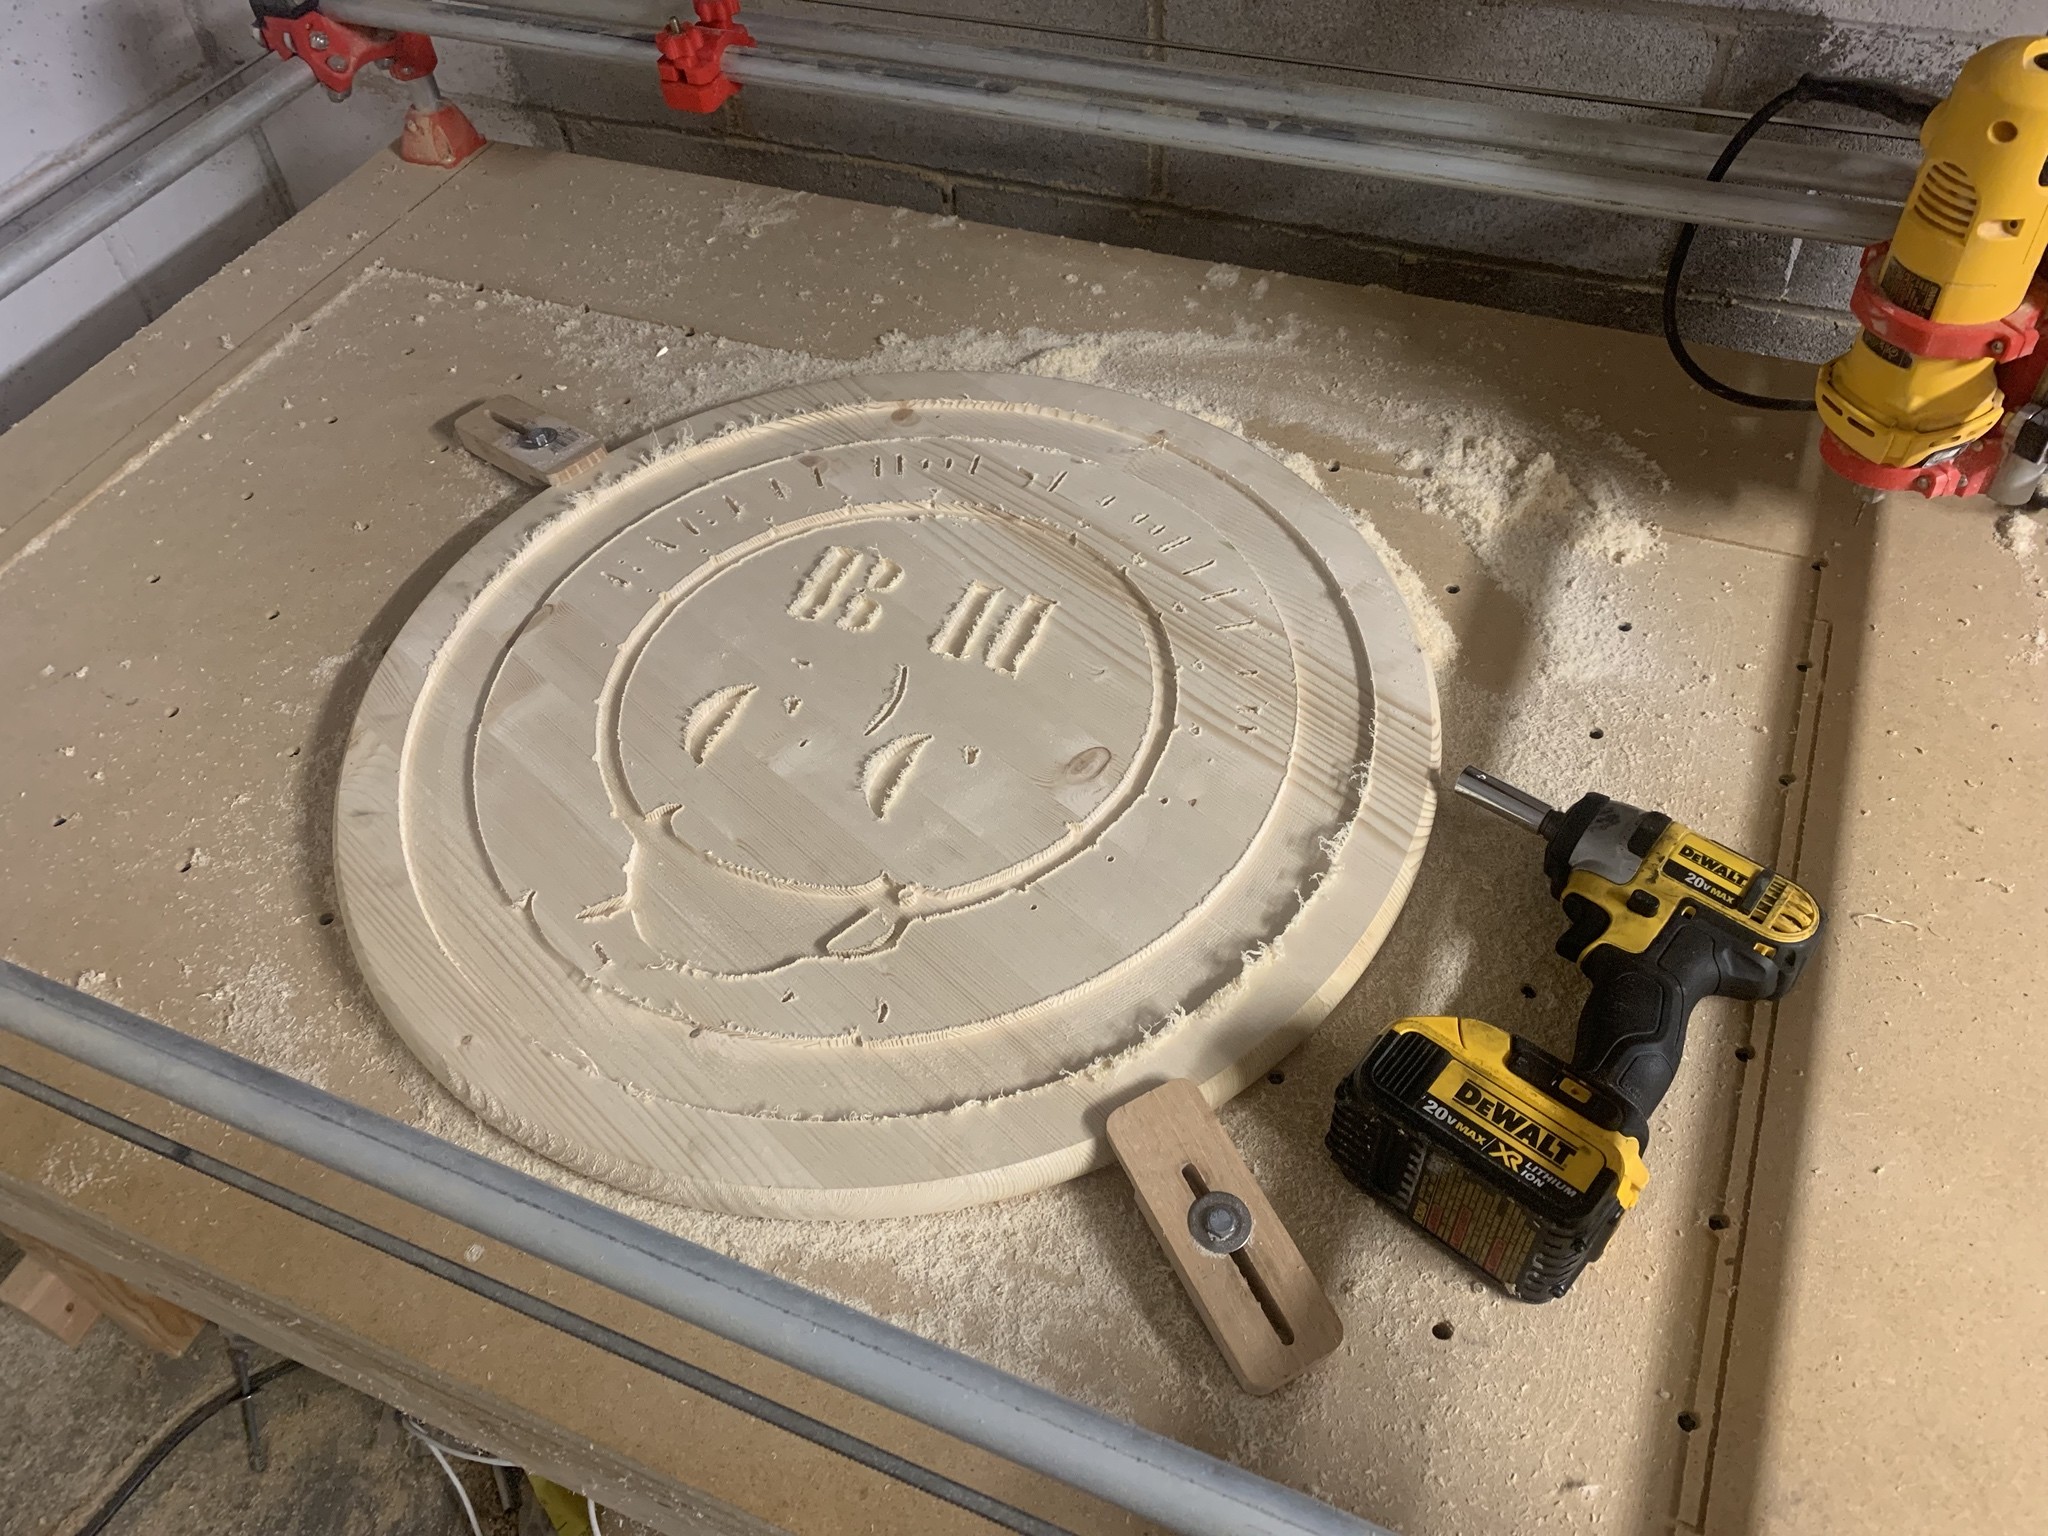
Will get resin filled later this week… Father’s day gift for my dad…
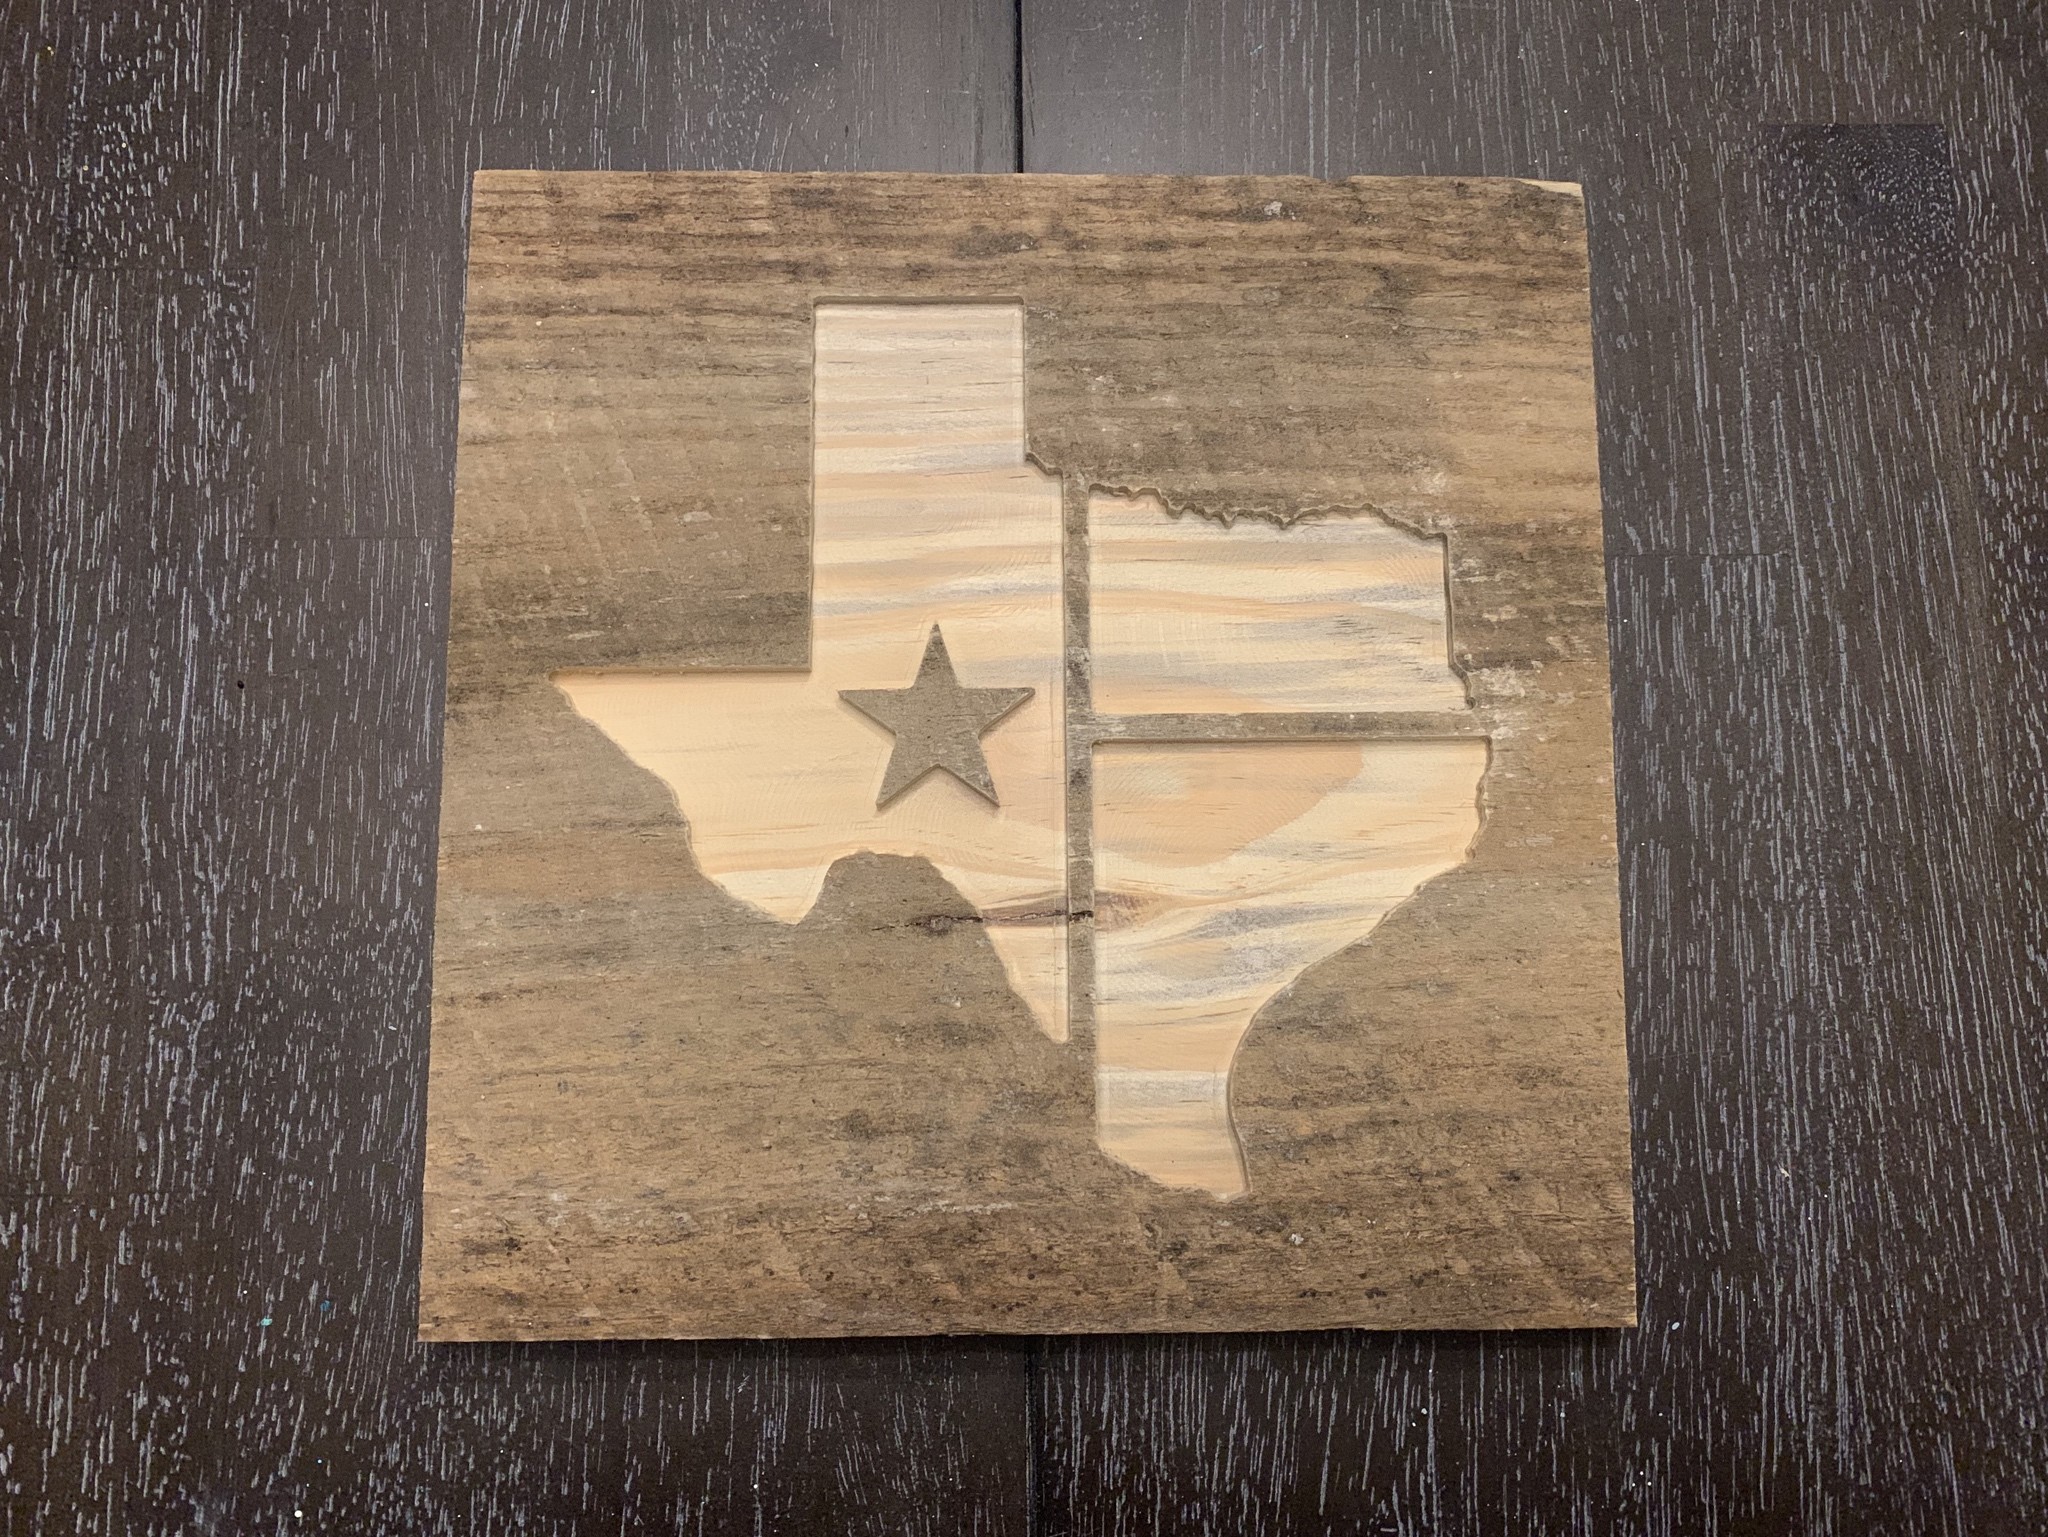
I know I’ve posted several things out of this same material, but it was cheaaap, 10" wide, and machines pretty nicely for pine. Minimal stringiness. Oh, and I think it looks quite nice too. 
When I run out of this stuff I’m not sure what I’ll move on to next… I want to make stuff that’s taller, more in the range of 18-24" tall, but I don’t want to use MDF or Plywood and I don’t have a jointer/planer so I don’t think I can make decent edge glued panels. Home Depot sells “project panels” that are made of edge joined boards but they are only pine as far as I know. Didn’t see anything like what I’m wanting at Rockler, mayhaps an actual wood store would have something.
Alternatively I found out one of my neighbors has a sawmill and has been running a little side-business so that could definitely be an awesome source of material.
The saw mill would be fun, but they would still need to be surfaced.
You can join boards with a jig on the table saw, or on the router table. I bought my planer and my joiner on craigslist. They needed new blades but were otherwise in good shape.
Also, ikea has countertops that might work for you.
I did think about those butcher block countertops but I wasn’t sure if they were solid wood or not! Good idea
i was figuring I could surface the slabs with a router sled and orbital sander. Though that’s definitely time consuming.
If only there was some sort of router that could move on it’s own.
Dude, we should invent that… automated routers… the future
Menards has butcher block. It's solid wood. Built a built in desk with some.
Bonus video…

Yeah, I’m playing with fire and resin on my dining table… what about it??
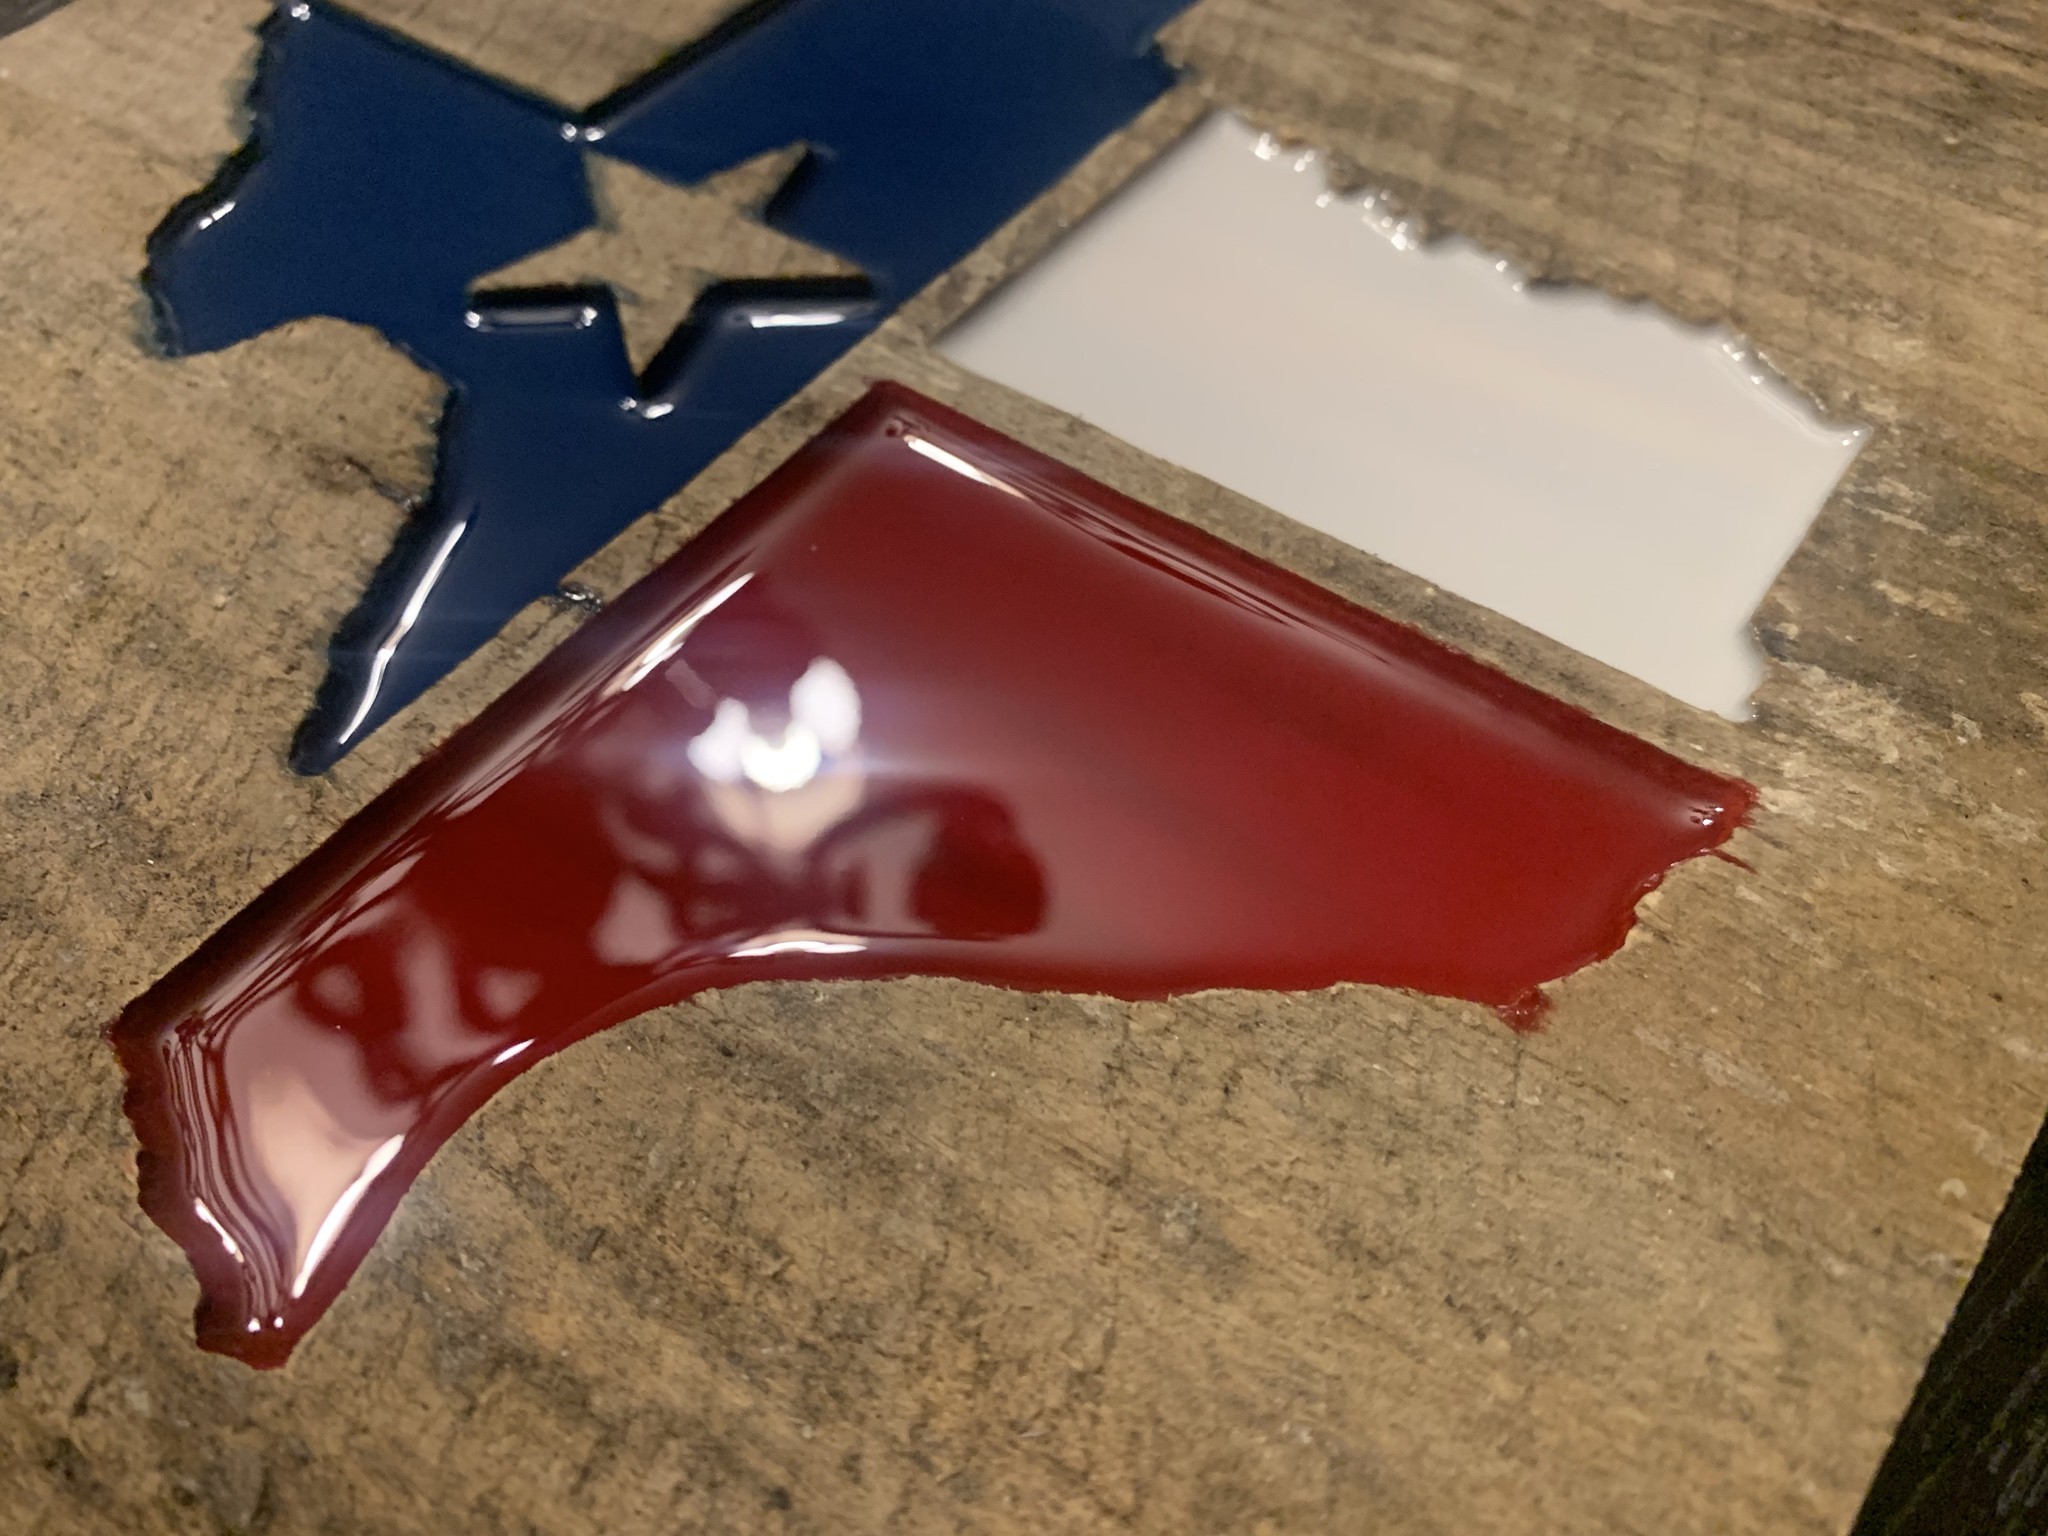
If you look long enough you’ll see imperfections. We can’t all be perfect ![]() I think next time I’ll pocket deeper, the resin just soaked into the wood around the edges and blurred the lines a bit. The mirror finish is nice though!
I think next time I’ll pocket deeper, the resin just soaked into the wood around the edges and blurred the lines a bit. The mirror finish is nice though!
For reference, these pockets were 0.2" deep and used a total of around 2.2oz of resin between the 3 of them. I think I could go to 0.3" or maybe even 0.4" and keep the resin dosing the same and any absorption of resin into the wood wouldn’t make it to the top surface. I guess I could also put some sort of sealant/polyurethane/clear coat on the wood before resin but I didn’t want to change the coloring or surface appearance of the wood at all.
I think you’re supposed to hit it with some clear poly first. Will look just fine on a wall though.
Yeah I think that is definitely the way to go. I did do the other sign without any poly though, I was just more careful (used syringes to put the resin in) about the level on that one. So it is possible if you’re not tired and rushing!
This poly I have (spray on satin finish) tends to bring out all the earthy yellow-y colors in this wood, which I don’t like compared to the more grey/neutral weathered look it has to begin with.
A lot of people also over-fill the epoxy then put it through a drum sander/planer to flatten it back out. I think I prefer the way I’ve done it because you retain the naturally glossy finish and the depth that comes with it.
Anyone ever tried machining through some sort of tape? With the v-carving stuff it would be great to have some sort of mask that could be machined through, paint the inside of the letters, then peel the tape up… But I assume the bit would just tear out the tape?
I bet you would have the same problem with epoxy wicking under the tape instead of (or in addition to) wicking into the wood grain.
I’ve seen a trick (never done it myself) where you hit with clear coat first so a little wicking under the mask is invisible. Then come in with color afterward and it won’t wick because all the gaps are already filled. I think that could work for you and you can keep the natural surface untouched after the tape is removed.
Isn’t that what they are for?..Eating is one of the things I do least on my table. I see a giant open clean sturdy table and just gravitate towards it.
Water based poly (polycrylic) doesn’t have the yellow tint, but it does have a bit of a plastic feel to it.
I have used Jamie’s trick with painters tape before on wall corners. You tape the edge, then cover with clear coat, then come over it with paint. The paint can’t get under the tape because of the clear, and the clear left on the wall gets covered by paint. There is sometimes some clear that gets under the tape, but not so obvious as the red.
The trick with carving through tape is you have to be able to cut it easier than peel it, or the bit will just pull it off. Think of those crappy veneers on plywood, tape is a much crappier veneer. Worth a try with a few different tapes and pressing the hell out of it first.
I’m considering upgrading to dual endstops so I can more easily run programs that require more than one tool.
But I figure if I’m going to upgrade I might as well upgrade to stainless while I’m at it… Which requires a full re-print of course…
In the mean time I guess I’ll play around with hard stops and see how much I mind them.
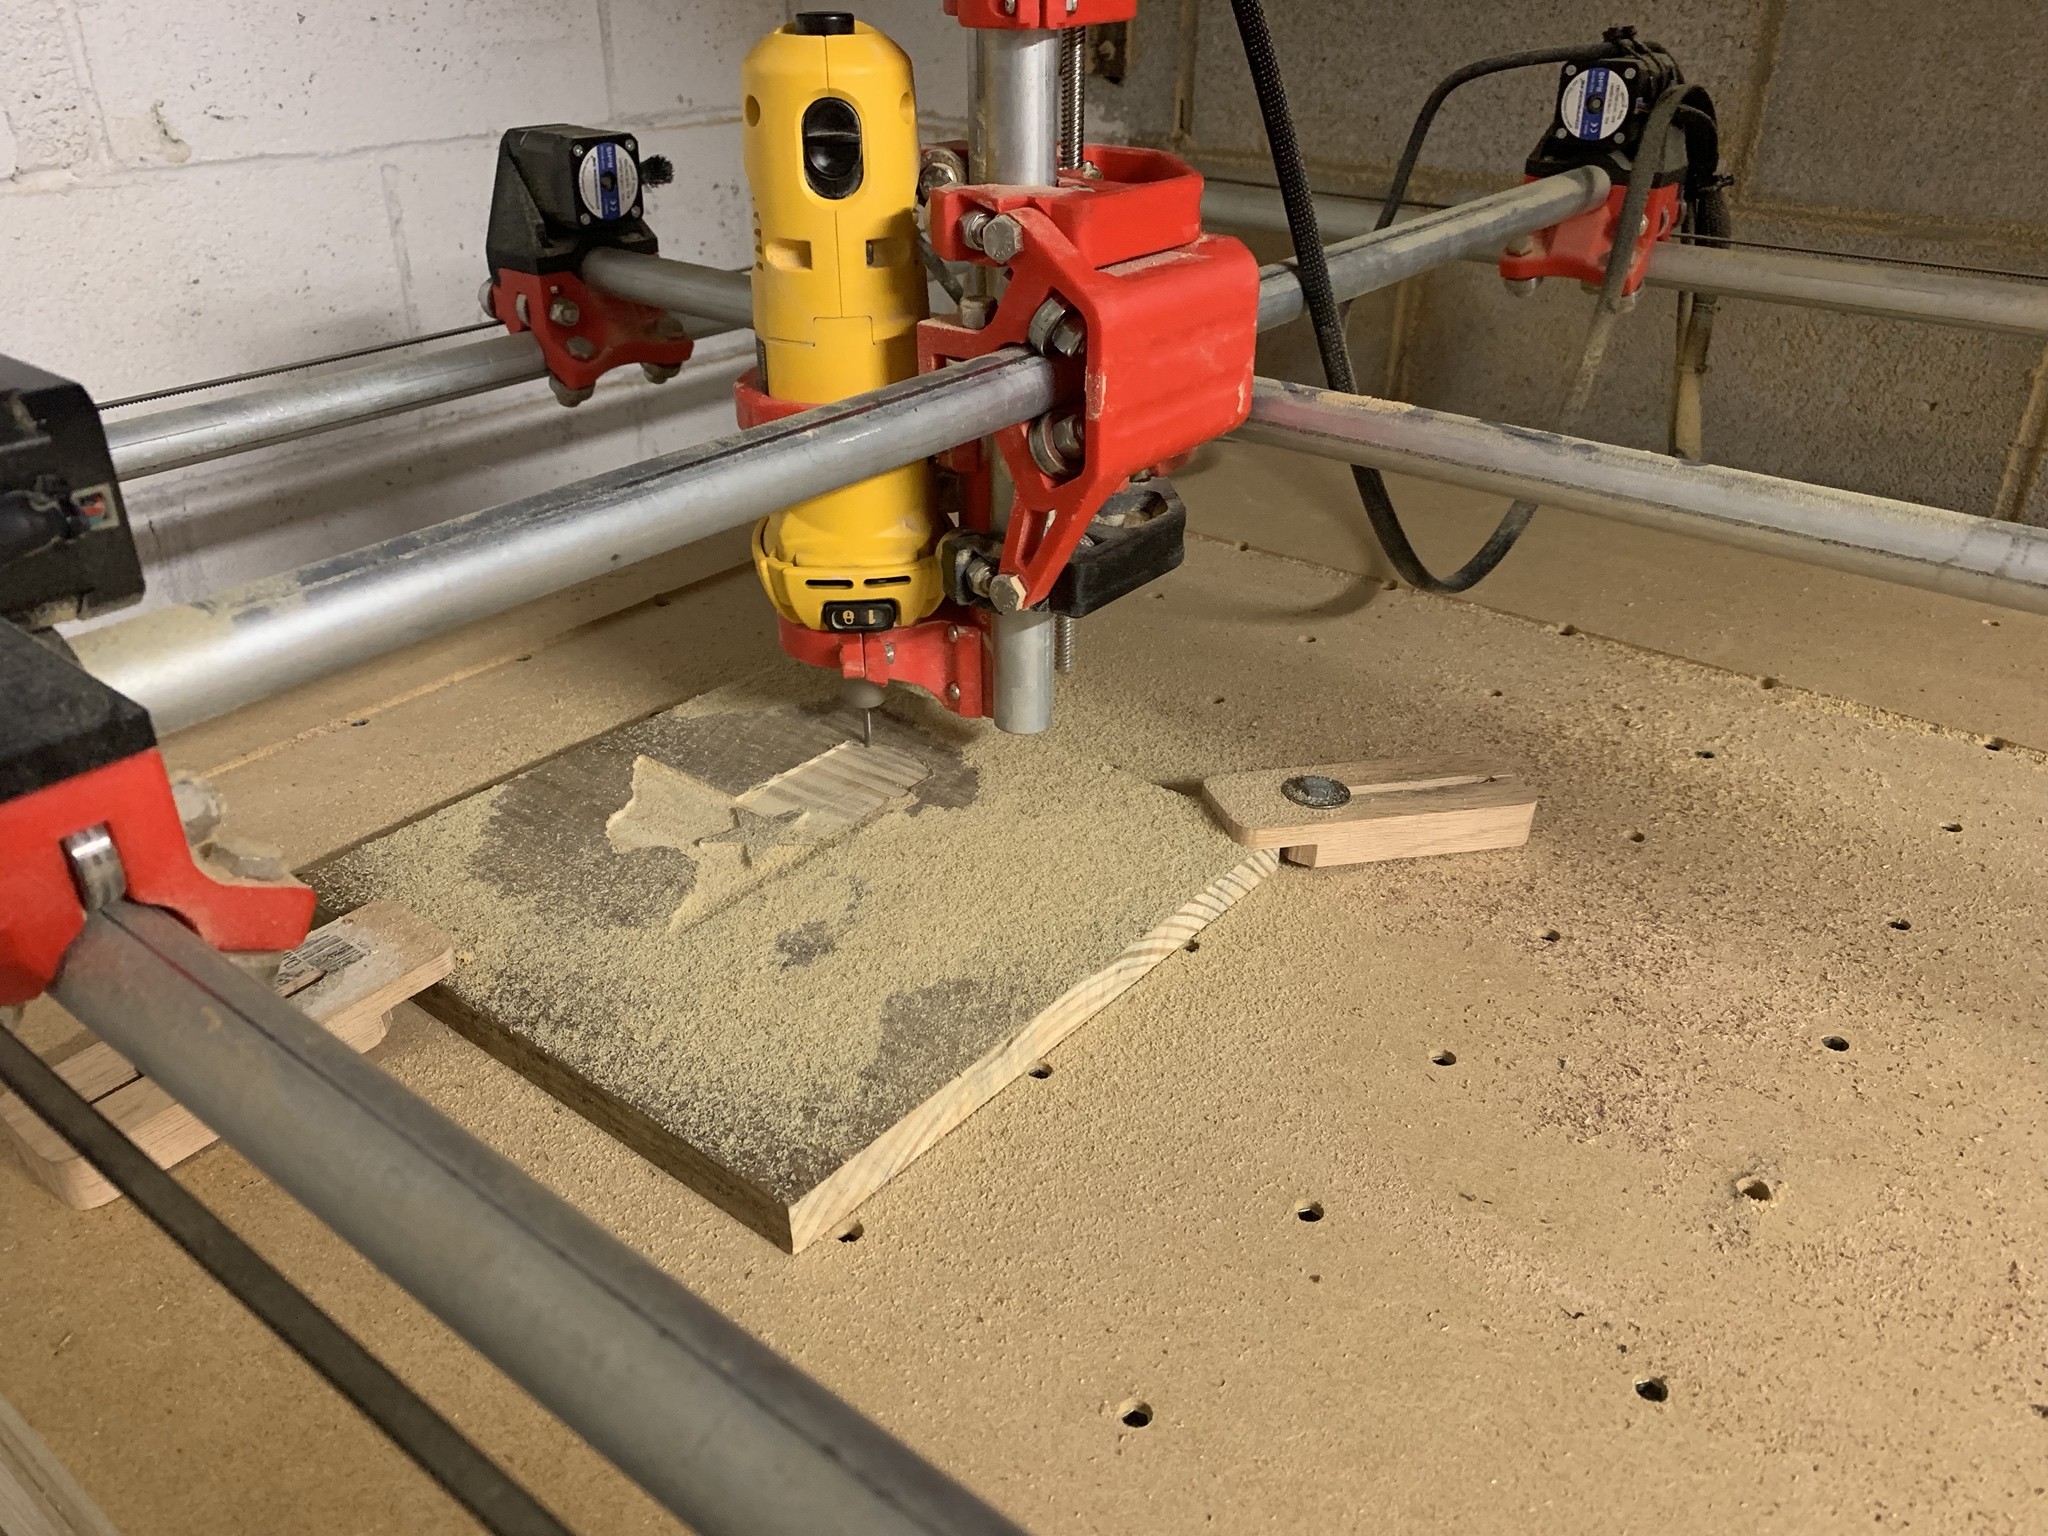
Semi un-related, I was going through old videos and found a couple of me running some stuff on the absolutely massive 5 axis router my school has…

In this video I was machining a mold for our carbon fiber seat. The mold is made up of a bunch of layers of 3/4" MDF stacked together and glued. The layers are cut 1 by 1 into 2d profiles, then after the glue up, it is machined to match the final shape.

I think that second video is running at something like 1000ipm?
Either way neither of the videos are anywhere close to stressing that machine… I always erred wayyyyy on the side of caution because I was terrified of crashing the behemoth. Work area 98"x61"x29"…
From my understanding it was an almost $400,000 machine new. 22k rpm spindle. 15hp spindle. 300FPM rapids. (Yes, it’s TERRIFYING when you home the machine and the table comes flying towards you at 3600 IPM)
Sorry, just showing off I guess ![]()
Officially the biggest piece (24" diameter) I’ve done yet… Stringy stringy pine 
Running the v bit tonight when I get home, wish me luck!
This is me testing hard stops. I’m still having jitter issues across multiple cam softwares (I thought maybe Fusion was outputting too many individual line segments/small arcs and overloading repetier host/minirambo so I’ve tried estlcam and Aspire). If I could solve that I would be so much happier. It seems to have minimal effect on the final part so I’ve basically given up…
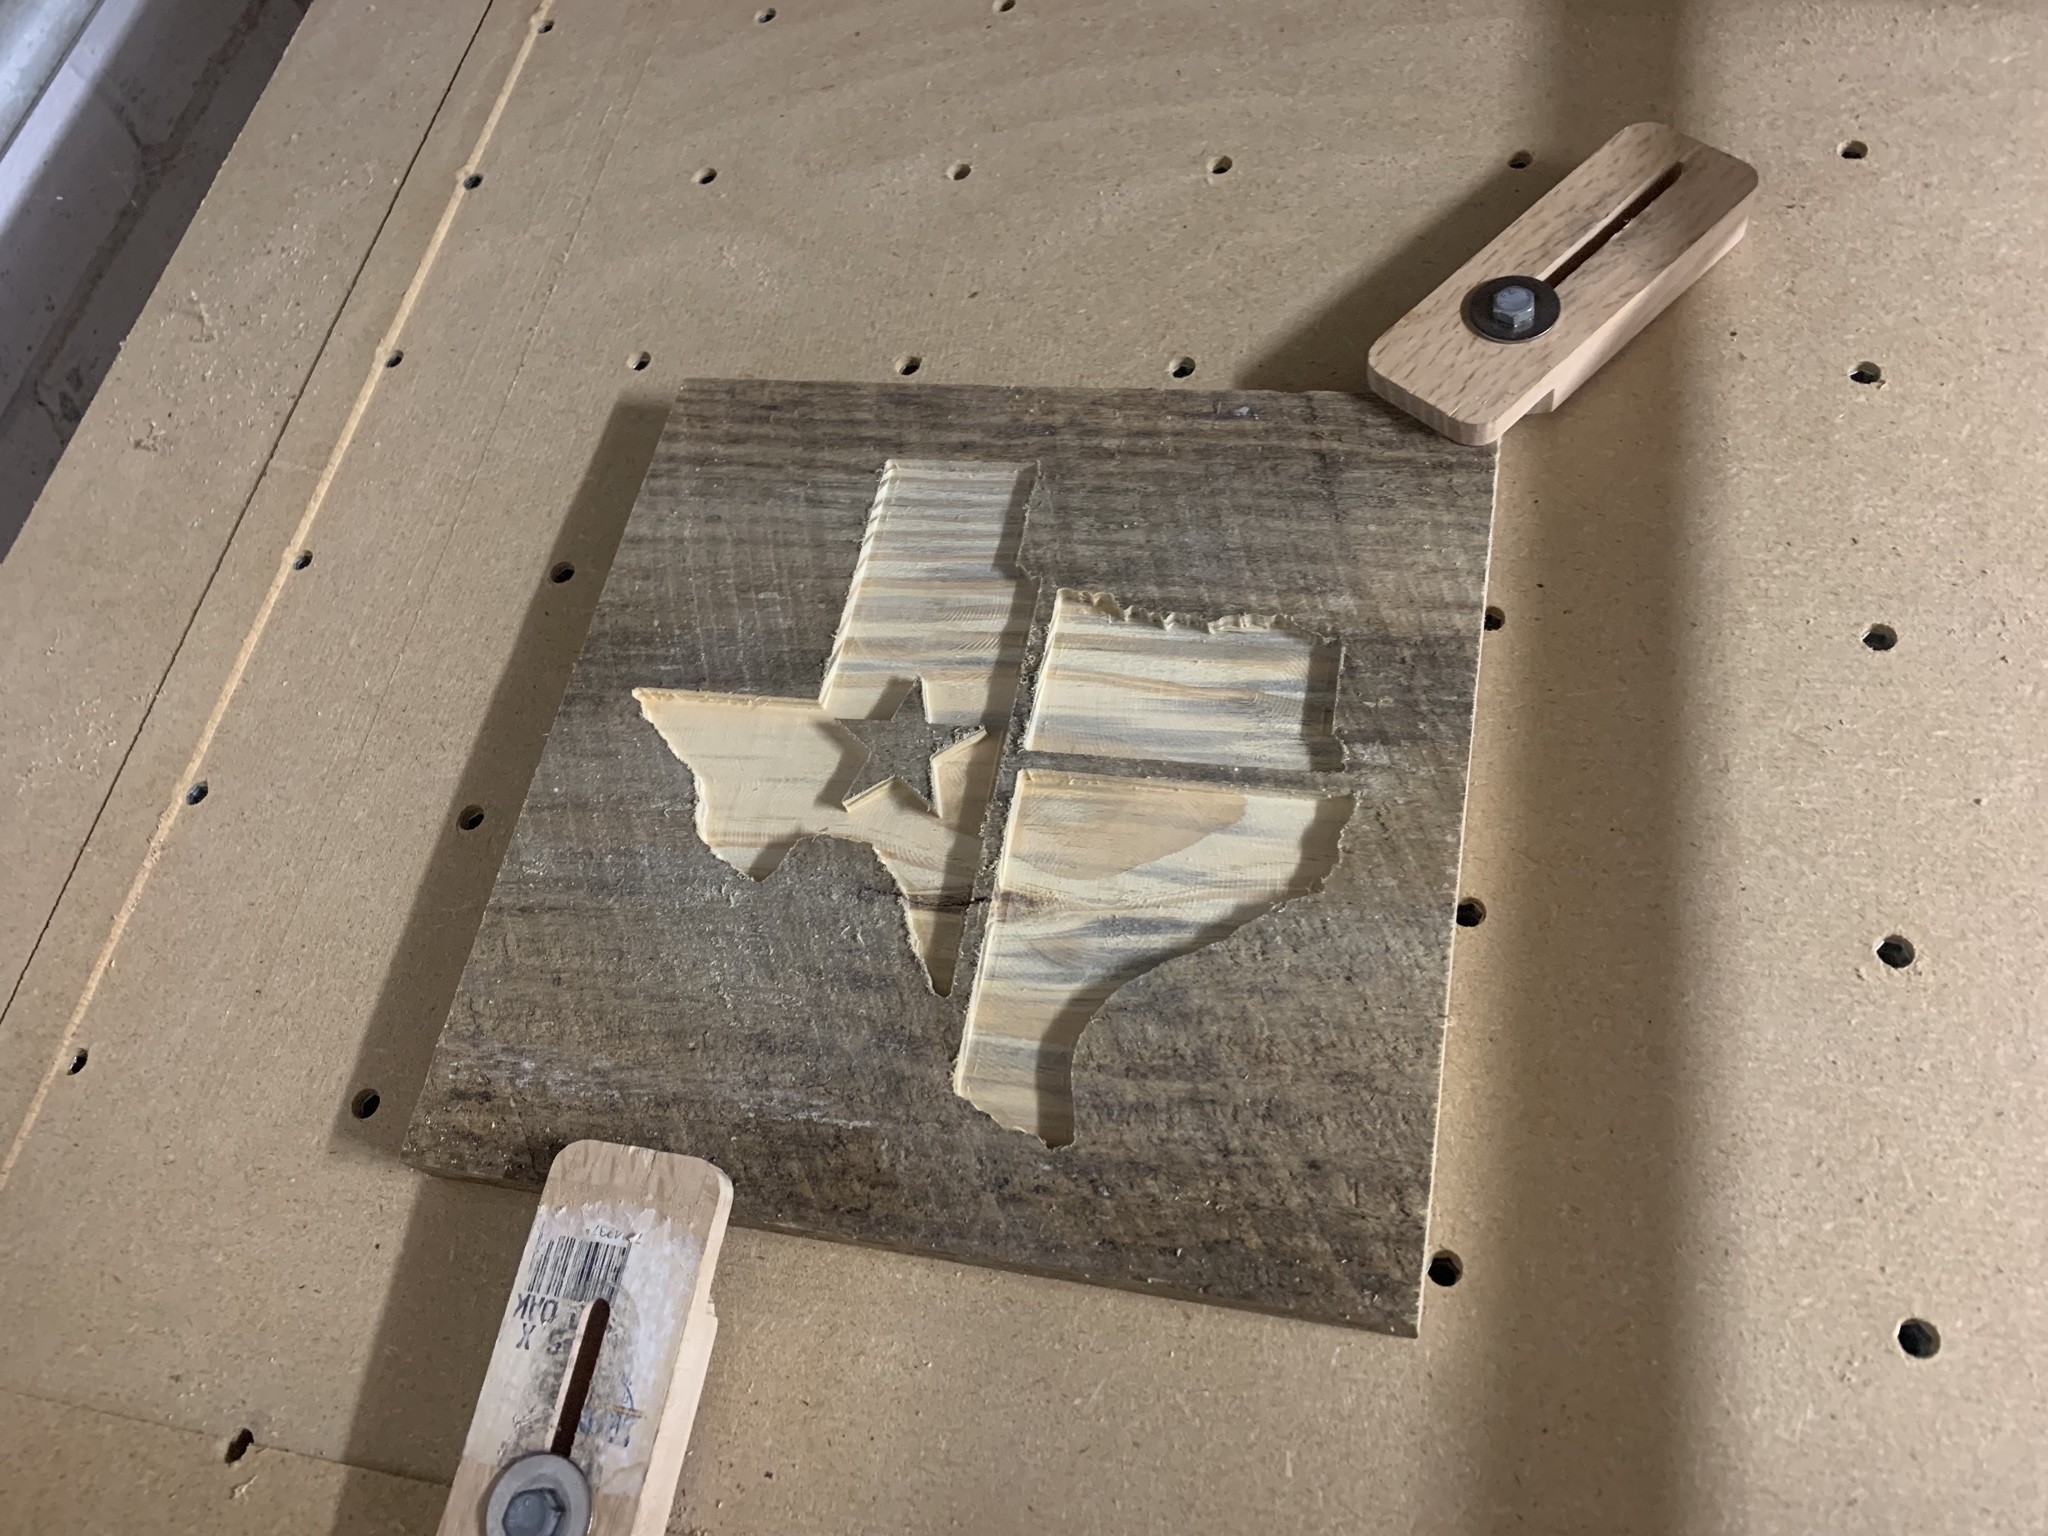
I am from Texas and the Texas piece is soo cool. Did you do the whole design with Vectric, or just the Cam part?
Also, can you please give more detail on the resin?
I work with vectors at work all day so I have a Coreldraw license as well. What I did was find a SVG of Texas, then added the lines dividing it into 3 parts, then saved the SVG, imported the SVG into Fusion 360, used it as the basis for my 3d model, then did the cam in Fusion.
I only ever use Vectric if I’m specifically v-carving. Fusion doesn’t do v-carving like Vectric does.
The resin was from Amazon–it’s casting resin, brand “Art 'N Glow”. I bought the 16 oz kit (which is pricey at $25 but I didn’t want to buy the entire gallon before I knew if I hated the process) and the Texas sign used around ~1.5oz total (so about $2.50, not cheap!) of resin. (12"x12" and the pockets are 0.2" deep)
I dyed the resin with Acrylic paint in this case–I bought some specific resin dyes from “Black Diamond” but the issue I have with those is the red is more pink than red… or at least it looks pink in the bag so I didn’t try it. You can dye resin with a lot of stuff safely, some things will mess with the curing and it’ll never fully cure–but acrylic paint is one of the safe options.
If you have any specific questions I’m happy to answer!
Had some minor misalignment between job 1 (pocketing) and job 2 (vcarving) which is a bummer, but thankfully it’s pine and I think I can fix the mistakes with a razor blade easily. Most likely I will just paint the inside of the letters, no resin. That said, if I can’t get the bottom looking good, I’m considering painting, then filling with resin just enough to hide the sins on the bottom of the pockets. Unfortunately I leave for Las Vegas Thursday and I have to design, cut, and finish a sign for my uncle before my flight so this bad boy isn’t getting any attention till after I get home…