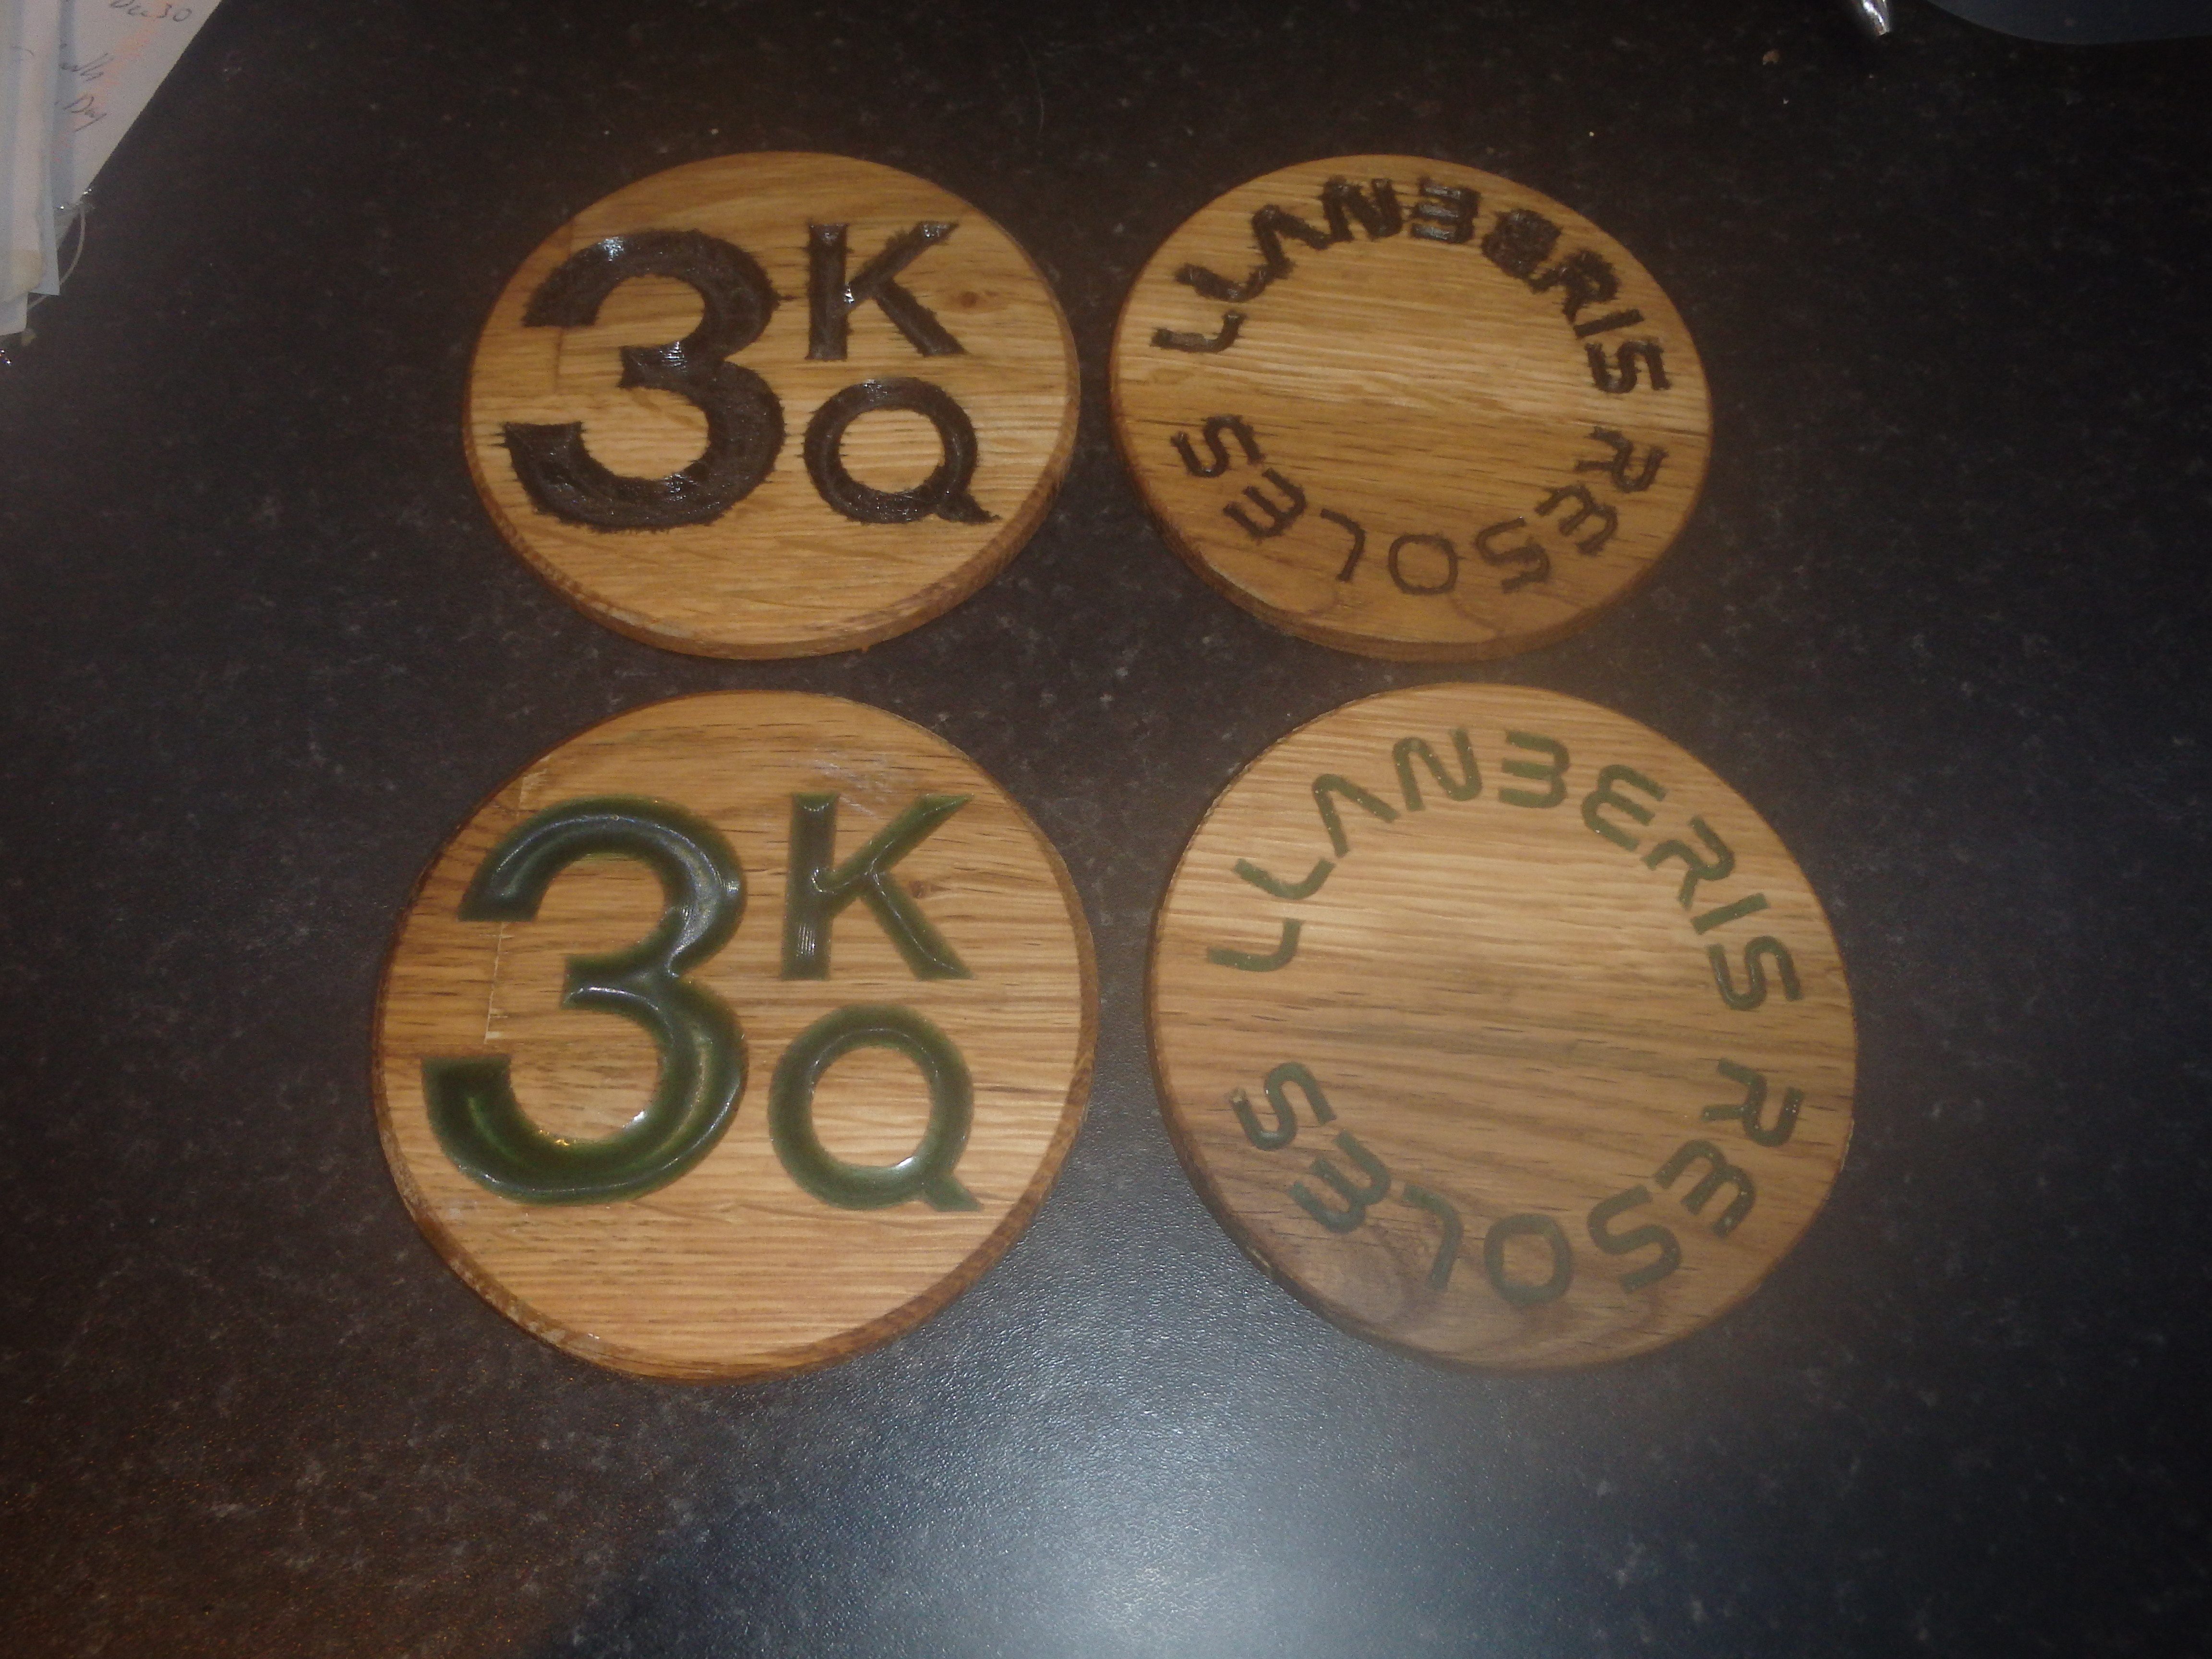
Here are some simple 100mm coasters, made from off-cuts of oak floor boards.
For the first ones I used a black acrylic paint pen to highlight the letters, sanded off the excess then oiled the whole thing. Unfortunately, despite a coat of varnish before the paint, and leaving it the black paint a couple of days to cure, the oil softened the paint and it bled
For the second attempt I used some Decorum epoxy resin pigments that my wife had given me for Christmas instead of paint. Learning from my first attempt, I brought the epoxy into the house to warm up, which made it more runny and allowed the bubbles to settle out. There are still a few little bubbles - is there any way (short of a vacuum chamber) to prevent them?
I also under-filled the larger letters slightly, so they didn’t get scratched when I sanded off the excess, but this didn’t work for the small letters (the grooves are only about 2mm across). Is there any way to keep the nice glossy, translucent finish? Or a way to get the epoxy in there that doesn’t require sanding afterwards?
Another thing I learned from last time was to engrave a circle around the outside of the coaster with the V-bit. I can then use this to as a guide to cut it out with a band saw, rather than risk a tool change.
Haven’t done the torch thing myself but seen several videos online. I think you’d get the technique down pretty quickly after scorching a practice piece or two. You might even be able to accomplish it with a hair dryer. The warmth both expands the air trapped in the bubble and lowers the viscosity of the “shell” of the bubble, so they seem to pop pretty quick and easy.
This site actually says that a torch is better (like @niget2002 & @ttraband suggest) since it gets hotter and is less likely to blow dust onto your workpiece.
It also compares other methods and gives some instructions on how to do it. Hopefully this gives you better results. Best of luck!
I’ve used a heat gun on all my epoxy pours, takes the bubbles out real nice. I’m sure a torch would work just as a good, but my dumb butt would scorch the wood ( I’m not very talented, hence the cnc lol)
As for the finish , u have two options. Don’t fill it all the way and have that cupped look, or fill and sand ( sanding u just need to go tinhiger grits and it will polish right up)
Just a suggestion, but I used a forsner bit to put 1/2" recesses in a scrap piece of wood. This allowed me to test a few mothods and colors before attempting my final piece.
I also learned to use thin ca or a very thin coat of epoxy to seal the wood before doing the final build. Otherwise it tend to get bubbles from air trapped in the grain of the wood.
I’ve honestly only done a few projects with resin,but I learned a lot in testing.
I use to use the headlight restoration kits from harbor freight to polish up the surface, but that was probably over kill. Next time I’m there (basically daily) I’ll grab a kit and see what results I can get using the least amount for ya.
i have played with epoxy a bit… surface bubbles r easy to deal with as described above… i had most my issues from using cheaper epoxies… ie. anything but a long set, deep cast. unless time is a major factor, always go with deep set, long cure epoxies. much more forgiving as u have lots of time to work. and also, u can truly pour things at .5-1 crystal clear without a vac chamber. the resin is much thinner and much longer cure time allows bubbles to surface before it sets.
Hey @RobinBennett, I was attempting something in the same vein (white background black text / epoxy) over on this thread, Woodworking finish order of operations question and @timonjkl and @thejat suggested laying down craft paper or shelf liner before carving and using a coat of shellac to seal up the wood to prevent staining. I just finished a project (towards the bottom of that thread) that turned out pretty good. Since my primo/shed is outdoors unheated, I would bring a 5 gallon bucket of hot water out there and soak the epoxy for about 15 minutes before mixing and pouring, I found that greatly helped the viscosity and helped with slow stirring to minimize the air mixed in kept the air bubbles down.