I think I’m finally “done” (for the week maybe?) with my Primo build. I started with a 20" x 20" build back in January but really quickly started hitting the limits of that size. So I opted to expand to 36 “x 36” and rebuild the entire thing.
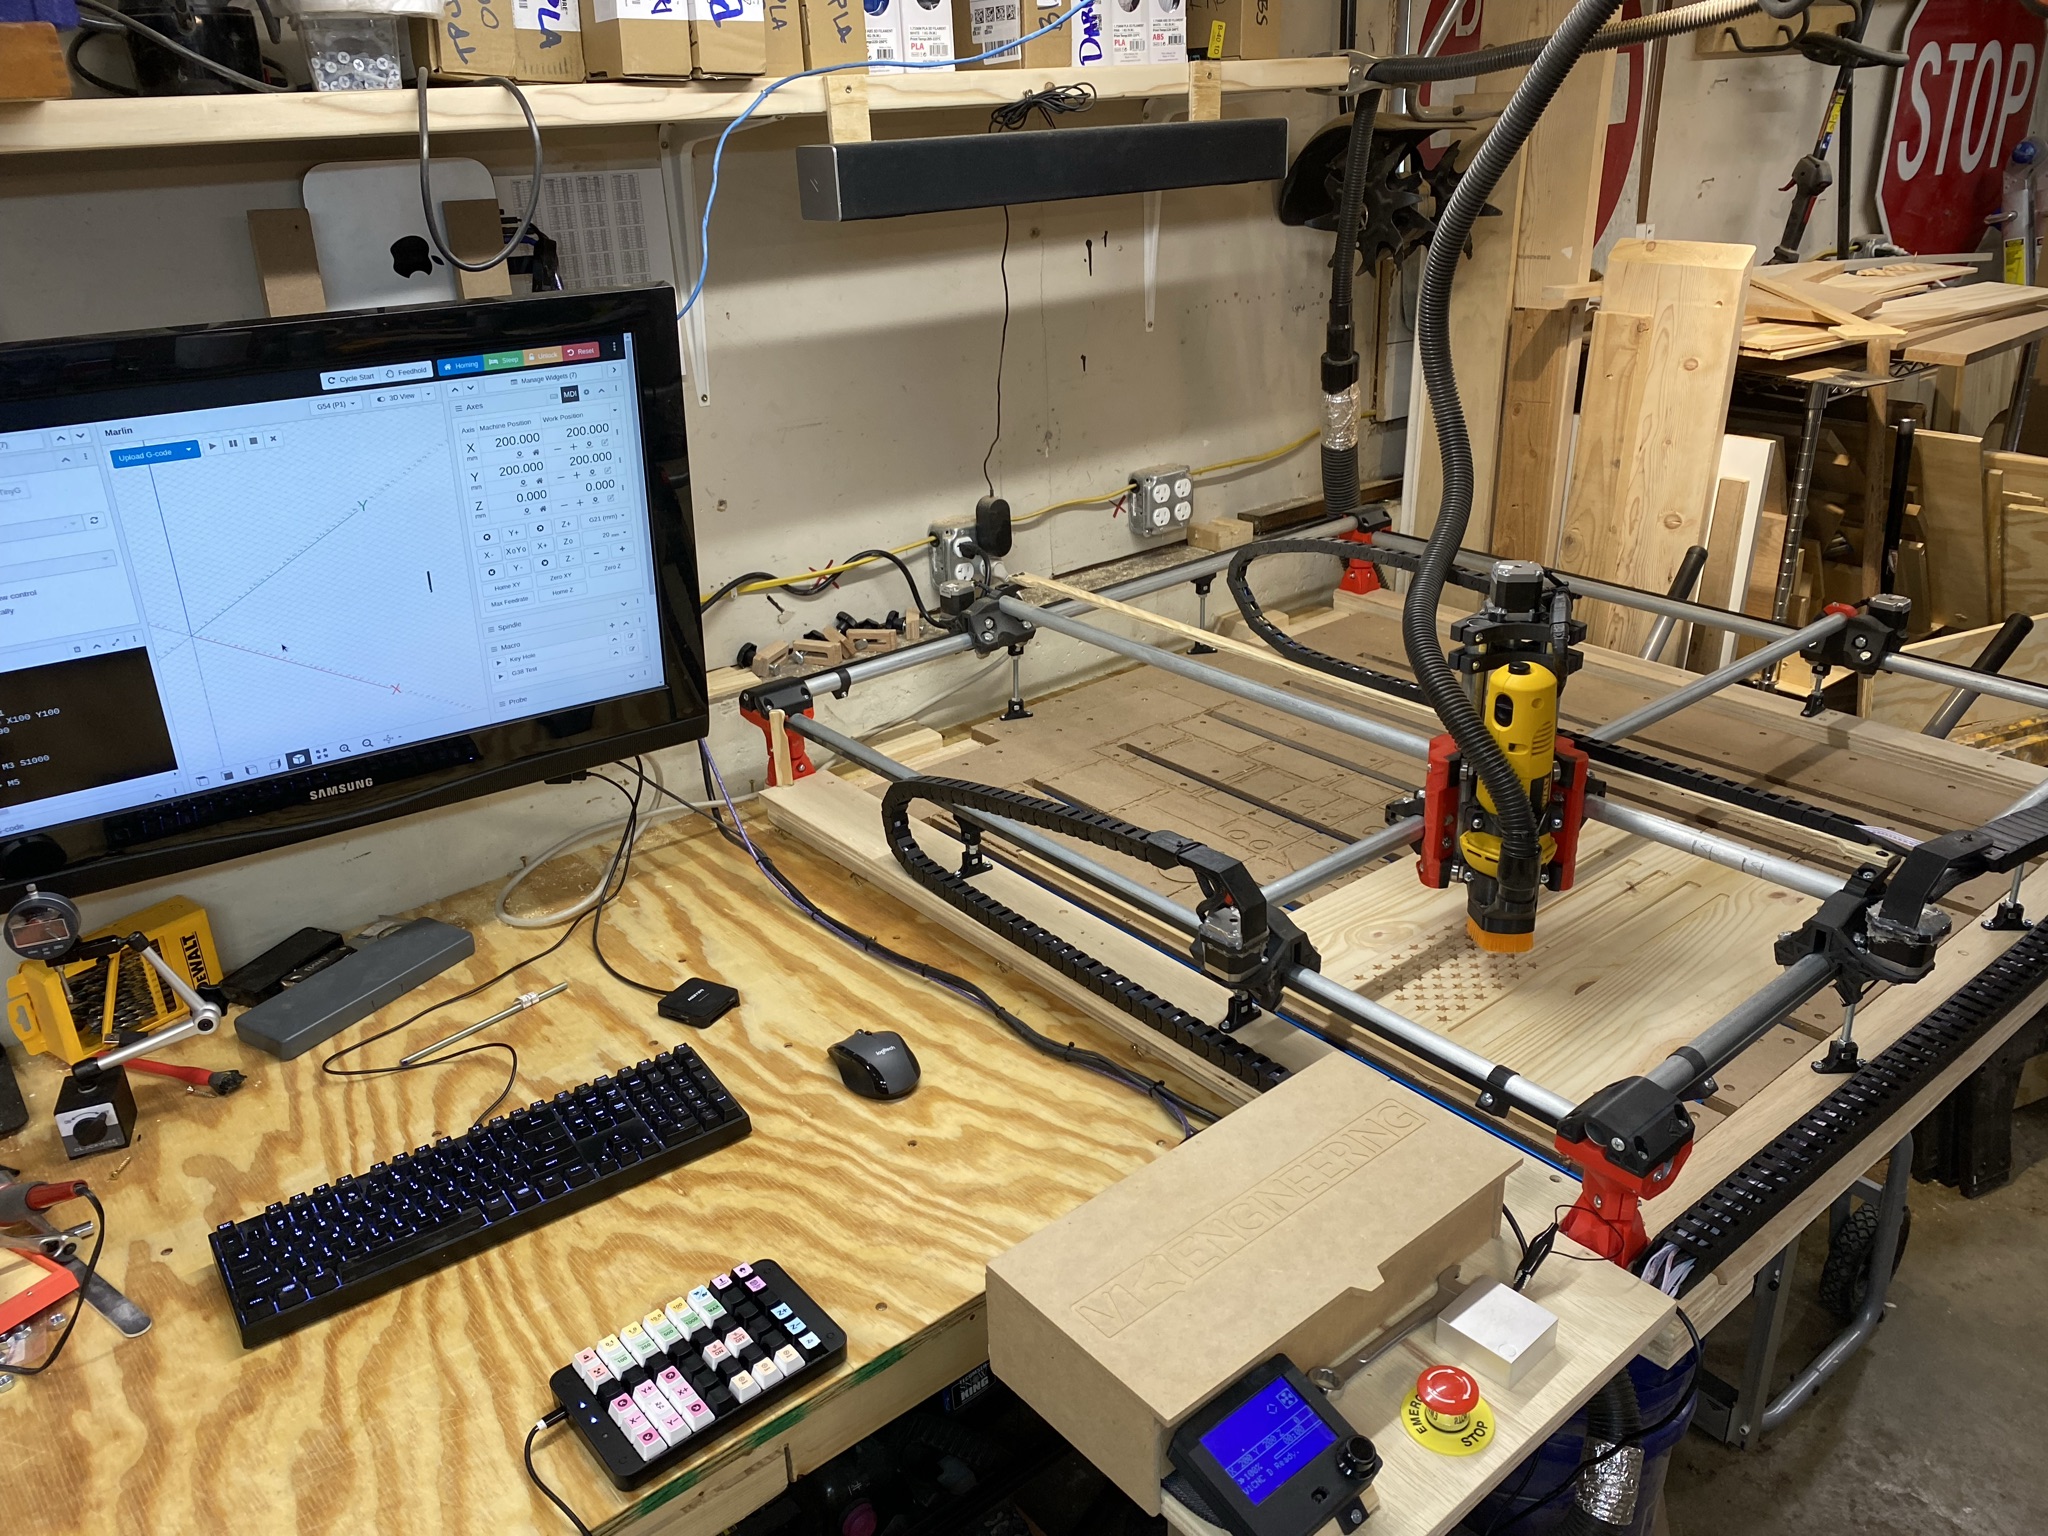
I’ve got it screwed down to a workbench in the garage, though I wish I had to space to have it on a free standing table (allowing access to all sides) - but this works for the space I have.
Because of the size I pretty quickly added mid-span supports to help with sagging in the middle of each span. Without the supports I was seeing about 2-3mm of dip in the middle of X and Y - with the spans the dip is almost eliminated although I haven’t really used the machine much since adding them.
I ended up building a small MDF box to house the electronics (SKR Pro 1.2) and centralize the electronics a bit. I’m happy with the box but I plan to change it up eventually. I realized that with the attached PC (Debian on a repurposed 2011 Mac Mini running CNC.js) I almost never use the TFT display attached to the SKR, so in the next iteration I think I might either remove it entirely or house it inside of the electronics box out of sight.
Having the electronics box sitting horizontal next to the machine seemed like a good idea and was great for the first few weeks / months when I was first building it out and learning as I went, but now it’s taking up a good 20" of space next to the machine and just gets in the way. My plan is to rebuild the electronics box into something that can attach to the underside of the CNC itself; likely vertical so I can still access the electronics as needed.

I resorted to hot glue to attach the cable chain mounts after the tiny (M2.5?) screws started breaking through the plastic. So far it’s held up with only a couple touch ups, but I’m not super happy with it and plan to change it up a bit eventually. I made a small modification to the DeWalt power cable to add an inline IEC C7/C8 connector to allow easier removal of the spindle for core adjustments without trying to fish the cables through the cable chain. I can’t find the link for the cable chain mount STLs I used (I found them on a post here somewhere) but ultimately I need to find an alternative - I may go with these: https://www.thingiverse.com/thing:4636547
For the dust shoe, I’m using: https://www.thingiverse.com/thing:2797108 which has worked pretty well so far. I may need to try and print some longer bristles to go with a few of the longer 1/4" bits though.
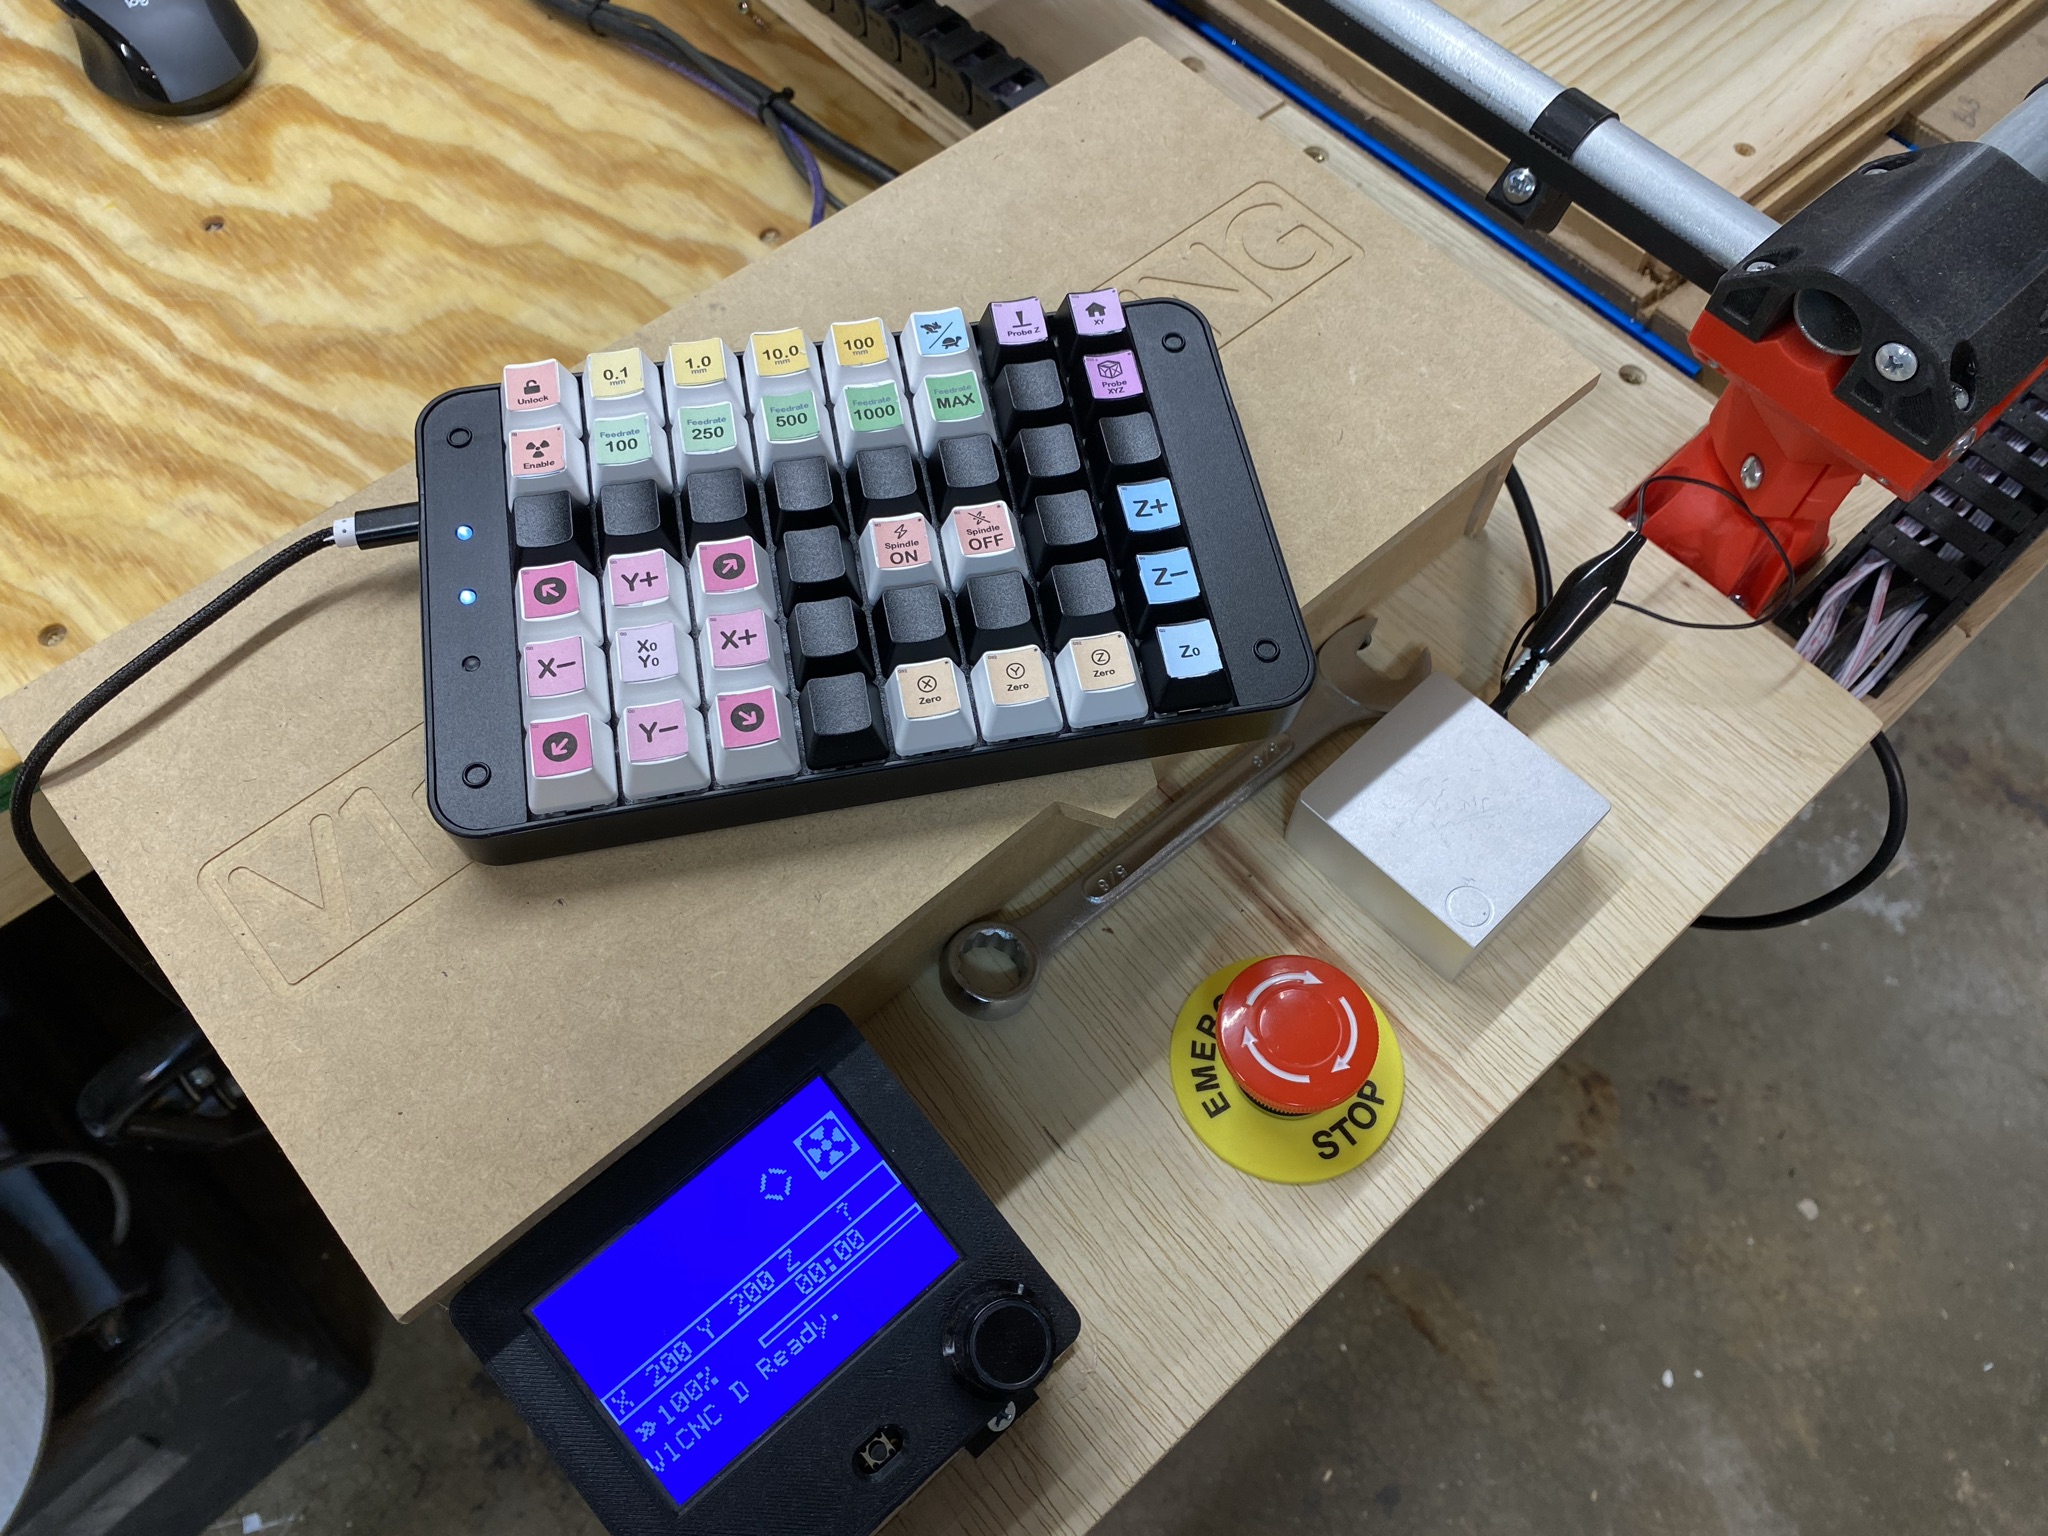
This is the second iteration of a keyboard “pendant”. The first being a simple mechanical numpad I bought off Amazon (you can see that one here in this very loud video) using a tweaked version of the cncjs numpad pendant package and while it worked very well, I found that I was still limited in the number of buttons I had versus the number of functions I wanted on the pendant.
I found a 48 key programmable keypad on Amazon that ended up being perfect for what I needed - I’ve got quite a few unused keys still and it more than covers the functions I wanted to have on the pendant. It was a bit pricey ($85 USD) but totally worth it. I ended up rewriting most of the cncjs-numpad-pendant package to implement a few additional features (lock/unlock toggles the keypad LEDs to indicate status, adding an enable button for controls like spindle on/off or probing/homing). I’m planning to release it on GitHub if anyone is interested sometime in the next week or so after I work out any remaining bugs.
Also in this picture is the X Y Z touch plate I just added to aid with tool changes. I haven’t done much with it yet besides getting it working in the firmware and testing it out, but I’m hoping this can help with multi tool jobs.

Finally, here is the first large (46" x 20") project I cut after getting the larger machine together. I’m building a full size 4 player arcade cabinet and this is my second attempt at a control panel - the first being cut out using regular power tools and a router. The precision on this machine is incredible and even cutting this panel out before installing the mid-span supports turned out quite nicely. I had to split the cuts over two jobs (the small holes in the top/bottom middle of the panel are what I used to line things up between jobs).
Overall the last 4-5 months of building, tweaking and improving this machine have been a ton of fun and I’ve learned a lot. Hoping to start learning a bit more about 3D carving / engraving now that I’m pretty comfortable with cutting out 2D / 2.5D stuff.