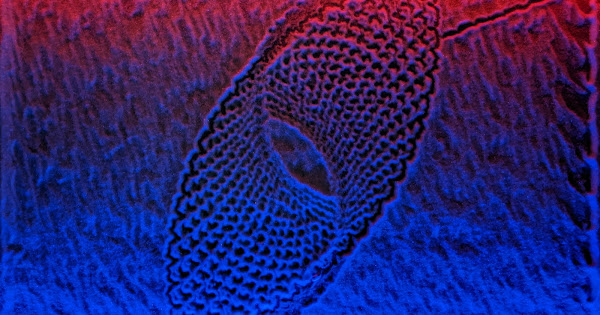
A new, smaller version of The Spice Must Flow with servomotors: Arrakis

Glue set up, I screwed the plywood back into the sand box and ran a test- no good! The plywood remains too bowed and the magnet loses the ball at high speeds. Back to a plain plywood bottom in the box…

I just got 4 more servomotors delivered from China. Maybe time to try a polar sand table…

OK, I was able to dewarp the plywood and it now seems to be working OK.

3 Likes

At long last…

5 Likes

video here

3 Likes

Well now I need to see how fast mine will go. I know it will make a heck of a lot more noise at that speed though. Servo’s are the perfect choice for your build!

The mechanism in my table requires quite a bit of muscle to move, probably because the X and Y axis bearings are all PTFE sliding on metal. I had a lot of trouble getting the speed (and quiet) I wanted from steppers, even NEMA-23 size, but the servos really fixed the problem.

It looks like the ZenXY mechanism is probably much lower friction because of the bearings rolling along the rails, but I think it may tend to get noisy if you raise the speed very much. maybe put rubber wheels on the bearings?

Typical NEMA-17 steppers are 6W motors. The servos I am using are 78W motors, so more than 10x the power, so it makes sense that they perform a lot better.

I have 4 more of the servomotors to play with…

2 Likes

The Zen 2 is urethane wheels, so it is very quiet, but at some point the tmc2209 jump out of stealth mode and make a lot of noise again. I think at around 40mm/s it is noticeable, under that it is pretty dang ninja mode.

I’ve been trying to run the table slowly to see how much better the patterns look compared to drawing them at 1000+ mm/sec which tends to throw the sand around. I noticed that at 100 mm/sec, edge motion is painfully boring, especially when the pattern has a lot of it.

I generated a test pattern in Sandify and ran it on the table at 100 mm/sec. It has a lot of edge motion, so it took 25:42 to complete.

Then I manually edited the same pattern file so that the drawing remains at 100 mm/sec but edge motion runs at 1000 mm/sec. The result is a high quality pattern that finishes in 15:13.

Video here.

I think I’m going to write a post processor that takes a Sandify pattern file and modifies it to set different speeds for drawing and edge motion.

5 Likes

I seem to have successfully written a Perl language post-processor for the pattern files that allows one to specify a drawing speed and an edge travel speed. That means you can speed up motion at the edges of the table while running the drawing motion slowly to preserve detail.

I wrote the program dual_speedify.pl using Strawberry Perl 5.32 in Windows. You start the program, specify the input file name (the name of the sandify pattern file), the drawing speed, the edge speed, and the home position X and Y coordinates. It then reads the file line by line and determines the location of each point specified in the G01 lines. It compares the locations of each two points (the previous one and the current one) and decides which speed in the form of Fxxxxx to append to each G01 line in the file. It saves the result in the pattern file name + _DS (for dual speed).

I am planning on some tweaks such as adding the two specified speeds to the output file name and maybe as comments inside the output file, but the speed control logic appears to do exactly what it’s supposed to now.

It might not provide a huge improvement if your sand table is not capable of high speeds for the edge motion, but if you ever install servomotors like I use in my table, the improvement in drawing time can be significant. OTOH, if you run the drawing speed at 30-50 mm/sec and your table can go up to 200, that’s a 4x speed up of the edge motion which you will notice when you’re watching the table. The sudden speed change, accompanied by the noise it makes, when it moves from the drawing to the edge motion, can be quite entertaining, especially if the difference in speeds is great.

I’ve been running multiple patterns through the dual speed program and will post some video this weekend. I typically run the edge motion at 1000 mm/sec and the drawing speed at 100-300 mm/sec.
I’ll post a link to the program in a day or two, after I’ve added a couple small conveniences and maybe some error trapping to it.

Here’s a sample of an original sandify pattern file followed by a sample of the dual speed version:

; Created by Sandify
; https://sandify.org
; Version: 0.2.6
;
; Machine type: Rectangular
; Min X (mm): 0
; Max X (mm): 590
; Min Y (mm): 0
; Max Y (mm): 980
; Content type: shape
; Layer:
; Shape: Circle
; Name: polygon
; Number of lobes: 1.2
; Direction: counterclockwise
; Visible: true
; Initial width: 206
; Initial height: 366
; X offset: -32
; Y offset: 119
; Rotate (degrees): 60
; Reverse path: true
; Number of loops: 200
; When transforming shape: smear
; Scale: true
; Scale (+/-): -2
; Scale by: function
; undefined: i+cos(i/2)
; Spin: true
; Spin (+/-): 2
; Spin by: function
; Spin function (i): 10*sin(i/4)
; Track: false
; Fine tuning:
; Connect to next layer: line
; Draw portion of path (%): 100
; Backtrack at end (%): 0
; Rotate starting point (%): 0
; Reverse export path: false
;
; File name: ‘091621_01’
; File type: gcode
;
; BEGIN PRE
G28 X
; END PRE
G01 X0.000 Y0.000
G01 X0.000 Y980.000
G01 X0.000 Y980.000
G01 X590.000 Y980.000
G01 X590.000 Y934.968
G01 X563.713 Y939.228
G01 X486.001 Y950.788
G01 X407.446 Y961.493
G01 X328.305 Y971.344
G01 X251.895 Y980.000
G01 X590.000 Y980.000
G01 X590.000 Y913.040
G01 X584.462 Y914.357
G01 X508.318 Y931.407
G01 X431.275 Y947.657
G01 X353.589 Y963.089
G01 X275.518 Y977.689
G01 X262.375 Y980.000
G01 X590.000 Y980.000
G01 X590.000 Y895.592
G01 X524.647 Y914.301
G01 X449.208 Y934.866
G01 X373.080 Y954.639
G01 X296.517 Y973.590

and here’s the dual speed version:

; Created by Sandify
; https://sandify.org
; Version: 0.2.6
;
; Machine type: Rectangular
; Min X (mm): 0
; Max X (mm): 590
; Min Y (mm): 0
; Max Y (mm): 980
; Content type: shape
; Layer:
; Shape: Circle
; Name: polygon
; Number of lobes: 1.2
; Direction: counterclockwise
; Visible: true
; Initial width: 206
; Initial height: 366
; X offset: -32
; Y offset: 119
; Rotate (degrees): 60
; Reverse path: true
; Number of loops: 200
; When transforming shape: smear
; Scale: true
; Scale (+/-): -2
; Scale by: function
; undefined: i+cos(i/2)
; Spin: true
; Spin (+/-): 2
; Spin by: function
; Spin function (i): 10*sin(i/4)
; Track: false
; Fine tuning:
; Connect to next layer: line
; Draw portion of path (%): 100
; Backtrack at end (%): 0
; Rotate starting point (%): 0
; Reverse export path: false
;
; File name: ‘091621_01’
; File type: gcode
;
; BEGIN PRE
G28 X
; END PRE
G01 X0.000 Y0.000 F60000
G01 X0.000 Y980.000 F60000
G01 X590.000 Y980.000 F60000
G01 X590.000 Y934.968 F60000
G01 X563.713 Y939.228 F6000
G01 X486.001 Y950.788 F6000
G01 X407.446 Y961.493 F6000
G01 X328.305 Y971.344 F6000
G01 X251.895 Y980.000 F6000
G01 X590.000 Y980.000 F60000
G01 X590.000 Y913.040 F60000
G01 X584.462 Y914.357 F6000
G01 X508.318 Y931.407 F6000
G01 X431.275 Y947.657 F6000
G01 X353.589 Y963.089 F6000
G01 X275.518 Y977.689 F6000
G01 X262.375 Y980.000 F6000
G01 X590.000 Y980.000 F60000
G01 X590.000 Y895.592 F60000
G01 X524.647 Y914.301 F6000
G01 X449.208 Y934.866 F6000
G01 X373.080 Y954.639 F6000
G01 X296.517 Y973.590 F6000

One change I will make will be to add the dual speed file name inside the file, and will include both speeds in the name. That way you can save multiple copies of a pattern file- the original, and as many different dual speeds versions as you want, and they’ll be readily identifiable by the file names.
1 Like

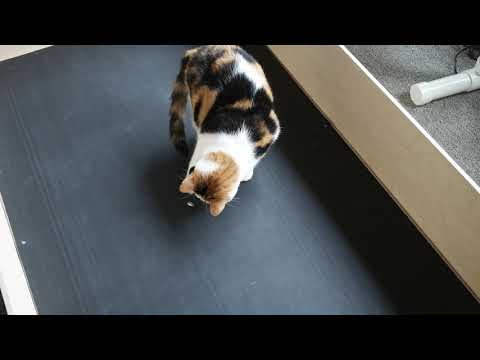
Here’s a new video of a file that’s been processed with the dual speed post processor I have named dual_speedify for obvious reasons.

2 Likes

In case anyone is interested, here is a link to the Perl program, dual_speedify.pl, that will create dual speed Sandify pattern files from Sandify pattern files for noncircular tables.

To run the program, you’ll need Perl. I used Strawberry Perl 5.32 in windows, but I think any recent Perl on any platform should work.
Open a terminal, type perl -w dual_speedify.pl and answer the questions. Example:

D:\Libraries\Downloads>perl -w dual_speedify.pl

Warning- there’s no error trapping, so be careful when you answer
the questions that will follow. Use at your own risk!

Type the name of the sandify pattern file:
091821_01.gcode
Type the drawing speed in mm/minute
6000
Type the edge speed in mm/minute
60000
Enter the home position X ordinate.
590
Enter the home position Y ordinate.
0

Processing is complete.

The dual speed output file is called 091821_01_6000_60000.gcode

Check the output file to make sure it does what you think it will.

The perl program replaces the file name read from the comment block in the original file with the dual speed file name. It also adds a comment in the “POST” block indicating that the file was modified by dual_speedify.

Note- dual_speedify.pl does not alter the original Sandify pattern file.

1 Like

Arrakis was publicly displayed at Maker Faire Milwaukee last weekend. I had a sequence of patterns programmed to run upon power-up, so it did not require any intervention at all and worked continuously throughout the weekend.

I did some experiments using glass beads at the end of the Maker Faire. These are the type used for striping the lanes in roads. I threw some of them onto the table with the baking soda and results were not great. They aren’t particularly sparkly and they are retroreflective, so they reflect light back to its source, which is down low to the surface of the table. They specifically don’t reflect the red and blue light to your eye when you’re viewing the table.

The different density/mass of the beads mixed with the baking soda causes motion of the ball to be very jerky and not straight where it should be straight. The result is rough looking patterns drawn on the table.

When I got the table back home, I ran it with glass beads only- the result is seen in this photo:

Google Photos

I wrote a blog post with links to video: Mark Rehorst's Tech Topics: Arrakis Sand Table Experiments with Glass Beads

Bummer, if they only weren’t such good retro reflectors. That would have been amazing to have it shooting colored light out.

BS and glitter? I want to try it but my table takes like 6 boxes of BS, if I had to replace it that would be a bummer. You could dissolve the BS later to get the glitter out and dispose of it.

:rofl: :rofl:
Speaking as the parent of 4 children, realize that if you intentionally put glitter in anything you’re committed to having random sparkles show up for decades to come. The concept of any kind of reasonable “disposal” of glitter is a stretch…

5 Likes

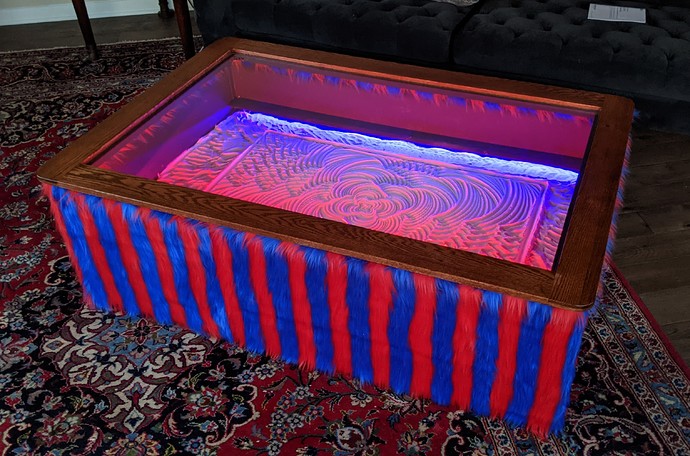
and if you cover a coffee table with blue and red striped fur cloth you’re committed to vacuuming up fur for the next few years, too…

Actually, the table doesn’t shed fur. All the stuff I am vacuuming up is from when I cut it to put it on the table.

The foam and fur covering was very popular with little kids at the Maker Faire.

3 Likes

In hind sight, it makes perfect sense. I think you would need people to wear headlamps or something to see something interesting.

1 Like

Blog post on the dual speed post processor, here.

Blog post on building Arrakis, that includes a link to the CAD STEP file, here.

Just for fun, a complete pattern drawing at 200 mm/sec with edge speed at 500 mm/sec. Yes, it’s very quiet:

4 Likes

I was still finding red glitter from that dude that had the sls glitter printer at mrrf years and years ago in our Element when I sold it last year. Glitter is FOREVER!!

2 Likes

Glitter = craft herpes

4 Likes