Advice use case:
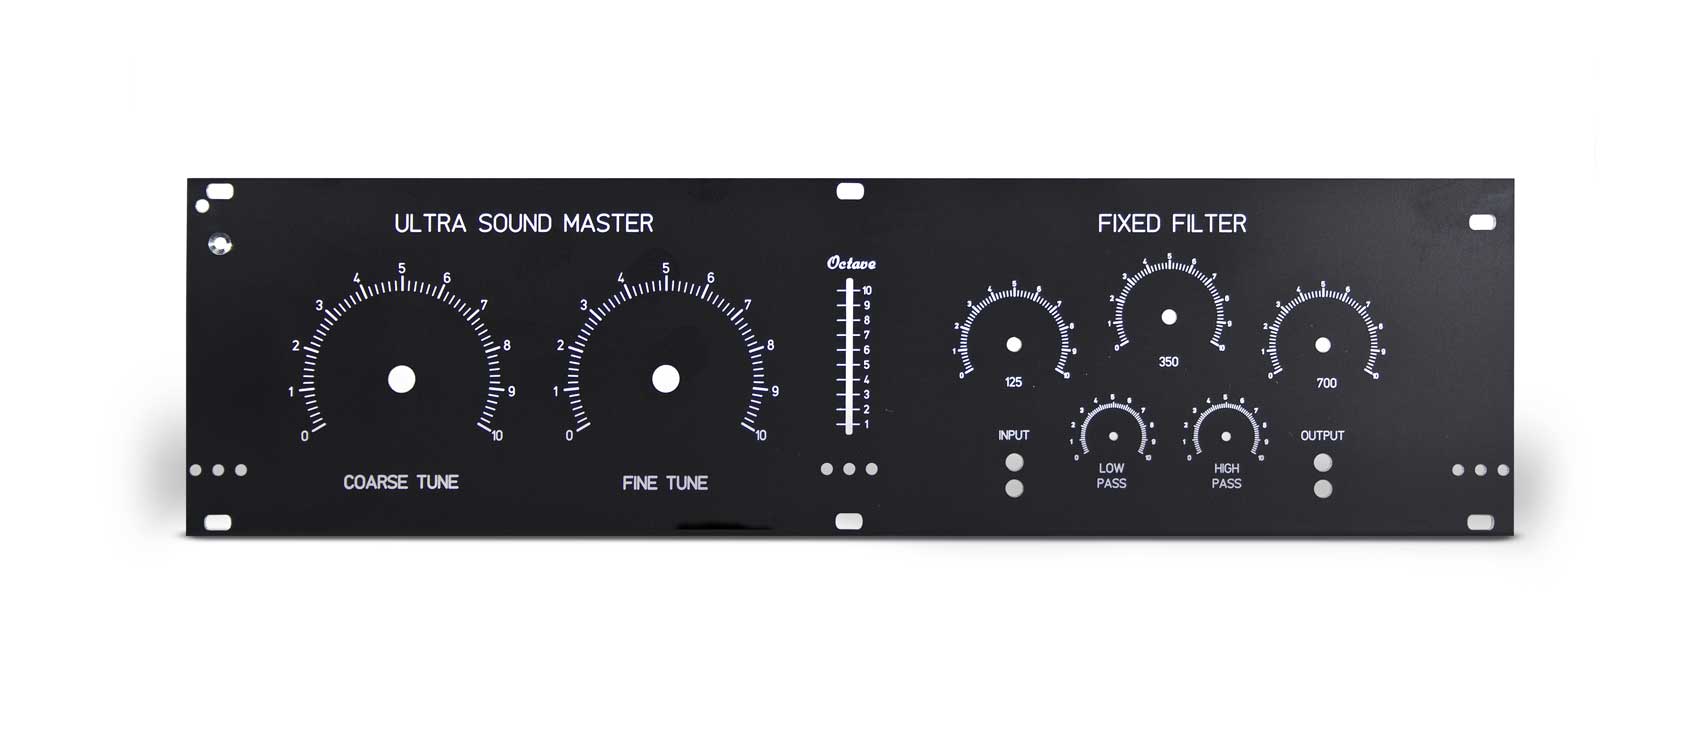
I’d like to use the MPCNC Primo to engrave writing for a front panel. It would be ideal if the stock to engrave had a thin layer of white on black or black on white so the engraving shows the writing clearly in sharp contrast. Here is a photo of the type of project I’d like to build with the Primo. The primo could also cut holes and rectangles to mount meters or LEDs.
You can get panel that has one colour core material with a thin skin of a contrasting colour for this exact type of purpose. The material isn’t very expensive. I don’t know what it’s called though. (I can just ask for leftover scrap (Which can be up to 70cm to a side)
If you have software that will export a .dxf then you’re 99% of the way there.
I would probably use a small endmill. Something, say 1.5mm (1/16") would probably be acceptable for the rounded corners to me. A V bit can do sharp corners, but there is a finite thickness to the surface coloured layer. My sign making friends use a laser to carve that material, as it’s sharp, and precise, but that has to have good venting, since the burnt fumes are nasty. Milling the material 0.5mm deep would produce plenty decent results, I think.
Carbide 3D recently added a diamond drag bits (a 90 and a 120) to their store. Given their community, I would expect them to work well. I cannot speak to how well they will do the job.
Given how small the detail is, another tool to consider is a laser. Put down several base coats of white spray paint. Cover that with a through black coat, then use the laser to remove the black coat in areas you want white. This specific things is not something I’ve done, but if you are interested in exploring this idea, give the dimensions of the panel, and I’ll run a test using a laser and post back.
Not exactly what you want, but I did something similar for a coworker. I had the wife cut a template with her cricut, then I put it on the front panel. I used white spray paint to paint the entire panel and then lifted the template off. It did take a while to weed all the little pieces.
the way i see it, if you use something like anodized aluminum, you could just use the tricks from PCB milling to get the finish you want.
Leave the black anodized finish where you want dark, and cut slightly through it to expose the raw metal where you want the light.
big anodized sheets can get rather expensive though.
and if your using V bits, perfectly level is a must so you get the same depth of cut (and hence width of cut) over your board.
Probe auto-leveling is what I use to do PCB’s and I see no reason it would not work on signs to.
It’s callled Traffolyte. I don’t have any experience using it personally (I’m still in the process of building my own machine), but have experience of ordering labels made from it and also some laser etching of it in the past.
Here are a couple options that I came across on Amazon when I was looking at doing some signs.
Not sure if they are large enough for your project but may be an option.
I’ve seen a few build threads for people that have made instrument panels for gliders or flight simulators so you might want to search for those and ask what they use. Unfortunately I didn’t bookmark them.
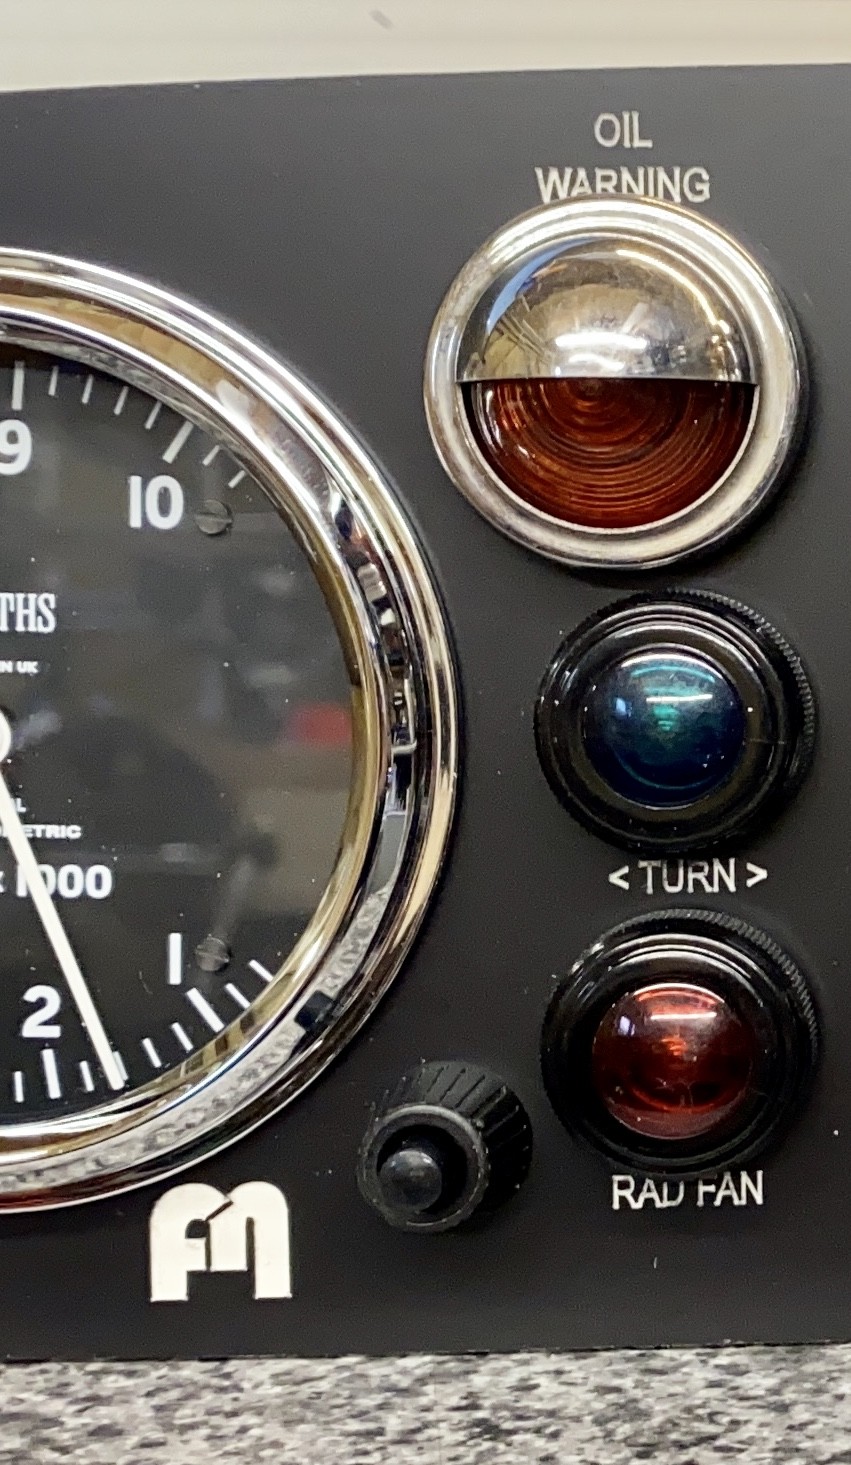
So I ran an experiment using the spray paint and laser method I outlined in my last post. I’ve only had my laser a couple of weeks, and have done near zero engraving with it. I theorized that the circles under “Input” were for cutouts for 6.35mm sockets for 6.35mm jacks. A standard 6.35 mm jack would need a 9.2mm cutout to mount. Using that, I sized the everything. The whole panel came out to 650mm x 178mm (25.5" x 7"). The “Low Pass” and “High Pass” gauges become the smallest details on the panel, with the following measurements:
I find the results good enough for personal use, but it does not cross the threshold into something professional/saleable. Up close, the “white” text is muddy. The black paint left in the “Low Pass” label is fixable. There are other improvements I could make, but I don’t know if these technique could ever be pushed above what I consider a professional threshold. There are alternate laser approaches that I don’t have time to try right now. For example, I could laser cut a mask and then use spray paint to create the white graphics.
All of these suggestions are very interesting and quite workable. I don’t have a laser right now so I can’t try the visually pleasing approach by Robert Bunney but his idea of the Carbide diamond drag bit is a good tool suggestion. I will try some of amazon’s plastics suggested by Gato (above).
As I was searching for more ideas I came across an eye popping solution by https://mickeys-flightdeck.de/ for a Boeing 737 instrument panel. His approach to painting and cutting words/indicators sandwiched with a milky white layer for back-lighting is hard work but looks very professional. In this episode, he shows how Cutting & engraving EFIS panels.
I see Romark make a great engraving/laserable laminate. Made in the US, but we use it here in South Africa. I cannot remember the name of the material we used when I used to do signage back in the 90’s but I remember it being a soft black and gold or black and white laminate plastic but a plastic that scratched easily. Never thought it very professional finish. I have always used a ‘V’ cutter but make sure you level your bed as you are working with small depth changes making big difference in line thickness. Having read the comments above, am going to see if my 5w blue LED laser works with it.
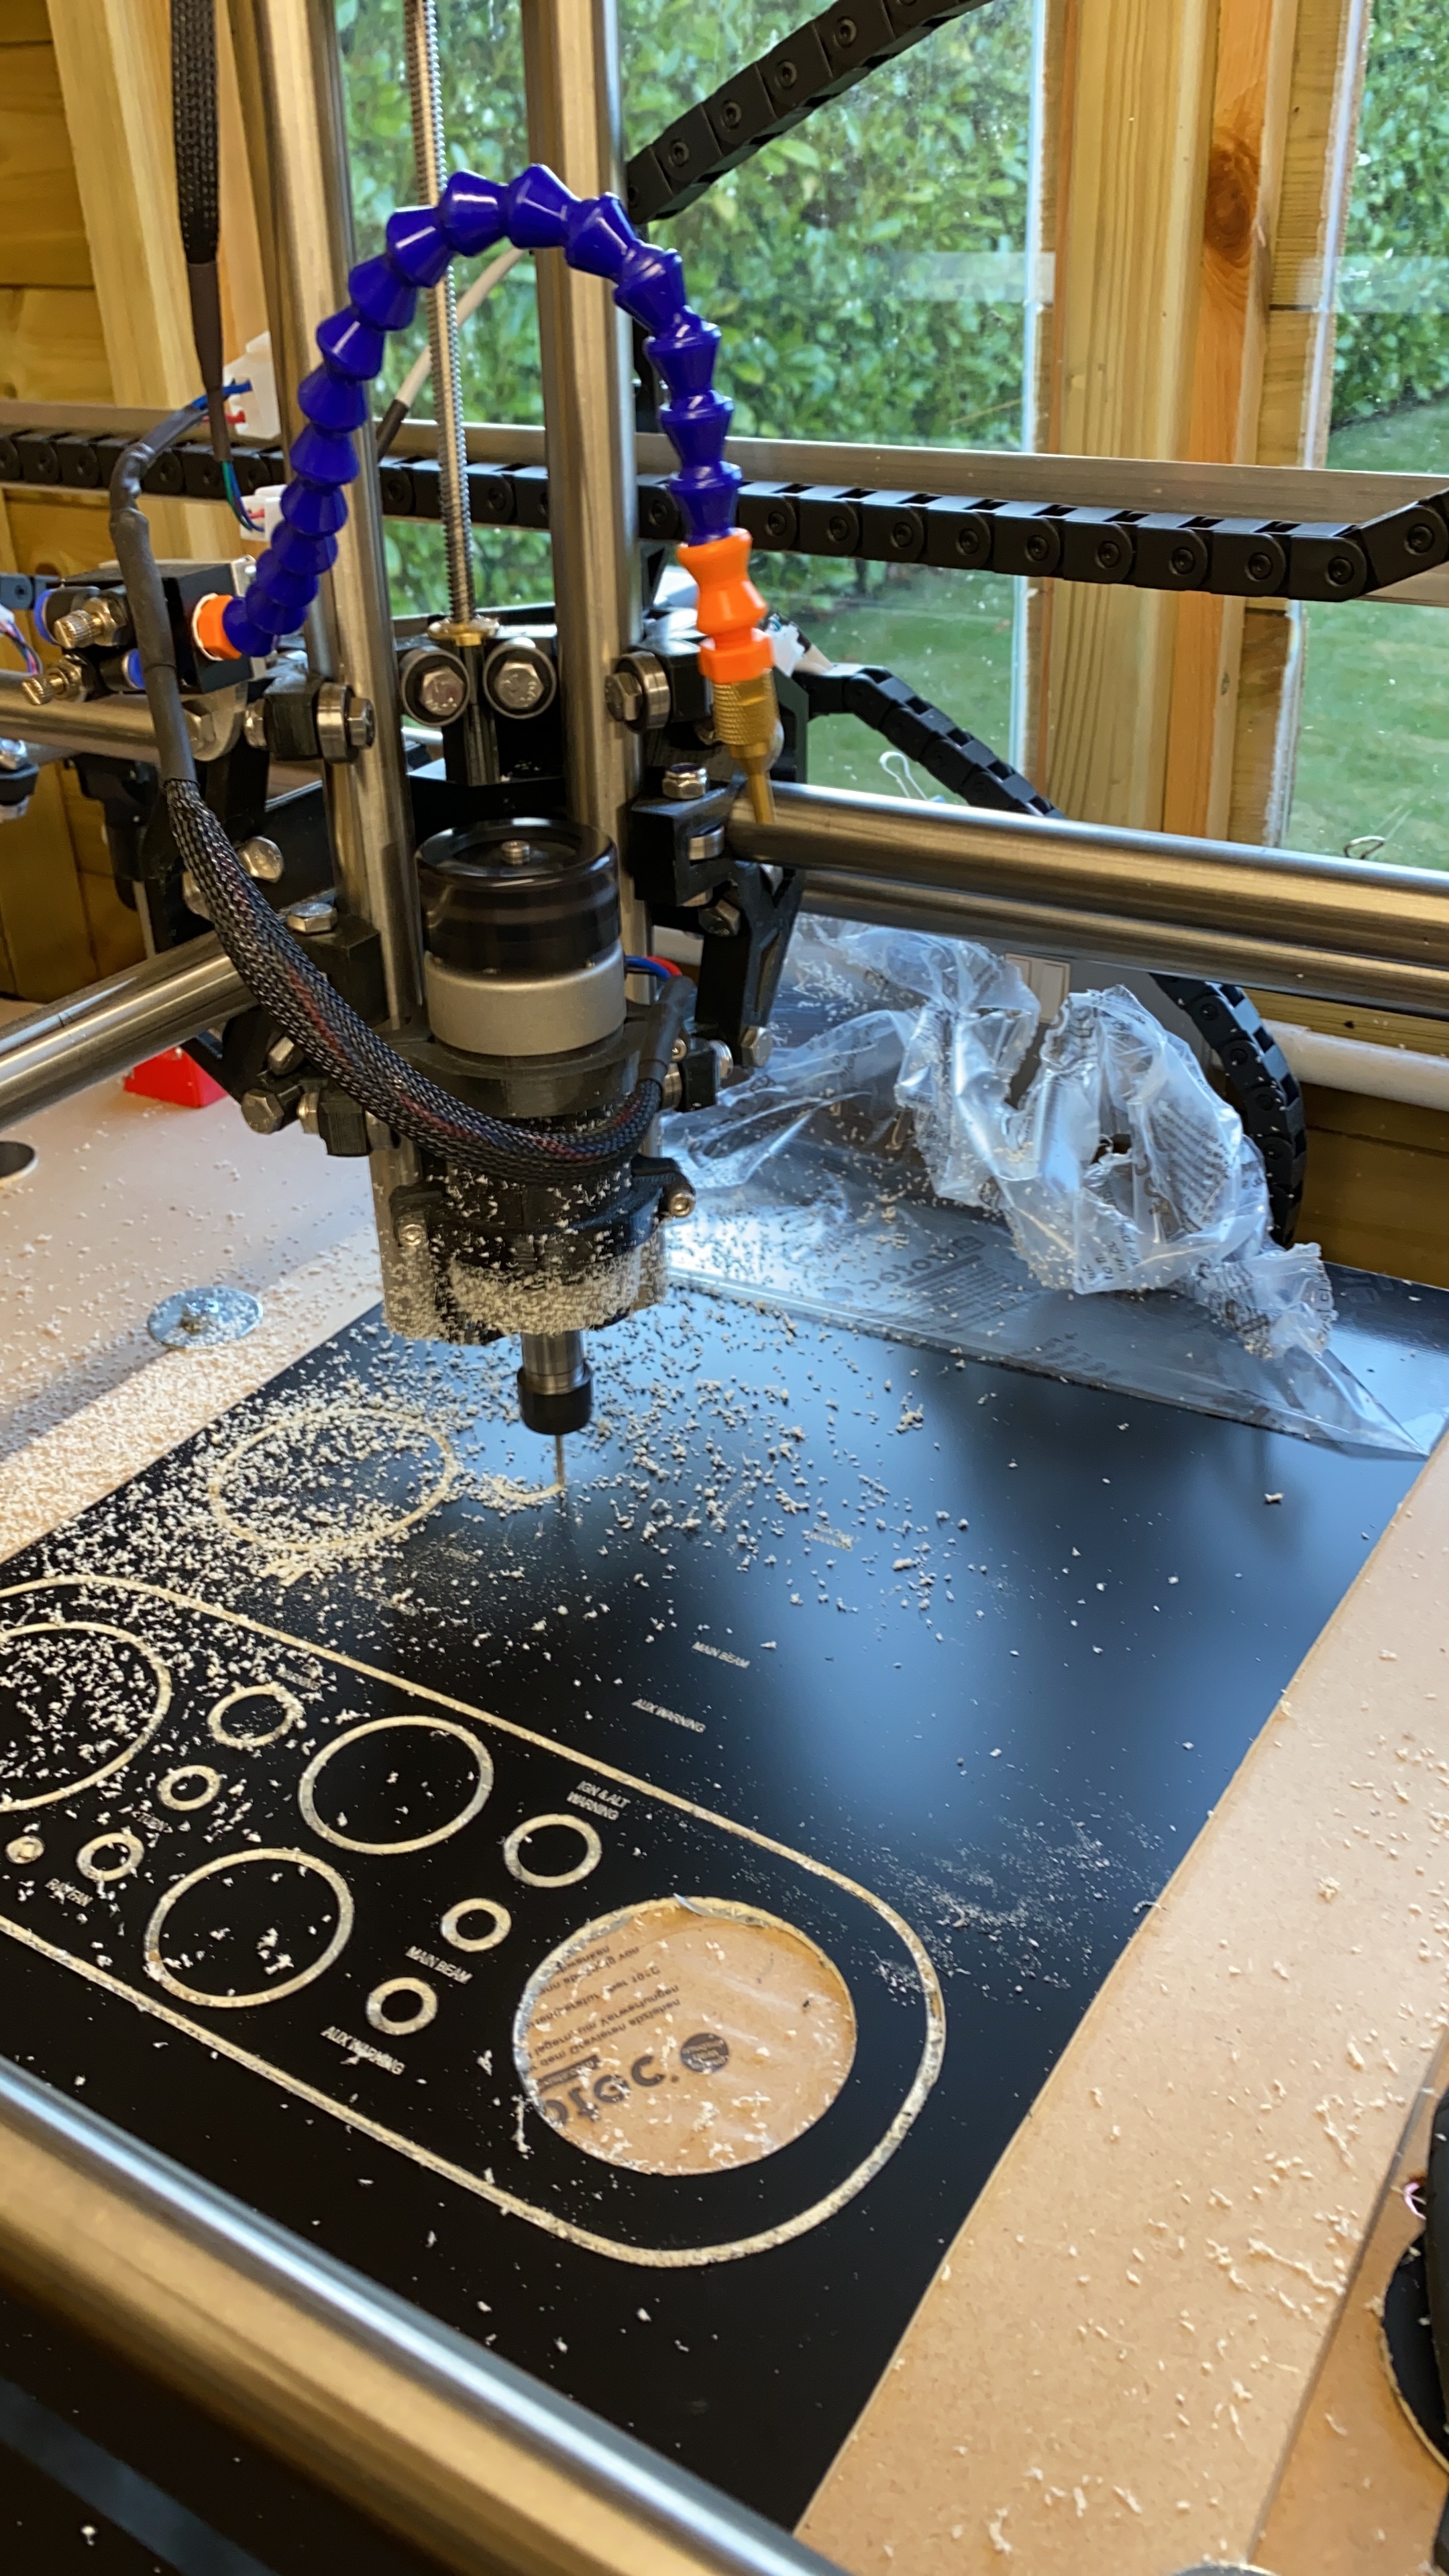
Doing it at home now, I used my MPCNC to make a panel for the jukebox with a clear 3mm persex I had in the scrap bin sprayed black and reverse engraved and spray the engraving white. I found that white engraving works the best so it does not show up the inconsistencies in the engraving which shows up as white defects. Not going to sell it, but for me it works and looks fine.