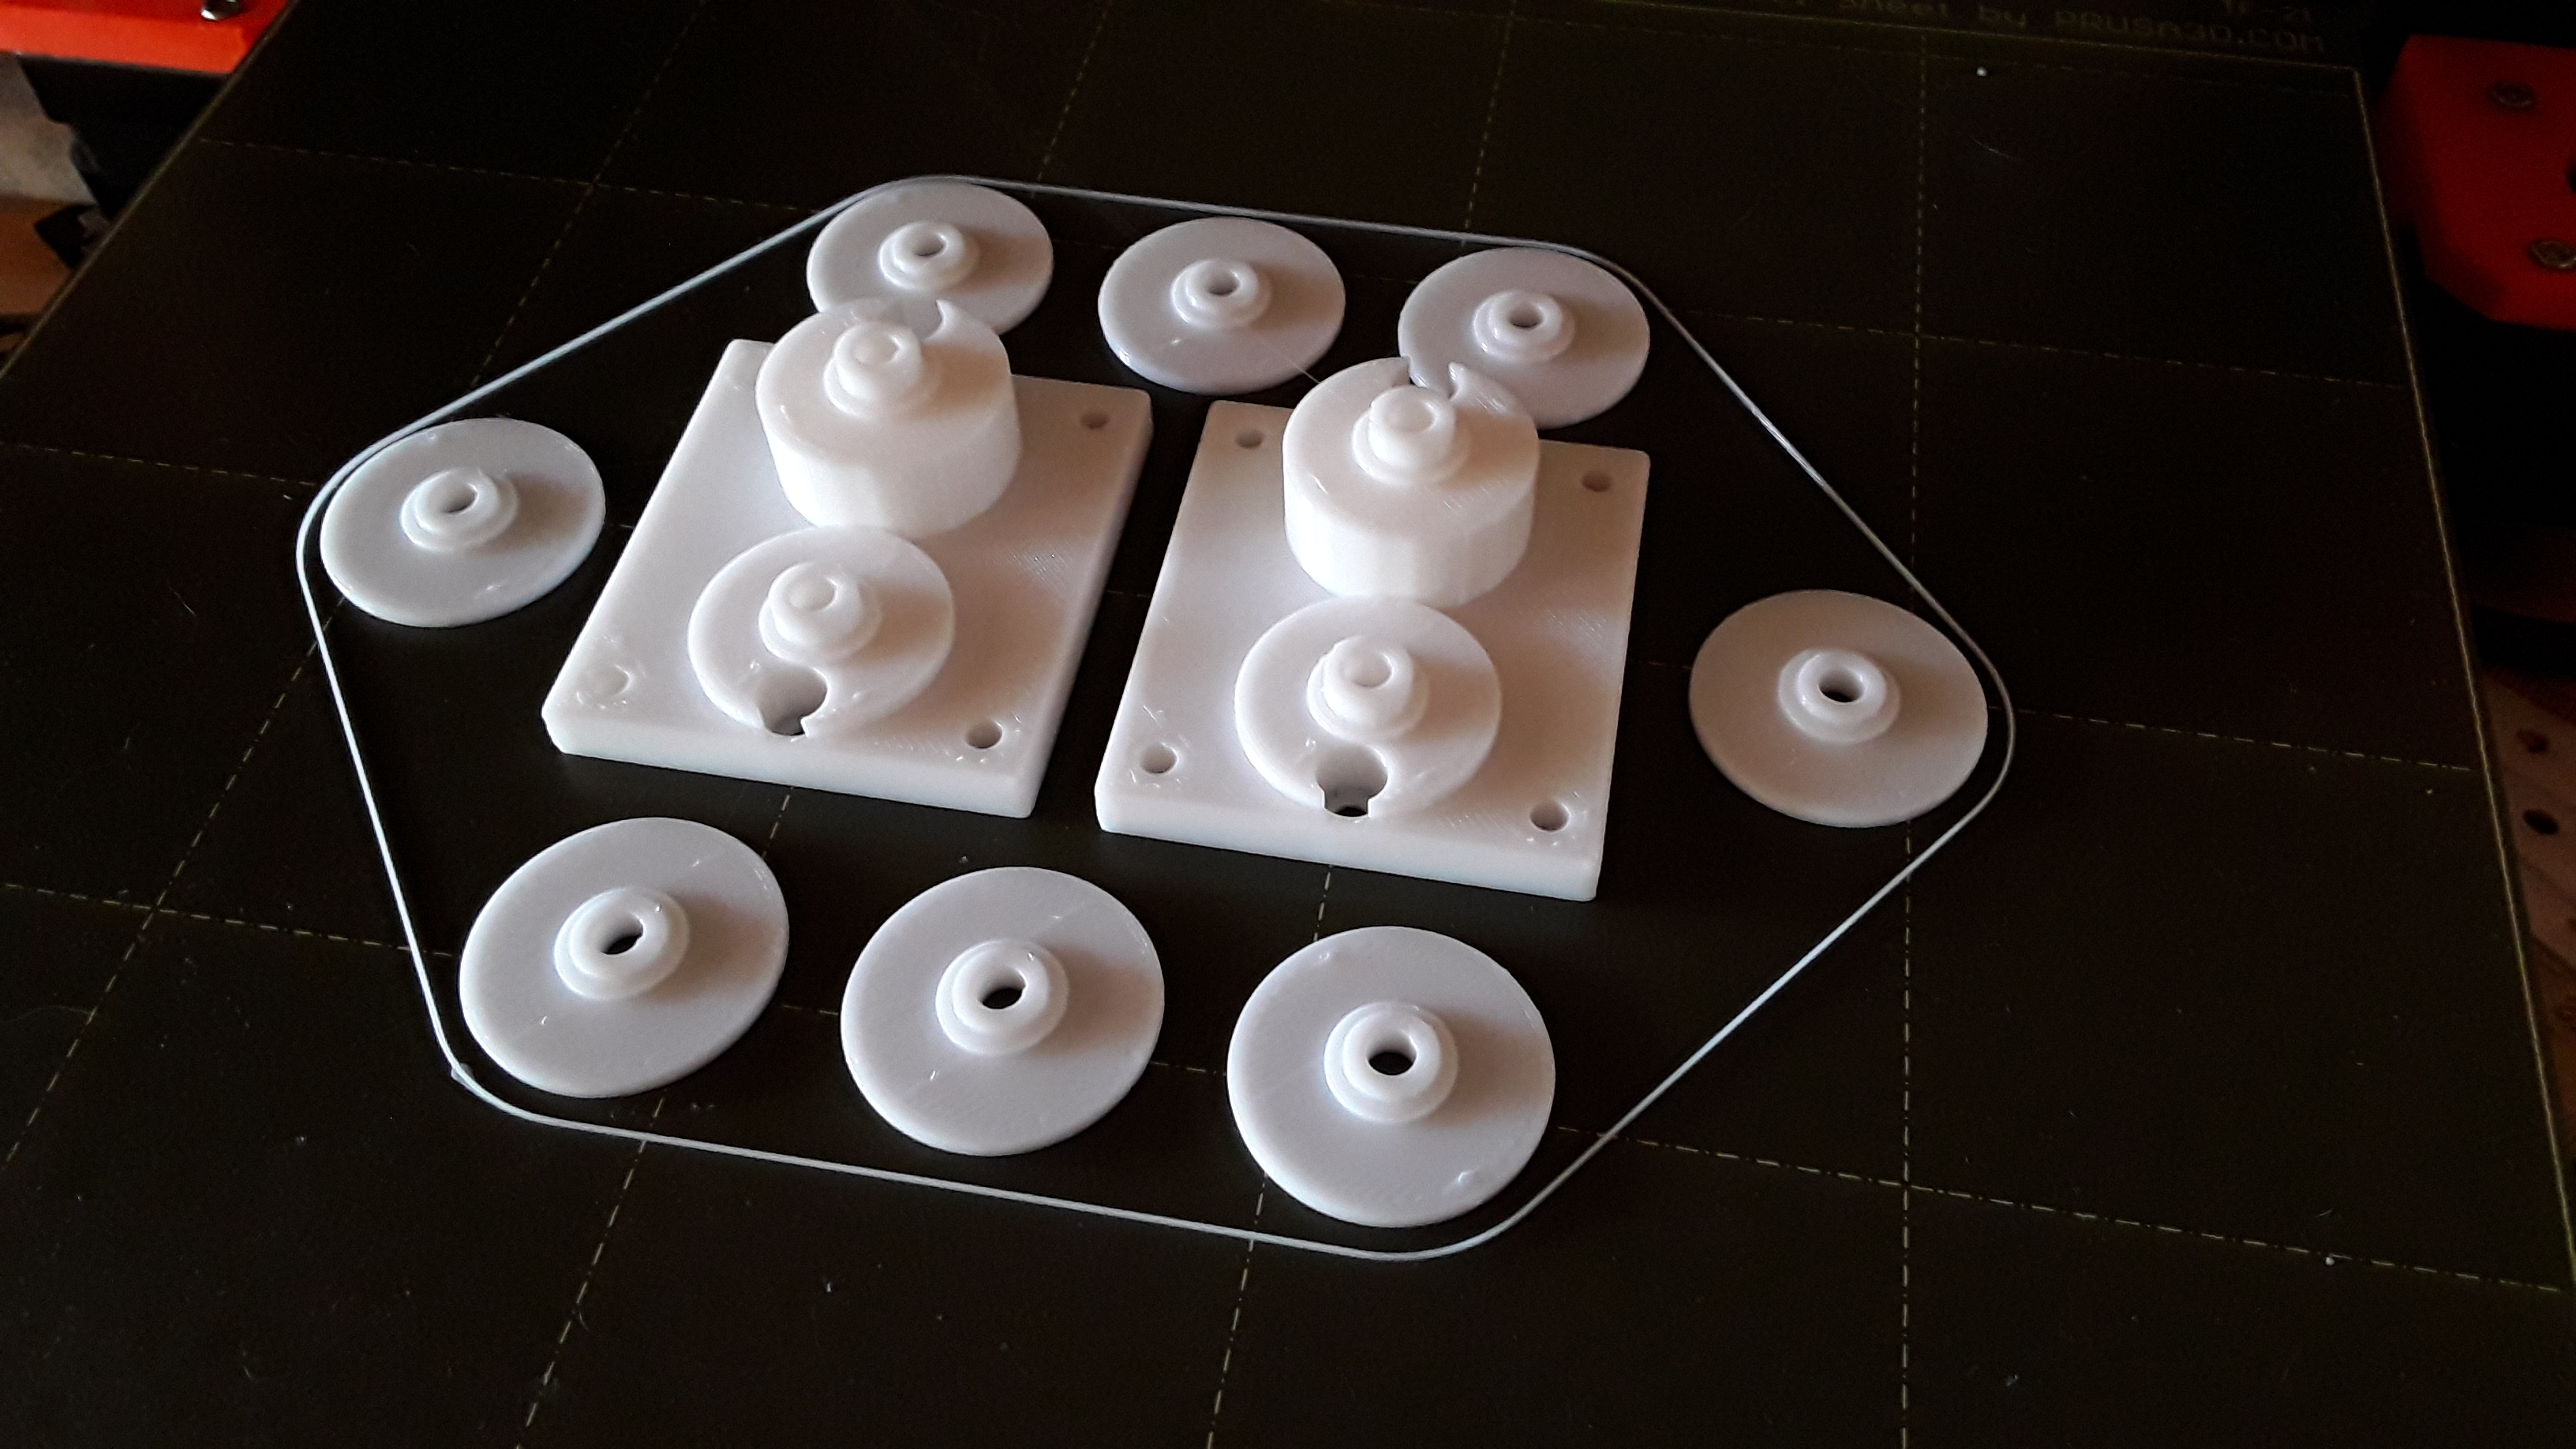
Here’s a little better picture of one of the rear idler assemblies from a previous build. The little flanges are simple to print and work quite well…
2 Likes
Making some progress!
Printing idler blocks and flanges…
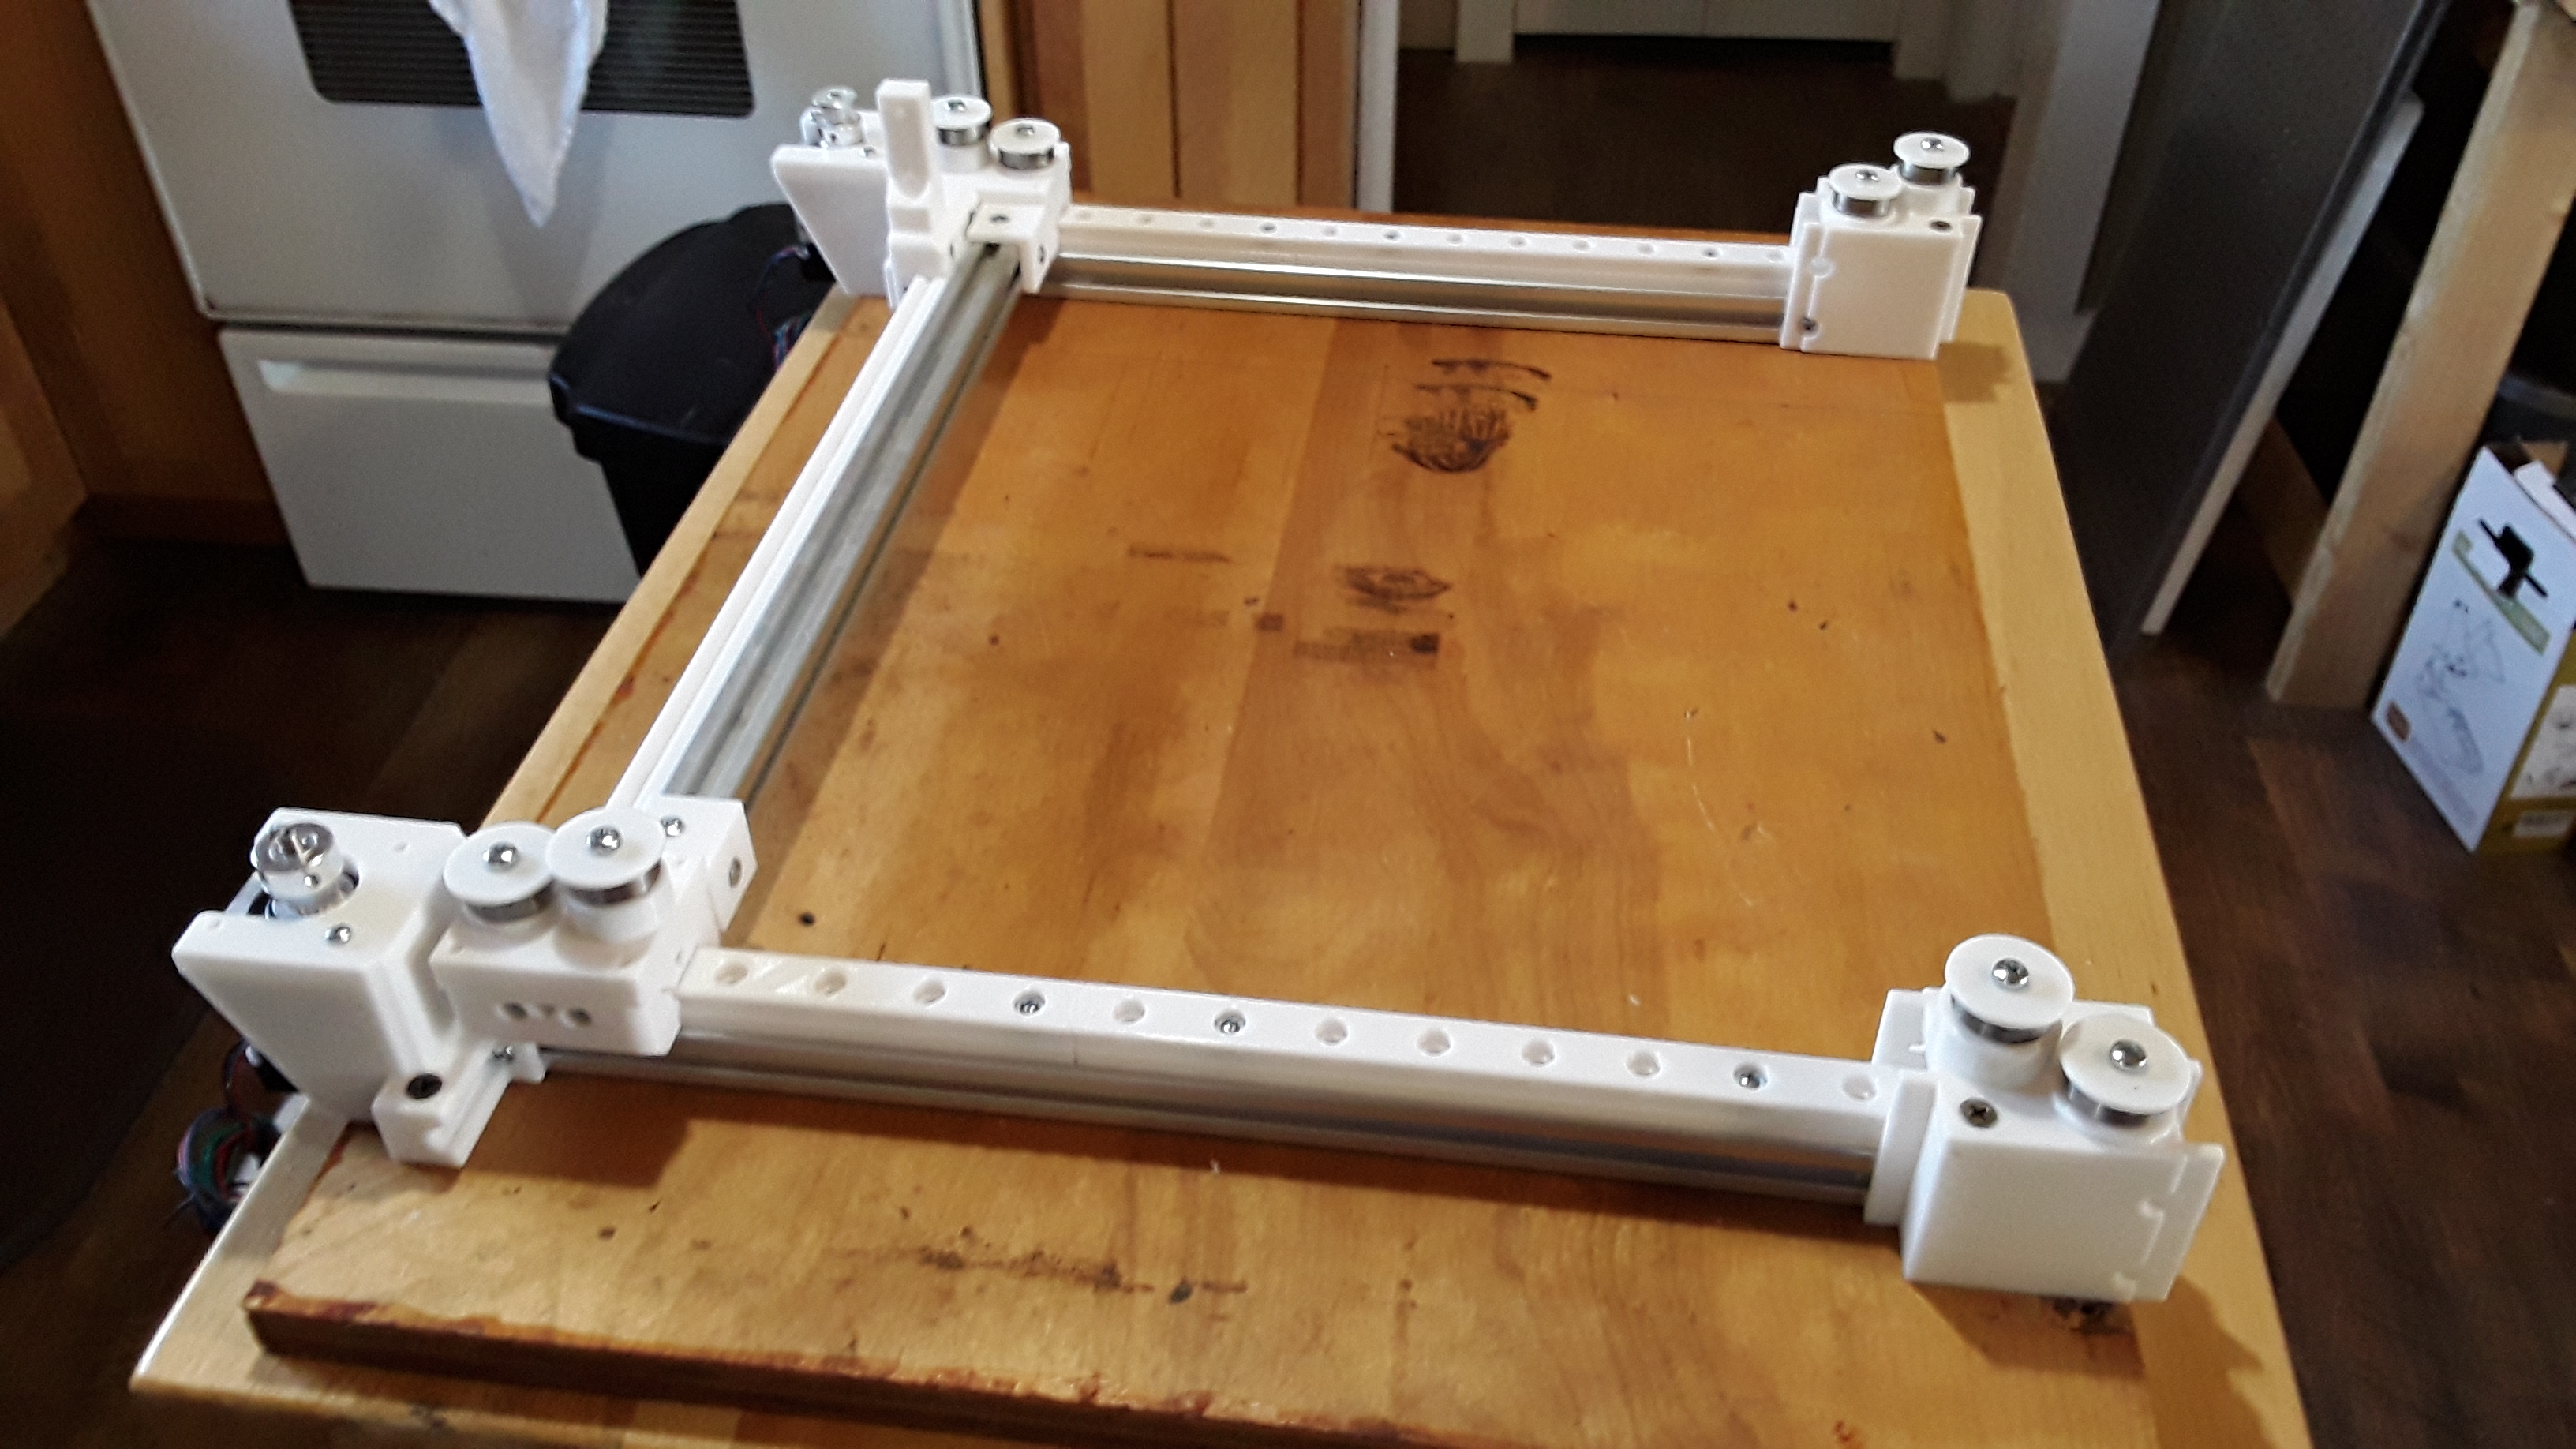
Machine is starting to take shape. It will need legs or blocking up to allow for Z-axis but okay for now…
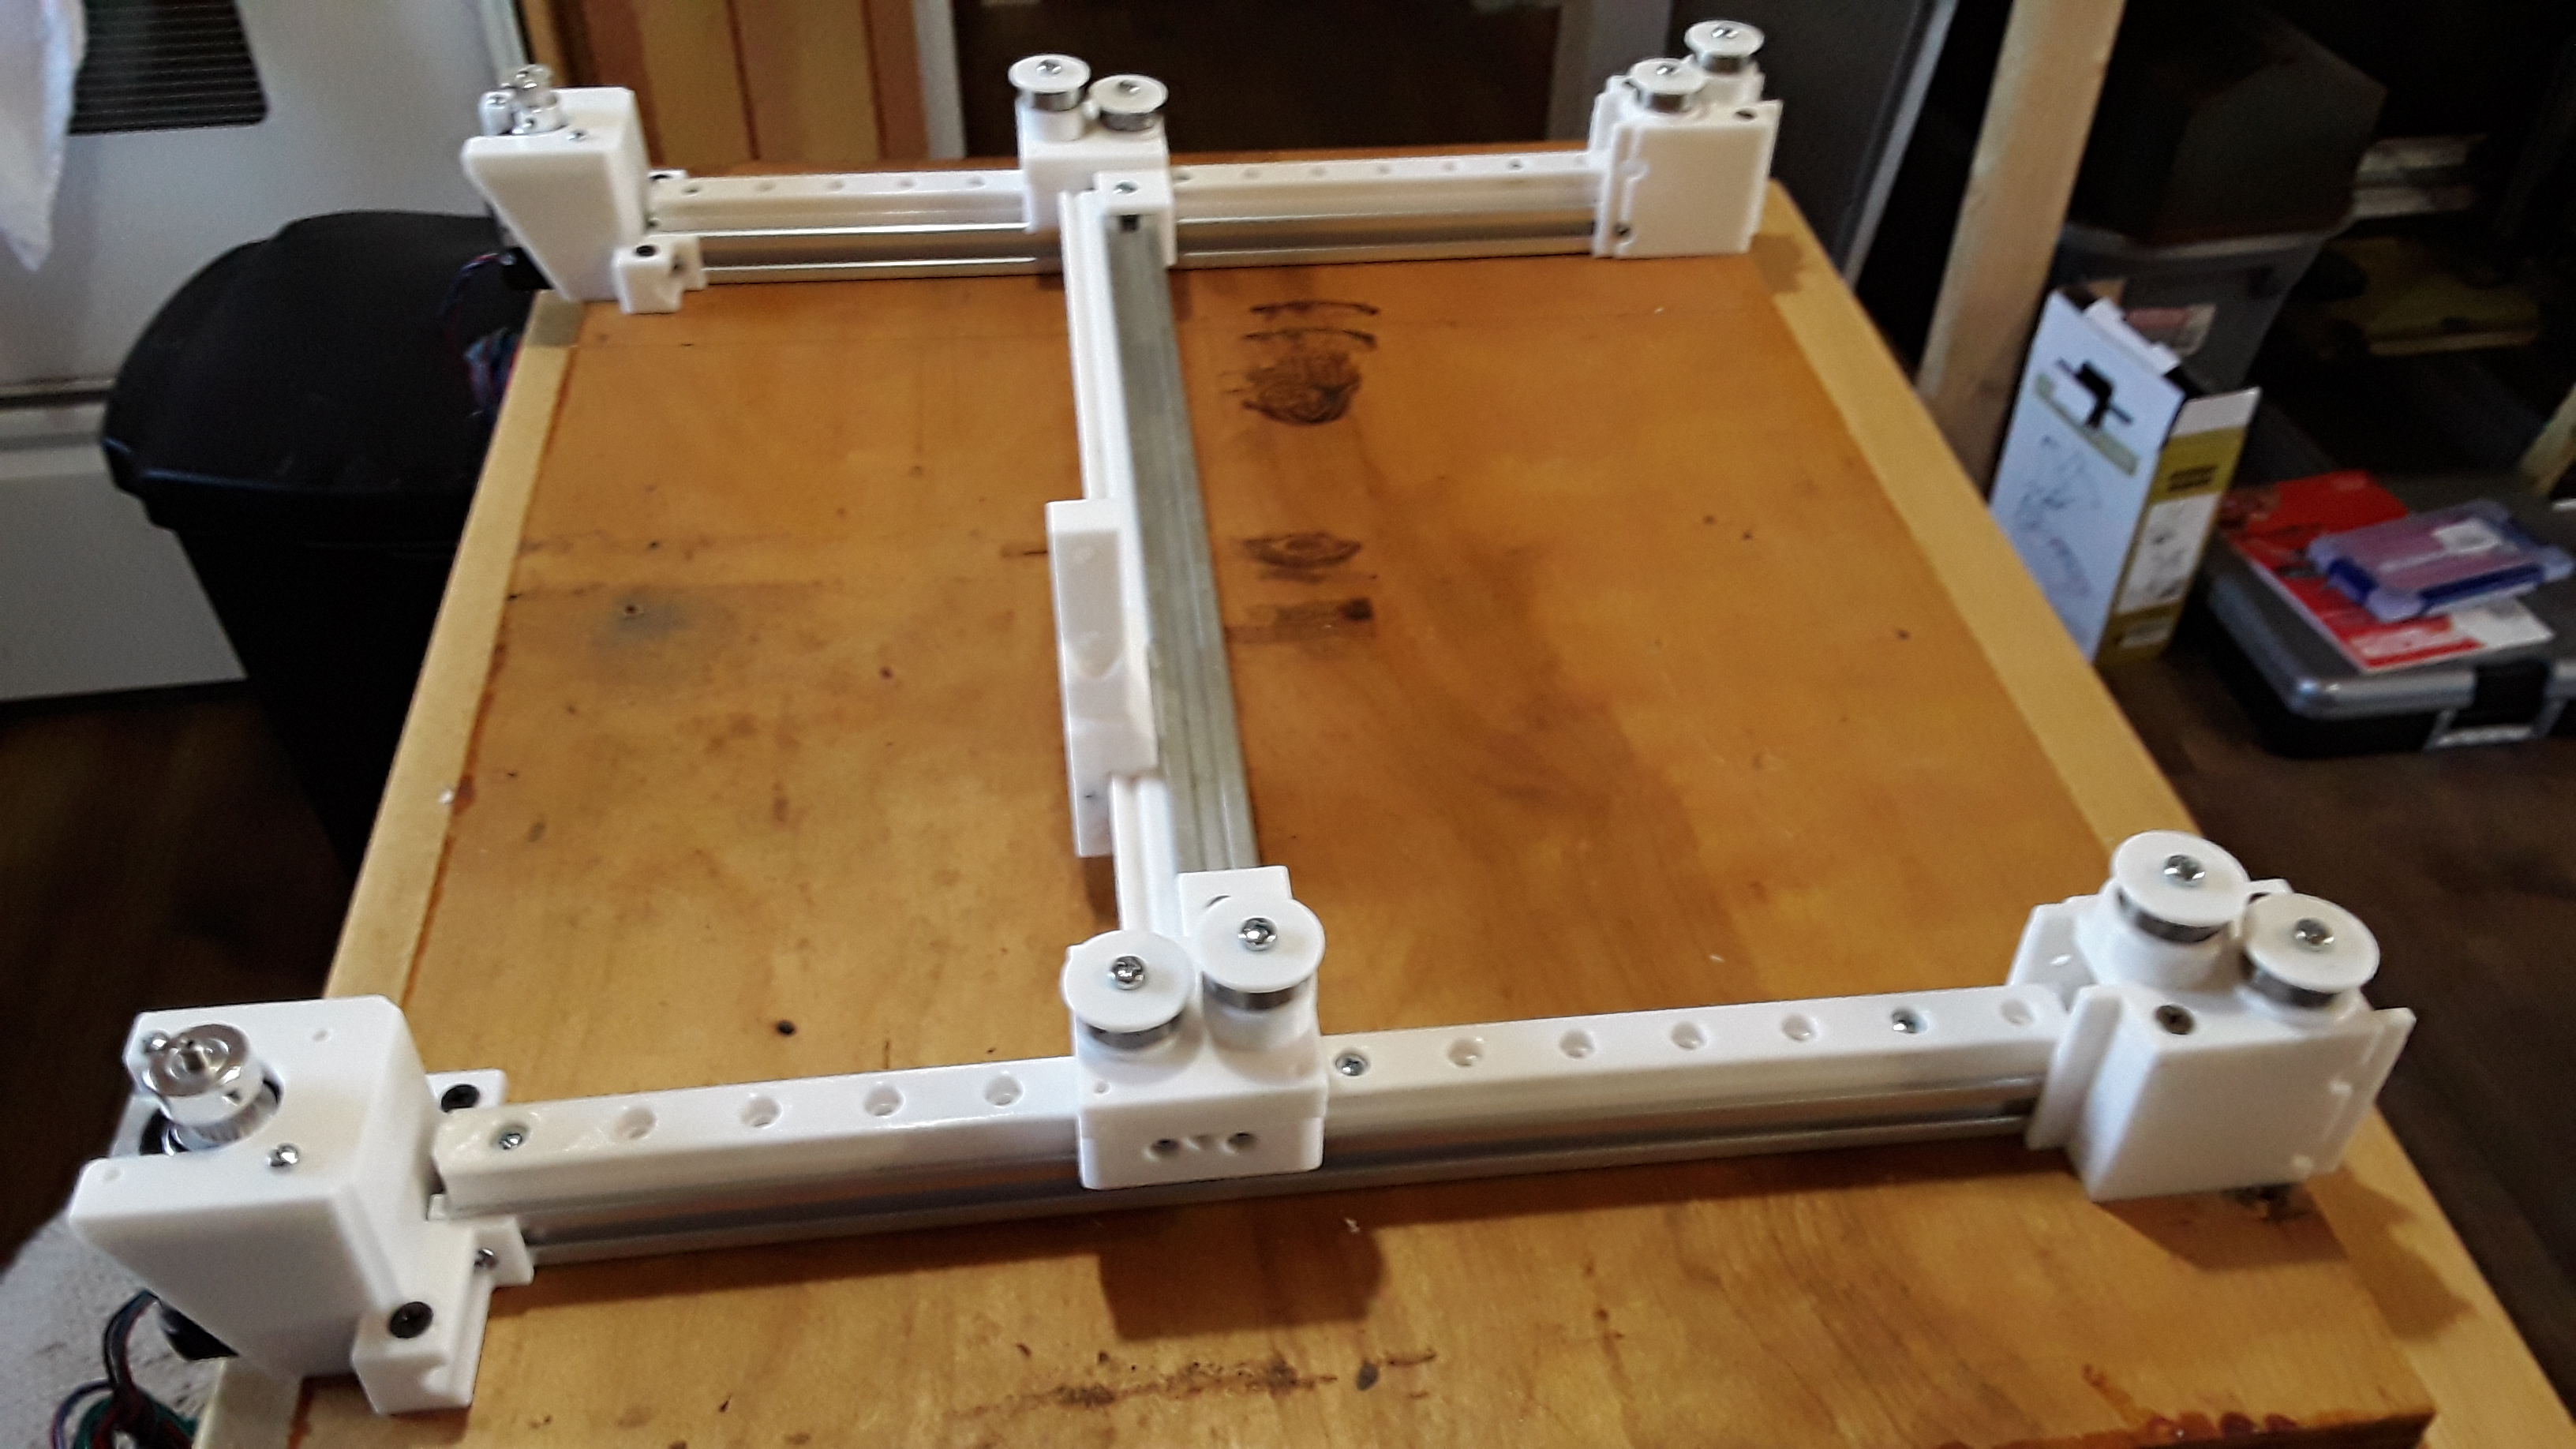
Matching up the upper and lower idler levels…
Checking ease of gantry movement over full range, front and back…
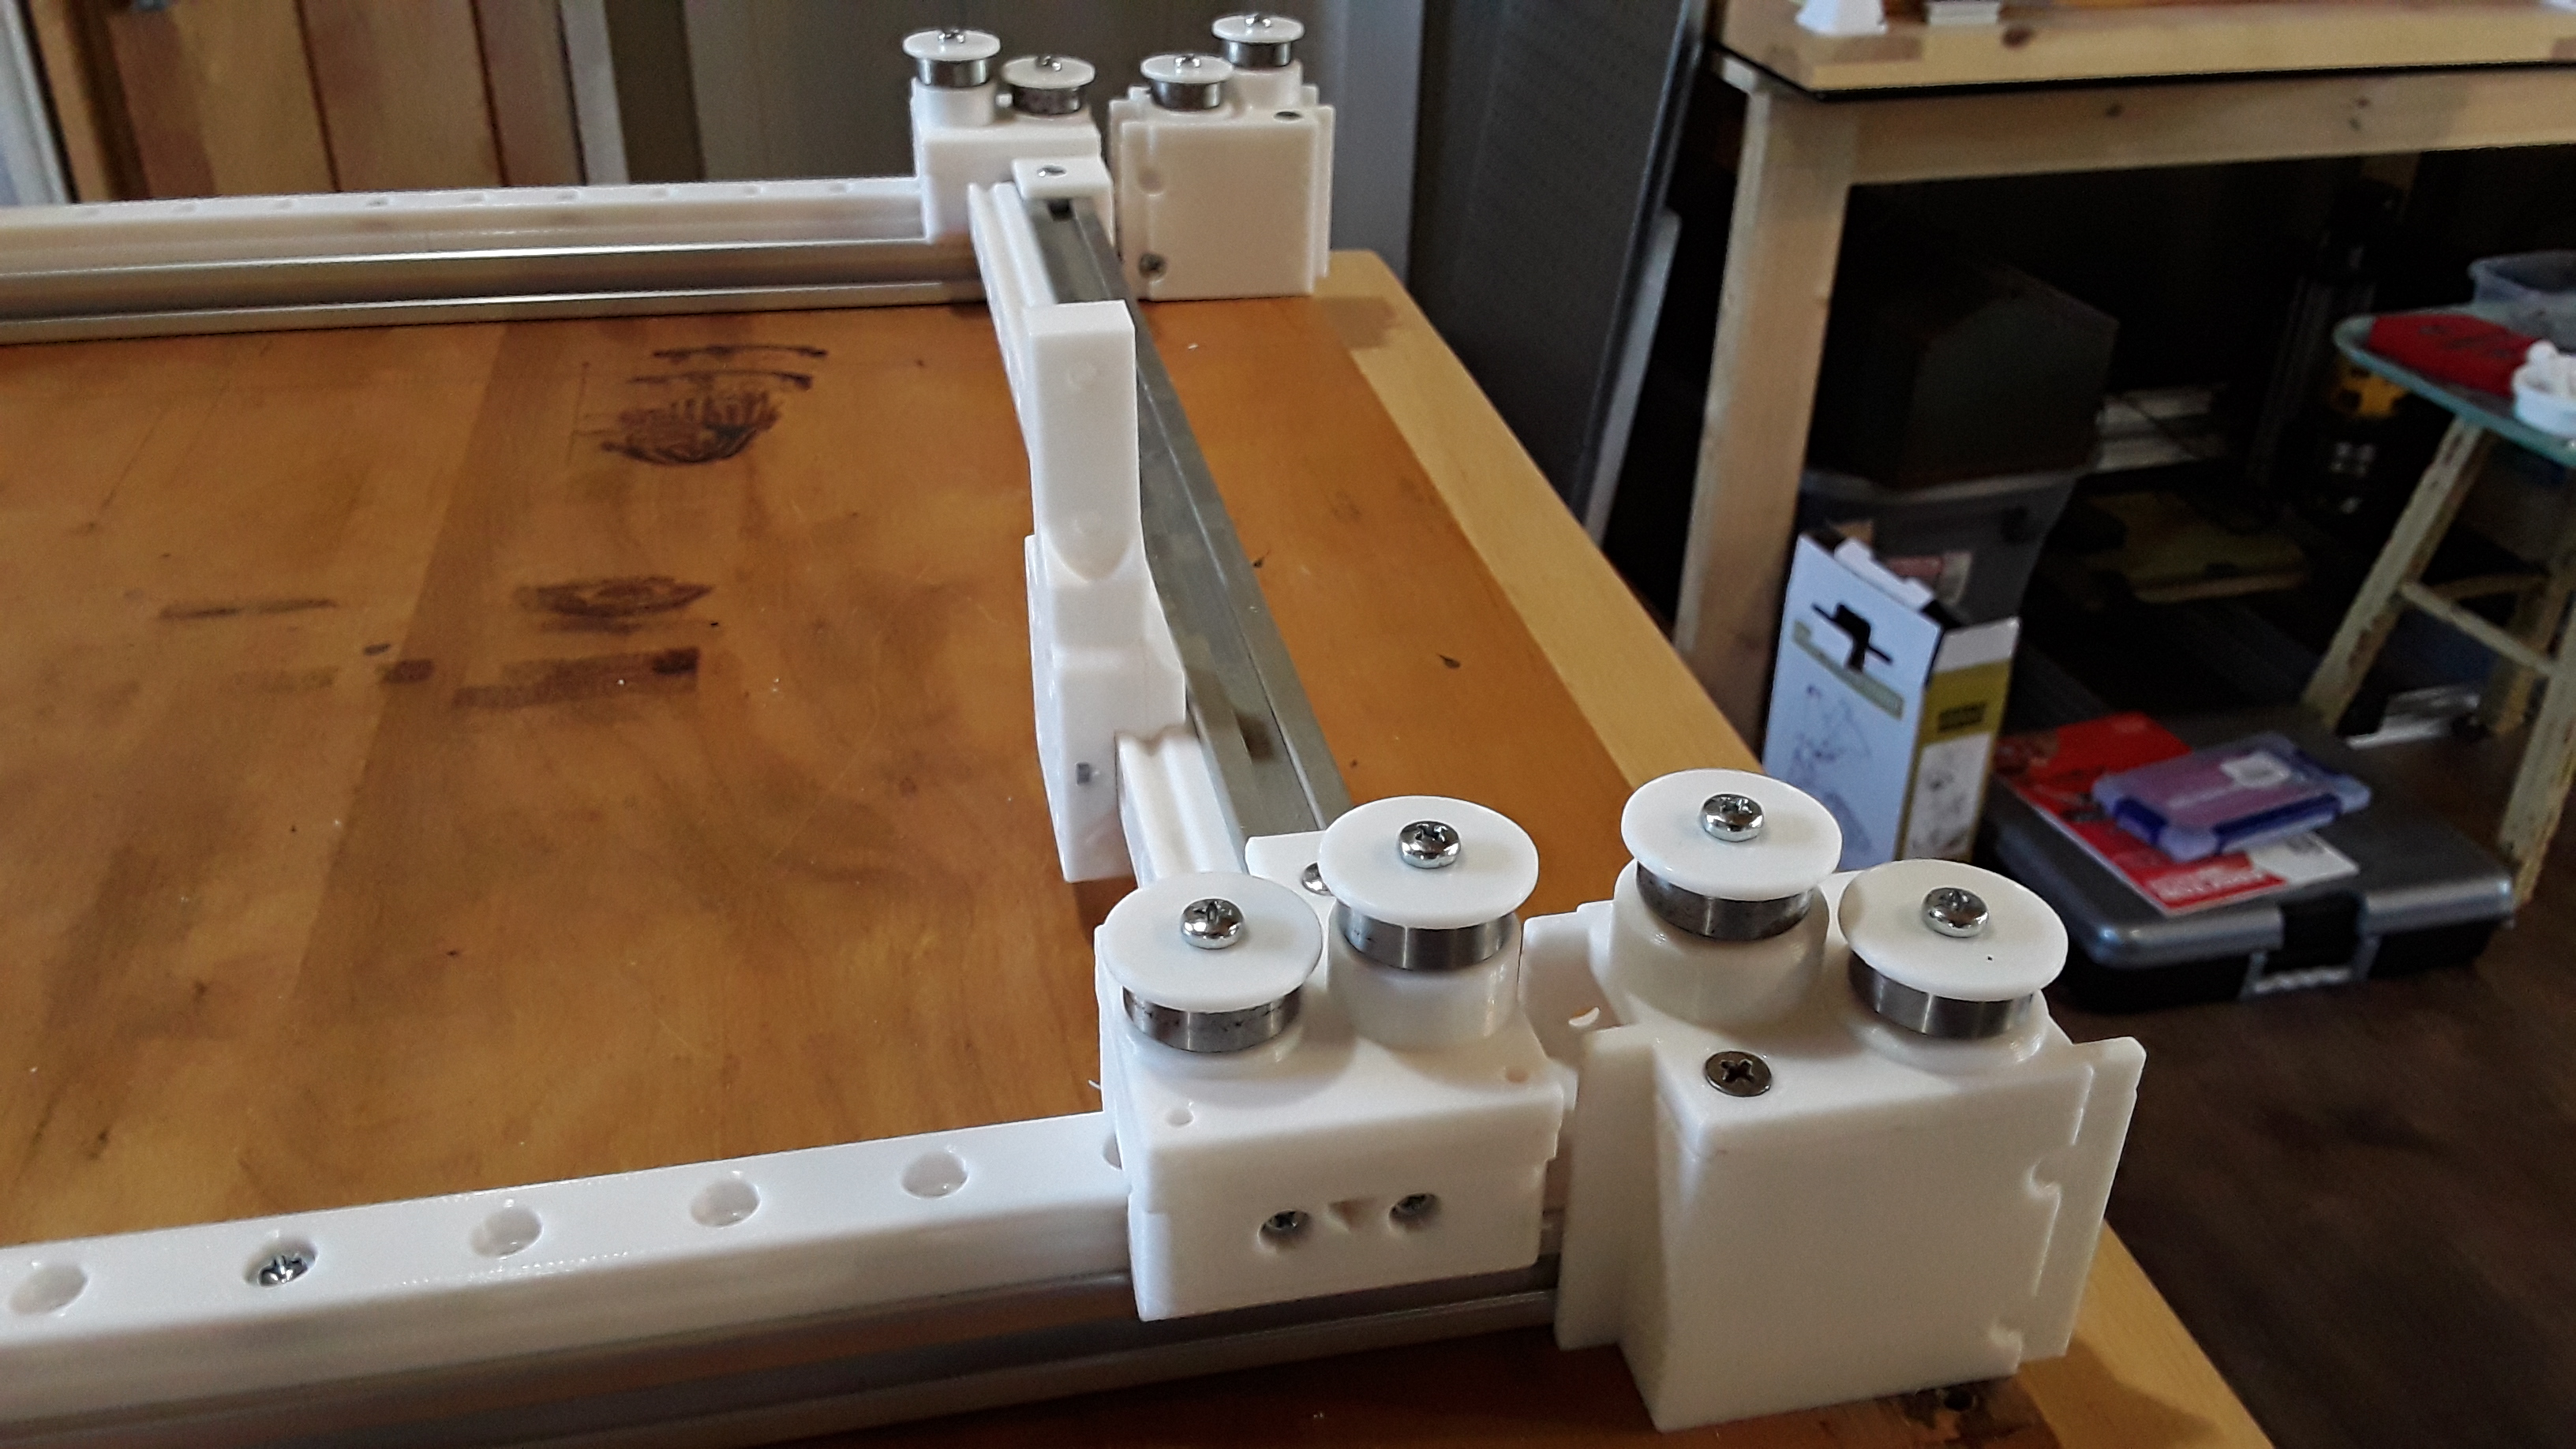
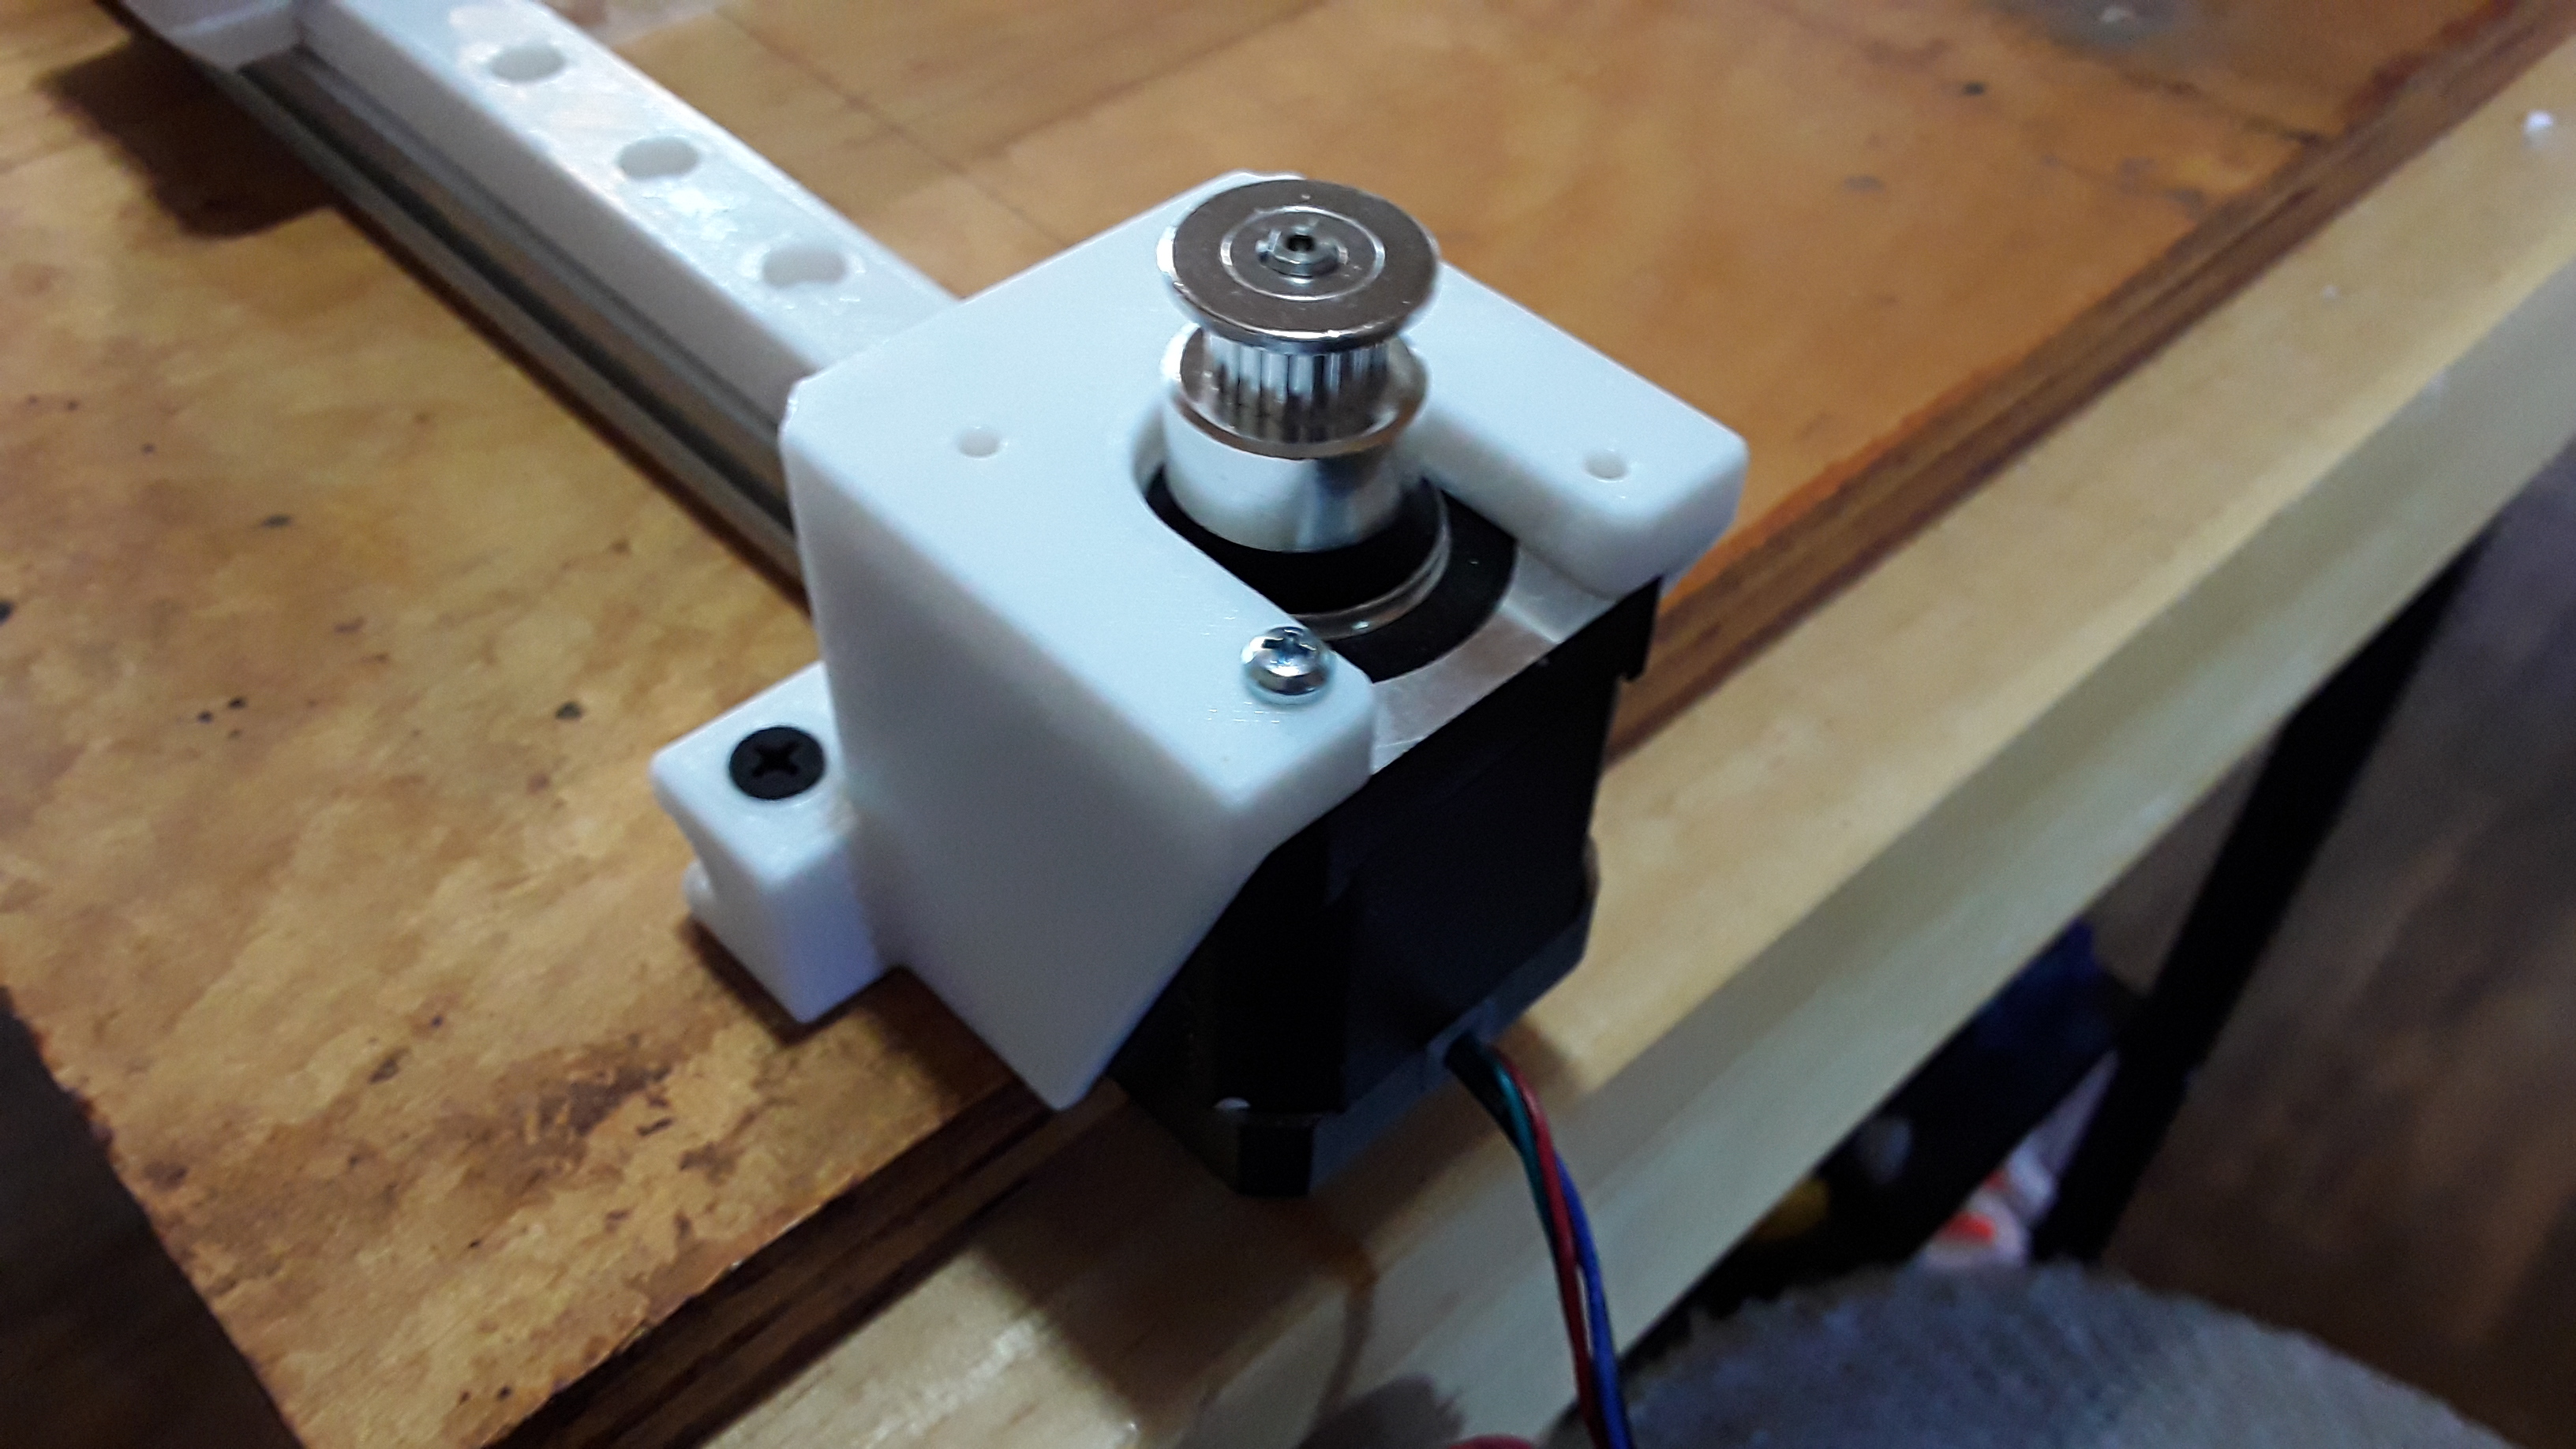
Front left motor mount…
Left gantry idler block and linear slide carriage…

Right block and carriage. The BB-bearing carriages have pre-load adjustment…
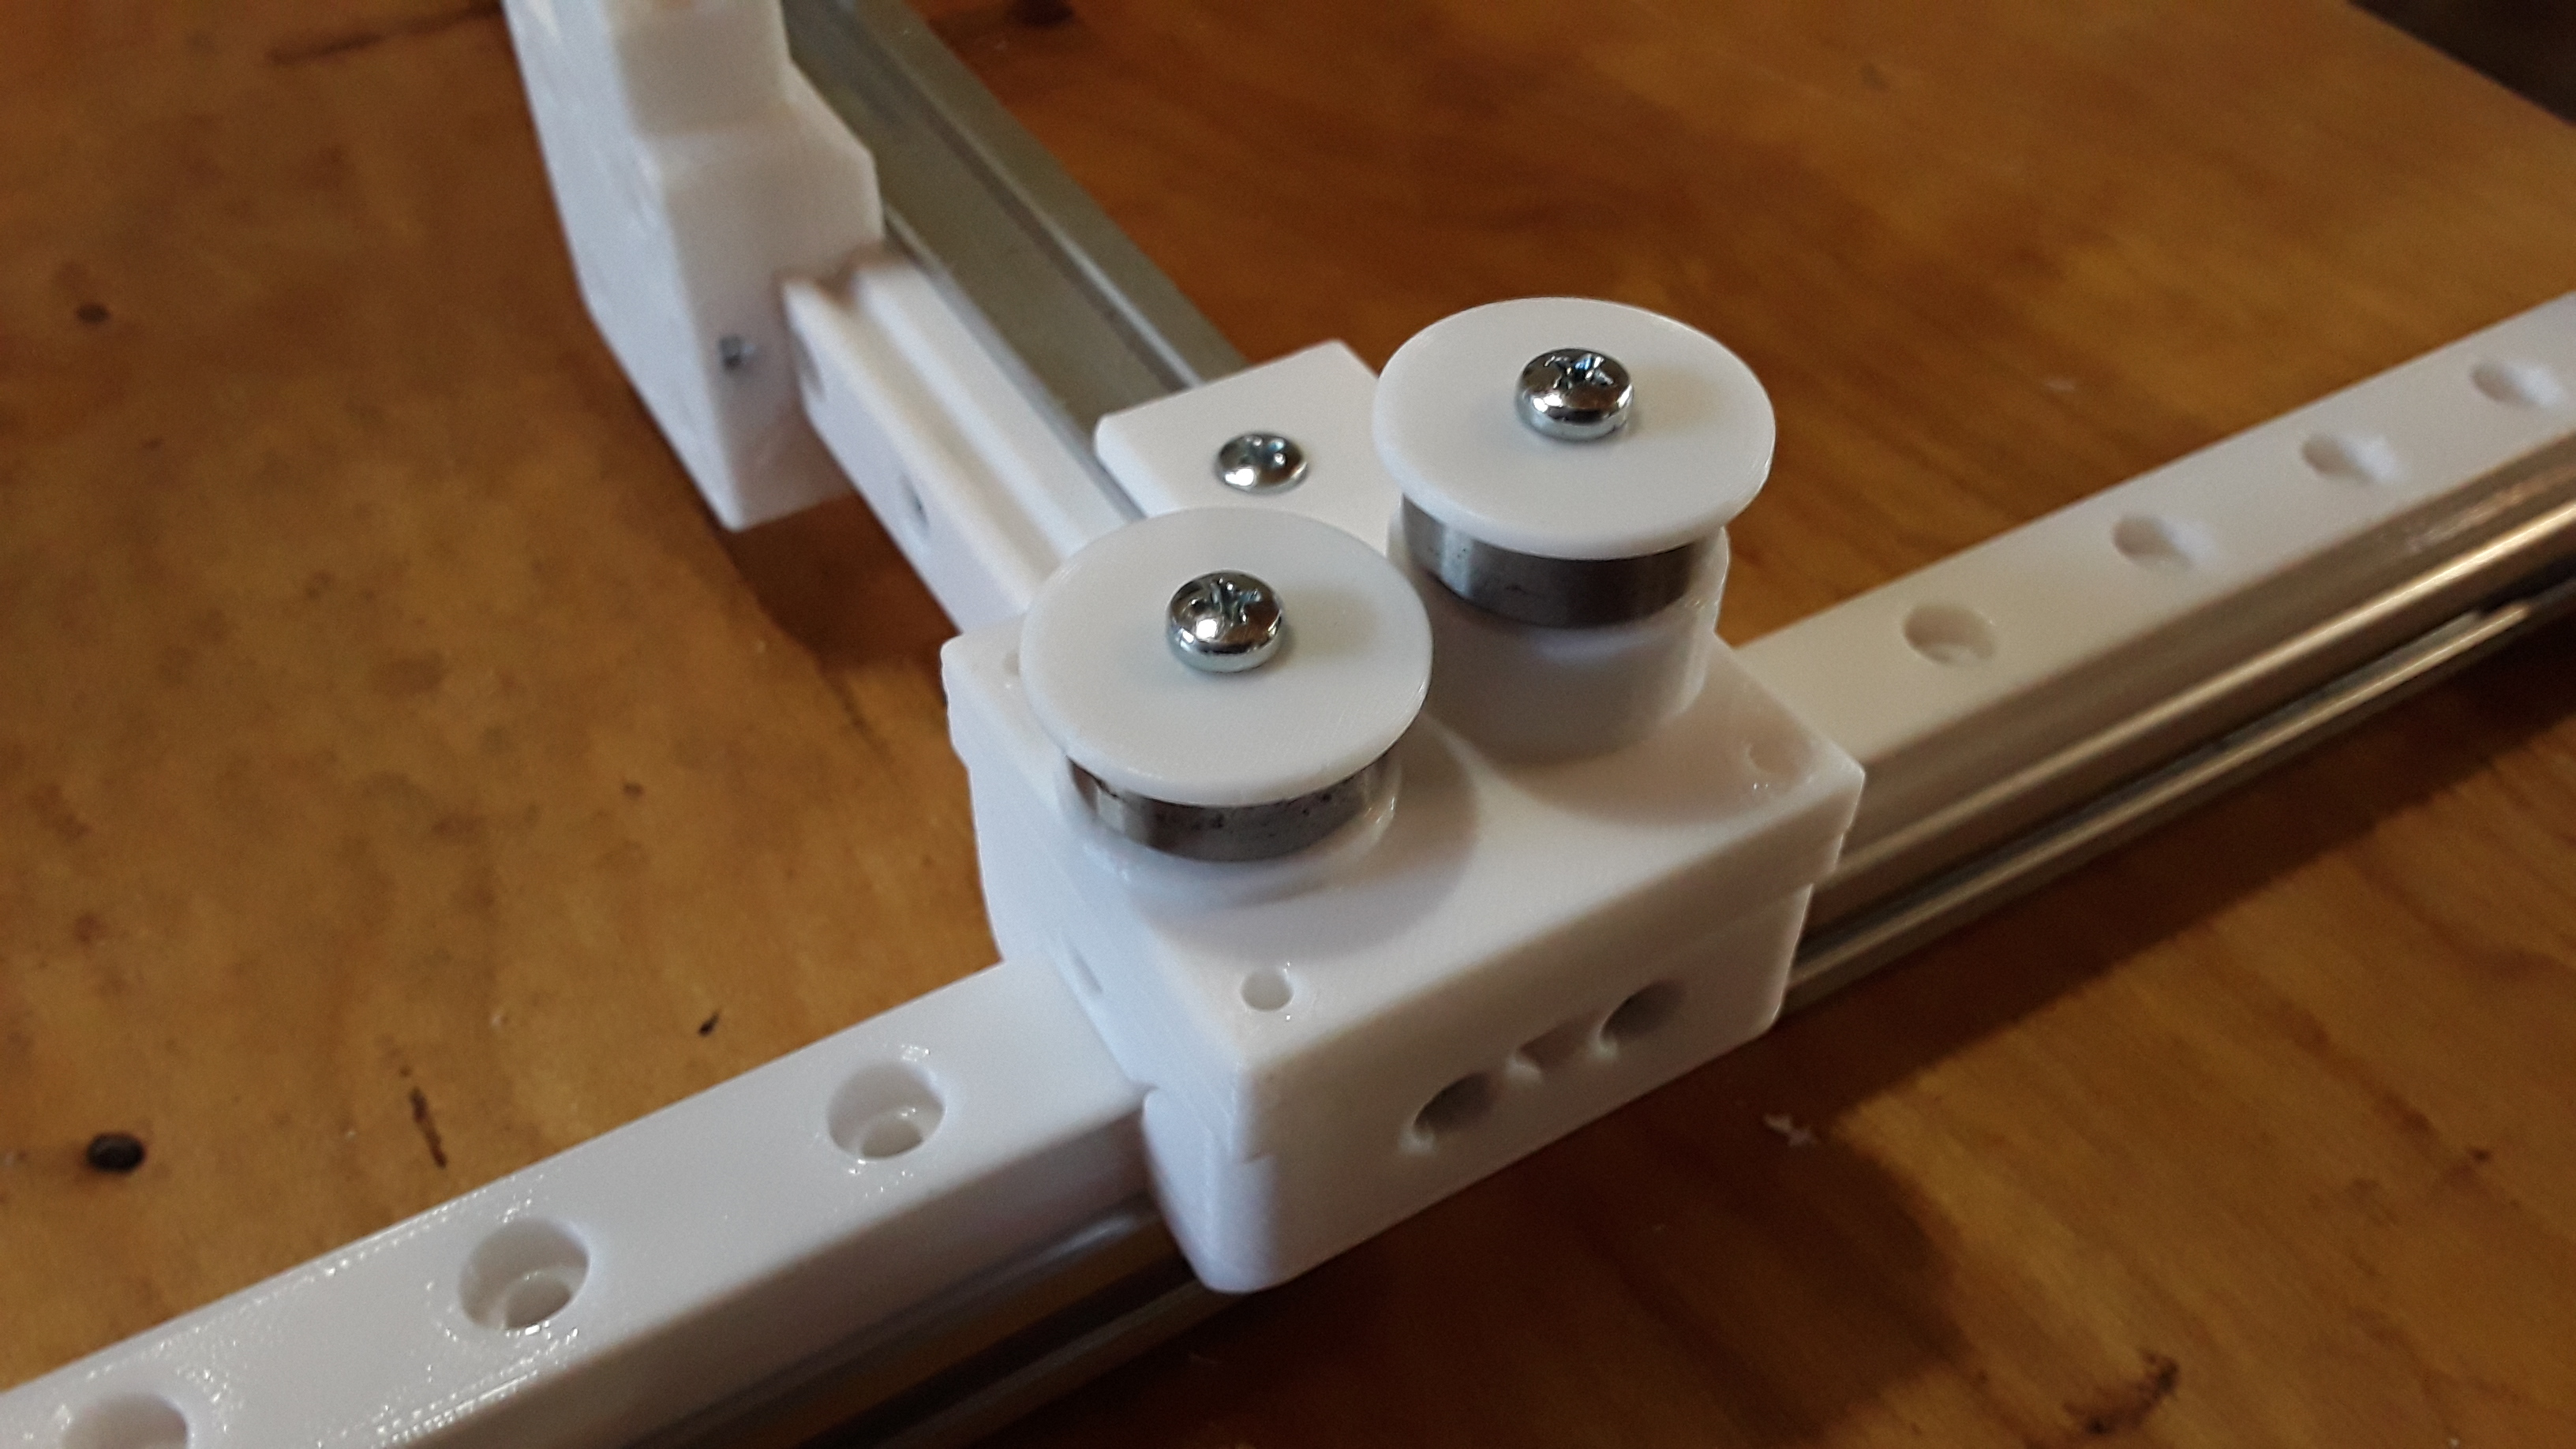
Right rear idler and spacer block…
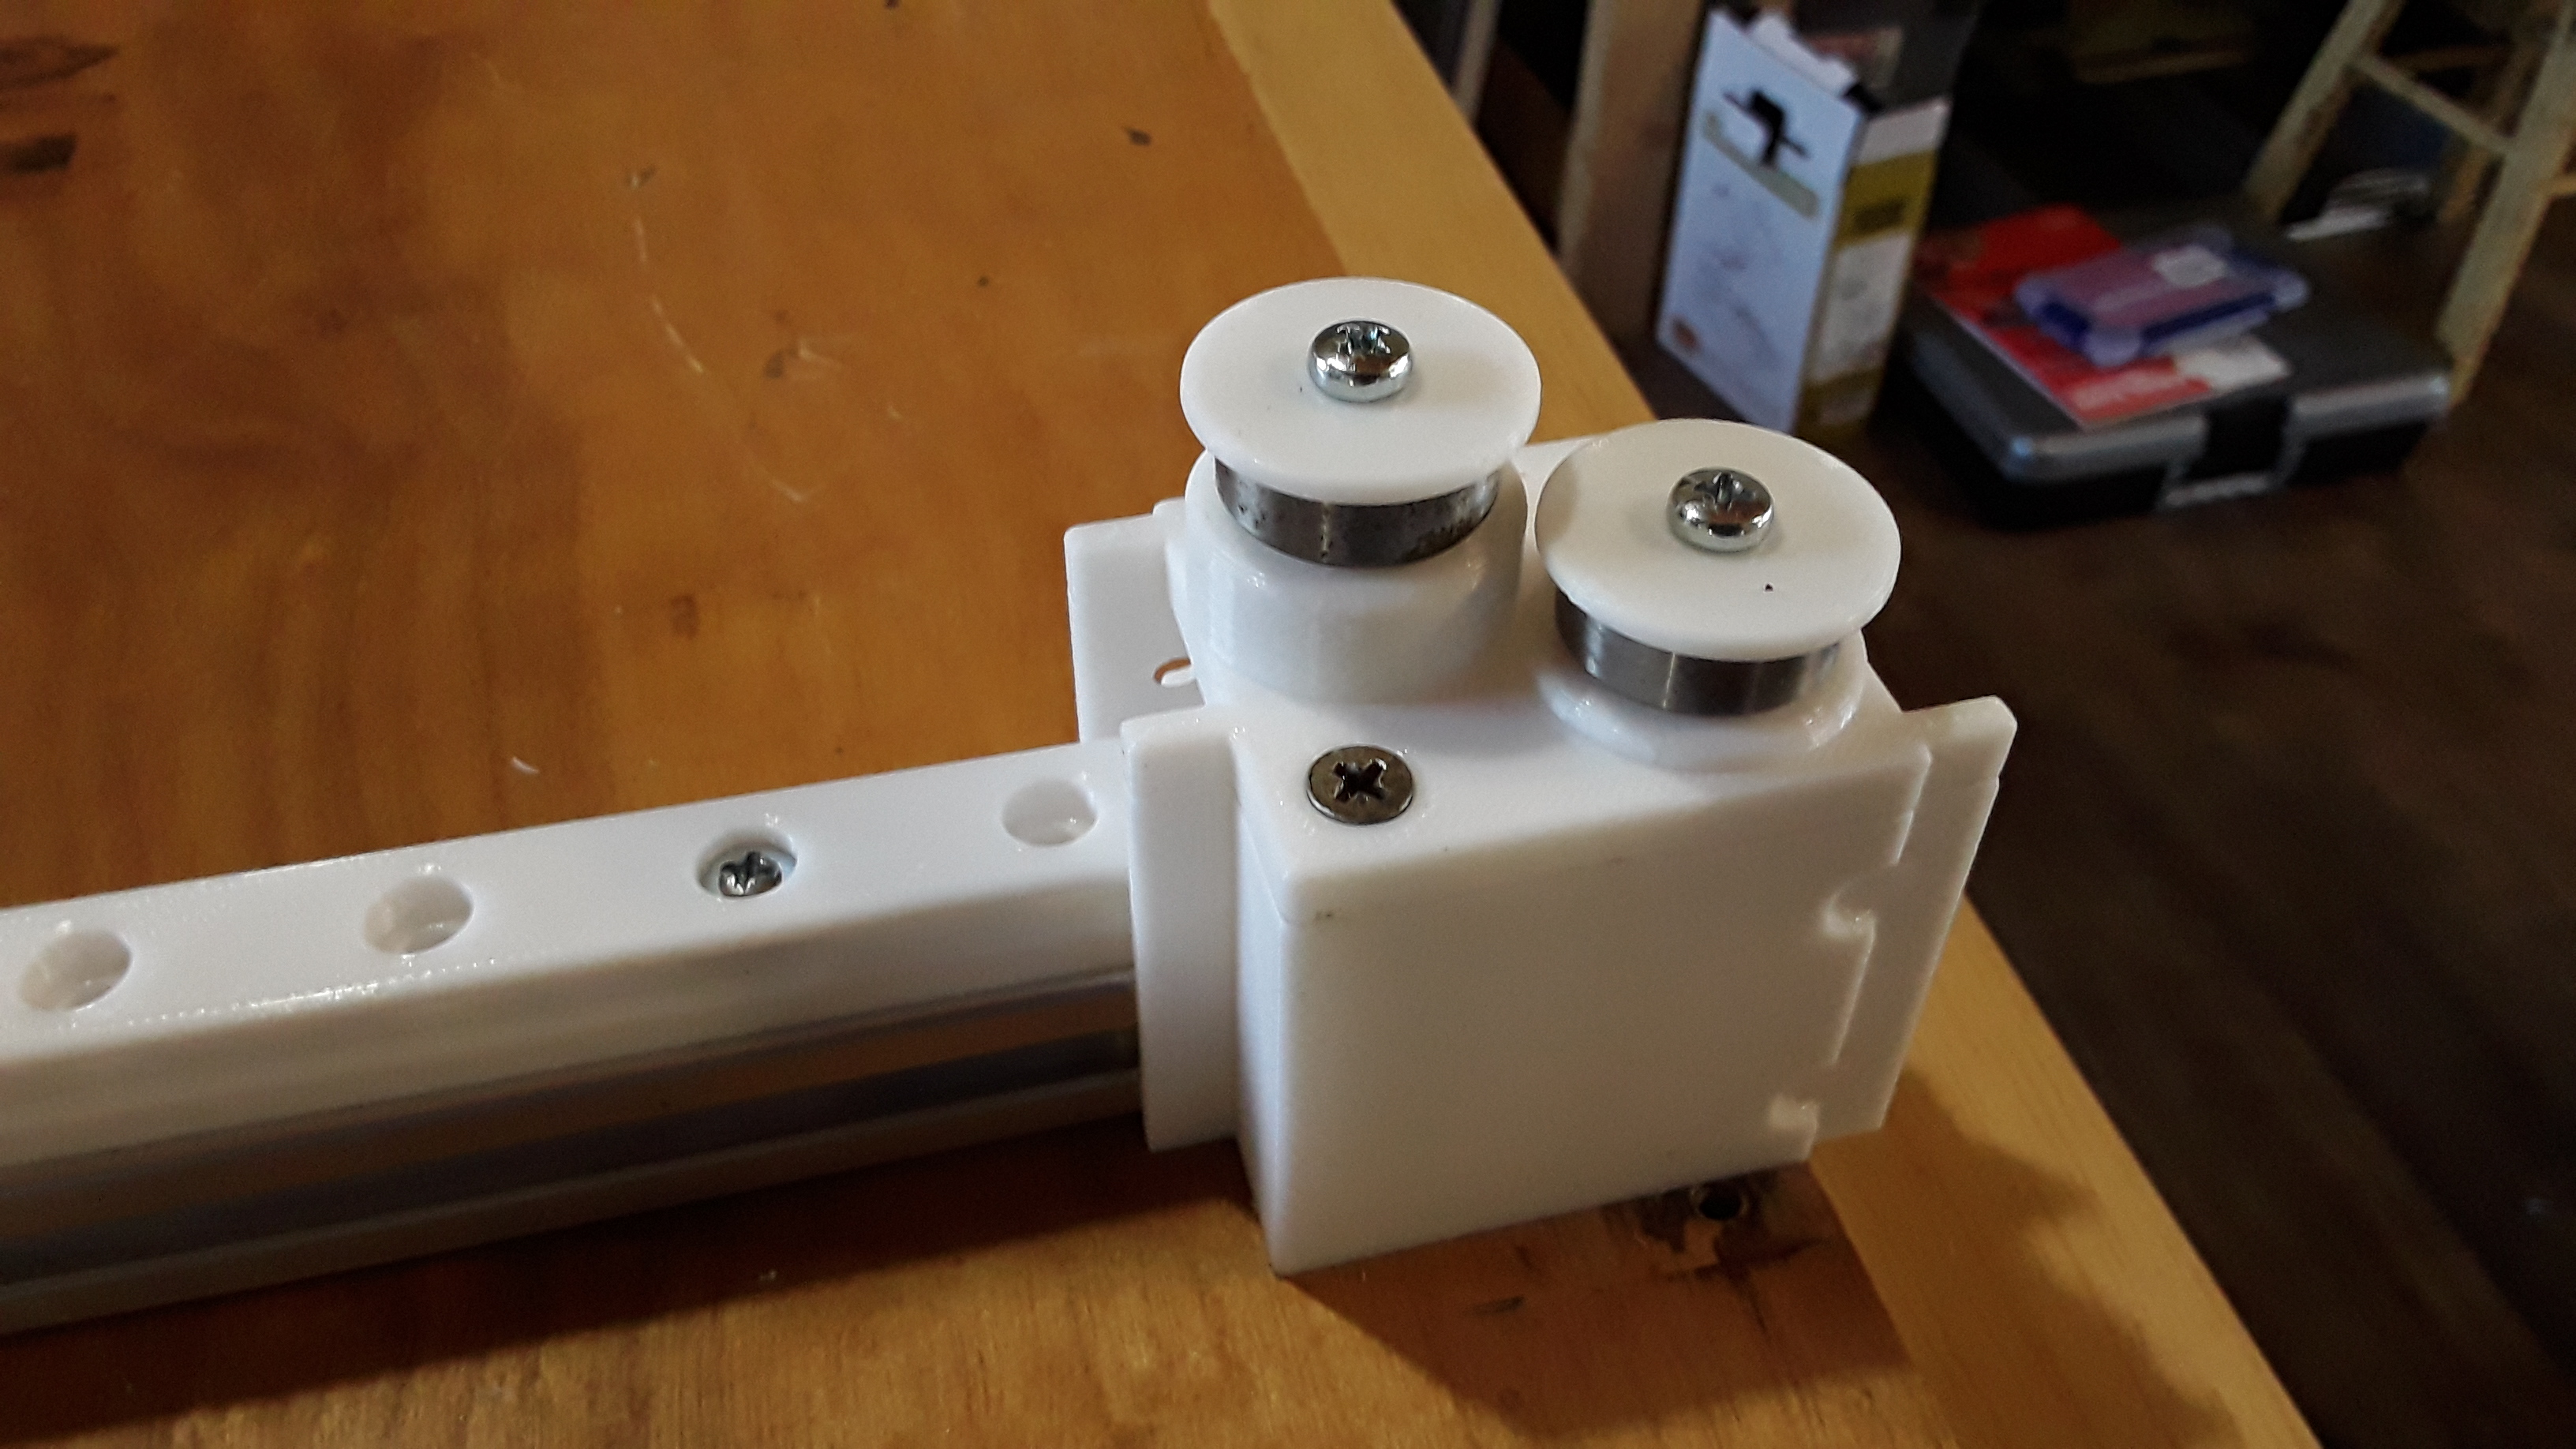
Left side idlers…
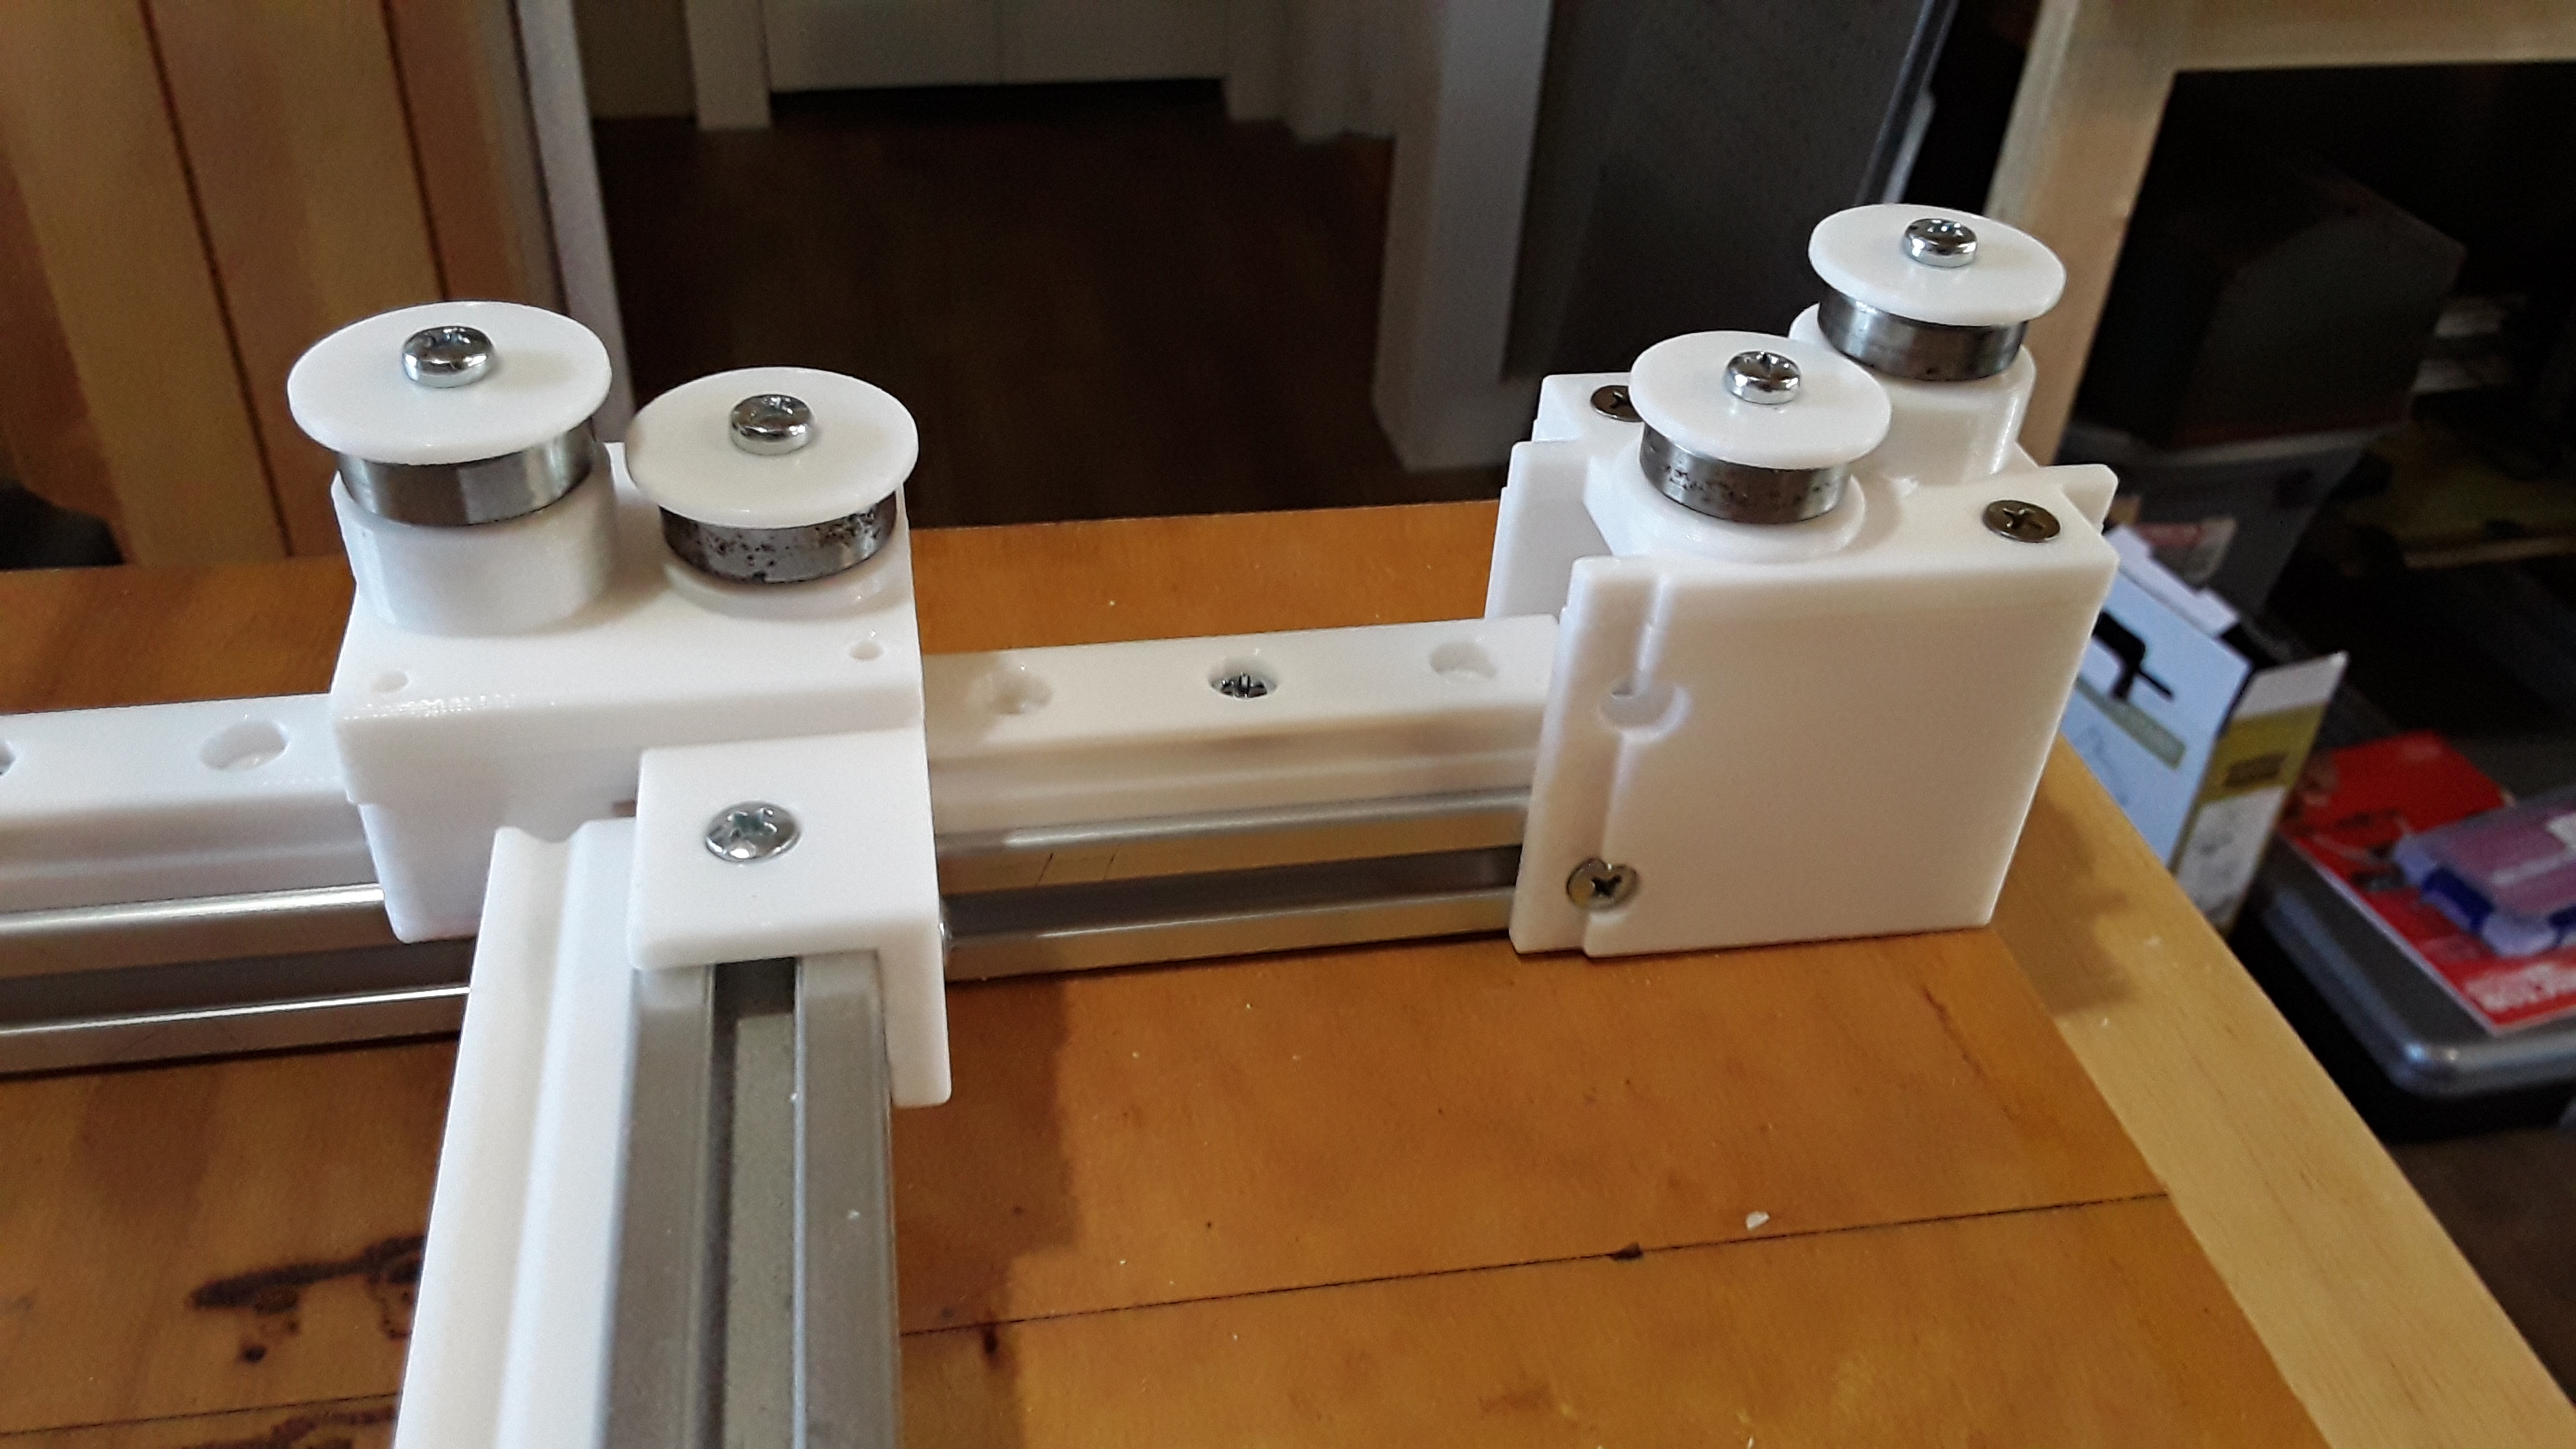
Gantry at extremes forward and back. Easy movement over entire range…

Uh-oh! Lower belt path blocked by some of that nasty plastic…

I obviously have a few alignment issues to address before I can belt it up and test… but I’m reasonably happy with the way it’s going together. I think it’s going to be a neat little machine.
Later…
3 Likes
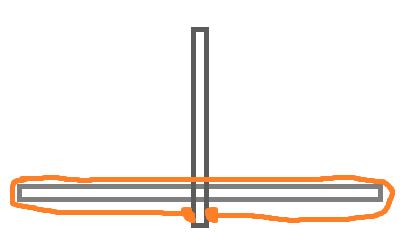
For a second I thought you were going to build a cantilevered CoreXY (confusing threads in my head).
Then I got to thinking, it such a thing even possible? A cantilevered system can’t be a true CoreXY, but it can use a similar spirit.
The X axis can be connected directly:
And the Y axis could be dependent on the X position:
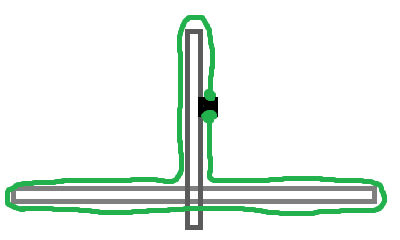
With counterweights this could potentially be fast. The downside is that since it’s not a true CoreXY it’s going to require writing some code to get it to work in Marlin. Or I suppose the coordinates in the gcode could be transformed externally into individual motor positions.
It’s also I think possible to have a symmetrical range of motion with some additional pulleys:
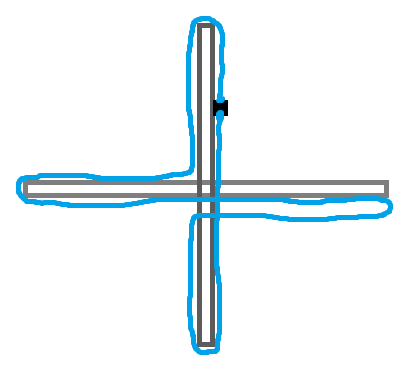
This wouldn’t work for a printer, and I’m not sure about a laser, since the wires are not going to be happy crossing the X axis. But I’m thinking more along the lines of ZenXY where no connection to the head is necessary.
1 Like
I really like how you made the Idler sets so they can be mounted either direction. One universal part that can be used in many places. Very smart. I also like how those belt guides turned out. Since you have a machine that uses those same idler belt guides I wanted to ask if they cause wear on the edges of the belts over time?
Nice work.
1 Like
Dang, Jamie! I’ve got neck strain trying to keep up with all that… 
No, this is just a basic CoreXY machine, pretty similar to the one @mordiev has going in his build thread. I’ve adapted his design to use parts I already had on hand or could easily print and moved the motors to eliminate extra idlers… but otherwise it’s the same idea.

3 Likes
Thanks, Aaryn. I don’t have that machine anymore… I gave it away and haven’t seen it for a couple of years. While I had it I never noticed any belt edge wear however. I suspect if the alignment and belt tension are just right, it should last reasonably well. Replacing a belt shouldn’t be too difficult, however, should it ever needs it… 
@jeffeb3 that’s excellent. I believe that would behave like a real CoreXY and CoreXY firmware would work. 
1 Like
Just curious what filament you’re using. That white just looks so clean.
I actually like it a lot. I am trying to decide if there’s anything I can do with it. A pen plotter would be pretty fun. I don’t think there’s a good reason to make the zenxy cantilevered. But that would be fun too.
Blaine, that’s Sunlu PLA from Amazon. I’ve been using it for several years now and really like it. These parts are all printed on a Prusa MK3S printer. No machine failures or malfunctions due to filament so far…
1 Like
Too shaky now with pencil and paper… at a time when I was younger, smarter, and a bit more the “fashion hound”, I bought a pair of bright orange boot laces from the dollar store. Obviously a “visionary” as well  … these now serve faithfully to help me visualize – and SWAG (Scientific Wild-A$$ Guess) – vital measurements, needed to CAD up parts for trickier belt routing cases, such as CoreXY.


Based on their posted artwork(?), looks like Jamie and Jeff might find this “tip” useful as well?
Just sayin’… 
2 Likes
Heh, I have a set of Kevlar boot laces on my winter combat boots. They’re quite bright.
There ya go!
You don’t like my chicken scratches?! I keep a notebook nearby most of the time and I work in a field that can’t use cloud services and I work remote. So I often draw up and photograph things I need to send to coworkers this way. It took me a few tries to get it right. But I probably could have busted out the straight edge and graph paper.
I like the look of that. I would pay a premium for bright orange gt2 belts.
Didn’t say that. I just can’t do that anymore and make heads or tails of it afterwards… and yours are IMHO close to being on the brink ![]()
Actually, when I worked in industry in the mid-'70s, designing circuits for military equipment, I worked closely with a fantastic retired-AF technician (I had been a technician in the Navy…). A big group of us engineers and techs would eat together in the company cafeteria each day, and I was famous (infamous?) for scratching out rough circuit designs on paper napkins… which “my” tech would then take and build test prototypes and turn into detailed schematics (which later would be sent to drafting… everything was pencil and vellum back then). All I had to do is tell him what IC’s and critical components I wanted to use and explain the theory of ops and he would take it from there. He’d dive into the nitty-gritty detail (I always hated that part!) and tie up all the control and power pins so that the IC’s were enabled to do their job and then he’d do the actual breadboard construction… and call me when it was ready to test. He loved it and so did I… we worked well together. I think he later got his EE degree… we were both taking night classes about the same time. Some good times and a great memory!
2 Likes
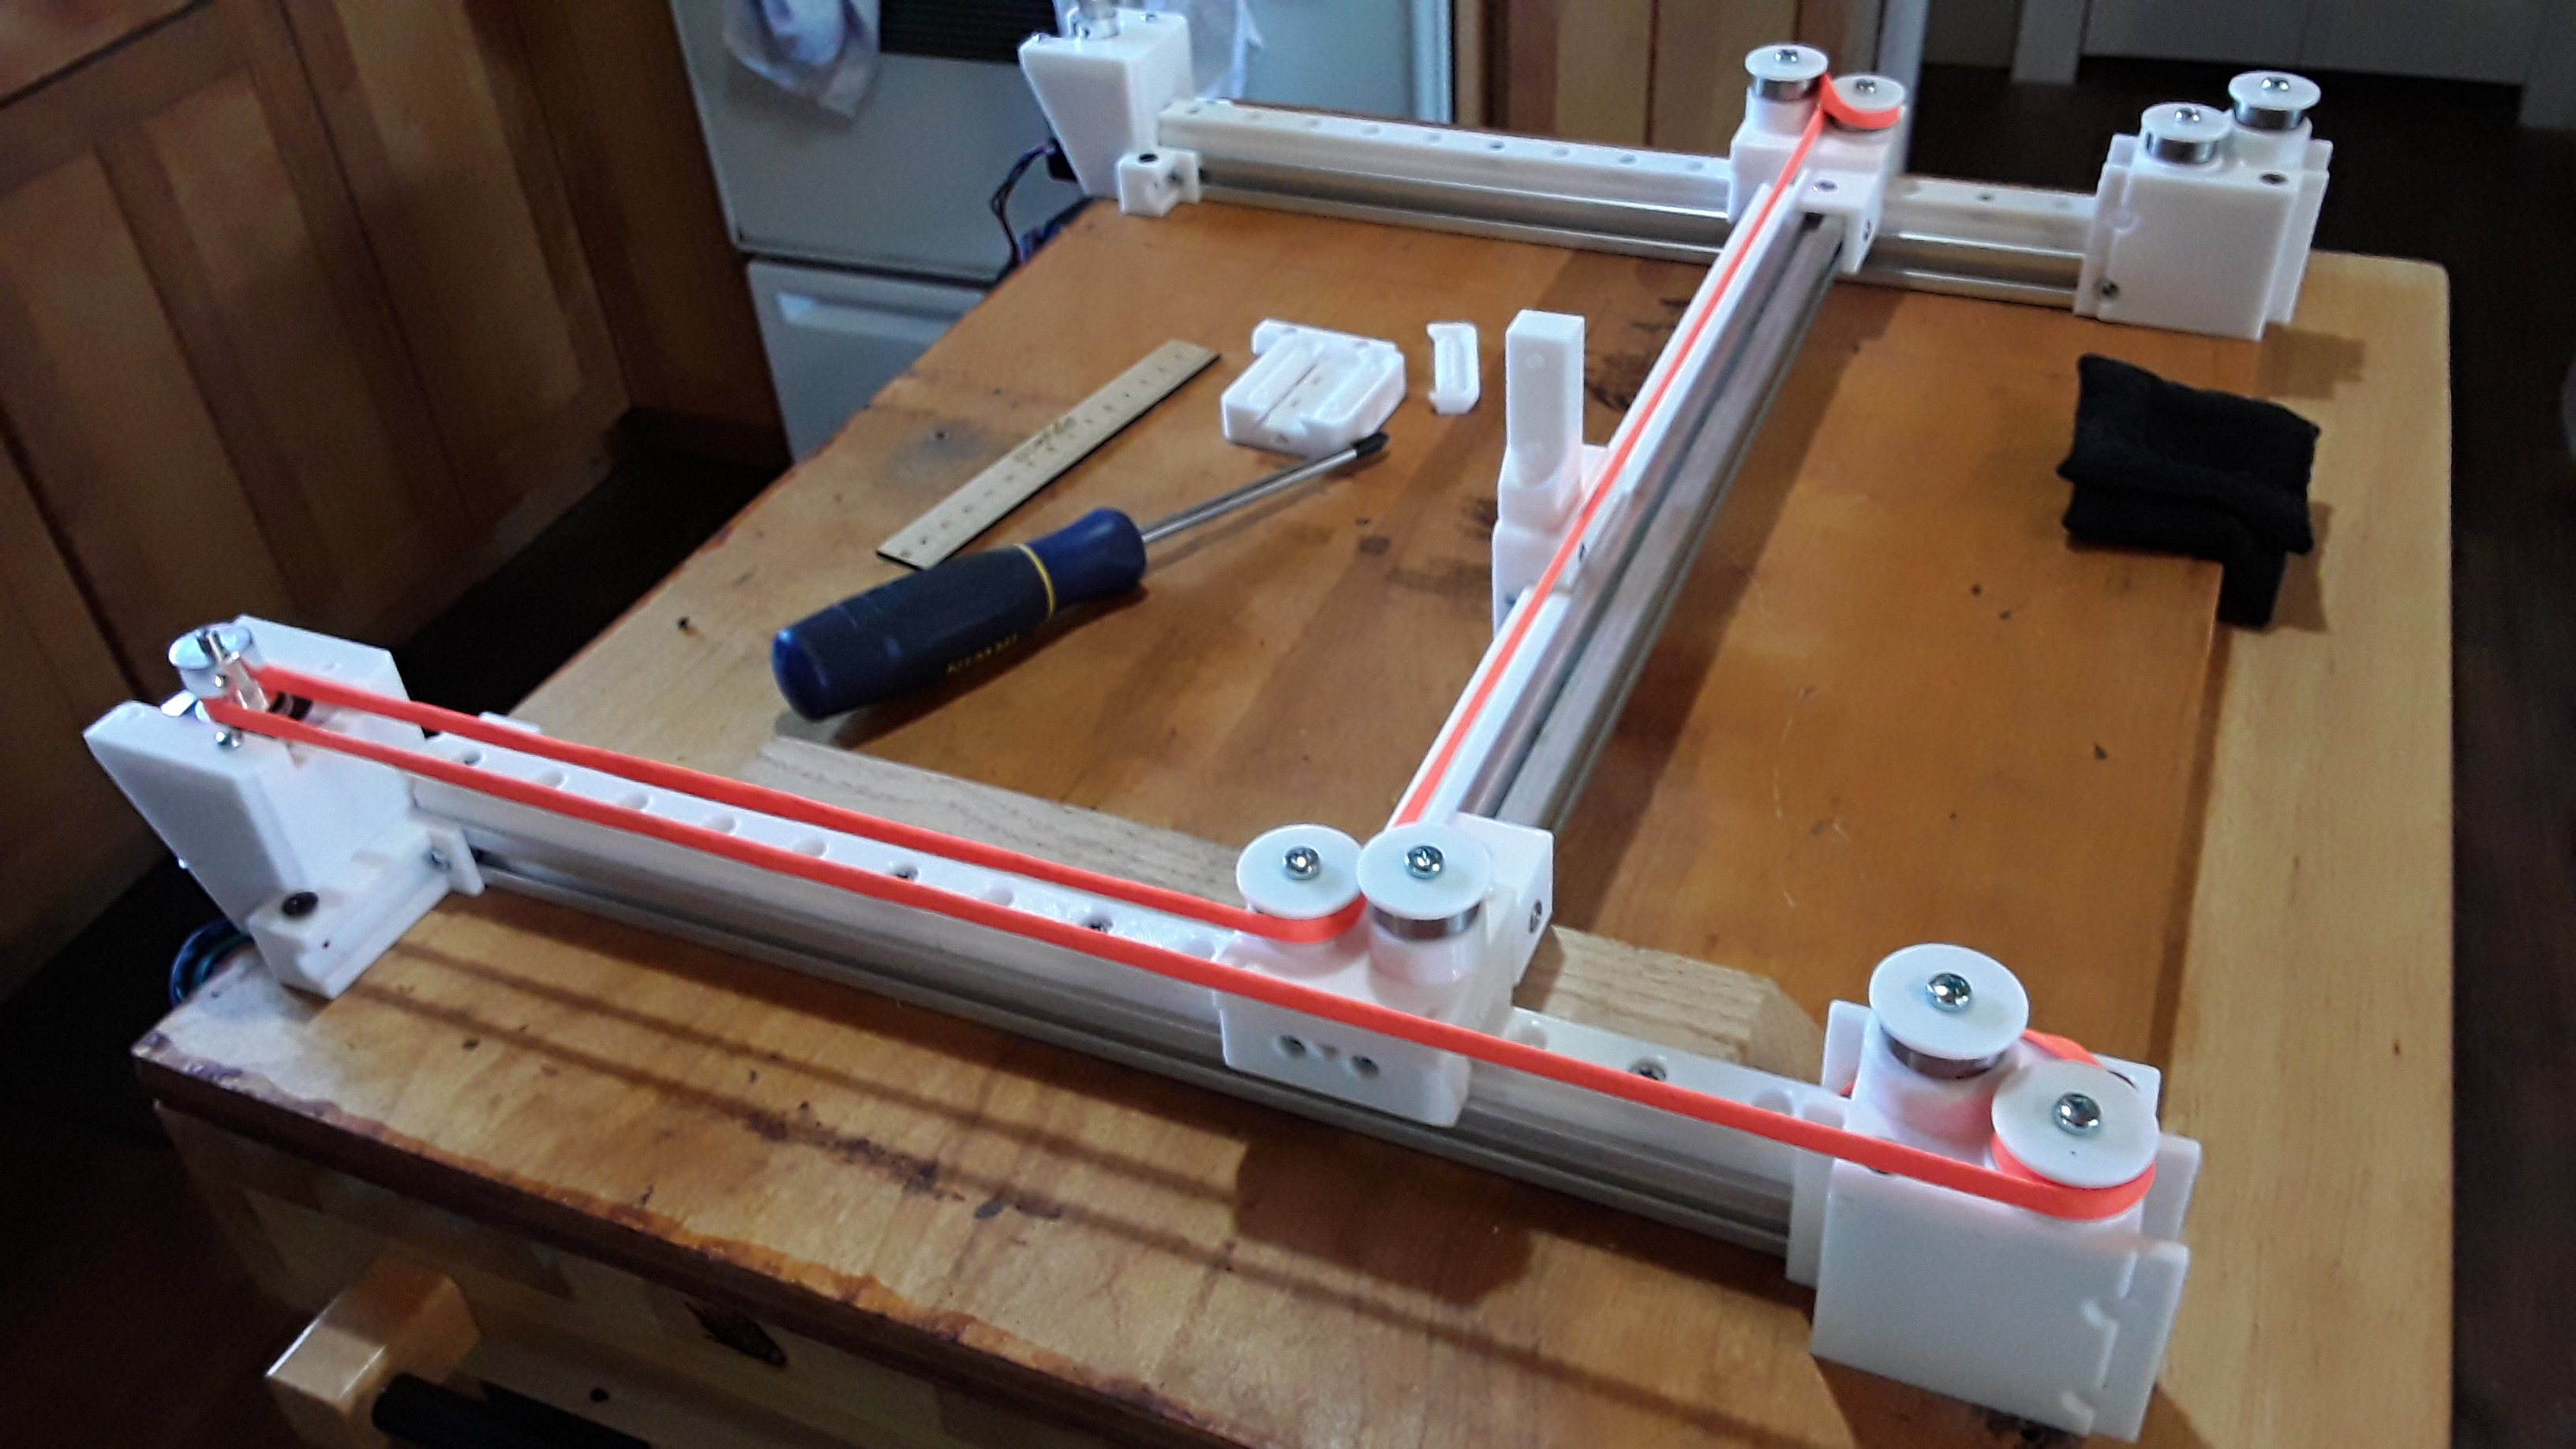
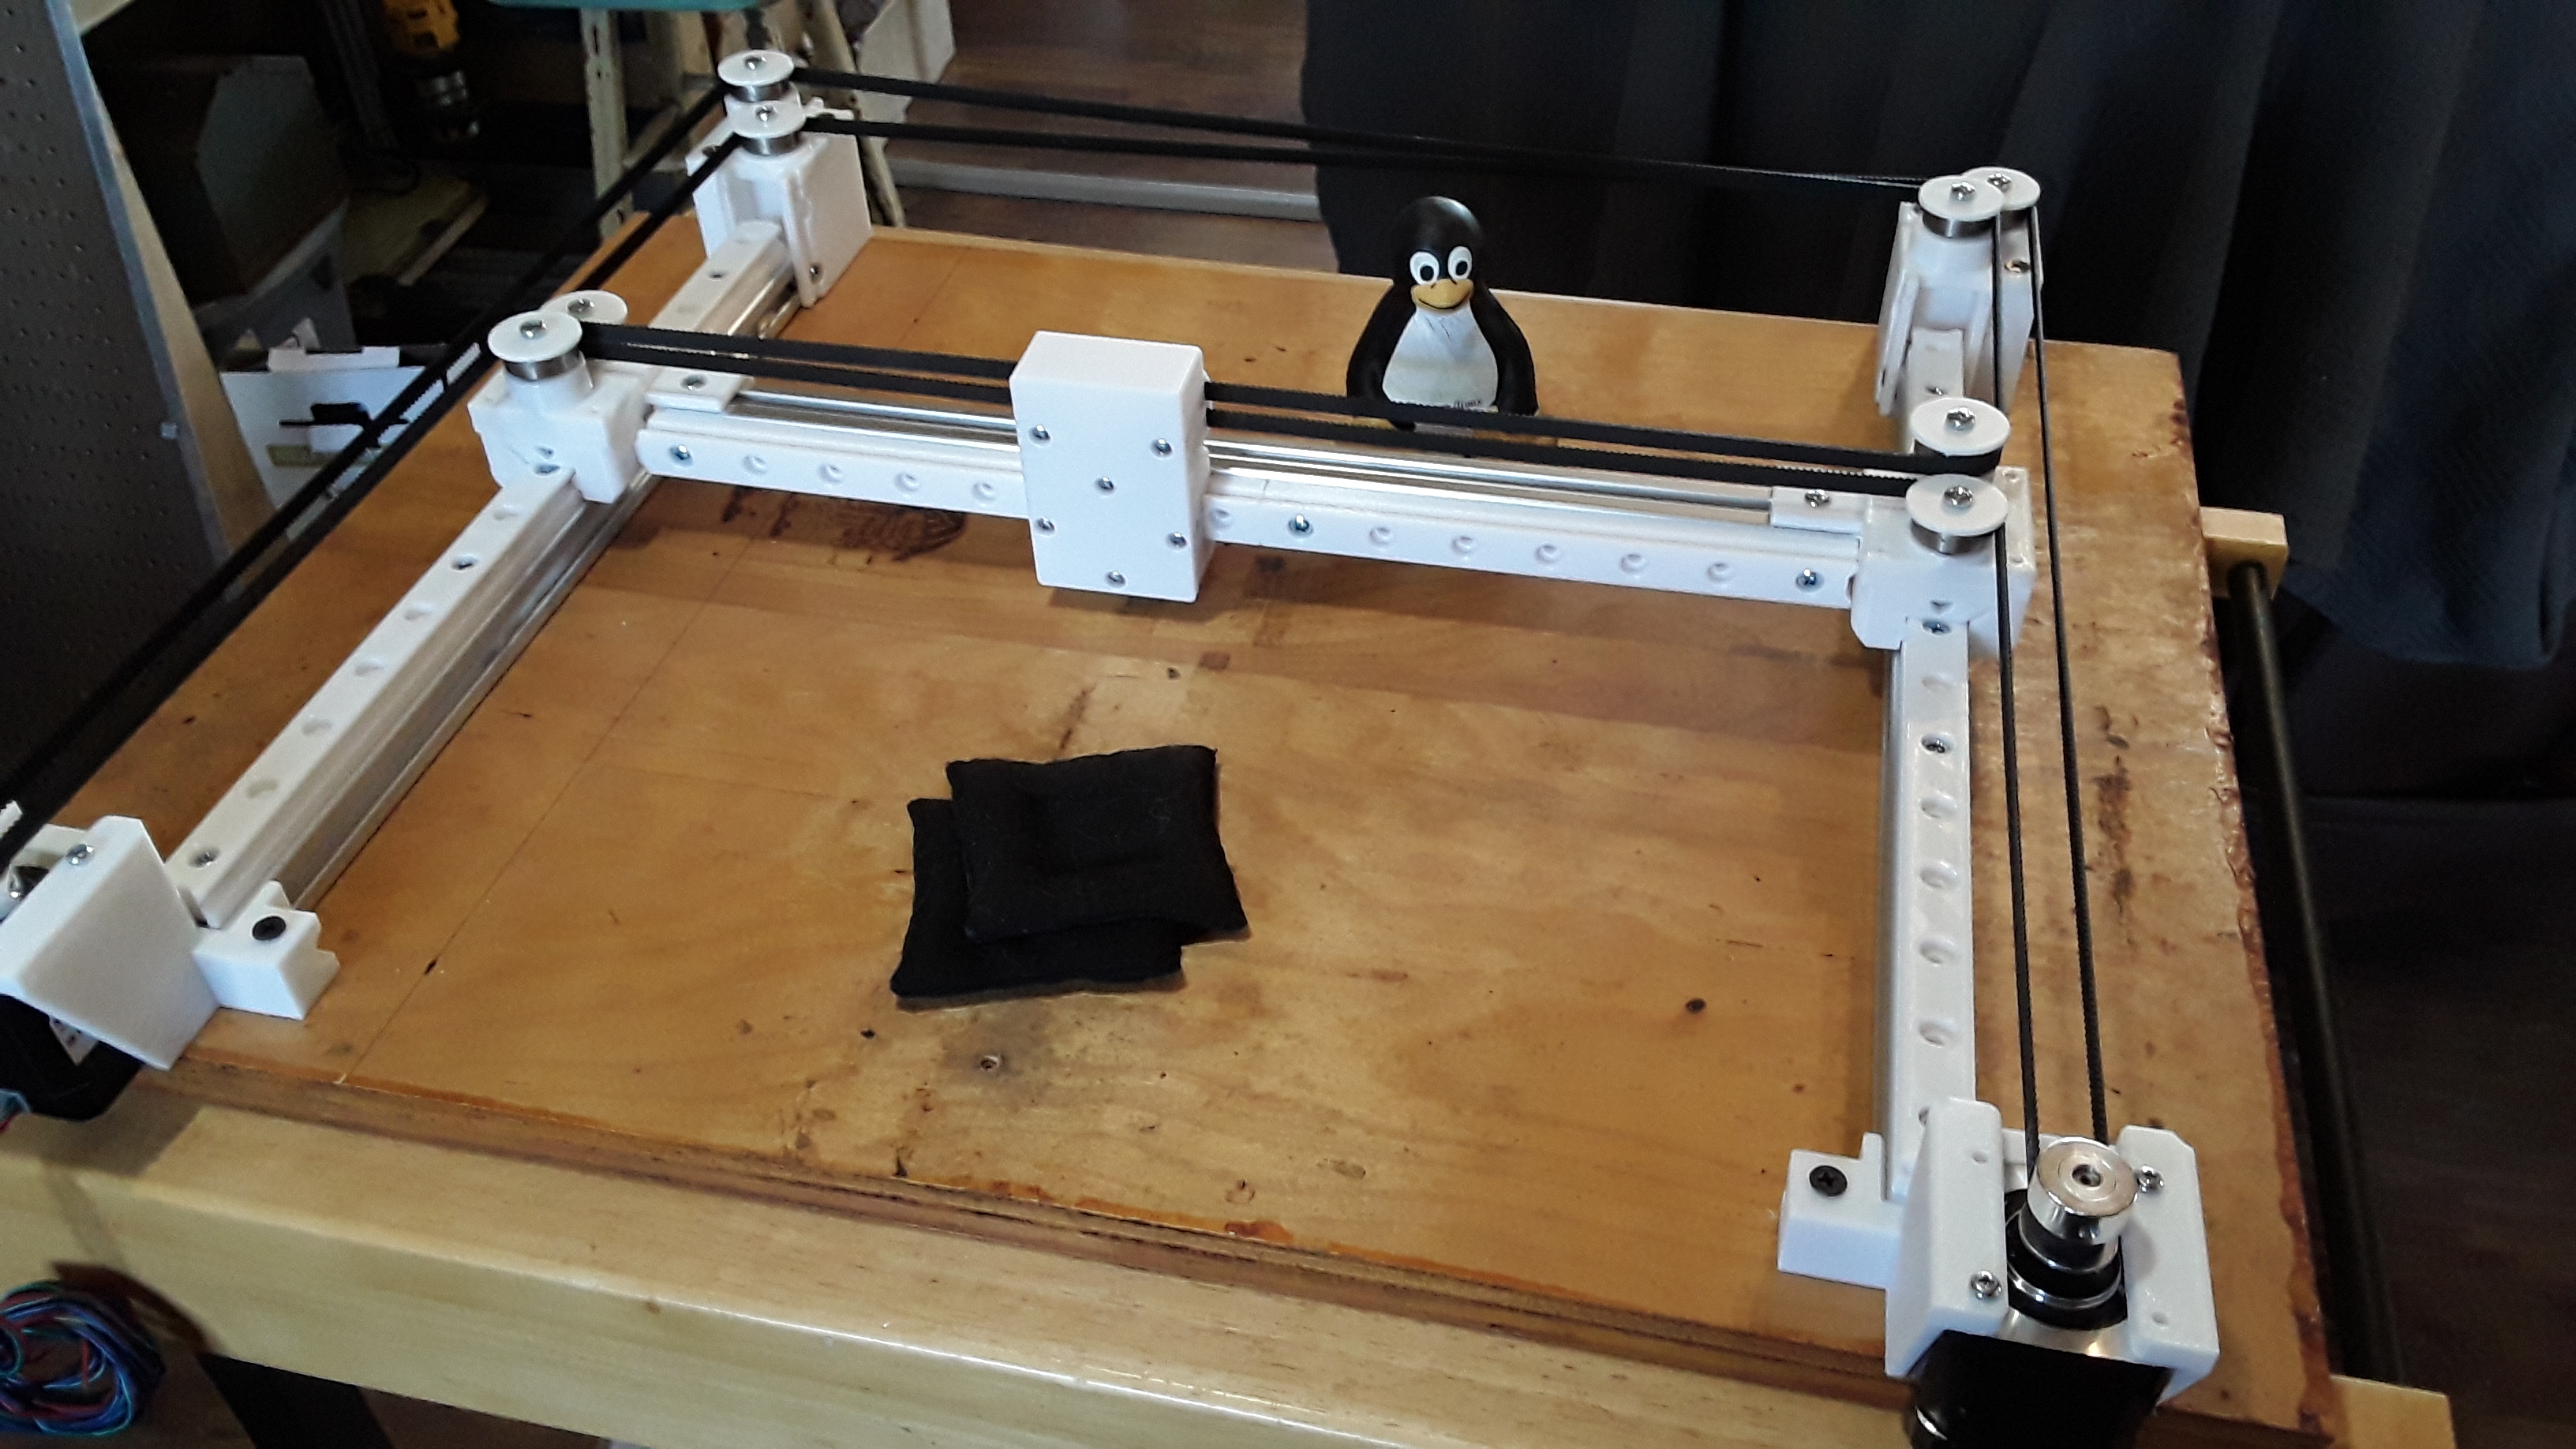
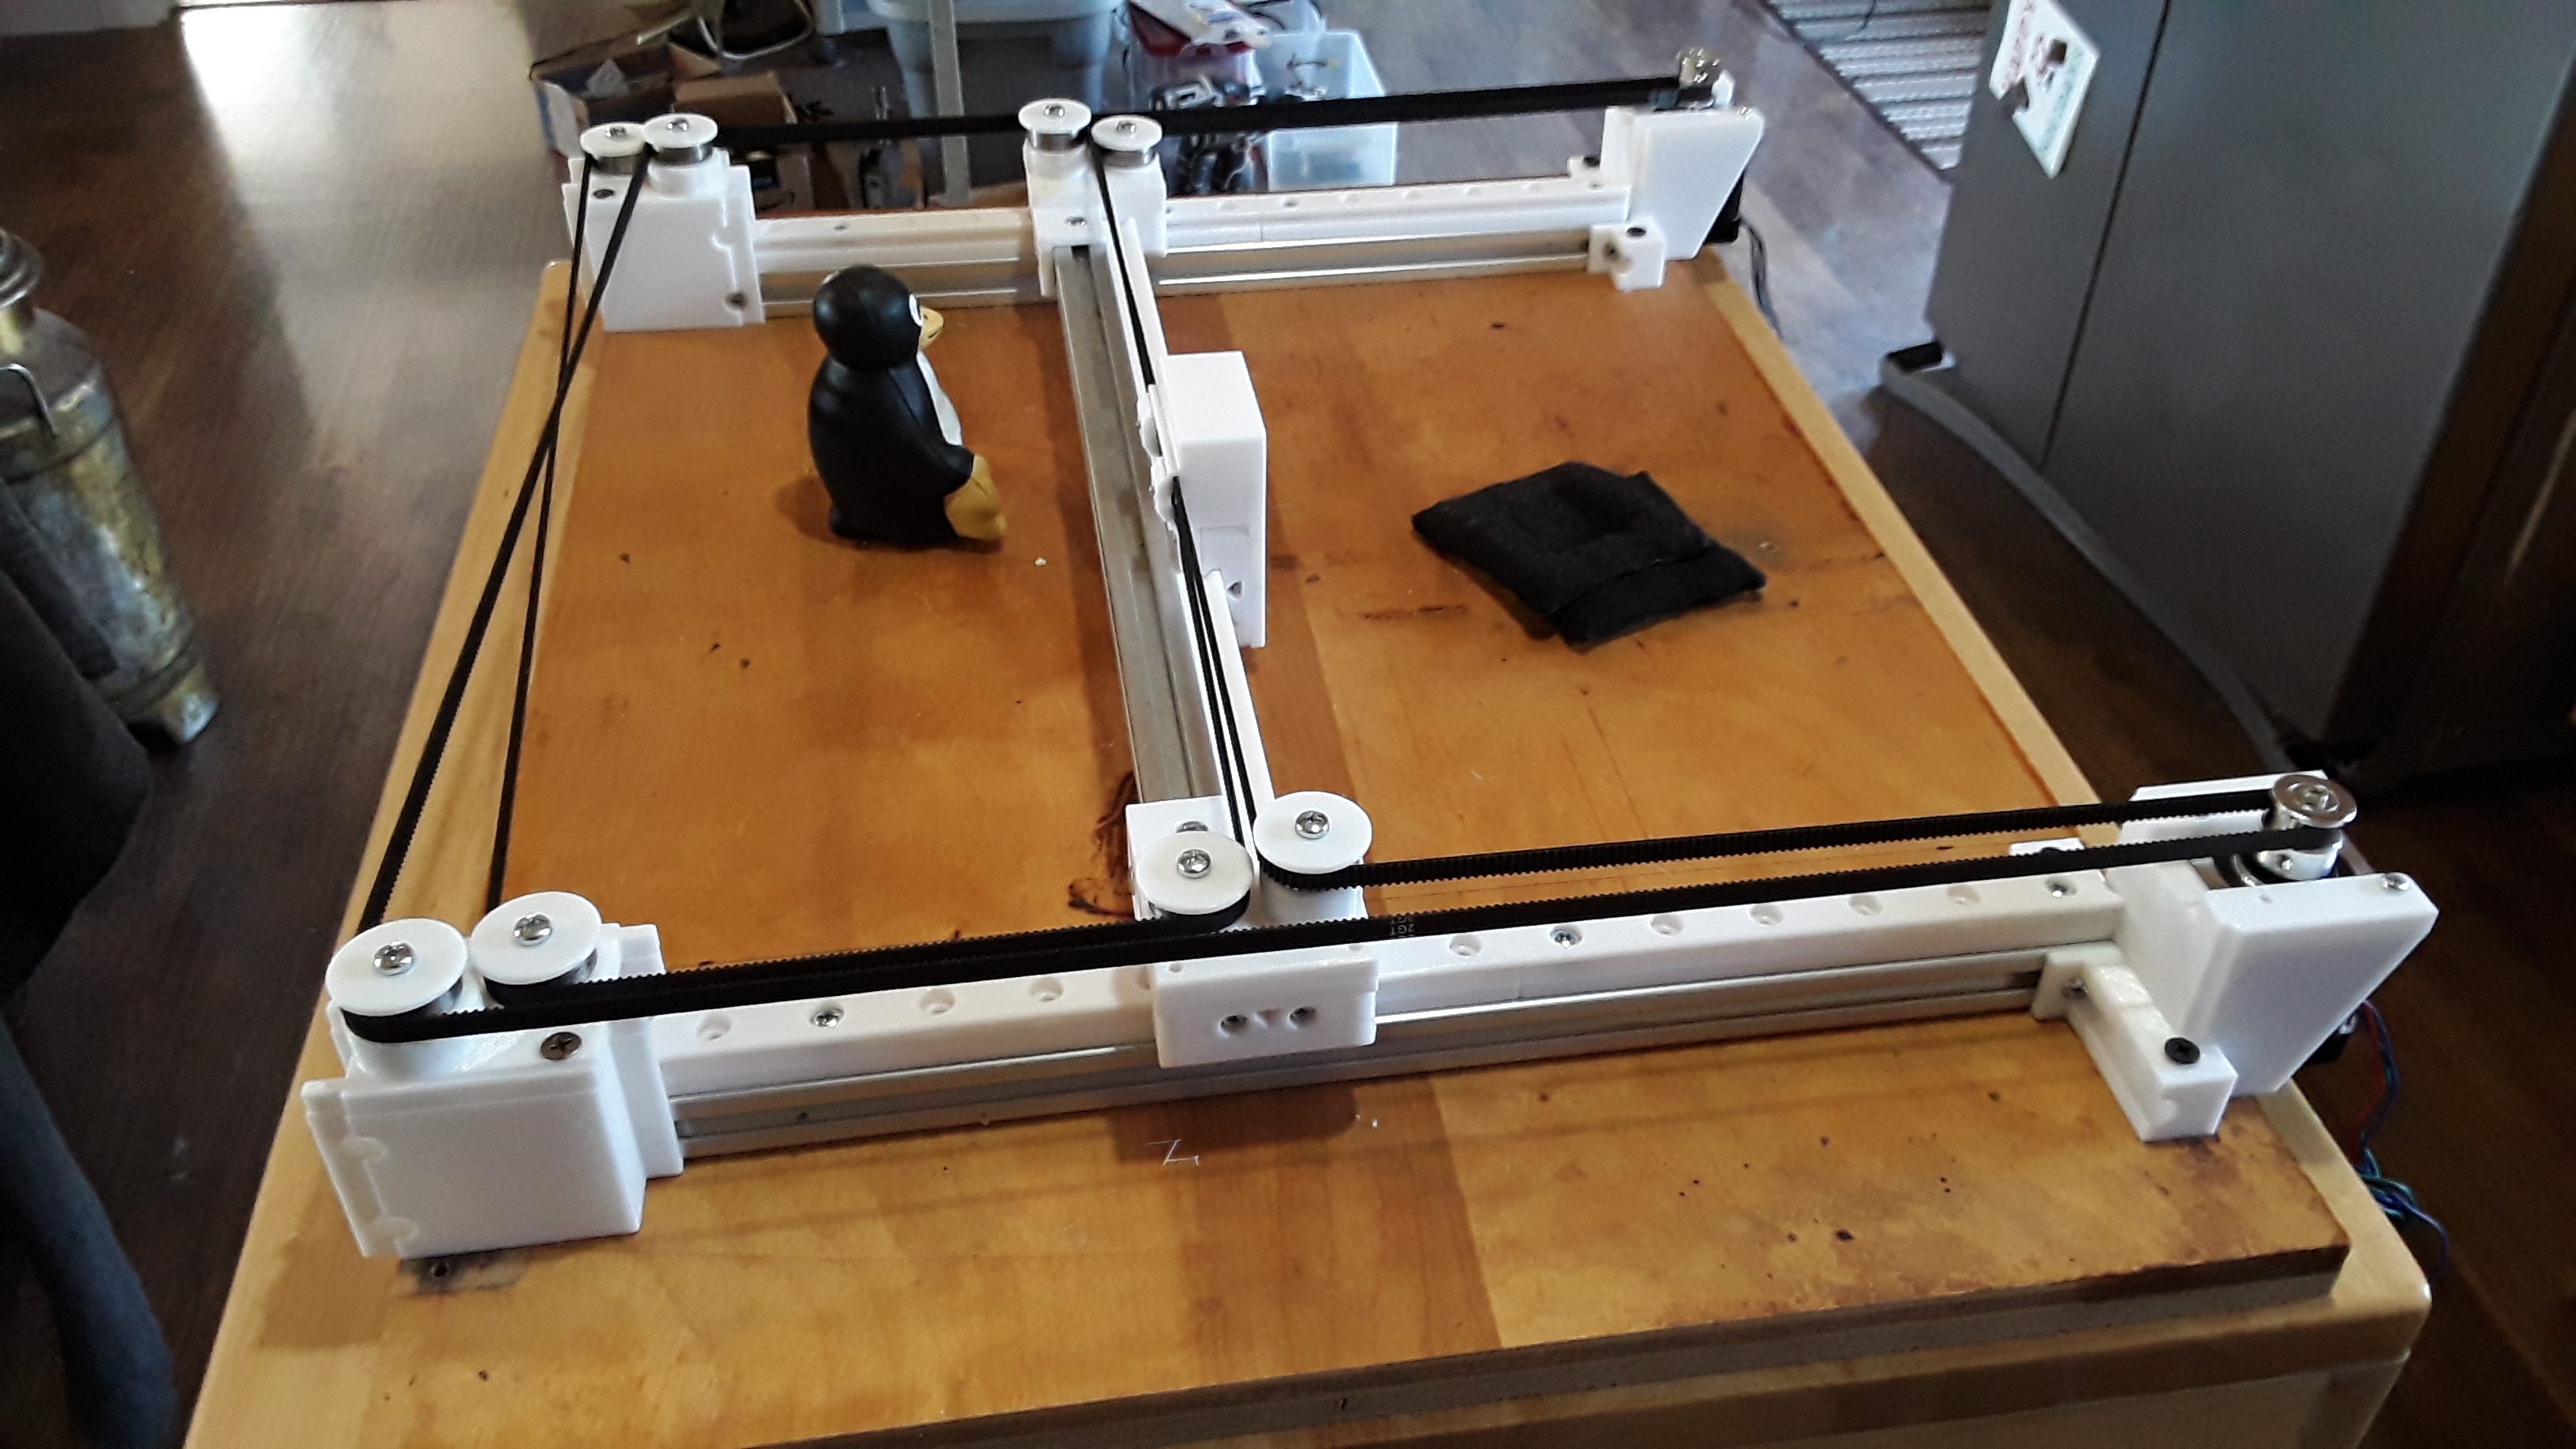
More progress…
Tux and I got the machine all belted up. Not perfect alignment but we talked it over and decided it was good enough to test…
Borrowed @mordiev’s belt clamps…
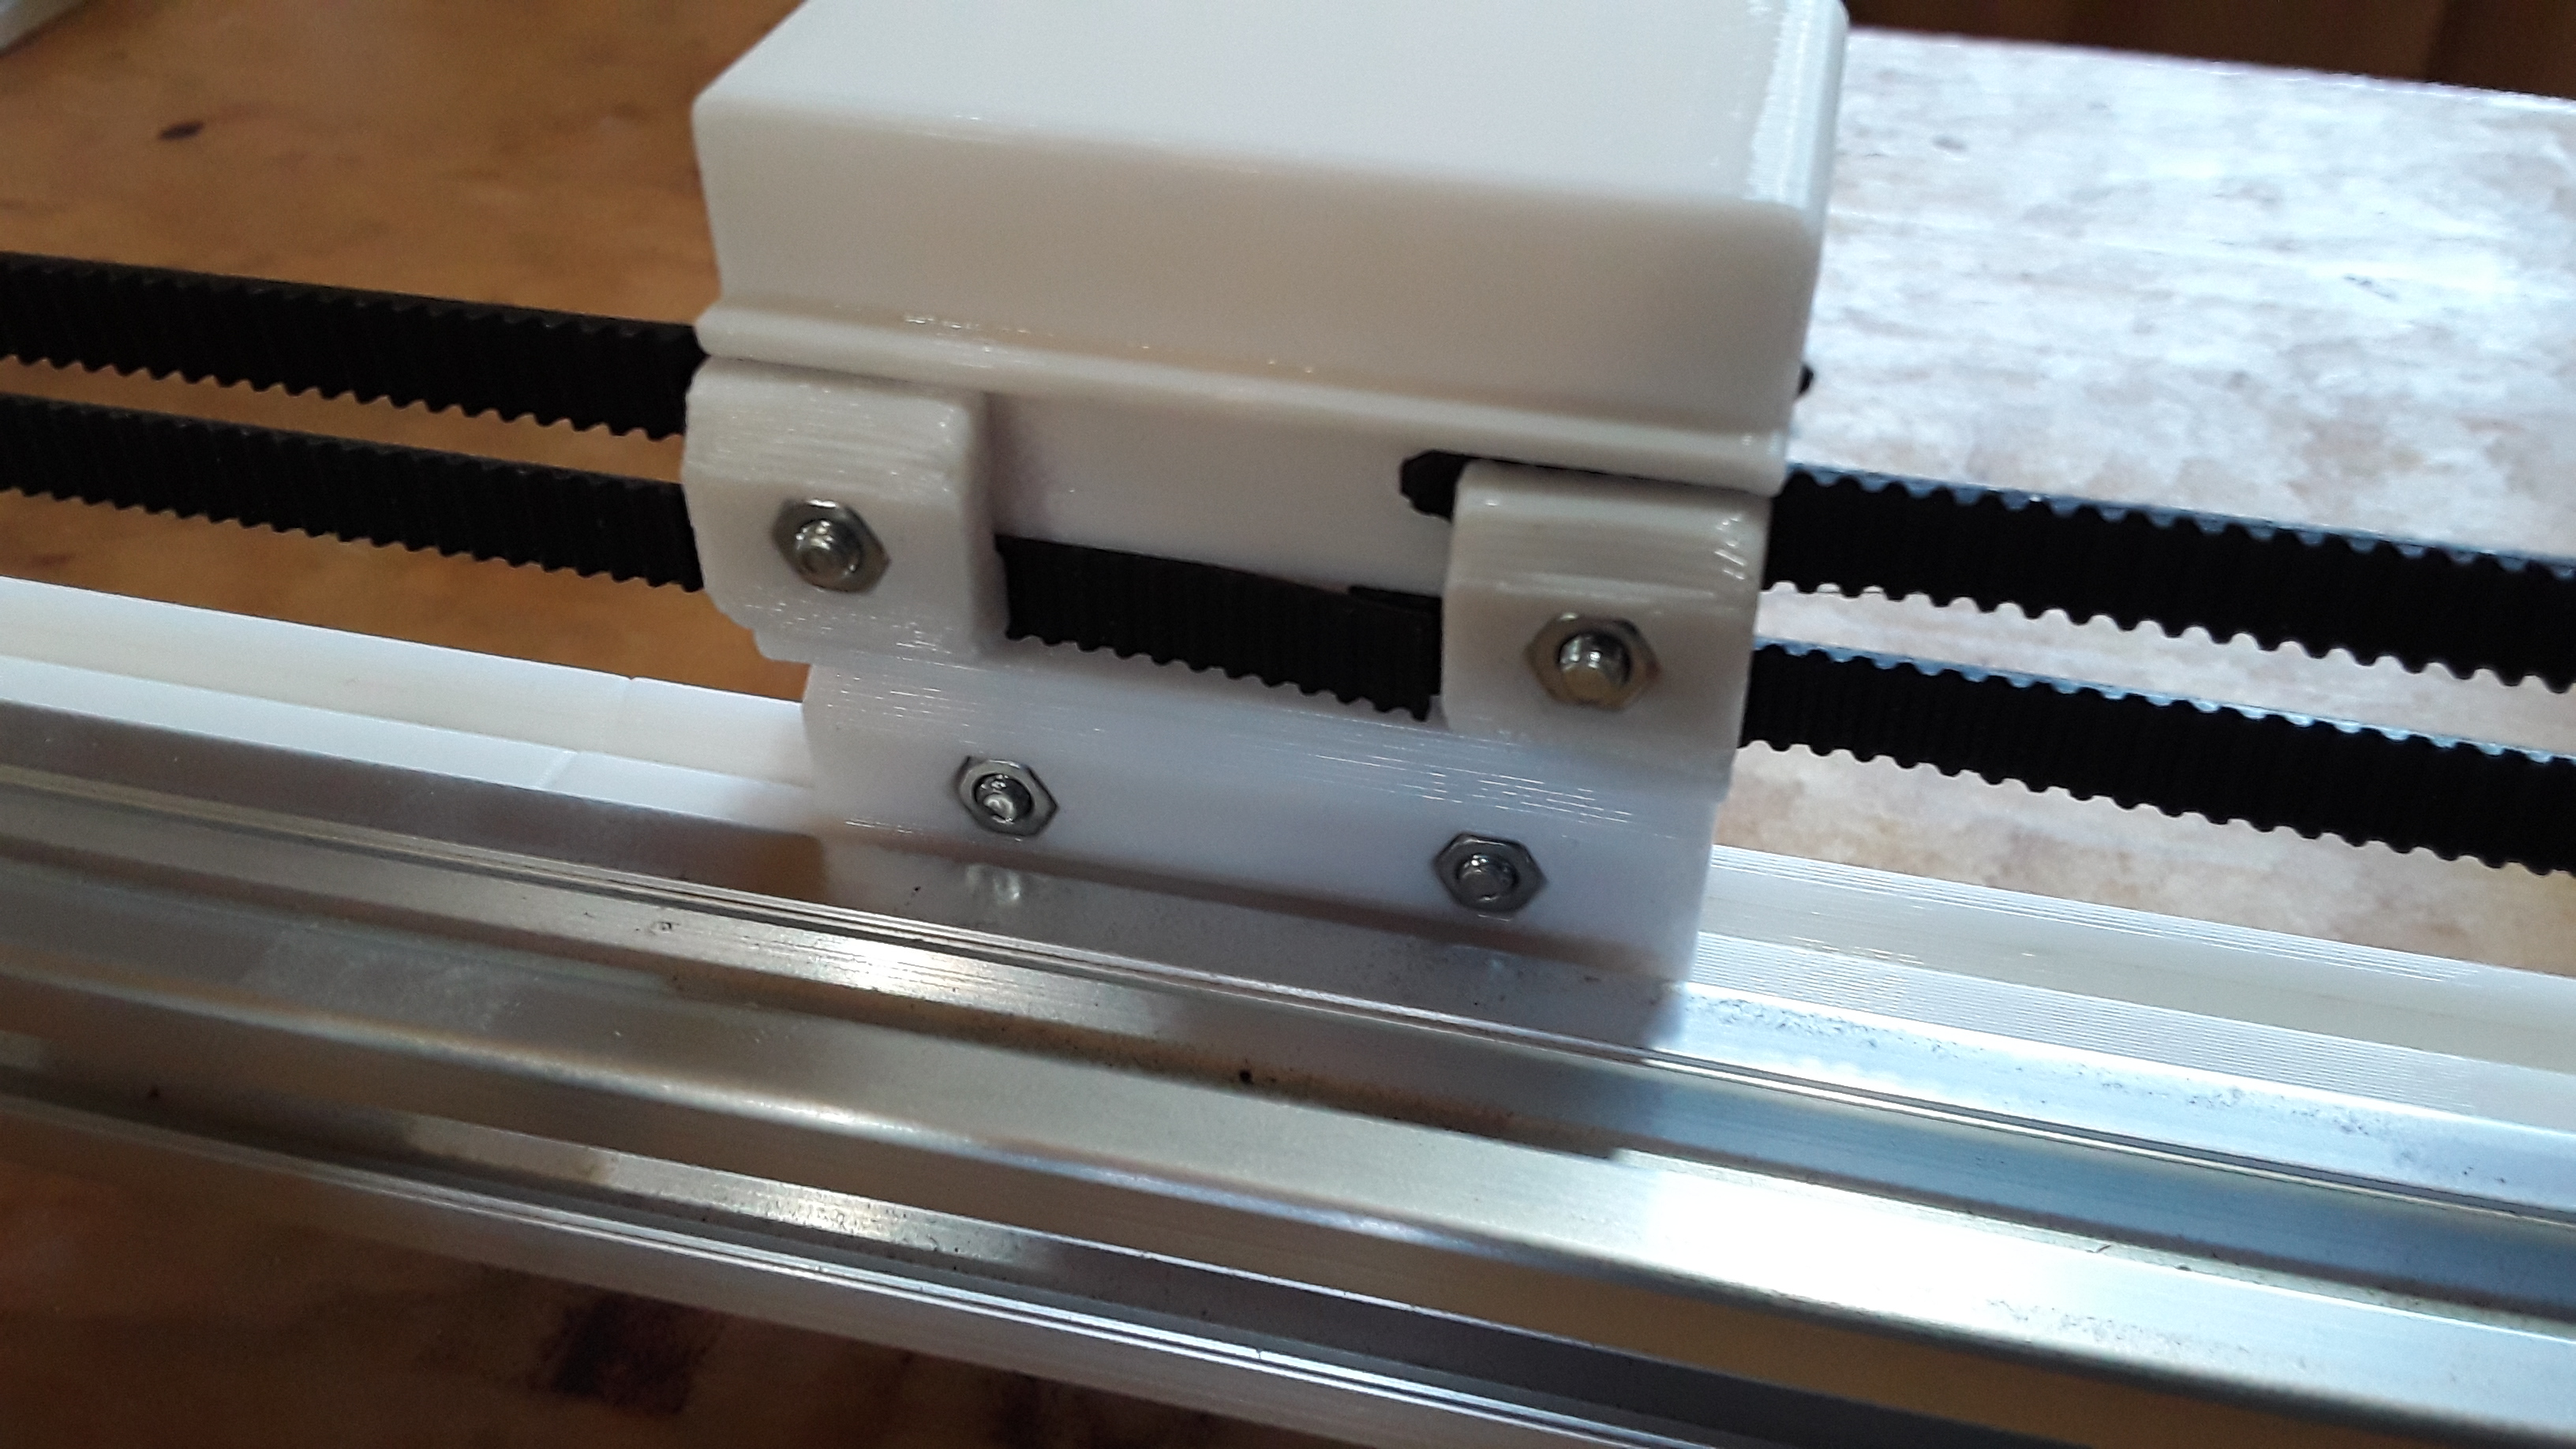
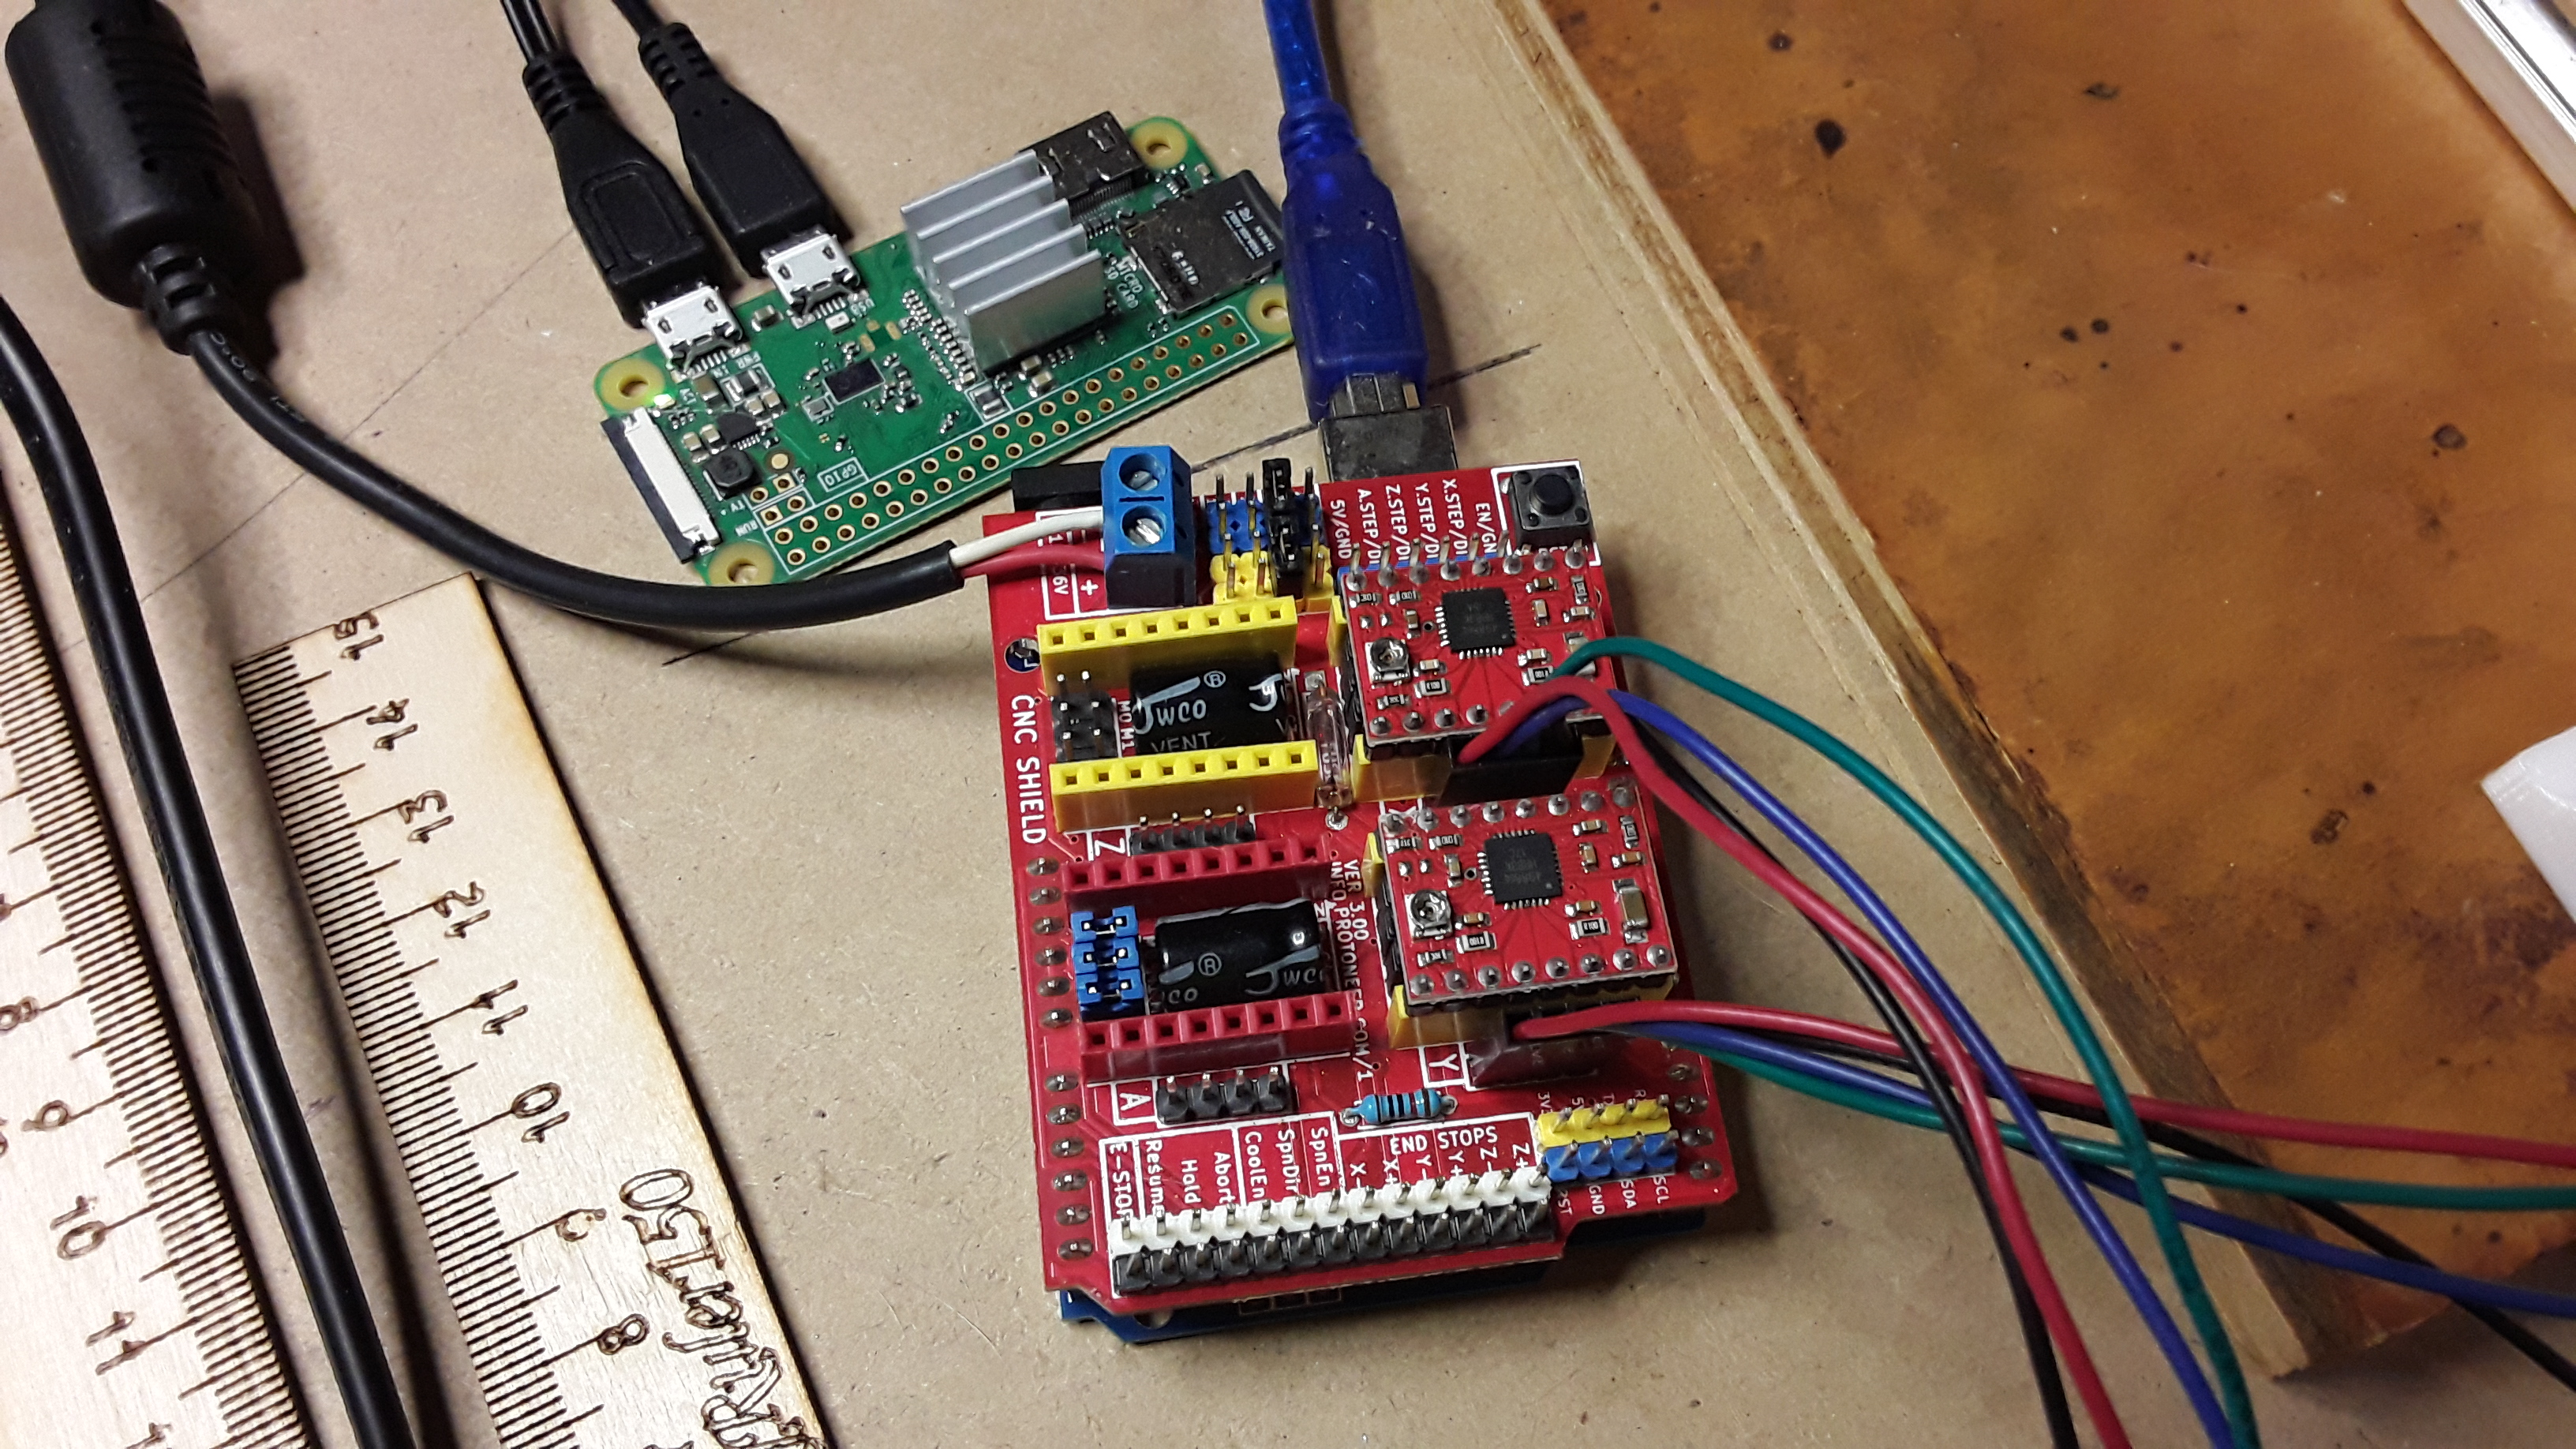
Picked up an Uno/CNCshieldV3 combo out of my stash… loaded it with Grbl 1.1h , with CoreXY enabled, of course… and added a Pi Zero W running Jeff’s v1pi image. Works a champ for this simple setup…
Took it for a spin and Tux likes it! That’s good enough for me… ![]()

– David
5 Likes
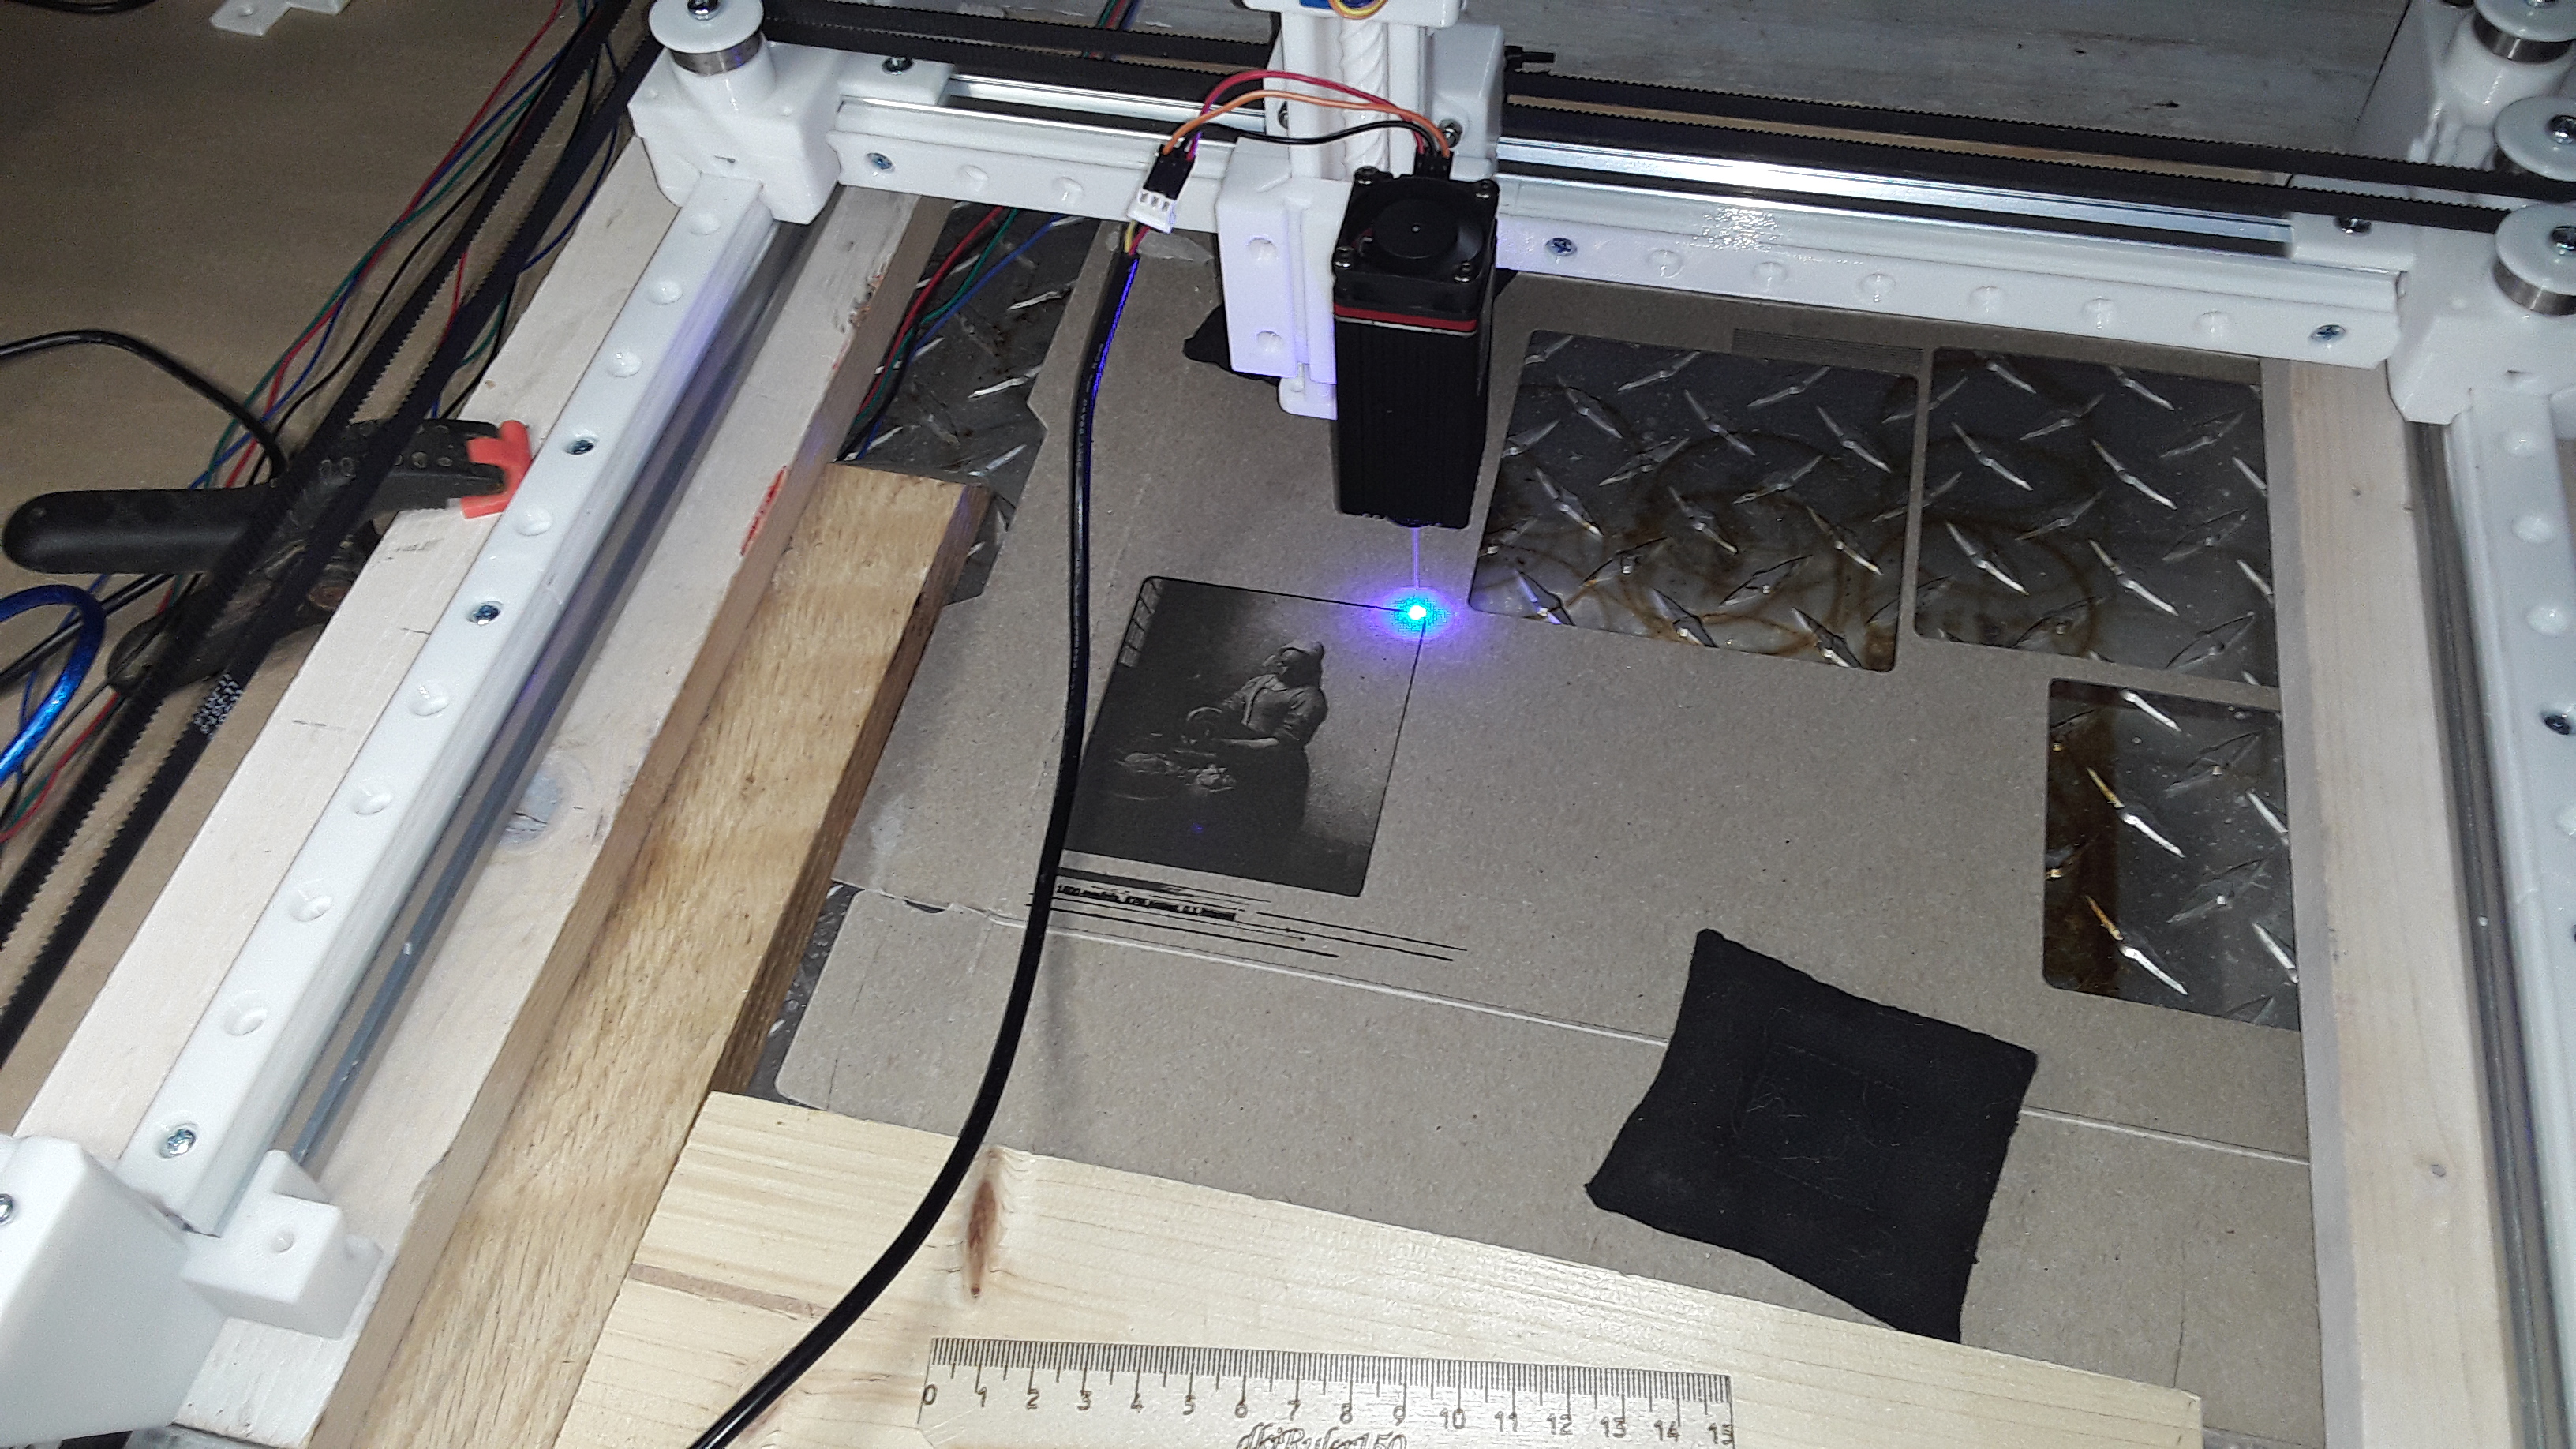
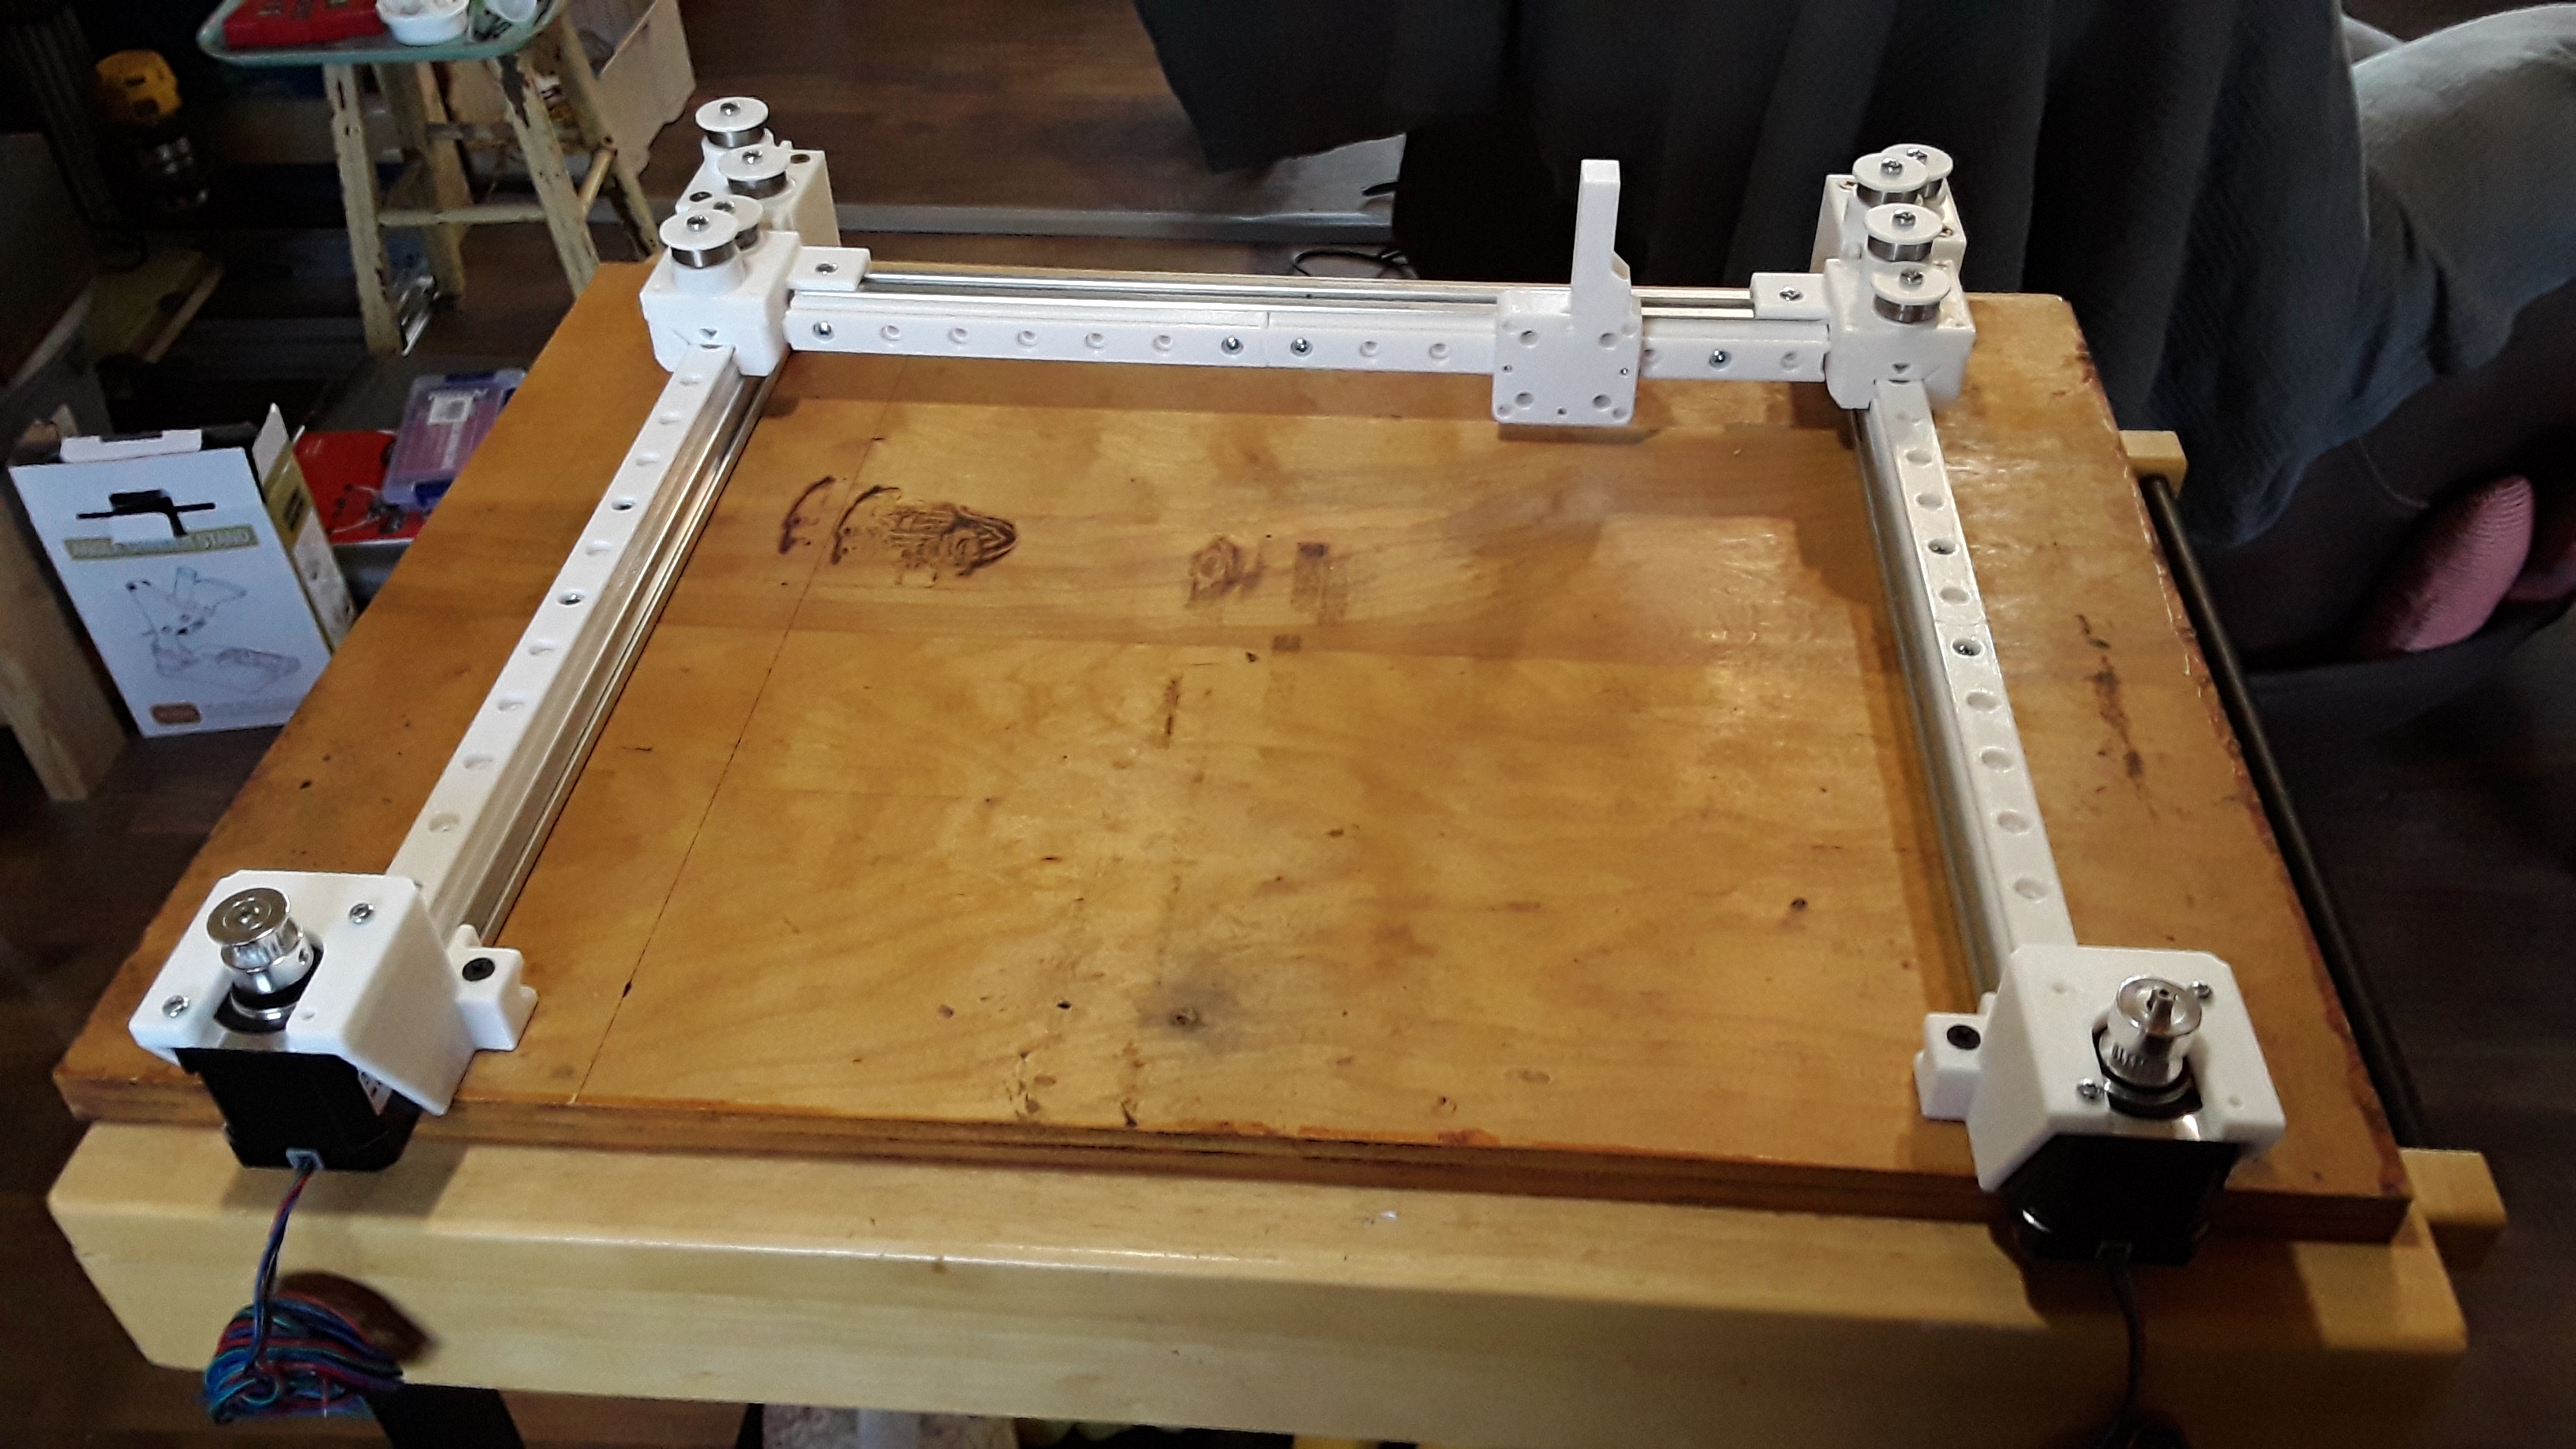
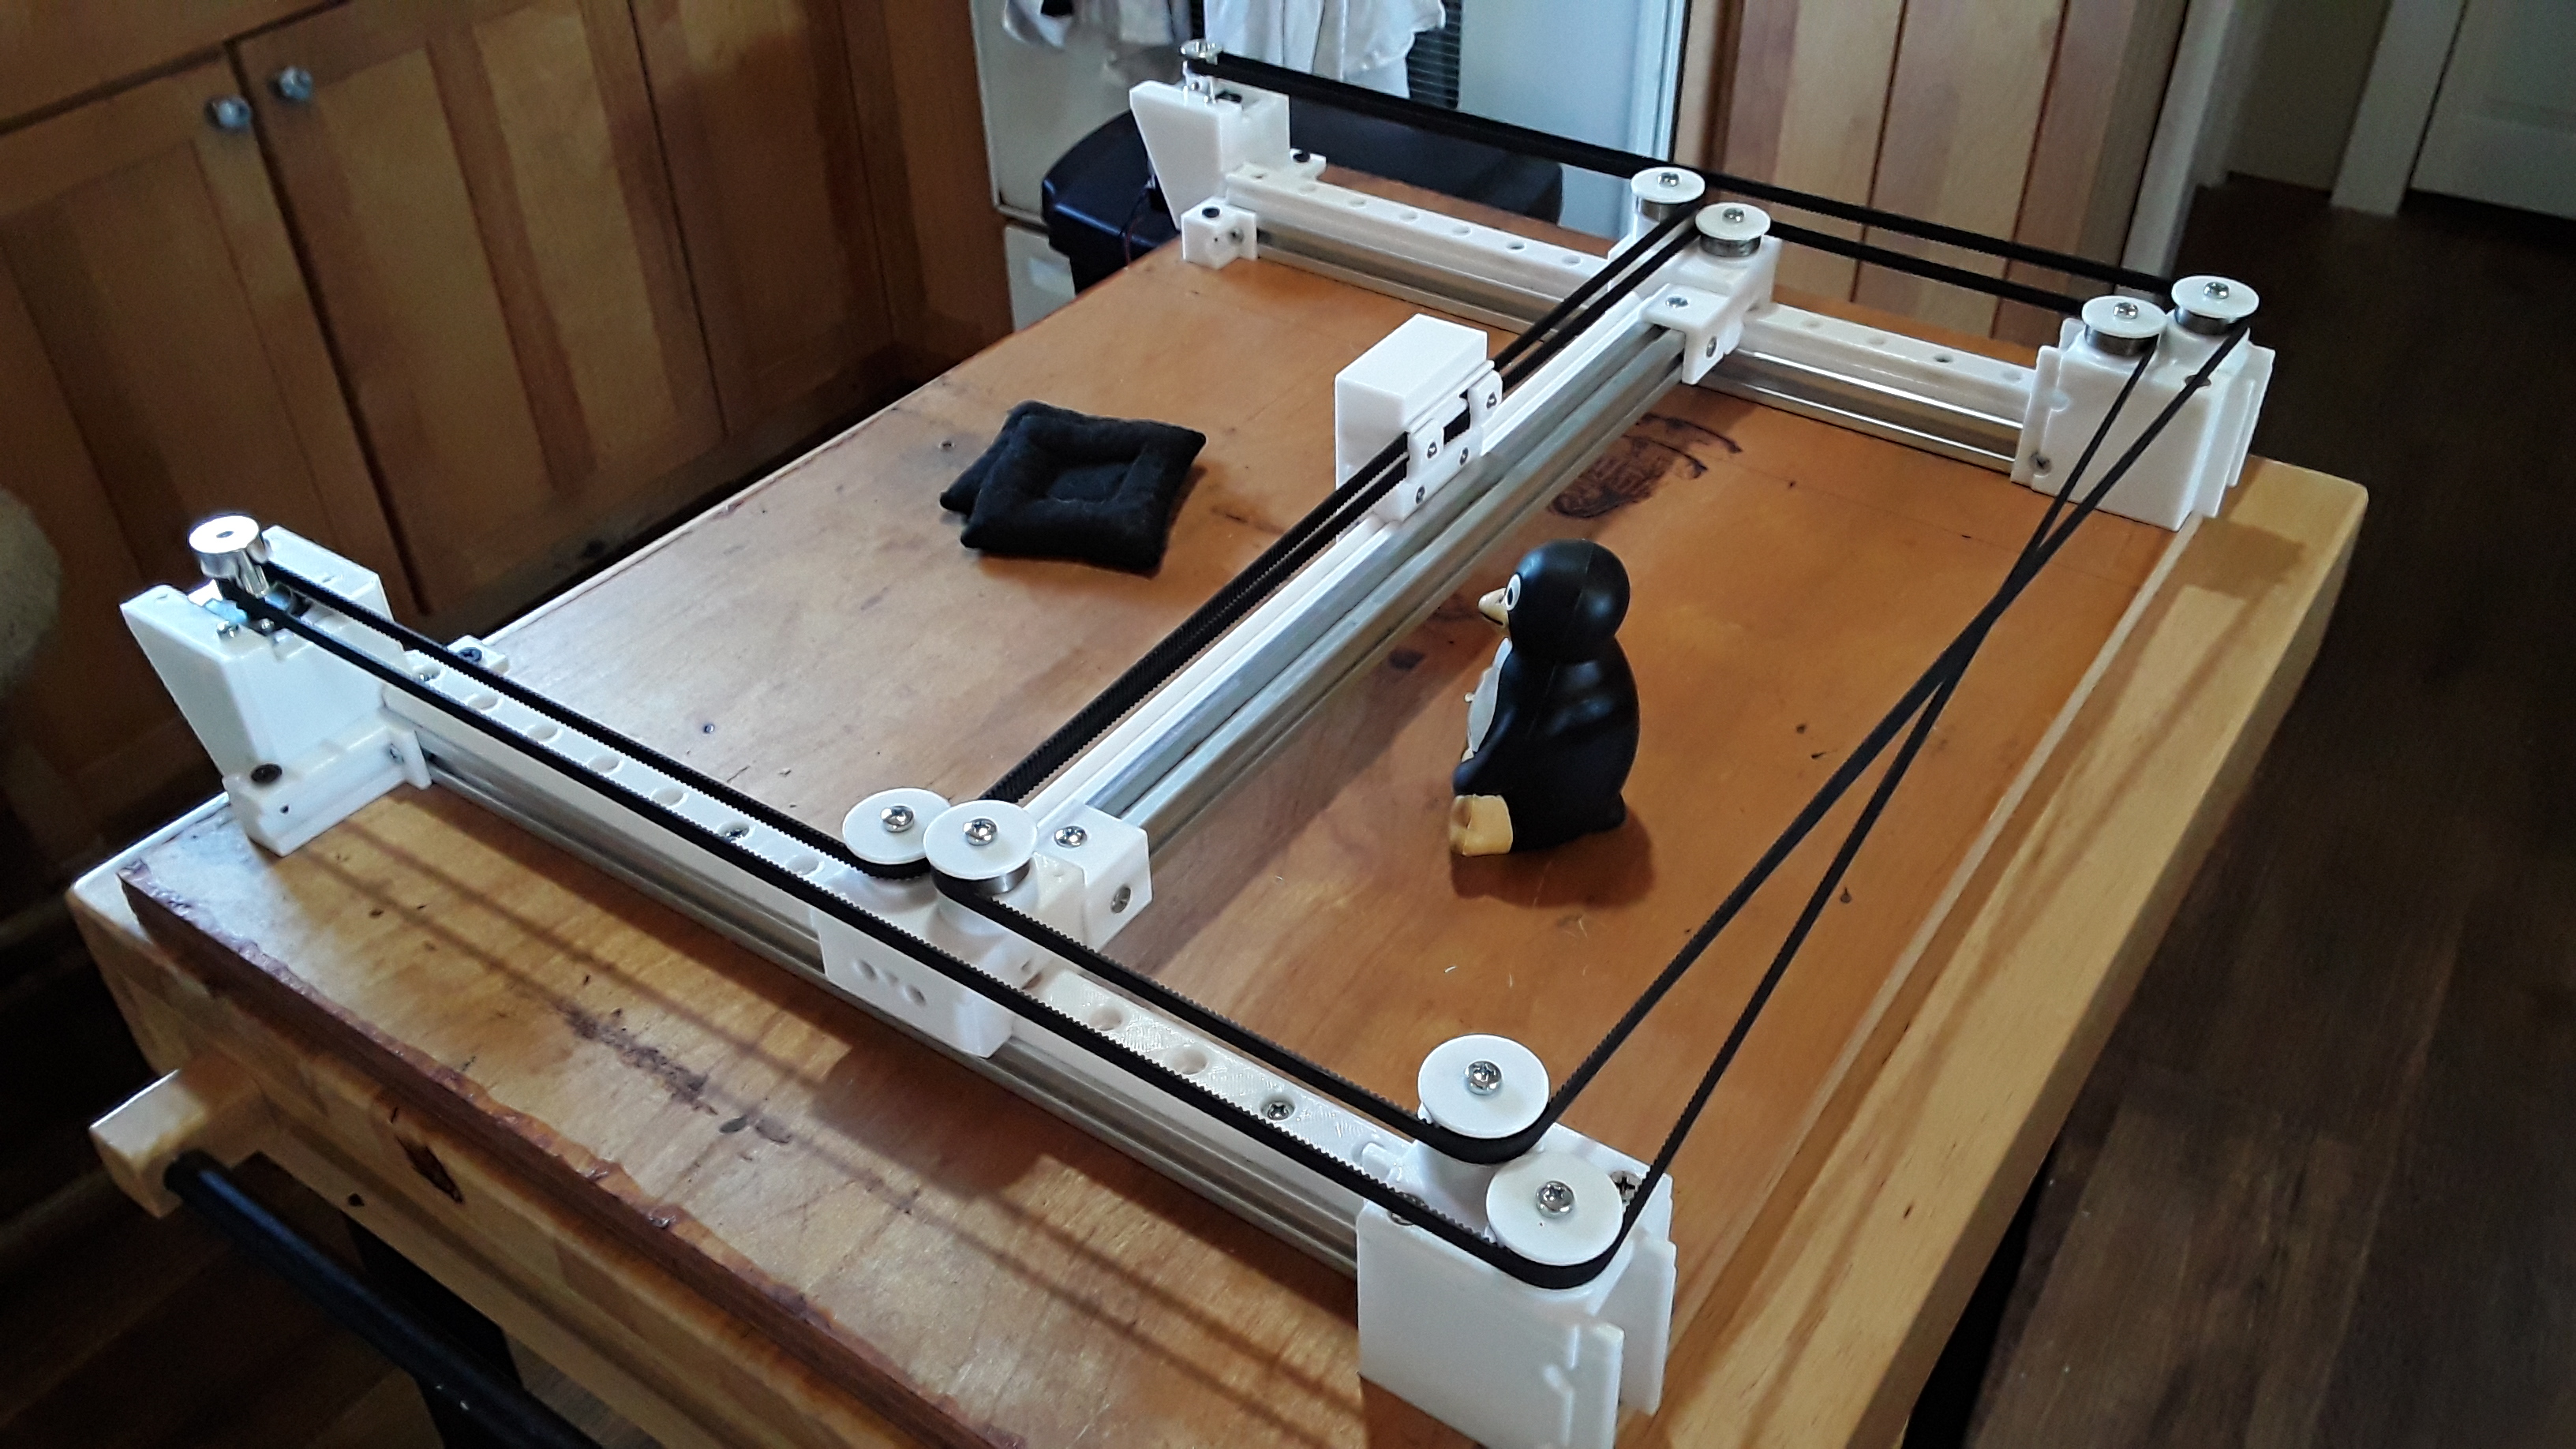
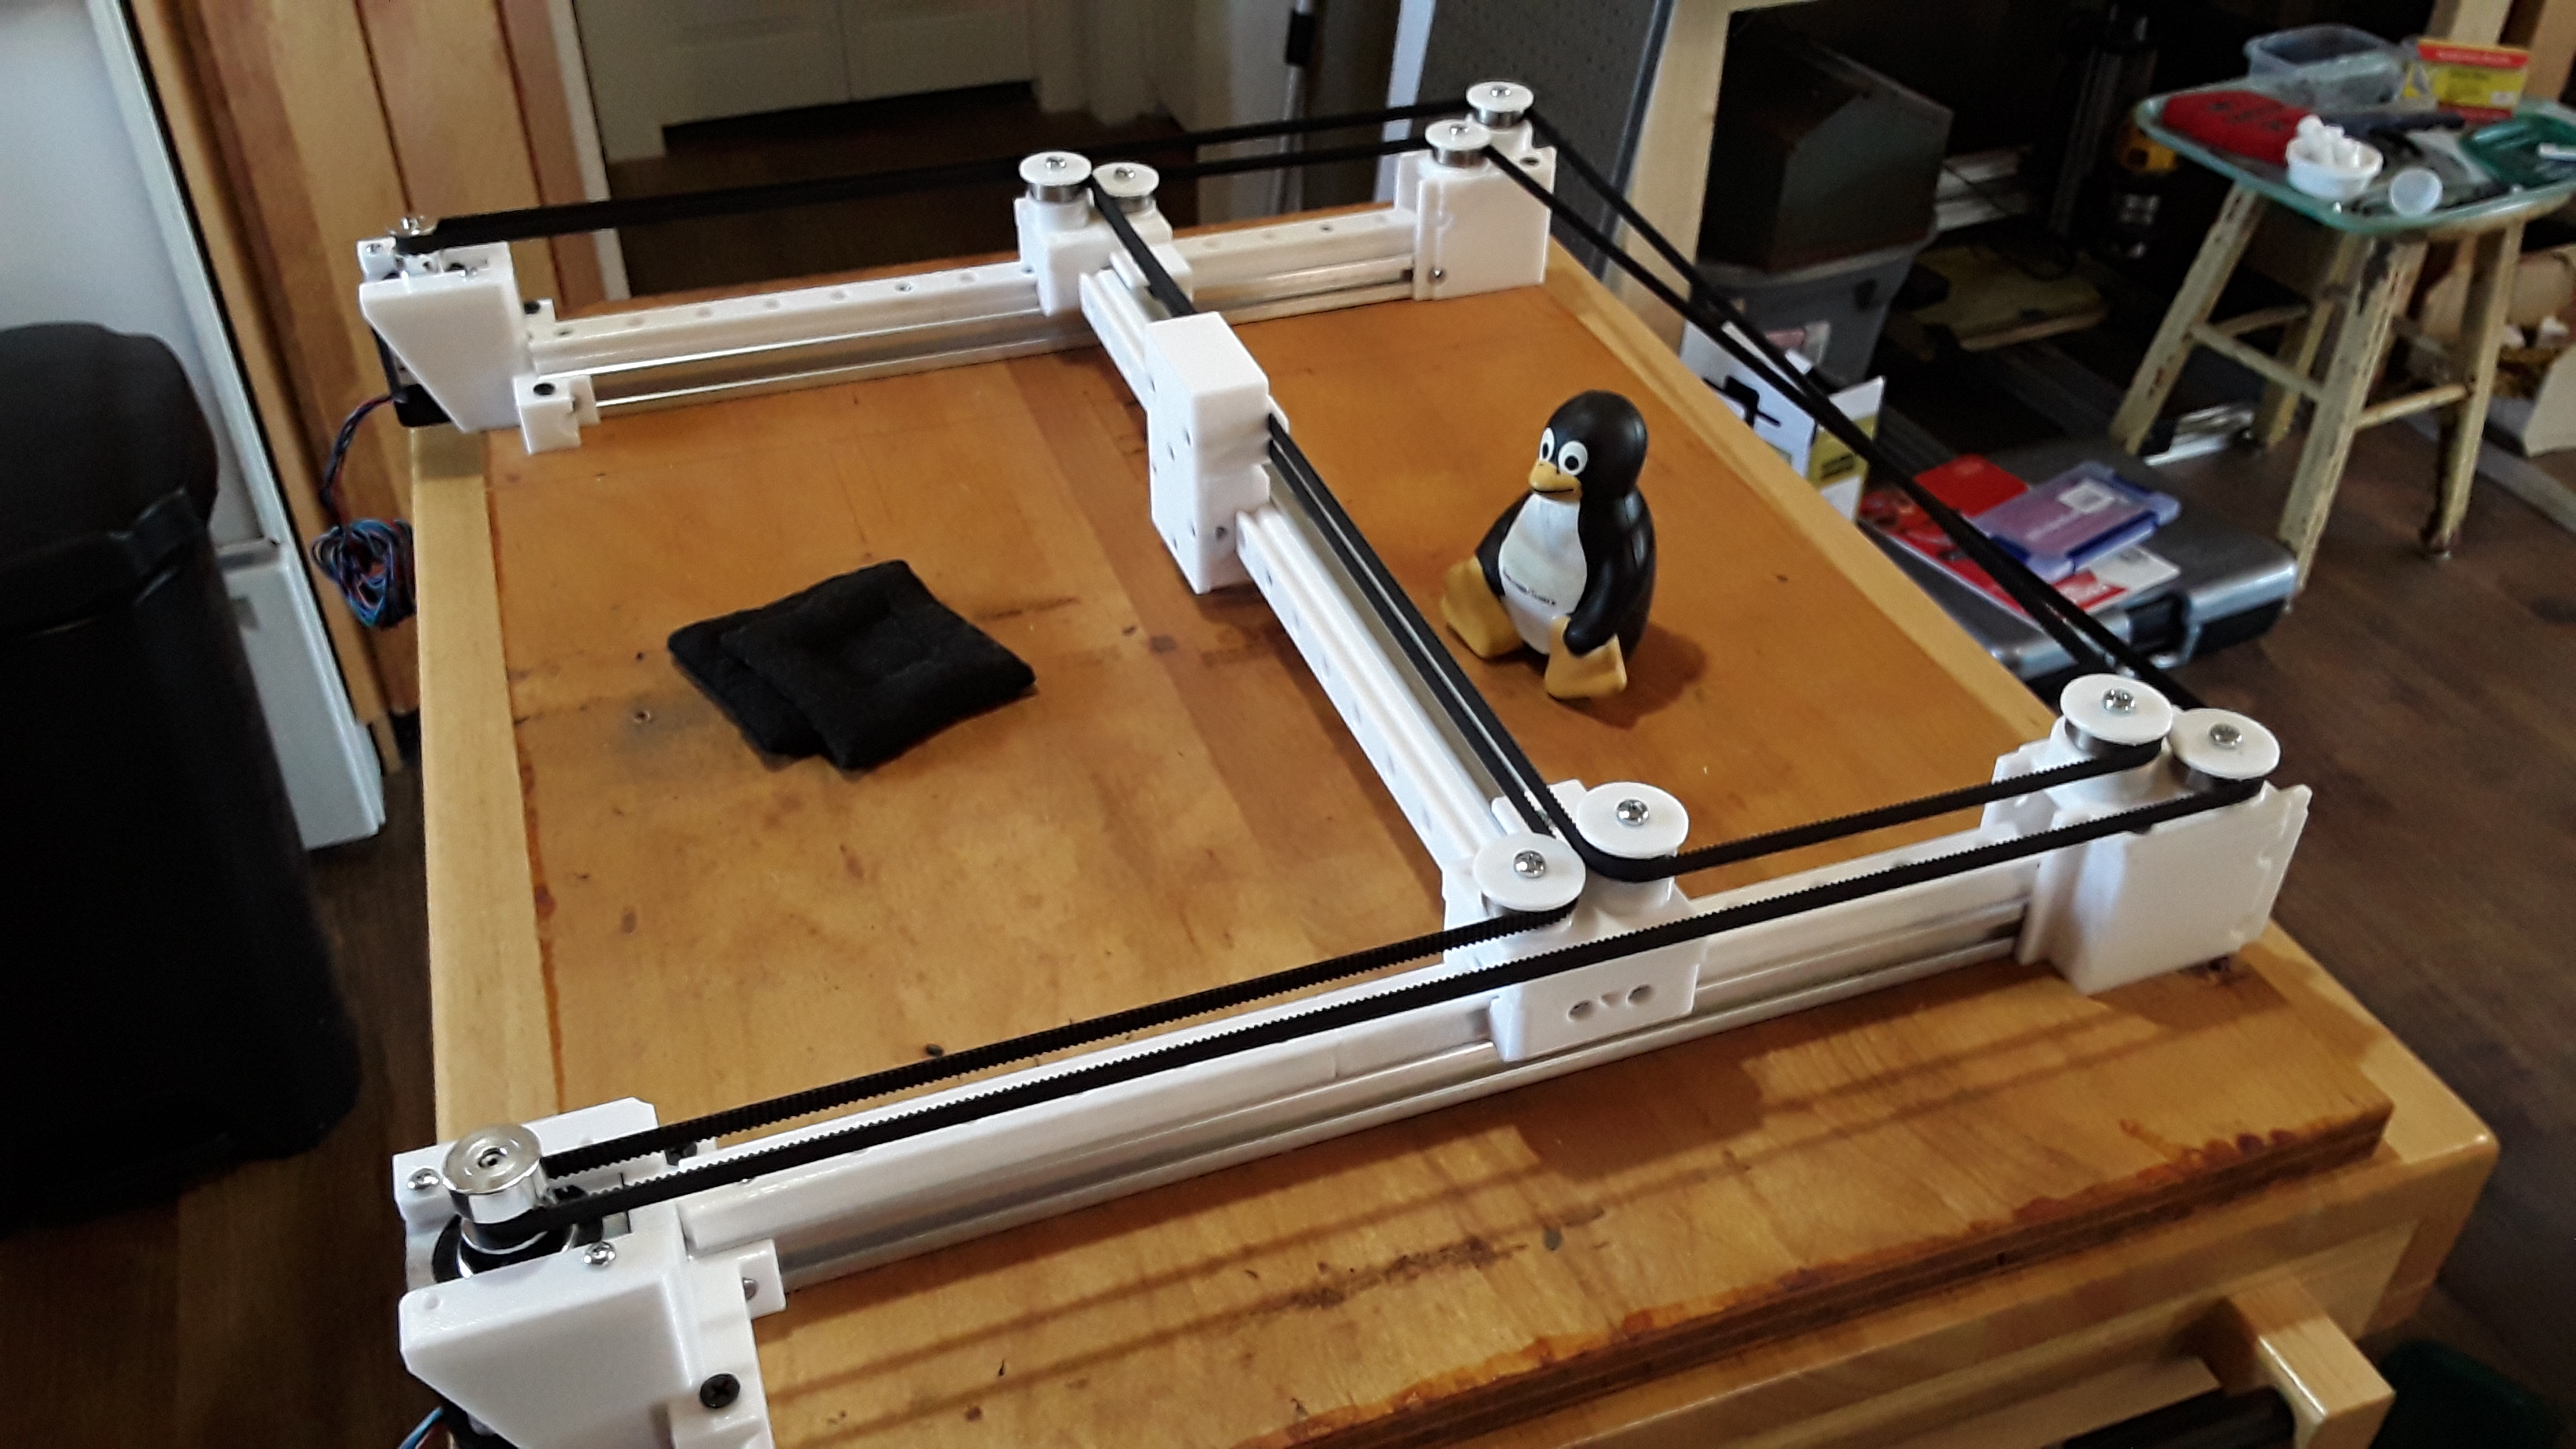
A little more progress…
Blocked the machine up on a crude wooden frame and installed a printed BB-bearing Z-axis as before. Created gcode for a big circle to test the extents of XY motion… boring I know, five times around and return to 0,0. There is a good bit of BB-bearing noise so it sounds a bit “gravel”-ly but otherwise actually seems quite smooth…

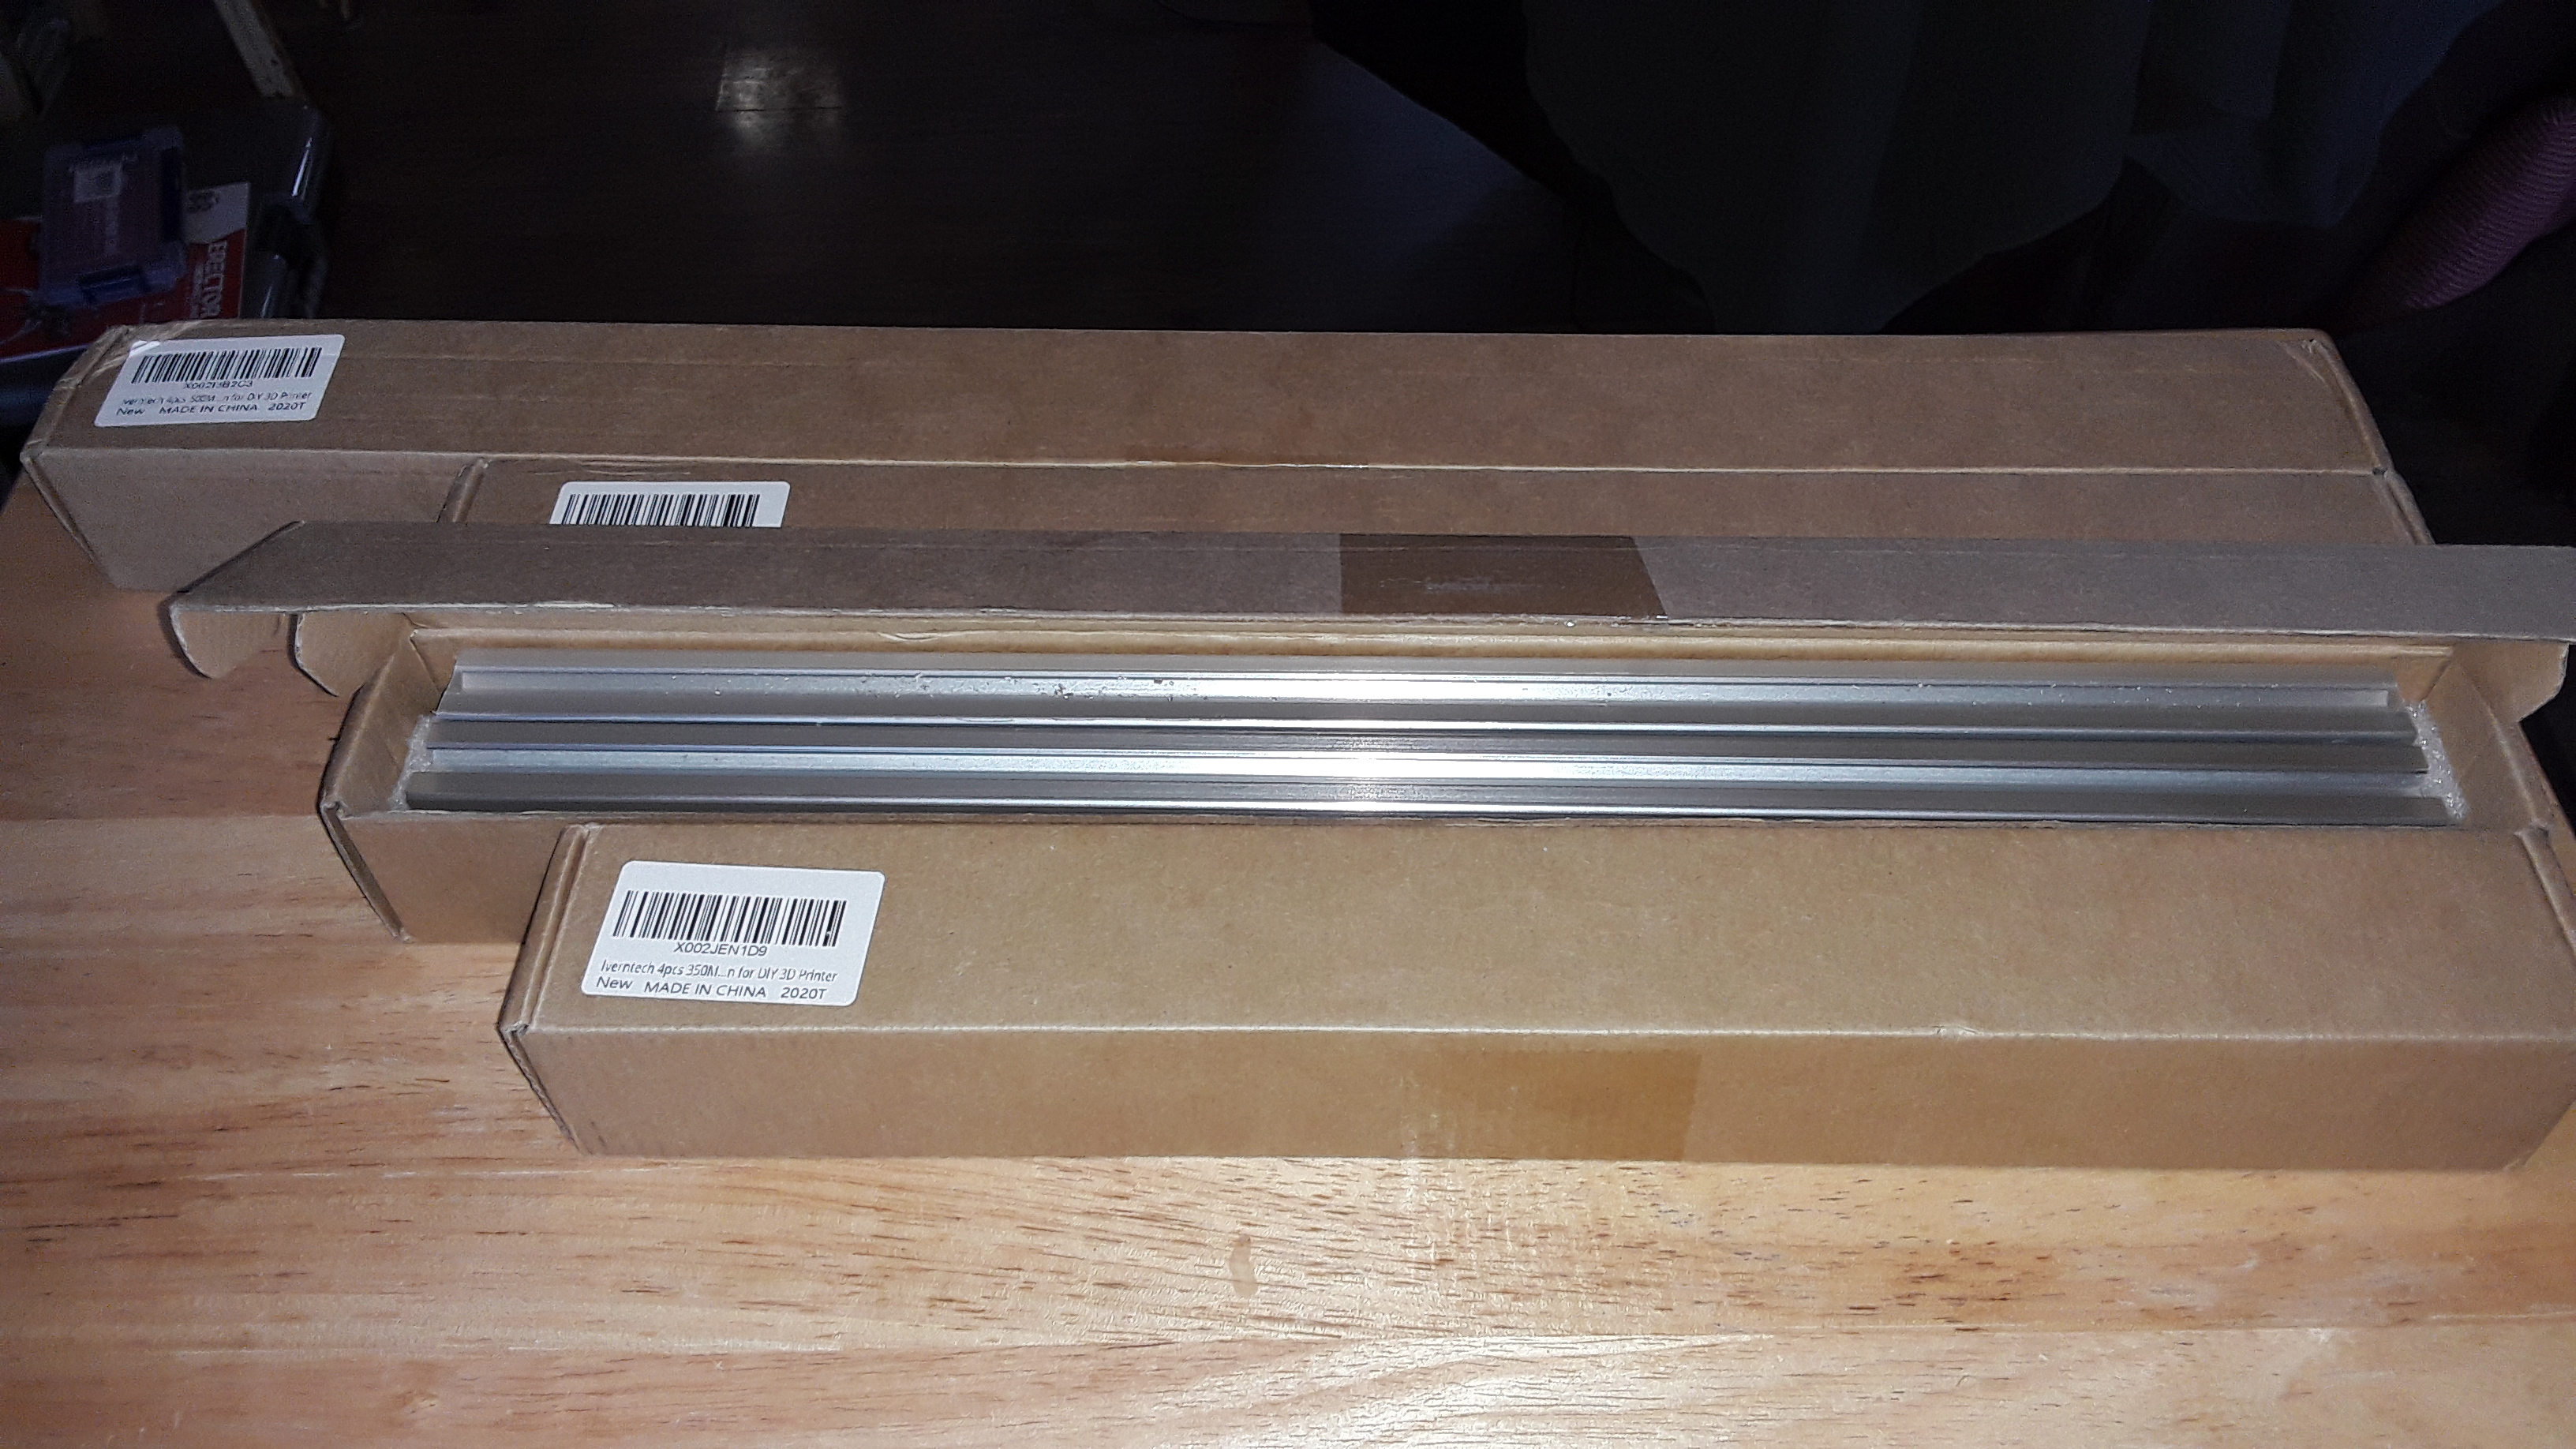
This machine is pretty small… I just used extrusion I had on hand. The circle in test above is 280mm diameter and I’ll lose even more when I mount the laser module. But I did order some extrusions… Amazon/Iverntech in 4-piece lots at 350mm, 400mm, and 500mm
and can enlarge it if/when I decide to make it a bit bigger. Three pieces of extrusion and new, longer belts would be all that’s required.
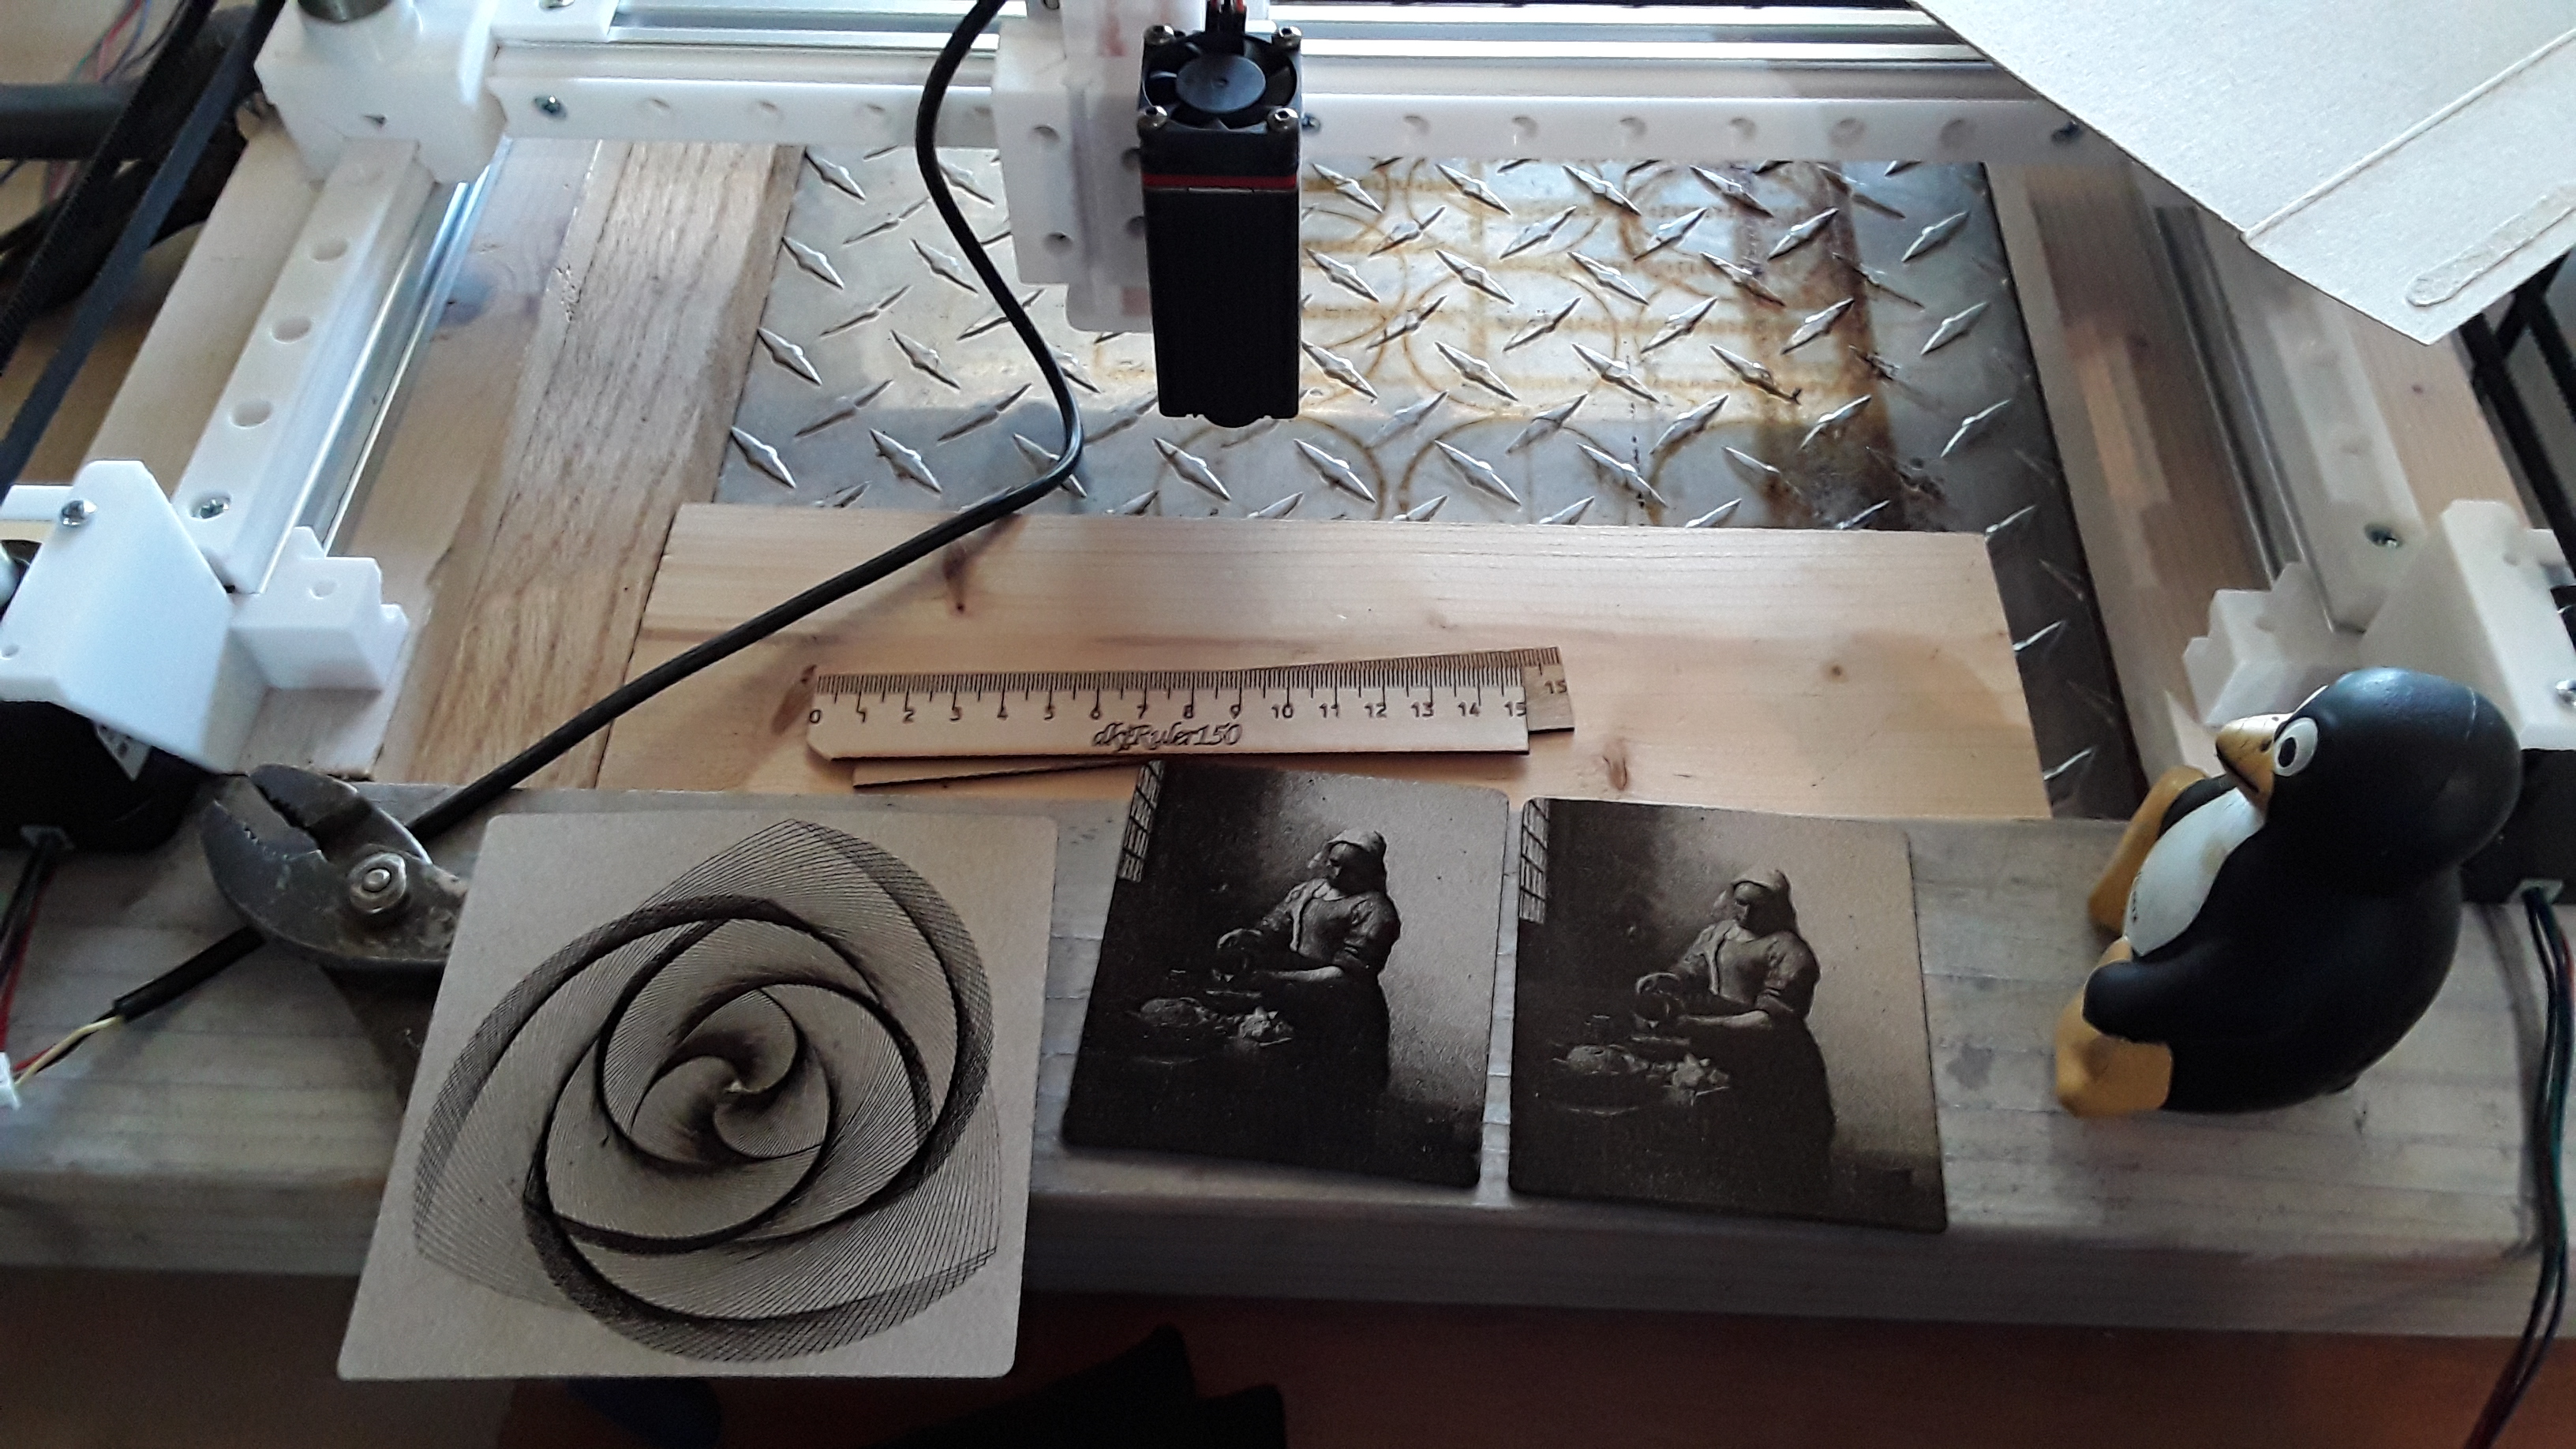
Next up, is to mount the Neje laser module and start engraving stuff.
Later. – David
5 Likes