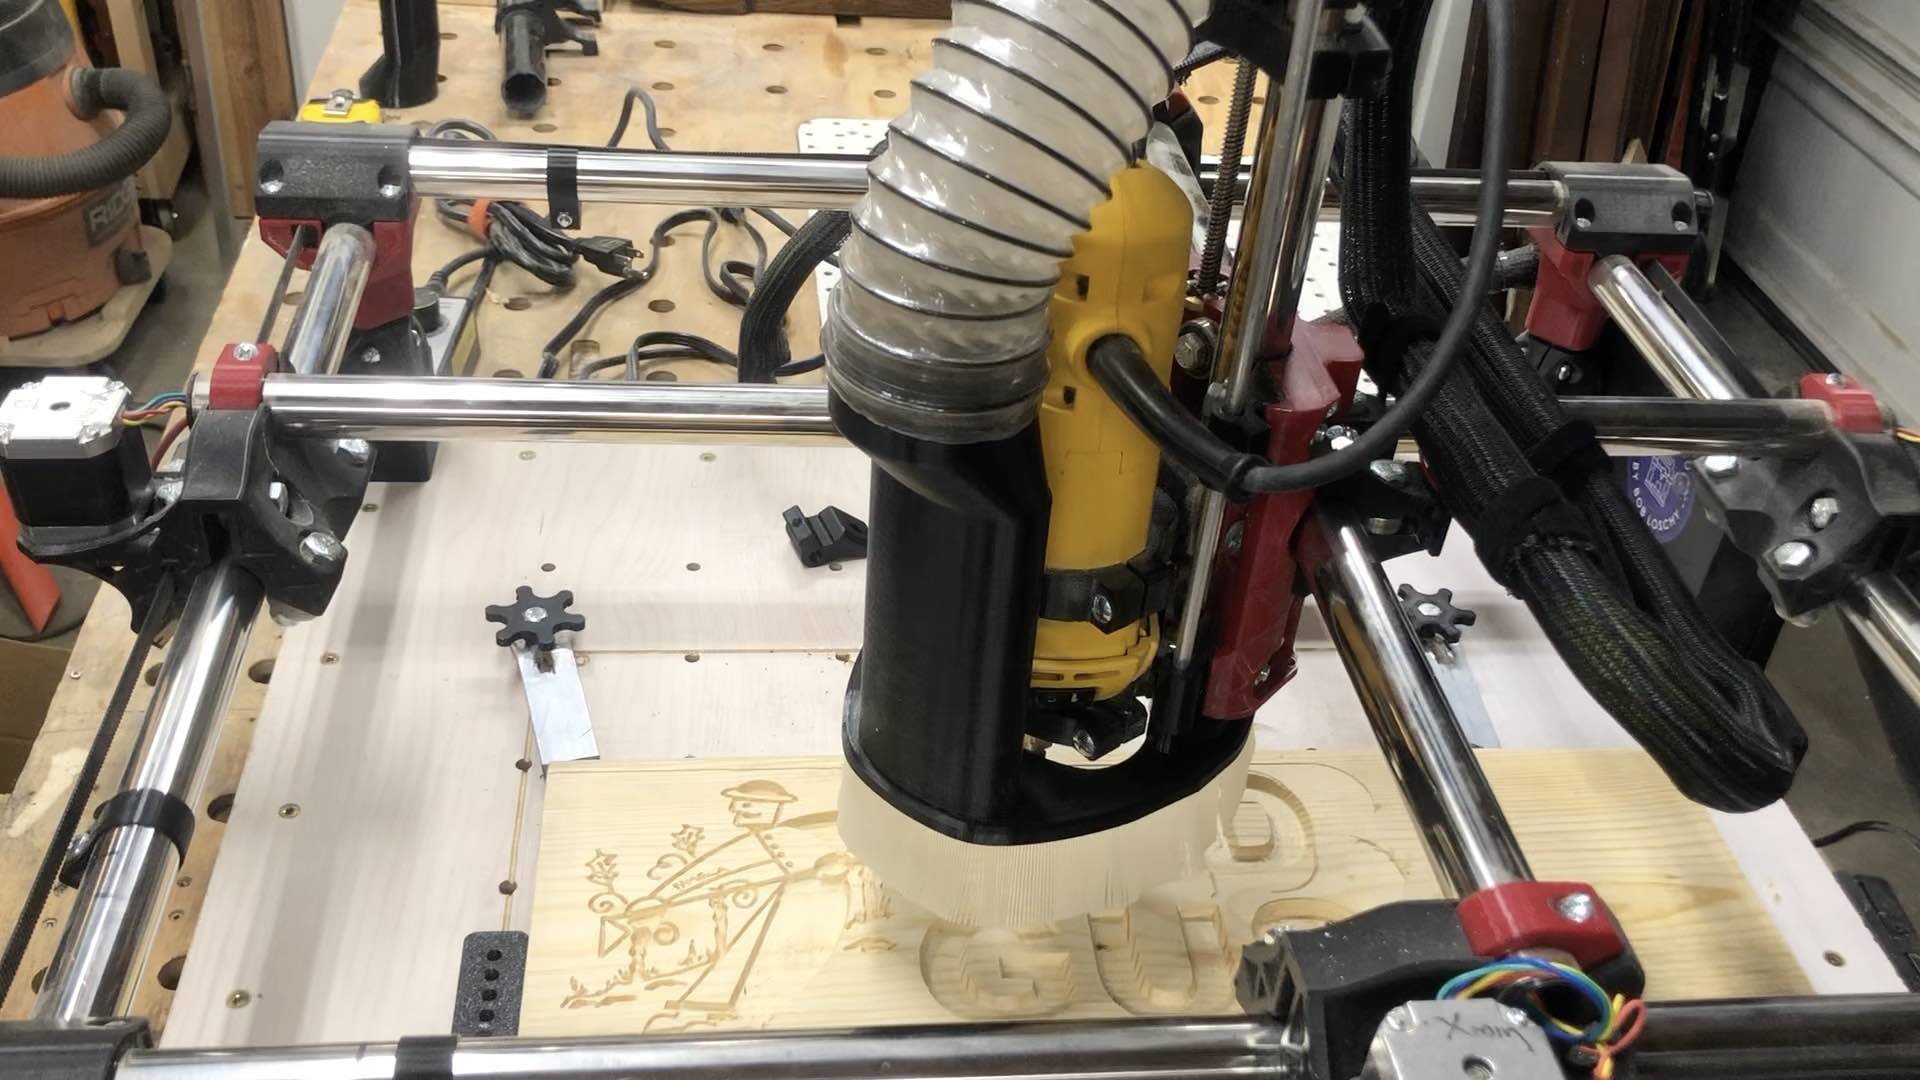
I am sharing my version of a dust collection attachment for the MPCNC Primo. I have tried several of the different designs offered and took a stab a designing my own (or course using input from, previously published designs). This was designed for use with the DEWALT DW660 tool. If you are using another router, the base and brush bracket might need to be modified to ensure clearance.
The key advantages for me are:
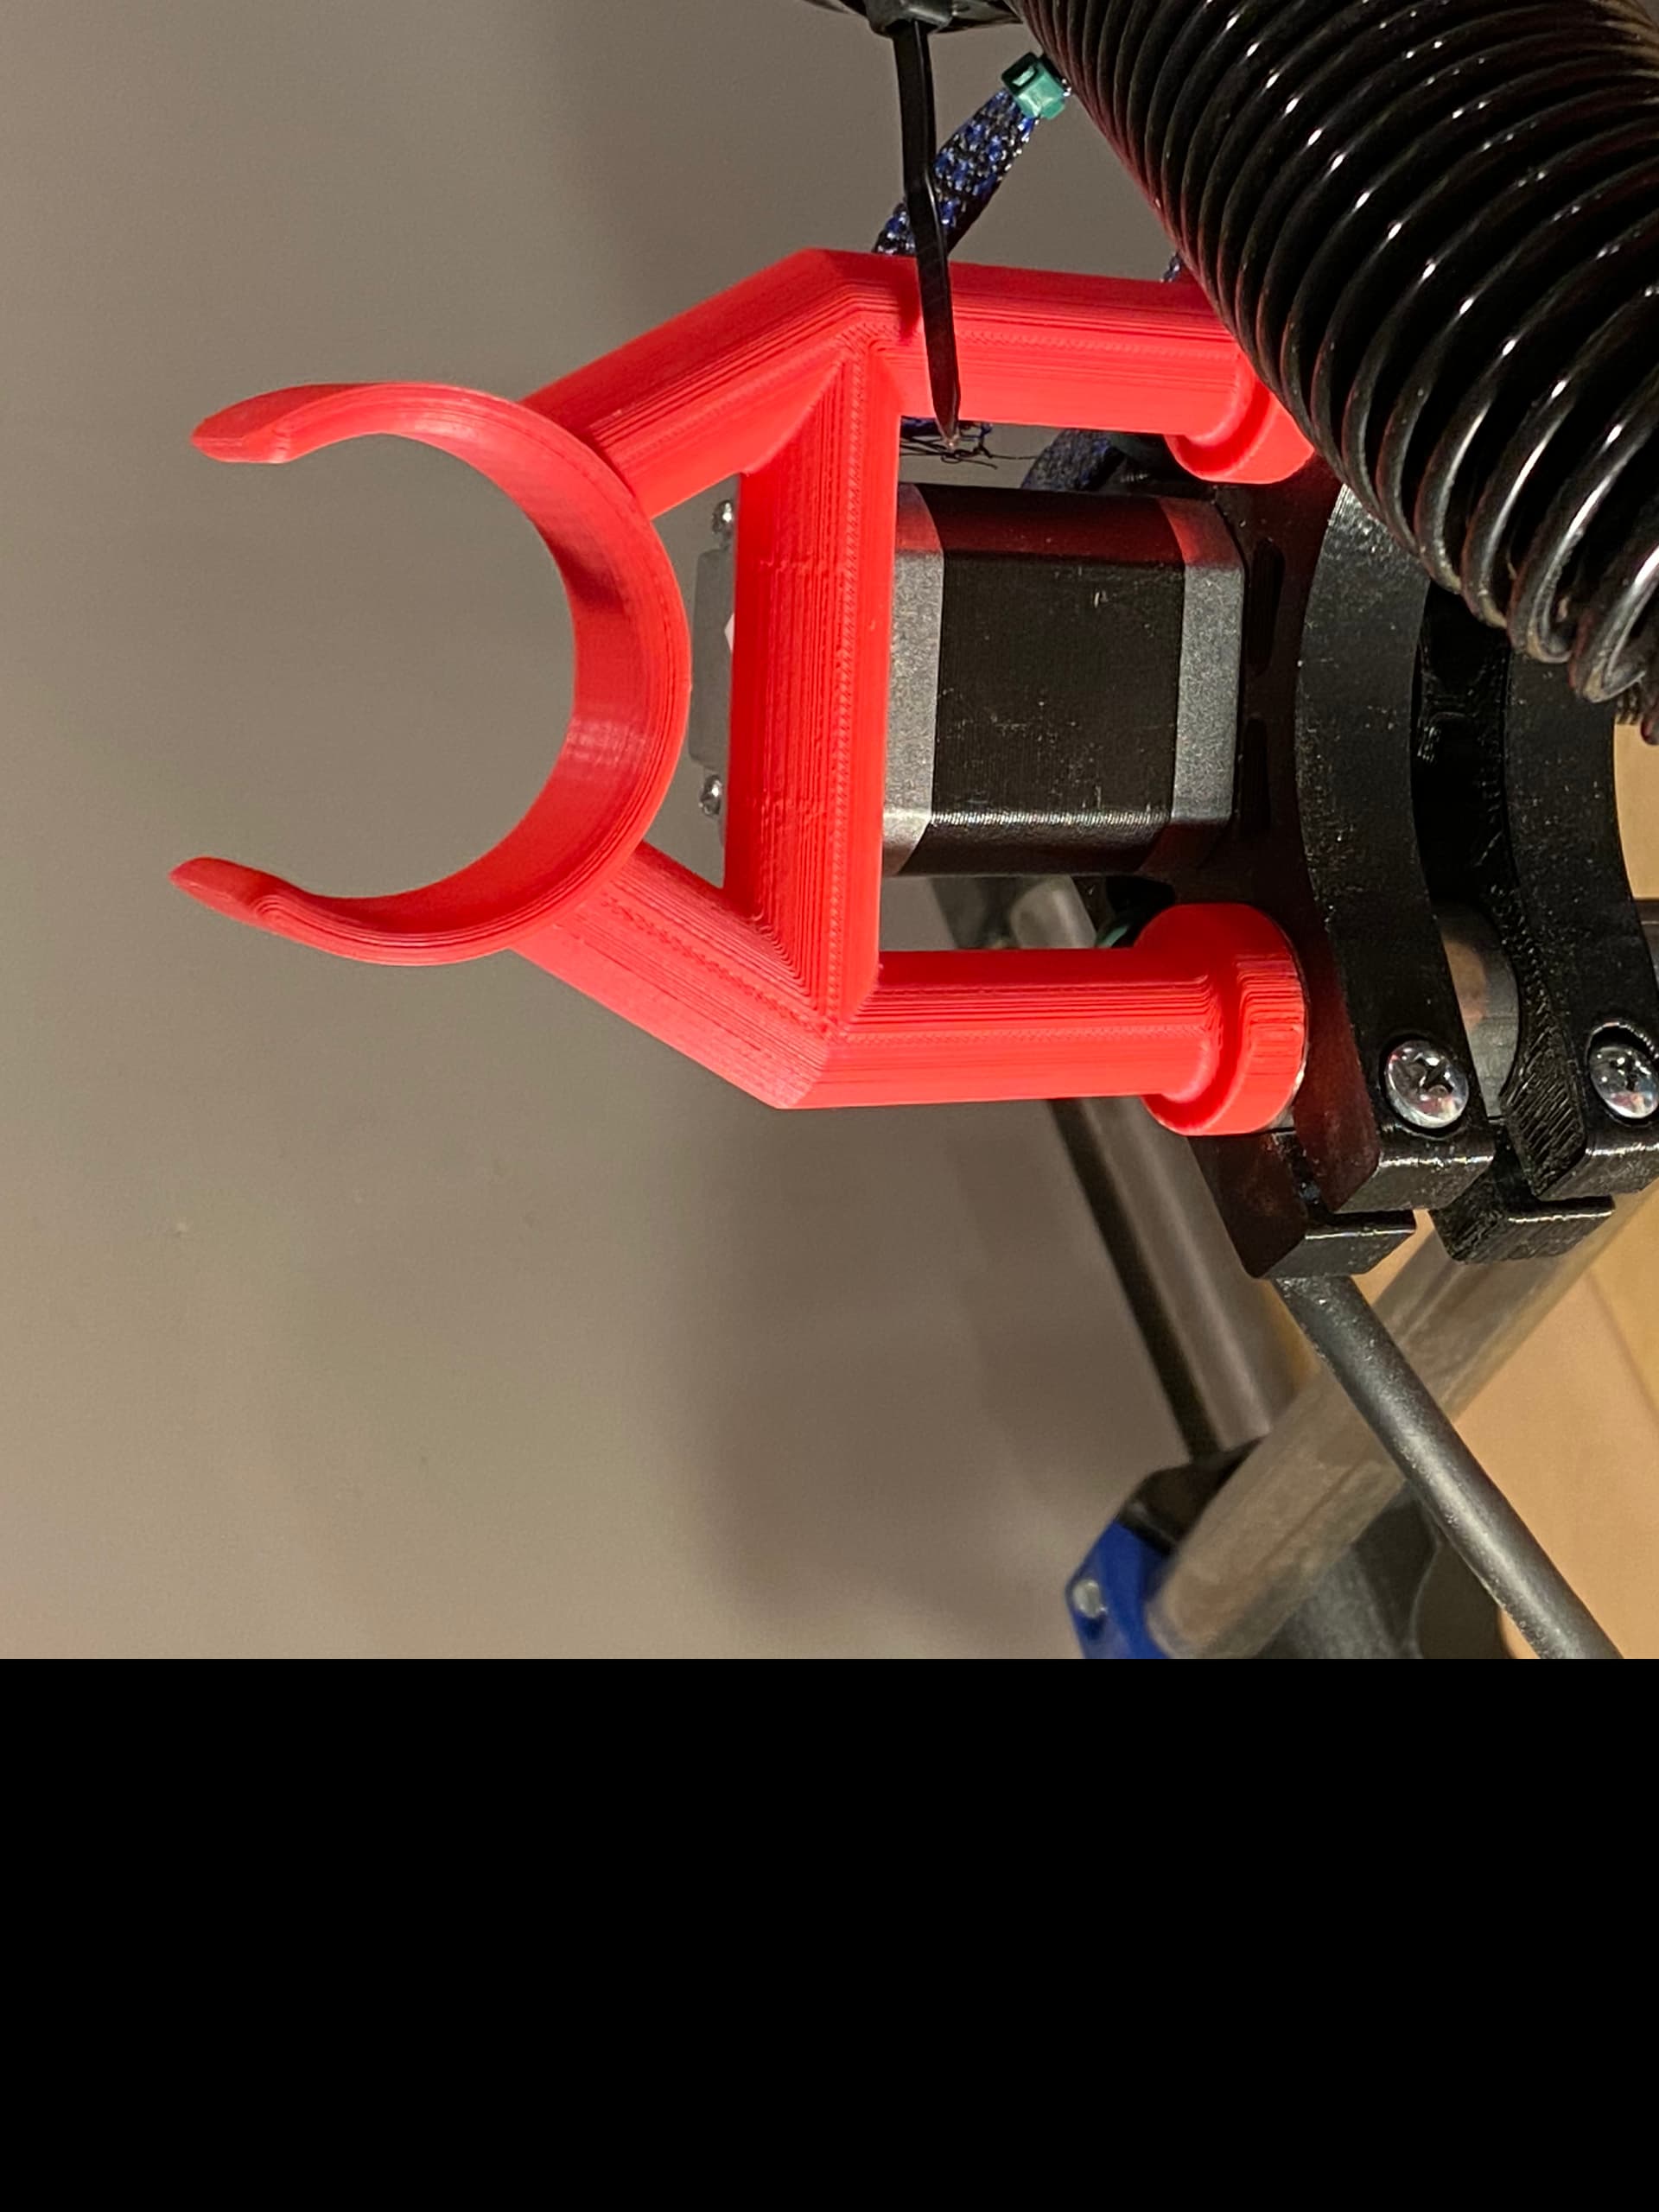
Assembly is mounted to the core. I have had little success with designs that attach to the
Z-axis frame and move up and down with the router.
Larger vacuum tube that works better for my dust collection. Also it pulls through larger
shavings that can get caught in the smaller tube designs. This is designed to fit a 2.5”
vacuum hose.
The shape of the tube minimizes the amount of adjustment to the X and Y zero switches
for install.
The vacuum tube can be easily lifted off and used to vacuum around the workpiece
manually.
The brush is printed in Sain Smart TPU and sized to push into the groove in the base.
No glue required. Also the length of the bristles can be easily adjusted in the slicer using
scaling.
The brush bracket attaches to the base with 8 x 3 mm magnets for easy install and
removal.
I can email the CAD files which were created in Fusion 360 if you want to make
adjustments. Be aware that since this was an interactive design the files are pretty
messy.
If I have stepped on anyones toes with this design, just let me know and I will add you to
credits.
Have been designing something simular the past few days to work with my Bosch Colt router. Agree that the ones mounted to the Z don’t work well. So fare mine mounts to the core and uses the tubes for the Z as the suction tubes, though I think your way would get more suction. Trying to design one that doesn’t reduce the working area from having the suction tube in front. We’ll see how it goes.
Thanks for sharing the idea!
I tried the vacuum through the z axis tubes and did not get enough suction. However I am using a harbor freight dust collector and it likes the larger diameter hose. Good luck
So I have installed this on my Primo and everything fits nicely except when I screw in the 1/4-20 screws to hold the rods at the right height. When I put the screws in I tried to do it very carefully and it still cracked the top clamps.
If you could supply the step files for these parts then I could easily just add some thickness to the clamps so they hopefully won’t crack. If you don’t want to put your design step files out there I completely understand!
Hey Robert, I appreciate your insight on the situation and your offer to help! However, I was responding to this topic because the part I am using is a custom part created by Bob (creator of this thread), who designed this particular dust shoe. I was not asking for STEP files of Ryan’s V1 machines.
I believe I used a 50% infill when I printed his part and I cracked it when inserting the set screws so I was hoping to thicken it up a bit if he could provide the STEP. I can always reverse engineer myself if need be. Just thought I’d start by asking Bob himself
Sorry. I totally misread the situation. I didn’t read the whole topic, and the part you described did not sound like something related to the dust shoe, so I just assumed…
I apologize for any late response. I just uploaded the step files for the two upper clamps with the 1/4” x 20 threads. FYI, I typically re-tap all my treaded holes as small variations in extrusion volume affect the fit. Hope this helps. I have been using mine for months and it has been working well for me.
Thanks Bob. Retapping the holes with a tap is a good idea, i’ll try that on the next print. I feel like I should increase nozzle temperature perhaps in hopes the layers form together tighter.
One thing I also do when printing parts that bolts will be threading onto is increasing the number of outer layers I print. It gives a little extra plastic for the bolt to hold on to.
One thing I have seen and done is to heat the screw up a little bit before inserting. Not super hot, but just enough so it will soften up the plastic as it cuts in on insertion, molding the plastic around the threads as it goes and cools. Just a thought!
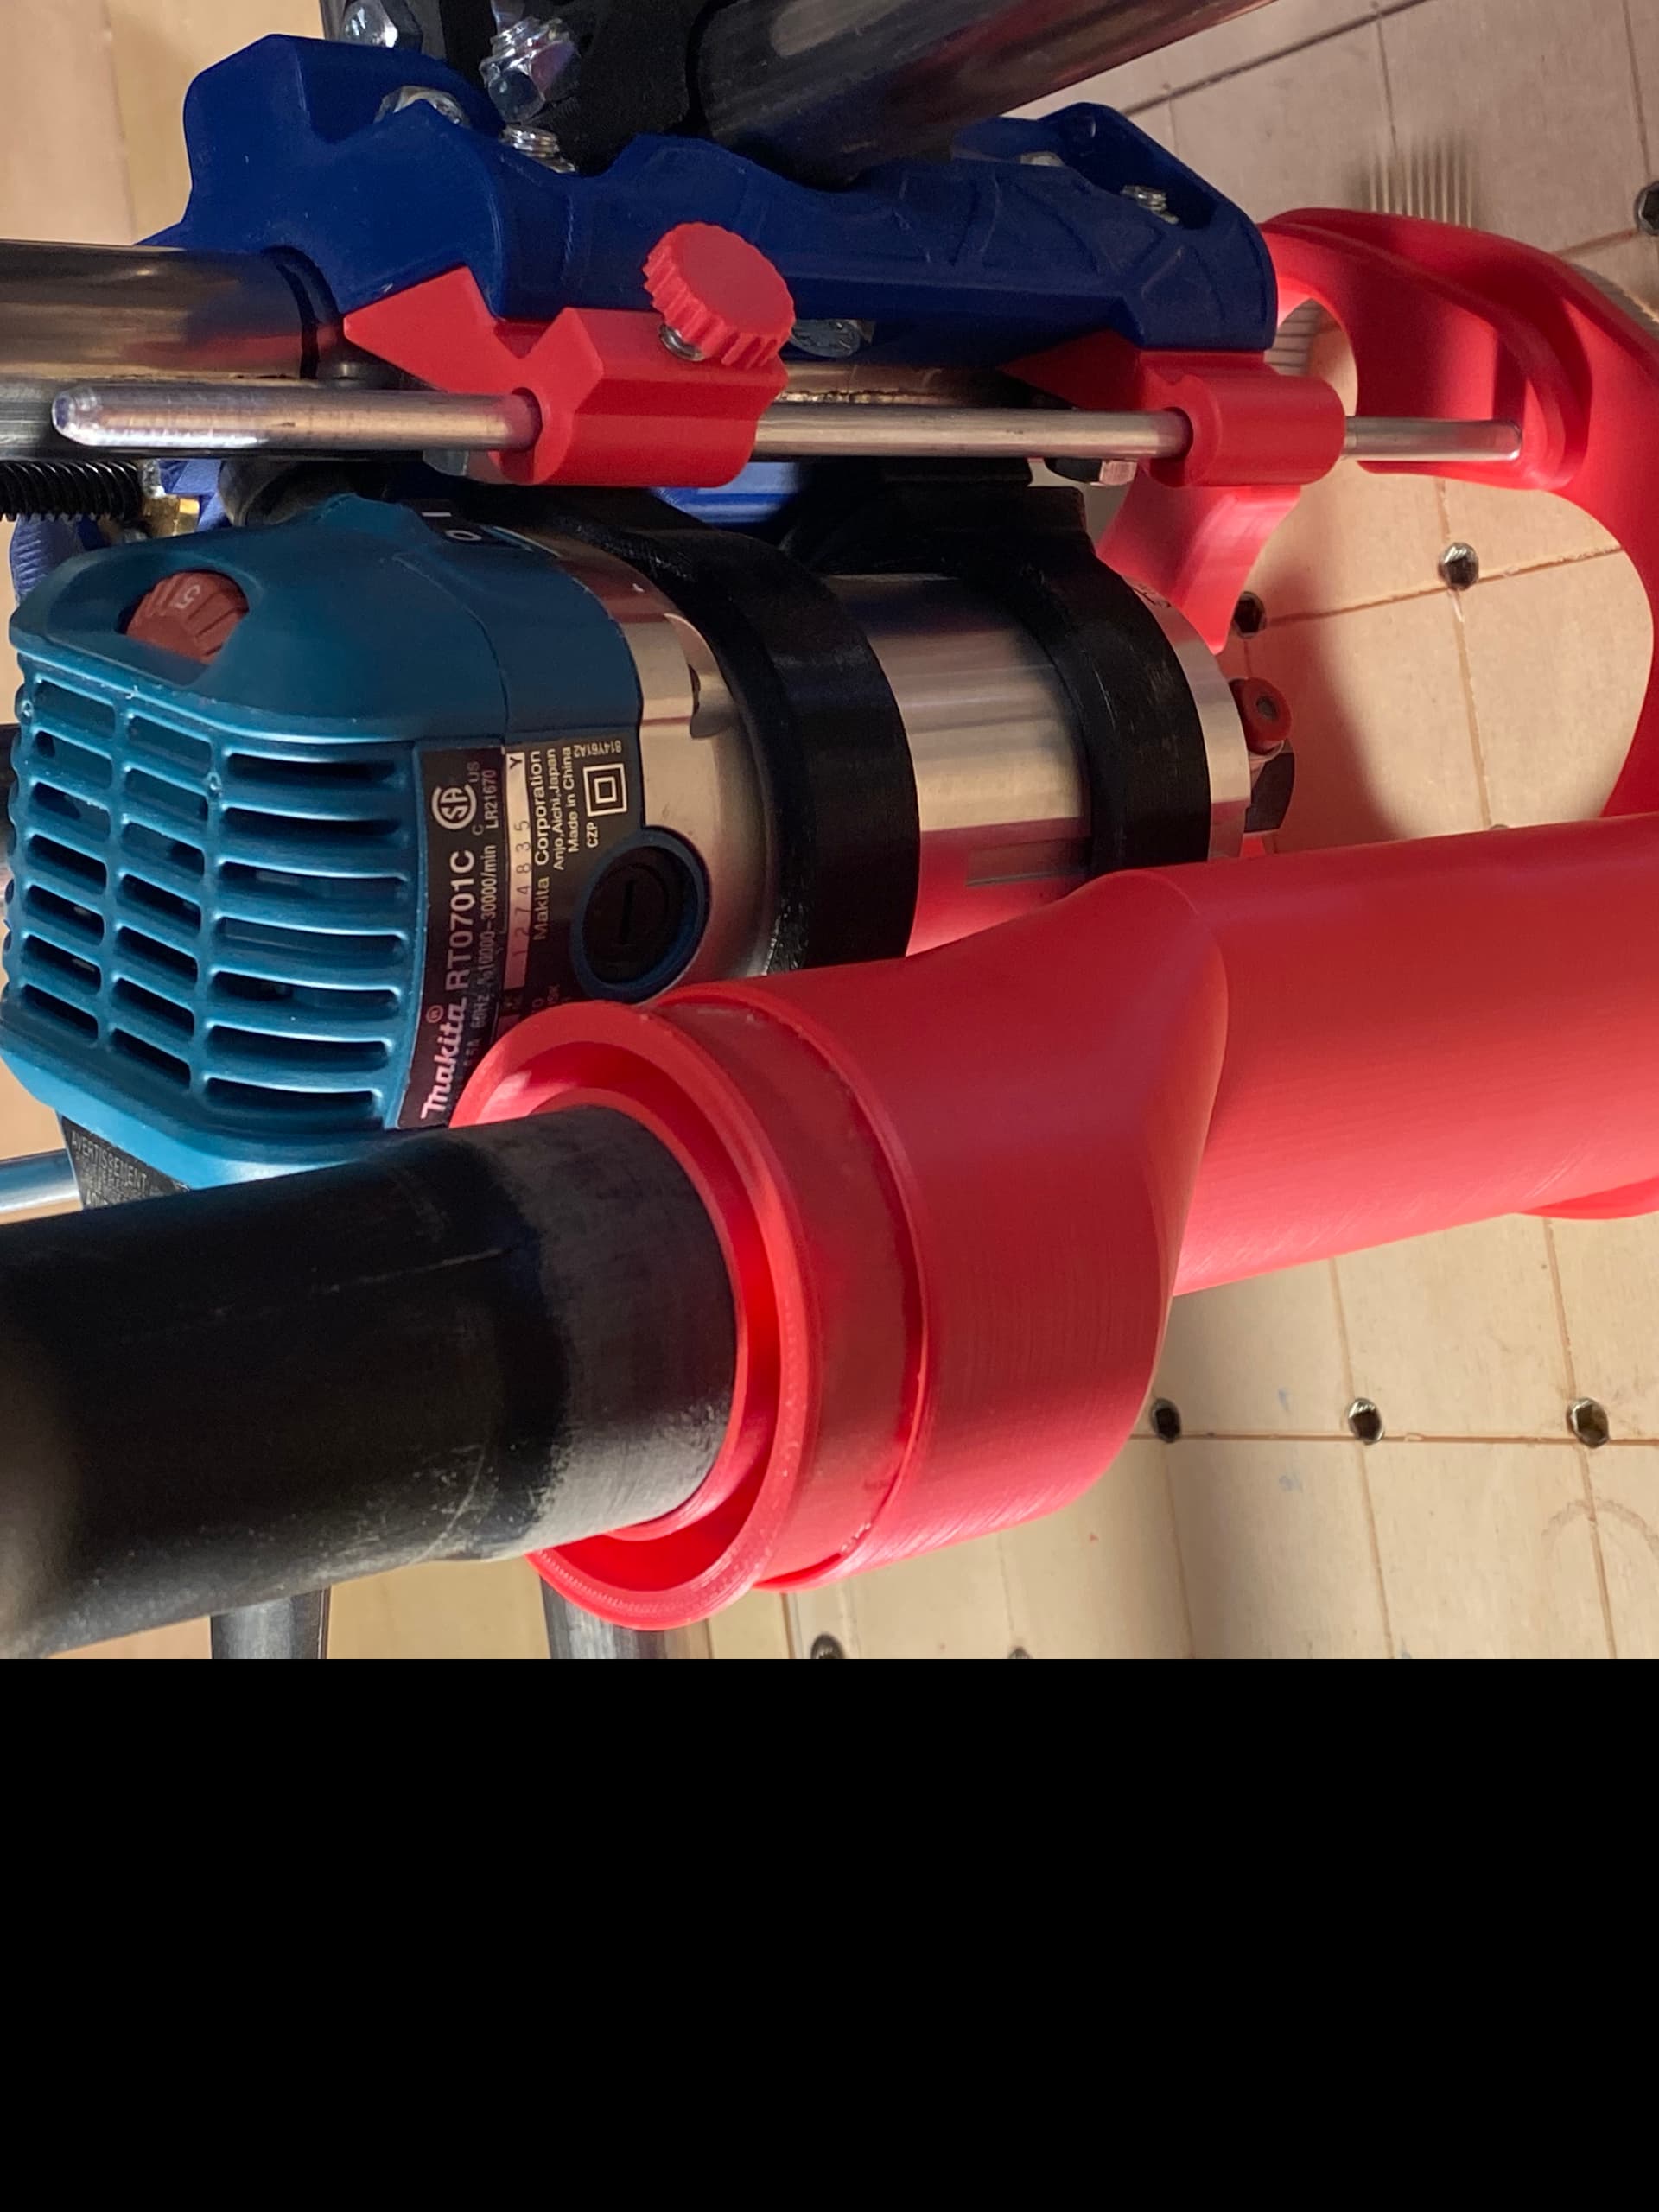
I’m very impressed with this design. I downloaded the files and put them into my CAD assembly file to see how it would work with a Makita. It looks like the Z clamps won’t work with my “C” core for 23.5 EMT tubing. I noticed you have stainless tubing so the clamps may have been designed for the 25.4 “J” core. They may work with the 25mm “F” core, the parts are very close. I’ll adjust the design for the “C” core and a Makita Router. Thanks for the great system and correct me if I’m wrong…again.
You are absolutely right. I build my MPCNC with the 25.4 stainless tubing. I will update the post in thingiverse to reflect that. Another person shared with me that they built this and it fit his Makita. The post of his build looks like he used conduit. I have forwarded your message to him to see if he can share any modes he made related to the tubing differences.
Carter I just built Bob’s design and it worked out great. My only trouble was printing the TPU but that was due to my inexperience. I did end up modeling the comb in Fusion 360 and adjusted the thickness to jest squeeze in the slot. Also note you want a tight fit and as your push in apply a little tension to the rubbery comb and it thins down a little to finagle it into the slot.
Very clever design. BTW I also have 1" stainless tubing.
I did change the aluminum rods to 1/4-20 as the coarser threads printed a little easier. I also design some simple heat head caps to act as thumb screws on the locking bolts that hold the rods in the Z height.
Bob, I looked before printing and the small parts would have been no big deal anyway. When I saw the difference the stainless in the pictures made it easy to figure out. I’ll adjust for the 23.5 and probably for the Makita but use your design. Thanks.
Craig, I saw your “make” on Thingiverse. I like the goalpost and screw heads. I’ve never used TPU. Oh Goody! another learning experience.
TPU is awesome. I use SainSmart and print at .3mm layer height on my MK3 with no issue. You can adjust flexibility through part thickness and infill and it is amazingly strong. I find new uses for it all the time.
Was not too hard once I got dialed in on the cura. I did save the comb gcode if you want to start with it. I have an Ender 3 V2 all stock if you want to try it?
-Craig