Another Quadcopter

Not sure what to call this one. My working title was “fakeowl” since I had in mind something like the FlexRC owl but wanted to size it for 5" props. I had seen something like that before but couldn’t remember where or what it was called. After I started drawing it and talking about it on the flitetest.com forums the guy who had the owl that inspired me reminded me that it was his shen drones Danaus I was thinking of. And that in turn was based off a QAV210 with prop guards added.

For reference my Onshape project for this is here: https://cad.onshape.com/documents/a023e2b86f7f9d2ca94cf0a7/w/8954d4f2255b144f9064ef10/e/3d3ae8cebc5730c002d79eb8

I started last Monday just sketching out some ideas to get a feel for what I was hoping to make and get a feel for how big it would be:

[attachment file=44164]

Seems viable. Last week my wife had to work late all week so I wasn’t able to get out to my shop and actually cut anything until Thursday. Instead I continued to revise my design in CAD:

[attachment file=44165]

And side view to gauge how tall the standoffs need to be:

[attachment file=44166]

Starting to come together! That motor in CAD was one I found in onshape search that was close but not quite the same as what I’d be using. But good enough for a mockup. And by Thursday I had some time to sneak out to the shop and run some gcode. I had planned on using 1/8" ply but was only able to find 5mm ply in sizes large enough at my local stores. So gotta go with what you can find sometimes:

[attachment file=44167]

Hey, this is looking pretty viable! Let’s put some gear on it. This is the “guts” from my “ultra budget mini quad” 3D printed angled arm edition (I’m not good at naming things) that also featured parts made on my MPCNC (The top and bottom plates) but they were simpler and could almost have been cut by hand quicker and easier. This is finally something I wouldn’t want to cut by hand and a good chance to really put the MPCNC to use!

[attachment file=44168]

I could try to fly it like this…but…one of the design aspects on this is that it’s kind of “inverted” with the motors on top and the props below them. The idea is with less obstruction under the motors you get slightly more efficiency - but I’ve also heard that this style of setup just “flies better” this way. So this is just mockup at this point.

Next I ran off a bunch of standoffs on my printer:

[attachment file=44169]

And now it’s time for other other plate. Should be easy, it’s simpler with no motor mounts, no flight controller mount, and no battery strap holes! Plus the outside is simpler since only 3 sides have “Dents” leaving a shelf in the front for my FPV camera.

But the forum gets upset if I post too many photos and things got…complex…on that simple cut so…next post please!


1 Like

Ok, the easy part! Let’s cut the bottom plate! Um…no, not so easy. I’ve been using painters tape and super glue to hold my work down. On smaller things this has been wonderful. But on 13" square stock with a warp to it even with kicker super glue just didn’t hold well enough. The work had lifted slightly cutting the top plate but it was still usable. The lower plate…didn’t come out as nice - some parts were substantially damaged:

[attachment file=44172]

But it was good enough to get a feel for how it would assemble and see if my spacers were tall enough:

[attachment file=44174]

And get a feel for how stiff it would be fully assembled:

[attachment file=44173]

Overall it wasn’t bad…but I wasn’t super happy either. I decided it needed 4 more supports around the prop guard sections, and one more in the center which I had left out to leave room for FPV gear but now decided I wouldn’t need that room. So top and bottom would have to be recut anyway as I expected.

So let’s try cutting a new base plate again! I’m only cutting 1.5mm per pass right now, I know I can go deeper on this ply but wanted to take things easy. All looked great up until the last pass of the final cut (the outer perimeter) when my glue failed again :frowning:

Nuts. Ok, let’s try carpet tape. I don’t like it because of how much it gums up the bit if I cut into it. But it sticks better so with this warped ply maybe it will work better.

Good news - the work stayed fixed! Bad news - once again the cut failed on the last pass of the last operation - this time my machine appeared to skip a step :frowning: But it did show me I could be doing full depth passes.

Next two tries I went with deeper cuts…and switched from carpet tape back to masking tape with glue - but used some 3M “90” aerosol contact cement “Industrial Strength”. Layer of tape on my spoilboard, layer on my work, 2 quick coats of glue and let it set a few minutes - boom that workpiece isn’t going anywhere but is easy to remove when done with no sticky residue! But again I had things fail on the last pass (only 2 this time so at least I failed quicker!) of the last operation :frowning:

[attachment file=44175]

Starting to get frustrated here. Went back to shallower cuts and positioned the work in a different part of the table to see if it made a difference (Seriously, the more complex top plate cut easy 1st try - why is this simpler bottom plate fighting me!) This time it missed steps and messed up on the first pass of the first operation :frowning:

Grrr. Well, that workpiece is ruined let’s just try it again for giggles. Yep, even in this other position on my bed it failed in the same place. What the hell.

Ok…let’s think this through. Try running the gcode with the spindle off and raised up just to see how it does. I can hear what’s happening and pay attention to the machine and not the bit this way. Hmmm, that’s interesting. Turns out my left Y Roller is making an odd rattling noise right where things fail. That roller was printed out of different filament than my others and did seem a little looser when I assembled the machine. The Y is also slightly out of square, I have to pull the left side in a bit against some stops to square it before powering up at which point the steppers hold it square.

But…when I set the current on my steppers I did so very conservatively, and with the machine where it sits naturally not squared up. Once squared there are a few small spots that seem to take a bit more effort to get past. Ok…let’s turn up the steppers. They’re still lower than the smaller steppers on my 3D printer and still stay cold to the touch.

Finally got the bottom to cut with no issues! Alright! But, let’s have another post break so the forum doesn’t complain about me linking too many photos before we finish this story.

In my excitement of finally getting the lower plate to cut cleanly I didn’t remember to get any photos. I just ripped it off the bed, sanded it down a bit and sprayed on some varnish.

Then recut the top plate with the design changes. I made a small mistake here - can you spot it? Entirely my fault. My daughter found the problem quicker than my wife when I showed it to them:

[attachment file=44178]

If you can’t spot it here’s a closeup:

[attachment file=44179]

Doh, totally forgot to define operations for those four holes :frowning: And the rest of the ply I have on hand is looking pretty ratty. So…bolted the original plate to this one (all the holes lined up perfectly but it really showed off how the outside cut of the original plate was damaged when the work lifted off the spoil board) and used it as a guide to drill the missing holes. So…re-assemble:

[attachment file=44180]

That varnish really makes the bottom pop :slight_smile: This looks “right side up” to me - but I know it’s actually upside down. So let’s see the top:

[attachment file=44181]

Was getting late so I skipped varnish…I’ll do that tonight. But maybe I have enough time to get it in the air before I crash for the night.

I’m running dRonin on this like I do all my multi’s but it had an older version - so plug it into the newest release and let it do it’s magic update. Then run though a configuration…figuring out which way the motors should go and which way the props should mount was a bit tricky with everything “upsidedown” but I managed to figure it out. Had to swap a few motor positions in software and the accelerometer calibration seems to have detected the upside down controller…so let’s try and fly an autotune flight.

Nope, I’ve got the instaflips :frowning: Ok…double check everything…all looks good. Except…hmm…that artificial horizon is responding backwards. Let’s do a yaw calibration. Ahh, there we go. Needed roll set to -180 and yaw set to -180 to compensate for the upside down controller.

Ran my autotune - got good looking numbers…and gave it a quick test flight at lunch. Very happy! Even flew it into a tree on purpose and it didn’t even crash due to the prop guards!

I’m still a bit worried about it’s long term strength. The PLA standoffs seem weak and the ply isn’t all that strong either - though once assembled the whole is definitely greater than the sum of it’s parts for stiffness and strength. I’ll probably redo the standoffs in PETG or Nylon. And would like to get some 1.6mm carbon to cut the plates out of - but that’s not in the budget right now. Heck even G10 or delrin aren’t in the budget since 12" square sheets are just barely big enough to fit this and 24" sheets are expensive to ship and I have no local suppliers :frowning:

Tonight I’ll have to varnish the top plate and work on mounting up my FPV gear. Looks like a little all in one camera/vtx will fit inside the frame nice and protected so that should be easy:

[attachment file=44182]

I like that. All the parts are so good now the little extra weight from having guarded props surely is better than munching props all the time. Down facing motors another plus!

It is cooling down here so maybe I can go find a nice spot to learn to fly, sims get boring pretty quick. When I bust my frame This is next for sure.

Well, I would suggest something better than cheap 5mm luan for the material:

[attachment file=44210]

To be fair I was wrong about doubting the PLA standoffs - they held up just fine. Also this is after purposefully flying it into several trees to see how it would react (bounces off) and bouncing it off the ground a few times (Like a hard landing only faster). But a 45 degree nearly full throttle slam into the ground was more than it could handle (I just can’t resist doing lots of fast flips and rolls even though I really don’t have room for them in the front yard!)

I’ll rebuild…but may or may not use ply again. G10, Delrin and CF are just too expensive to have sheets shipped though. So thinking about milling it from a HDPE cutting board…or maybe lexan, or maybe making my own composite from denim (old jeans) just to be totally different.


Dang, that took a beating. Maybe do the outer edges replaceable?

Could be done that way…but it’s heavy enough already so I don’t really want to add more parts. I’ll probably try lexan since it’s fairly cheap and I can actually get it locally. But…it’s also heavier and I know from past experience it doesn’t hold up very well to my abuse either. It should look cool at least :smiley:


So…haven’t had much time to work on this this week. Brakes on my truck failed on my way home on Tuesday - thankfully they held enough pressure for me to make it home without hitting anything…but we were down to one vehicle on week with lots of after school things for my daughter and meetings for me and my wife. So I wound up having to ride my bicycle to and from work the rest of the week. Finally got time to repair the truck Thursday evening…and didn’t tighten the drum adjuster enough so on my test drive they failed again…I hate drum brakes. Rode the bike again Friday…and finally got them repaired Saturday without trying to rush in the dark so things went much better. Truck is stopping better than it has in years now.

But…all that meant I wasn’t able to get to the store to look for any material to cut a replacement frame from. Finally today I got a chance. Went up looking for some lexan…but all they had was 0.093" and it was quite pricey in a piece big enough to cut the frame from. But I went for it. Then I saw some 0.125" PVC sheet that was only $8. Hmmm…PVC is pretty tough…not very stiff but this frame stiffens up when assembled so at that price worth a try.

[attachment file=44646]

The PVC cuts like butter with my 1/8" single flute endmill. One pass nice and easy. Could have done two passes for a cleaner cut but right now I’m more interested in quick and dirty than finish quality. Just want to get it together and see how it does.

One more plate and 40 screws later:

[attachment file=44647]

Well, it looks pretty good. But…that PVC is just too flexy. It did stiffen up but not enough for me to trust it to fly. It can twist very easily and I could easily see a motor giving enough thrust to deform the frame and cause all kinds of problems.

But I did pick up that sheet of lexan as well. Unfortunately I rushed too quick and tried to use the same gcode…but I didn’t notice the lexan was thinner. So I was taking a bite out of my waste board as well and the lexan was a lot tougher to cut, and my work holddown was failing on the lexan…so it did NOT go very well.

[attachment file=44648]

It’s also kind of hard to get a photo of this stuff once the protective film is removed.

You can see just how bad the cut was due to a combination of too fast of feed rate, too deep of cut, and the work moving:

[attachment file=44649]

But it was enough to see how stiff it would be:

[attachment file=44650]

Man, this thing would look so cool all out of lexan. But…I’d have to find thicker lexan - it’s still too flexy :frowning:

Guess I may have to follow through on my threads to make some “denim micarta” from old jeans and give that a try…

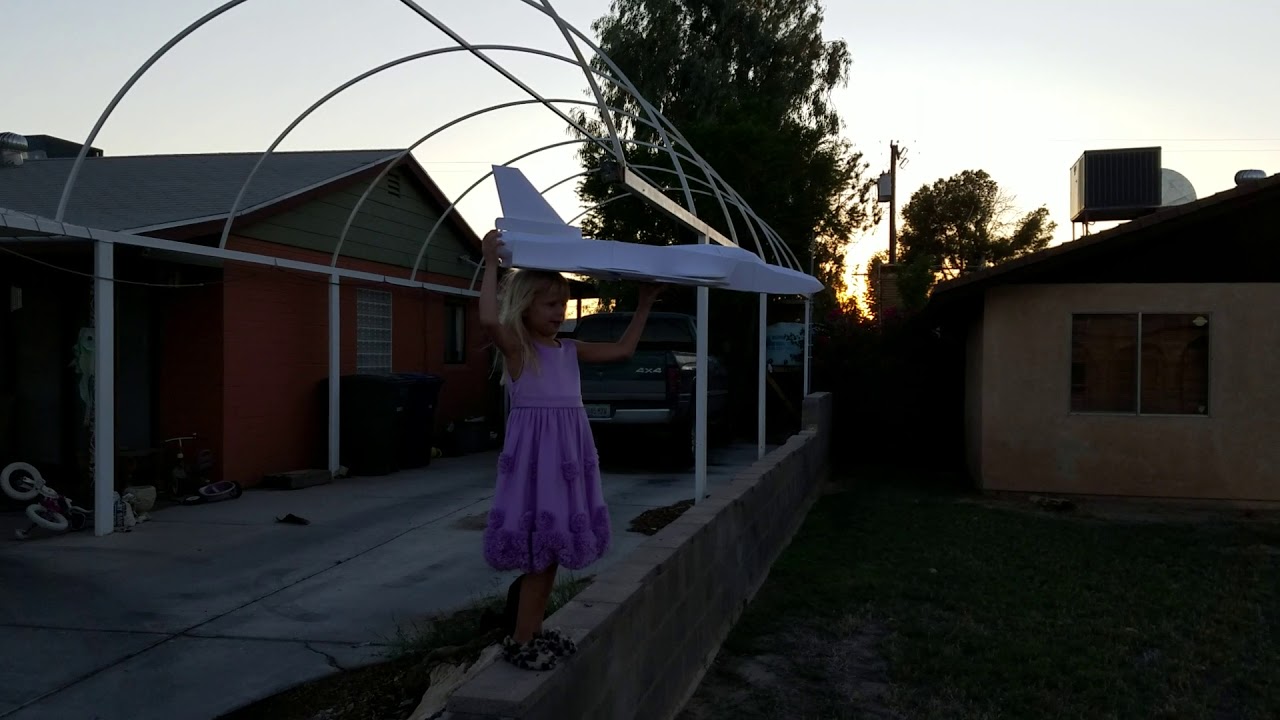
On a happier note…cut this out of foam with the MPCNC this weekend:

[attachment file=44651]

I had a few minor mistakes in my CAM, places where I did a through cut but should have done a score cut, or score cut that should have been through cut, or score cut that should have been marking cut. And made a few mistakes in assembly. So this one won’t be getting RC gear. Instead I turned it into a chuck glider for my daughter since she liked it so much:

Going to revise my gcode and cut another for myself, got an EDF on order for it and can’t wait!


20170924_160900.jpg

20170924_162820.jpg

20170924_175120.jpg

20170924_175143.jpg

20170924_181450.jpg

20170924_182552.jpg

1 Like

You had a crazy week!

I know the testing/experimenting sucks when it doesn’t work out but when you find the right material it will be awesome. Clear would be so freaking cool. I had my tubular build fold itself literally in half so you are right to worry about flex. Some is needed though for durability.

Yeah, weeks like this…I can do without :slight_smile:

I enjoy the testing/experimenting. I’ve been building quads for almost 4 years now and am fairly involved in the dRonin firmware project. I’m constantly looking for new/different ways to build them.

I’ve used wood, aluminum, various plastics, CF, G10, CF/G10 composite, CF/Birch composite…and in one ill fated attempt…bread. (I really wanted an edible copter!)

CF is great…but expensive. And I’m just not a fan of using flat plates of composite - I’d rather do a custom layup with some form to it and make something stiffer/lighter than bolting plate together.

So this is just a bit of fun. I could go with one sheet of ply and one of Lexan or PVC and that would probably be fine. But the whole thing out of clear would sure look neat. (even neater if I engraved something into it and edge lit it with some LED’s…) so I’m probably going to check another local store to see if they have any thicker lexan. I know I’ve found it locally before but it may be too expensive in a large enough sheet to cut this from.

Get super crazy and 3D mill some HD foam and give it a fiberglass skin?

I have been thinking about trying something like that…but I’d probably just use the foam as a form and then dissolve it out leaving just the fiberglass skin.

Now that the weather is getting nicer and I can work outside that kind of thing is becoming possible again. In the summer I didn’t want to be cramped up in my little shop with the fumes from resin :wink:

I still want to try using old jeans and epoxy to make my own composite…it’s just something I’ve been kind of fixated on for a few years but haven’t quiet got to actually putting into action.

I did see a Denim knife handle made that way, it was from his great grandfathers jeans or something. It did end up looking amazing.

did you ever do anything else with this? ive been looking for a quad to build as a trainer quad and would like to give this or something like it a try. care to share the files?

Yeah, I hung it on my wall as decoration because it was just too fragile :frowning:

Only flew a few packs through it - was using it to test and learn 3D flight…and…I’m not good at 3D flight it turns out. And this isn’t good at taking hits. Yeah, it protects the props fairly well and it was fun being able to fly into a tree and recover. But even mild crashes resulted in one or both plates being destroyed.

If it was cut out of better material it would be great. But you’d have to find something stiffer than 3mm ply, lexan, or PVC without being too much heavier. CF would work but sheets that size are REALLY expensive.

I’m thinking about trying it again and doing it out of some kind of hybrid material…like dollar tree foam in the center but laminated with fiberglass on the outsides. One of my friends recently bought a composite airplane (velocity XL) and is talking about sending me to the EAA composite construction class so I can help him with repairs on it…not sure I’d trust myself on a human carrying airframe but I’m up for taking the class. And reading through his class notes has given me some good ideas on how to fabricate better material to try this again. Some really good info on how thicker laminates gain a LOT of strength even if the center material is weak.

My friend has more fiberglass and resin than he can use before the resin goes bad so I may talk him into doing a few experimental layups with me to see how it works out…I’ll be sure to share details if we do try it.

I thought I had posted the link to the onshape project in the first post - but I see it didn’t come across as a link. So here it is again:

OnShape Project

You should be able to right click on the parts and export DXF’s…or clone the project and make your own changes (Please let me know if you make any improvements!) I haven’t shared DXF’s yet since it’s still such a work in progress.


1 Like

thanks. I’ve been thinking about trying it with some g10 fiberglass. I’ve got some old server pc motherboards, you just heat it up with a heat gun and knock all the parts off

That could look neat…just watch out for the dust cutting old motherboards. G10 dust isn’t much fun and neither is lead solder :wink:

Not sure if it would be stiff enough or light enough - but probably worth trying. I have one quad frame that’s CF/G10 hybrid (basically G10 with a thin layer of CF on the outside for looks) and have a little 230 acro quad that was all G10 which I loved. The G10 is a bit heavier and less stiff than CF but I’m not sure if PCB material like a motherboard is thick enough to work well…it might on this frame but on a more traditional frame you’d want at least 3mm thick G10 and even then anything much larger than the 230 and the lack of stiffness would be an issue.

The 230 I rebuild with CF parts and it’s much stiffer now…but takes more damage in crashes. With the G10 parts I never had any serious damage despite some hard crashes at full throttle into pavement. The G10 can just flex a bit and absorb the energy. The CF parts on the other hand don’t give and that energy has to go somewhere. So after switching to CF the arms started breaking (either layers delaminating, or the ends smashing up) or motor shafts started bending even with less intense crashes than the G10 version took no problem.


good point on the dust. I’m probably gonna try and scale it down to like 150mm and 4 inch props

Well…you’ve got me thinking about this again.

That and a friend of mine recently got a new (to him) plane - a Velocity XL which is a kit built composite airframe…though his was factory assembled. He’s been taking classes from the manufacturer to learn about it and recently took a composites construction course from the EAA which he really enjoyed and now wants to send me to.

And I spent last weekend rebuilding the dash on my truck because it disintegrated when I had to pull it back the weekend before to fix a vacuum line that broke while I was replacing the AC. That consisted of a lot of epoxy, plastic welder, flox, and fiberglass.

All of which has me thinking about composites. The manual from the EAA course my friend gave me had a bunch of great info. And there are some great articles on flitetest.com with info about using composites in model construction.

So I broke down and ordered some fiberglass cloth from thayercraft, I got 5 yards each of 0.73oz cloth and 1.43oz cloth which will be here Friday. I still have to decide on and order some resin to go with it though.

In the meantime I decided to do some experiments. I picked up some 6oz bondo cloth at the local big box hardware store along with a can of the bondo fiberglass resin. This is way heavier cloth than I’d want to use but it was <$10 for 8sqft so fine for testing.

I cut out a 13" square piece of dollar tree foam and peeled the paper off of it. I then cut some pieces of the 6oz cloth slightly larger and mixed up an oz of the bondo resin. First side seemed to go fairly good…1oz of resin seemed about right. Then flipped it over and did the other side…here 1oz seemed like way too much…odd…and it started to smell like melting foam…hmmm. Put it between two boards with some weight on it and then gave it a few hours. I came back to a mess:

[attachment file=59200]

Long story short…the bondo brand resin is a polyester resin not epoxy. Polyester Resin uses MEK as a hardener…and MEK is a strong solvent which does not play nice with foam. It basically melted my foam. Well, that was a waste of cloth :frowning:

I also have some west systems gflex epoxy my friend with the plane gave me. So yesterday I did a smaller scale test with that. (smaller so I waste less if I fail and because there isn’t enough of the cloth left to do 13" squares again.) It went much better:

[attachment file=59201]

In the long and short direction it’s looking pretty good…but it can twist diagonally way easier than I’d like. A second layer of cloth at 45 degrees would probably solve that…but with 6oz cloth I don’t really want to do multiple layers. When I get my lighter cloth I plan on doing 2-3 layers so that should be no problem.

The gflex is a bigger issue. It’s just not the right resin for this since it’s designed to be more flexible and I’m looking for stiffness. So I’m going to have to decide on a better resin. I’ve got a few I’m thinking about but won’t have funds for them for a week or two so while progress will be coming on this project don’t hold your breath waiting for it :smiley:

1 Like

Oh - and yes I did consider just glassing the plywood…but foam is considerably lighter than ply and with the composite construction I should be able to get better strength than the ply with lighter weight using foam as the center. We’ll see if that actually works out.

I mentioned I was working on this to some local RC guys and one of them offered me some 3/4oz cloth and resin tomorrow. So that will help me make progress a little quicker than I was expecting to :smiley: