Hi All,
Need some advice. Trying to decide on if I build the MPCNC or Lowrider2.
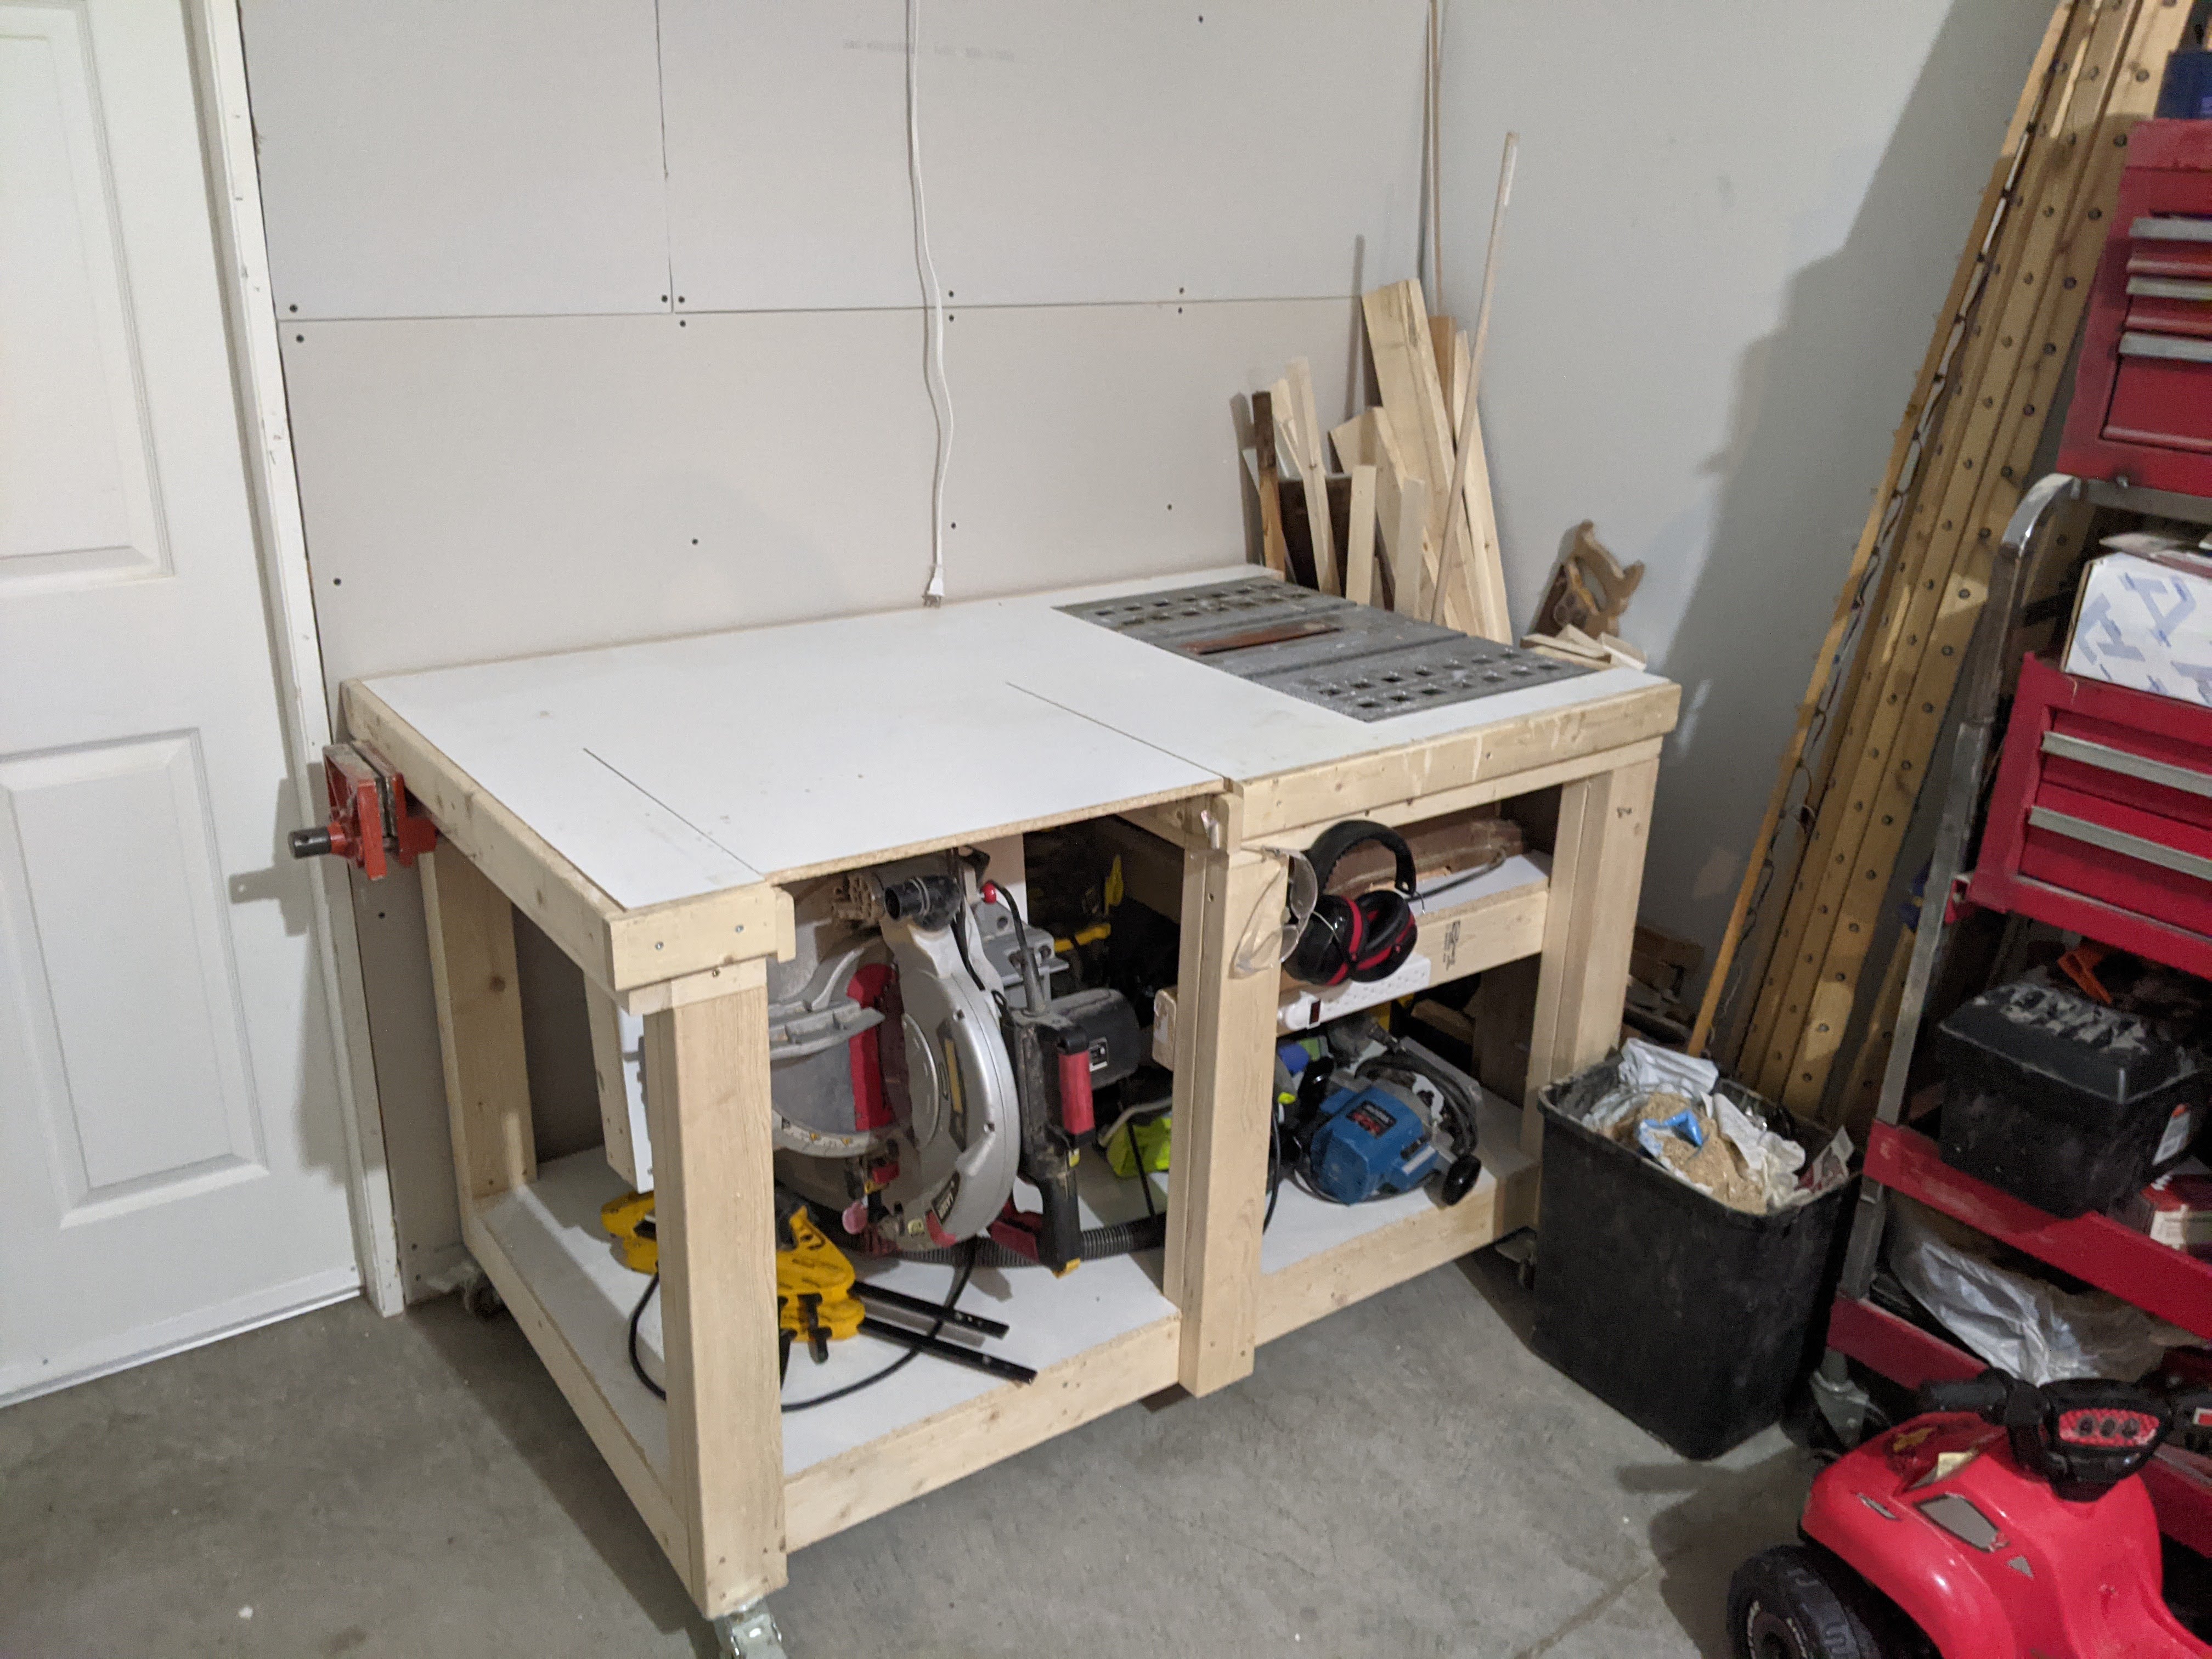
I want to mount either an MPCNC or Lowrider to my 3’x4’ workbench (see below).
Plan to make a all in one workbench which has a CNC, Drop Saw, Table saw… as you can see the drop saw tucks away nicely and the table saw is in built.
I am very limited on space.
Leaning towards building the Lowrider2 as it seems more versatile and upgradable (Size wise) if I get more space.
My worry is the lowrider2 might have a lower resolution then say the MPCNC?
Is it more prone to movement on the Z-axis and Z-axis due to the rolling Y-axis (possible movement?)?
I would love to add a laser engraver in the future so would like to have the definition for high quality PWM prints.
Like all us DIY’ers, always trying to get my best bang for buck
i have found my lowrider is just as accurate as my mpcnc once dialed in, but it was a little bit trickier to get it dialed in cause there is more little things to adjust, especially on the Z axis.
Both my machines run to 0.1mm and i can often get it to 0.05 if i am careful on small things (less then 150mm square)
the main downside to the lowrider is the max speed / acceleration tends to be less because the gantry setup is heaver then the MPCNC, so it has more mass to throw around.
i run 2000mm/sec acceleration on my MPCNC, my lowrider is closer to 500mm/sec to avoid shaking.
the acceleration of the MPCNC makes it a bit more flexible for laser
one advantage of the lowrider is you can park the gantry at once end of the bench when not in use and use it as a work bench (the gantry only eats about 300mm of desk space)
The lowrider can be made MUCH bigger then an MPCNC
the MPCNC caps out at about 400x400mm if you want to be doing metals with it, little bit bigger for timber although not much.
The main problem is that the side tubes start to flex a bit which reduces your accuracy.
the lowrider caps out at 1.2m on the X and the Y has no real technical limit. (its more what will fit in your shop)
Final note is Z axis
the MPCNC is top down, so the longer the Z the more flex you get at the bottom of travel (which is when you want it really tight) so it limits you a bit in your Z axis (mine is about 90mm to do aluminum on it)
the lowrider works from the bottom up, so you get the most flex at the TOP of your travel.
So having a really long Z axis does not matter so much when your milling down low, the rest of it just hangs there. (my lowrider has a 260mm Z, i use about 50mm of that on average, but its nice to have )
hope that helps in the decision process, both are great machines, but require a bit of TLC to get dialed in really tight.
Thanks so much for the great and fast feedback. Loving this community already.
Blockquote
“one advantage of the lowrider is you can park the gantry at once end of the bench when not in use and use it as a work bench (the gantry only eats about 300mm of desk space)”
This is Exactly what is swaying me towards the lowrider ( the ability park it out of the way and use the workbench space for other projects.
The speed limitation makes sense. This will only be for small evening or weekend projects so speed is not an issue for me… but sure I might take that back in future
there is tons of doco on the forms about dialing in the lowrider, i think its just a little trickier then the MPCNC to get cutting just perfect (but then again, your mileage may vary)
The only other downside with the lowrider is needing to make the flat parts.
and doing that without a CNC machine is possible but takes a while and needs care.
which i must confess is why I built an MPCNC, to cut the parts for my lowrider
Thanks. Haha… the catch Catch-22 of making the flat parts.
I think I am going to attempt printing out a template (1:1) and tracing it with a jigsaw and drill press. Then hopefully when my machine is up and running maybe CNC some more accurate parts if need be.
echoing Michael here
Its the holes that really matter
the edge can be out by a fair way and not really matter.
If the holes are out, weird things happen, like the gantry not sitting flat.
Justin - the following assumes you have a 3d printer and will be using a router/trimmer in the machine and therefore you own one of those too!
By far the simplest way to build really accurate plates is to print a router/drilling template of the plates about 4mm or so thick. As long as you keep the holes in the correct size and location and the perimeters, you can cut as much out of the middle as you like to save a bit of print time. Split the y plate in two halves- it’s symmetrical but it’s easier to print two halves - no need for any fancy joints, they’ll just butt together.
Now cut the plates roughly to shape, and stick on the plastic templates with a bit of hot glue, double sided tape, or screw them through a couple of the bolt holes (you are going to drill them out later so don’t worry about marring the workpiece.)
Get a hold of a bearing (pattern following bit) for the router, and follow the template. Once that’s done use the template as a drilling guide on the drill press, and you shouldn’t be able to tell the difference between these and a machine cut one.
One day I’ll do an instruction thread with Pictures!
 which has a CNC, Drop Saw, Table saw… as you can see the drop saw tucks away nicely and the table saw is in built.