I was worried about that. I guess I should take the trip to the plastic shop
If it is weak I will get some HDPE that stuff is about the same price.
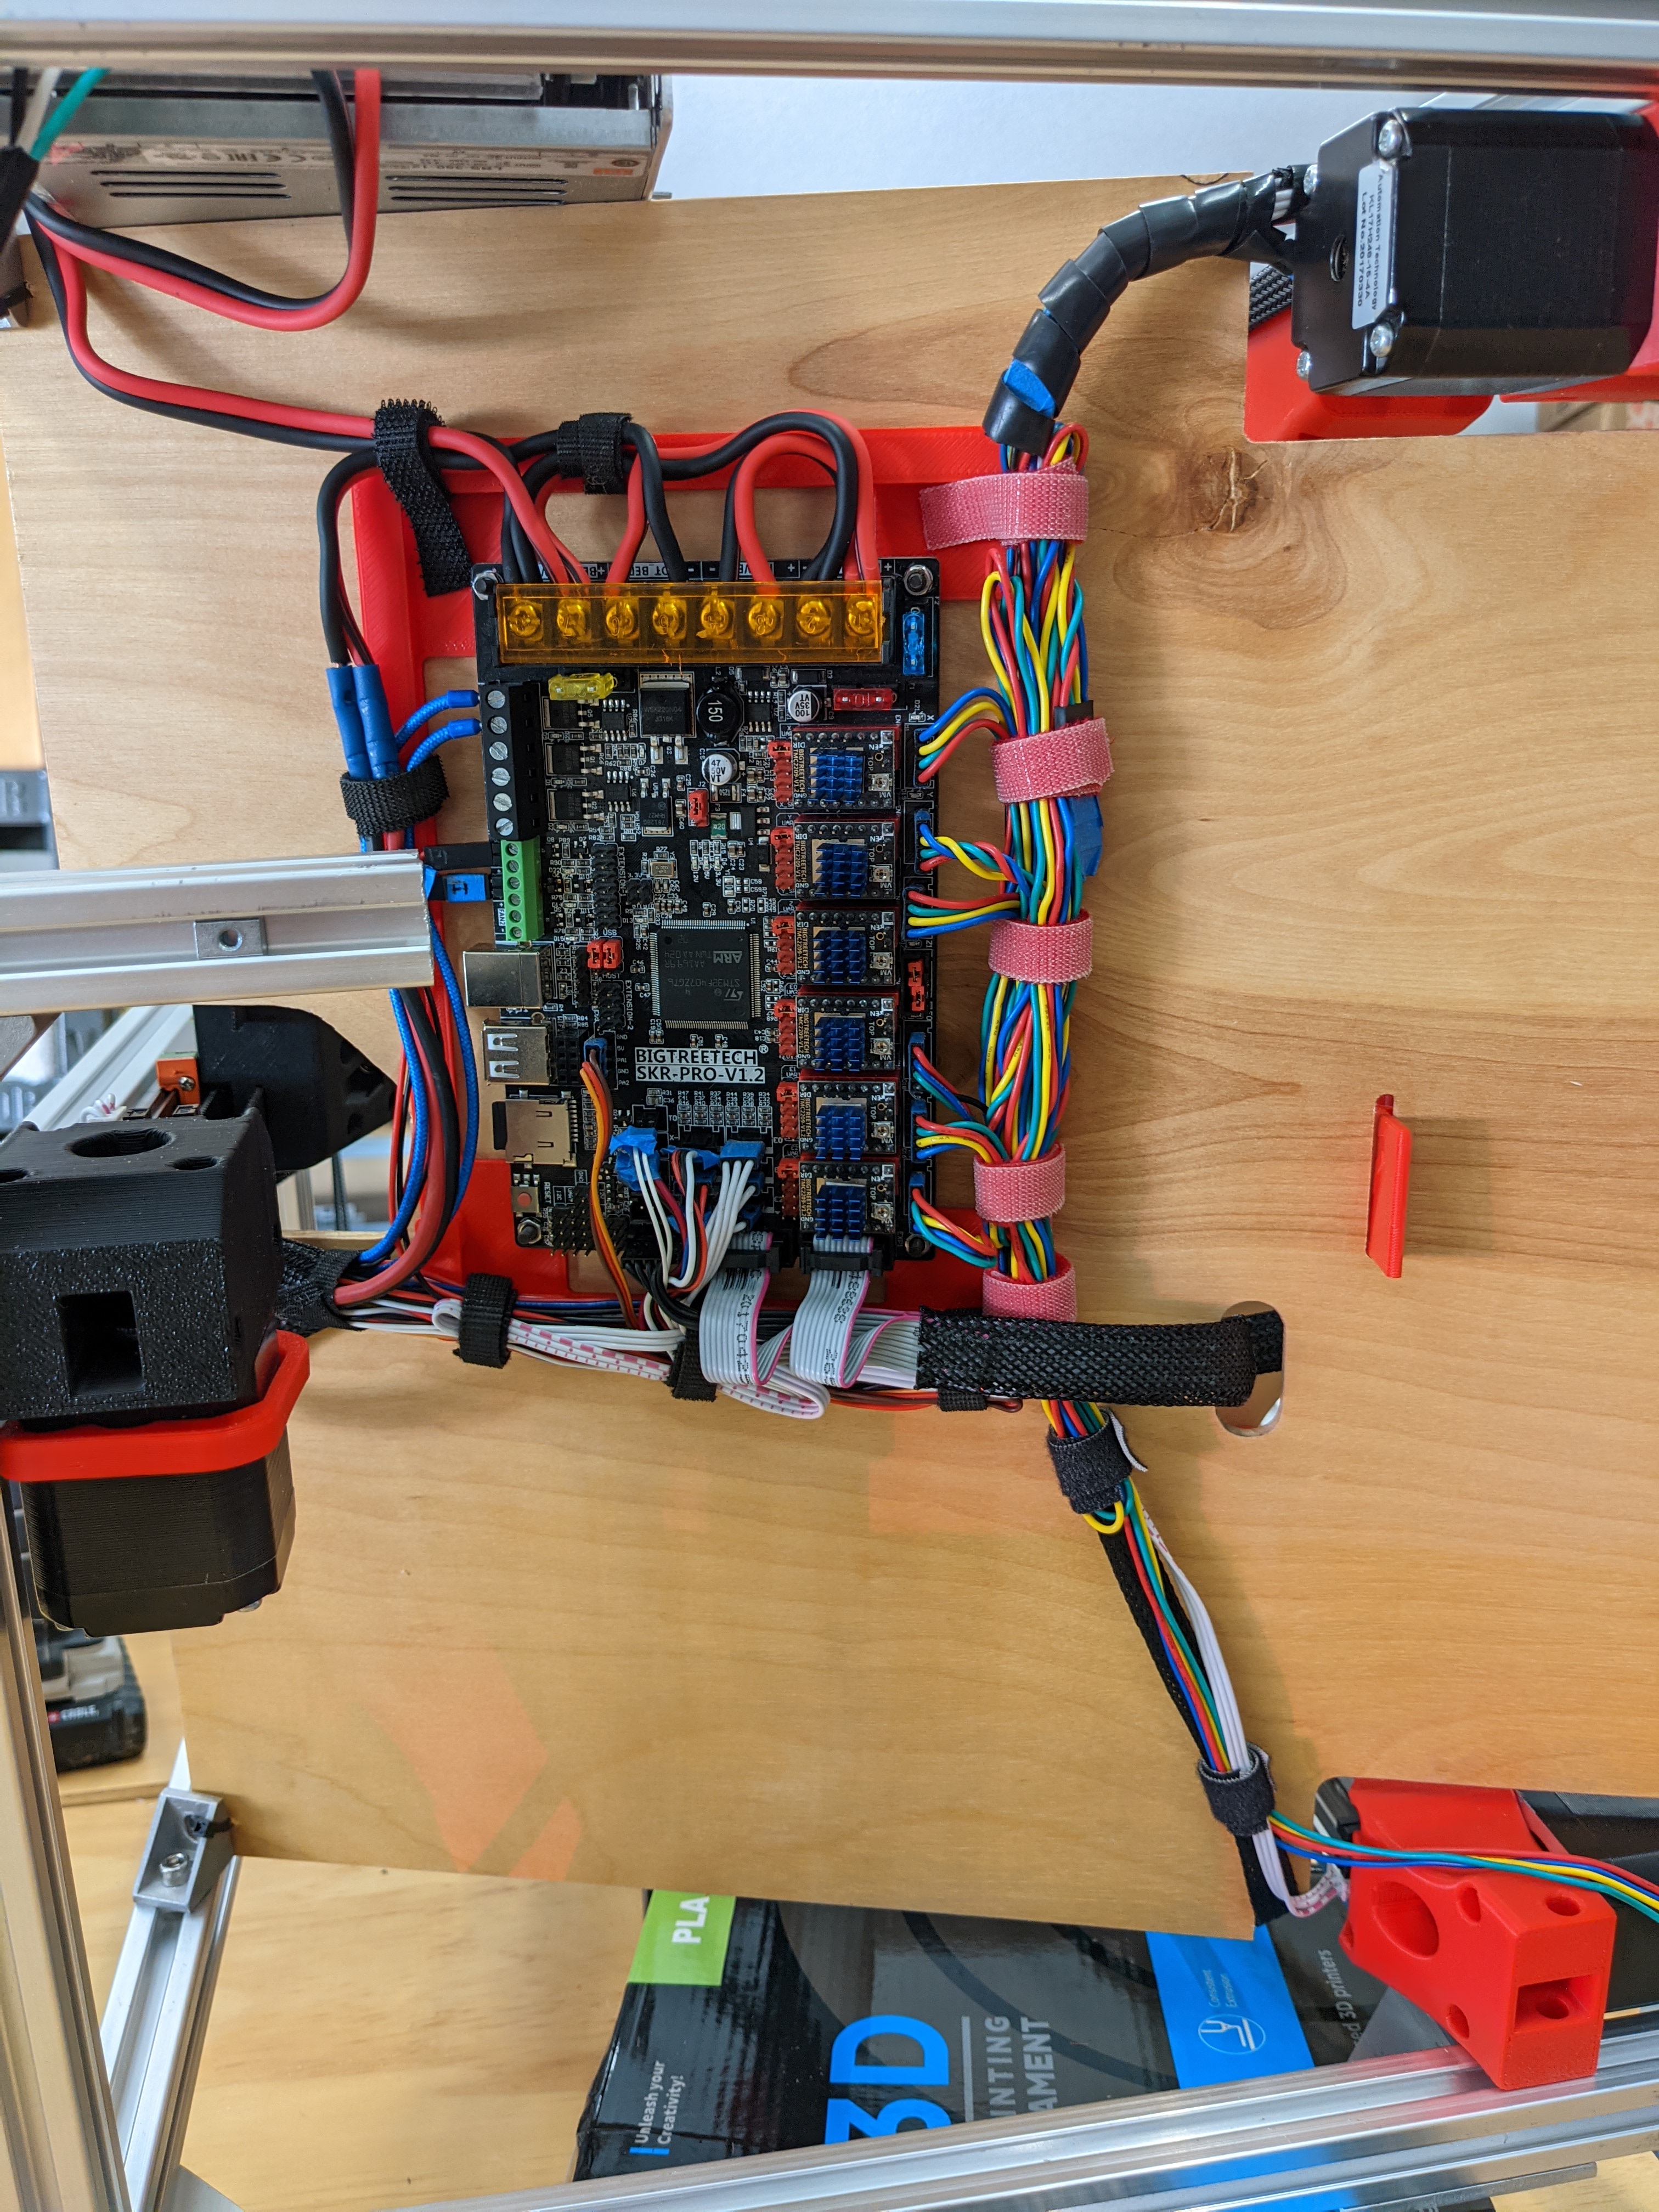
Well it doesn’t jave to have any more wire fasteners but those two front steppers still seem sloppy to me.
3 Likes
Looks like customs was reasonable with my V1 package this time, but my CF rail has been “out for delivery” for 6 days now. I’m a little concerned that it’s been lost somewhere. Sheesh. Maybe I’ll go ask at the post office if it’s being held there tomorrow.
I’ll probably have the rest of it here this seek. I ended up short a couple of POM wheels, should have added them to the V1 order. I opened up a pack that I got from Amazon, and they’re the wrong ones, much larger. I ordered them a while ago, so probably too late to return them. I’ll end up using them for something, I guess.
It’s not the extrusion prices that irk me so much as the cost of all tf the ancillaries to put it together. The T nuts and the corner braces add up to hideously expensive really fast… Unless I want to wait a couple of months for it to maybe arrive from China. I can easily double the cost of my build with that stuff.
Spray paint is an option. Just saying.
I was looking at the HDPE as well, but the 300mm build platform is a little limiting for choices, since I can’t use 12" wide panels. I think I’ll end up with the Melamine over MDF panels after all.
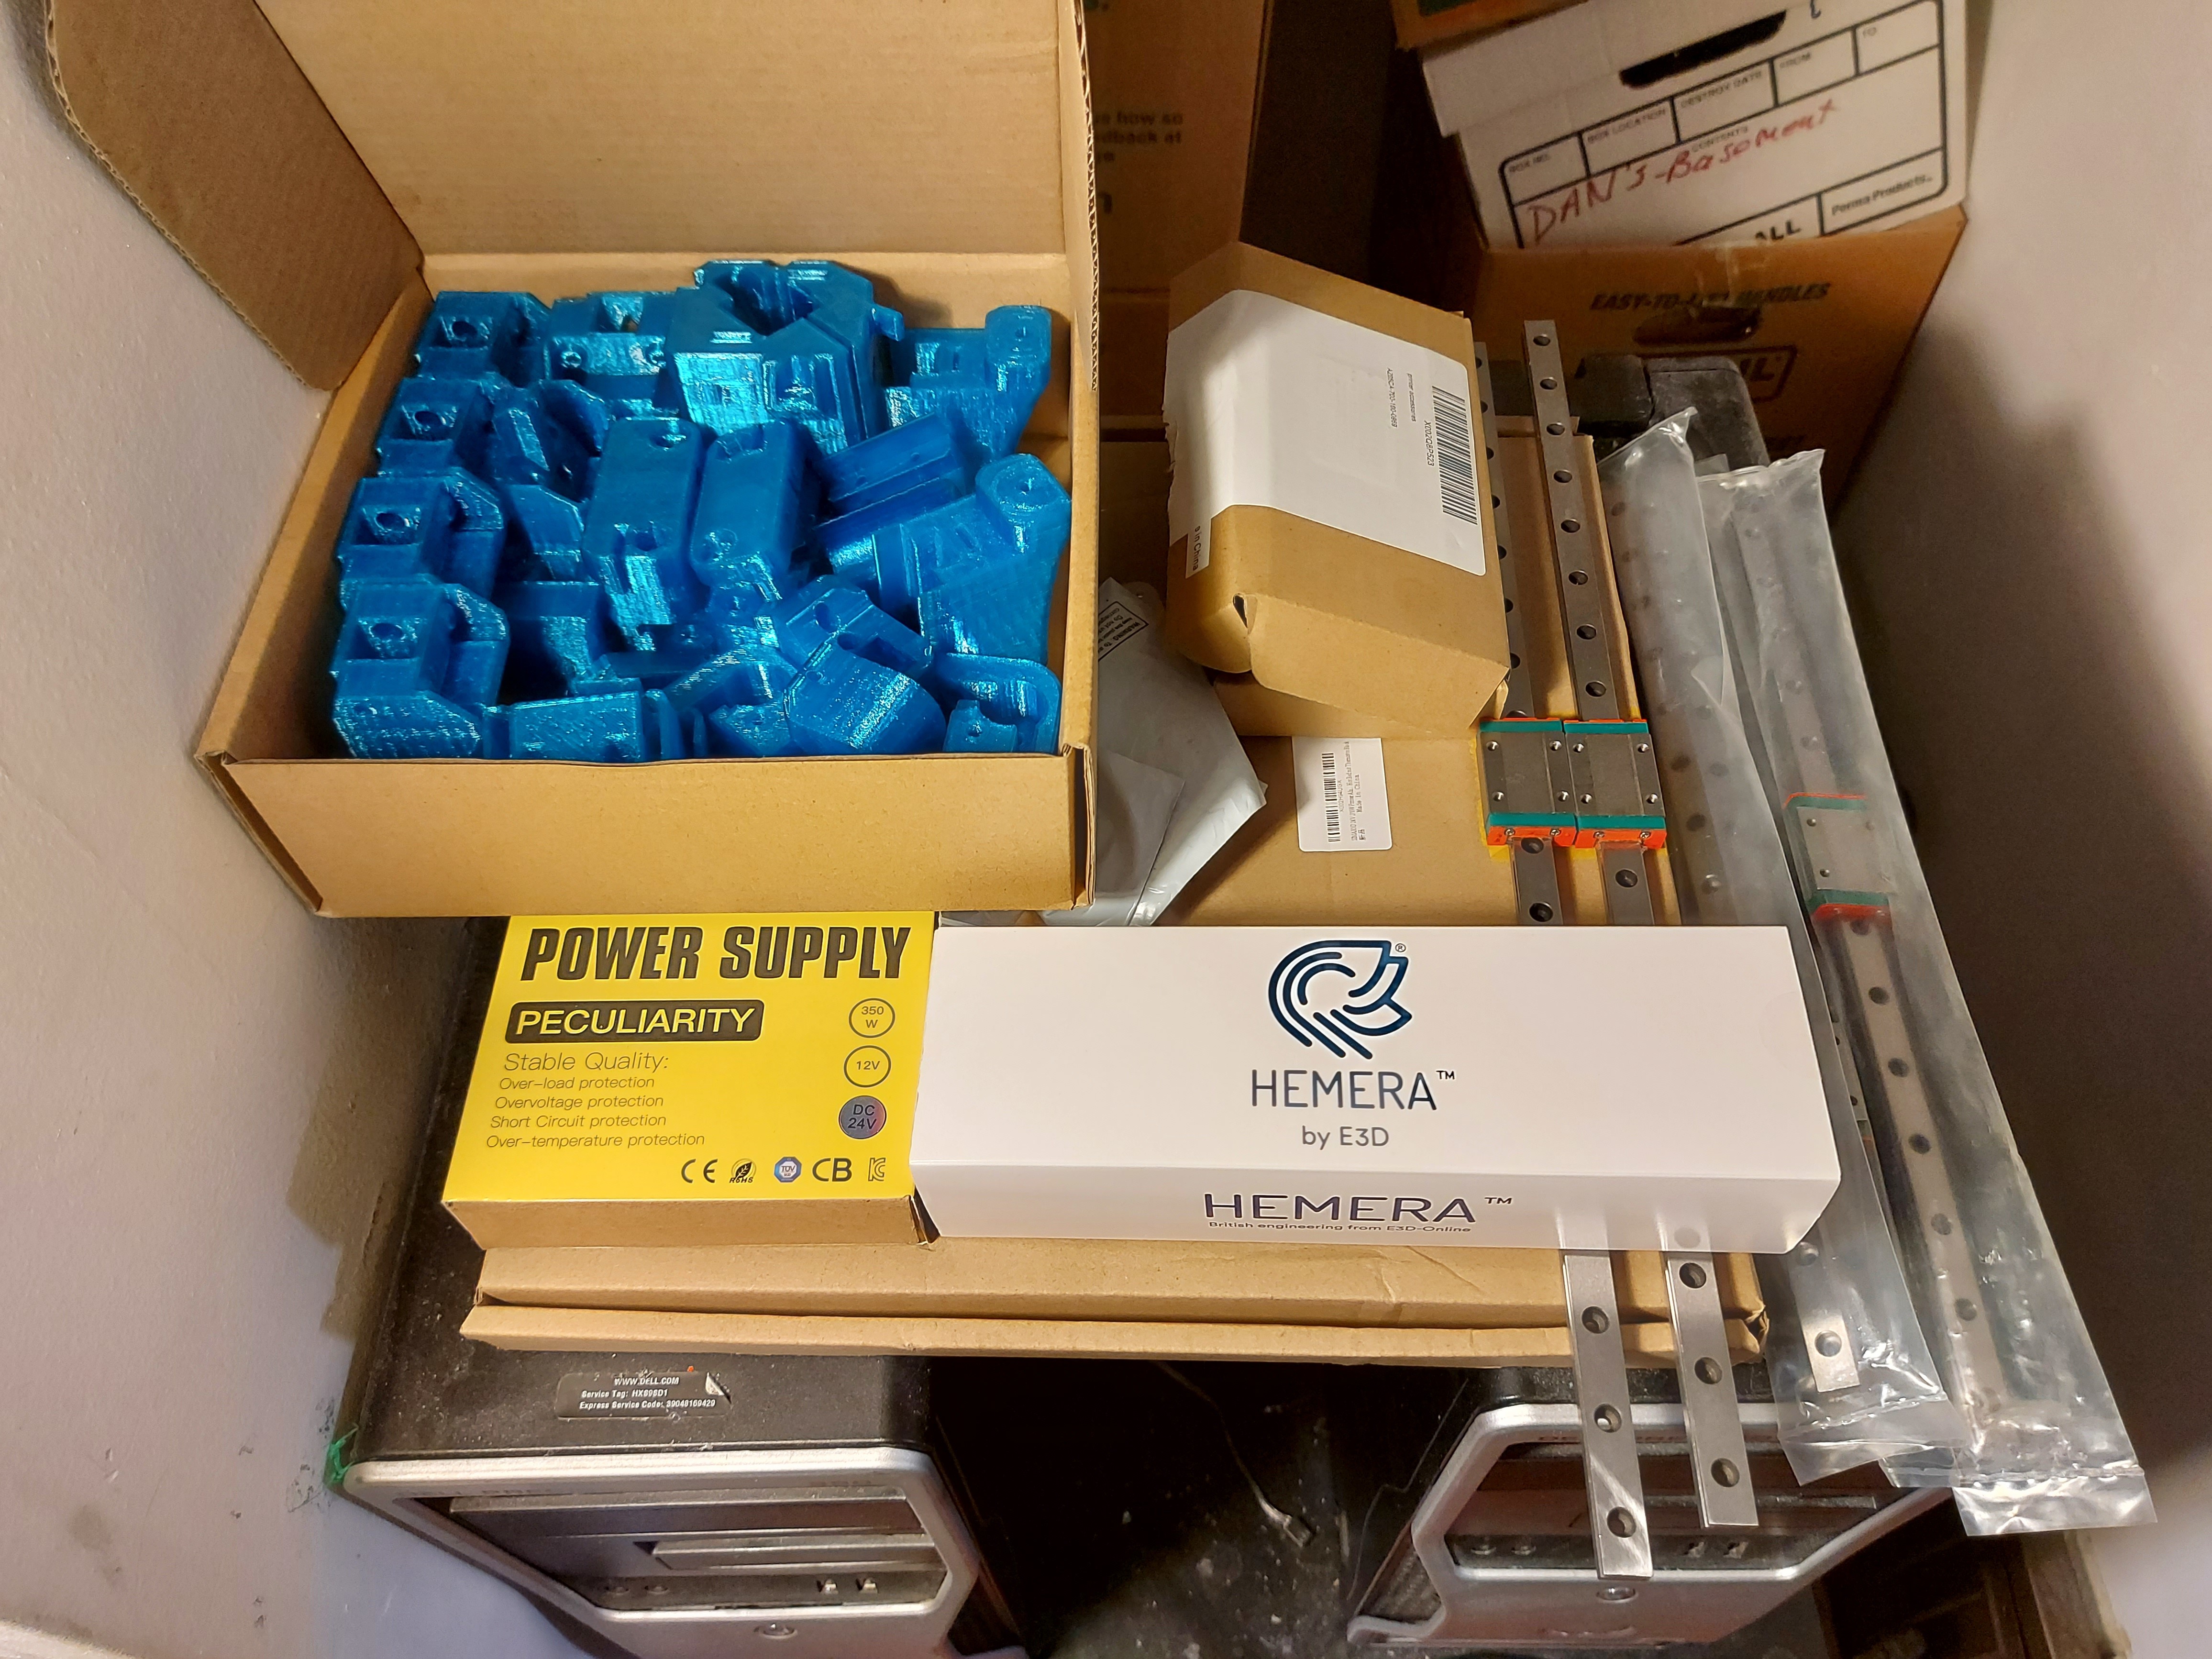
Nice surprise in the mail today, my Hemera kit showed up. This pic is the closet where I expect the printer to live. I have a pile of old PCs for it to stand on. Maybe I’ll make a shelf for it or something.
So I have the build platform here, power supply, most of the printed parts, BLTouch, Hemera, various odds and ends, and 5 MGN12H rails. Still to come is the CF rod, and V1 package including the SKR Pro, LCD, motors, belt, and pulleys.
Now it’s time to start working on the box, which means learning to use Fusion 360.
I have a few concepts in mind for a box on frame, with various possible frame materials. I’d like something dimensionally stable, so that probably means primed and painted for wood or MDF. Also in the running is HDPE and aluminum square tube or angle. Of these, I don’t think I can paint the HDPE. Extrusion is probably not in the running. I’ve pretty much gone through my budget on this one already. I might buy a little more, but going to try to use what I already have mostly.
I’ll need a new case for the TFT35, still, so that will be on the printer soon. I did consider that as the printer’s first project though. I’ll also need the Hemera mount, but Ryan is still tweaking that, so it’ll wait.
Considering colours to go with the transparent blue. Black is always good, goes with everything. White is kind of boring, but safe. I have that rattle can of pseudo Makita blue. Tempting. A high contrast colour like yellow would … probably hurt my eyes… needs more thought.
1 Like
More transparent blue?
Silver?
Lime green?
Actual white would look good. But it would get dirty.
1 Like
I have a few small parts to add to the model. I have the filament guide/tube holder, the spool holder, and the wire passthrough (gunna take pics of this shortly). SKR Holder, wire catcher thing.
So if you need something to print you can print my NSF spool holder parts, just not the big “S” shaped ones. You need the tubes and the pins.
I really hope to work on the box today, but I am sure you will want to modify it a bit. I might run to the plastic shop first, though. That will take a couple of hours. On the box I am a bit torn. I am not sure I should make the wedge shape thin or thicker and part of the structure. Keeping it the same thickness makes it easier…well problem solved I suppose.
I was thinking of making the whole thing 3/8" plastic, but 1/2" might be more fun. For 1/2" we could use screws into the material itself, 3/8" we would need to use a screw and nut for all the pieces and that might look tacky.
1 Like
I want to make my box from mdf because I’m kinda cheap that way, but I want to cut windows in the sides and door for light, maybe the top, too. So I’ll have to add some plexiglass (my friend buys a couple sheets at a time).
Will the thickness be parametric as well? I’m not sure if I’ll be better to make the windows just big enough or the same size as the panels and bond together (i.e. 3/8 mdf 1/8 plexi)? I think I’d like the second option, maybe plexi on the outside so the cutouts don’t gather desert dust.
2 Likes
If you add plexy to the outside you can use it to cover the screws and nuts. That is actually a fun sounding idea. I was just about to head to the plastic shop…need to do some sketching real quick. If you have a rough idea, post it.
I plan on mounting my spool in the side so that will be a large hole.
Parametric… I’m trying. Fusion assembly constraints are still not clear to me.
I wish I had an actual idea. It’ll probably be similar to my corexy from anet parts project, except the top won’t need a hinge.
Basic idea is just some holes in the mdf and plexi on the outside for sheathing. Maybe some corner trim pieces that could hide screws as you suggest and the seams at the same time. .
I’m also thinking of voronoi cutouts on the sides and top instead, and an actual window on the front door only.
I’ve got some work to finish up on the car, though, and I’m not buying anything for this until you are done, so I haven’t done anything for it yet. At all. Nothing. Except daydream.
2 Likes
I was thinking a plywood (or 1/2" HDPE) skeleton frame, covering mostly where the extrusion would be and open areas in between. Epoxy the nuts in place, then pocket out holes for them in the melamine/MDF panels. Corner braces for the edges, and hopefully a nice overall surface finish.
My printer gets a lot of scrap plastic in the bottom, but generally stays pretty clean. My current one, the biggest problem is some PTFE lubricant that I was using for the screws, which leaves a white powder residue on stuff.
Thinking that I have to have some fun with the laser with this one too.
2 Likes
Well they sold me a giant stack of 3/8 hdpe for half price…So I took it.
Barry was right though, foamed PVC is not a good idea. After looking at all of it plastic they had it is just to expensive as compared to wood.
I will probably build one hdpe and the rest baltic birch or mdf.
2 Likes
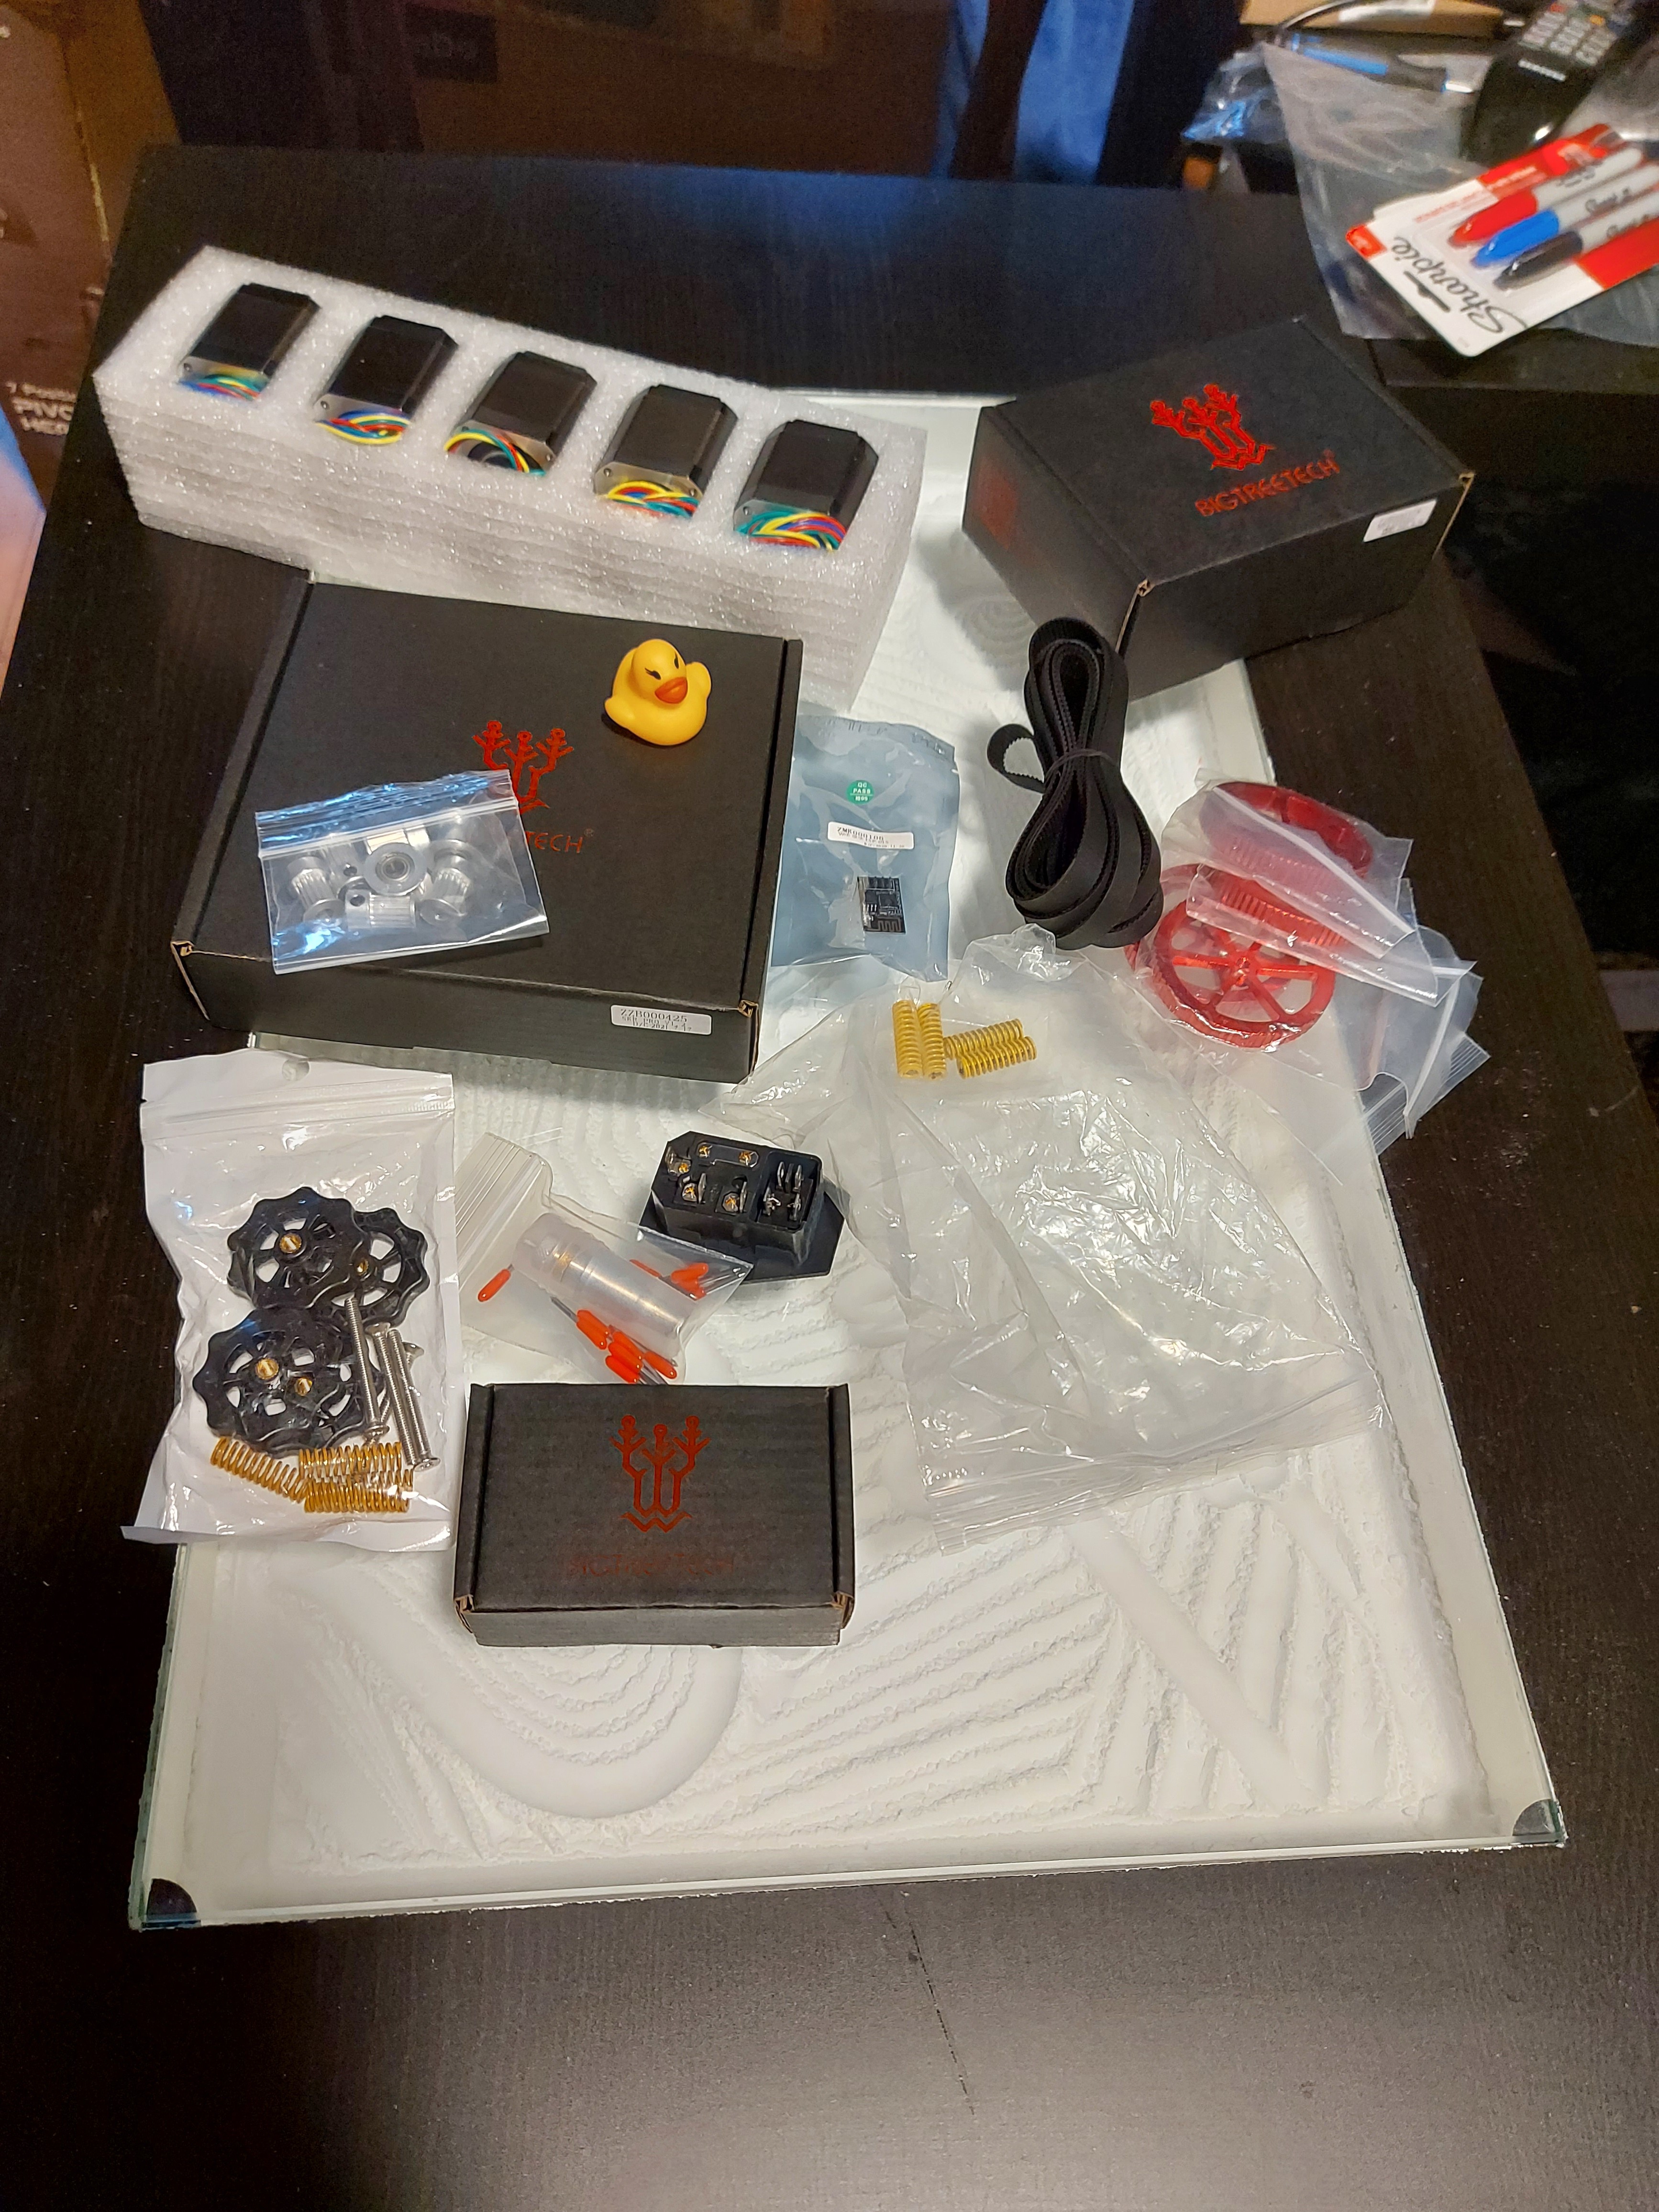
V1 shop goodies! The rubber ducky in the SKR Pro box made me laugh.
Now if the CF rail would finally go from “out for delivery” to “Delivered” I’d be happy.
3 Likes
I just updated the model to be adjustable. I am adding the other goodies right now. So I should have a few more prints for you.
That other stuff is just some random stuff they have thrown in my shipments. If you can’t use them…well neither can I, 
3 Likes
I did drop in some of the bed plate springs I am using small grey ones, they aren’t in that picture so make sure you don’t toss them.
They rolled behind a BTT box, I made sure to keep them.
I’ll try a fresh copy of the model, and put my rail lengths in. 400mm for the Y rails, and 350mm for the Z. The build plate is 320x320mm (300x300mm usable) and the CF rod is 500mm (I think I remember you saying ~150mm + usable X so I need about 450?) I might put a nozzle wiper on the side, so I might leave the extra. Maybe I’ll have room for a nozzle wiper. Between the leftover from the LR and the 2m I bought here I should have plenty of belt.
Still to print (I think):
- Hemera tool mount (+ part fan)
- BLTouch mount
- Wire management stuff
- Probably case feet
- SKR Pro mount
- TFT35 E3 case (still working on that as a 2.5D project, too. I think red oak would be perfect.)
Seeing as how this printer is supposed to live in a closet with an overhead hangar bar, spool holders should not be necessary, since I can just pop them onto the bar.
Will need to model/draft:
- left and right side frame panels
- back panel
- build plate panel
- bottom wedge
Kinda bummed about needing wiring harness extensions. I wonder if I’ll also need to extend them for the hotend, BLTouch and X/Y endstops because of extra size and height.
I have 2 ideas there.
- Make a small circuit board to sit near the top of the back with connectors for the alpha/beta motors, X/Y endstops, BLTouch and hotend, then do an extension harness to the main board
- Make an alpha and beta harness more direct to the motor mounts. (I need to split them at some.point anyway)
I feel like option 2 will result in the “Screw it” result and leaving things messy, but functional. It will probably come down to my ability to mill a PCB for the extension on time. The 3018 I bought for that task was a POS that made exactly one PCB ever, then broke. I haven’t tried it on the Primo yet.
Think of it this way, How much bigger do you need it? I have a 200 mm range in X (with room to spare) So if you have 300 usable you need +100X. Same for each axis.
The bed though…you will need to figure out your own holes I would say line up with my front edge, centered.
Maybe there is a different place for the board. You are going considerably bigger, I can only assume you will need a lot of extensions. I ended up only extending an endstop and one stepper. I cut one stepper shorter and used that as my extension. If you put the board on the back wall you can not extend all the extruder stuff and maybe get the steppers straight to it…hard to say.
I will get some basics of these but depending on your joints and thickness it could need editing.
I have some confidence in my ability to adapt. I did consider relocating the main board, the trick then is the LCD. it might work out if I use the left side panel, and do something clever with a front panel. I’ll put some thought in it before I start cutting.
Yeah, bigger… 1/2 again, in 3 dimensions… 3 3/8 times the build volume… Freakin’ H00ge. That was a decision I clearly did not entirely think through.
I’d like to verify and check a few things in regards the SKR Pro.
- TMC 2209 drivers: bend or clip the sensorless homing pin?
- Drivers go X to Alpha, Y to Beta, Z to Z1, E0 to extruder, E1 to Z2, E2 to Z3?
- Endstops go… taking a flier… X, Y and Z are obvious. E0 to BLTouch, E1 to Z2, E2 to Z3?
- Wifi module? Cool… use with universal Gcode sender? Going to assume it’s not going to be like Duet Web control. (I bought one of those modules that plugs in instead of the TFT. Might experiment with firmware… but only if I’m sure I can restore it.)
- Fan0/fan1, which is hotend cooling fan and which is part fan?
- Is board/TFT already flashed for operation? Gotta assume that current firmware repositories are for MP3DPv2. I suppose that if I’m modifying/compiling firmware, many of these questions would be “I dunno, what did you set up?”
- Jumper wires with TMC2209 drivers are for?
Well, that’s what I’ve got when I look at the SKR, lol.
The SKR mount, Hemera mount, and wire guide don’t appear to be in the model, using the same link as I have been. Edit: Oops. I see where it is now. Was looking at the old model still. 
Edit: a pic of the board, just because… with the bed springs hidden on the earlier photo.
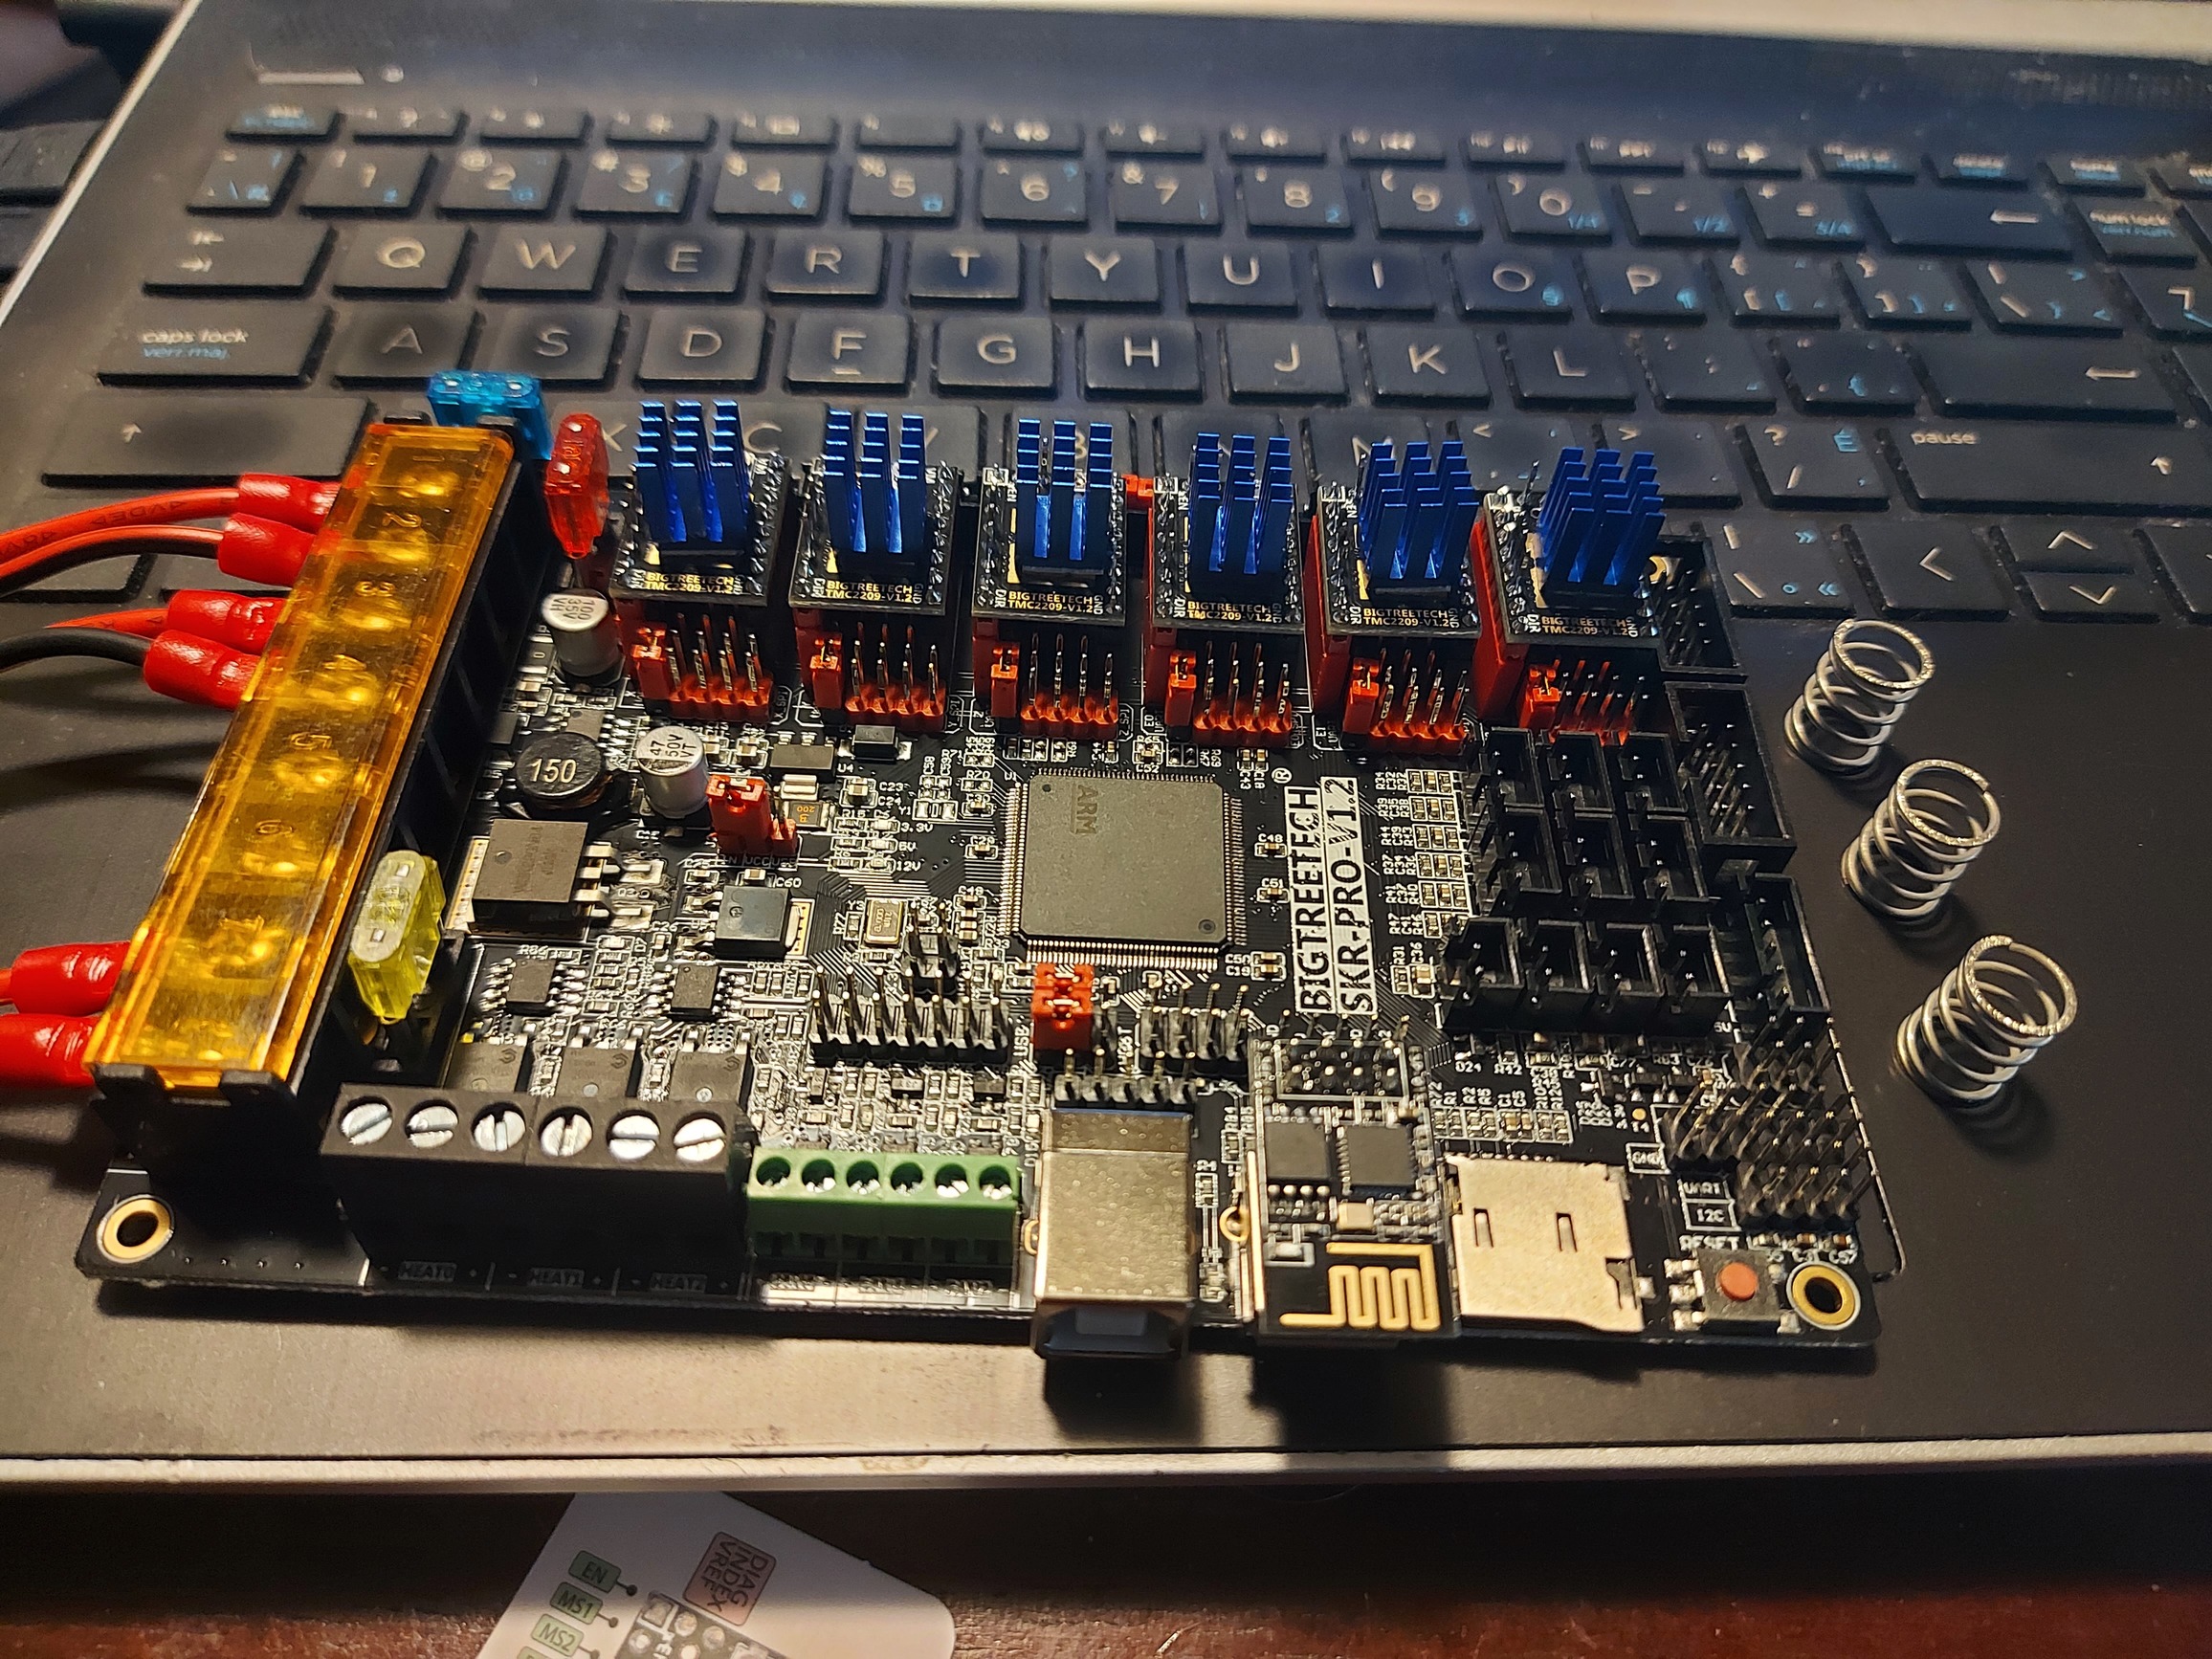
1 Like
Well answering my own questions…
7 is for 4. Jumper wires to program the ESP8266. My interface thingy is different from the one they TeachingTech uses, rewatching video to try this…
Edit: more answers.
Yes the board/tft is flashed. I connected opto endstops to see which triggers what with M119
I have the wifi on my network, looks otherwise correct, 250000 bps, but no response to gcode, so can’t check endstops on wifi, but TFT seems to work fine.
Didn’t ask before, where BLTouch connects. I think I’ve seen this somewhere before, don’t recall the details.
Yeah, new toy. It’s 2:30 AM, and as cool as this is, need to sleep.
1 Like
I think it is supposed to be this project:
Is that what you flashed?
It also requires the serial port for wifi to be enabled in the firmware. 6, IIRC.
Fan 0 is the part fan. Fan 1 is the hot end. There are firmware settings for making fan1 turn on only when the extruder is over 50C. That is so nice.
3 Likes
- yup bend or clip. I bend…just in case.
2)yup. If you look at my picture in the other thread you can see the direction they are facing when plugged in. Two are flipped if I remeber right.
3)BL touch black and white signal and negative to endstop port (I’ll double check), the other three go to the bltouch pins
4)Wait of that, lots of stuff to do before introducing an unknown.
5)Jeffe got that one.
6)yes
7)not needed
1 Like