I bought a gorgeous piece of walnut, and figured that I’d get started on those Christmas gifts… but first a test.
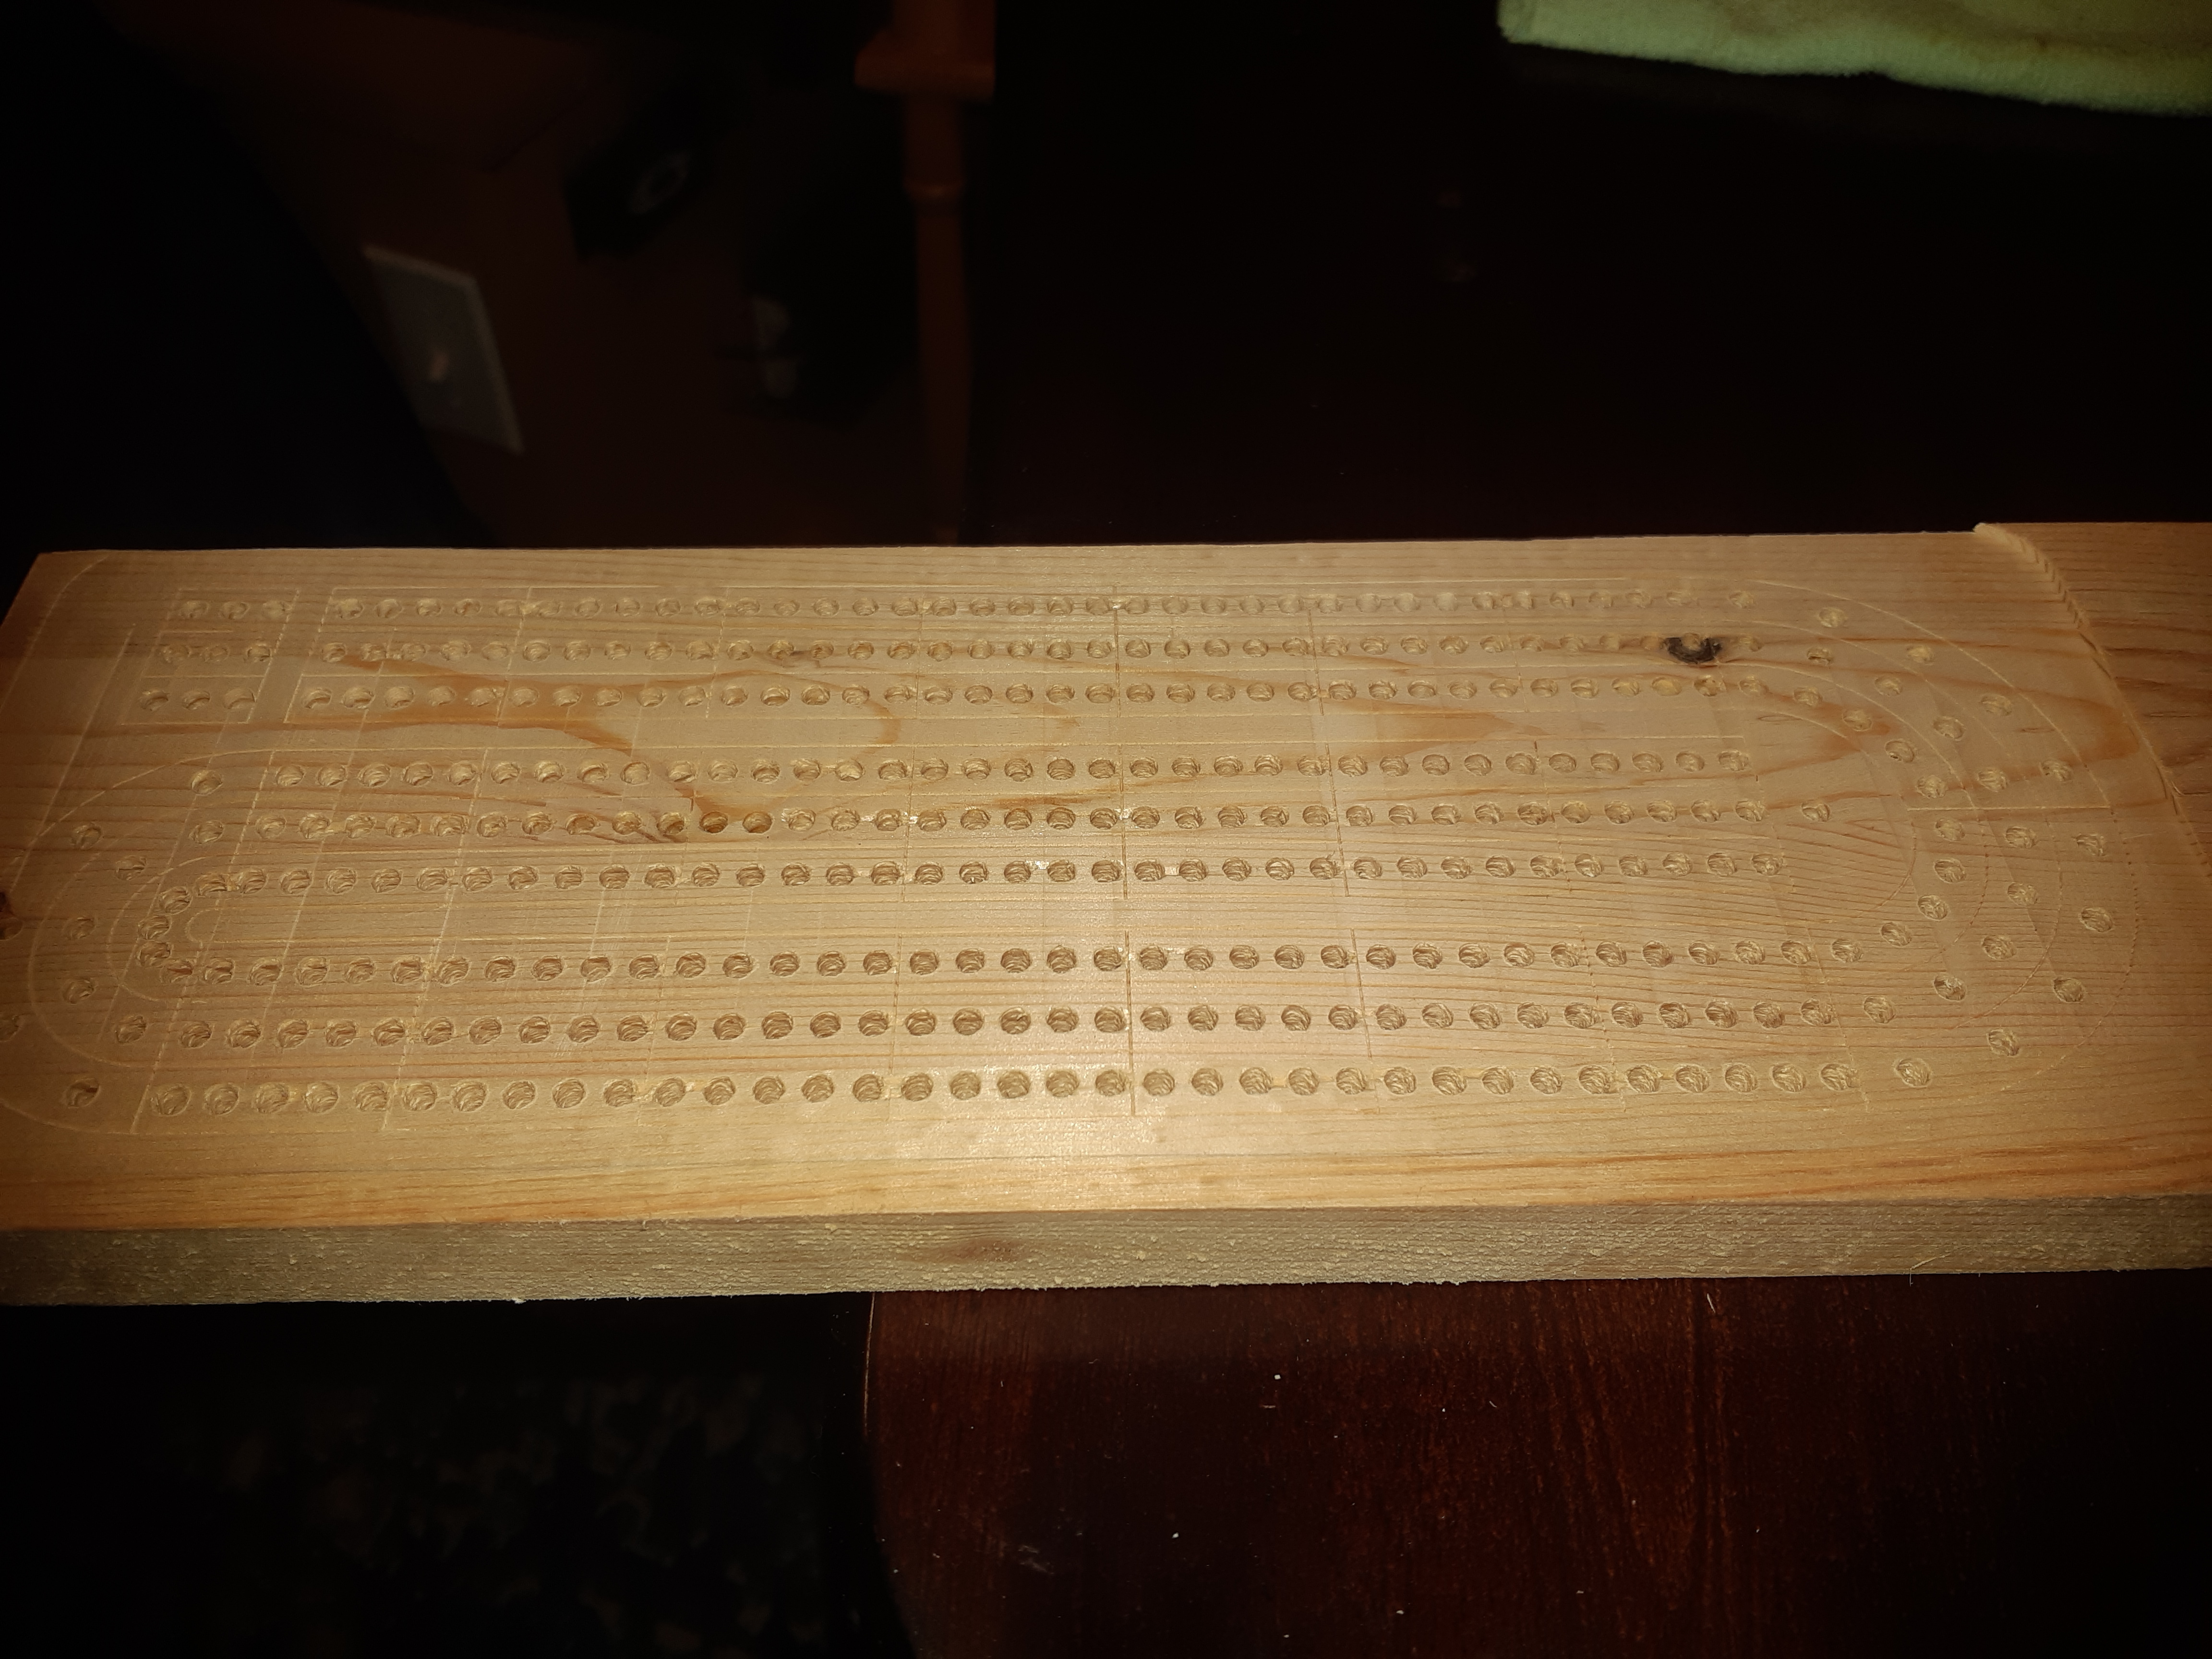
Pass 1 is a big pocket with my 1" surfacing bit. The walnut is a little rough, so it needs a shave.
Pass 2 is the outline of the cribbage game with an engraving bit.
Pass 3 is 170 drills, 10.5mm deep. Wow, does that ever take a long time. Since my test piece is a pine 1X6, I ran it at 200% speed, and it was still hours.
I tried using a 1/8" drill bit for drilling, but of course the CAM thinks it’s an endmill. I’m going to see if I can reasonably define a drill bit, instead of many passes per hole, do each in one shot. I can turn the router down to a reasonable speed for the bit, I should be able to shave a couple hours off the process.
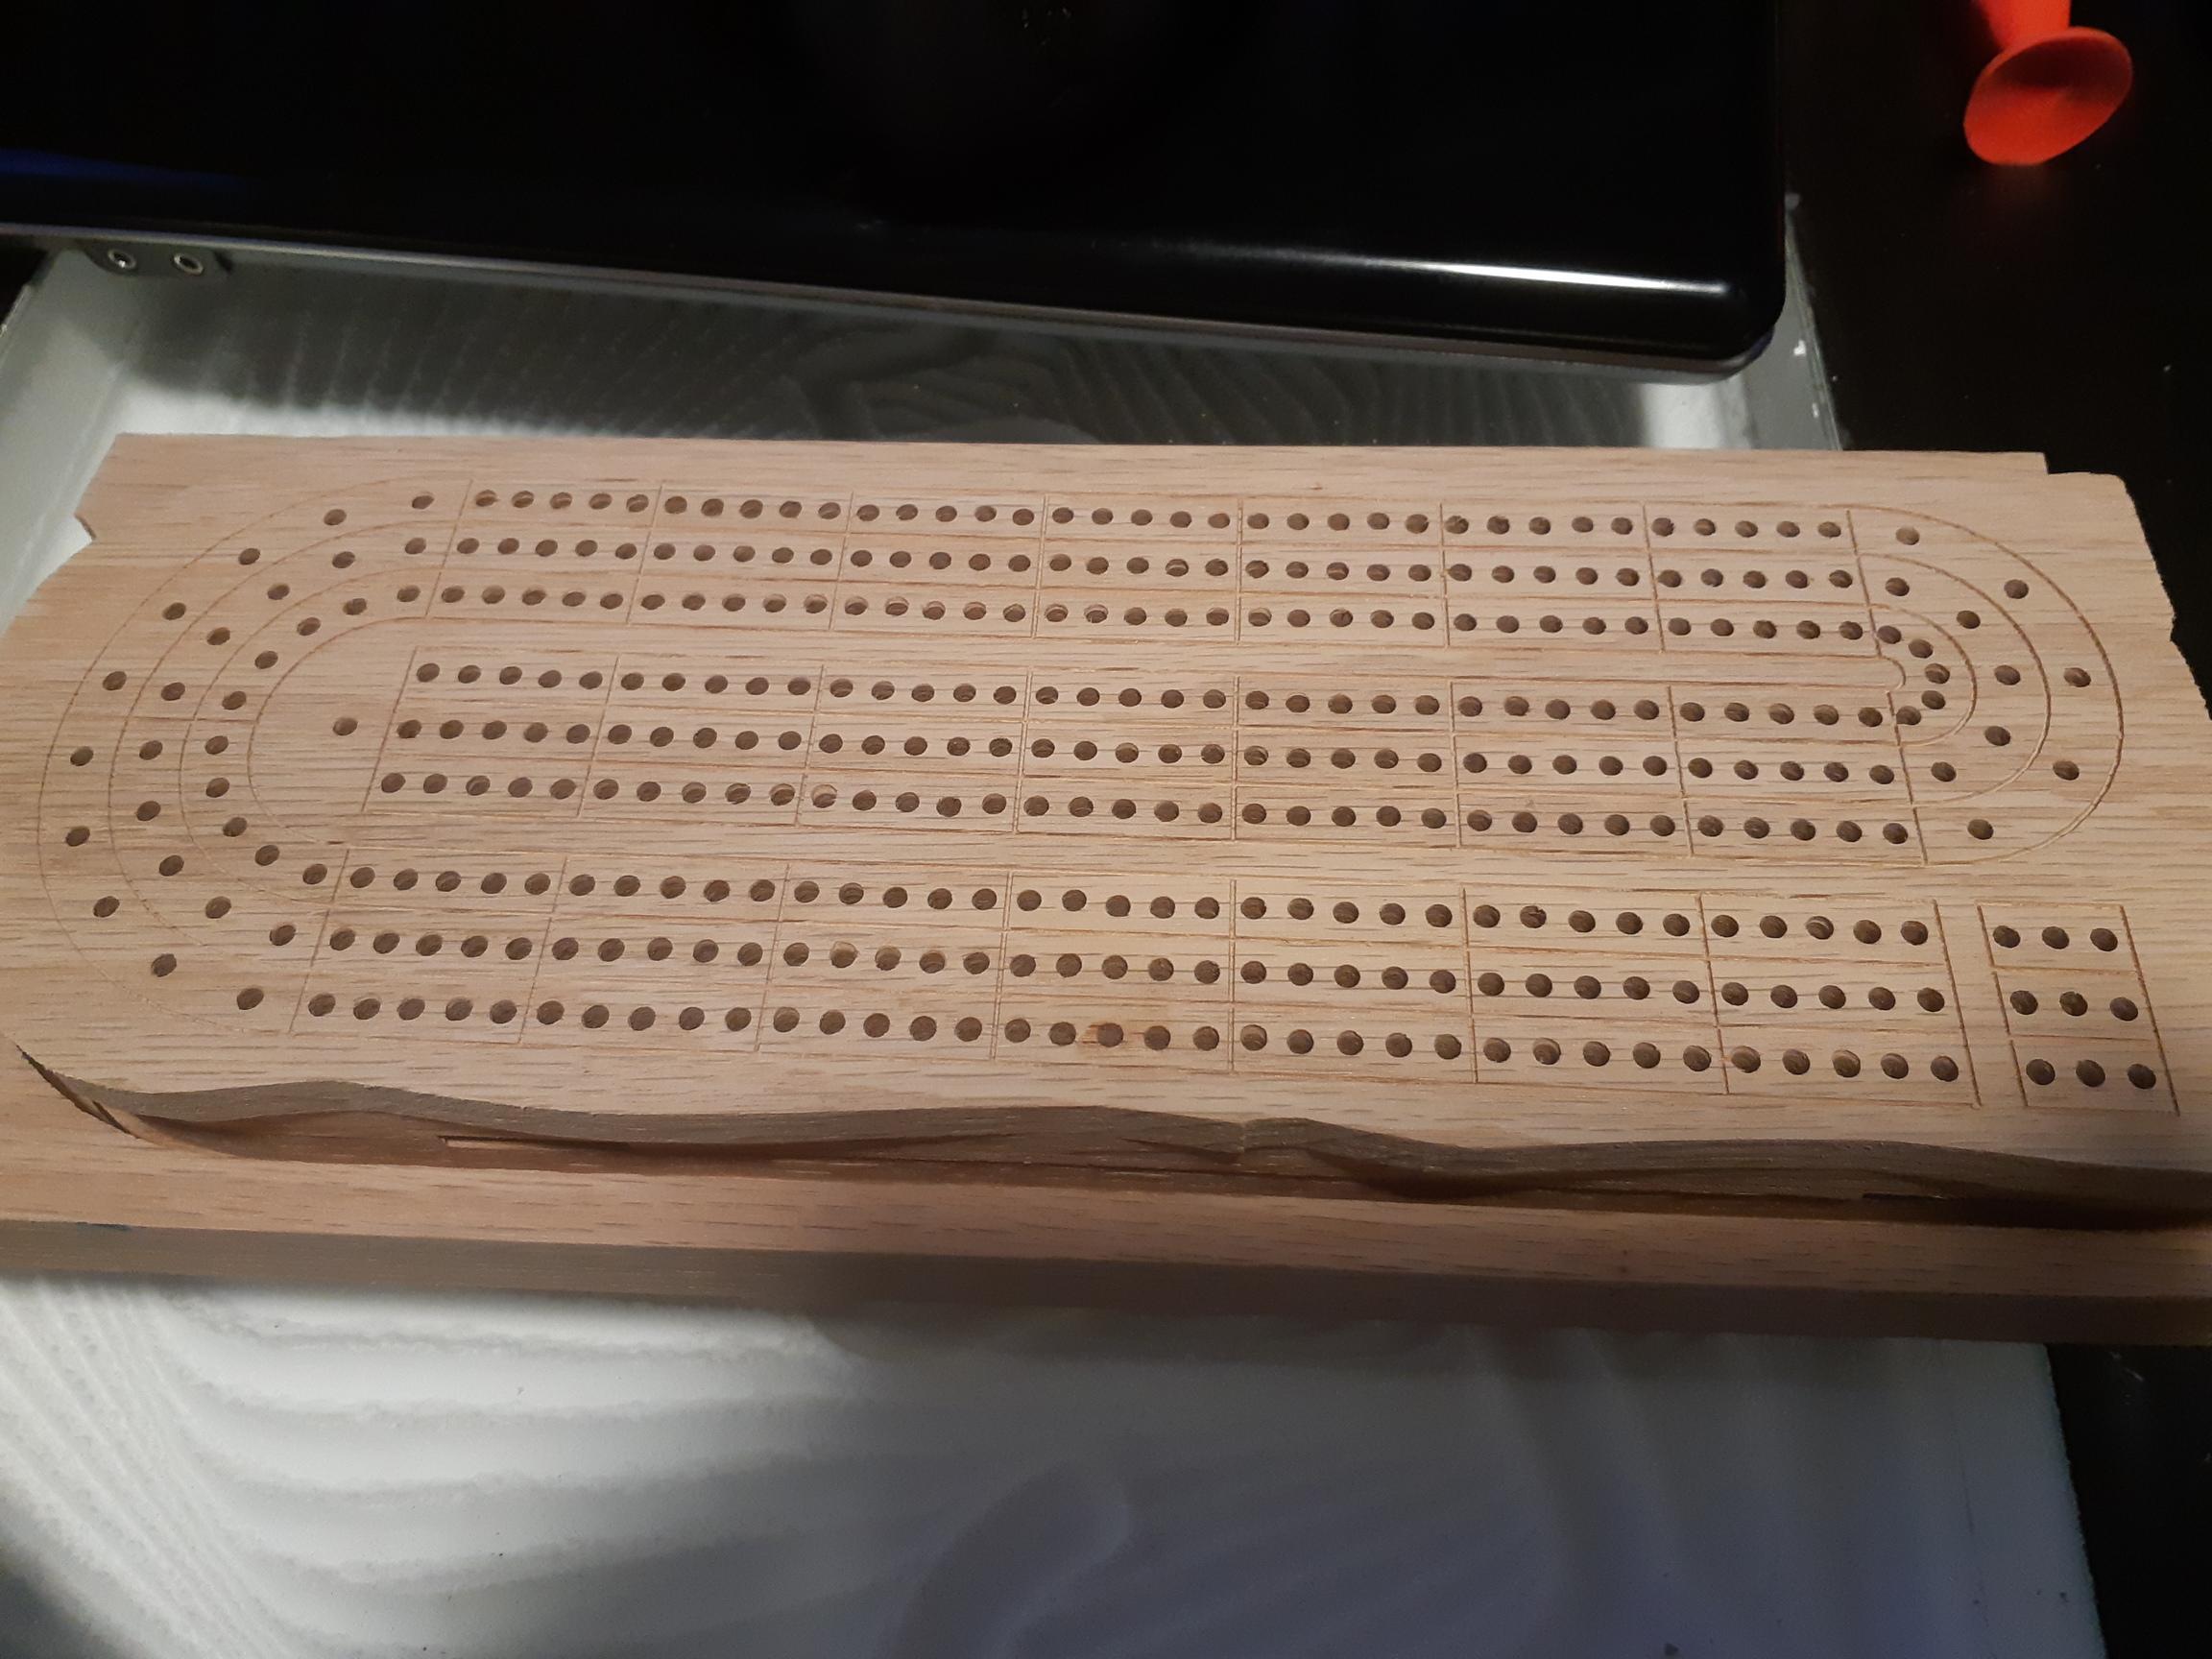
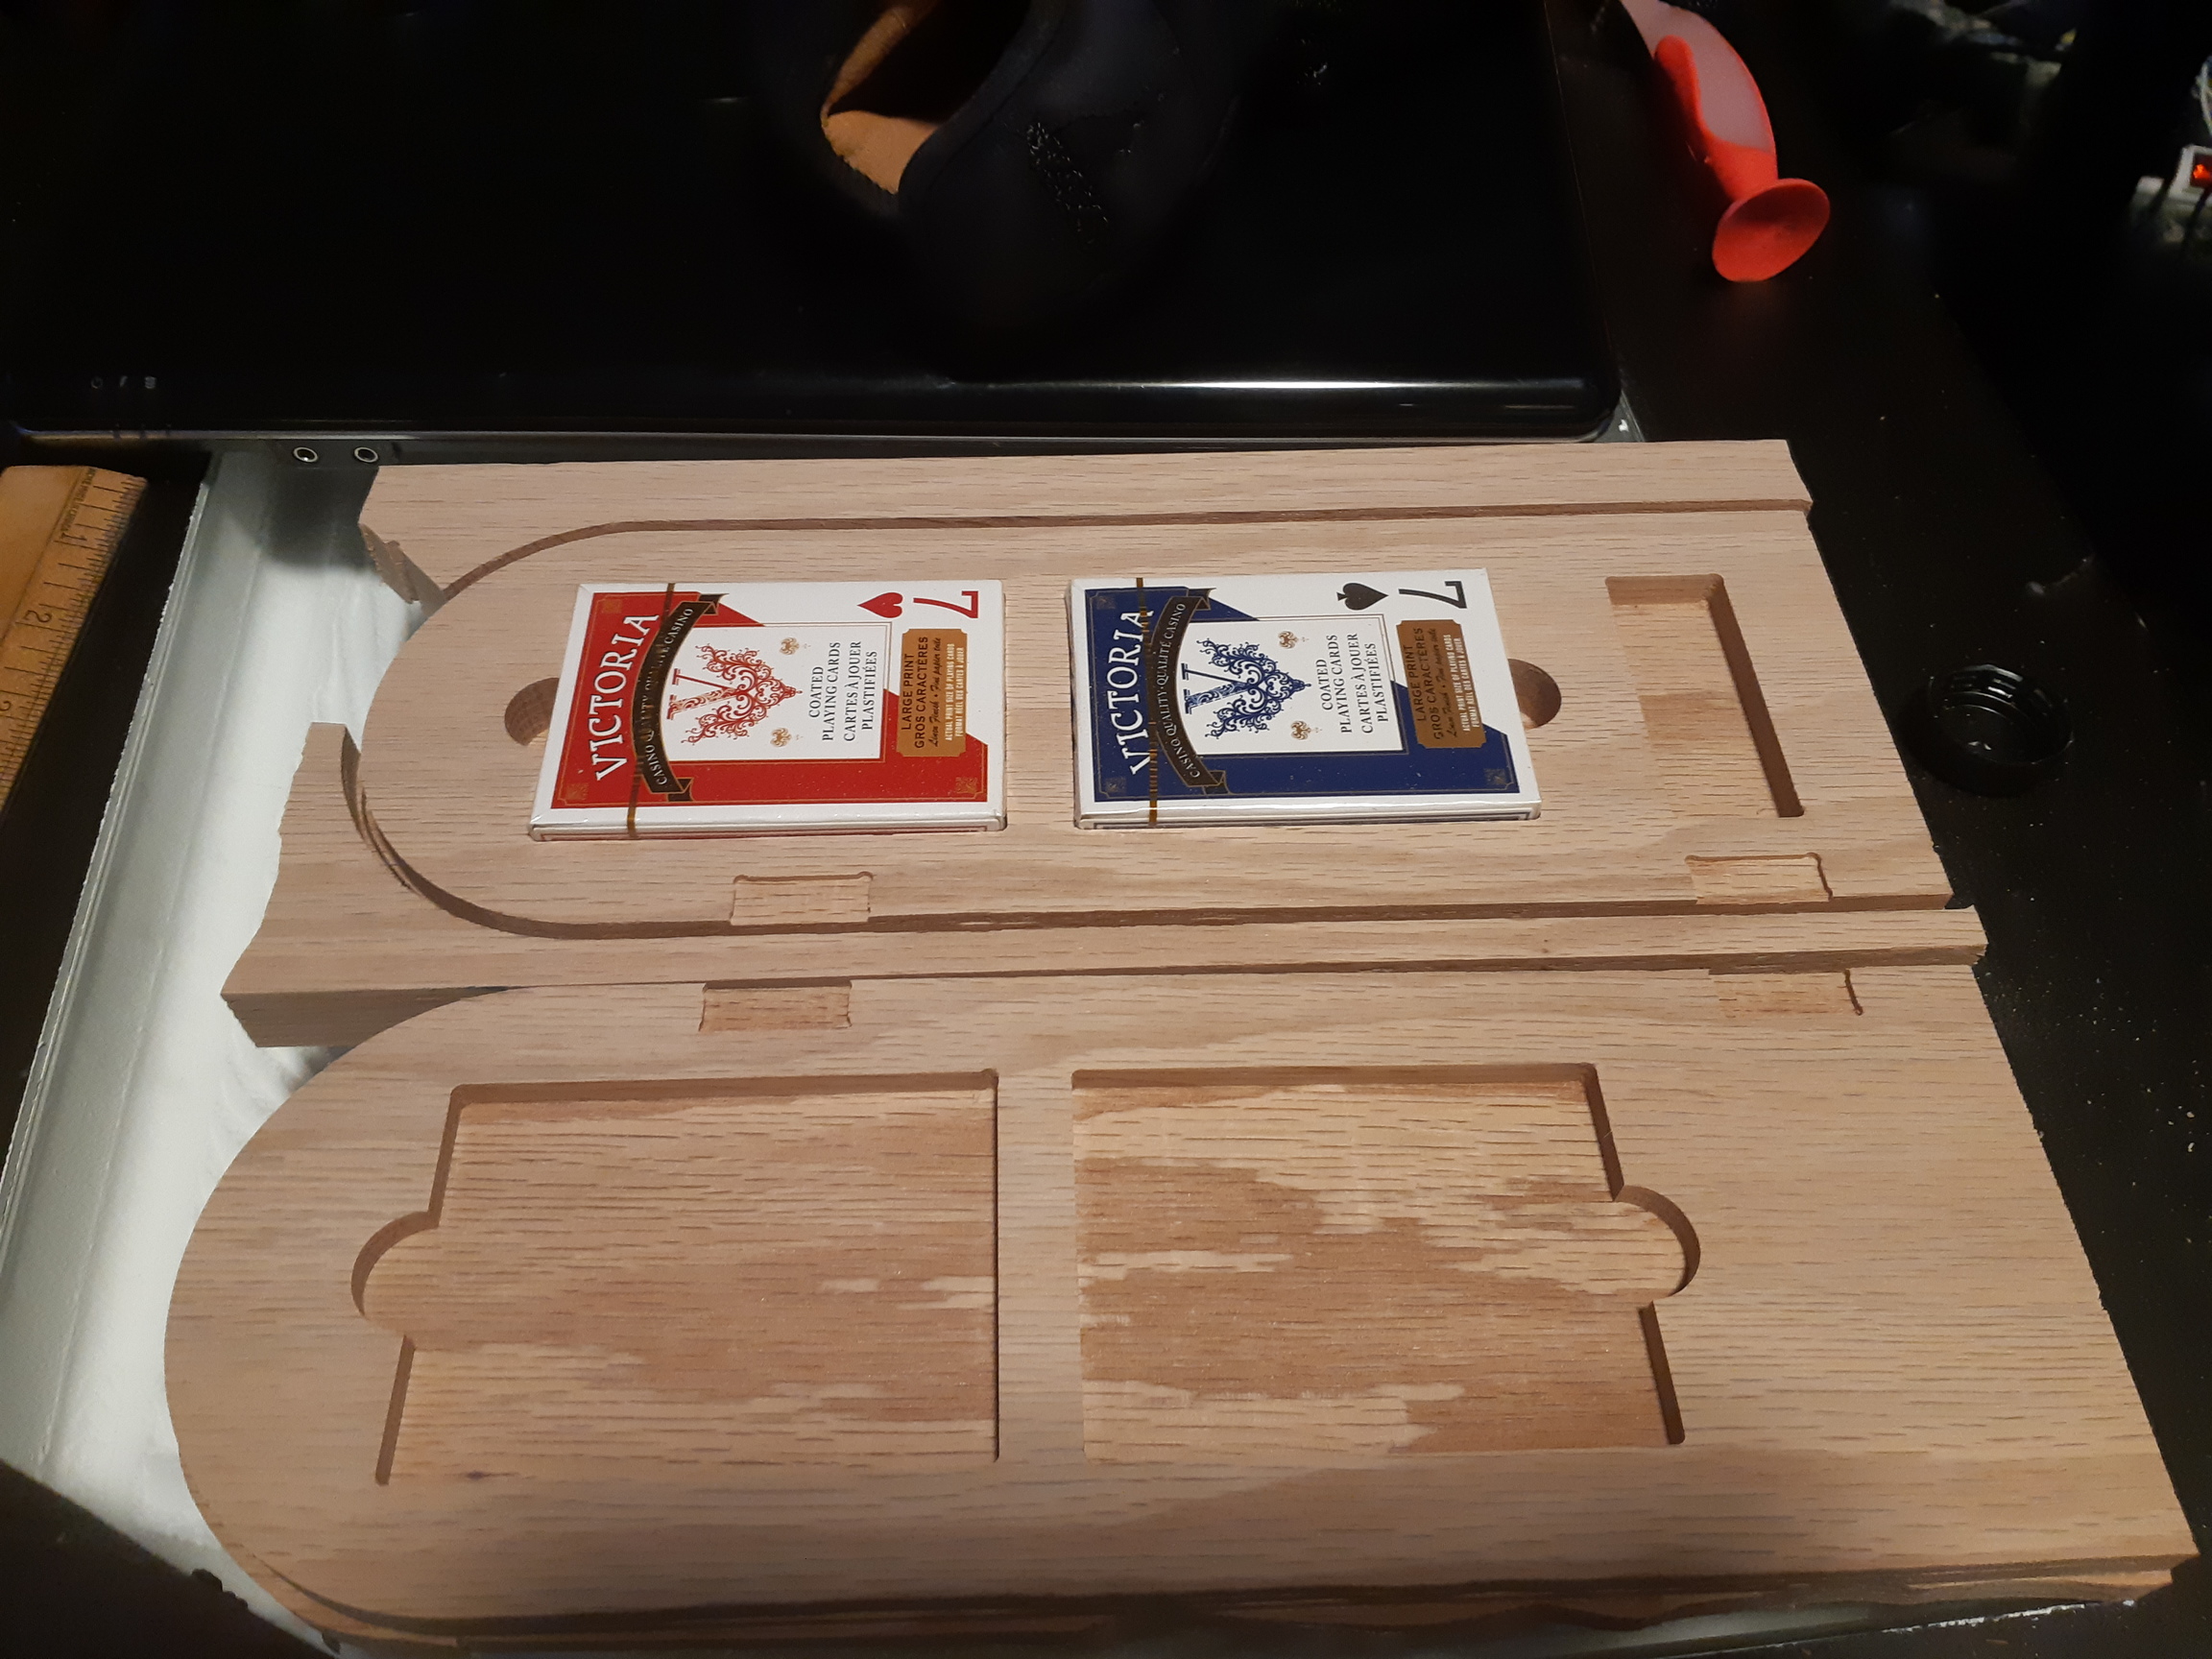
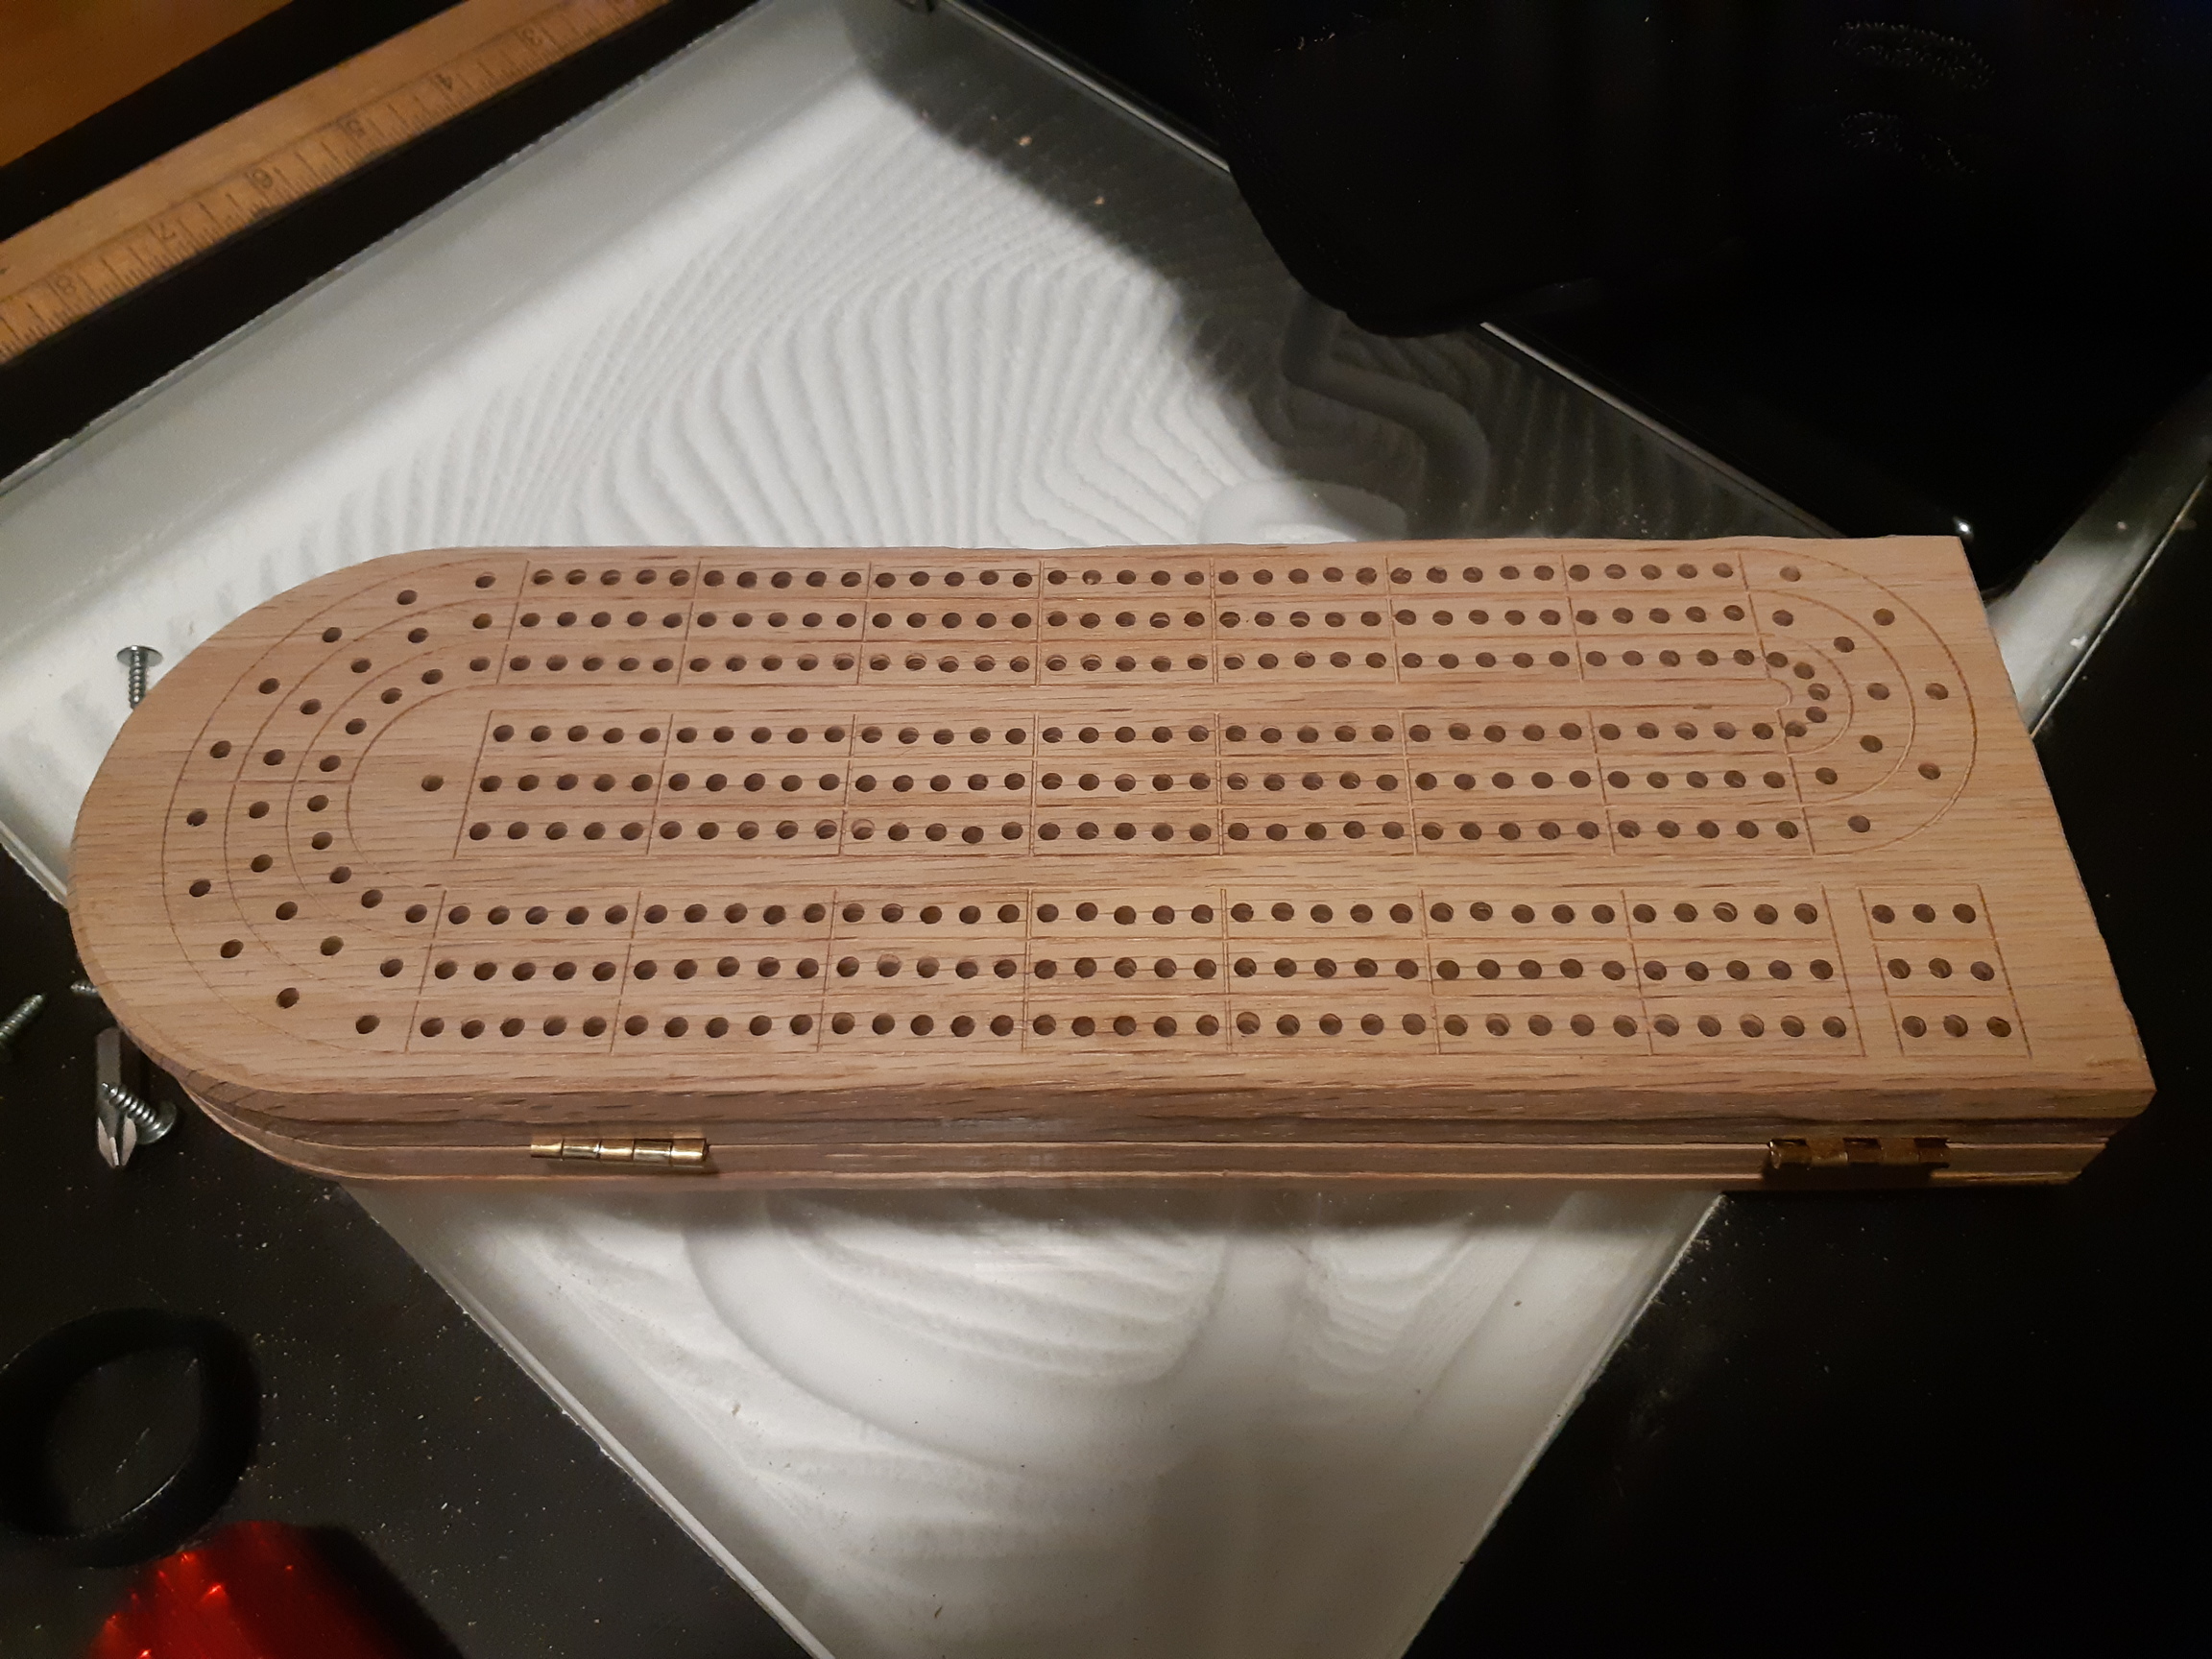
I have a file to cut 2 pieces from the back side, this is the front. The cut from the rear will cut the board out, leaving room to carve this into the front. It will make a 2 piece board, hinged on one end, and hold 2 decks of cards and pegs for the game. A catch will keep it closed.
I was thinking of doing this too, but I was going to my path a bit more eccentric and add a laser engraving of the lakes where my father-in-law likes to go camping.
Almost nailed it. Somewhere in the process, I accidentally redefined one of the drill holes to be the same depth as the engraving, instead of the correct depth of 10.5mm. Well, easier to fix than the other way around, I guess. I just hit the indent with my drill press, but that hole will probably be a slightly different depth than the other 169.
I only cut the outside partway through, because the 1/8" bits dont stick out enough to properly cut through 3/4" material. I cut the top side through on my scroll saw, which loves to wander. I plan to finish with my other router and flush trim bit, I just need to cut the waste portion off. I cut the round part on the scroll saw for the bottom, but going to use my table saw to trim it down first.
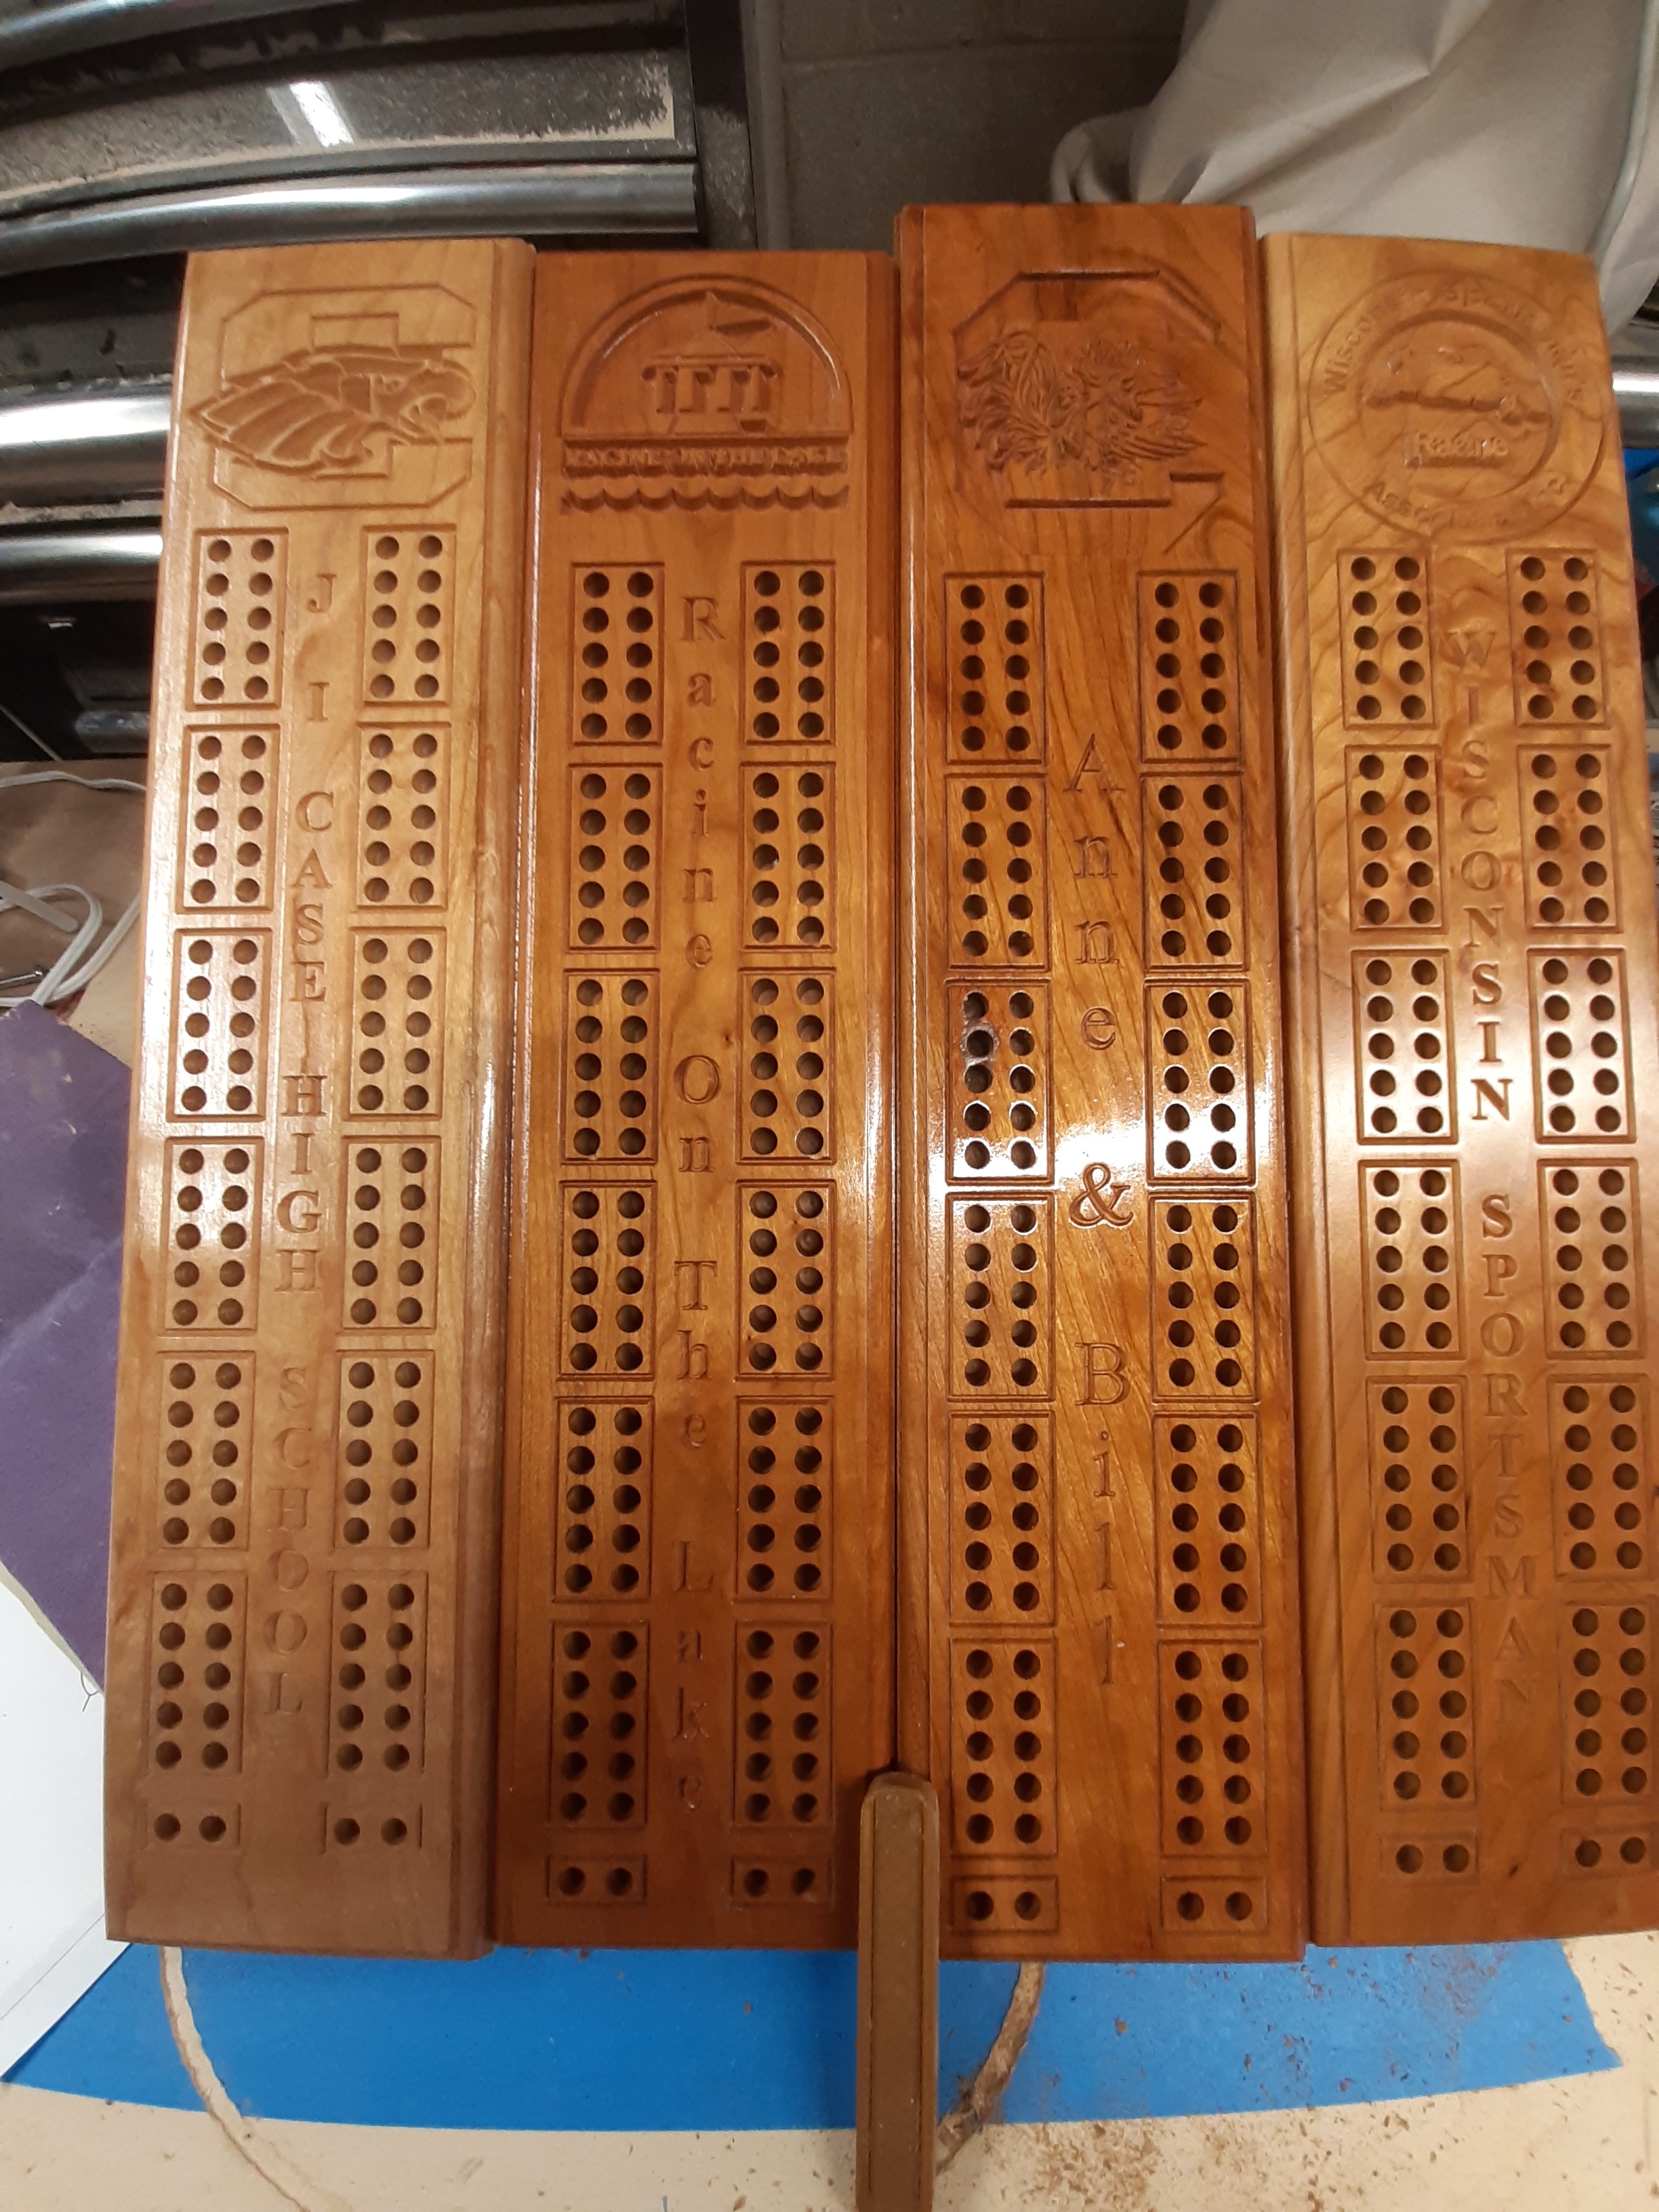
This is a pretty standard board, the only real custom option is that it’s hinged for lefties. Well, that and Dad’s name is engraved into the back surface.
I did change my mind, and made this from red oak instead of the walnut.
Still have to hit the edges with a sander. Take the hinges out and smooth it.
It’s somewhat thicker than a “normal” board, because I didn’t want the holes.boring into the space for the cards and pegs. That always bugged me about most boards where the holes over the peg storage would go through. It doesn’t really matter, but it was an annoyance.
I have a few things to correct for the gcode, and I’ll probably make a couple more before Christmas. Gotta send this one to my father.