I have a project where I want to ‘skin’ some plywood/mdf panels with aluminum (including wrapping around the sides of the panel). I found aluminum flashing to be pretty inexpensive and since it’s just going to skin something, I don’t need it to be very thick. My plan was to cut the wooden panel/shape on my lowrider, leave it in place and spray some high strength adhesive on it, lay out and roll the aluminum flashing on it and wait for it to set. Then (and this is the question), should I try to use the lowrider to actually cut the flashing to the size needed or just use the lowrider with a marker attachment to draw cutlines where I could just use my snips to cut it? Since I want the aluminum to wrap around the sides of the panel, the aluminum piece would be larger than than the wooden piece. I thought that if I tried to cut it with the lowrider, I should use some “removable” adhesive between the wood sheet and the aluminum in the areas where the aluminum would ‘fold’ around the sides. That way, there’s still something holding down the edge of the flashing while its being cut, but not be a permanent bond. Has anyone tried to cut flashing? (searching for ‘aluminum flashing’ turned up nothing on the forum).
I’ve not tried this myself but what if you glued and sandwiched the flashing under the wood first then ran your program to cut the wood, then run a second program with your required offsets for the overhang/wrap for the aluminum skin underneath. I’d imagine you could then snip the flashing and roll over the lips?
Just an idea.
Assuming I understand your question/suggestion correctly, I don’t think I could get the z-axis depth precisely accurate to cut the wood only but not touch the flashing. If off by even a very small amount it will cut through the flashing since it’s so thin.
Yep you got it. I did consider this part too, if the feedrates aren’t very different I wonder if you could get very close still with program 1 and then do the bottom with program 2? Like I said, just an idea.
I do like the the sandwich idea. But I could just do the bottom layer first, apply the adhesive
only to the part of it to be skinned, apply the aluminum, and then place another board on top. I’d have to cut through that board to get to the aluminum, but that probably would work and I won’t have to worry about putting low strength adhesive on the aluminum edges… and likely remove any potential issues with tearouts and snags and such.
It may be easier to just test a piece and see if it moves around much. I’m likely making it more complicated then it need to be.
Possibly, but I do have concern about running something spinning at thousands of RPM against a potentially razor sharp piece of metal.
I wouldn’t use a cnc for that, it seems overkill and complicated.
Can’t you just stick the aluminum on your wooden board and then trim the excess with a simple hand router?
Edit: I havent red well, apparently you want to fold the sides, I thought the side would be a separate piece of aluminum
I’ve done something very similar in the past using a router, by sandwiching a thin metal sheet between two sheets of 12mm MDF, the bottom one cut as a template. In my case there were a couple of places I could screw through the entire thing to secure them together.
I wonder with the flashing being so soft whether it isn’t worth just using snips, and beating it flat at the end of the job?
That was my original idea and just use a pen mount in the router position to mark where the lines are to be cut, that way I don’t have to hand measure and lay everything out. But I might go ahead and give the sandwich cutting a try, just to see if I can do it.
Maybe I’m missing something but couldn’t you take a large piece of paper in place of the aluminum and cut, fold and shape it the way you need. Then open it back up a cut the aluminum to match. Metal shears maybe
I think if I already know what the pattern needs to be (big assumption), using the lowrider with pen attachment to draw the pattern on the flashing would be easier and more accurate than trying to trace a pattern made from paper. But to your point, mocking it up with paper could reveal things that I might not foresee when designing the layout… particularly dealing with the corners.
As I started to lay things out in my CAD, I came the realization that I can’t make every cut I would need with a 1/8-inch router bit. So I think I’ll try using a marker to mark out the lines and then use the router to cut out the general outline of the metal and use snips to cut the rest that the router bit can’t reach. 
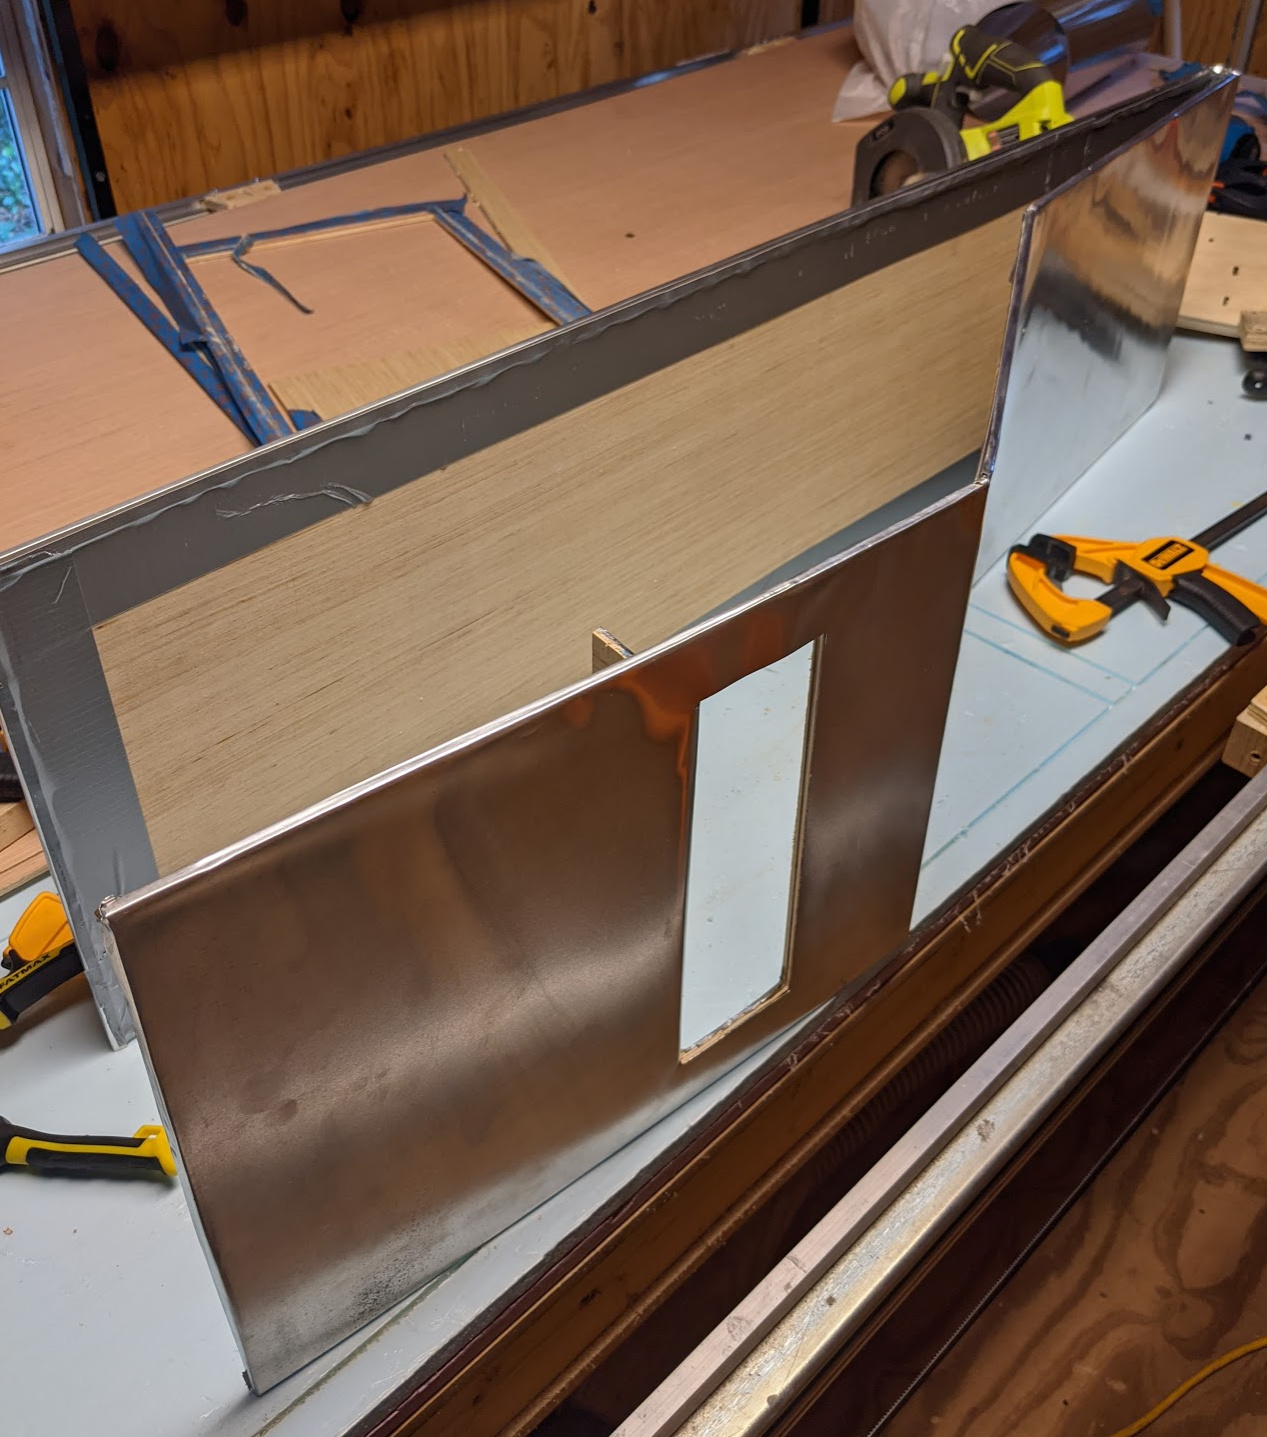
I was able to successfully cut the flashing. I first started with cutting out the wood pieces. I had a problem with z-axis depth and my tabs didn’t come out how I wanted on the small piece of wood in the center so I had to tape it in place.

I then placed masking tape around the cutout pieces, applied a spray adhesive (Loctite High Initial Tack), rolled the aluminum flashing out, and then installed a board on top. Sorry, forgot to take pictures during this process. I then cut out the shape for the aluminum flashing. I didn’t mark the places to cutout with a marker as I couldn’t get the 3D printed pen mount to come out to the right size… Normally I have to scale up a model just a little but the one I grabbed off the internet needs to be scaled down a little. I’m not sure it really mattered anyway. It wasn’t hard to figure out where to snip.
After all said an done, it turned out well enough. The flashing (which comes in a coil) does tend to peel away from the adhesive near the ends where the flashing still has its curl in it. But using a wooden block to press the flashing along the edges, it seemed to straight out and wrap around neatly. On some edges I used some superglue to try to help it stay in place. Then, I applied some duct tape along the edges to keep the edges folded down and in hopes of keeping my fingers from being cut.
It’s not done yet. I have to do sides and bottom and I will probably 3D print some corner guards or something since they are rather sharp and didn’t come out very neatly.
I’m going to try this weekend to cut the side panels without sandwiching the aluminum between wood to see how that goes. I plan to cut out the wood, apply some masking tape around the edges, lay down spray adhesive but leave the masking tape in place and roll out the aluminum flashing. This way the entire flashing is ‘glued’ down. I might be left with masking tape on the inside if it won’t come off, but I don’t think it will be a big problem if its there.
Have you heard of the trick where you put blue tape on the spoil board and the flashing and put a few dabs of super glue to glue the tape together? It will give you uneven thickness, but if you’re cutting through, you probably don’t care.
To make ‘double sided’ tape? I think what I can do is this:
- Cut the shape in the wood
- Mask off the outside of the cut piece
- Spray adhesive over the wood and masking tape
- Apply another piece of masking tape, non-adhesive side down, to the masking tape that’s already down (i.e., creating double-sided tape)
- Apply the flashing.
Or just apply tape to the flashing and then press it to the adhesive.
But then I have to figure out how to exactly layout the taping on the flashing and then apply the flashing precisely so the tape matches…
I use Fusion 360 in my shop so I would create a manufacturing setup with 2D contour for the MDF and a Sheet Metal project for the flashing. I would use tape and glue trick that Jeff mentioned for hold down and a V-bit to either mill out the pattern or score the pattern into the flashing for cutting out by hand.
If it is a big enough project (on going) it might be time for the vacuum table I have been wanting to build…