I have an enclosure I’m fitting my Primo into and I need to know some drag chain details.
What size do most of you use? I’ve seen somewhere in here a 10x15 for the XY and a 15x30 for Z. Is that correct? I’m using a makita router and possibly a laser later.
Do the chains fit inside the total foot print as listed in the calculator?
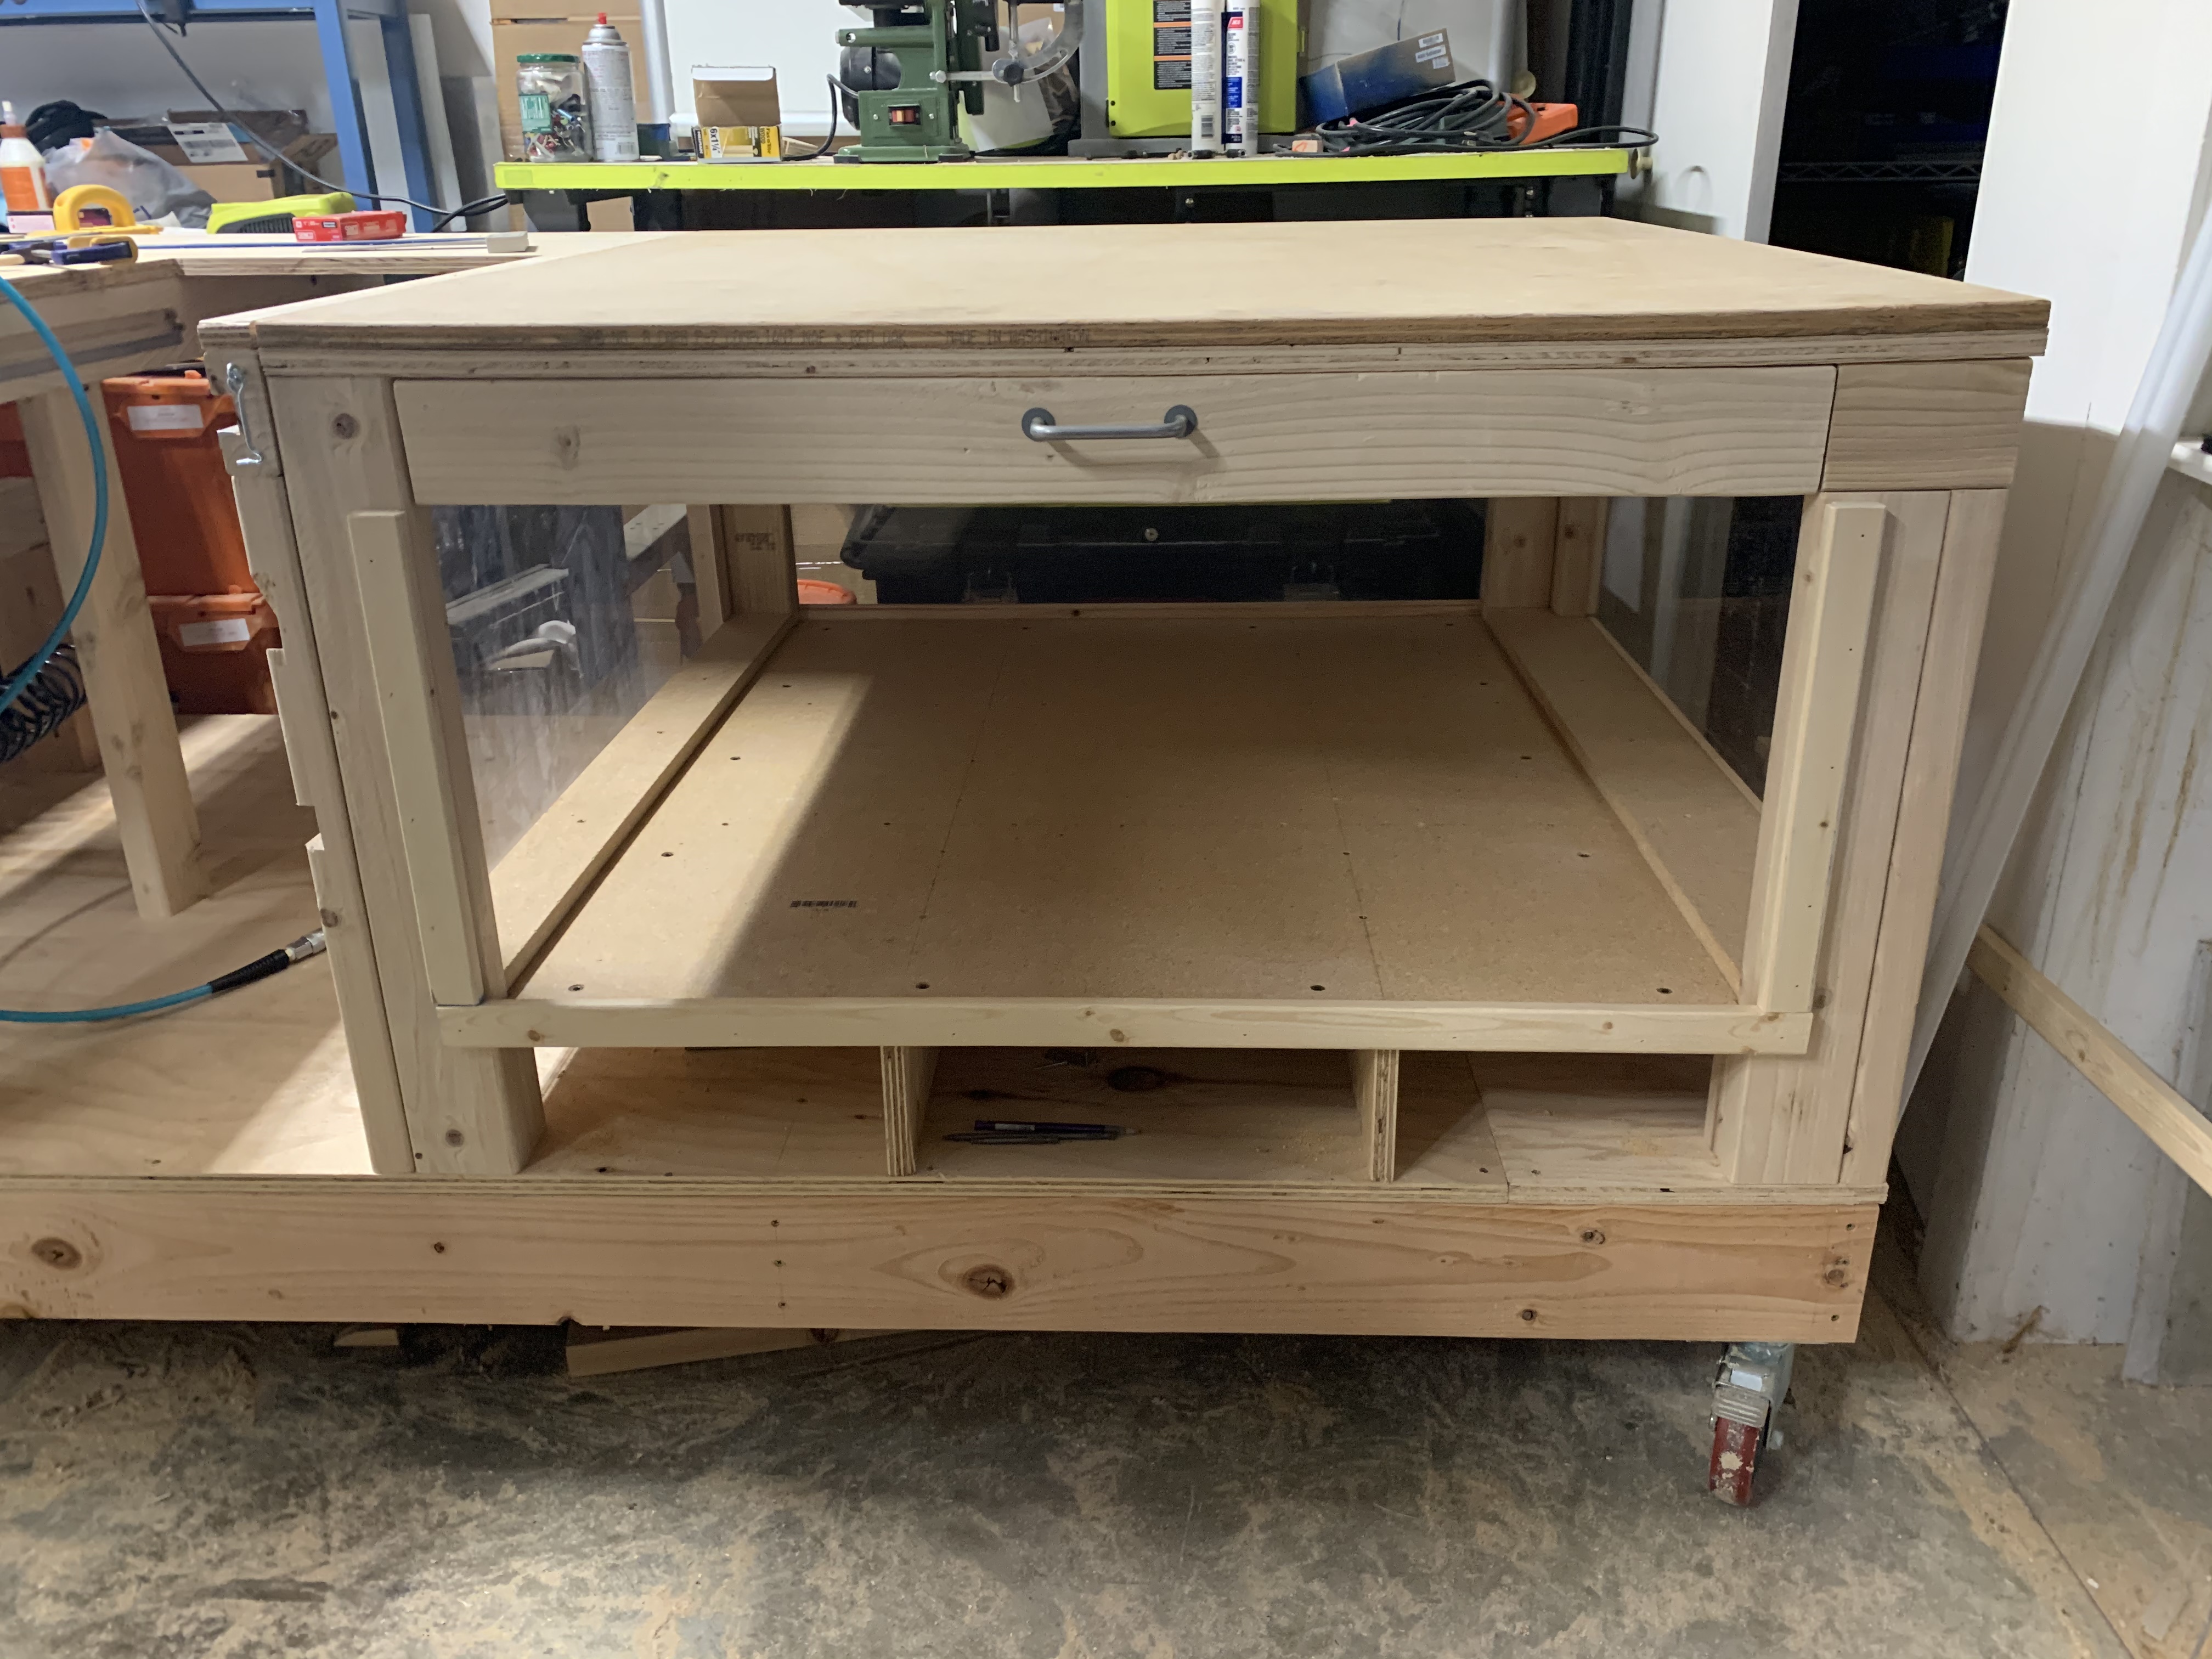
Here’s my mostly finished, under-work-bench enclosure
I use 10x15mm drag chain originally purchased for my Burly from Amazon. I continue to use that chain when I upgraded to the Primo. This chain worked great on the Burly with serial wiring, but it was a bit tight getting all the wires for two stepper and two end stops through each chain. But it works great now with the wiring installed.
On my burly, I had a couple of mid-span supports, so on those two sides I ran the chains outside the tubing . On the other two sides I ran the chains under the tubing. I couldn’t find brackets I liked to attach the chains to the trucks on Thingiverse, so I ended up modeling some for both types of wiring.
Note that since your machine must fit inside your enclosure, and that steppers are so far outside the trucks on the Primo, you have plenty of room to run your cable chain outside tubing and still be inside your footprint.
When I went to the primo, I had to design new brackets. I’ve attached them for reference. Depending on which trucks you put the chain on, you may have to mirror them before 3D printing. I attached them to the truck using contact adhesive since I wanted to be able to remove them if I needed to make changes, but they worked on the first try, and the the glue is holding up.
Note it is possible to move the X cable chain to the back of the machine where it is out of the way. It means a longer wire run.
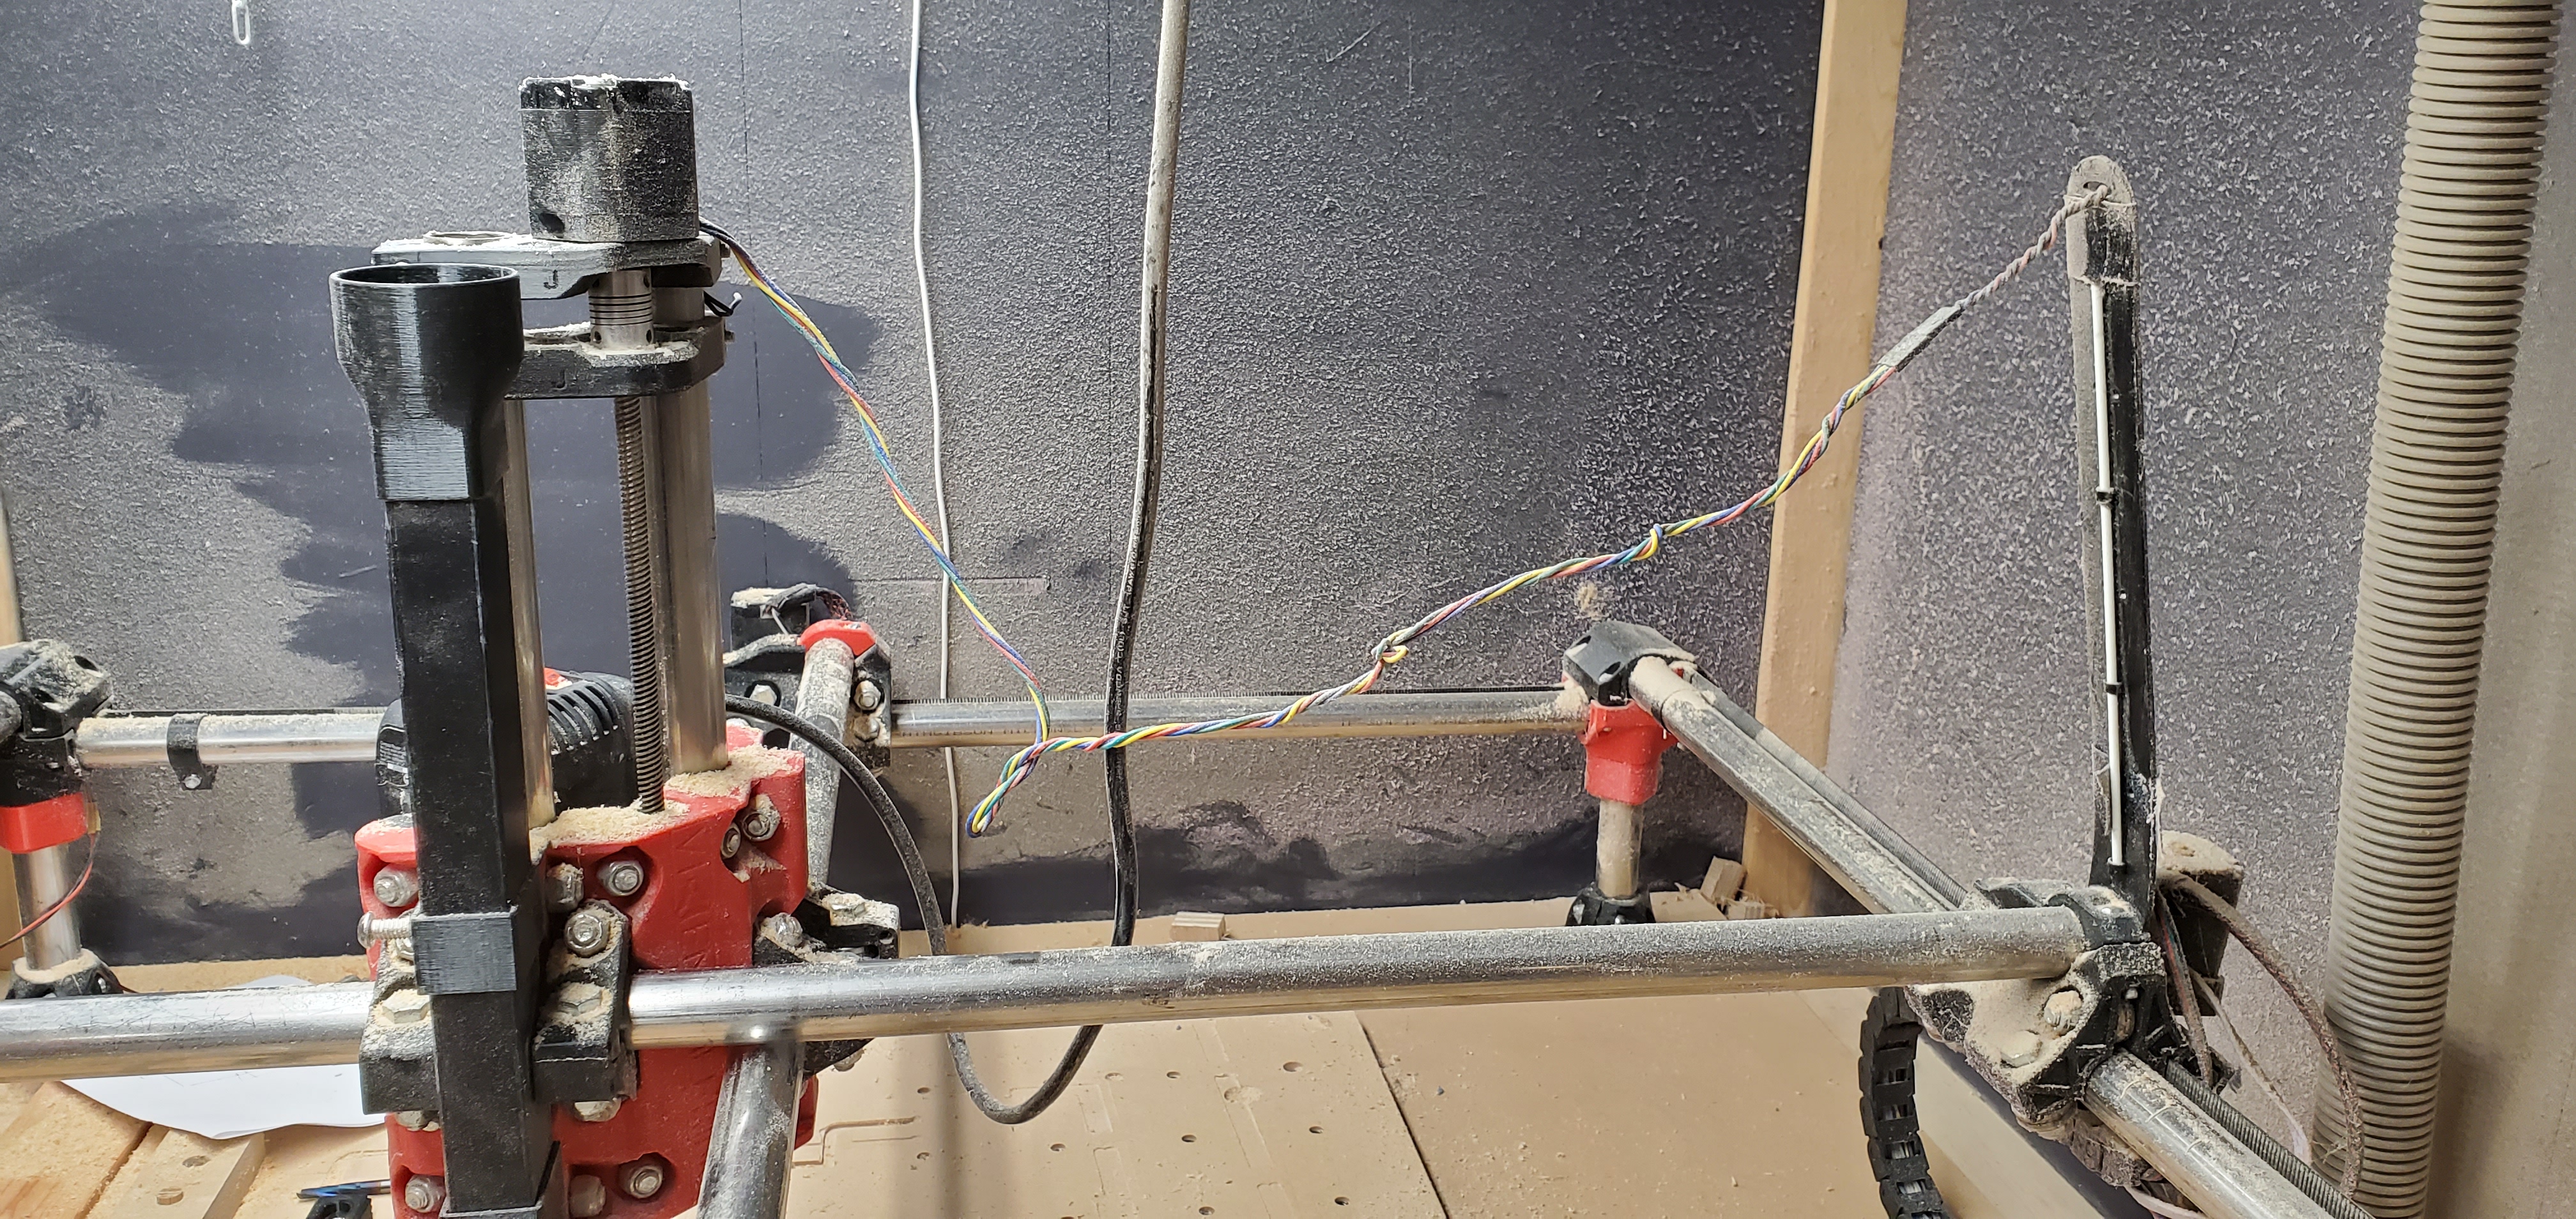
Edit: Cable chains for Z seemed like overkill for me when I was building my Burly. I poured over all the MPCNC images I could find for an alternate solution. I ran across a one line (I think by Ryan) in a forum post that said all I had to do was twist the wire the right way. After a bit of experimentation, I came up with what you see in the picture below. This is the Primo, but my Burly solution was the same. the wire between the stepper and the attachment point is heavily twisted and acts like a spring. In all the hours I ran the Burly and in the more limited hours I ran the Primo, I’ve never had a problem. And I figure I’m moving around notably less mass than a cable chain solution.
I 3d printed a load of drag chains, fitted them and then found they look really good but are massive dust and waste traps. I pulled them all off and then used the spring tape measure inside nylon tubing with the wires and moved everything above the CNC. I had already made a metal tubed frame on top of the CNC to keep the dust in, so it was easy to print various attachments to keep the wires off the bed of the CNC.
@robertbu has a very good idea as well, using the torsional twist of the cable to keep things up right, I use the spring of the metal to do much the same job.
Hi Robert, was does the ‘spring tape measure inside nylon tubing’ look like?
Like vinyl hose/tubing from big box store would work, or this is a special kind of more flexible tubing? Thank you!
I am a little behind OP and making table and wire routing decisions – I really like an under-work bench enclosure like this shows. that is outstanding, so I’m GLAD I saw this thread! I need to be able to keep the area clean and quieter, as I will be in the space, and will be running a K40 laser in the same space.
Brock,
Very nice build. What is the approx cost for the clear plastic? type? i was reading that polycarbonate is much tougher but acrylic is cheaper. The big box store pieces are $$ but looks like you either found a cheaper source, or dropped some cash for that. Thanks!
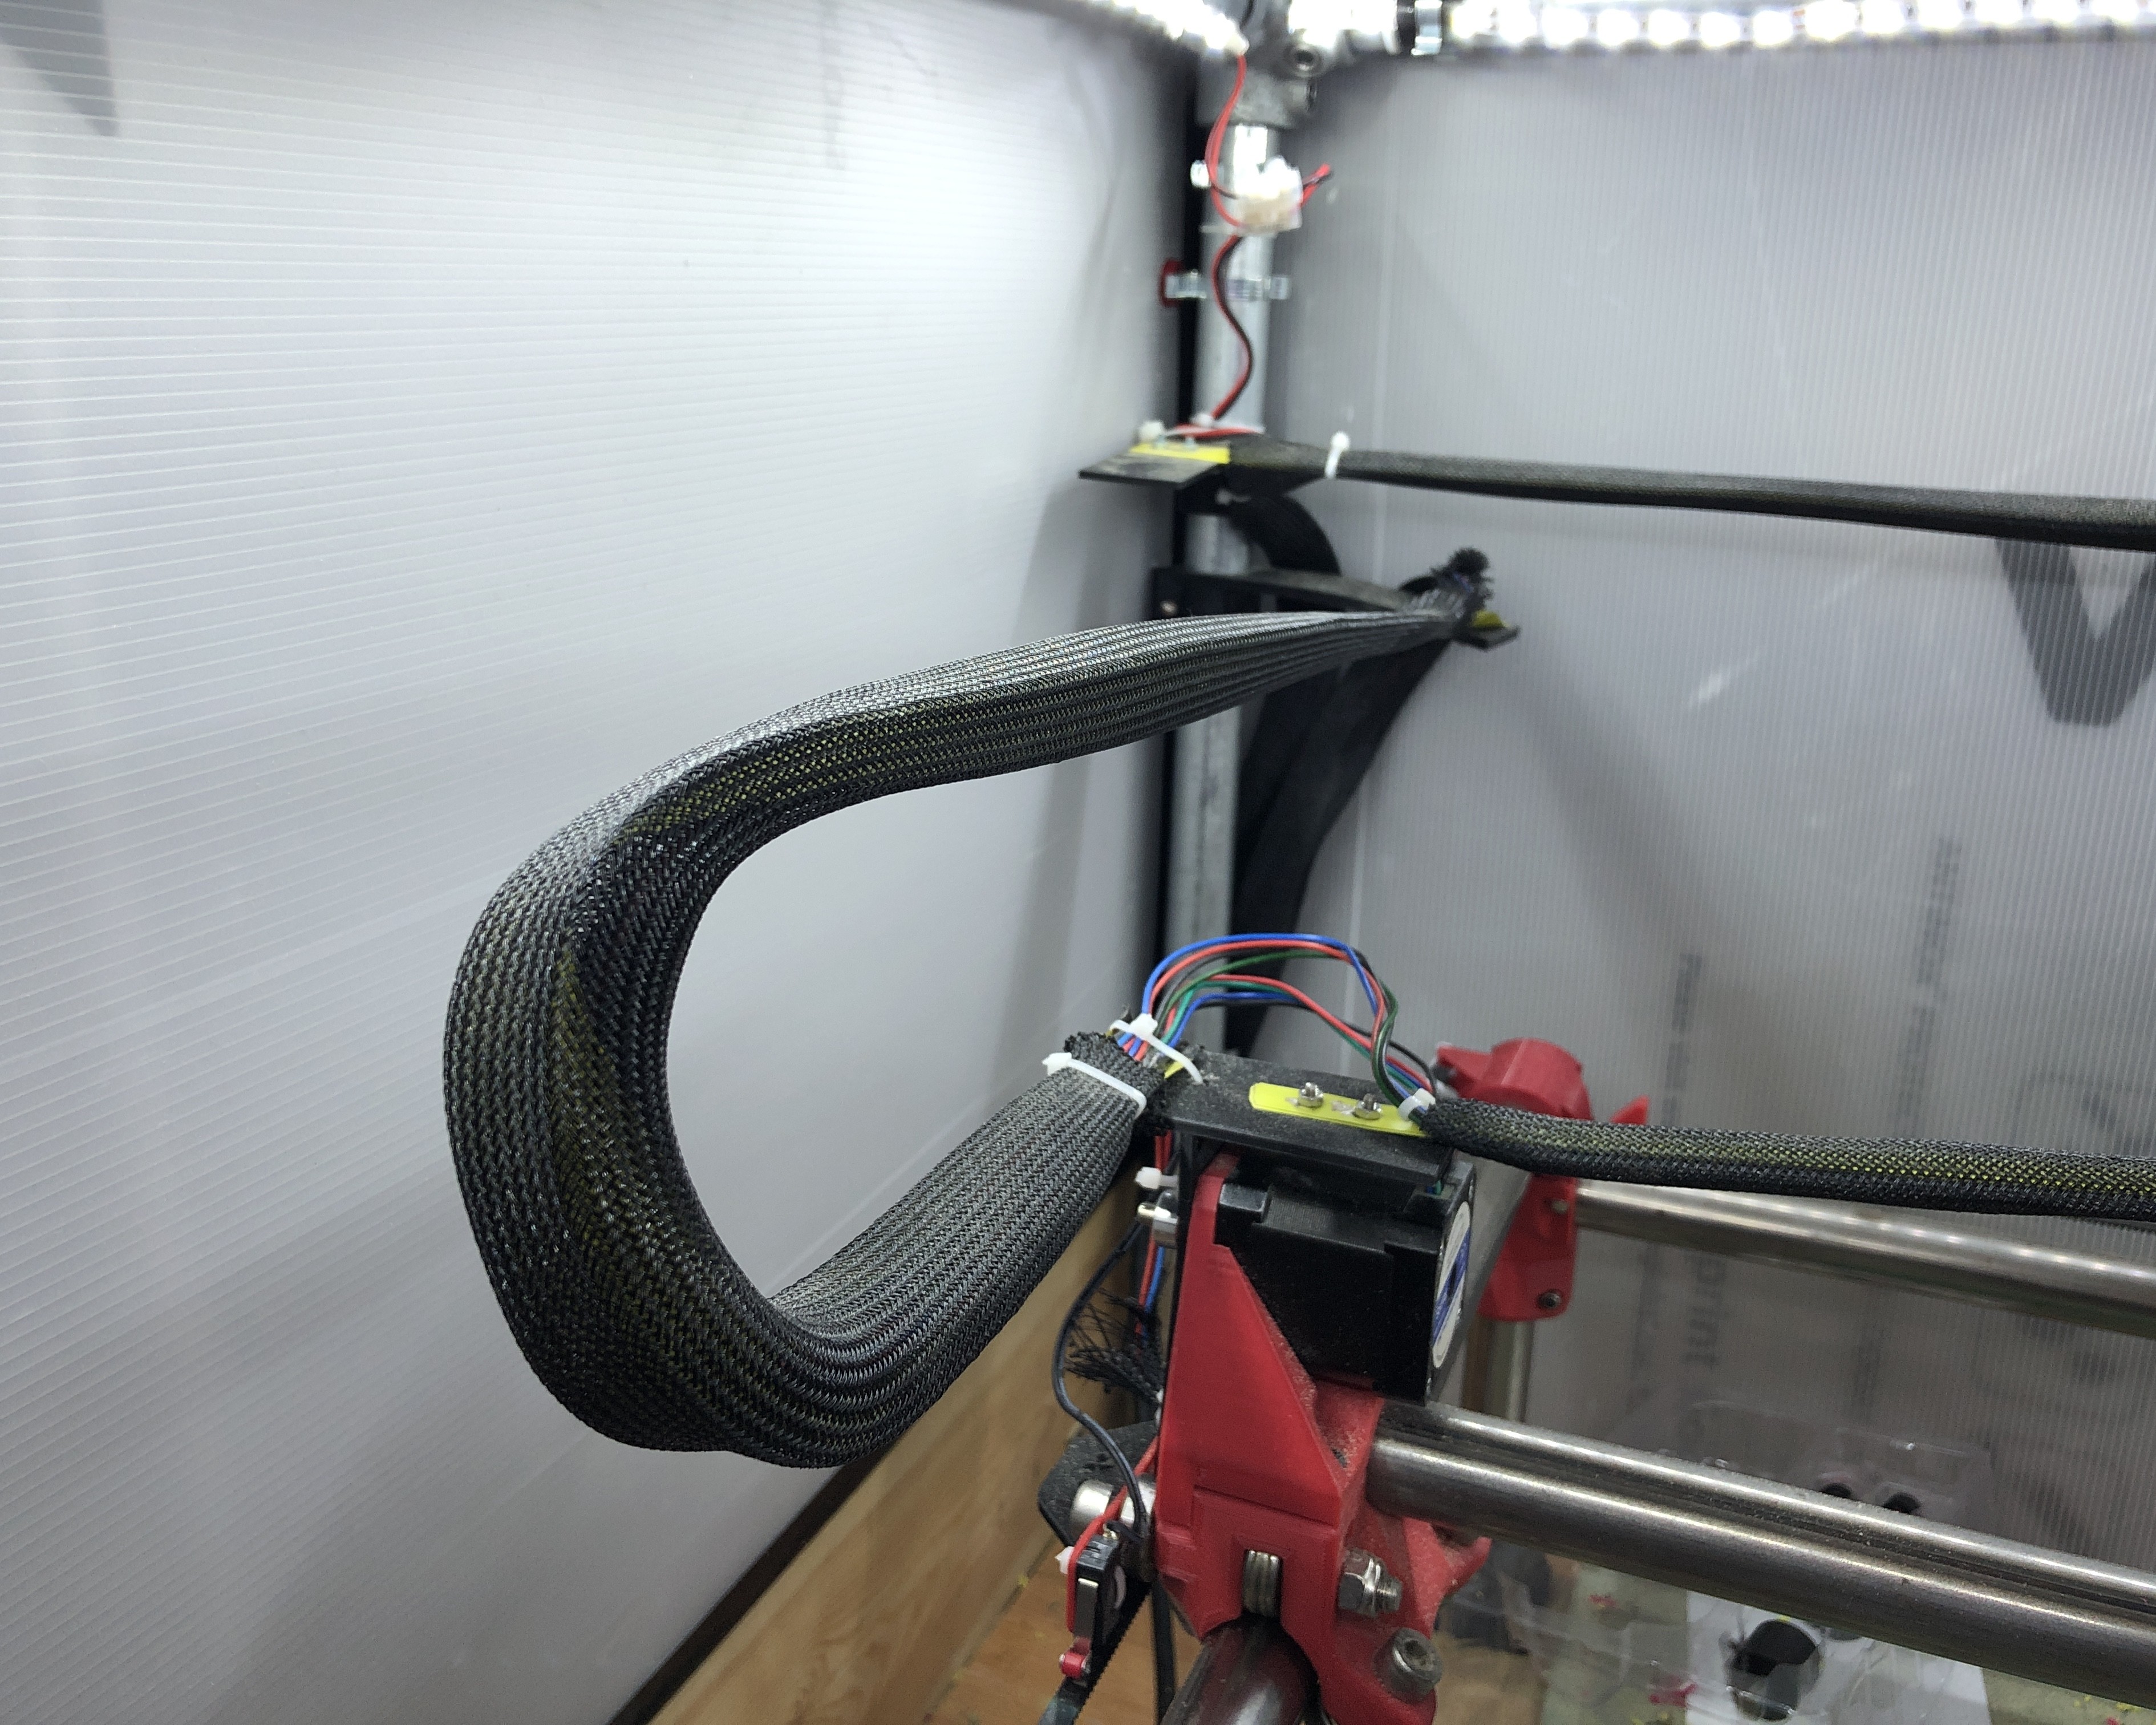
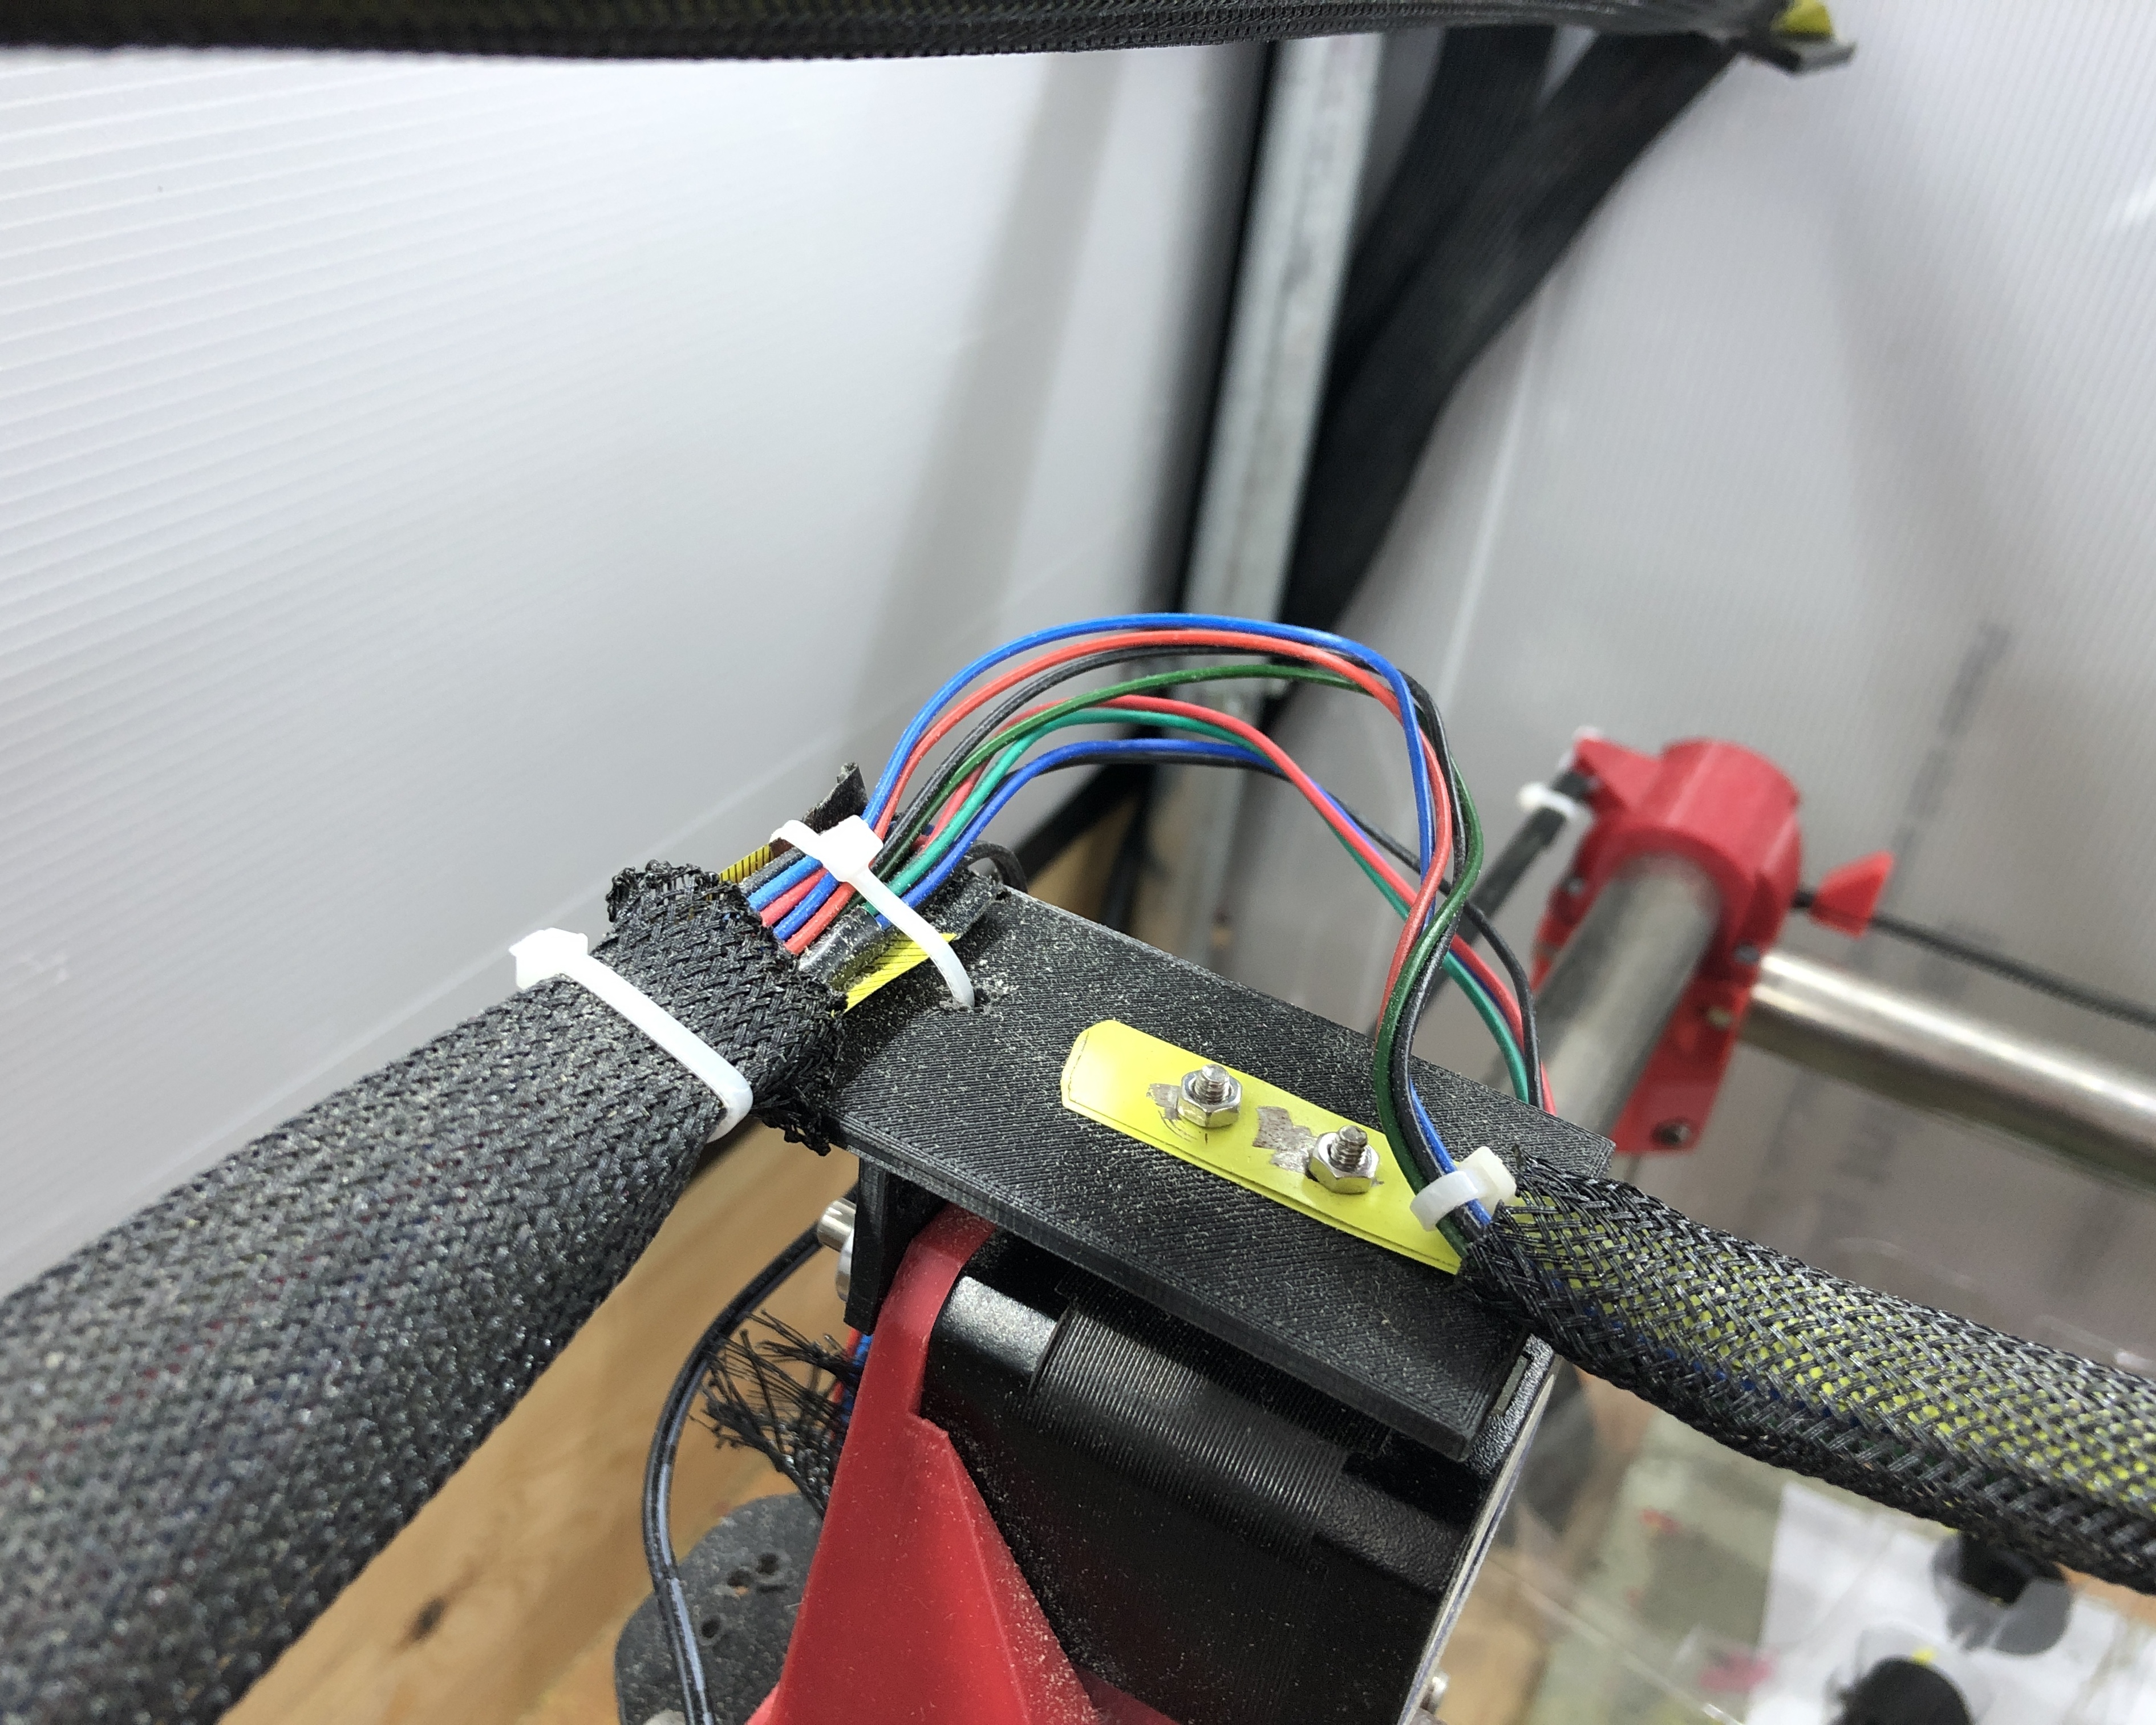
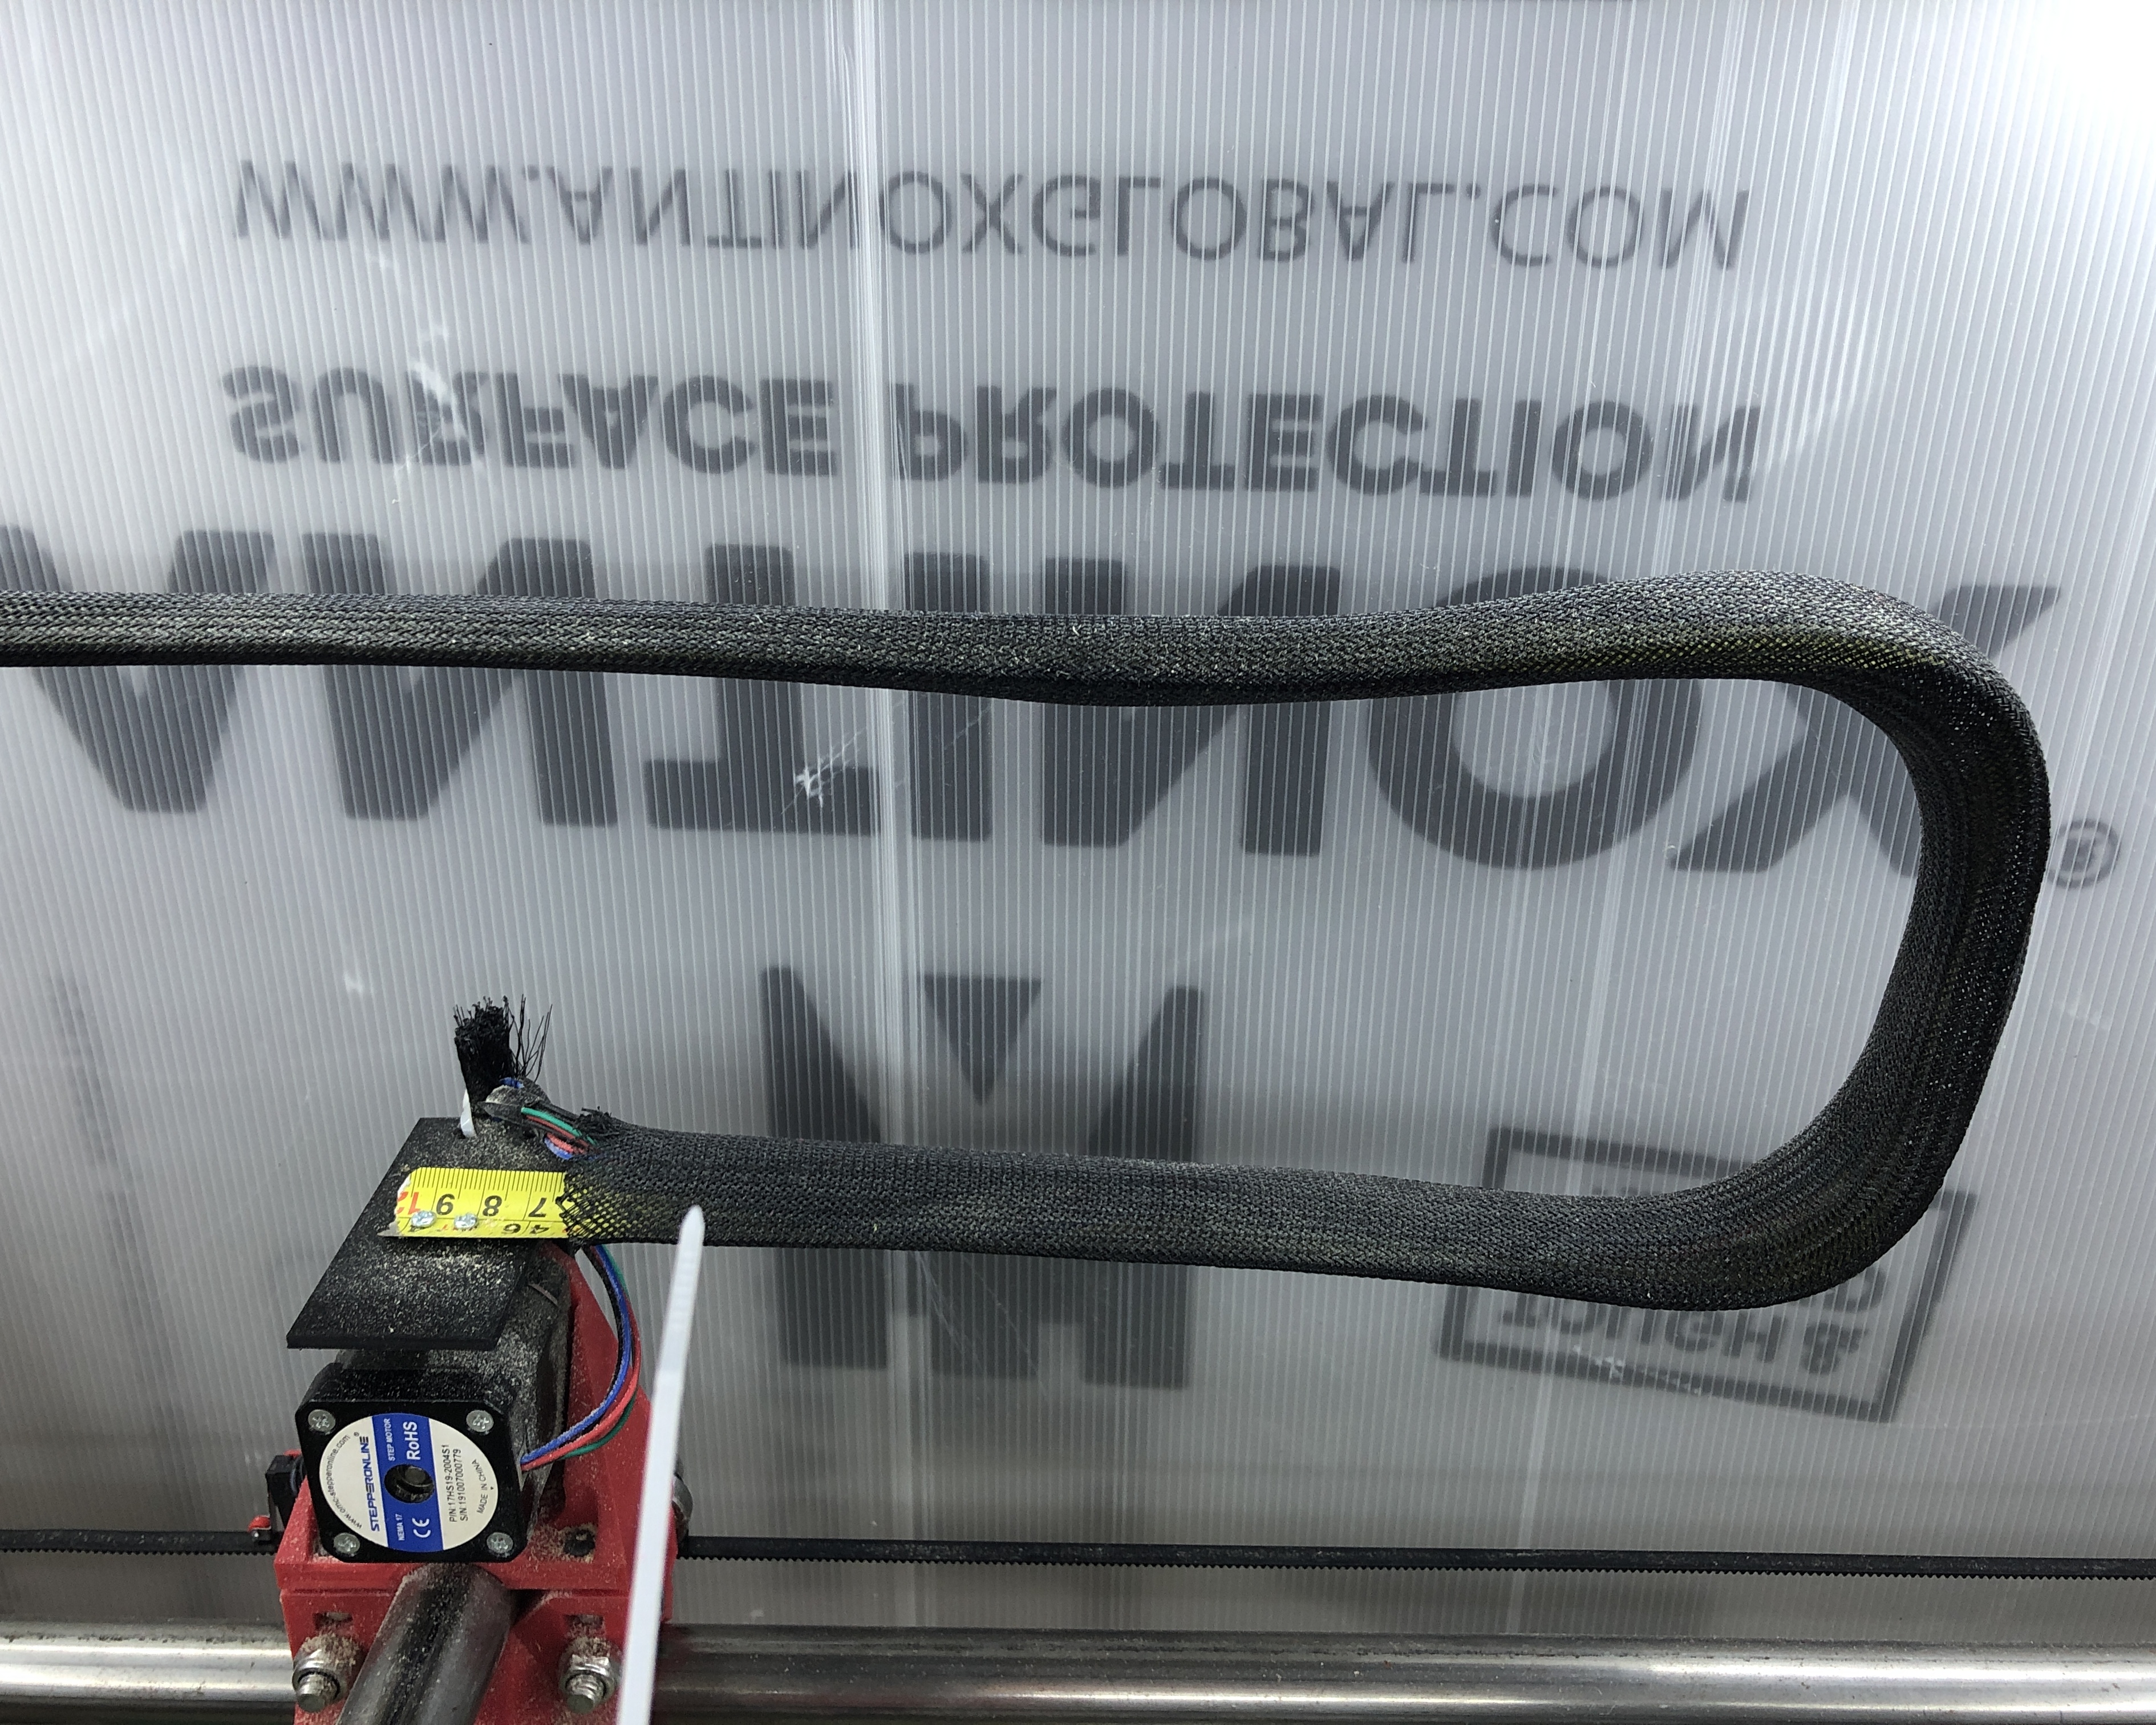
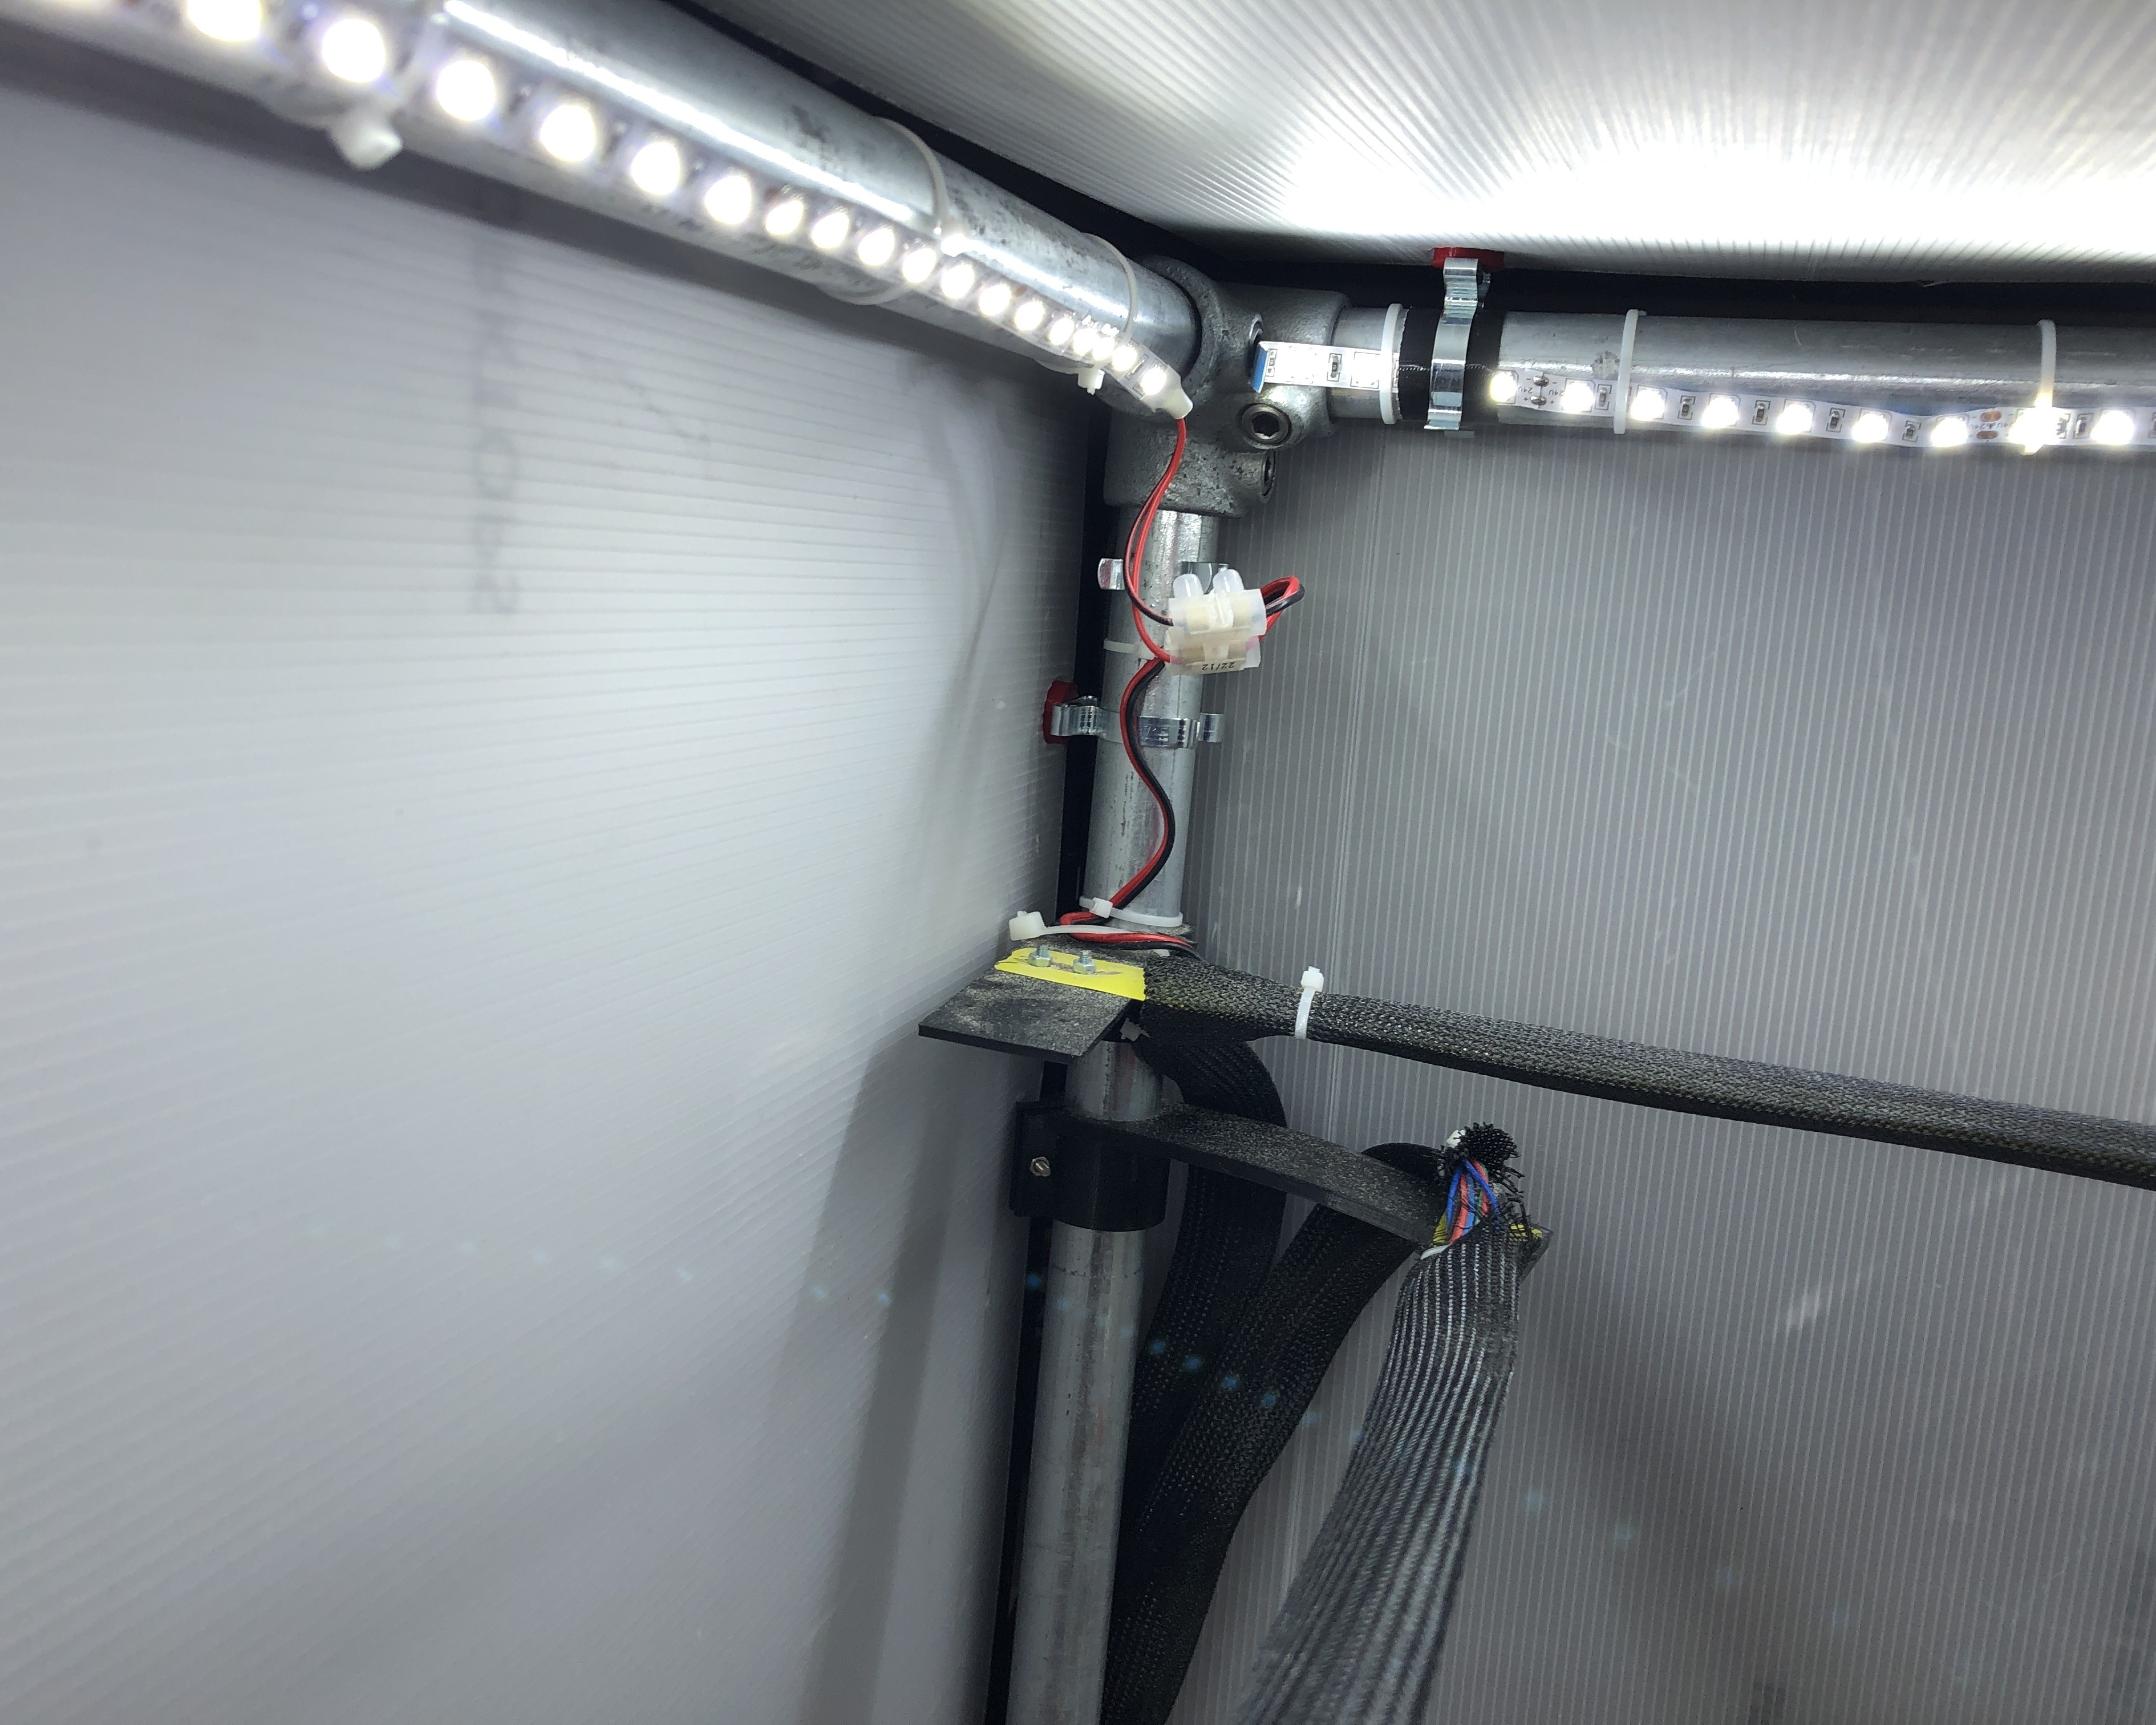
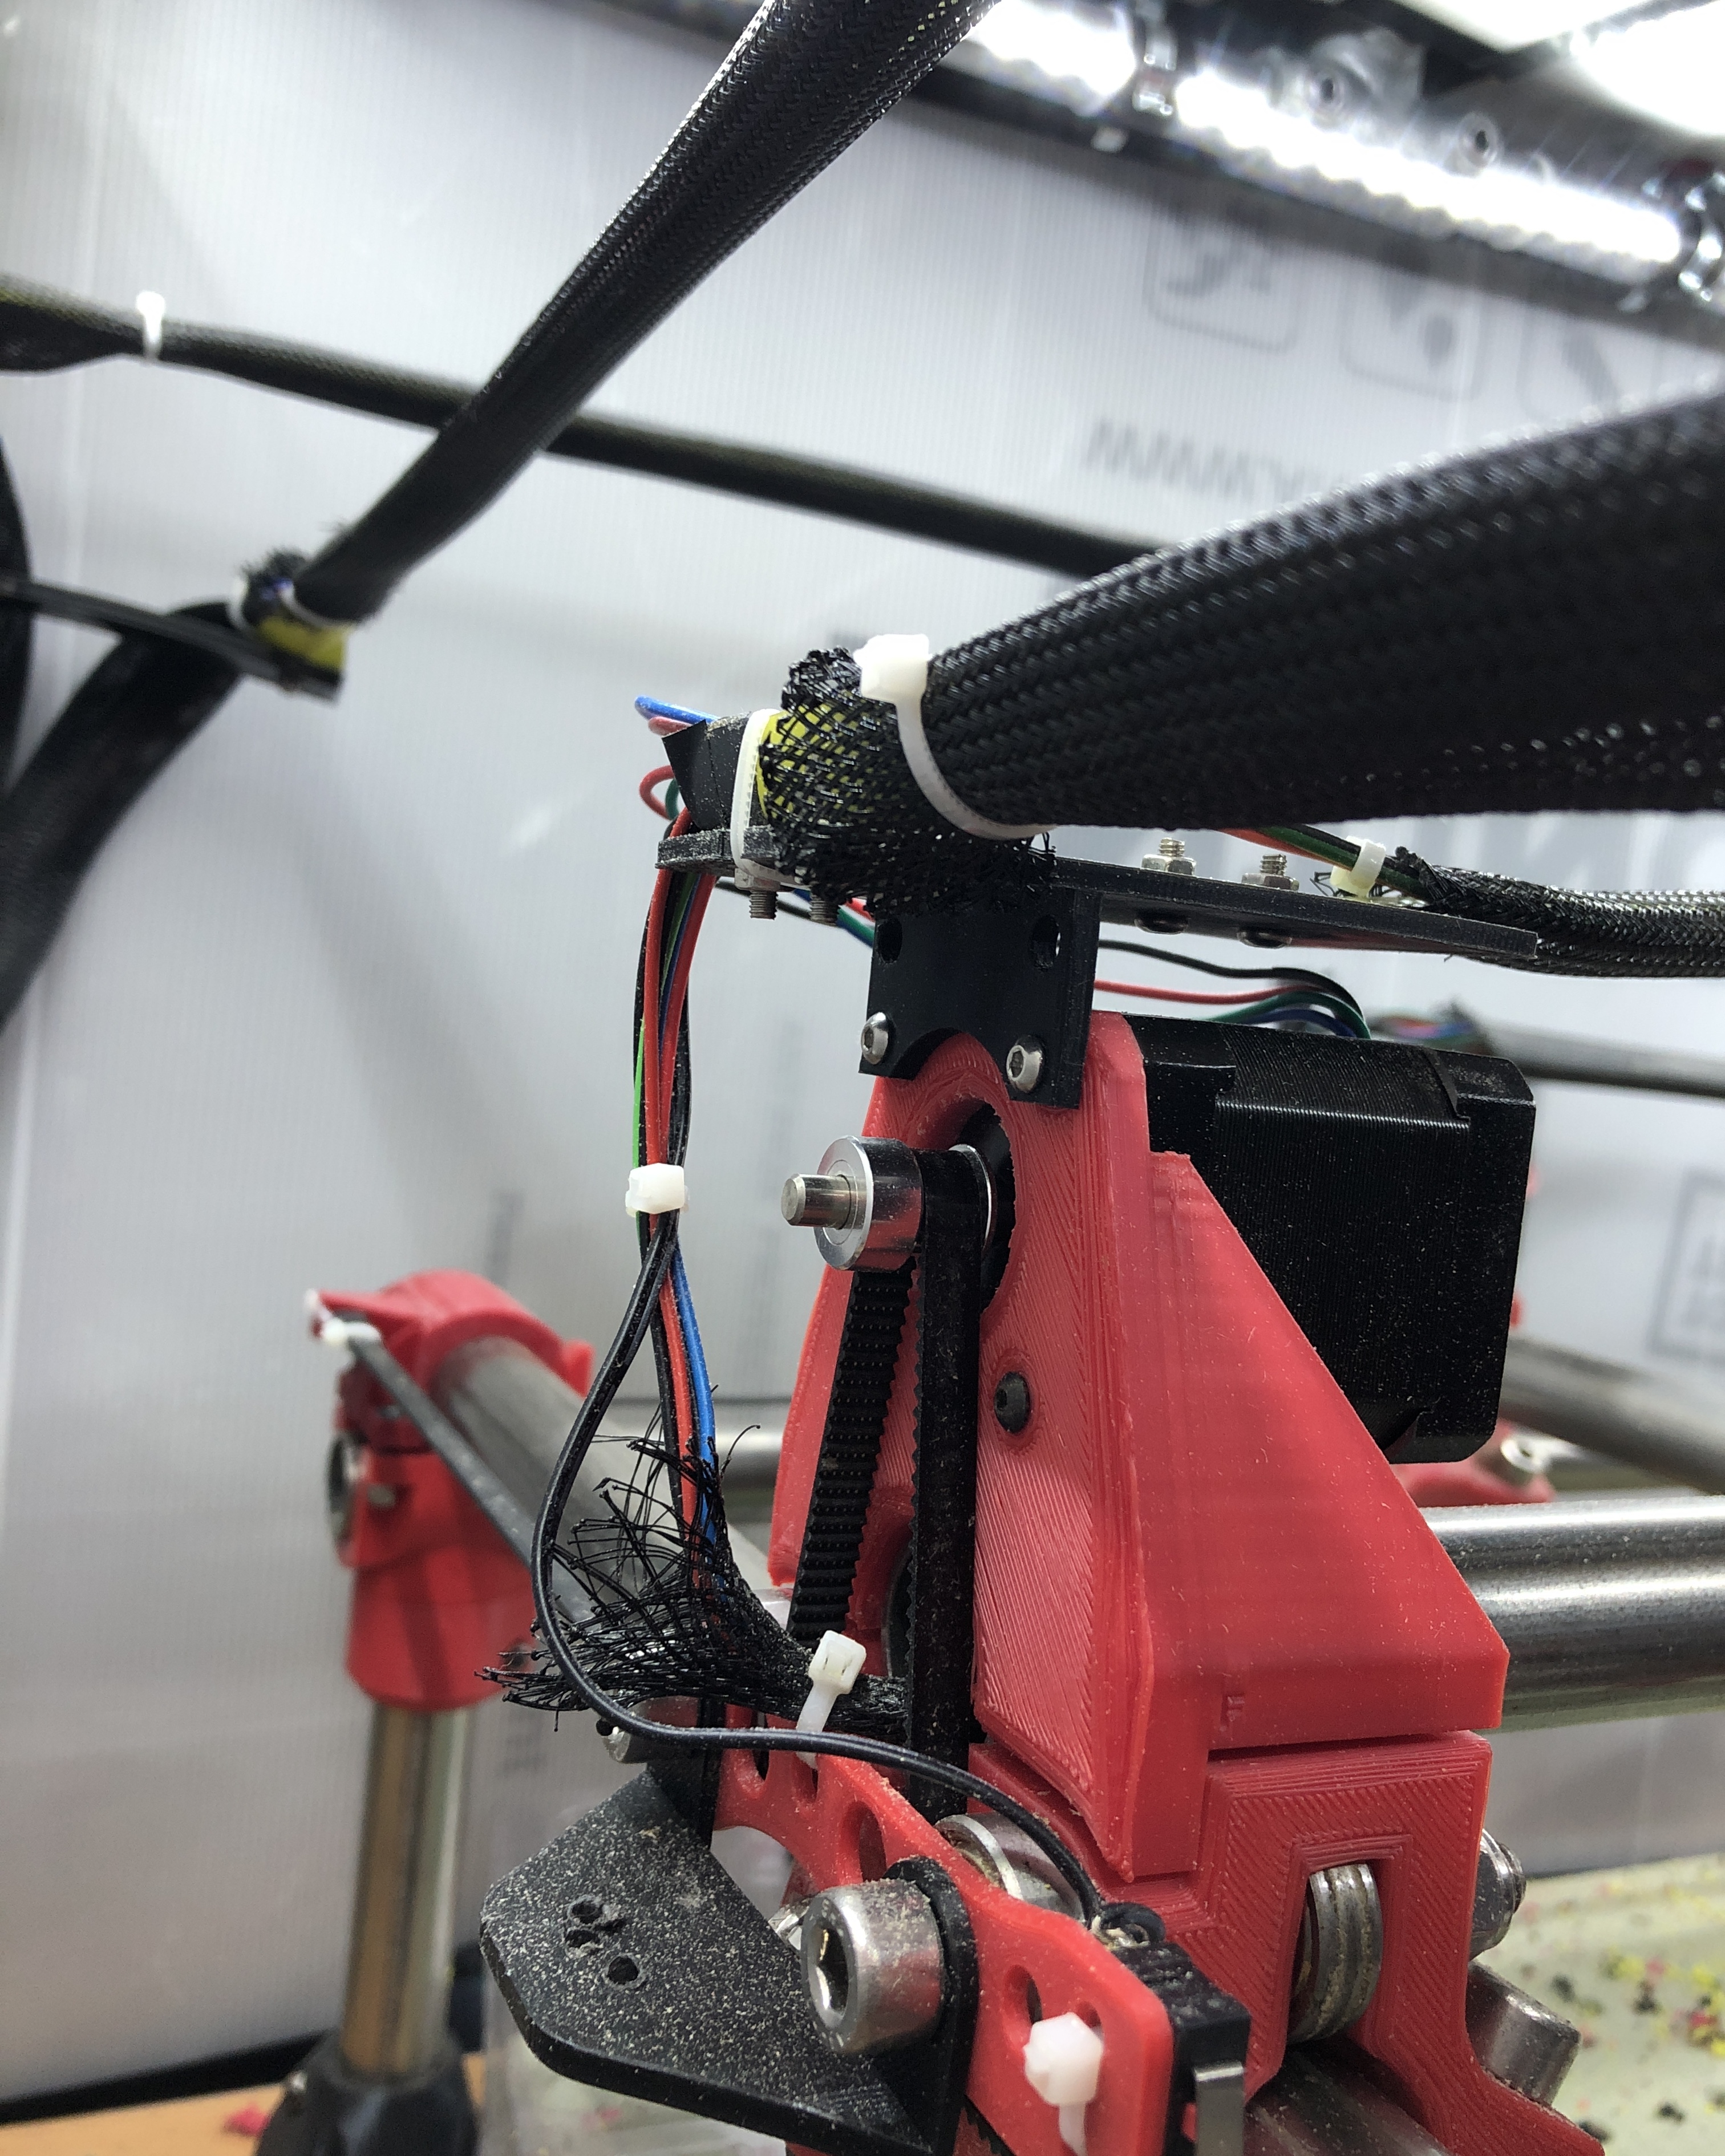
@Zymurgist, this is the tape measure trick that he is talking about. And here is an example of the braided tubing. You’ll need to select the correct size based on your tape measure and cables that are going through.
Here’s some pictures taken very quickly. The CNC machine is in the garage and its not being used much as I’m writing software for it. I have put 2mm plastic sheeting on clips around it to keep the waste in, which can be removed quickly but it’s freezing here in North Yorkshire in the UK.
The idea is to get all the wires into the air off the bed. I have 25mm tubing all around the CNC machine to put 2mm sheeting on, and have 24V LED lights so it’s an easy fix for me.
I actually got this for free at work! We have a huge cage covered in lexan for our drone tests. Upper management wanted the lab to look better so they went on a cleaning spree and got rid of so much still usable stuff. My garage is now cramped because of it haha. It was a full 4’ x 8’ x .25” lexan (polycarbonate) sheet, I know that’s expensive!
I have more examples of the tape measure trick in my build as well. I went one step further and put an aluminum channel for the Z axis wires to ride in.