Get a spring-loaded shower curtain rod or three, or even just some bungee cords, add some old shower curtain liners, and you can have an easily collapsible temporary spray booth.
2 Likes
Oh that’s an amazing idea! On my way to grab some more mineral spirits tomorrow from the Depot, I’ll stop by Walmart and grab enough to make 4 walls around my area. I have enough bailing wire to hang them from the ceiling too. Thanks for that tip!
A fold and a spring clip or clothes pin can help keep the corners closed.
@wcs39204 did you try the Floetrol that David recommend on your other thread?
I want to try this the next time I use my gun since I’m getting crappy results as well.
I’ve been wanting to do the temporary paint booth idea that @ttraband recommended since the last time the over spray was blown onto my newly painted garage door and car. ![]() Luckily I was getting rid of the car and you had to look really close to see it on the house. But still really annoying.
Luckily I was getting rid of the car and you had to look really close to see it on the house. But still really annoying.
1 Like
Plastic sheeting from the home center can work just as well as shower curtain liners, it’s just that the liners already have reinforced holes for hanging. I just snag old liners whenever we replace them, then don’t feel bad about tossing them once they’ve gotten too ratty to keep doing the job.
I did see it in the store, and I ALMOST got it, but I could only find the latex version, not the one for oil. I also couldn’t get a definitive answer on if I’d still need to use thinner, or if the Flood product was the actual thinner. It went on super smooth, mostly. some spots I think I got in a hurry and got the gun at a weird angle, but mostly the coat is good. few little spots I’ll have to sand down, and I think I got some sawdust in one spot where it shot out of the 1/16" groove in the edges lol.
A temp booth would be amazing definitely, especially one that can pop up and down quickly. I thought about instead of shower curtain rods and liners, maybe getting some schedule 40 PVC and some of that disposable drop cloth like I have on the floor. Put the PVC up high enough I can leave them there, and just add drop cloth as needed. Paint, Pull down, trash and move on.
1 Like
I’ve been spraying automotive paint lately. I’ve only done a few small parts, so I used a pop up paint booth I bought on amazon.
Previously I used 2x4’s and 6mil plastic bought on amazon to make an 8’ cubed paint booth. It worked really well. The next paint booth I make I plan on using 1.5" PVC tubing for the frame and velcro to hold the corners together. The plan is to have one I can collapse when not using. Wrap the plastic around parts of the frame and tie it all up into a big bundle.
2 Likes
EXACTLY where my mind went! I remember a while back seeing some friends of mine building isolation booths for their recording studio, using PVC pipe, PVC elbows and moving blankets. They didn’t glue the elbows to the pipe so they could tear them down when not in use. I see you and I are on the same logic. Which is scary for you… LOL
oh. and to answer your question… yes. flotrol is a thinner. But you’re right. it only works on laytex.
What’s worse is the other day the wife and I were on the same wavelength… I’m doubly screwed 
2 Likes
So that’s why I couldn’t find an oil version. DOH. Oh well, I’m gonna snag a gallon of mineral spirits tomorrow and do a 220 grit sand, tack cloth, and 2nd coat. I think I had my air flow out of whack where it was blowing more paint than it should. It’s all trial and error for me, never having used one before.
The fact that it’s a cheap’o avanti from harbor freight probably doesn’t help my case much either.
1 Like
LOL double whammy ![]()
So I just pulled a double at work. 3pm - 7am. I’m beat. But also impatient. And I’ll be DAMNED if I was going to let that harbor freight HVLP gun defeat me! So I got here to my shop… I only had about a quart of Kilz Original left, and right now, there’s a nationwide shortage of oil based paint, and you guessed it, KILZ TOO. So I remember blowing paint like mad the last time and I was sweating bullets thinking I’d have to rush this final primer coat in order to get it all covered before I ran out.
I thinned the paint as per the manual. So far so good.
I put the gun together, and did a few test passes on a piece of masking paper. Got the air/paint ratio looking really smooth. So far, still good.
I head to the cabinet and shoot it. And shoot it some more. Then some more. Then some more. I still have 1/2 a quart left. How is this possible?
Oh well, hell yea! I shoot it some more and it’s got a NICE coat of primer on it now. Apparently when you read the manual about how to set up the air/paint mixture you don’t have much overspray, and you don’t blow through paint! WHO KNEW?
Anyway, My net is acting slow up here at my shop, so I’m gonna go home, have a nice hot shower, a cup of dunkin donuts coffee and I’ll post a picture or 2. Tonight, I will come up here and shoot the Rustoleum black satin oil base paint on the cabinet (HVLP), and get all of my carriage bolt heads primed and painted too (Rattle Can)
Oh! And I only had 2 runs! Not bad, but they were in the corners around the speaker panel. I kinda expected runs there, so I’m not disheartened about it too much. I’ll do a quick 1000 grit sand before I shoot the black.
I’m so happy right now I could hug you all. But I’m not gonna. Thank you all for the help and tips along the way. It’s nice to have this family here when ya need advice, and not get judged for not knowing.
4 Likes
I’m glad it worked well for you.
I’ve been learning to spray automotive paint on motorcycle parts. I finally gave up on the husky paint sprayer and picked up a dedicated gun. The cheaper guns do well with laytex and other paints, but I could not get it to lay a good flat coat of the more expensive paint. Maybe I should have stuck with it a bit more.
When you sand the primer, don’t go finer than 600 grit. Go too fine and subsequent layers won’t adhere as well. The paint needs something to grip on to.
Sanding with 1000 grit and above should be used for final sanding before buffing and polishing if you’re going to go to all that trouble… and that should really only be done to clear coats sprayed on top of your final color so you’re not sanding the color directly.
2 Likes
Thank you for that tip! I will pick up some 600 this evening!
I was pretty upset that this gun wasn’t working right tbh. After all the songs of praise it got on every single arcade forum on the planet. Turns out it was user error, and it actually does lay a pretty flat and smooth coat. I may have overkilled it with paint but at the same time, I was also learning and getting my hand technique practiced.
I’m not gonna clear, polish or anything like that. I might wet sand between the 2 top coats to keep things smooth, because I heard that will lay it down super flat, but I honestly might not even to through that much trouble either. Just check my work, spot sand and shoot again. I’m ready for this part of the project to be over lol
As promised…
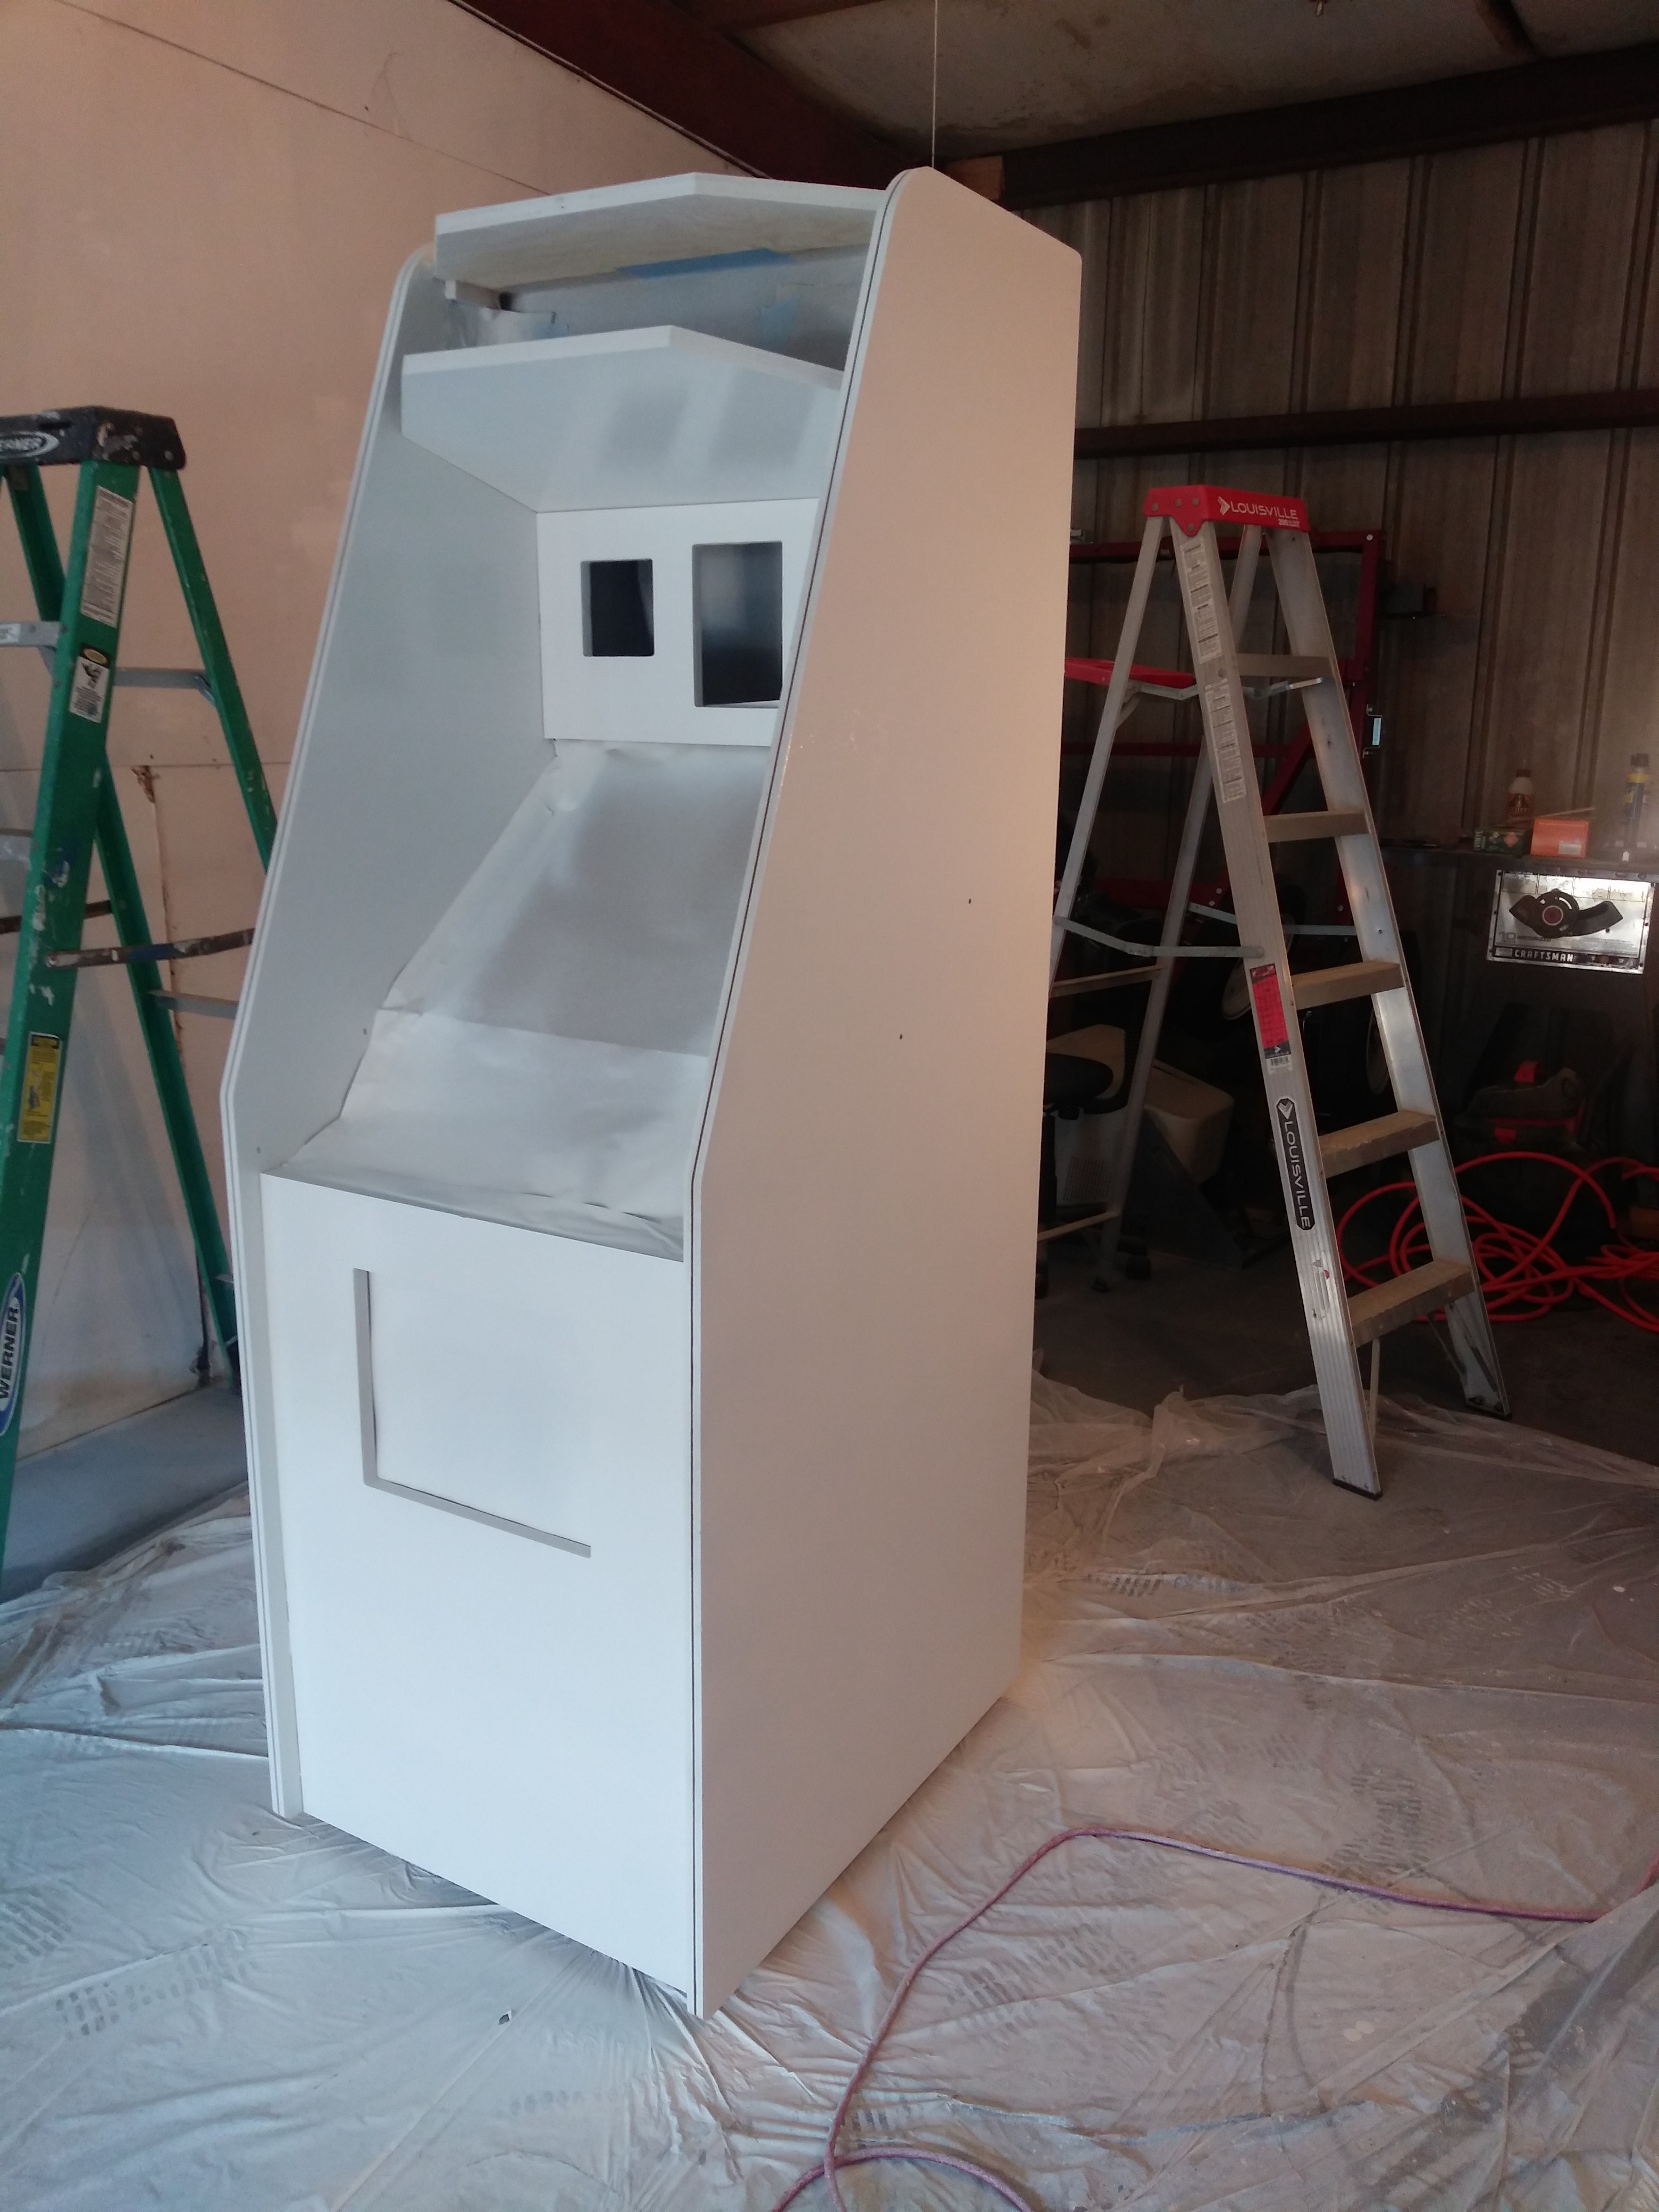
Here…
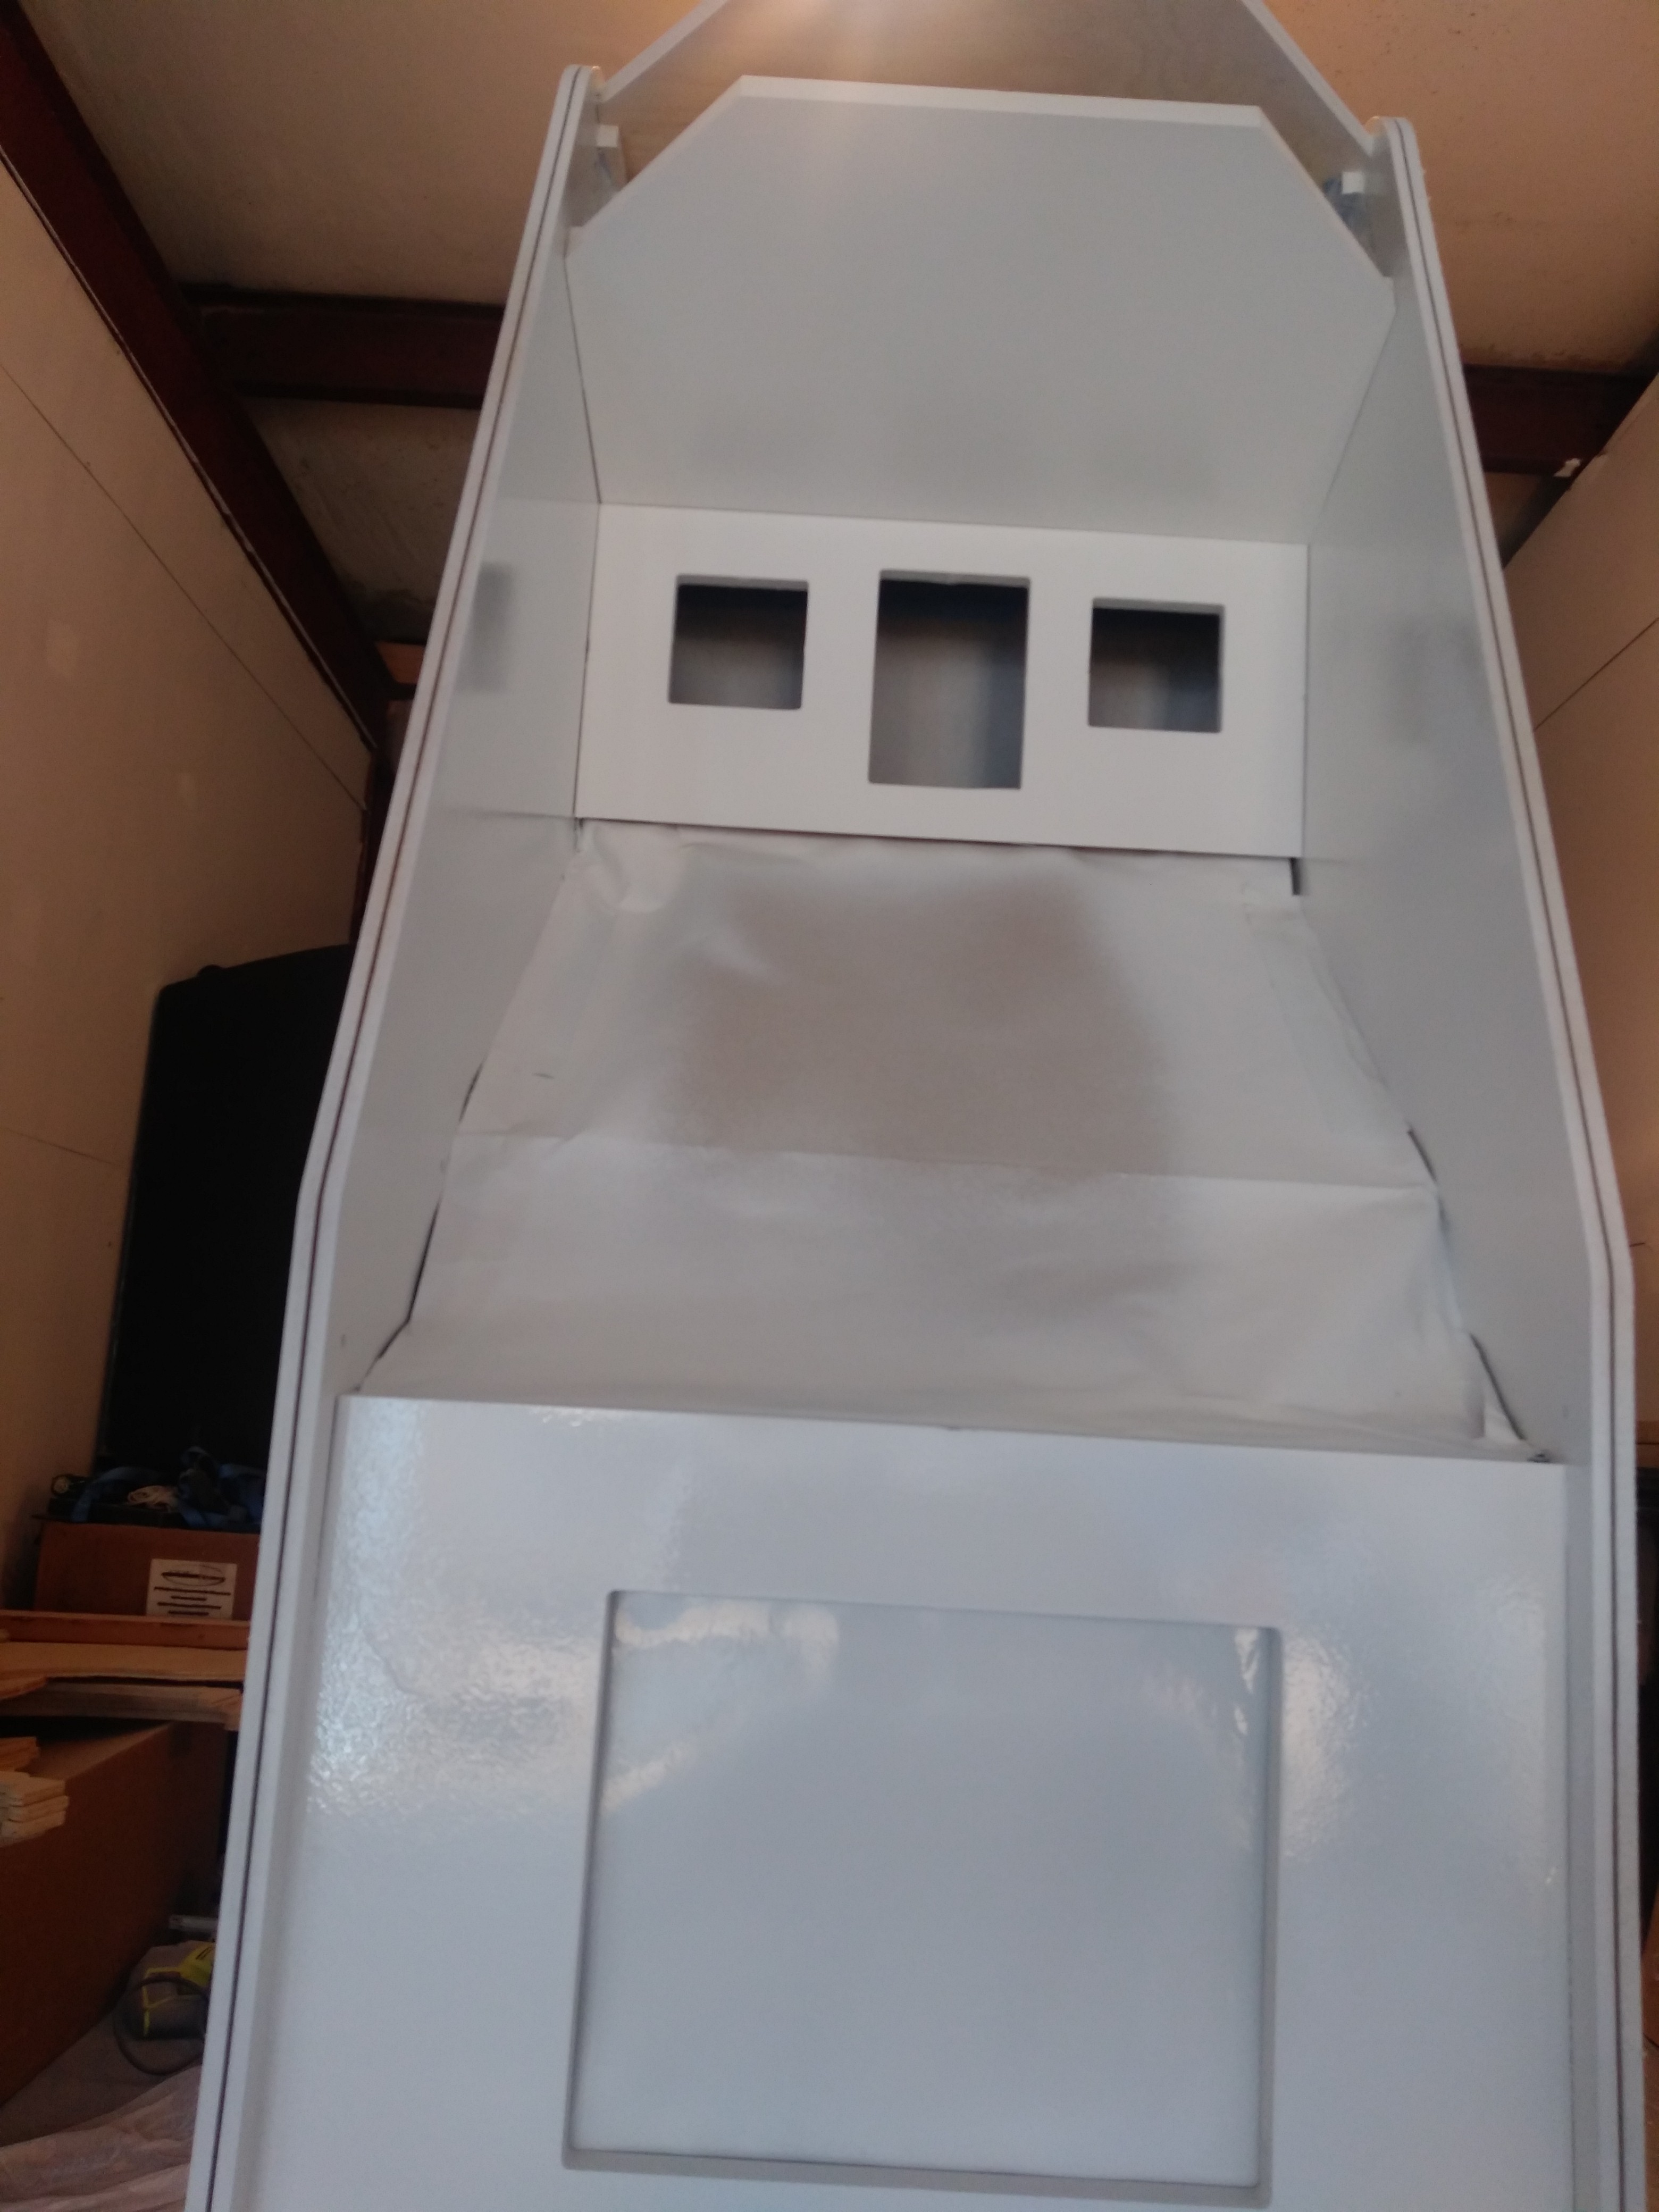
And here…
5 Likes
I’ve found that basic tools do fine when working with basic materials, but that higher quality finishes often draw attention to areas where a little more care, or a better quality tool (or tool tuning process) can make a significantly visible difference.
Glad you got the technique down, and that the cabinet is coming together well for you!
1 Like
Thanks! I agree with you completely. Goes back to the saying ‘you get what you pay for’ so to speak. Your job is only as good as the tools you use I guess. I’m not expecting a pristine finish, I think it will be nice enough for an arcade machine that will be stuffed in between others in my home arcade. The original was wrapped in a leather textured vinyl, but that stuff is extremely expensive. To do 1 cabinet would cost $400. I am a purist at heart, but my wallet isn’t lmao Even a little orange peel won’t hurt my feelings. Eventually I’m gonna upgrade my air compressor and get a really good HVLP gun. But for now the turbine HVLP seems ok-ish enough for what I do.
Thank you for your compliment! I’m SO ready to get this done because the wife reminds me every day about those holiday reindeer that I cut last year… I woke up yesterday, and saw she had gotten the ribbon, and ‘gloss white’ paint. Subtlety isn’t her strongest quality LOL
I also have that Centipede cabinet to do, and 2 cocktail arcade cabs that I’ve been commissioned to build for a local pizza joint. Having a CNC machine is both amazing, and a burden (when people realize you have one and what they can do anyway).
Speaking of CNC machine, I still have to put my 3/4" birch y-plates on and rewire everything ‘neater’ too. Oh when does it end? 
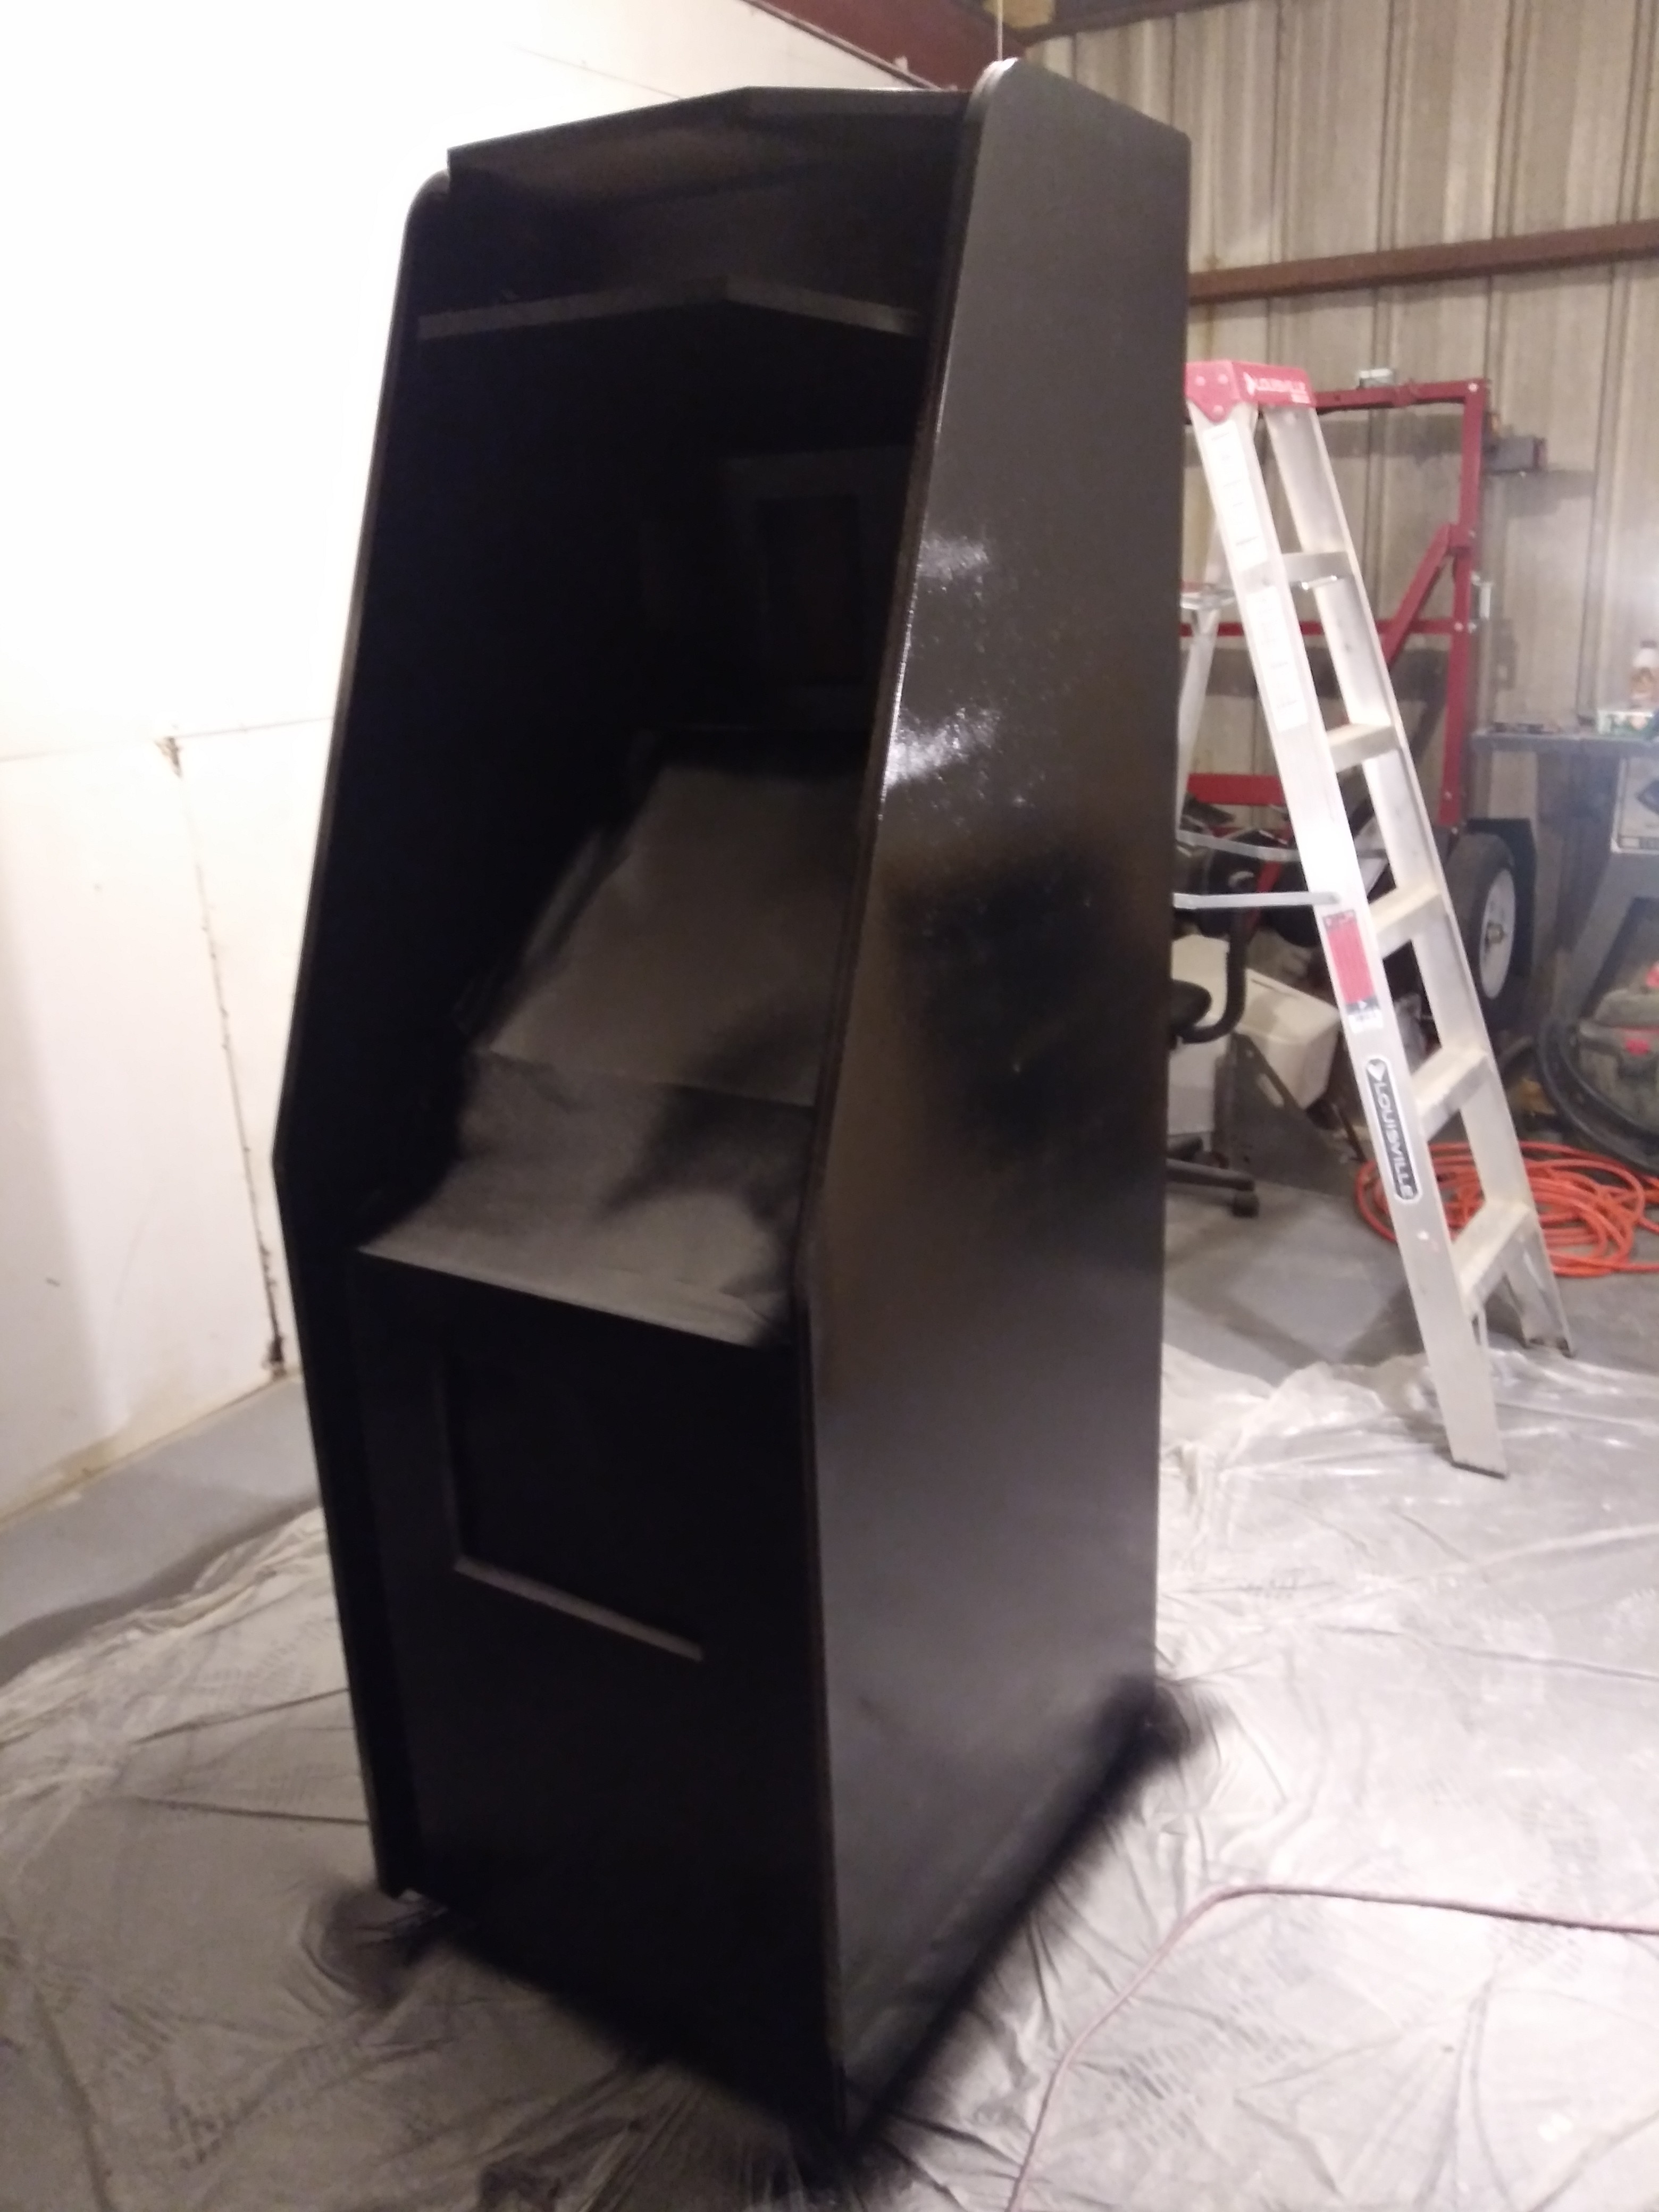
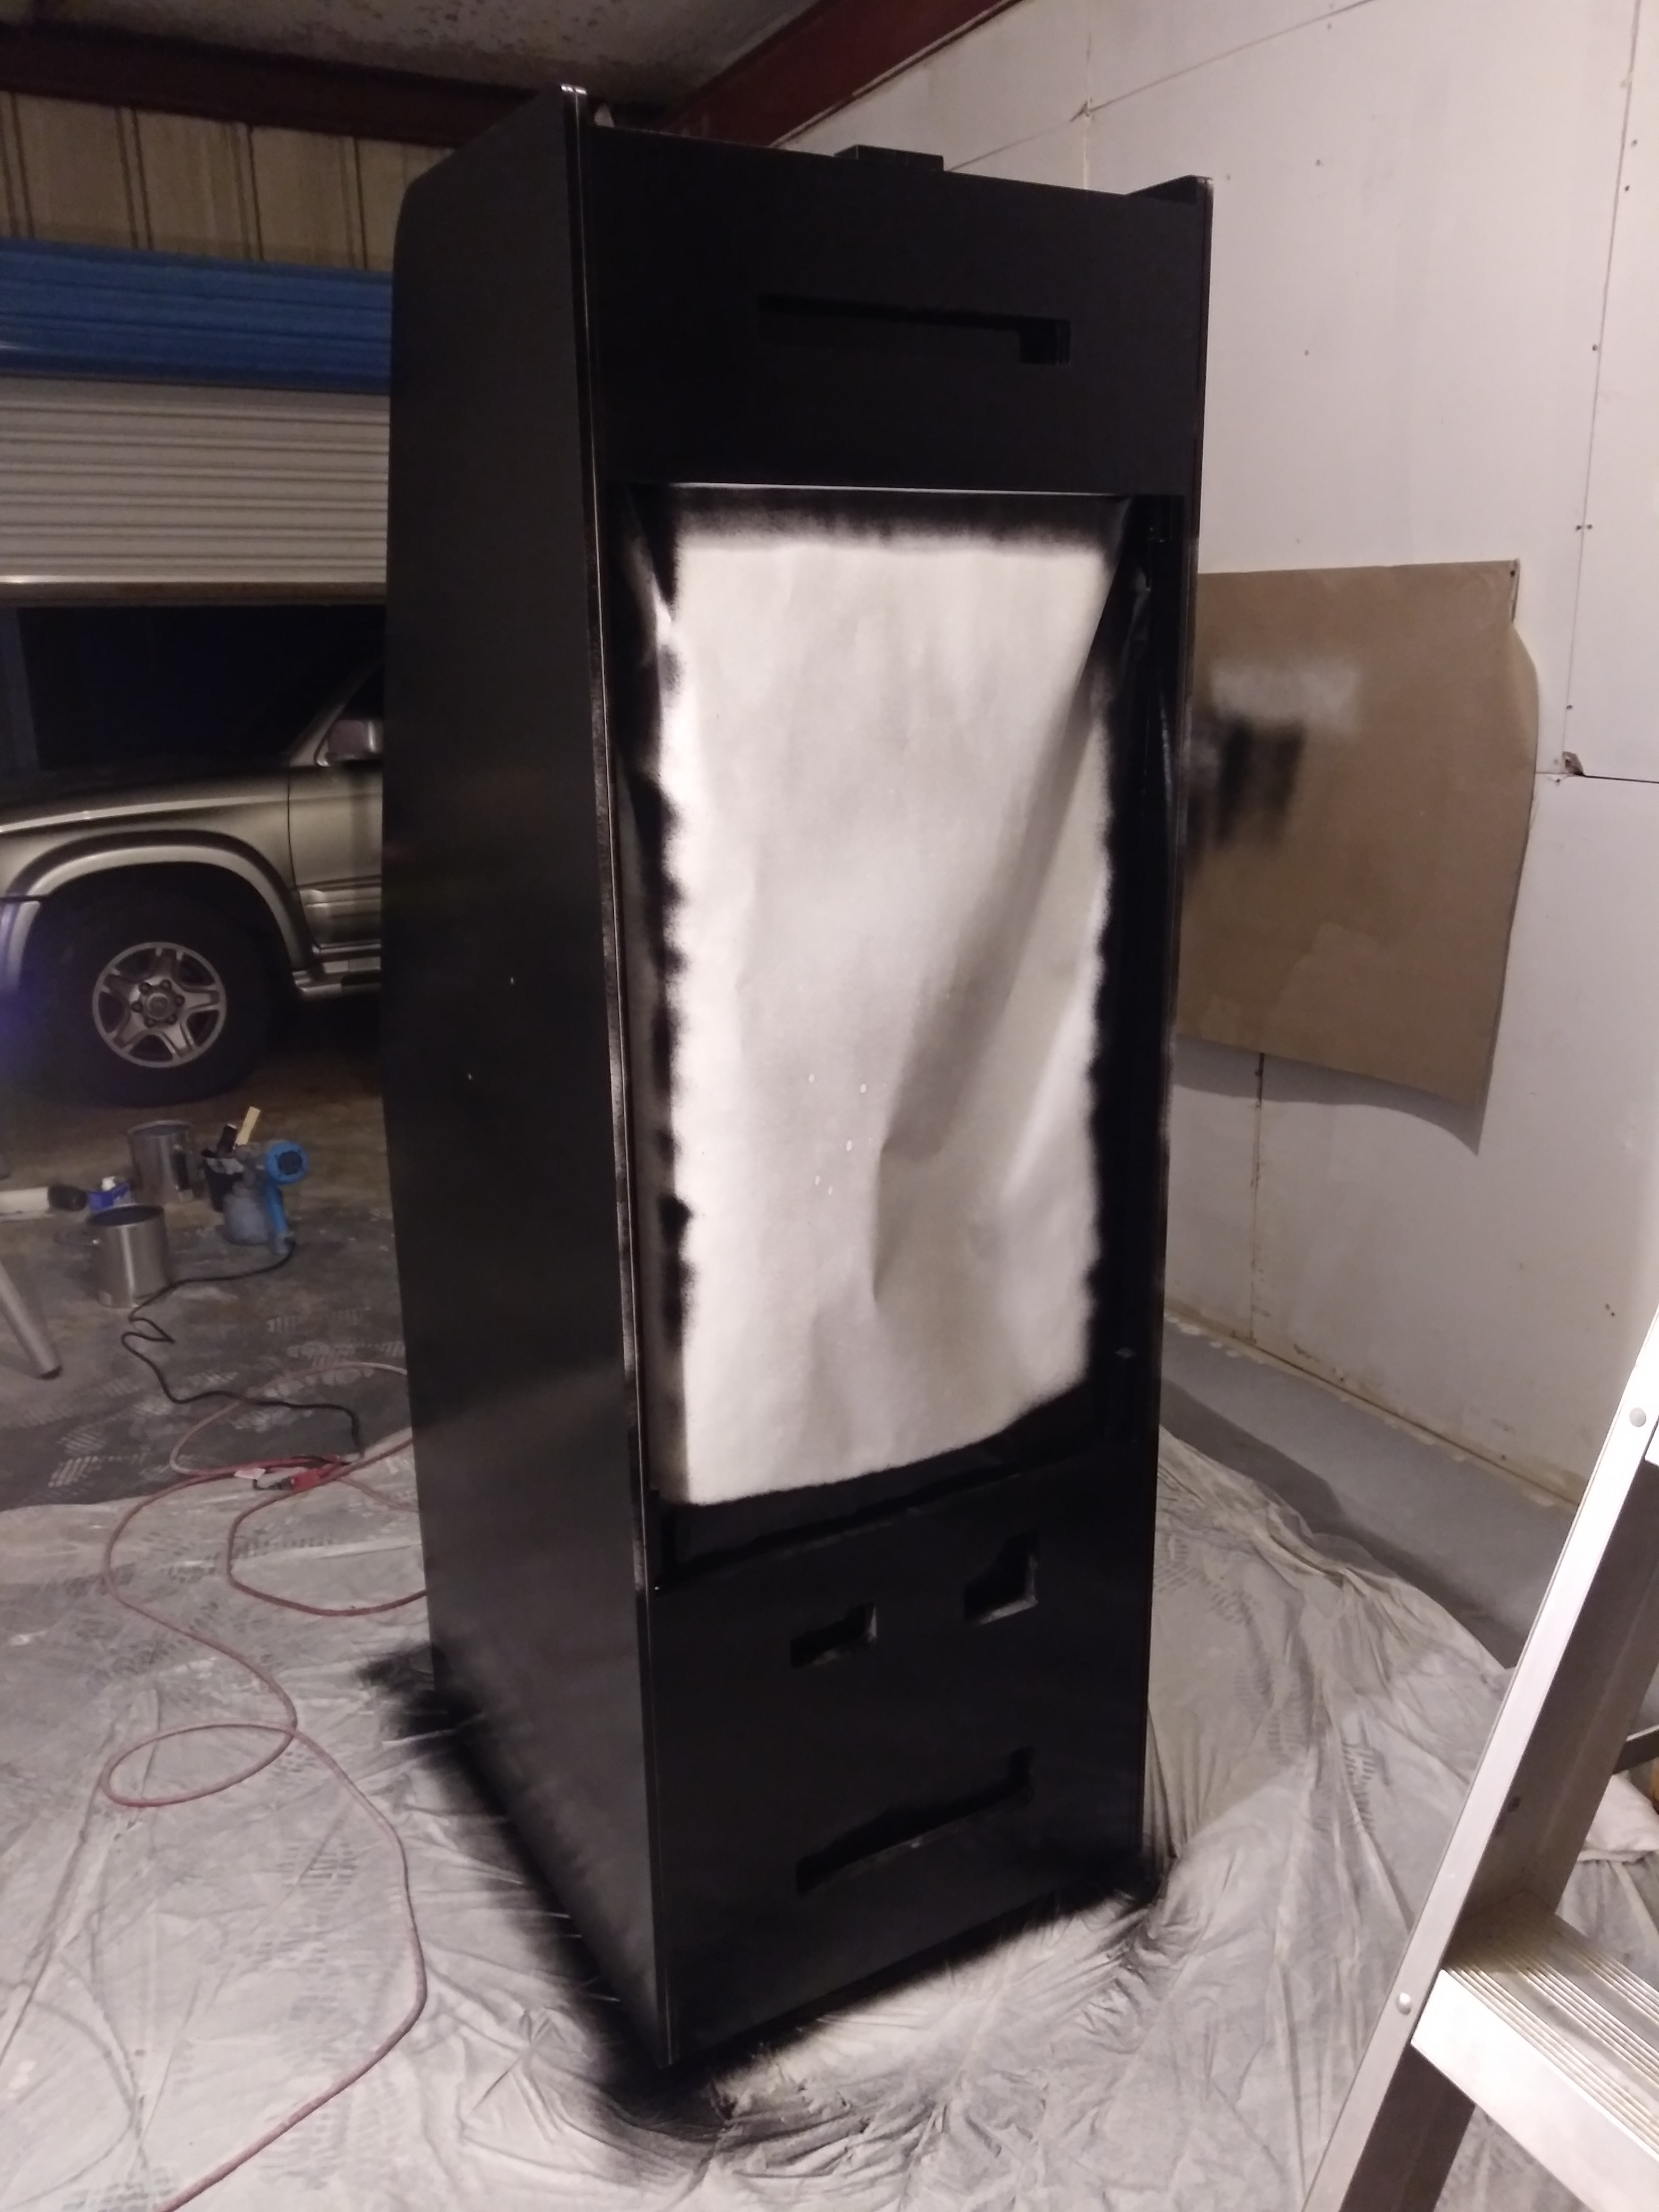
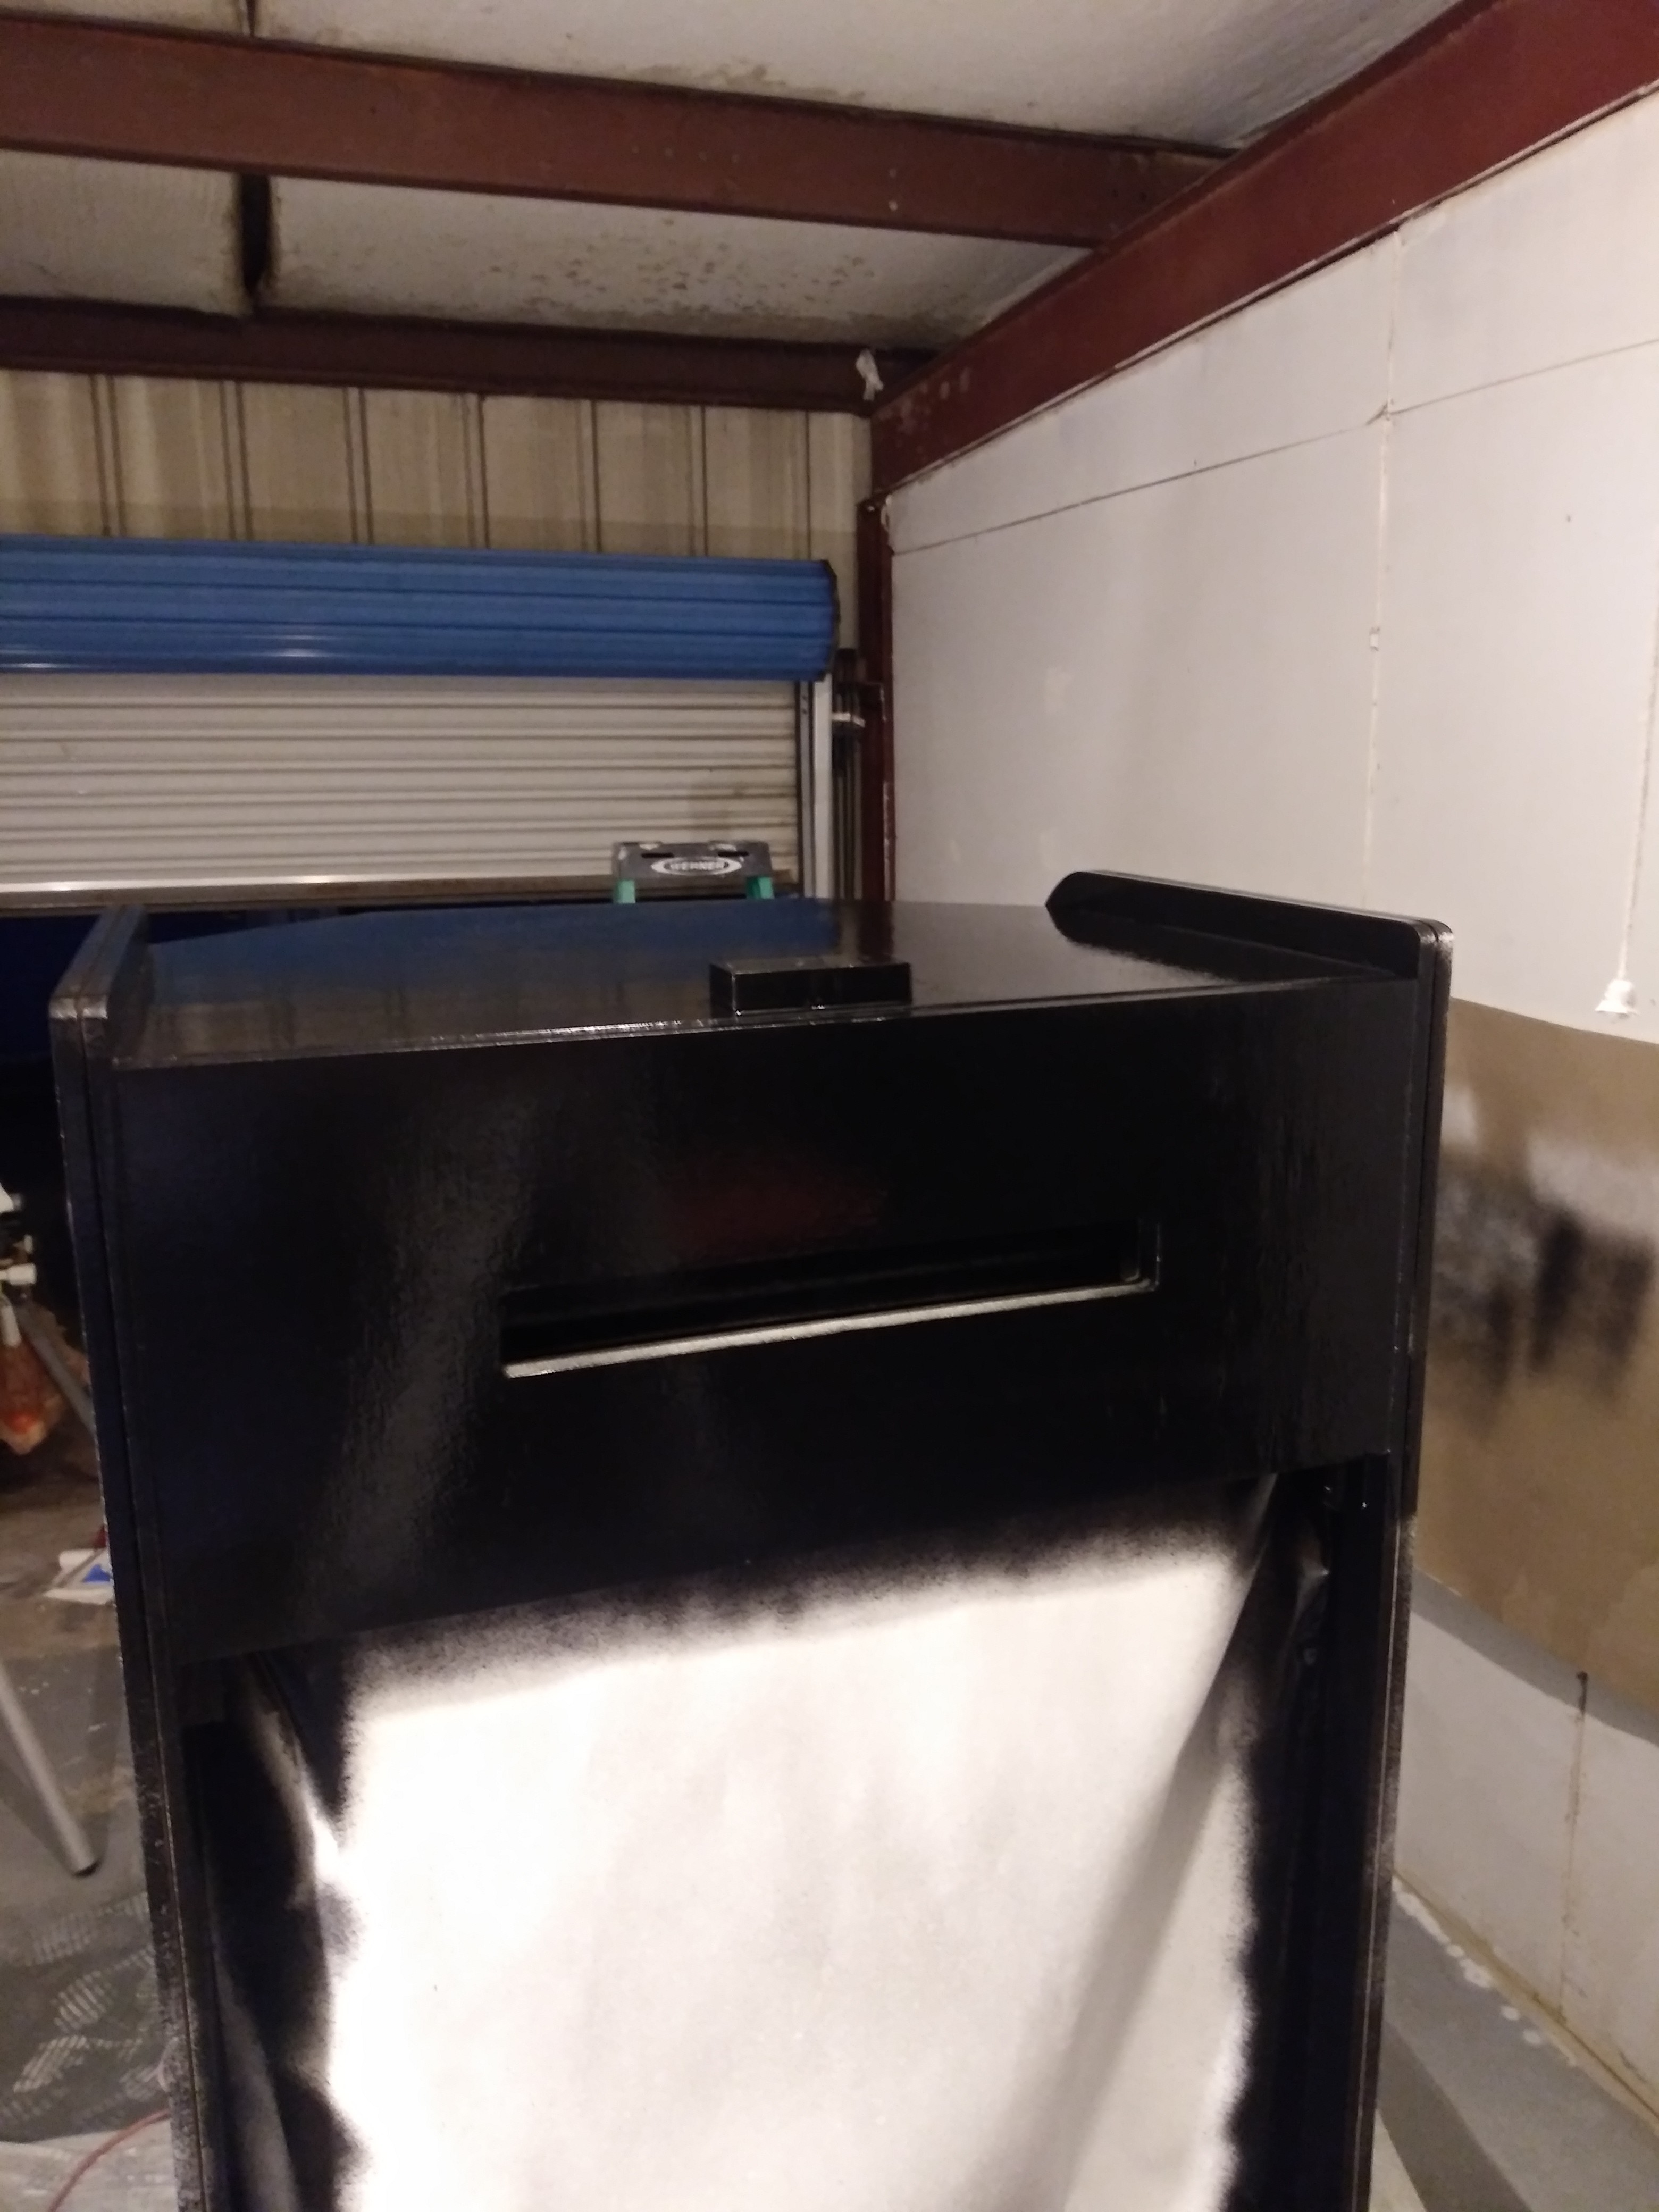
First coat of Rustoleum Satin Black laid down. I’m getting pretty good with thinning the paint, and actually spraying evenly. However, I think I am still trying to apply too thick of a coat, when I should be doing less thick coats, and more thin coats. But at any rate, it’s turning out nicely, and here’s where she stands right now.
Spraying is such a smoother finish. Doubt I’ll ever pick up another brush and roller. lol
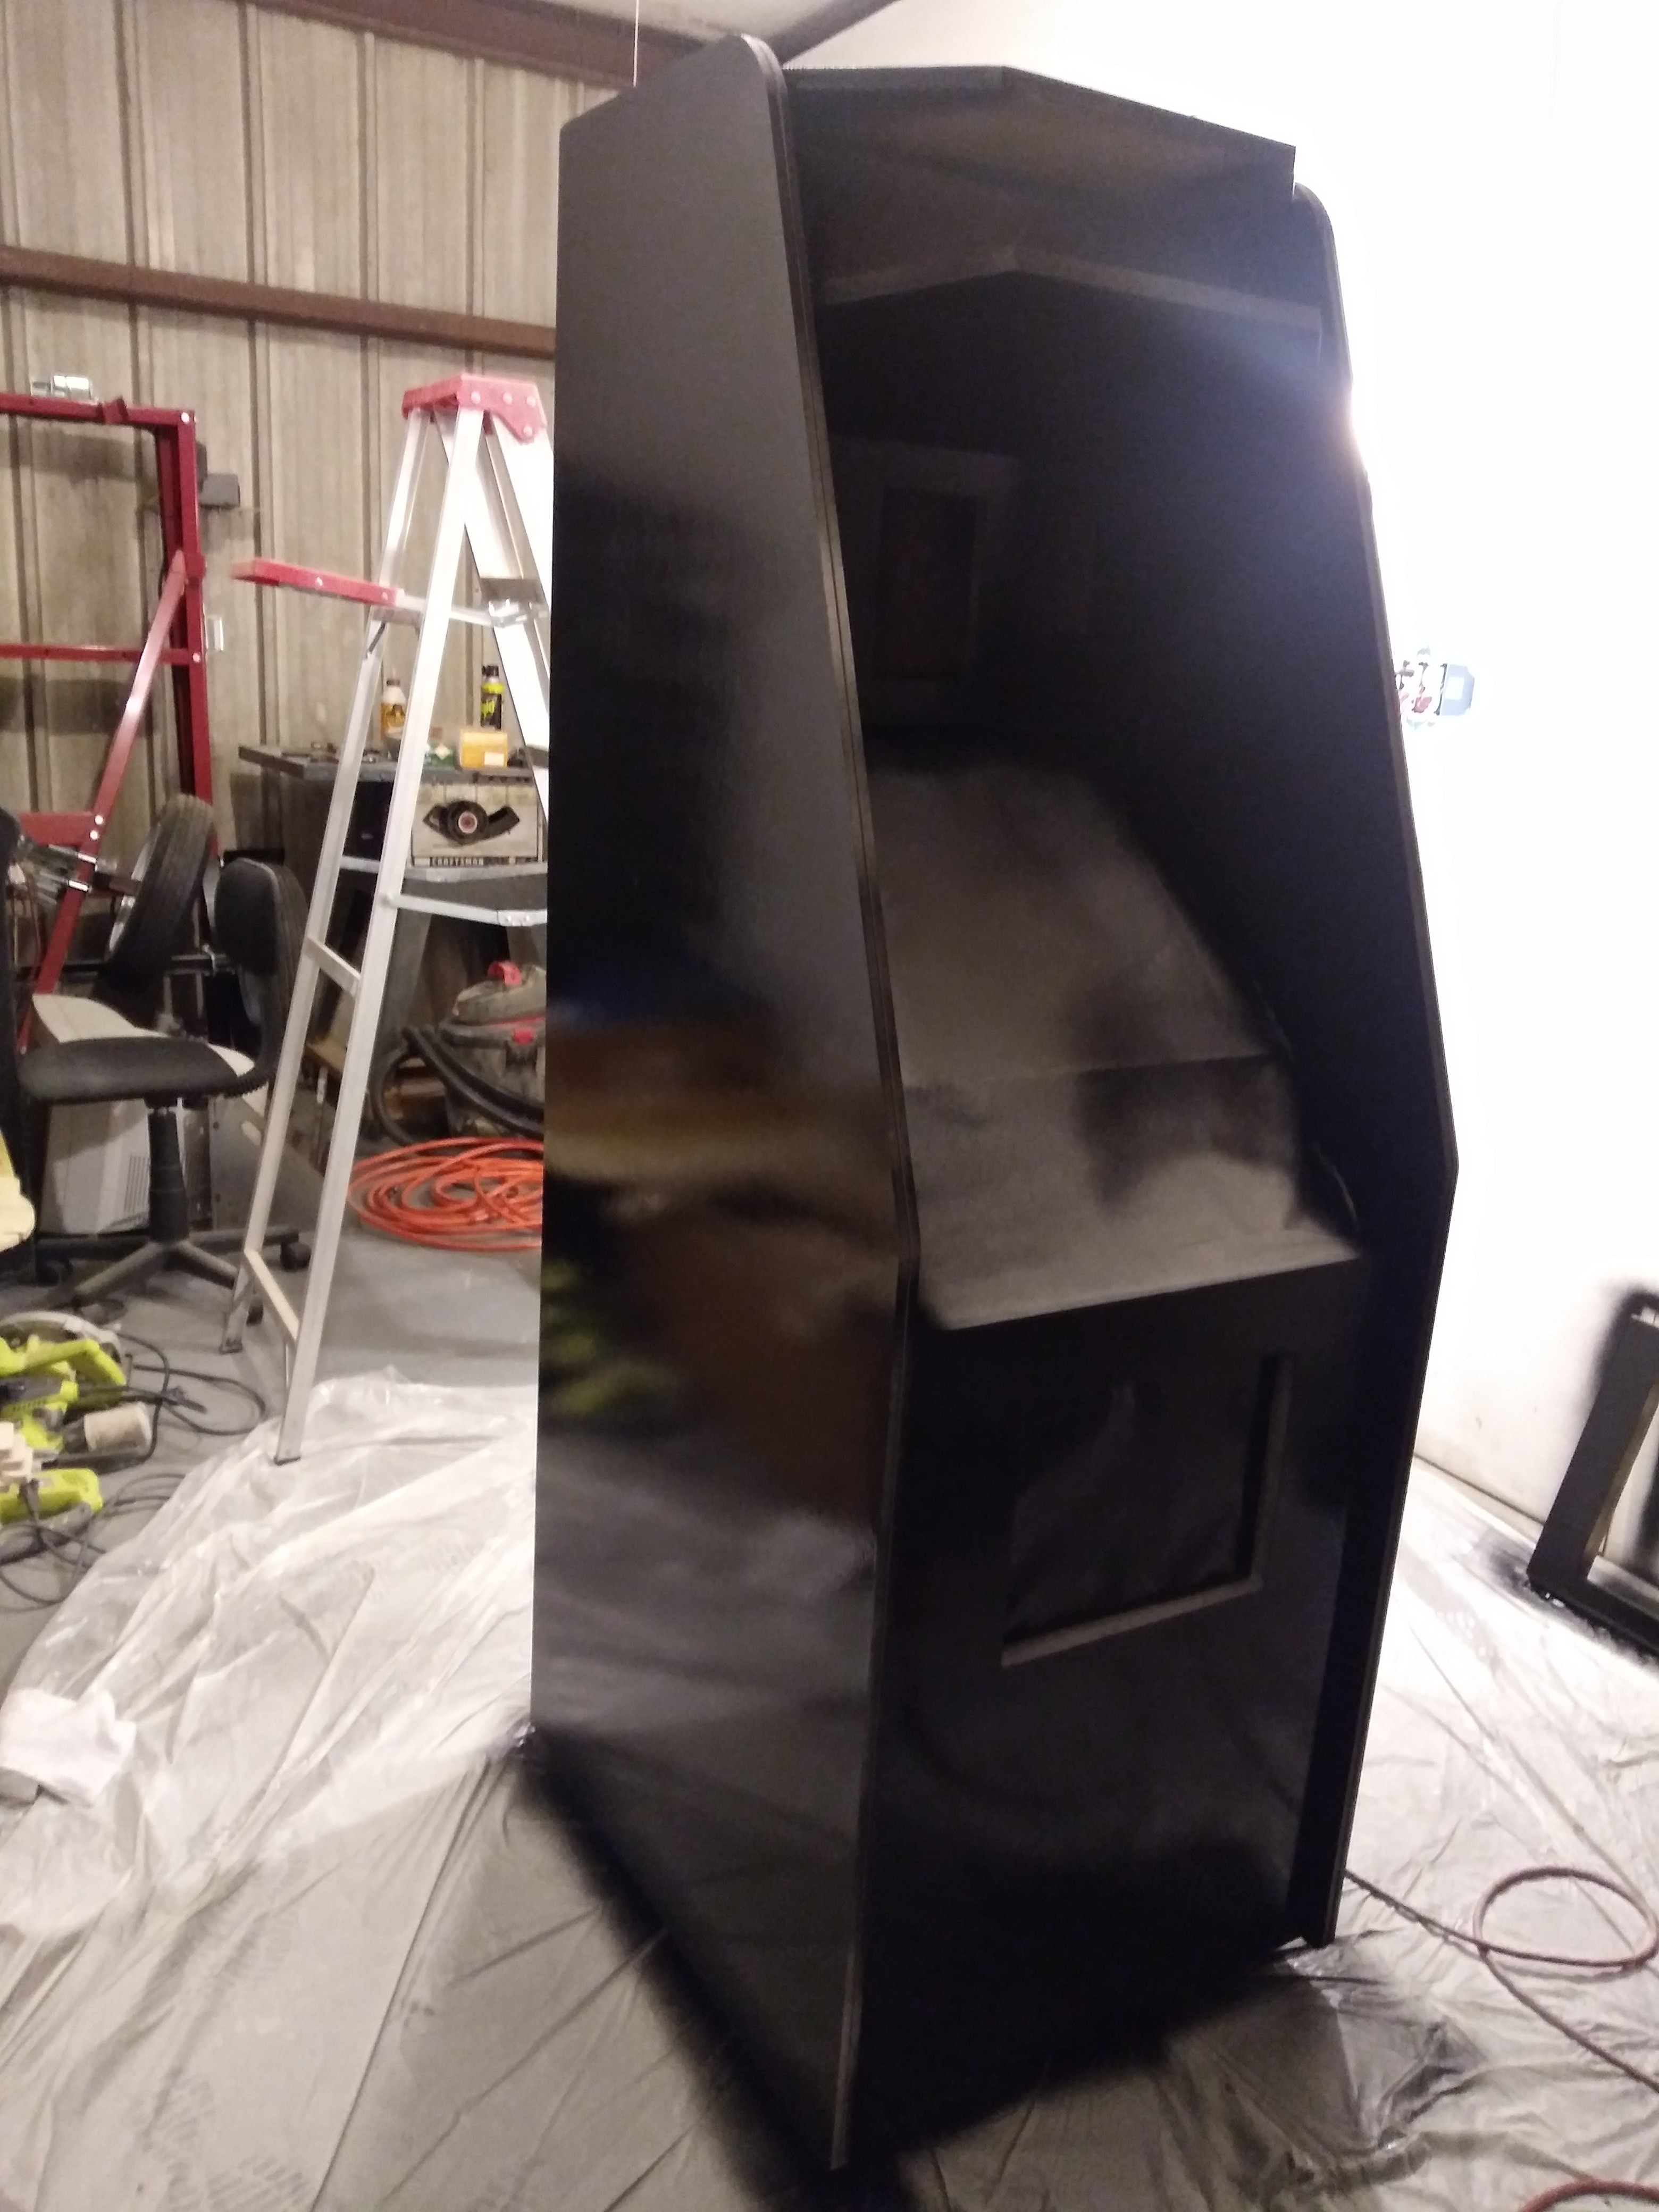
The coat looks shiny because it’s still wet. The satin finish should have just a tad more shine than flat, and less than semi-gloss. Or so I’m hoping.
Just look at that. Happy Happy Happy!
Before you tell me that I missed a spot lol I took this photo before I realized I had missed that area. It has since been corrected! LOL
So, what’s next? Well. I’m in the home stretch now. Tomorrow night I’ll go back up there, check everything, if needed, I’ll hit it with some 600 grit sand paper, and then shoot the final coat on it. I got alot of coverage tonight, so I’m hoping tomorrow will just be a kind of ‘touch up’ visit. The enamel was so much thinner than the primer out of the can, so there’s definitely a potential for runs if you’re not careful. I had to get my foam roller out and address 2 areas. The same 2 areas that had little runs when I primed it yesterday.
ALSO. I can tell you from experience, the Rustoleum flows out very nice and smooth as it dries, so I’m not too worried about it.
After tomorrow… We begin putting it all together! I have everything I need, either in hand, or on the way. So get ready! Schtuff’s about to get real.
PS: You’re going to see alot of areas that didn’t get paint. Like on the edges, and around the cutouts in various places. These will be covered by components, so I didn’t feel the need to take a chance on getting a run trying to paint an area that’s not going to be visible from the outside or inside. Just putting that out there.
Thanks for following along thus far!
4 Likes
I empathize. It is so easy to spray paint once you have it running and have committed to cleaning, it is hard to not put a lot down.
1 Like