Hi all, I am new to EstlCAM and having a hard time figuring this issue out. I want to create a pocket with multiple islands in it, but some of the parts are quite close to each other.
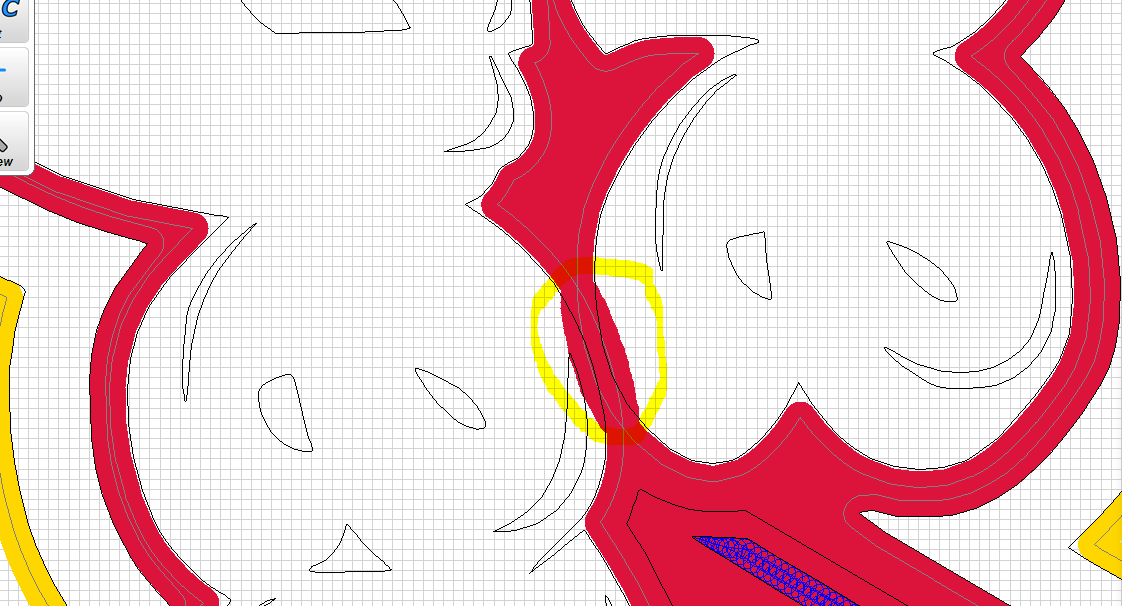
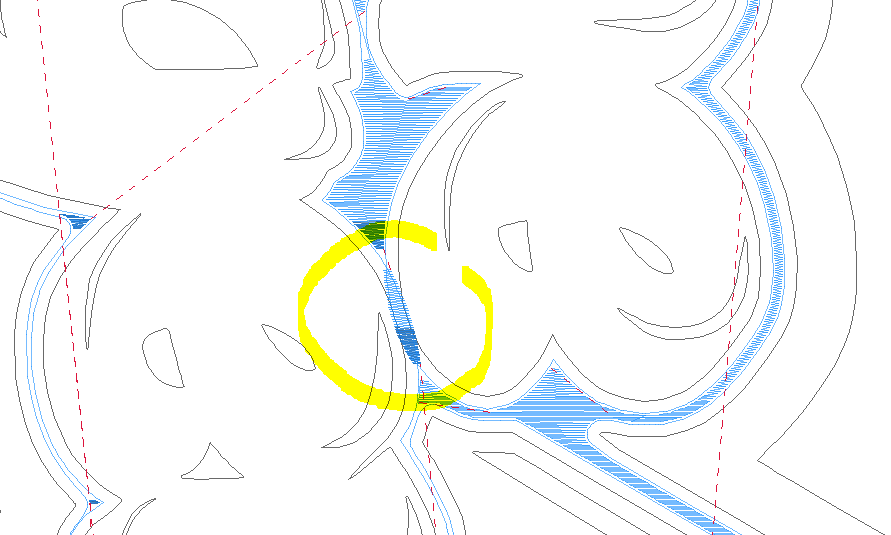
I want to create the islands while avoiding cutting into individual parts because of the machining path of the other parts. As an example I’m trying to create a pocket around two “bubbled” words (each word an island). I first make each word a part then create the island pocket around it using hole on a shape encompassing both words. For the most part it works, but an example of the two parts eating into each other is circled in the image below:
I have encountered this before and I believe it is a bug in Estlcam. I don’t know of an easy workaround.
A difficult workaround is to modify the artwork by dilating and eroding (also called closing or opening) so the narrow section is not present in the artwork to begin with.
I’m not sure if this is a small-ish thing that @christian-knuell can fix given a test case, or if it is deeper.
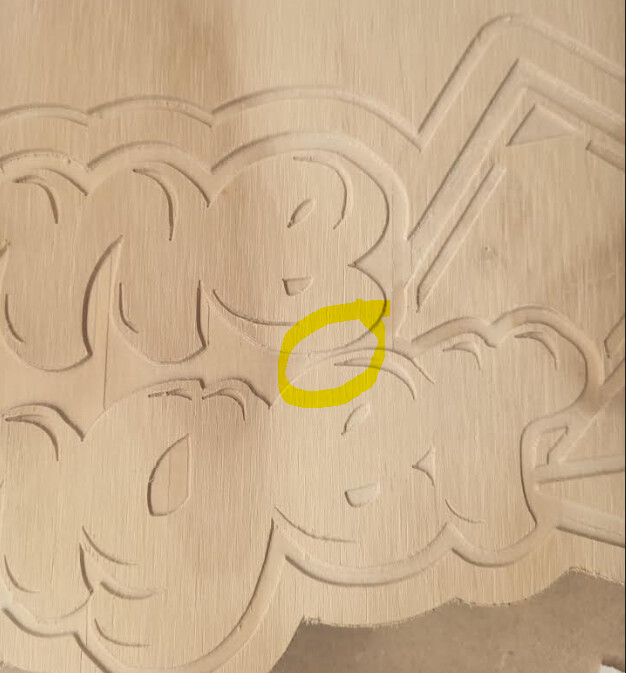
Thanks for the reply, it saves me a lot of time trouble shooting for an option that may not exist. I decided to test out using one of my V tools and the carving option to clean out around the islands. Will be slower, but if it work I’ll take it. Since I’ll be infilling around the islands with white resin, the base of the pockets doesn’t need a particularly nice finish.
You’re not alone. I’ve run into this multiple times. I either switch to a small diameter bit or cheat and make an inset in inkscape to create smaller islands that won’t cut outside the lines. Then finish the full size with a smaller bit. This happens a lot when making coasters with small details.
Figured I’d follow up with the results using the V bit and carving option. Got the results I was looking for; quite happy. This is my first build for (and time using) CNC machines. Overall, I’ve enjoyed learning the process with the LR2.
That’s very nice. Great effort and way to get over your obstacles for your design.
I’ve done a few things in signs with not much success. I keep thinking I’m tooling wrong. So allow me to pose this: Did you use a V bit for the whole sign or did you tool change to bottom out the pockets with a straight bit?
I’m still in my very part time learning of this machine and I get awfully interrupted with soccer seasons. So I get some learning, then I have to set the machine aside for time reasons. I’ve only attempted to cut a few signs and got some measure of success. I really want to get good at this as I have some ideas I want to start cutting. Also the honey-do list is growing.
Hi @DuffyNW. First a caveat: I’m very new to cnc machines, and this is my first project using one. That said, happy to share my observations and hope that more experienced people jump in to correct or give better guidance.
I used a pretty standard 12.7mm 60 degree V bit for all the pocket work.
though I’m calling them pockets, I did not use hole>pocket/island for any of the pocket work, I used the carving options.
– I think this was a viable solution because my project was not big (400mmX260mm). Something large like a street sign would probably take an impractically long time and would be big enough that you could use a more standard 180 degree bit.
my pockets were not very deep, ranging from 0.7mm to 1mm depending on detail. I could imagine deep pockets would also be an issue for the V bit
I had to use a very small stepover (~1%) to get a clean finish. Even 5% was looking rough. Though this worked for me, since we’ll all have different builds, you may find it doesn’t have to be so small.
Make sure you are square and level
I actually took calipers to each side of my gantry to make sure everything was level for the Z. I then screwed down a piece of spoil board and tested the level with a simple gcode that carved a 0.5mm deep line along the outer edge of my work area (very fast, only a couple minutes to run). I inserted some paper card under low spotsof the board until the line cut relatively even in depth.
after the spoil board was down and level, I screwed my project board down, re-zeroed for the added height, and ran the gcode again to ensure the project surface was still level.
I used separate carving and cutting gcodes instead of a tool change break.
I did this in case I had to rerun any specific parts (eg it did not carve deep enough in some spots). I could make a new code to rerun just those specific areas, but not have to change or adjust anything machine side.
One gcode contained only cuts using the v bit and another using only the cutting bit. I ran the carving file first, let the machine return to origin, swapped bits and ran the cutting file (using a 3.18mm double flute upcasting bit).
– note that this failed the first time because my bit got hung up on a cut out part (didn’t use enough holding tabs). Since the cutting takes a lot less time and ruined 5 hours of carving, I decided to cut first (more holding tabs) then carve the second time.
when switching tools I used calipers to measure to make sure the replacement bit was sitting at the same height as the first bit.
test parts of what you want to carve first
to play with depths and width, I pulled out sample parts of my dxf (eg the trim detail and on of the pockets) and tested carving scarp wood on just those bits until I found setting I liked.
Thanks for your interest, I hope some of this is helpful information. in the end, this is what I got off the table:
Very nice! I agree with using two seperate operations instead of changing bits in the middle. The only thing I’d suggest is using a downcut bit. I get far less tearout and much cleaner edges. What are you using for a finishing pass?
Thank you for that very descriptive reply! I truly appreciate it. Sorry it took me so long to provide my thanks, you took plenty of time to draft that response, it will definitely serve me and many others well!