I’m doing a carve in Estlcam and and the path is wider than my 45 degree bit. I selected the pocketing tool option and selected an endmill to do the clearing, but no tool path is being generated. Am I missing something?
Not sure how to get this to work.

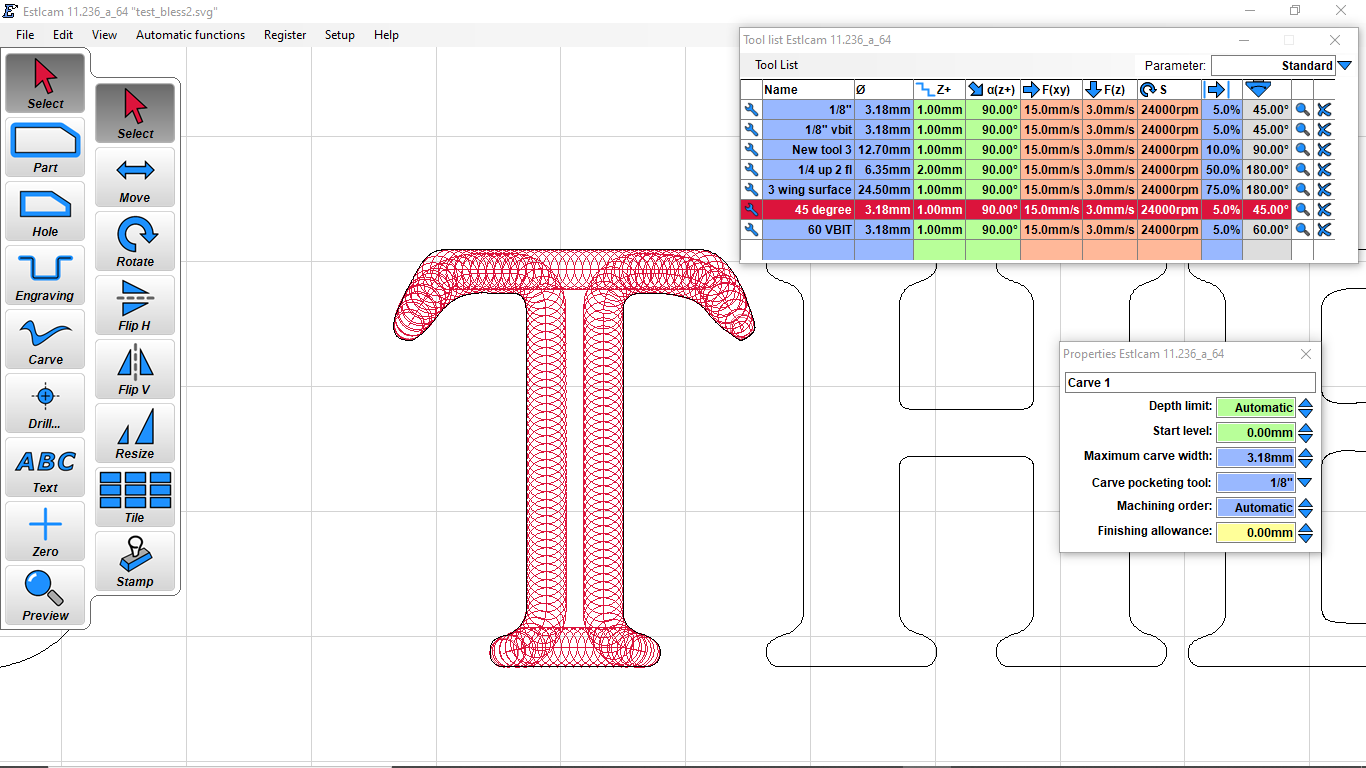
I think you need to play with the maximum carve width and the max depth. The red spirals confuse me, but I can tell it isn’t trying to get all the way in the middle. You can also play with using a different pocketing tool (with a flat bottom).
1 Like
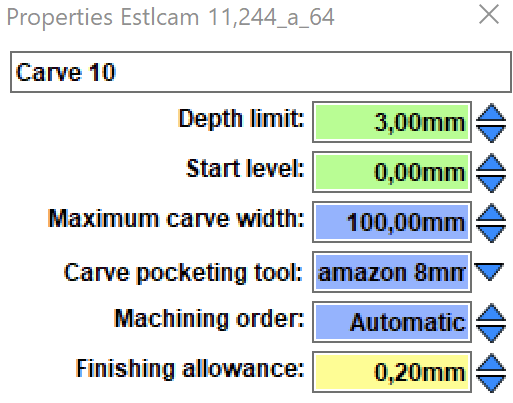
I use this tool a little differently, by setting a maximum depth (Usually shallow), and then setting the width to be greater than the widest that it would ever need (typically 100mm.)
The result is that it carves out the entire shape, with a flat bottom.
3 Likes
I believe the spirals you mention are actually just circles. They represent the diameter of the tool, which is often a v bit. As you increase your max depth, those circles get bigger, representing the increase in tool diameter as you go up the bit.
I’ve found that limiting depth of cut is productive, because estlcam can go quite deep, even for small carves, when set to automatic. Your current maximum carve width is inadequate to cut all the middle of the letter out. You can increase it as far as you like within the confines of the shape without penalty. Try 1/2/3/4/5mm and see how the red shapes increase in size until they overlap.
1 Like
I had the same issue, and googling led me here.
I see the replies here say you have to widen the v-carve so it starts clearing using the V-carve.
And yes I can do this but that will take so long…and that is the reason the clearing feature is there I guess. But I also get no toolpath.
Did you manage to get the feature working like it should?
hmm seems to be working if I set the carve width to 100mm then it starts to use the clean mill instead of the V-bit to clean up the big spots.
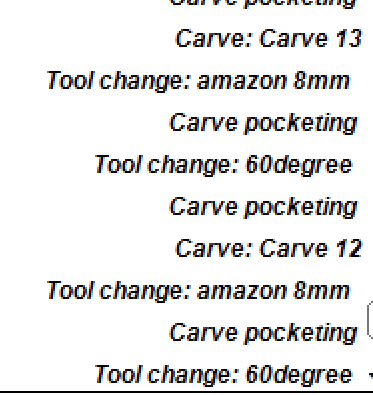
Ok now I got it working it switches back and forth between the clearing bit and the V-bit, which doesn’t really work if you don’t have a tool changer.
1 Like
Yes, with a specified ‘Carve pocketing tool’ it will switch to that for the large areas, and with non specified it will use the tip of the v-bit to mill the bottom of the pocket, which takes a very long time.
I used the carve pocketing tool and then manually split the gcode into two separate files so that I could manually switch tools, including setting Z=0 on the top surface of the workpiece.
I think it is probably possible to trigger OctoPrint to pause, manually jog and change tools (including setting Z through the Octoprint UI), and then resume, in which case I wouldn’t need to manually cut and paste the gcode. But I haven’t worked through the details.
I think a Marlin pause (M0/M1) to change tools is not viable because it won’t accept commands (G38.2, or G28 Z) to set the Z coordinate while it is paused, so an Octoprint-level pause is required. Or now that I think of it, the tool change could be a canned routine, and that could work.
The M0 pause does not, but you can wroite up the script in Estlcam to do all of those actions, with a pause in between. It’s been a while, and I’ve changed from Marlin so the commands are different now, but I used to do something like:
G0 X0 Y0 Z25
M0 "Change tool <n>"
M0 "Attach Z probe"
G28 Z
G0 Z10
M0 "Remove Z Probe"
G0 Z3
The extra pause between the change and attach Z probe… Well, If you guessed that I forgot to do that and let it crash to tool into the work, you’d be right…
1 Like
I have figured out the toolswapping, but I do not fancy doing this often. As it could result in misalignment if I do something wrong.
I even changed the post processor for Freecad although I by now adjusted some things.
You can find it here it is for marlin and it replaces M6 with a bunch of commands.
![]() (can’t include links in my post, but it’s just Freecad forum so I pasted an image…)
(can’t include links in my post, but it’s just Freecad forum so I pasted an image…)
Although since then I have added a z-max switch and now I home z to max and when I do a tool-change I just go to G53 then do G28 Z. If you don’t do this you have to manually input Z max every program since you would sometimes home z on the top of your part and sometimes not. (at least I do this)
I set all my home settings in G55. (for this to work good in Marlin you need to home your axis so it knows where the offsets really are.)
Already recovered 1 failed program after emergency shutdown. Since G55 is stored in memory you can just home the machine and start milling again.
If you did this in G53 aka normal coordinate system and you placed your home manually on your work-piece you would have lost your home settings when the machine got reset.
1 Like
Just a little heads-up to anyone trying out G55, if you set to G55 then home it will reset the G55 home offsets.
So for setting G55 home offset I have a macro: G55/nG92X0Y0/nG53
if you forget G53 at the end and you press the home buttons on your screen you will loose your offsets.
Where is the edit button on this forum…
But anyway.
M0 doesn’t work in Octoprint it is even blocked by default, and I tried it after unblocking it would somehow work but I got a button on the interface with resume and no message. And the button wasn’t reacting that good. So maybe it works if you run it local but not from my mobile.
With v11 select a pocketing tool and increase Maximum width (the not so obvious trick) to pocket with a flat tool. In v12 all you need to do is select a pocketing tool. The Depth defaults to maximum and only needs to be changed if you want a shallower pocket.
To avoid having to switch back and forth between V-bit and pocketing tools (post #9) select all like paths and Edit : Group them.
")