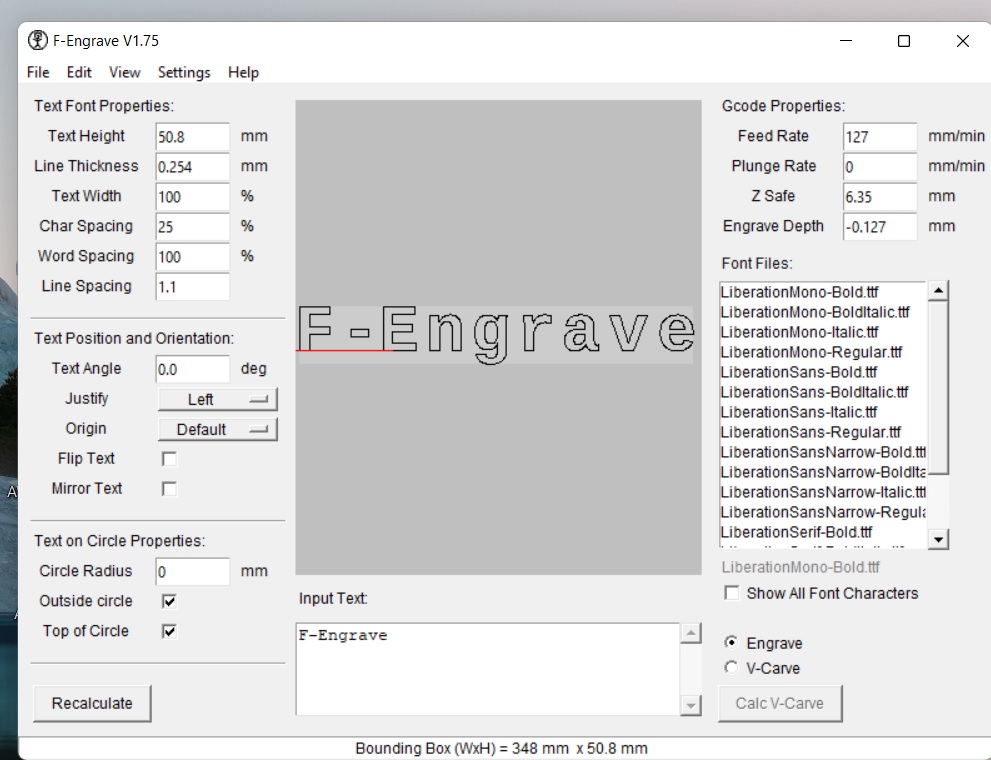
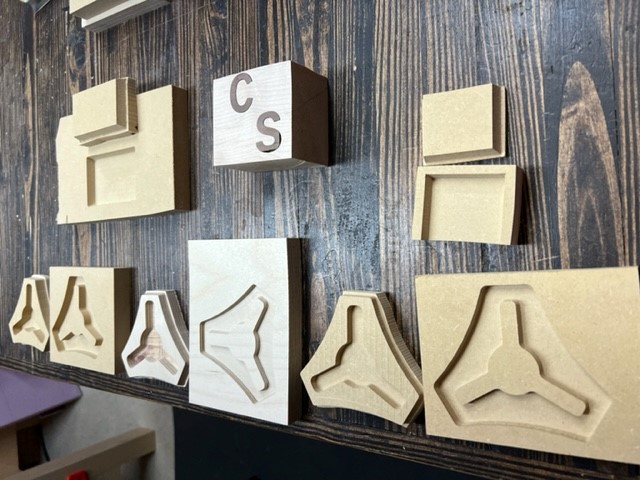
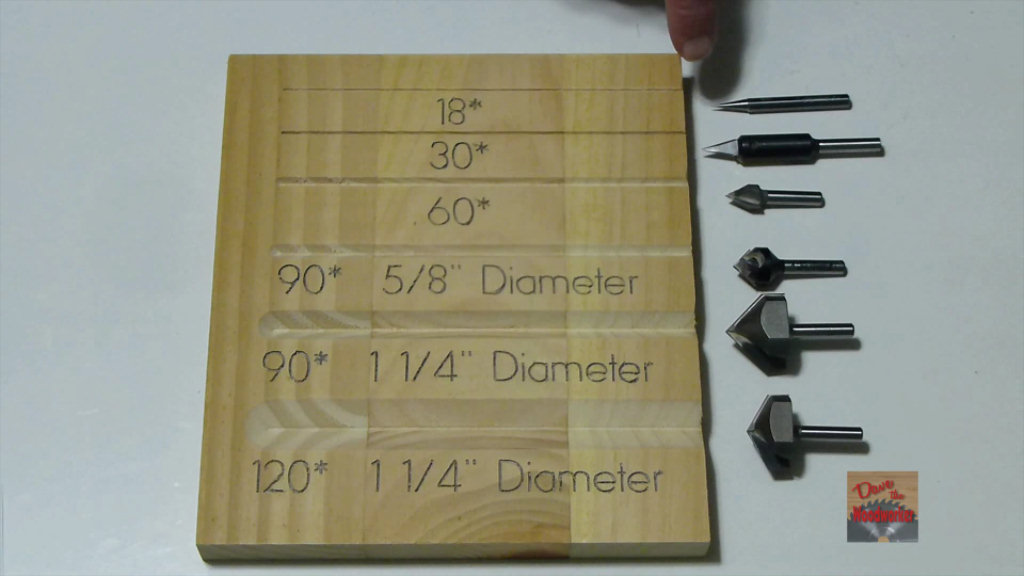
I’m officially giving up on F-Engrave for now. I’ve spend the last month trying to learn inlays. I will say I did learn a lot about how the male and female pieces work together. However after hours and hours of tests I cannot get a good fit. The male part is always smaller than the female. I’ve tried a 60 deg, 30 deg and bought a new 6.2 degree bit. It’s possible I got a bad download, Marlin problems or other issue. I can’t blame F-Engrave because I don’t know if it’s something on my end. I discovered a few things when I use Camotics to visually view my cuts male and female before sending to the MPCNC. If you change the vbit size in F-Engrave the size of the male part changes widths. Which makes sense, but it gets wider if I use a smaller angle bit, which doesn’t make sense at least to me. Seems like around the 60 degree bit size it works the best. But I can’t cut small or detailed inlays with a 60 deg bit. I really want to use the 6.2 degree bit but the male part was the worst of all with this size bit. I’ll post pictures of the F-Engrave I have, Marlin FW version and Inlay pics. But for me I’m going to attempt Carveco using the Marlin PP that I found on another post here. Not sure if that will solve my problems, but giving it a try.
I found a knock off of the Amana 46280-K on Amazon. Has the same measurements, I checked the angle and used a calculator to verify the angle. Since I thought my angle was the issue. Are you using F-Engrave to make inlays?
I used EstlCam most recently, which has some idiosyncrasies of its own but I am very happy with the results. In the past I had used F-Engrave and I had struggled somewhat but ultimately got something satisfactory.
Part of my problem is I knew my router had some bad runout (later learned it was some dirt in the collet) and I was trying to model the bit as a slightly ‘blunt’ V shape, which led to all manner of fake offsets and stuff which made everything much more complicated.
That’s cool. I use Estlcam quite a bit and like it, but was unsuccessful using it for Inlays as well. I’m actually considering changing over to the Arduino Mega with Ramps and run Estlcam as my controller. I have SKR pro v1.2 right now with Marlin. And as you probably know Marlin has idiosyncrasies as well. Getting those male and female pieces to fit together with a tight tolerance is not so easy it seems. Right now I just downloaded Carveco Maker paid the $15 a month subscription to see if I can get it going. So far seems pretty easy. I found the Marlin Post processor on another post in the V1 forum.
Try following this guide especially the prismatic settings section which i think is likely where you are having your problems.
You will have to experiment with the setting depending on the bit angle you are using, for reference i’m using a 20 degree 0.2mm v bit with a prismatic setting of -1.578mm with a 5mm cut depth and get pretty good results.
Always apply the prismatic setting to the male piece, not the female.
if you are doing inlays always use the V-carve settings/calculations or it will simply engrave.
the video shows version 1.5, but all the same settings are there its just the GUI has changed a bit.
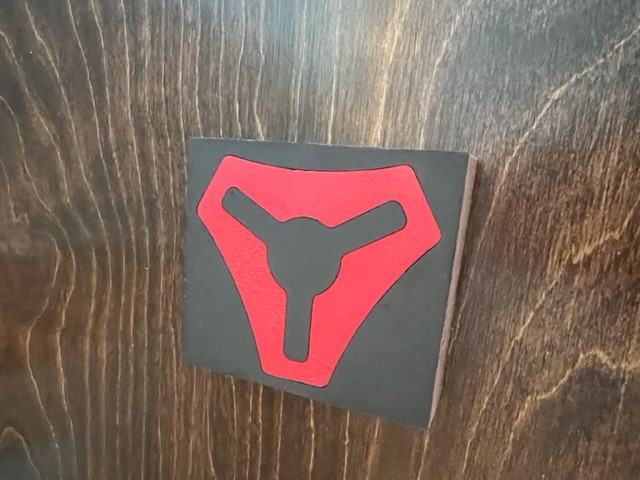
Thanks Simon, but man i watched this video so many times pausing and breaking it down step by step. I truly believe it has to do with the calculation of the bit angle. I’m not sure how the math works and probably over my head. But I could not get good results. On the bright side I just finished a successful inlay with Carveco Maker. I know it’s not free software but for 15 a month It will have to do for now. The inlay is just painted foam and there is a small tolerance gap. But it’s mostly because I trimmed it with exacto to test fit. I’ll be cutting wood soon using same setup. IMO Inlays are not an easy task, but having a good platform and setup, whatever you choose, will get you on the way. Good luck guys. I’ll post a final wood inlay later on.
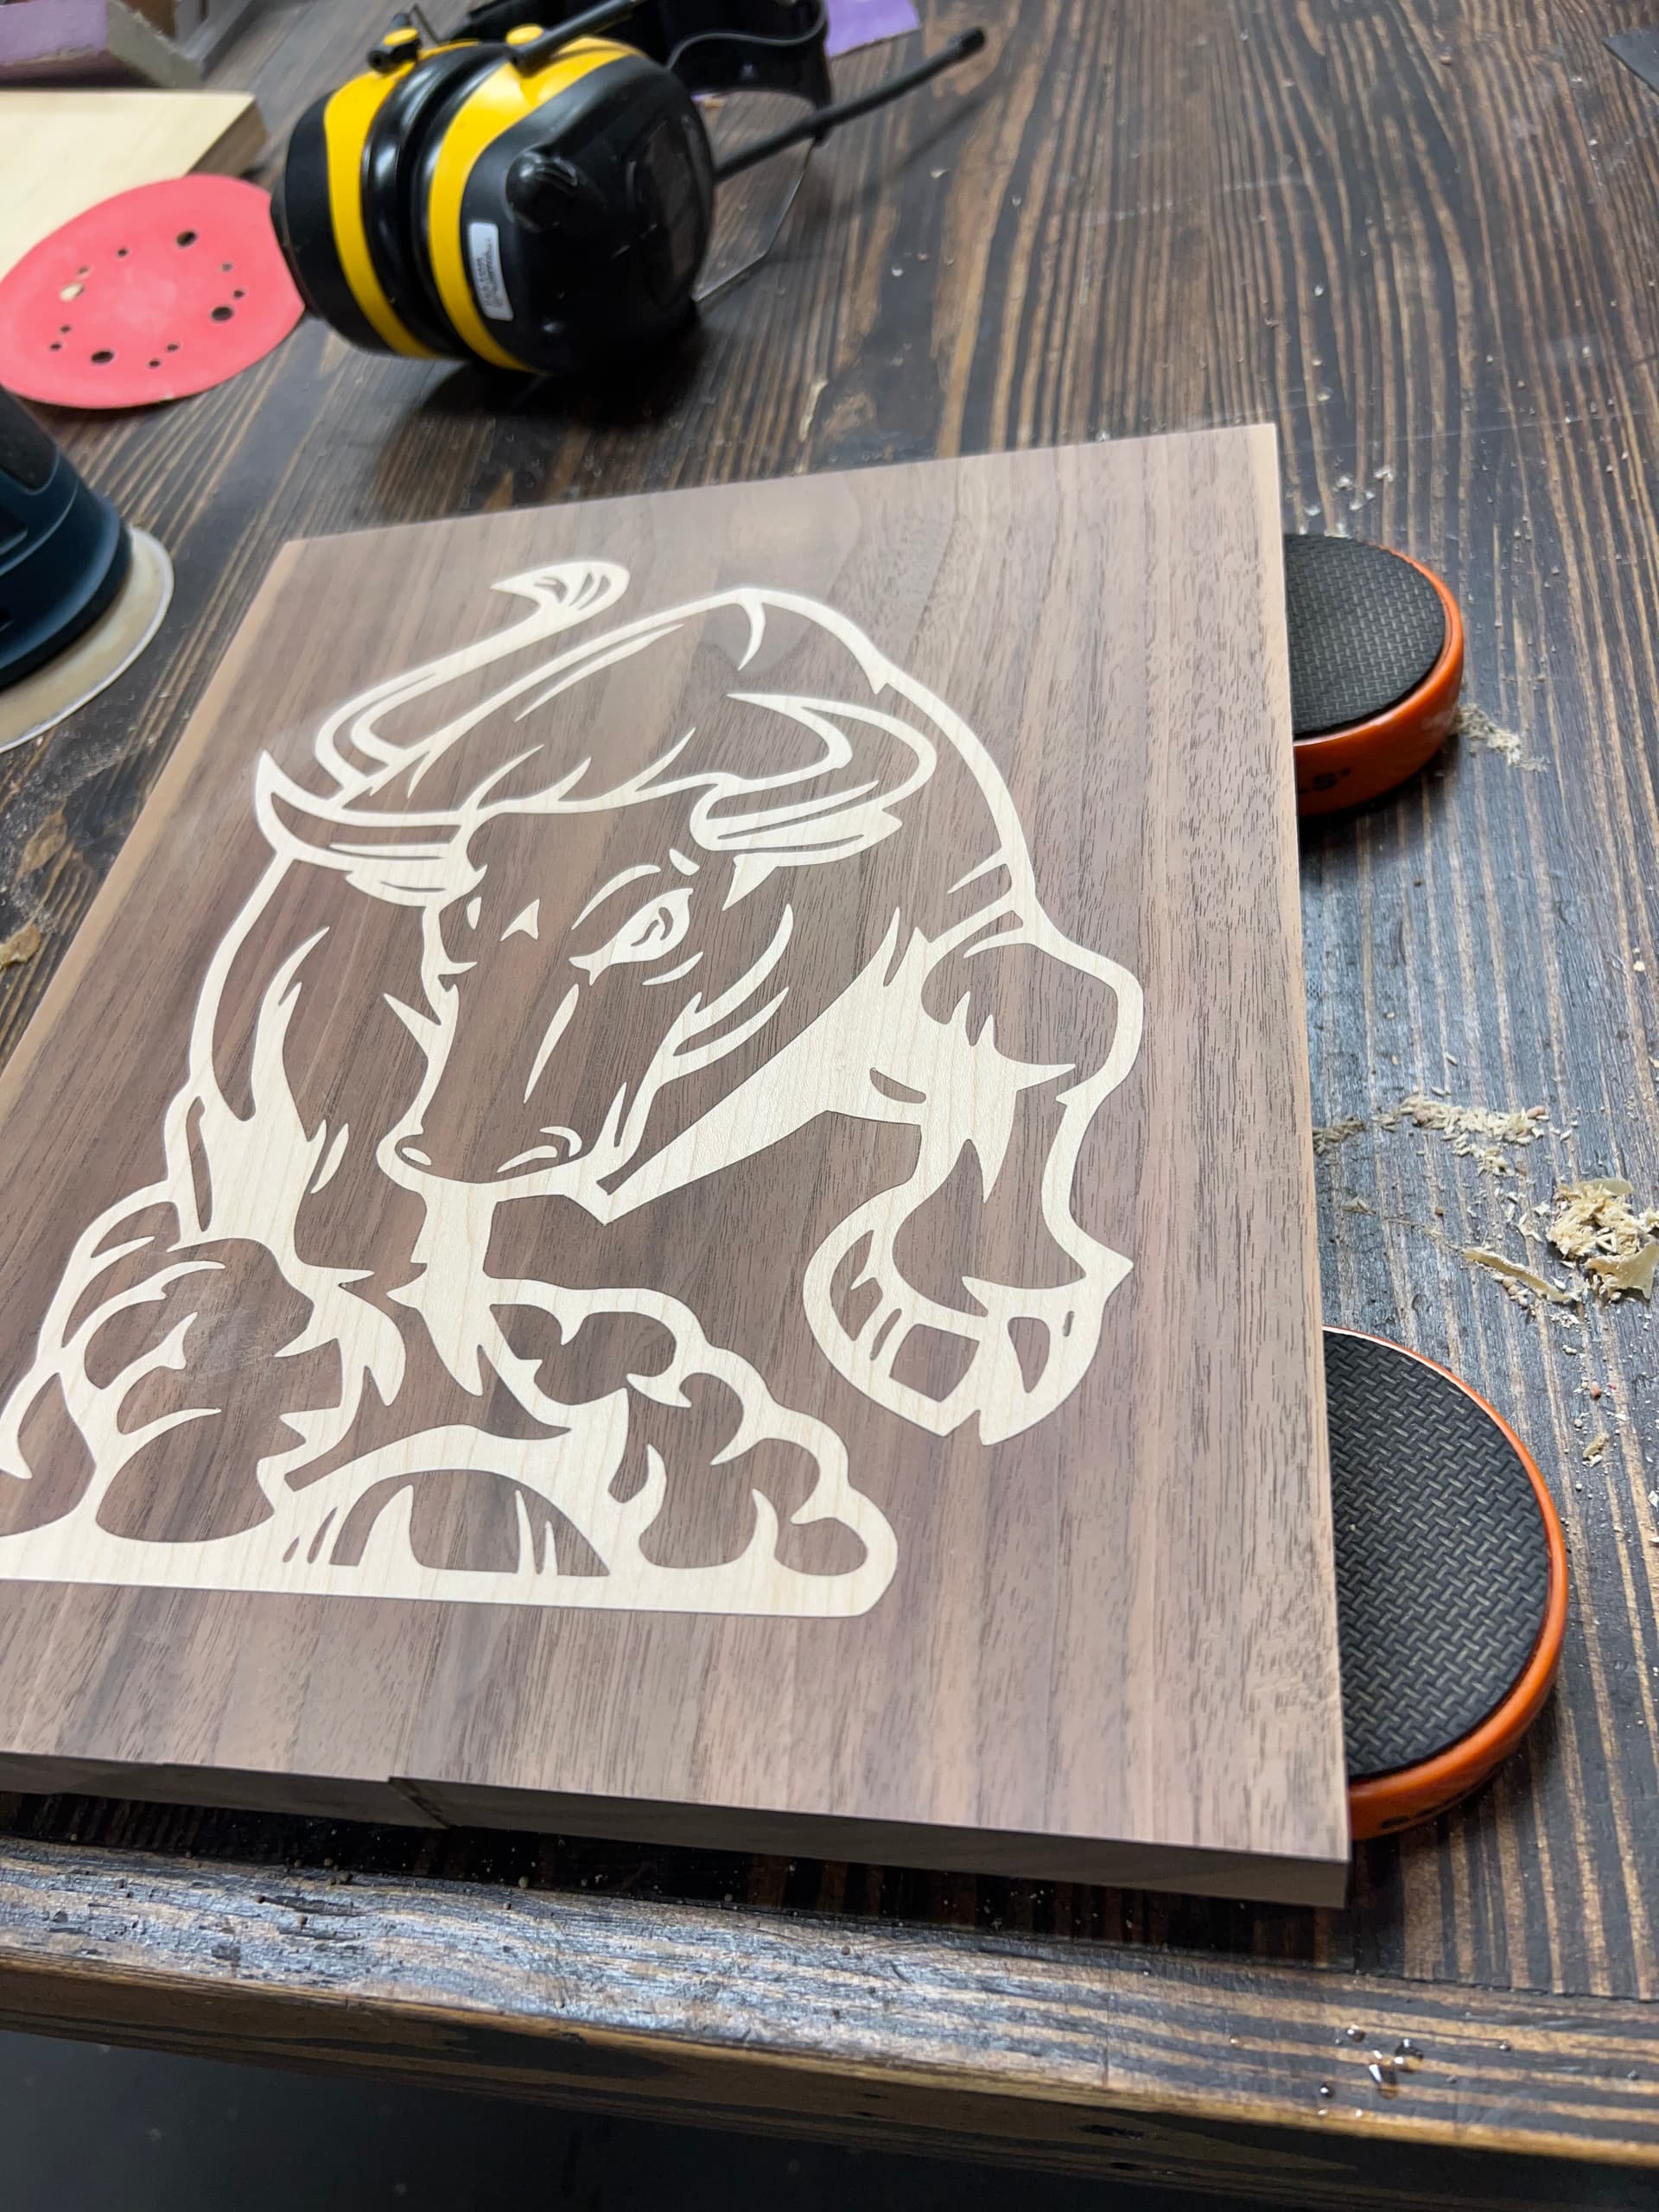
Dude, that’s looking pretty tight right there! I see the random orbital in the background… man if I tried this I’d need a planer and there’d be no inlay left at the end lol. Excellent job!
Thanks Kev. I used the MPCNC to clearance cut the majority and then brought it smooth with the orbital. I plan to add a keyhole on the back for hanging and spray coat with laquer.
I’ve had a keyhole bit stashed in my 1/2" router box for years… afraid to use it manually. Just such a big chunk of carbide dangling off a tiny shaft and has to be a closed pocket cut… seems sketch. I figure the cnc would be perfect for it, but haven’t had a chance to try it yet. I wondered what the parameters should be… only get one chance to get it wrong, and keyhole bits aren’t cheap. I’d be supper grateful if you shared some good cut parameters for keyholes (mine’s a smaller single flute freud… ~3/16 shaft with ~3/8 head).
Ah yes lacquer has got to be the best finish for this sort of thing… nothing is clearer and more showy… albeit lots of coats and sanding but 110% worth the expense. I use lots of deft rattlers on stuff like this.
Yes Jamie, I heard the same about the grain. Although I do believe it would probably be better with endgrain, just due to the fact that the wood fibers can mesh together a bit better. And not to mention less tear out. I found the 6.2 deg spiral tapered ball nose bit that I have now causes much less tear out on woods like walnut. The 30deg bit I was using, has only one cutting edge and it caused a lot more tearout on hardwoods. A different 30 degree bit may have given better results. Just be sure to do a roughing pass first with something like a 1/8 in or 1/4in spiral up or down cut. The finishing pass with the vbit you choose. This way it puts less stress on the vbit and gives you a cleaner cut.