I’m nearing the end of my build and have hit a snag. I’ve implemented a laser, which functions correctly, but am struggling with Marlin’s fan settings.
Goal: Turn on a fan when the laser is active. Fan turns off if laser is not actively cutting/engraving.
Pertinent Info
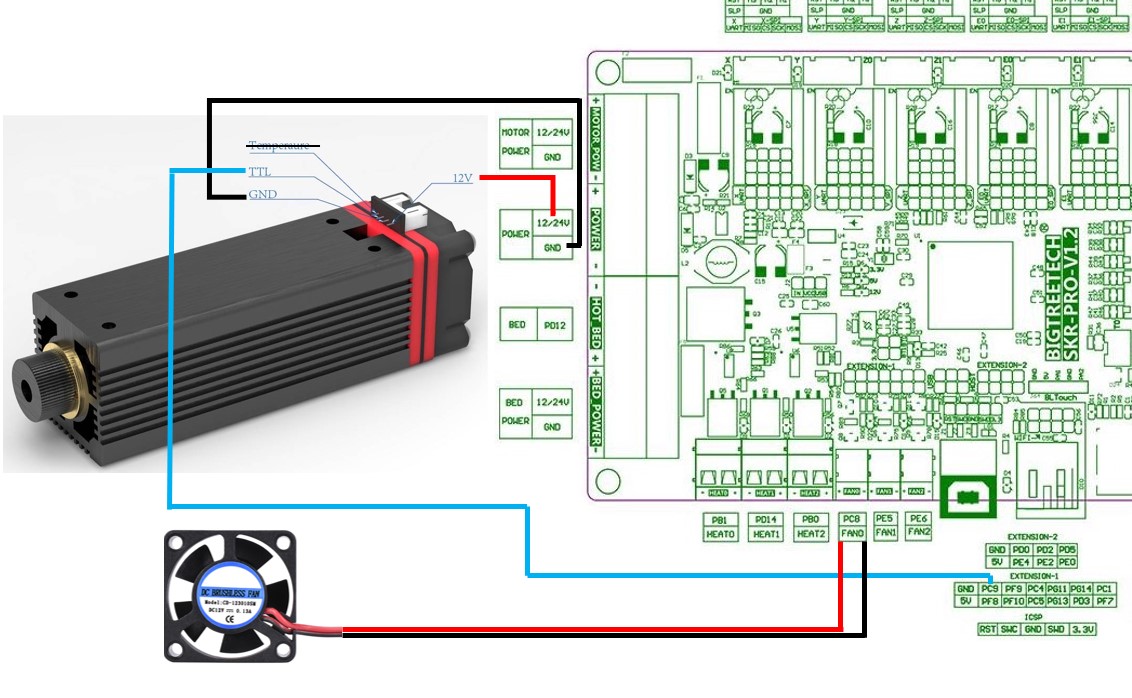
Model - Primo Board - SKR Pro v1.2 with TMC 2209s Laser - Neje 20W Firmware - V1CNC_SkrTurbo_Dual_8825-2.0.7.2 Software - CNC.js via RPi 4B
What I’ve Tried
Using the latest firmware build from git, I successfully added a controller fan using pin PE6. For the additional fan I used pin PC8 and tried to use the Extruder cooling fans section, setting the #define EXTRUDER_AUTO_FAN_TEMPERATURE to 0 thinking that I could at least get them to turn on, with no success. I could probably add a thermistor to get it to work, but this doesn’t ultimately accomplish my goal.
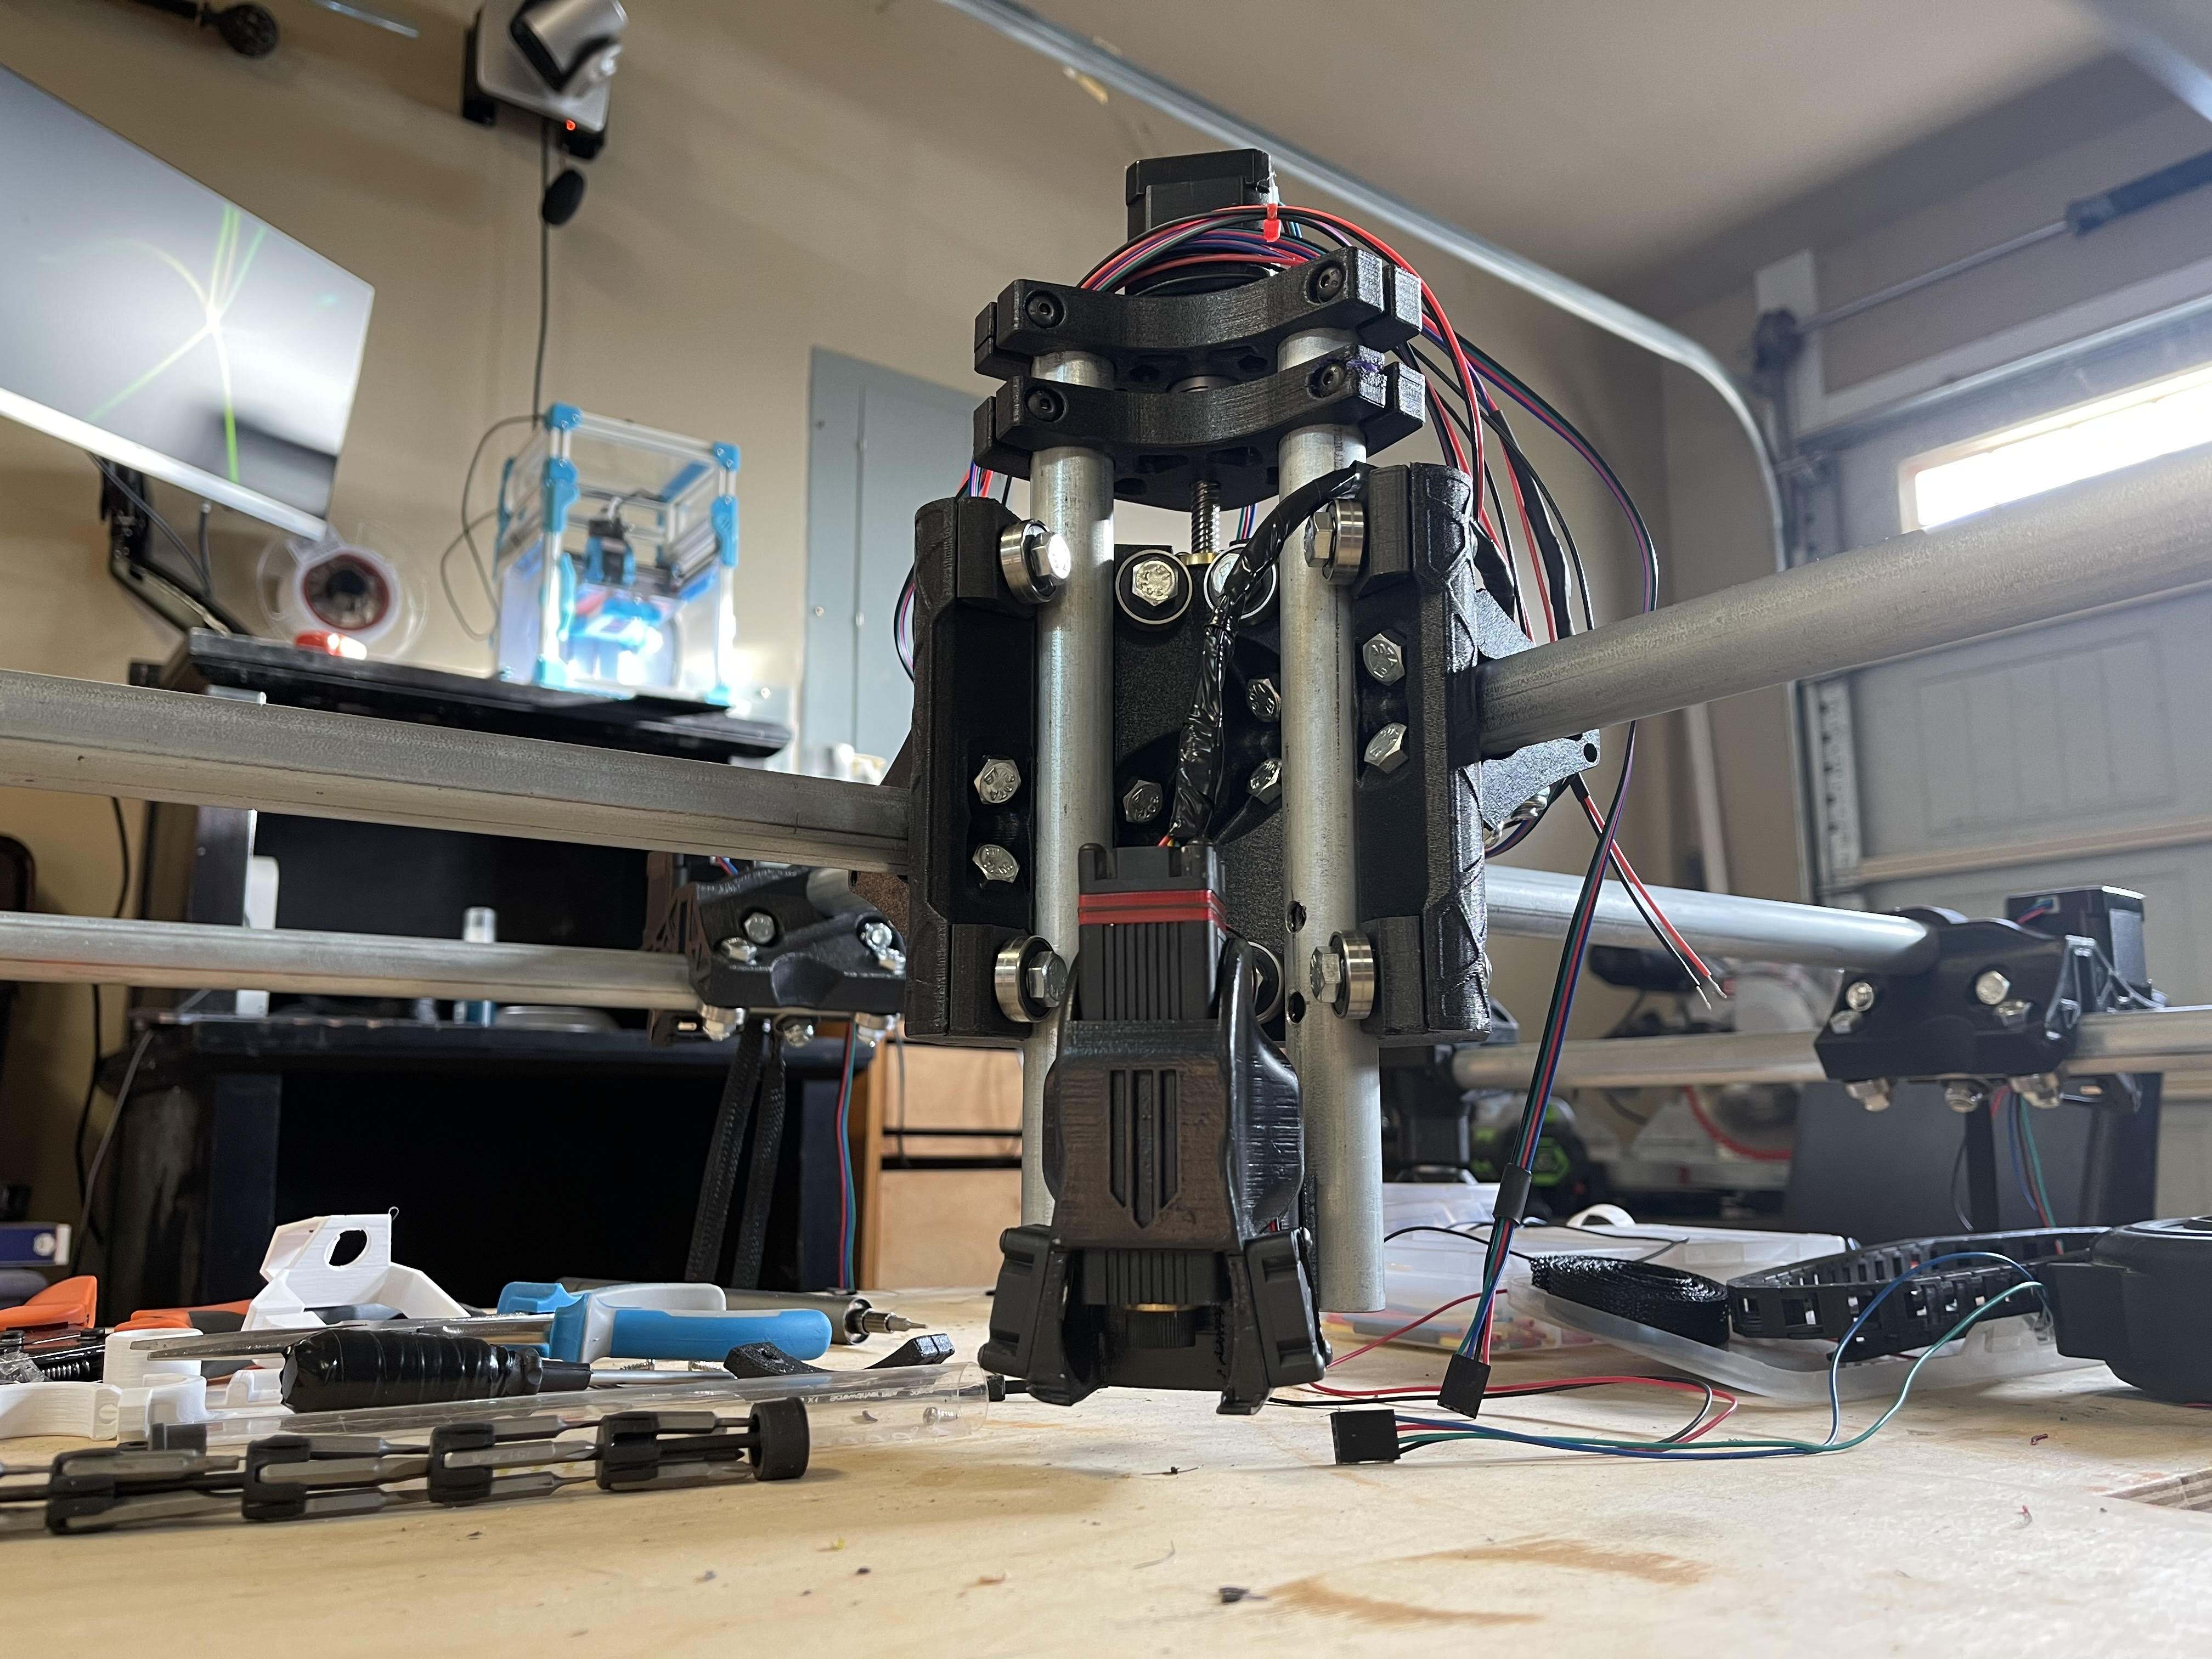
I’ve included a diagram of my (relevant) current wiring for your review at the bottom of this post.
Summary
It’s been so long since I’ve messed around with Marlin (since switching to Klipper for 3DP) that I don’t know what I’m doing anymore. Appreciate any input you can provide.
I’m not sure of your exact goal here. If you want the fan on during the entire run of the g-code file but otherwise off, then the easiest way would be to insert an M106 at the beginning of the g-code file and an M107 at the end of the g-code file. Code can automatically be added to the beginning and end of a g-code files in many CAM packages and g-code senders. I use M106/M107 to turn my router on/off in my files.
It’s not what you are asking for - but I’d love to see how this laser performs! I’ve been thinking about lasers for a long while, but can justify spending too much buck on it. This seems like a perfect compromise - or is it??
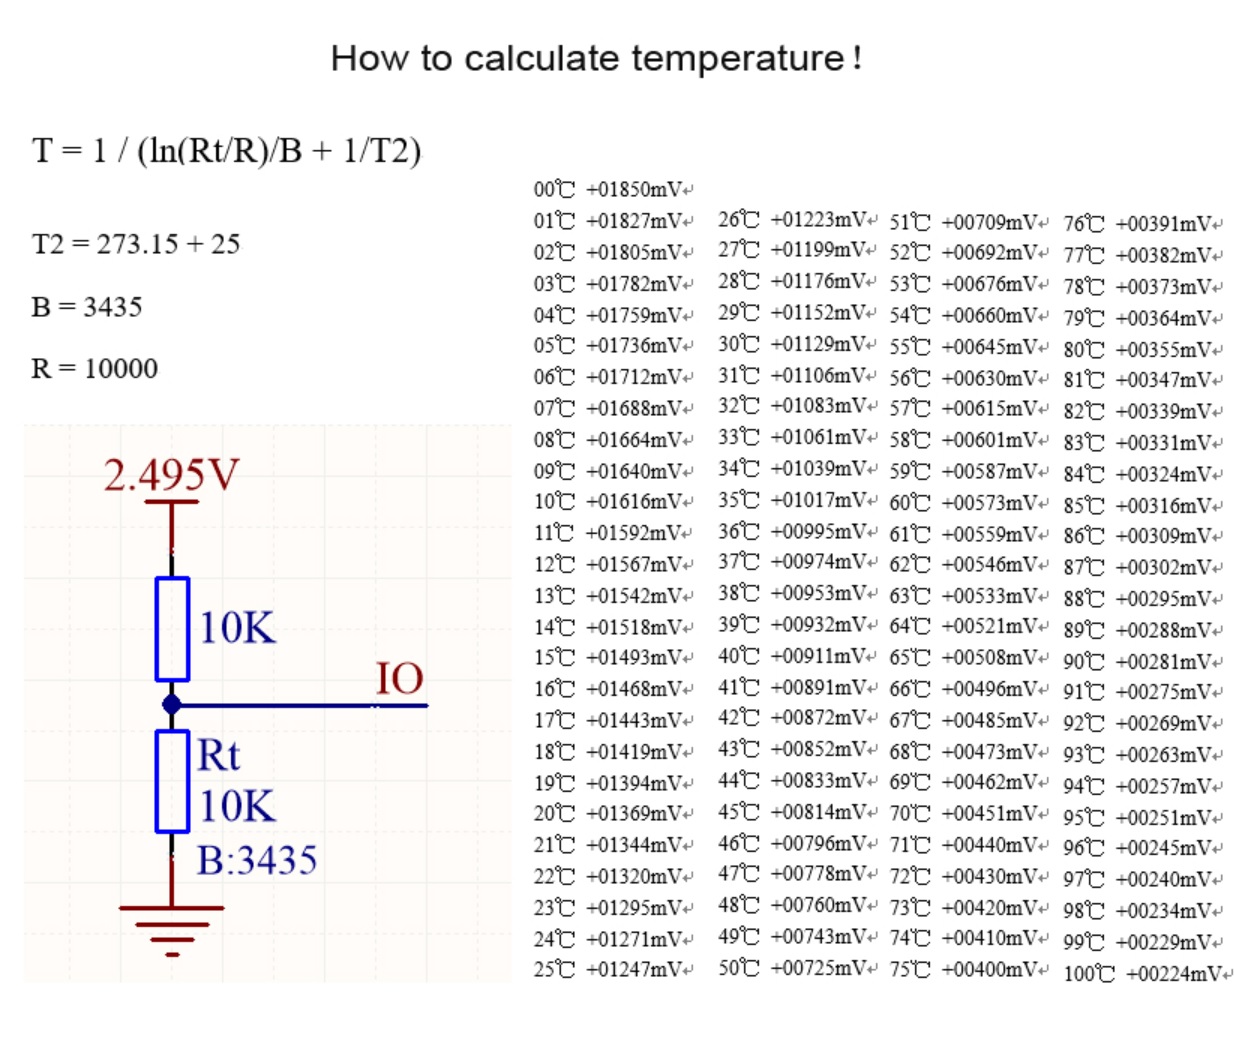
Do you have any reason for believing a second fan is necessary? There is already a fan on the NEJE laser module, powered from the +12V. Have you made any tests to check the temperature with the included control/temp display module? There is already a thermistor inside the module, it’s output can be measured at the module connector … the one you have struck out on your diagram. Info Here
@turbinbjorn There are several reviews of this module on YouTube. As to it being a perfect compromise ,it depends on what you want to achieve with it.
I had not even considered that the temp line could be used for this! That’s excellent. Am I able to just run that wire to one of the thermistor pins?
My intent behind the additional fan (actually two of them) is to use them as an air assist instead of using an air compressor and hose. I’m trying to avoid having to run my compressor while burning. Is this a bad idea?
As I understand things, one of the benefits of air assist is that clean air is pushing the smoke and other products of combustion out of the beam area. I’ve seen several air assist fan designs that draw from inside the cutting enclosure and it makes me wonder if using “dirty” air for air assist is as effective.
On my K40, I got a $12 aquarium air pump, hung it on the back of the cutter, and plugged it into a relay-controlled outlet, then ran some vinyl hose and used a .030" welding tip as a jet. To make it “aimable” I taped the last few inches of the tubing to a length of 12 gauge wire which is secured to the gantry. The wire is stiff enough to hold its shape and support the tubing and allows complete freedom of positioning. This has been pretty effective, inexpensive, and quiet.
As far as my understanding goes, this is the biggest benefit.
As for using “dirty” air, honestly, it probably makes zero difference. Until the air in the chamber is so smoky that it’s difficult to see through, it’s going to be better than the actual visible smoke. Routing the air through more ducting to get “clean” air is chasing zeros. The improvement there is probably better spent just moving more air, which the additional ducting would impede.
A solution like your aquarium pump is better, but mostly because there is actual static pressure that the pump builds up (so that it can blow air at the increased pressure of being underwater) and then having that aimed as a jet of air through the needle, which will increase its velocity allowing it to clear air faster. If you were to run that pump with clean air straight from your vinyl hose though, something like a print cooling fan (using “dirty” air) would probably out-perform it.
The temperature wire in the 4pin connector is the thermistor output, NEJE would like you to buy their plug in control/display unit, however, they do publish the external circuit needed and the resultant output voltages, you would need to parse this data and make a suitable display if you wanted to DiY it…easier to give Neje the asking price!