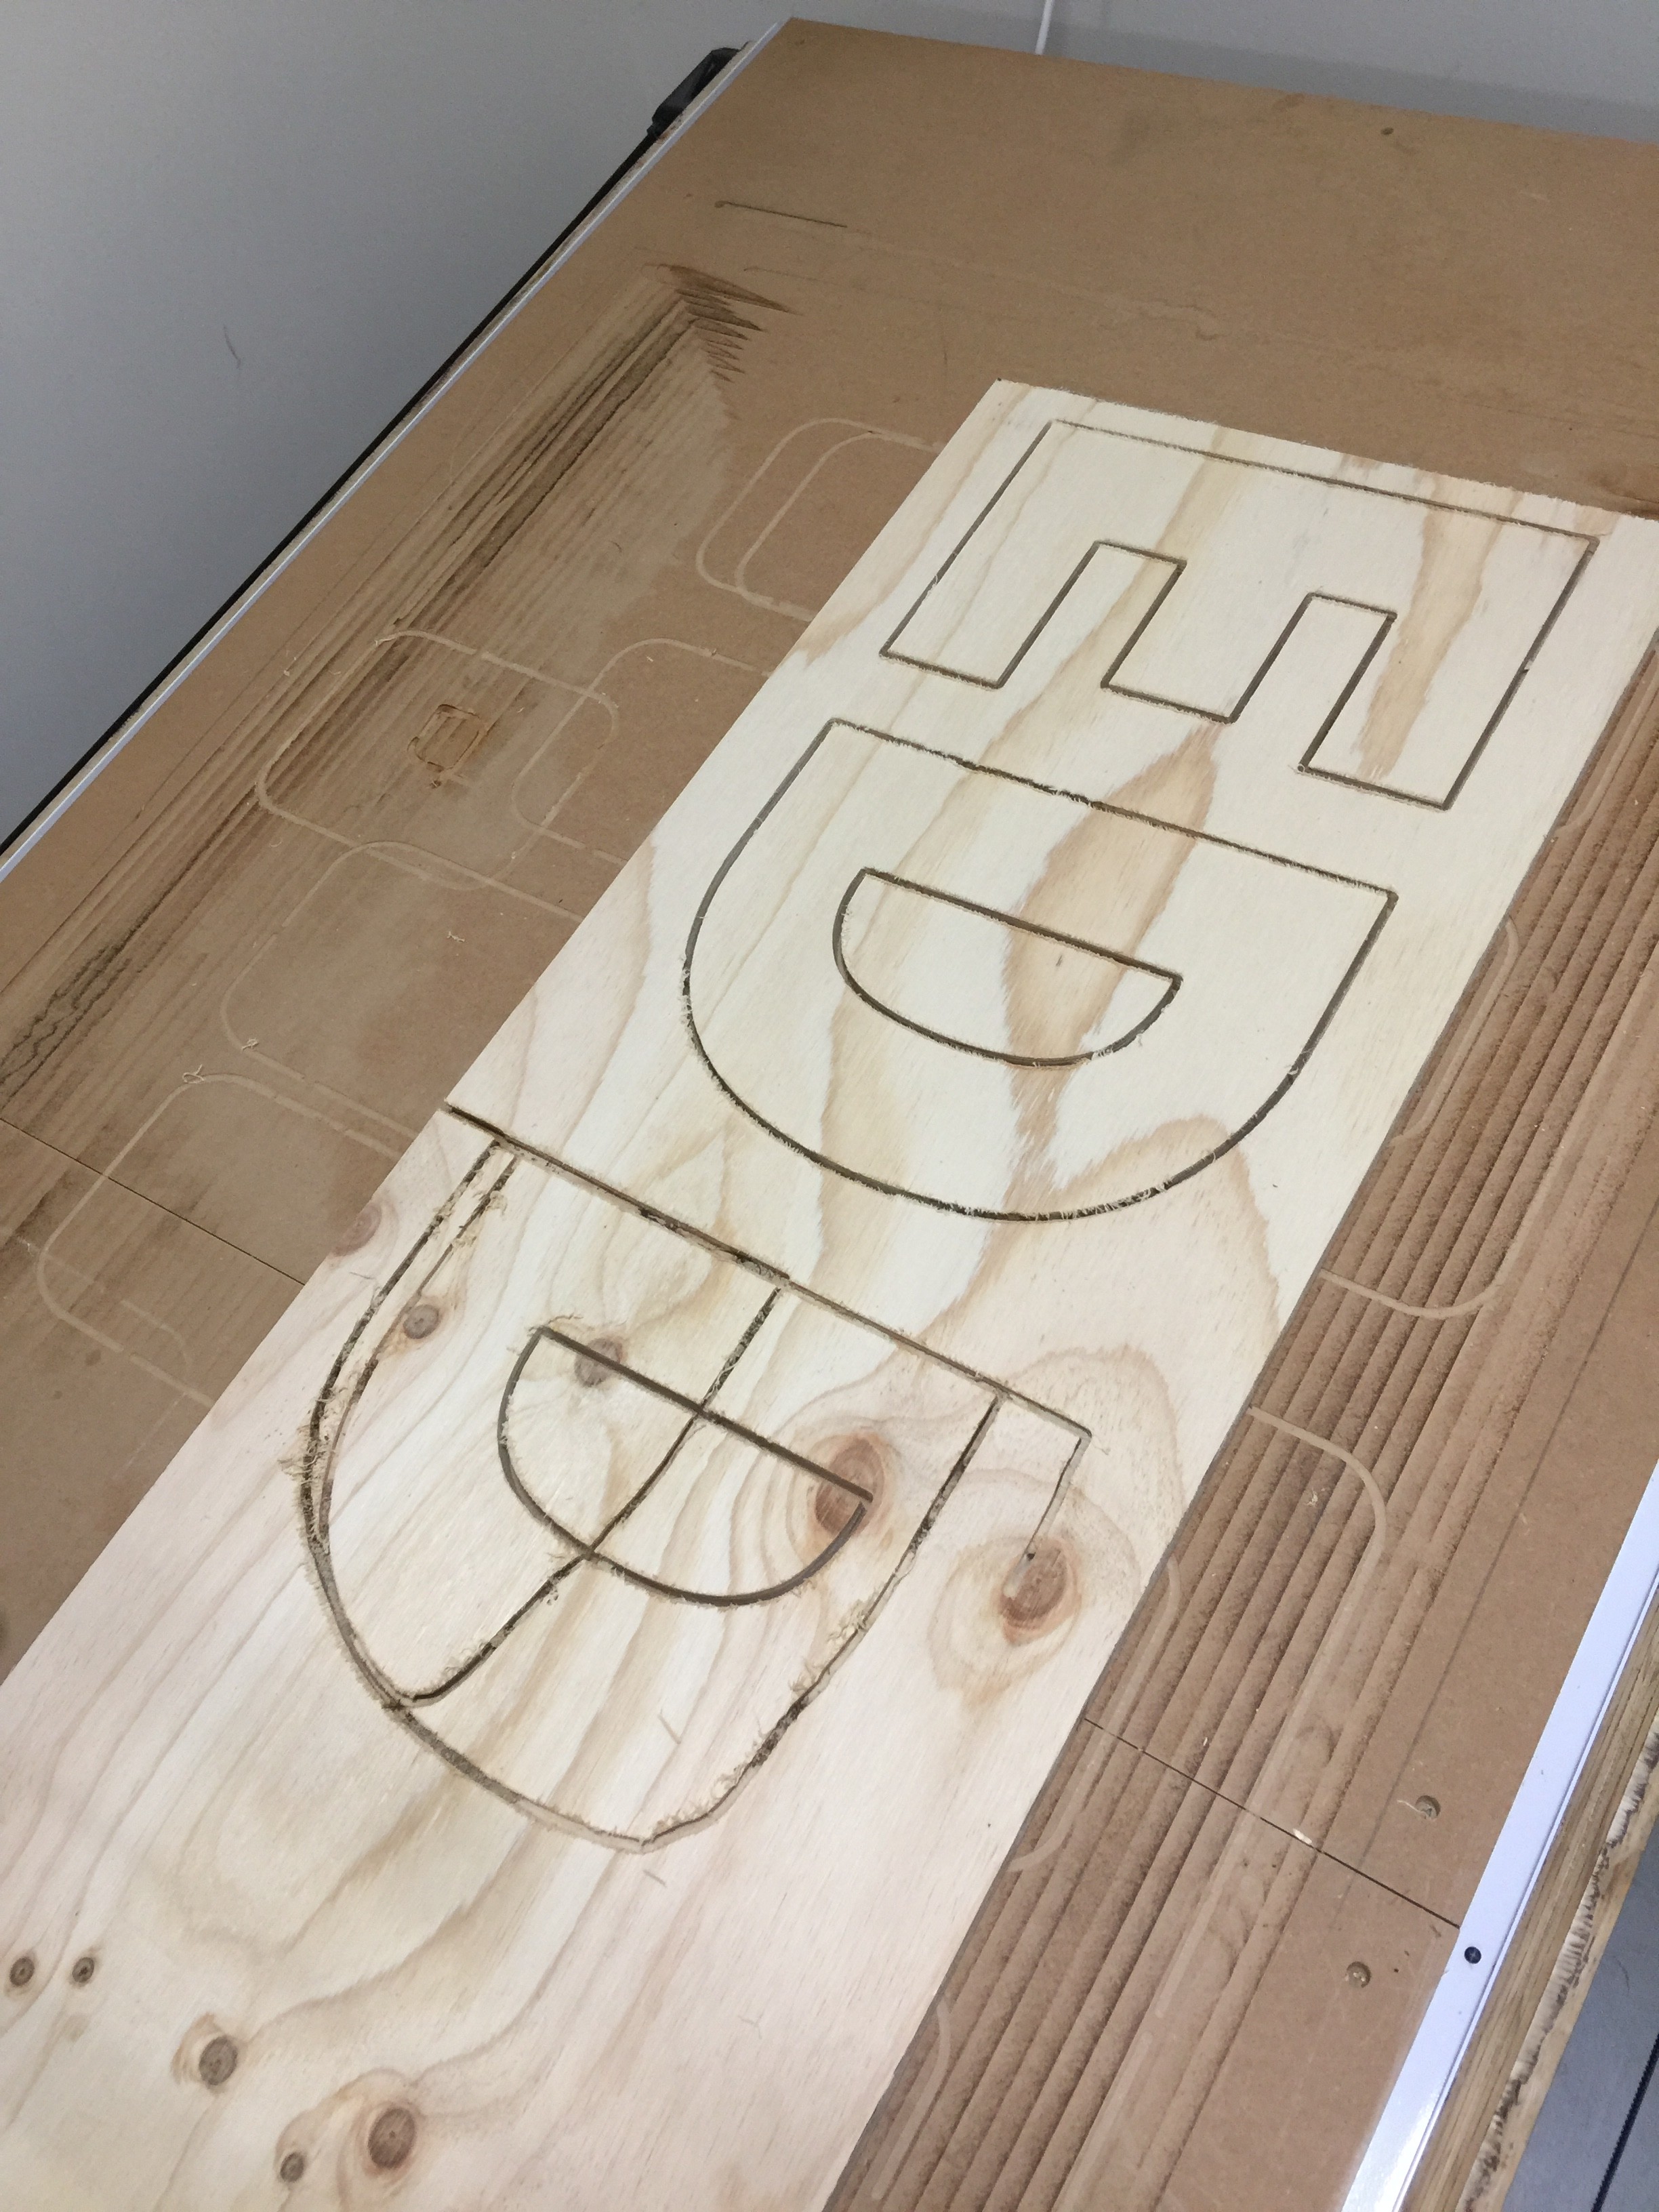
I have been trying to cut shapes in plywood for a kids chair.
I used Aspire to create the tool path Looks fine with no open curves and I even checked it with the “vector validator” in aspire. I applied Marlin Post Processor script to save it out.
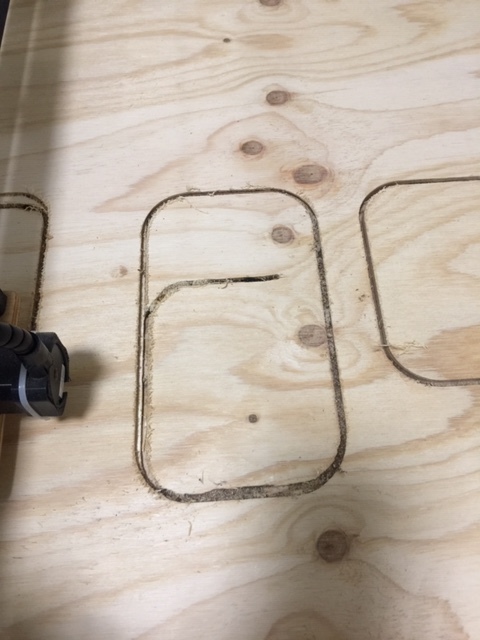
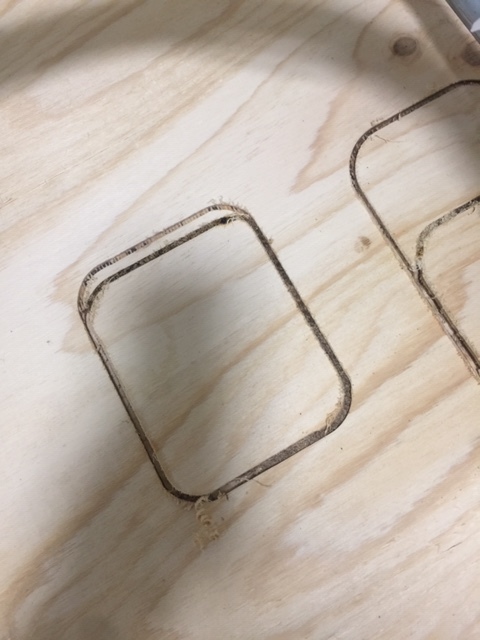
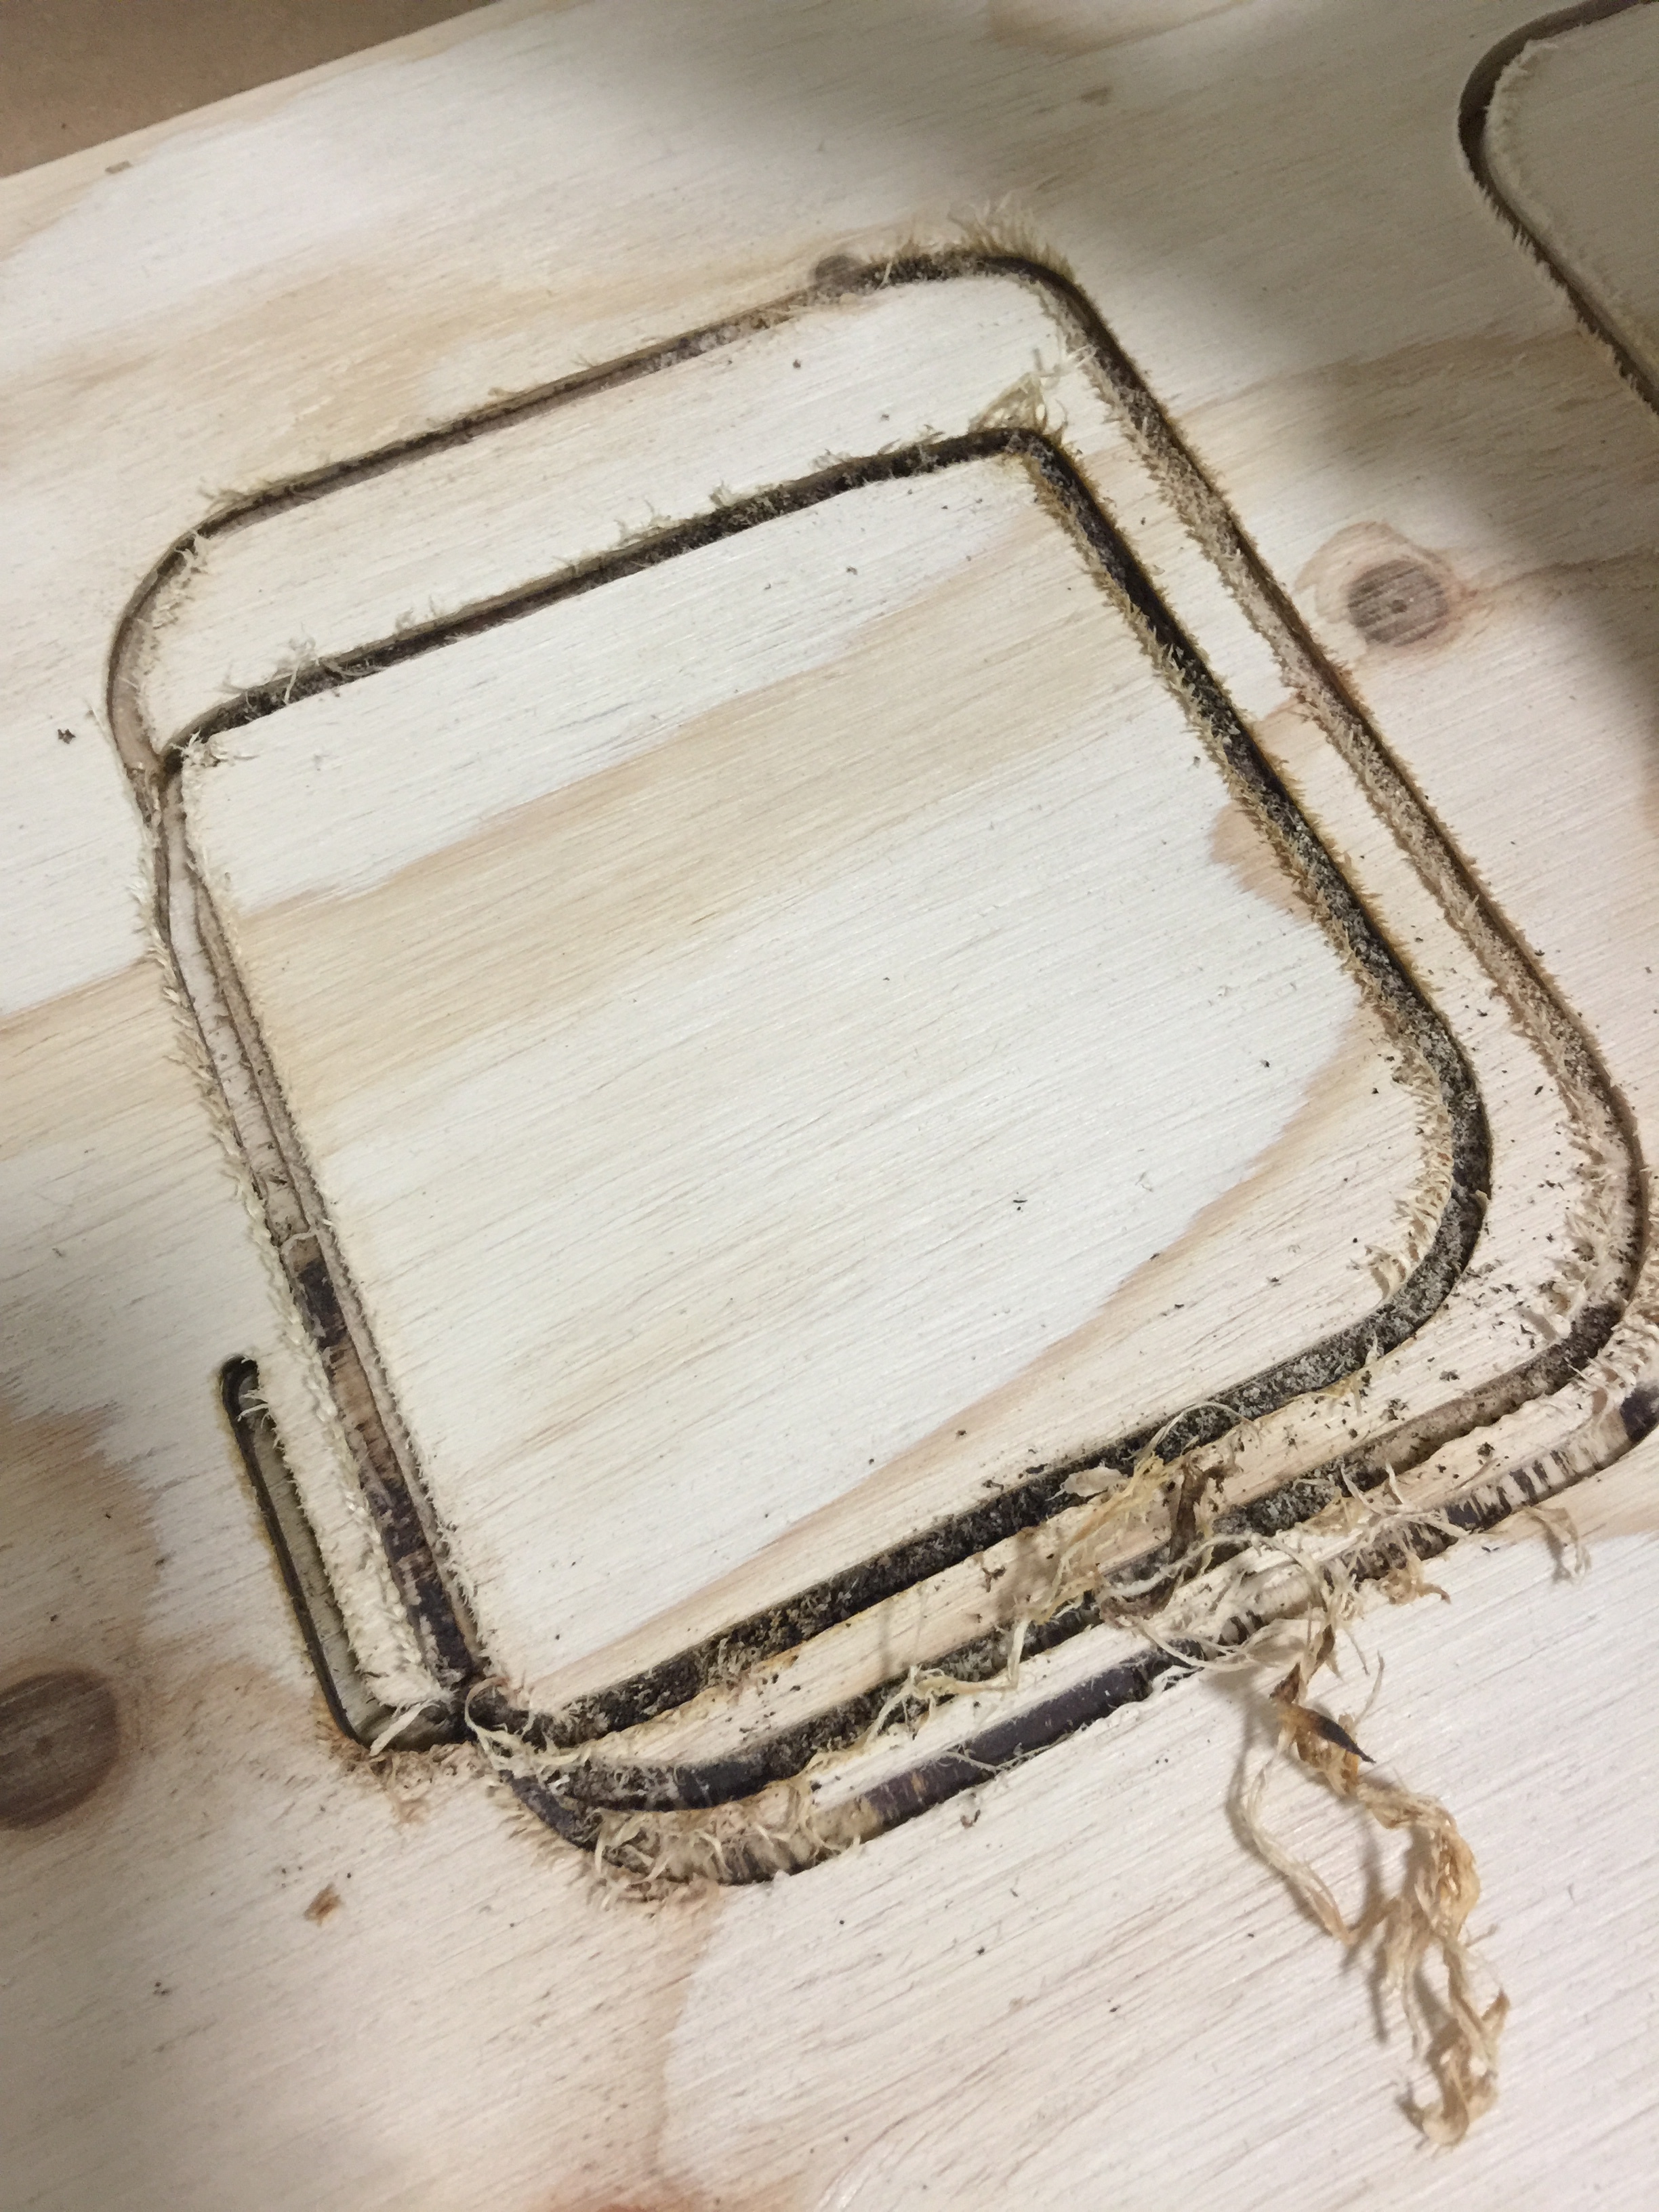
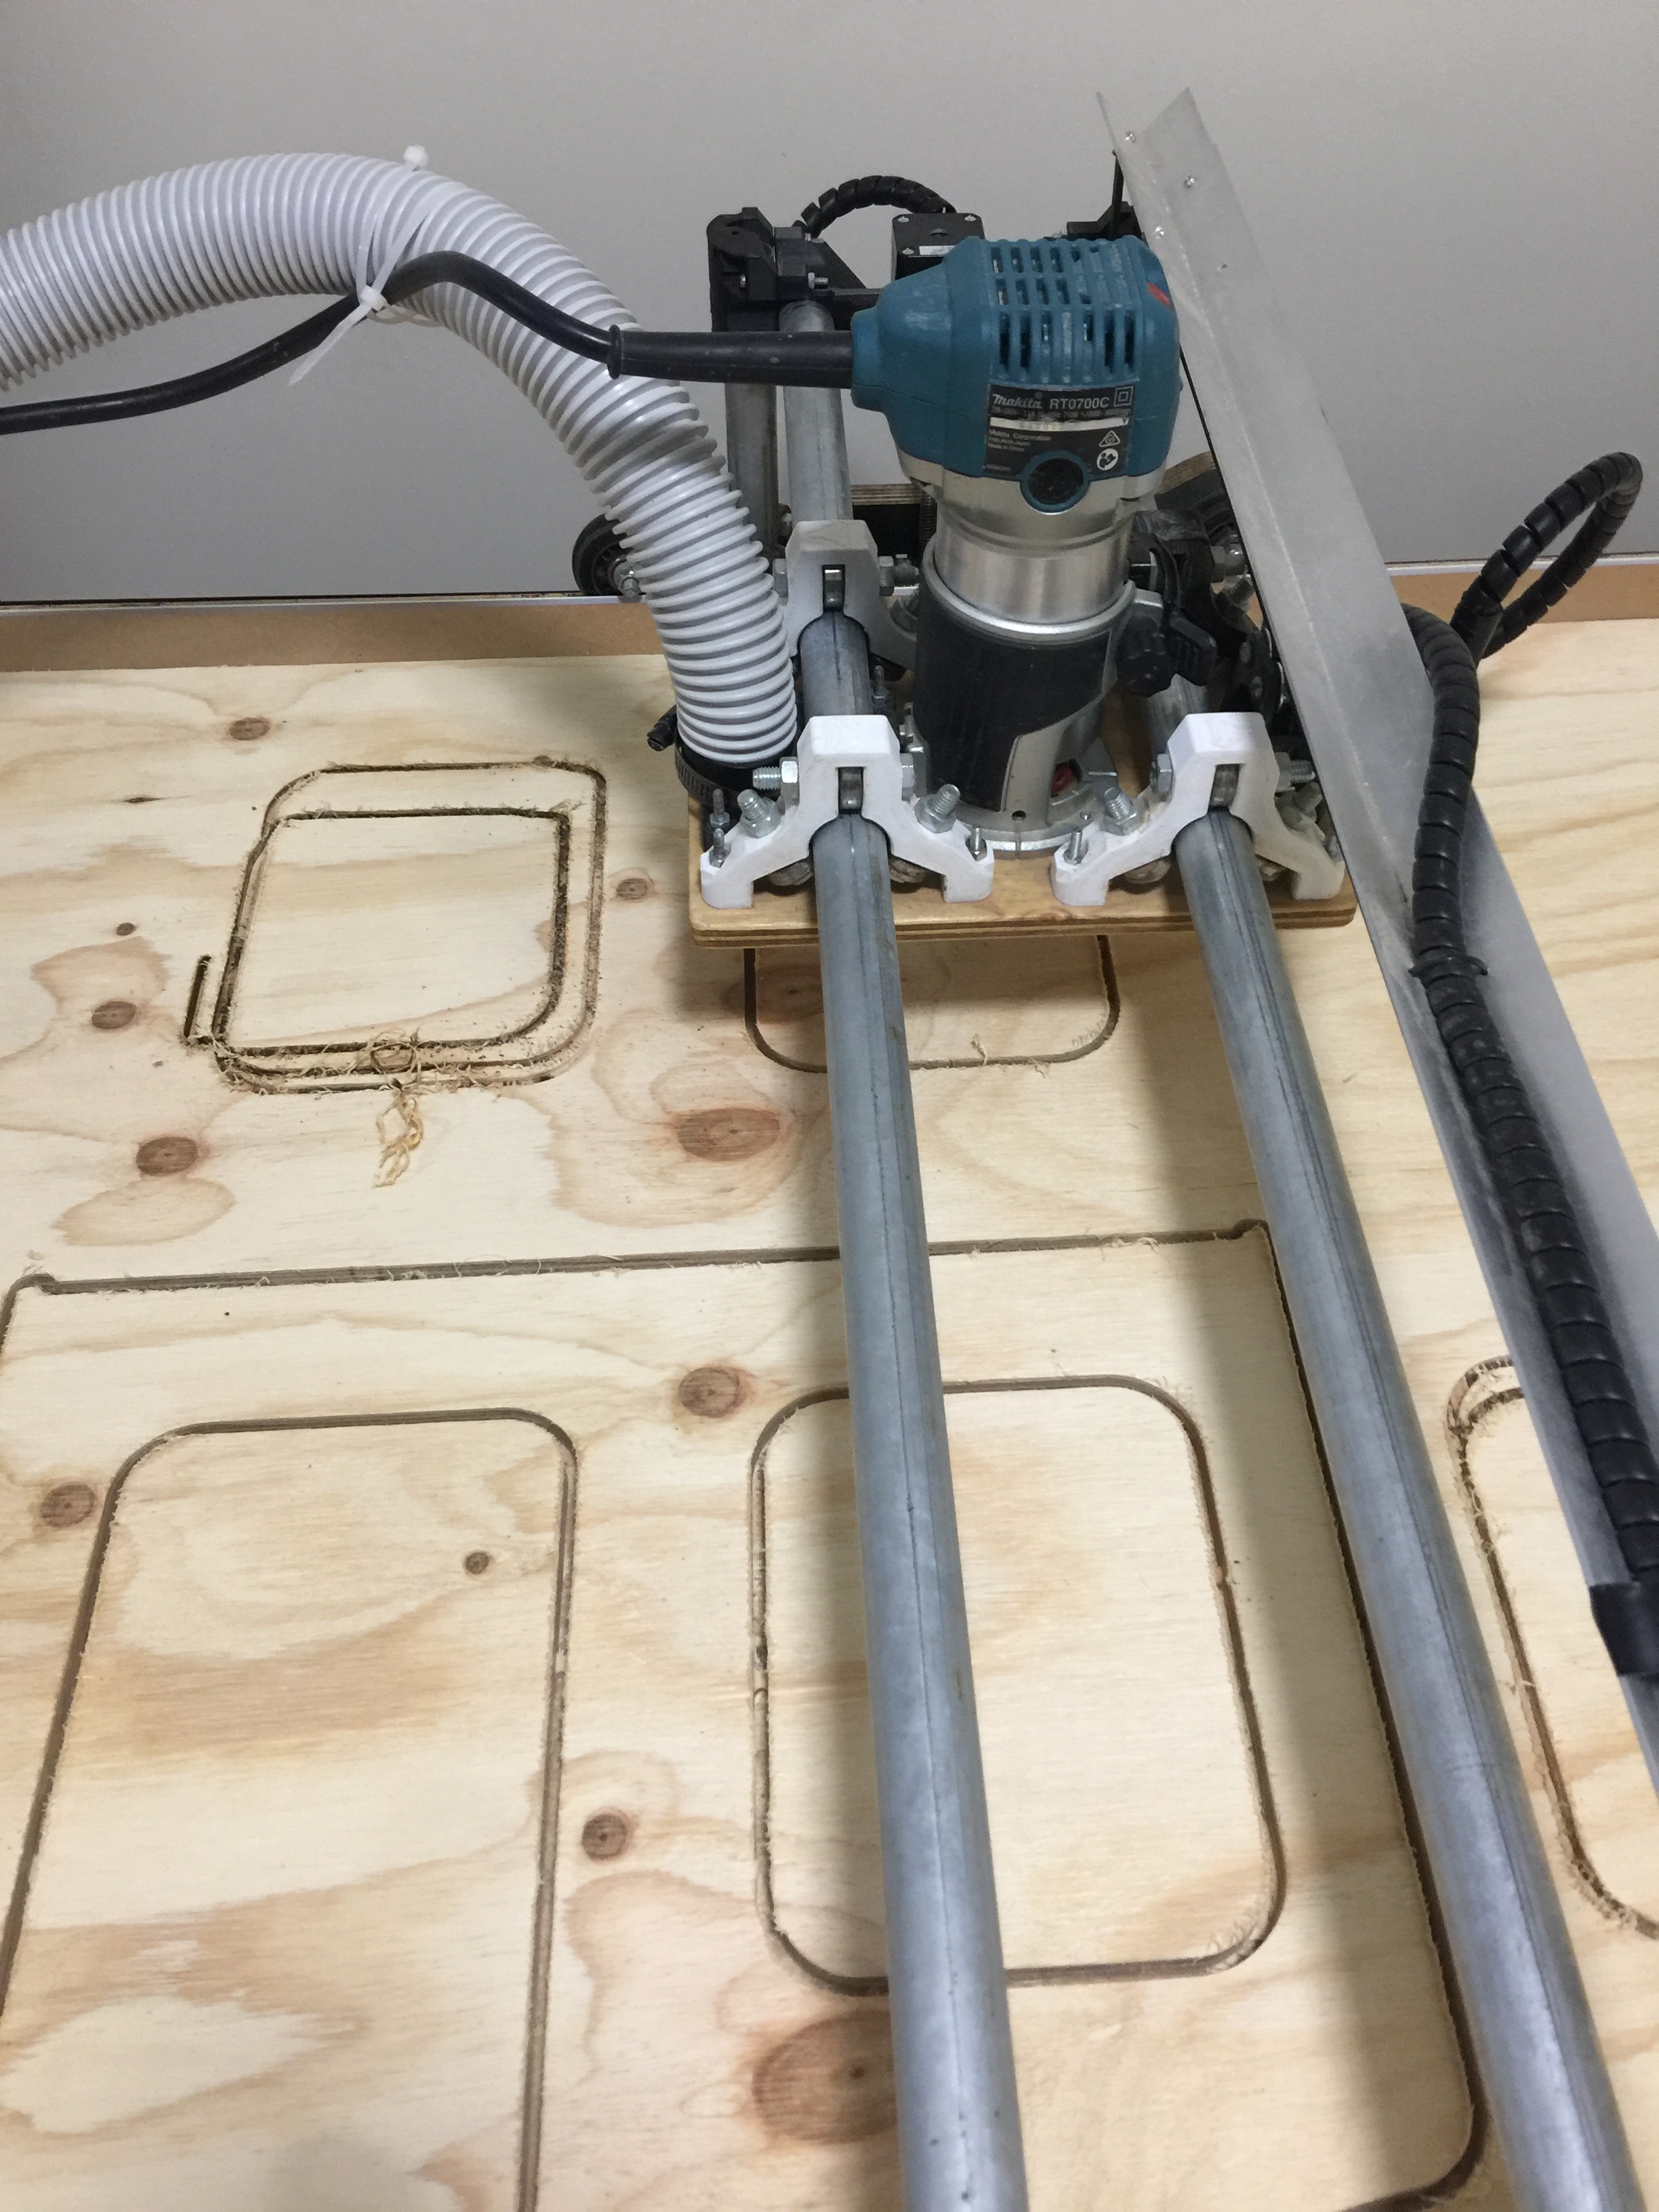
Each time I start the print a few cuts look great and then after some time the machine starts on some weird path of its own. it’s not always the same either. I have re-adjusted curves etc. in Aspire and saved out again & again to no avail. Often the X axis shudders violently when stuck in a groove to the extent that I have to stop the cut as it starts to smoke the plywood up
(once it actually created a hot ember )
Here’s a few images of the cut going wrong. note: I did update the Marlin PP n Aspire about a week ago.
The machine doesn’t have any feedback. It doesn’t know where it is. It just carefully counts the steps in each direction. If it loses steps, then it will wander off and have no idea anything is wrong.
There are a few possible causes:
the stepper driver current may not be set high enough. What controller do you have and what drivers?
the stepper driver current may be too high. If the drivers get hot, then they can just turn off. If one axis turns off, then it won’t go where it wanted.
The wires may be faulty. If things are wired wrong, they can aplit the current in half, making it too weak. It can also be intermittent wiring issues. Something that works at first, but when it heats up or stretches out, it may be loose.
Something could be binding, making the motors work too hard to move. Extra hardware, or something installed backwards may be the cause. Or something may need to be adjusted.
The CAM may be wrong, and you may be trying to carve too much, too fast. Start with the conservative settings in milling basics and do some testing deeper or faster once you have a good baseline.
Yes, the grub screws on the pulleys can come loose, and then the pulley slips on the shaft.
Share a photo or a few of the controller, the wiring, the machine, etc. You can test in foam, to completely reduce the load on the bit. You can start with the test crown to make sure the gcode is good.
I checked the X,Y grub screws + wiring & all is well there.
I just set the driver current to 800 (a drop from 900) & then ran another test… first 20min. all was great & then bam hppened again.
This time I noticed the X axis belt vibrates violently.
Is it the X axis that it’s wandering in? A motor skipping steps will also make some noise, usually, but it could be masked by the router.
Does the X axis move freely when the machine is not powered up? Is there any binding or tight spots? Is the motor getting hot? Is the driver? (I don’t recommend testing the driver temp with your finger, if they’re hot, they’re too hot to touch.)
The motors that Ryan sells through the shop should have plenty of capability for the task, but the X axis is a little weaker than the Y, simply because it relies on a single motor.
What are you using for speeds and DOC? What bit in the router?
I’m running at 10mps. on a 4mm single fluted straight bit. DOC - 2.5mm with a ramp in of 6mps.
I might check the soldering on the X-Axis wires as maybe once wires are warming up the solder might be expanding to the point of causing intermitent breaks. the wires have been heat shrinked on connections as well.
note: I have done a Dry Run & all is smooth so am guessing its only when under load so therefore wiring should be fine yes ?
Intermittent wiring is a pain. If one coil has a problem, it can skip across the gap, but not under load. At least, I’ve atteibuted some gremlins to that.
The current set at 900mA should be fine. Is the controller in a hot spot? Do you have a fan on the drivers? You could try M122 after it fails. I have caught errors like ola (open loop on coil A) or over temp warnings.
@jeffeb3 I appreciate your reply… I’ll reset the mA to 900 & open the control board box for venting. It’s winter here in Sydney so am under the impression it should be farily cool. Summer will be a massive tester though… 42 degrees + here. I only have the heat syncs glued to each driver… no fan. might install a fan into the box.
I always have a fan on mine. I suspect they were overheating. Some drivers shut down. The TMCs may just drop the current, which would lead to this issues too.
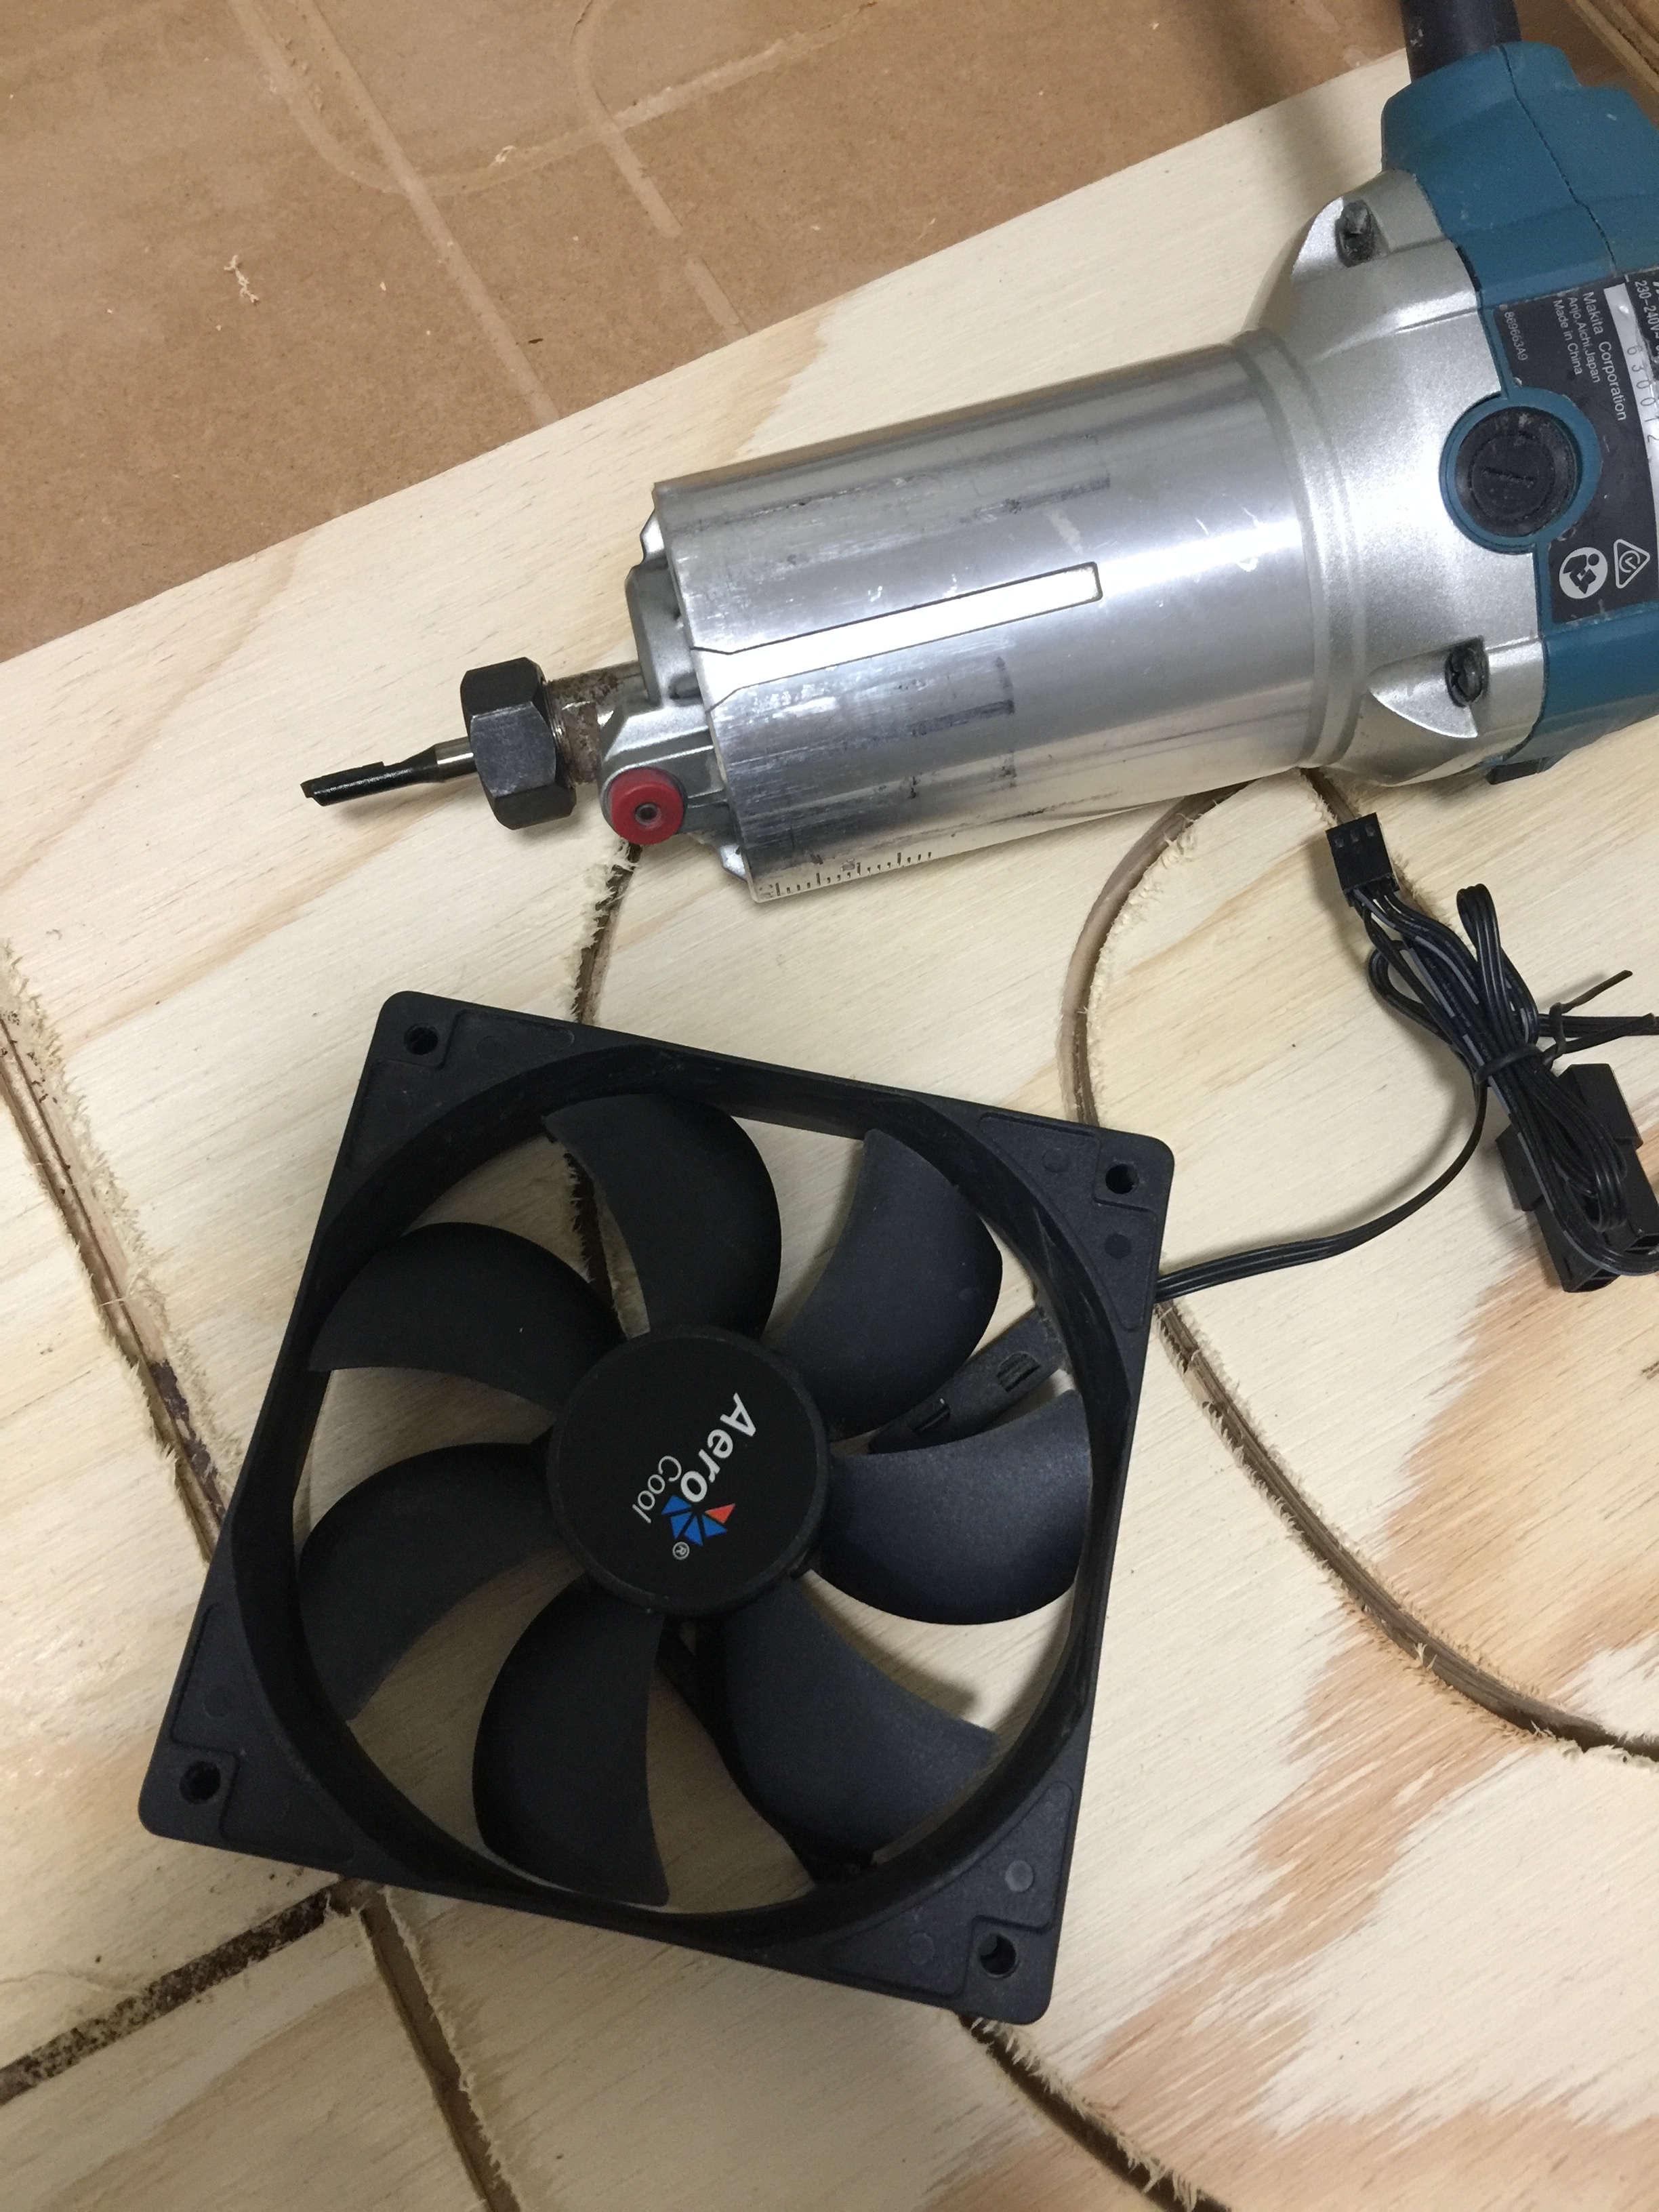
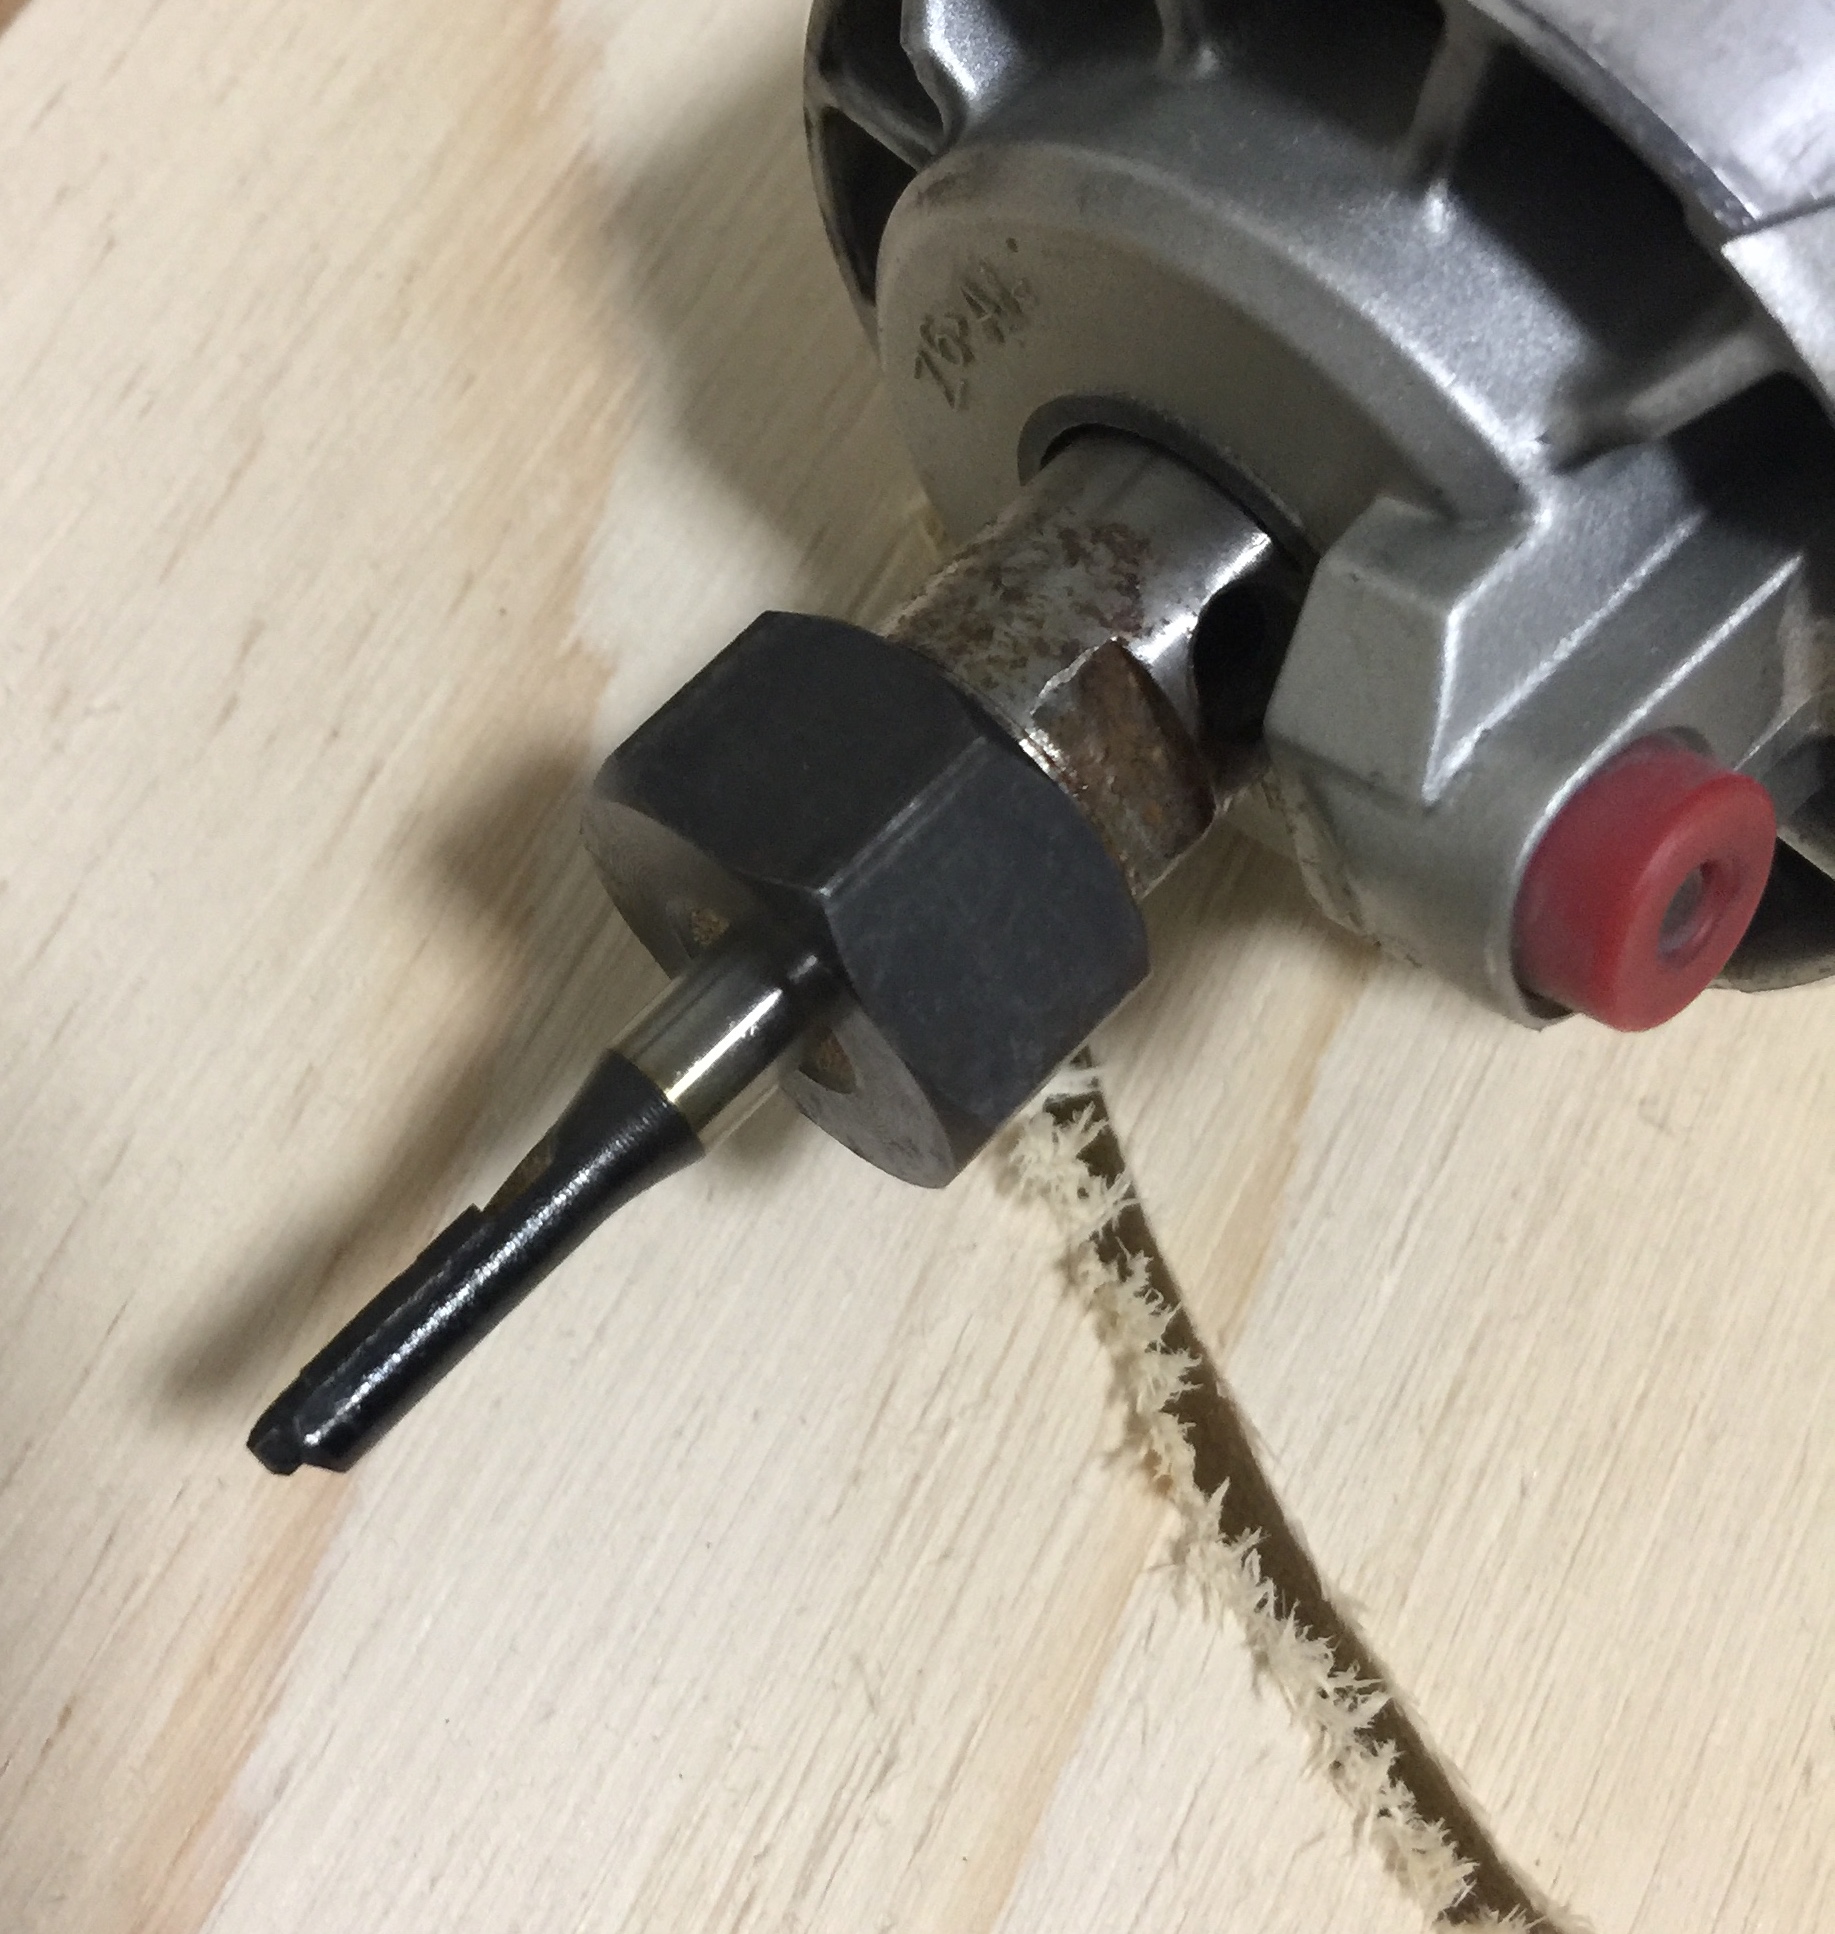
That cut is really burnt. Can you show a picture of your cutter? Either that is not an endmill (I have had drill bits shipped), you are moving at way too high RPM, or maybe too slow.
Usually it is the common things the fellas have already listed, but that cut is looking mighty suspicious.
I set the router to # 3.5
note: I have an end mill compresion bit on order.
Now I have a big hole in the side of my controller box… mounted the fan. I just don’t know how to get the fan running after plugging in the wires to FAN-0
OK I’ll hook the fan to 12V outlet. I’m relieved to hear I can hook a fan to 12V as I was starting to worry that I’d have to make edit to Marlin & I’ve not been able to edit the code to date ( I can’t work out how to open the code in visual studio. edit-- I tried connecting to the “BEd POWER” but no luck I’m thinking with the SRR Pro v1.2 I could try adding each wire to the 12/24 V input… but that might blow the fan as it would be 240V coming in right ? (as you can tell I’m no electrician)
As for end mill bits - I’m in Australia. There’s a small shop here called Adam’s Bits that produces nice bits & I have a compression bit on order. Hope it will make cleaner cuts as ploughing through ply atm is very messy with this old bit I received from my Dad… prob. been sitting in the shed for 1000 yrs.
Is that a straight flute 1/4 endmill? Ill be honest, I did not read the full thread here but straight flute bits rip material in the direction of travel instead of up and down like upcut/down cut bits. A straight flute bit puts significant lateral loading on the machine which can over power the steppers. Your bit being beat up will make it worse.
I’m not saying I’m right but I had a similar thing happen with a dual flute straight bit. Worked great when sharp but after about 20 items it would randomly start pulling the machine sideways. Increased holding load current but it was not enough. No problems with spiral bits. I will never use a straight flute bit again unless it’s 1/8 which is much less load on the machine
@Robp - as per our conversation in your thread… I will try another bit and post my results here.
My take away from this so far is… ditch the straight bits and stick to spirals for profile cuts.
add a decent fan to cool the motor drivers. I’ve already cut a huge hole in the side of my controller box for venting so might as well carry on with the upgrade… just not sure where to hook the wires up for the SKR pro
Straight bits can be great but they do take a bit of experimentation to get good results, there are certainly much slower than an upcut, but can produce a cleaner edge.
Now compression bits are even trickier. You are using an upcut and a down cut at the same time. That means you need the bit to be centered in your material. you have to do full depth plunge cuts for them to work properly. It is a very high load on your machine.
They sound ideal but if you get an upcut set up right to remove the material as needed and do a full depth clean up pass (like my speed test videos on YT), you will get fast cuts, with clean edges and excellent tolerances on a cheap endmill. Fancy bits are for very specific use cases.


 I’m thinking with the SRR Pro v1.2 I could try adding each wire to the 12/24 V input… but that might blow the fan as it would be 240V coming in right ? (as you can tell I’m no electrician)
