I couldn’t just flip stepper wires and make it go opposite direction? Wouldn’t that make positive increase in number move right, instead of left? No, that’ll mirror image the parts.
How do I remap the coordinates? I don’t have the space to flip the machine 180 and start it at the other side unless I pull it out 3 feet from the wall. That clashes with a whole bunch of tools in my small shop
I just started to print a few parts for the LR3 and just saw your core print. How are you getting your part to print so quickly I put mine in CURA and getting a 2 day print estimate.
From the documentation: The core has a recommended infill of 35%
I print it with 2 perimeters, 35% adaptive cubic infill and 0.333333mm layer height. Between that and the rather quick Repeat printer, those are the print times that I get.
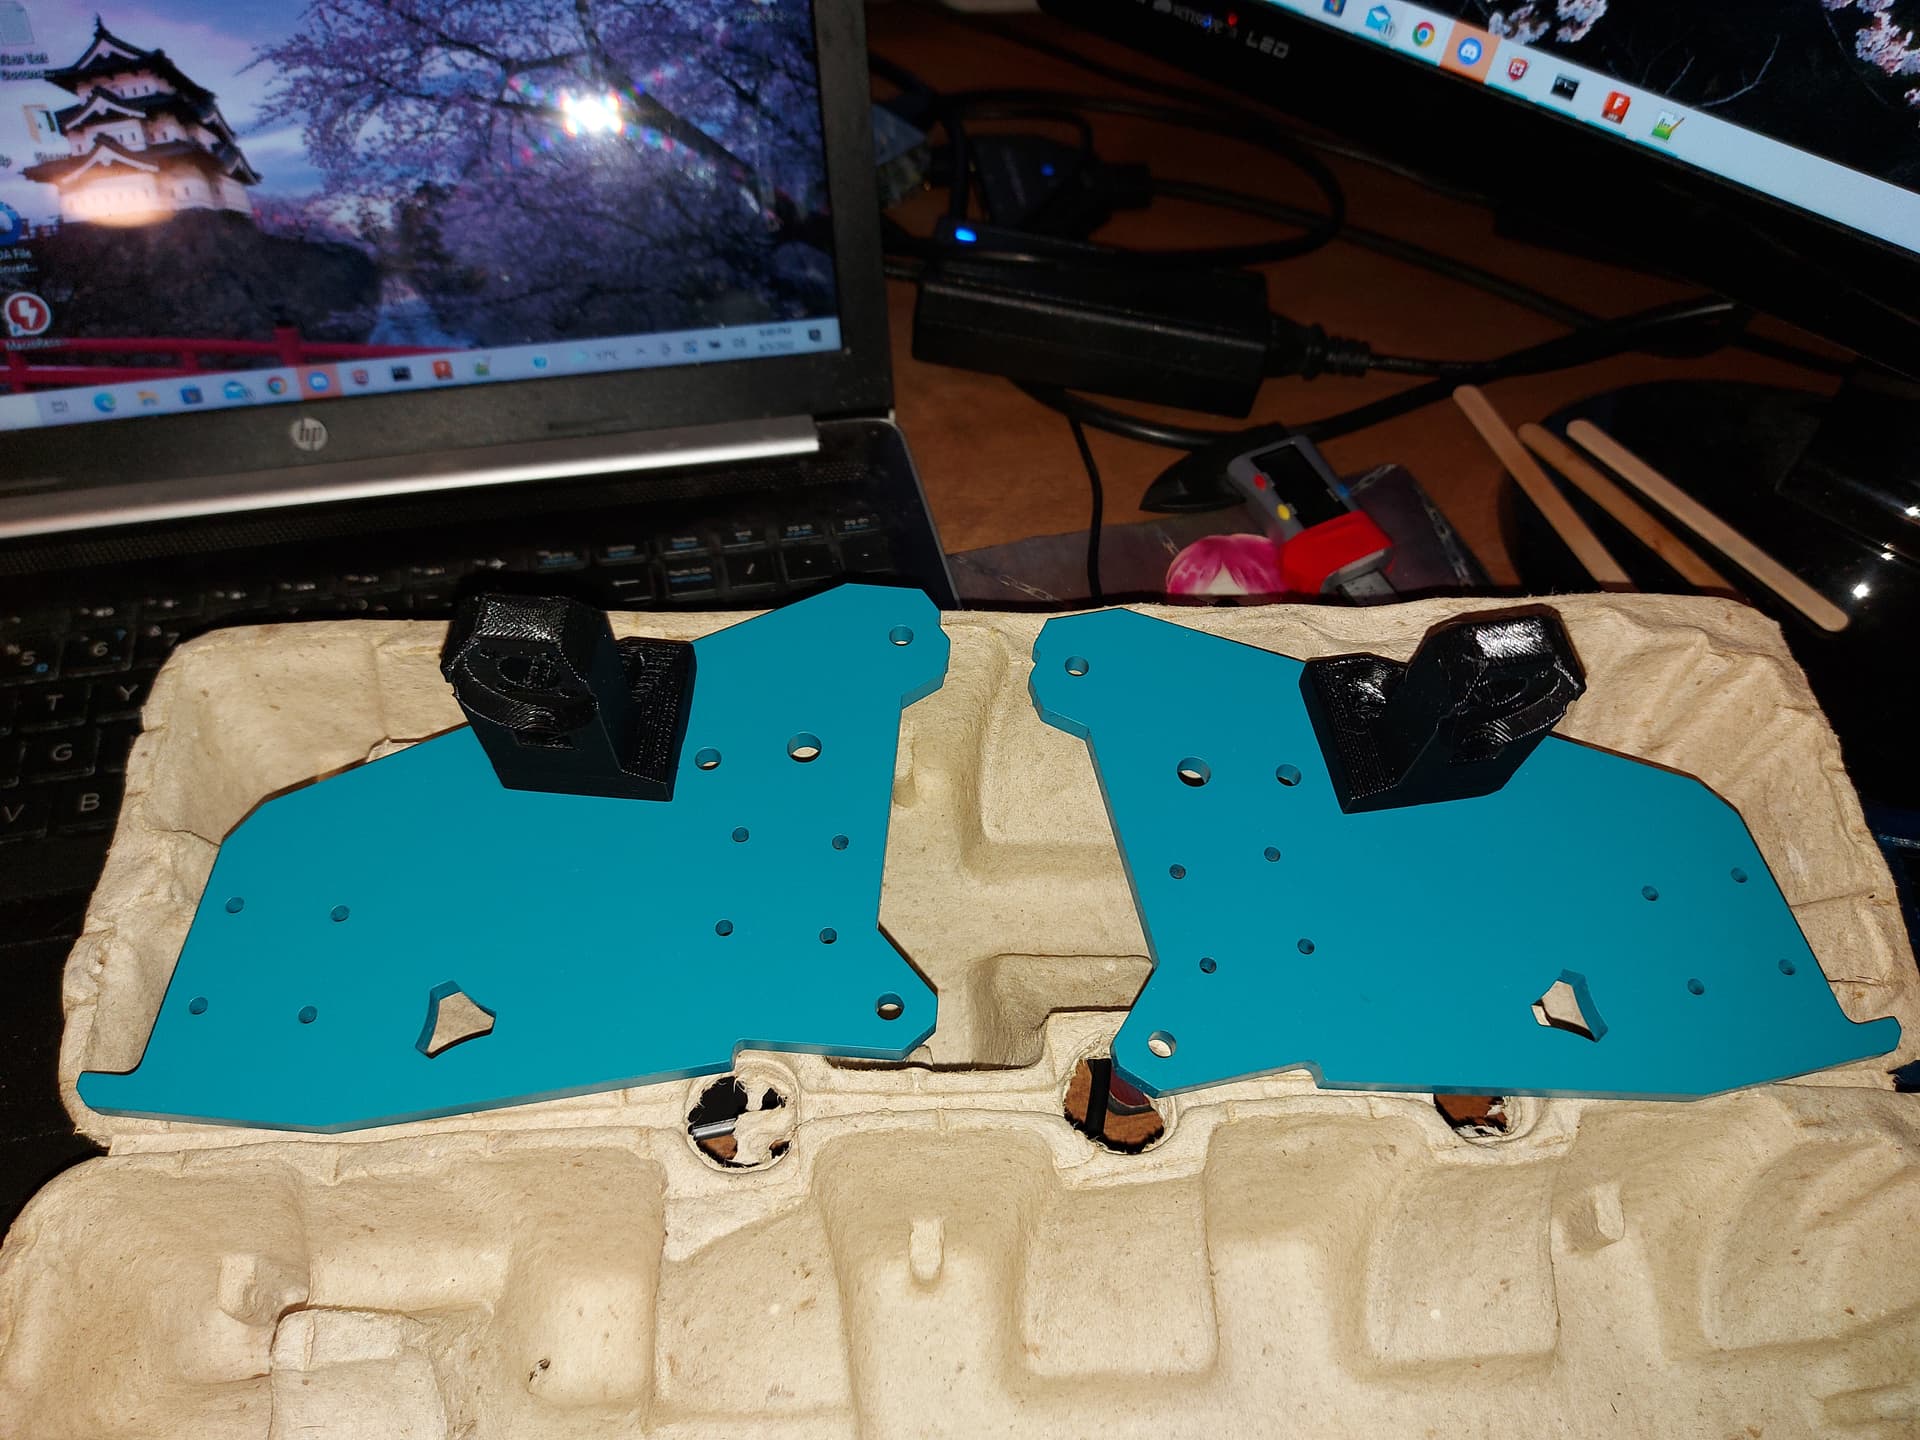
So, I painted the steel XZ plates. I decided to go with faux Makita blue rather than a clear coat. Gotta wait 24 hours for the paint to finish curing.
I printed the XZ stubs in black PLA, same as the rest of my LR3. These are 70% adaptive cubic infill.
While I was at it, I.printed the bearing wheel parts to replace the 60mm skate wheel parts. I dont think the smaller diameter wheels are going to cause me problems. and the parts look very nice, too.
The steel parts are very heavy, but that’s fine by me as they will increase the stability of the Y rail, I think.
Just spent a couple of hours tapping 32 holes for M3x0.5 threads in preparatuon for rebuilding the LR3 again.
So I updated the size of the access holes for the M5 screws to the beam, so it should allow removal of the screws all the way. On the advise of the person who does the laser cutting, I eliminated sharp corners, both interior and exterior. Some of the features seem a bit weird that way, but the overall pieces look nice.
I specified the rail holes as 2.5mm, and it took the tap well. The holes look frosty now, of course. I also added 2 holes to mount my LCD for the Duet on one piece only. I hope the threads are good enough to securely hold the rails. Even turning the tap by hand it got quite hot, and Im not sure how well the first few theeads formed. I hope that I don’t need to go to 18mm M3 screws and use nuts, as it wouldn’t look as nice.
No problems, but I actually don’t use the extra height most of the time. I have used it for some thicker projects, but mostly it was because I don’t like the idea of cutting the 200mm.rails that I bought.
Did you upload the files here? I remember someone uploaded something somewhere… I’d love to have 2.2cm more working height, so I’d need 4.4cm more Z-travel, right (assuming my workpiece is a 6cm cutting board)? I could also design a table where I can remove some boards, but I think that might be a lot more hassle in the long run.
I had done the squaring on my LR3 to the point where a 2’ square cut had diagonals closer than the 24x24 piece of plywood from ye olde agent orange Home Despot. Figured that when I was cutting on the table saw, that was always square enough, so I didn’t worry about it.
Putting together a retro arcade machine, and stuff wouldn’t fit. One panel kept popping out pn me.
I guess I had two pieces that were at the wrong angles on the machine, and that was enough.
So I squared it again. Measured diagonals on a 3’ by 5’ rectangle (about as large as I can cut) and adjust… now they are as close as I can measure with a tape. I used several foam boards from the Dollar store, cutting grooves into it, probably doing a number on the bit going through that paper (taped 4 pieces down to the table in the corners of the table.)
Bummer I wasted about 3/4 of a sheet of 5/8" plywood.
I think though that I need to make a better torsion box. If Im going to be this picky about square, maybe it’s time to make sure things are also flat.