Oh no…the history of betas in that box!!!
2 Likes
Boy … that is hard!!! You had a great collection of Core, I remember the pictures.
1 Like
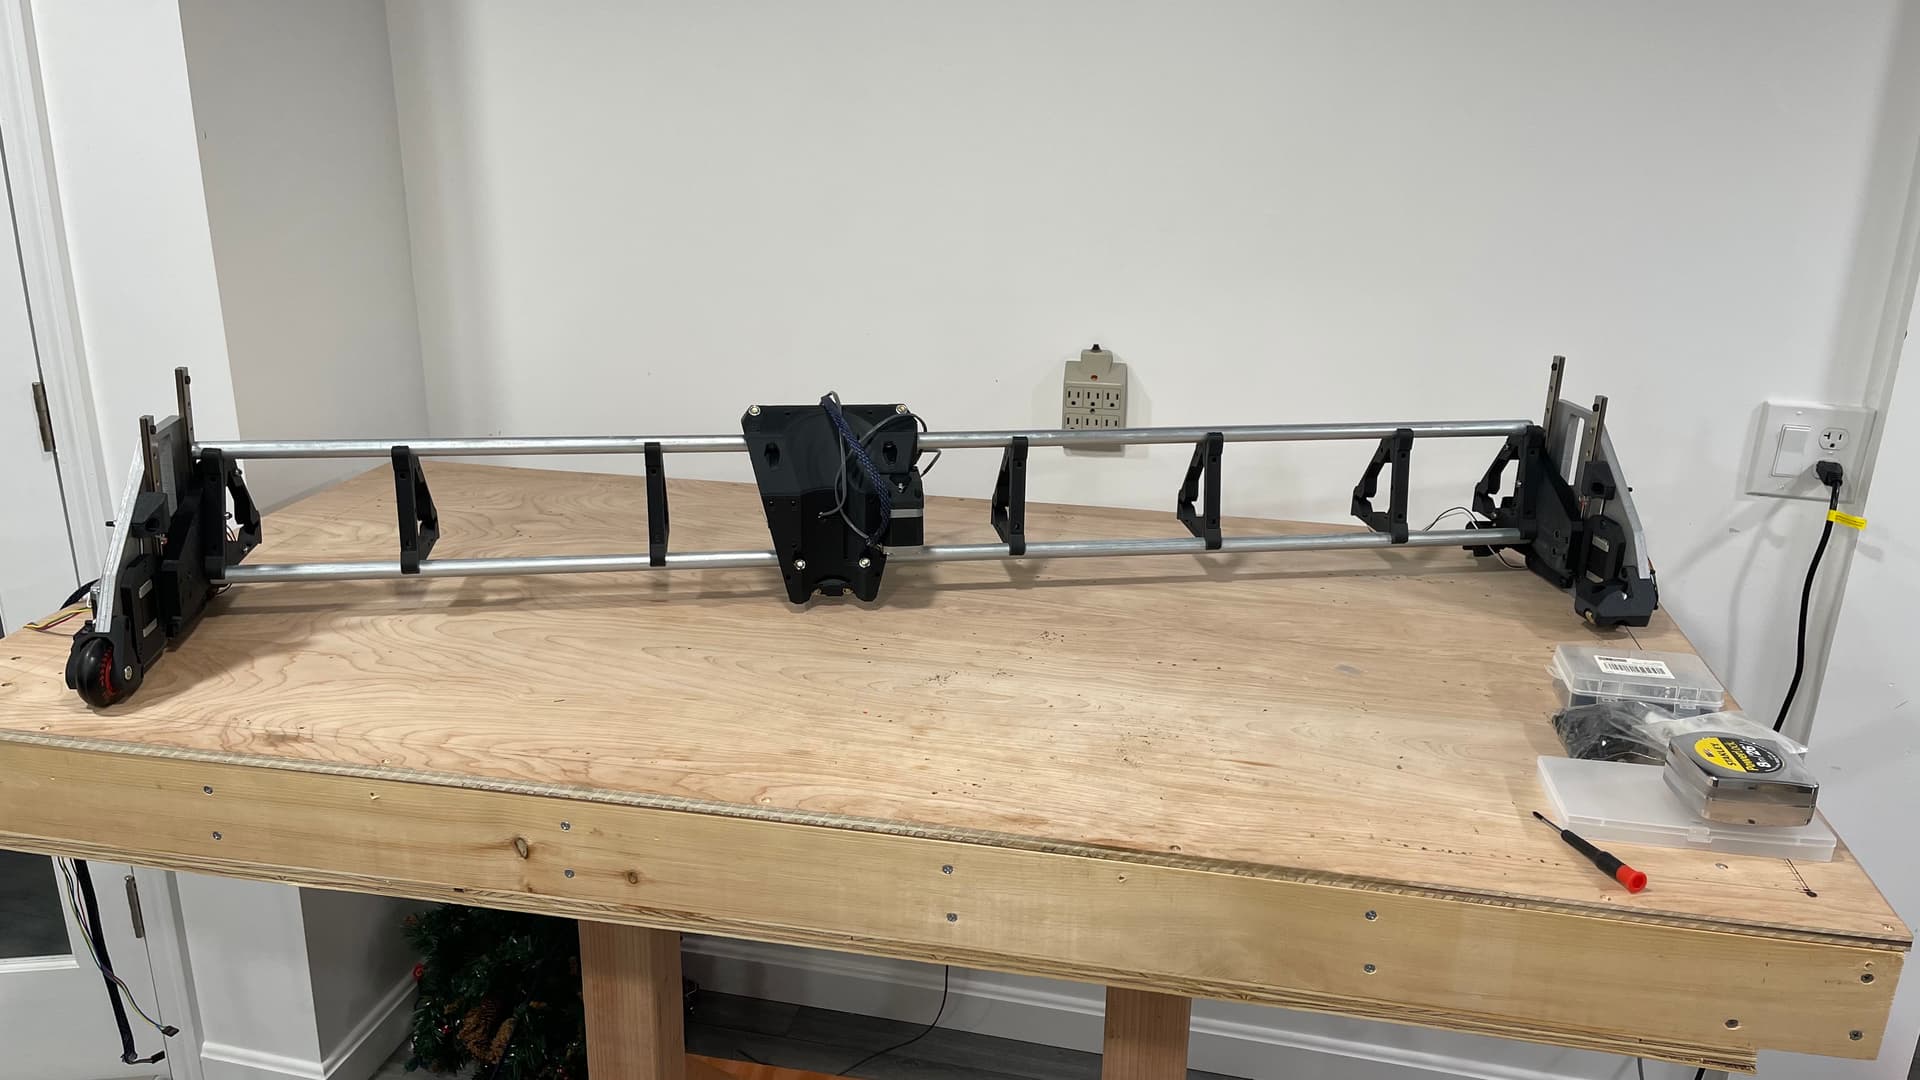
Had some time today and decided to dry-fit the printed parts into the YZ plate.
Well…
This was the result… 
I was going to keep the YZ plate natural with just some poly on it, but I found couple cans of Silver hammered spray pant, the pictures don’t do justice, They look really cool, but that can change… acrylic maybe???
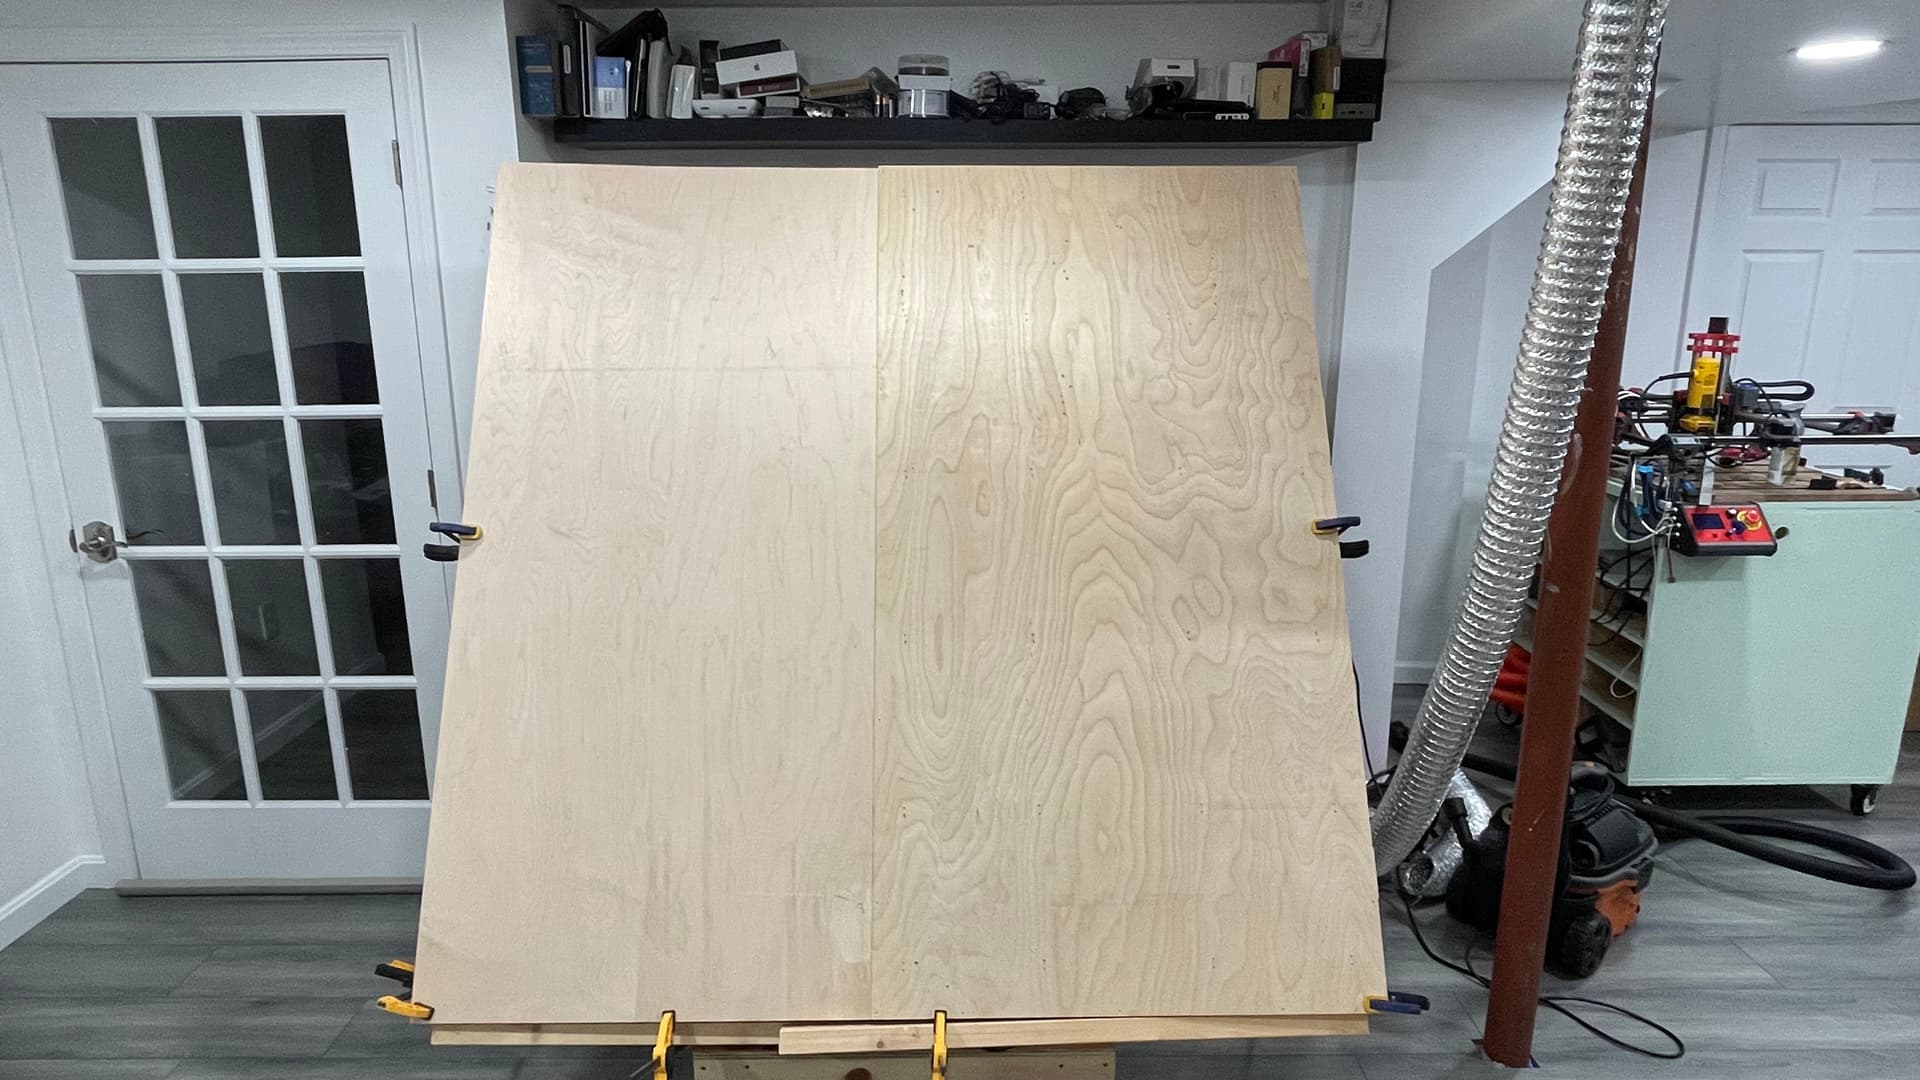
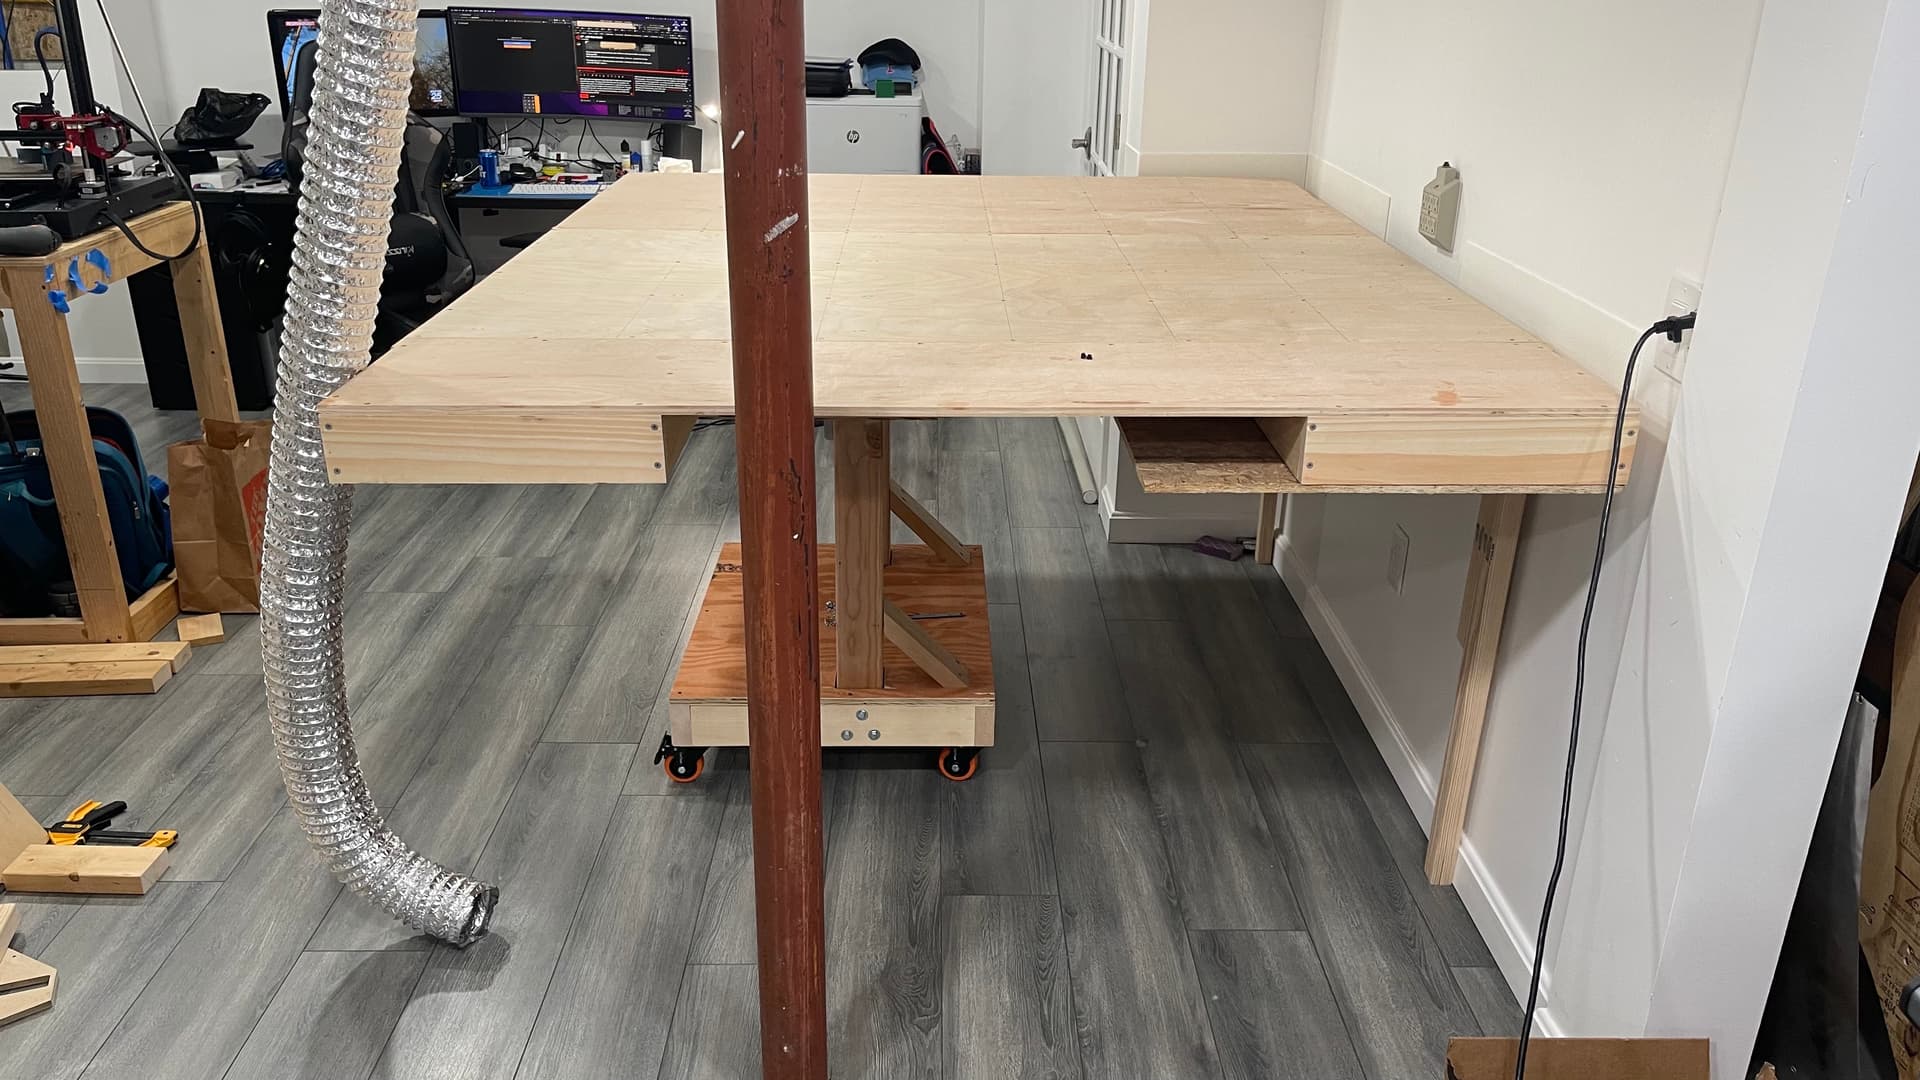
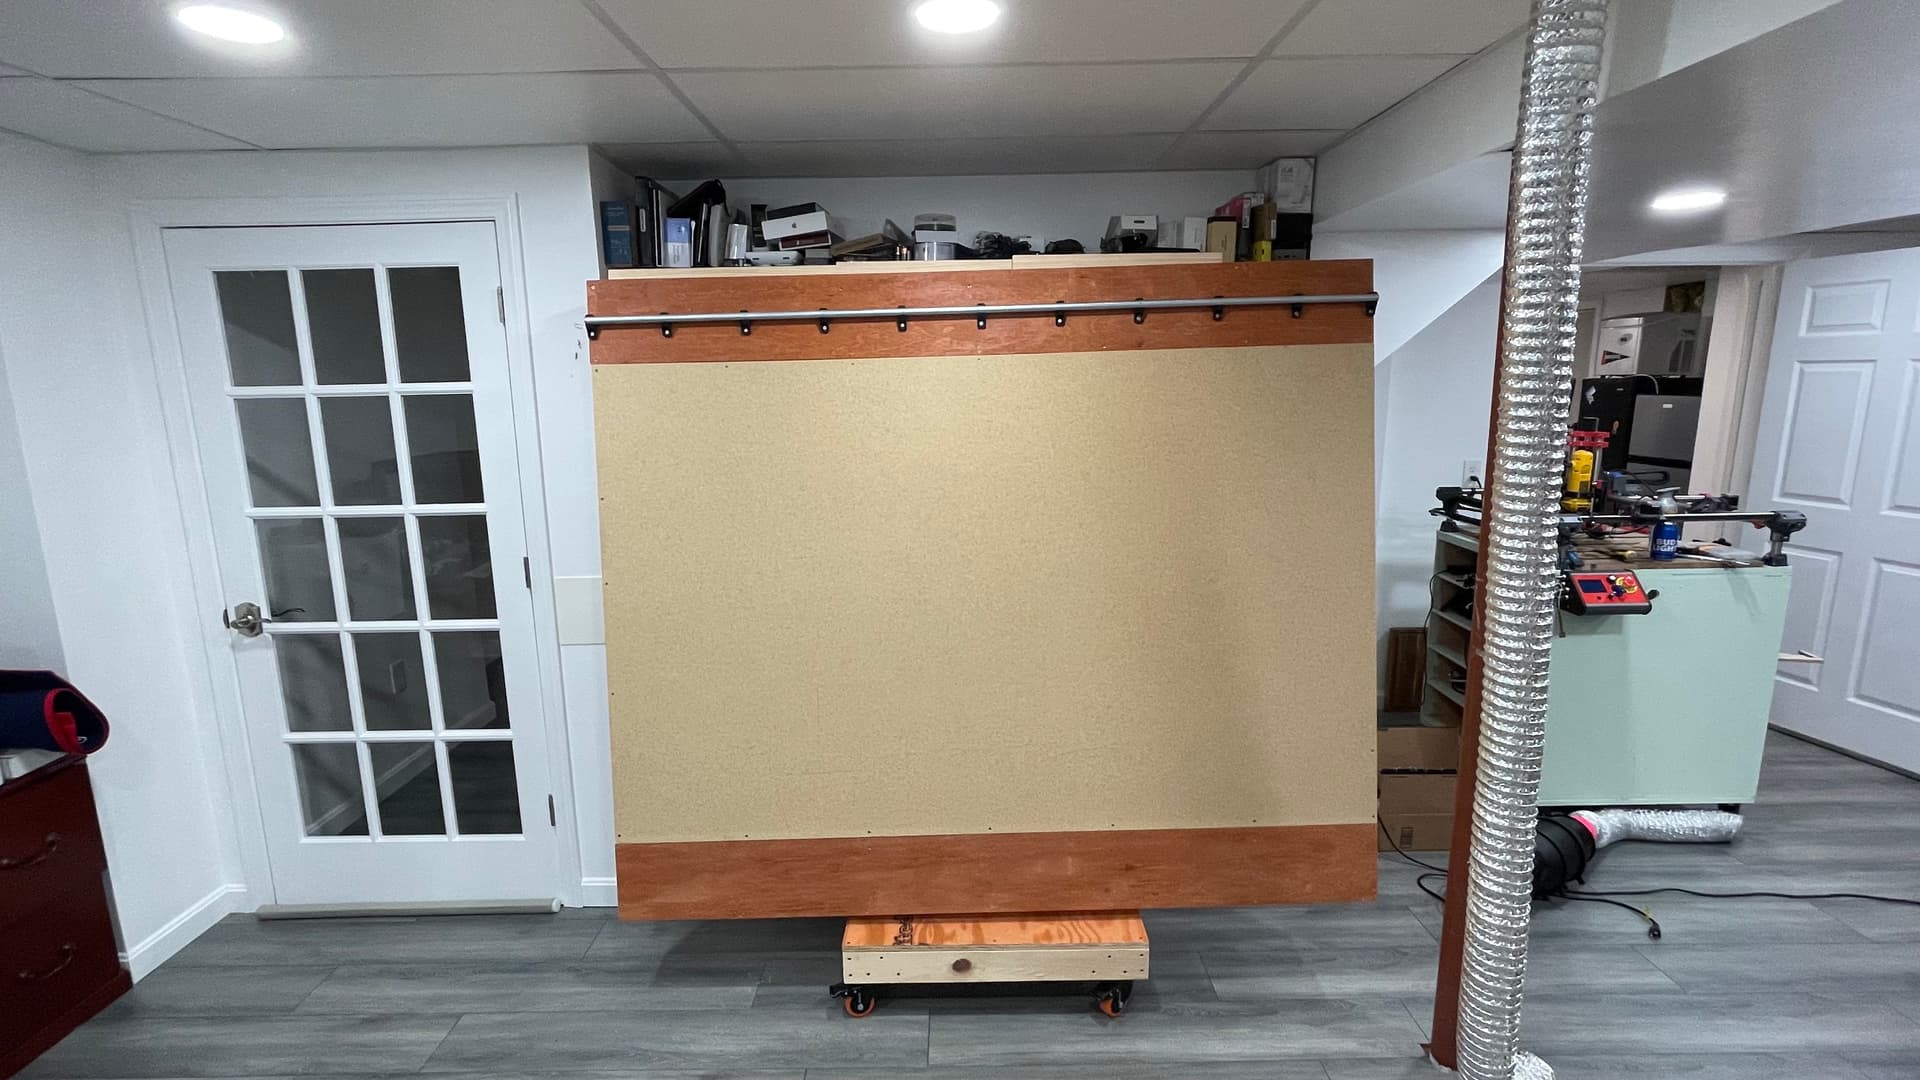
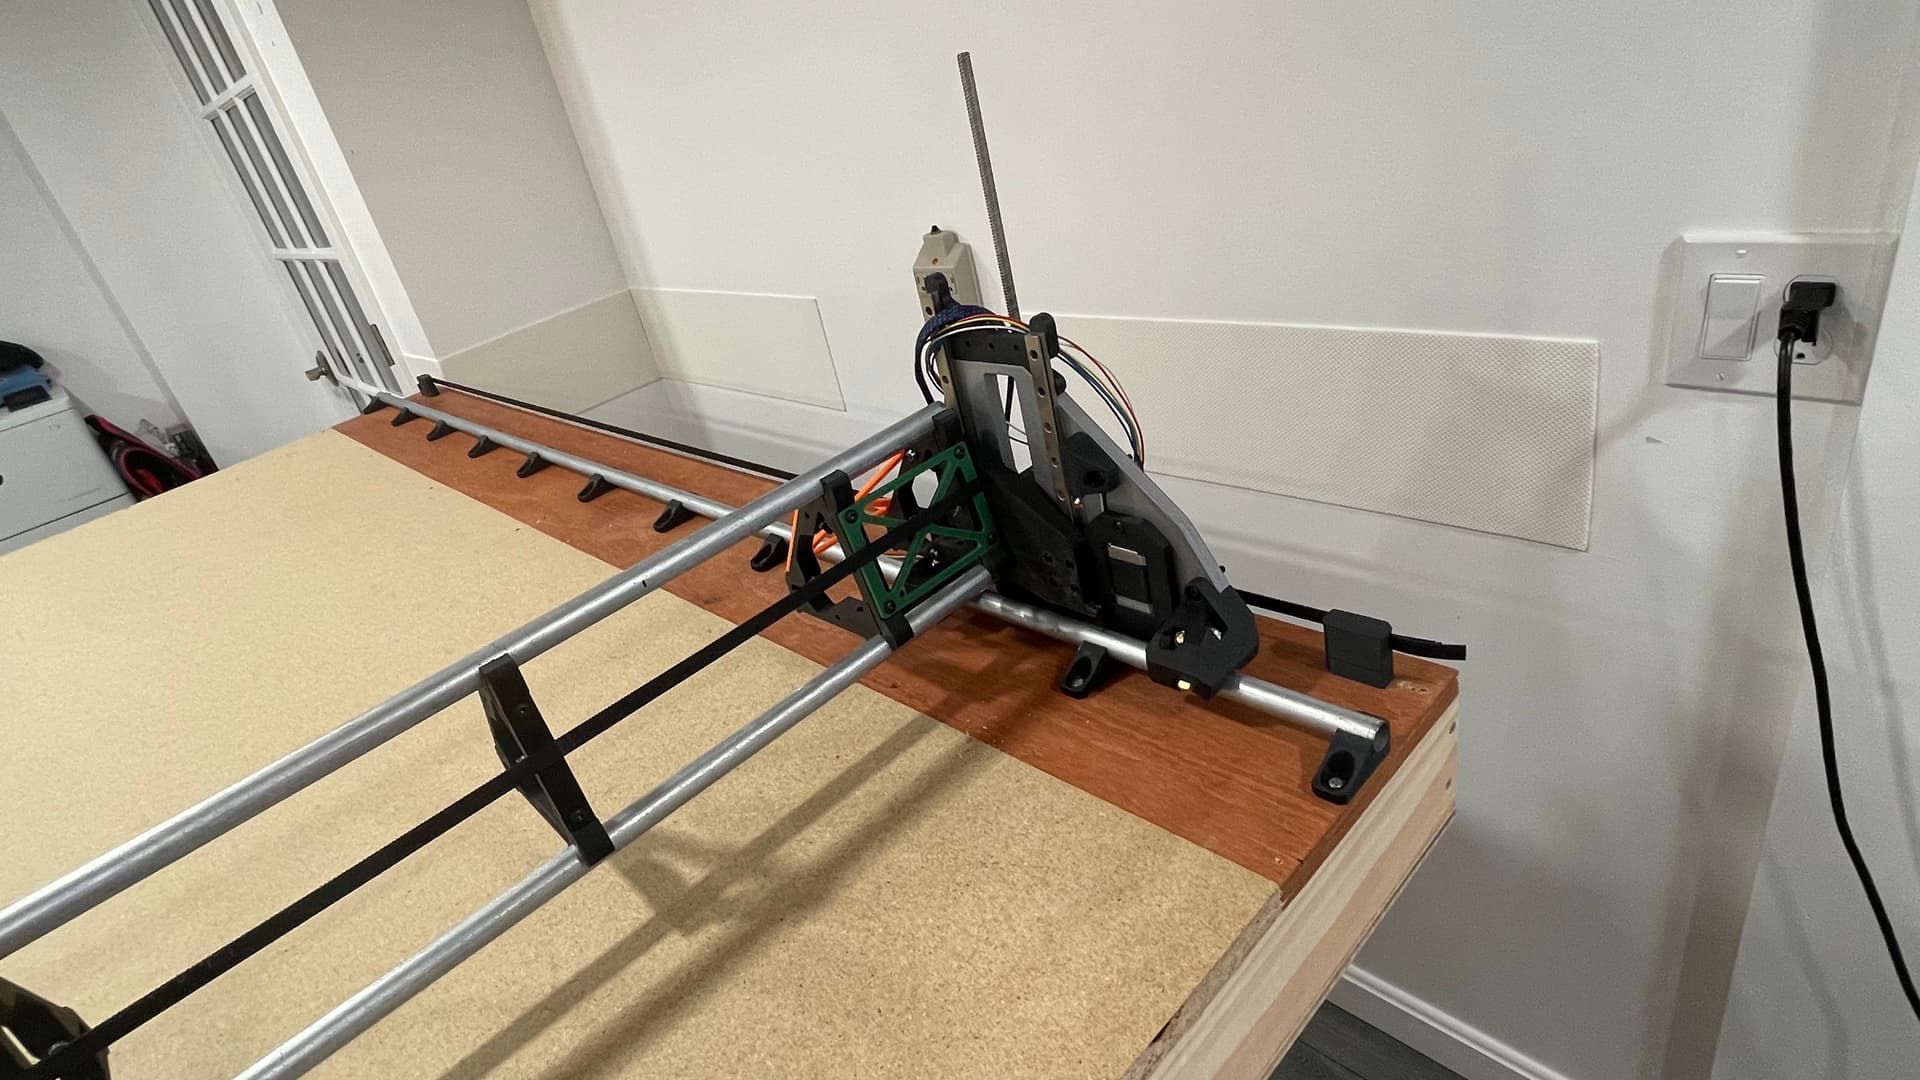
After that, it was time to work on the table.
The original table was 34"x64" (864mm X 1625mm). The new table will be 64" x74 1/2" give or take 1" (1625mm x 1900mm).
I took it partially apart, got the top off, move the center of gravity to the front as much as I could as I’m not able to center the table because when it folds it would hit the base.
This is where I’m standing right now.
The top is being held in place by clamps, also I will have to add legs, the table is too heavy for the folding brackets.
Next I will rebuild the torsion box and add a wing, thanks @JKStewart Jonathan for the idea.
We always have an IF… If that lally column wasn’t there, I could have a full sheet LR3. (I still need to cover that F#$%@!* column…)
4 Likes
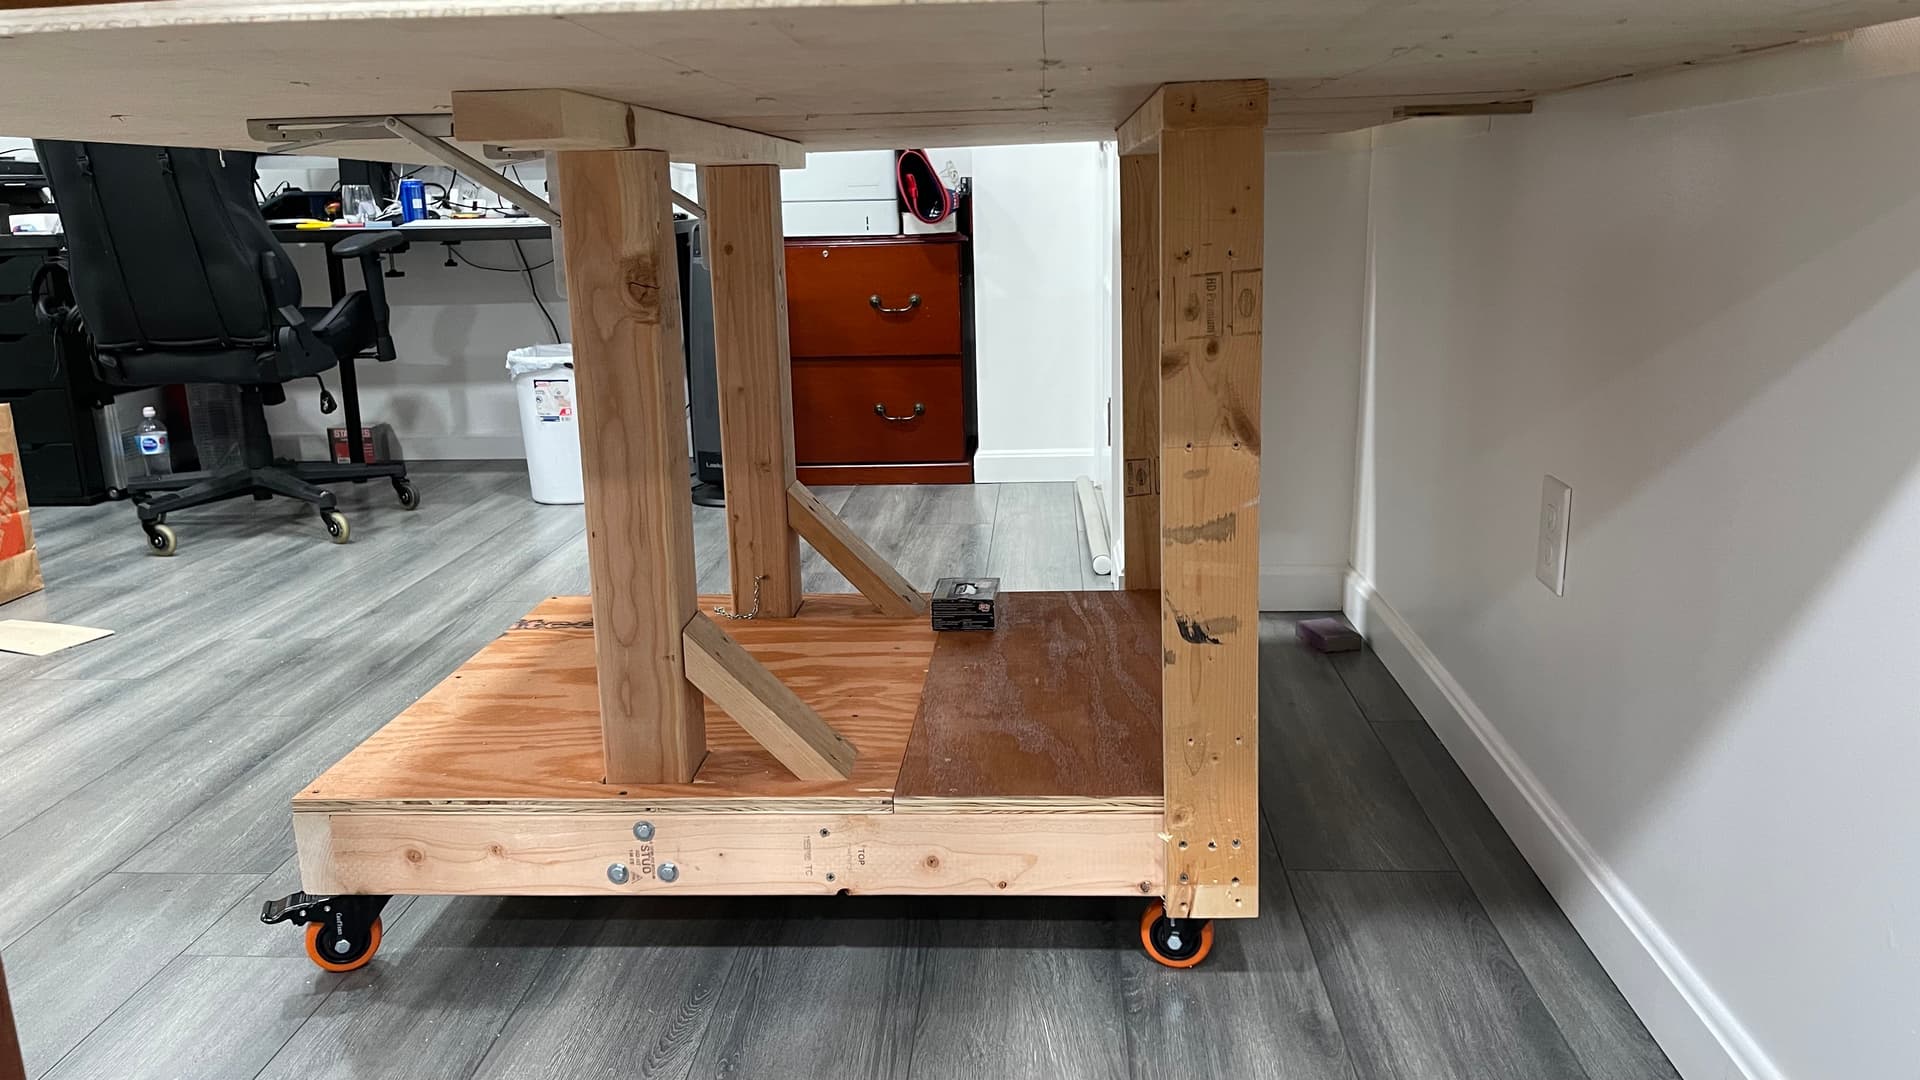
Didn’t get much accomplished today, kinda finish the table early morning and print the hose hanger.
All the plywood used are leftover from other projects. Only had to buy a couple 2x4 and some 1x4 to extend the torsion box. The base of the table will need to be modified, I will need to add a good 18" to 24" inches towards the X +, if no legs are used, it is pretty unstable, any extra weight on that side and the table wants to tip over.
For now, I will keep this way until I can get someone to help me take the top out of the base without take the top apart, this thing is heavy, I also order some Gas Struts Spring Shocks to help get the table up and down easier. Will see if it works.
The table is pretty flat at the added wing, specialty where the wheels will run.
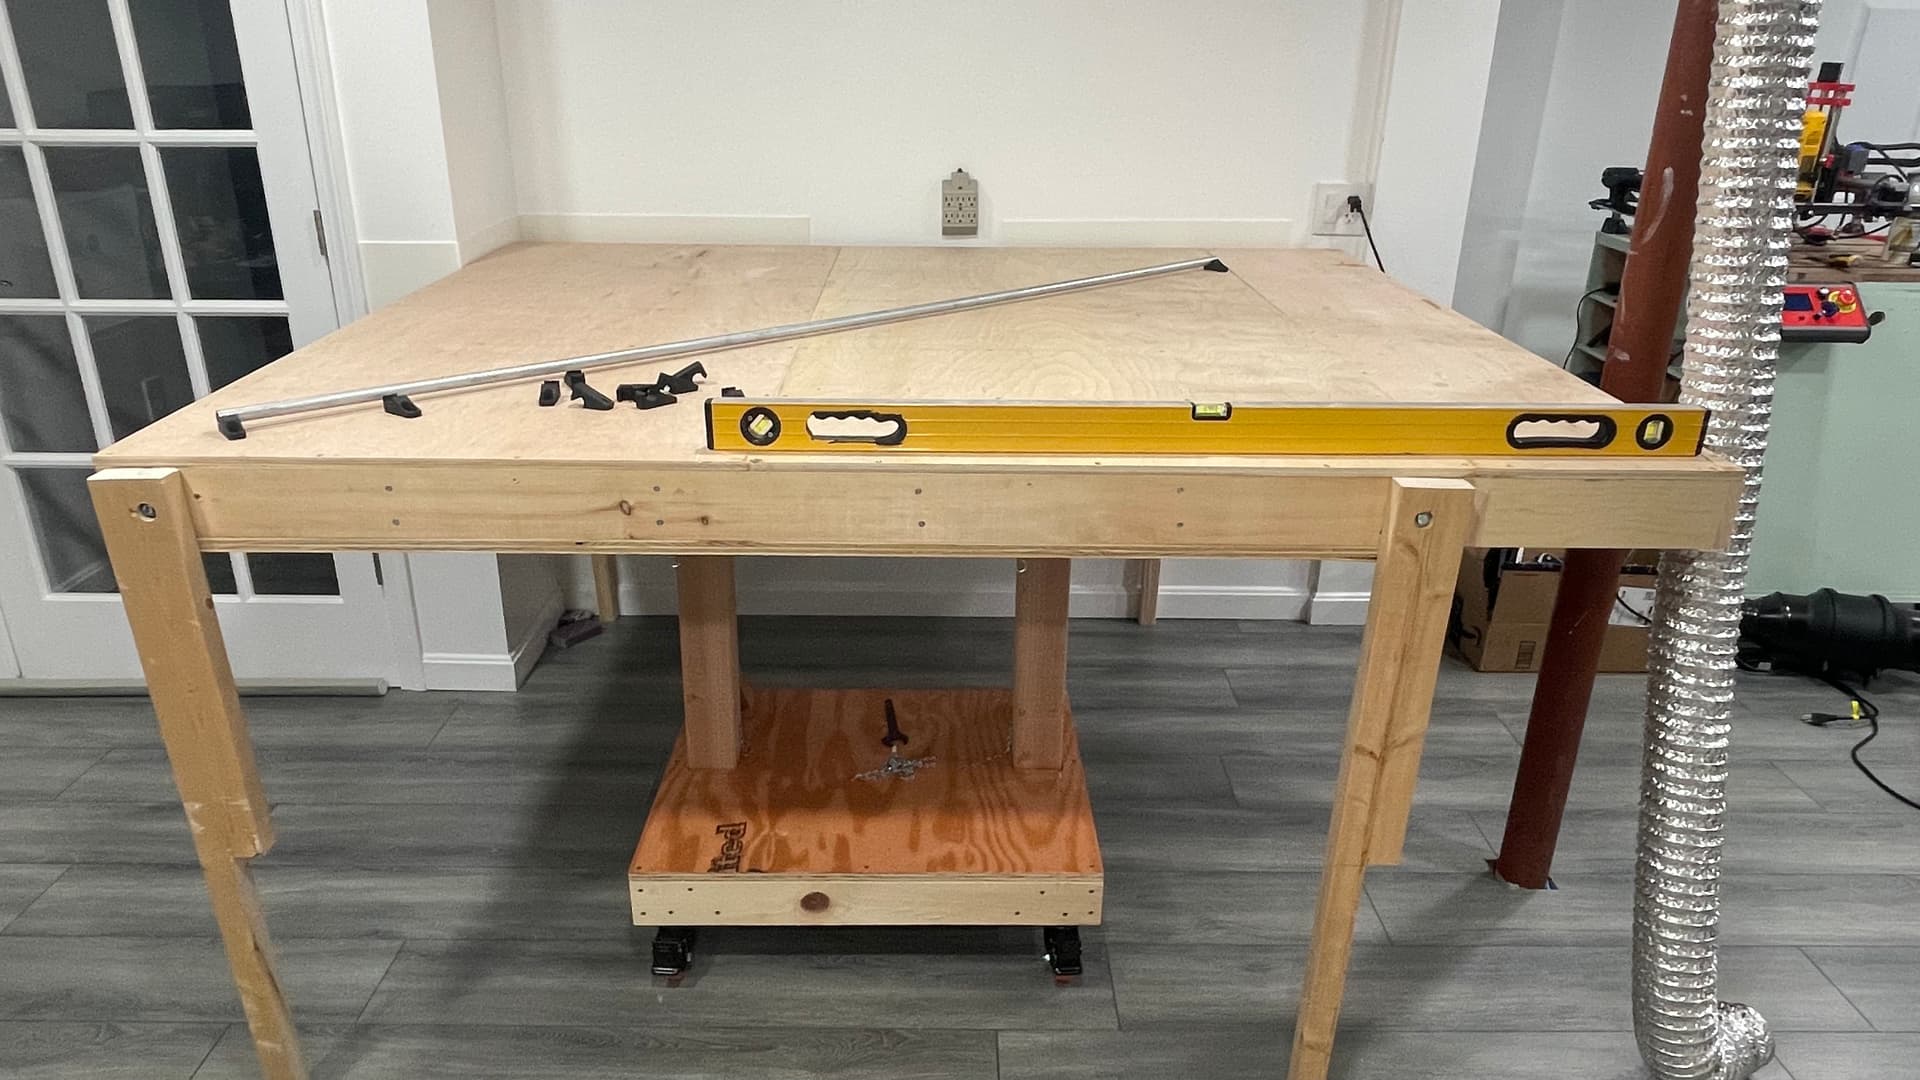
The table will get some Wood Puddy to cover the old holes and the plywood joints, some sanding then the waste board goes in…
The front legs eventually will come out after I add to the base.
4 Likes
The way the LR3 was design, the spoil board should be flat with the table surface or use a thinner spoil board like 1/2". I originally thought That I would be able to add the spoil board right on top of the table, like I had for the LR2, well that was not the case…
So I modified the table again.
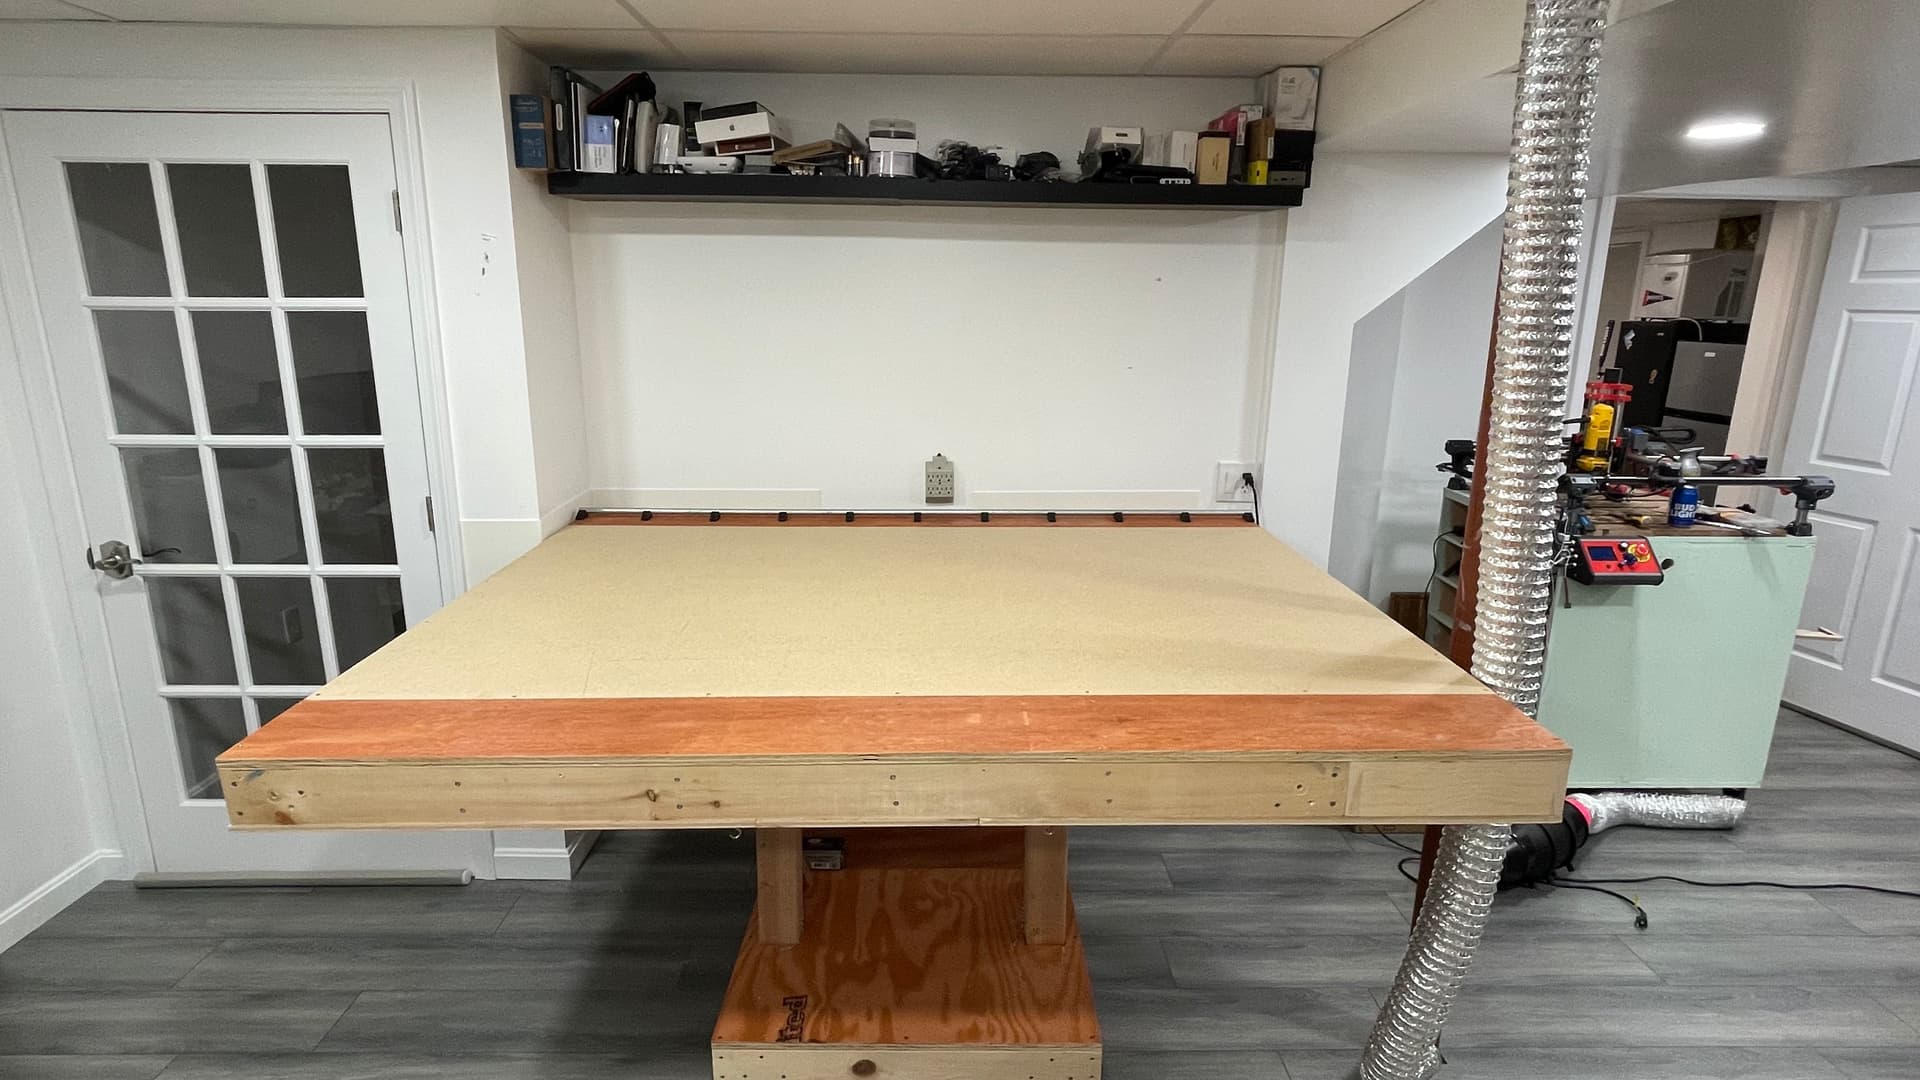
I swapped the 1/2" ply that was on the top for the bottom, add the spoil board and fill in the leftover space with 3/4" plywood.
On our Beta test PM, Jeff @jeffeb3 mention/suggested added storage under the table and I quote.
" 1. The clearance for the spoil board, like you said.
2. To get the same work area footprint, you need a larger table, because the machine fits in top now.
3. Many of the constraints of the table involved hanging over the edge and filling under the top surface and having a belt on the edge. Those are gone. So maybe there is a more function table for you (like a cabinet with drawers?). So it may be worth it to consider updating."
Well he is right, after doing this mod to the table, I realized that I can totally use the back side of the table for storage/cabinets like he said.
Plenty of space for cabinets like storage space.
So you guess what the LR3 will be cutting in a very near future…
5 Likes
Made some progress with the build.
Was able to run all the belts and mount the router
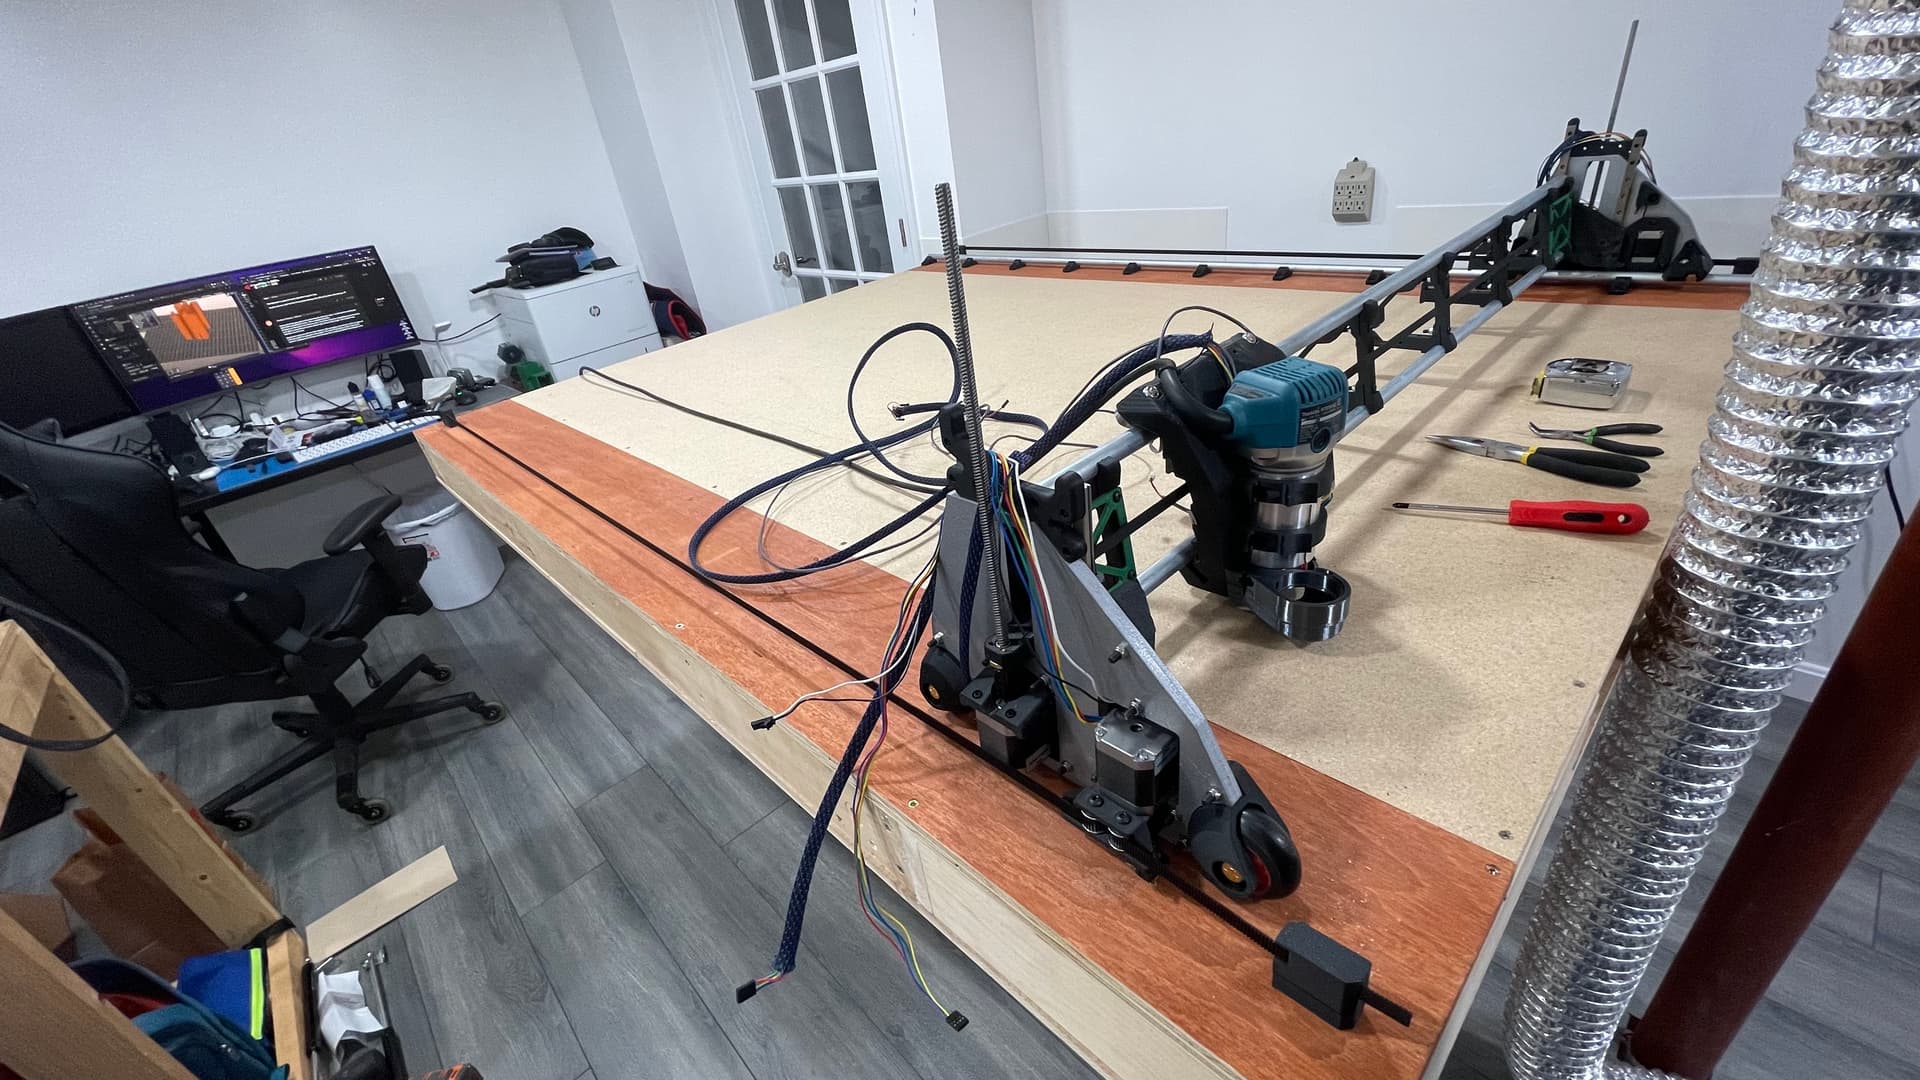
I’m going to design a new case to hold the Rambo and Raspberry Pi, very similar to the one I have for the Primo.

But that will be an upgrade, for now I’m printing a case that Ryan design and that will work just fine.
5 Likes
That is great news. Nothing like the first moves.
Maybe that area begins could be used to store the gantry. How long can you get drawer slides 
I have been looking at your build to try to figure out how some of these parts go together. It’s been very helpful. Thank you for the vid and pics.
2 Likes
Oooo, that is cool to see.
2 Likes
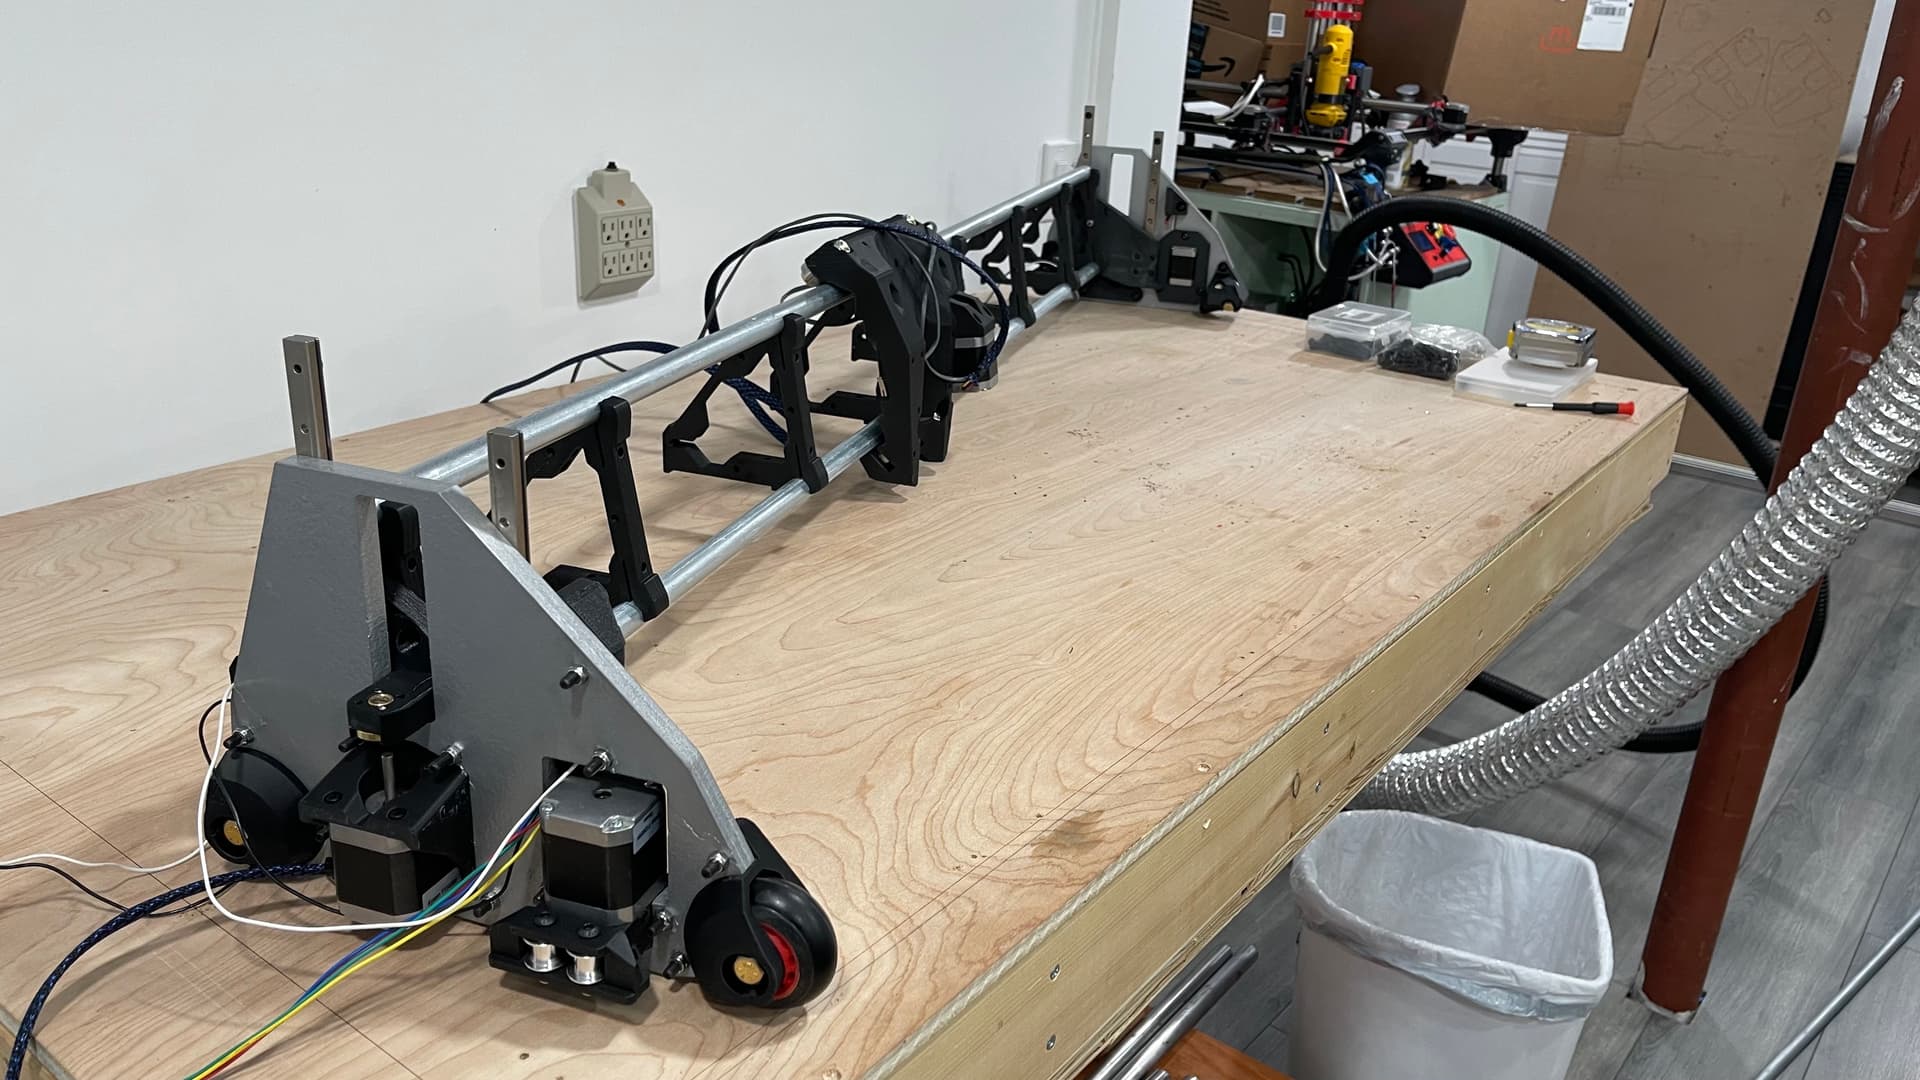
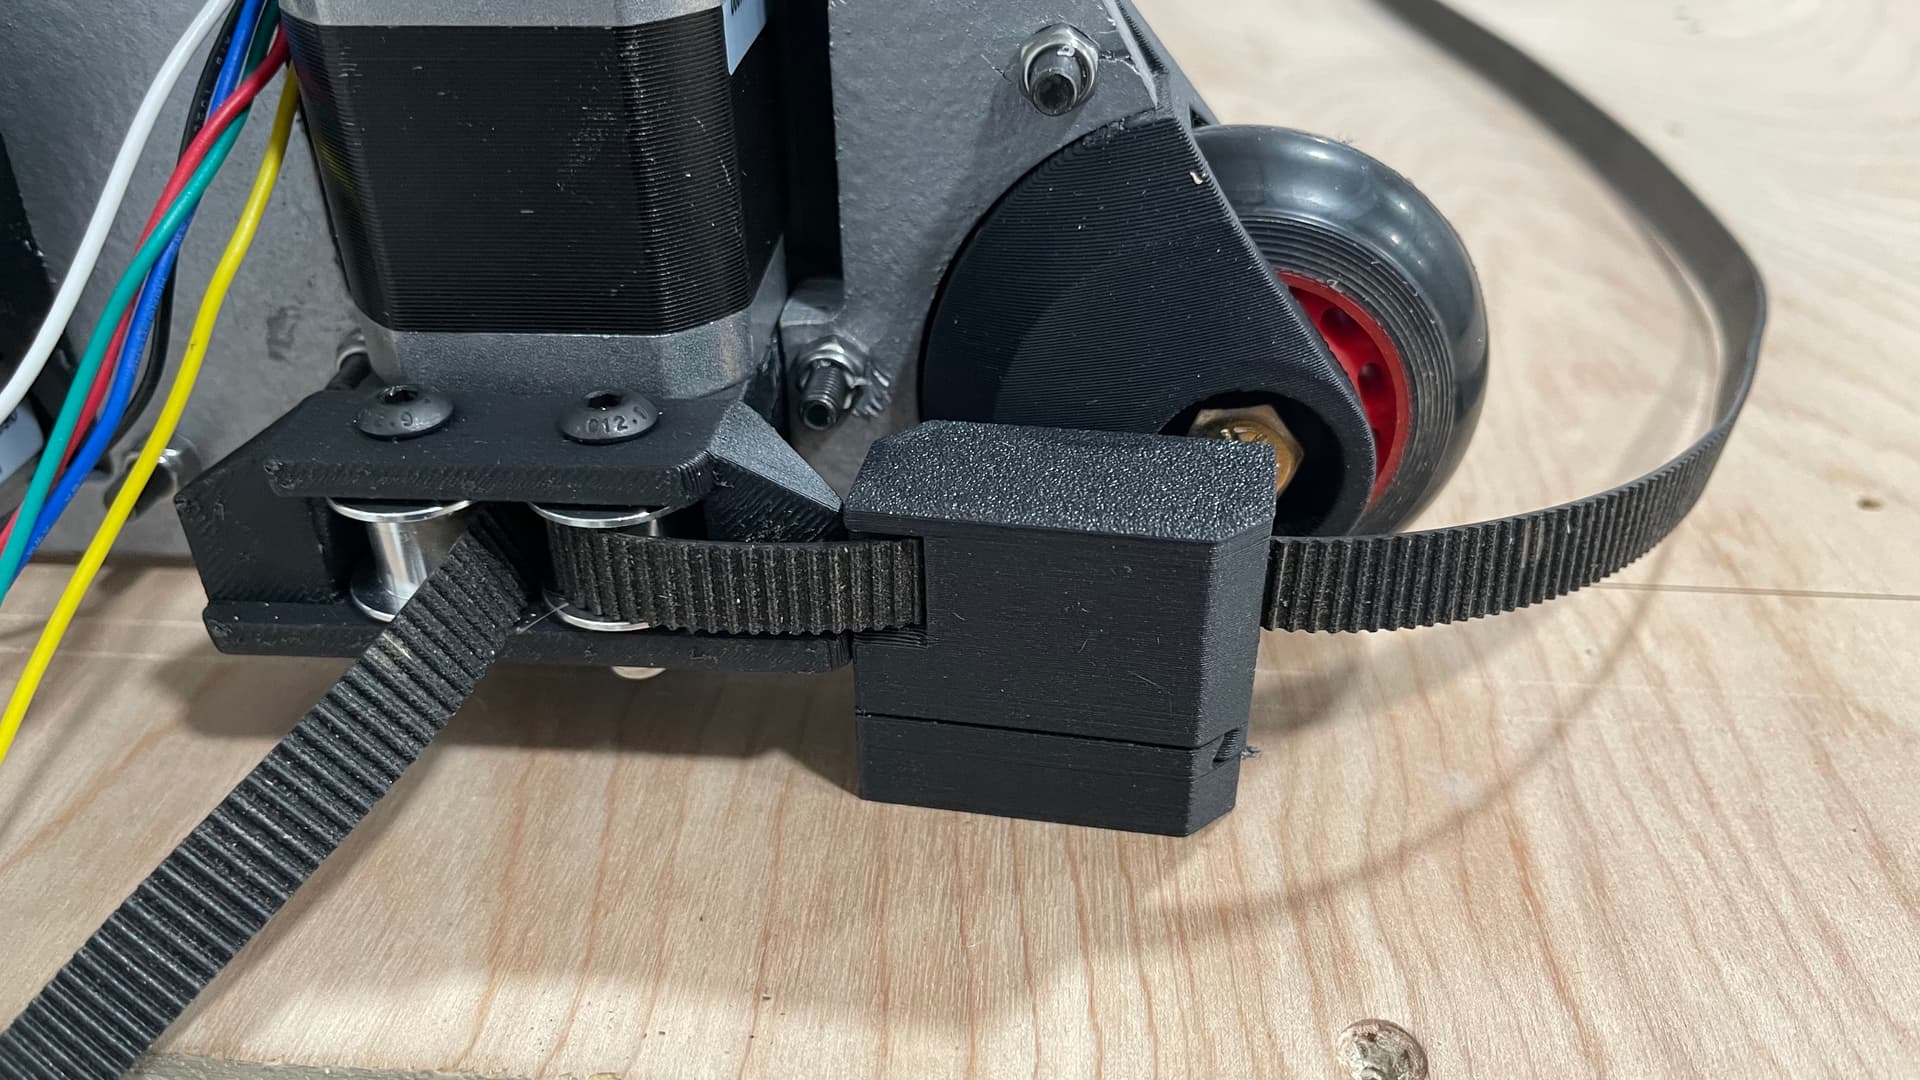
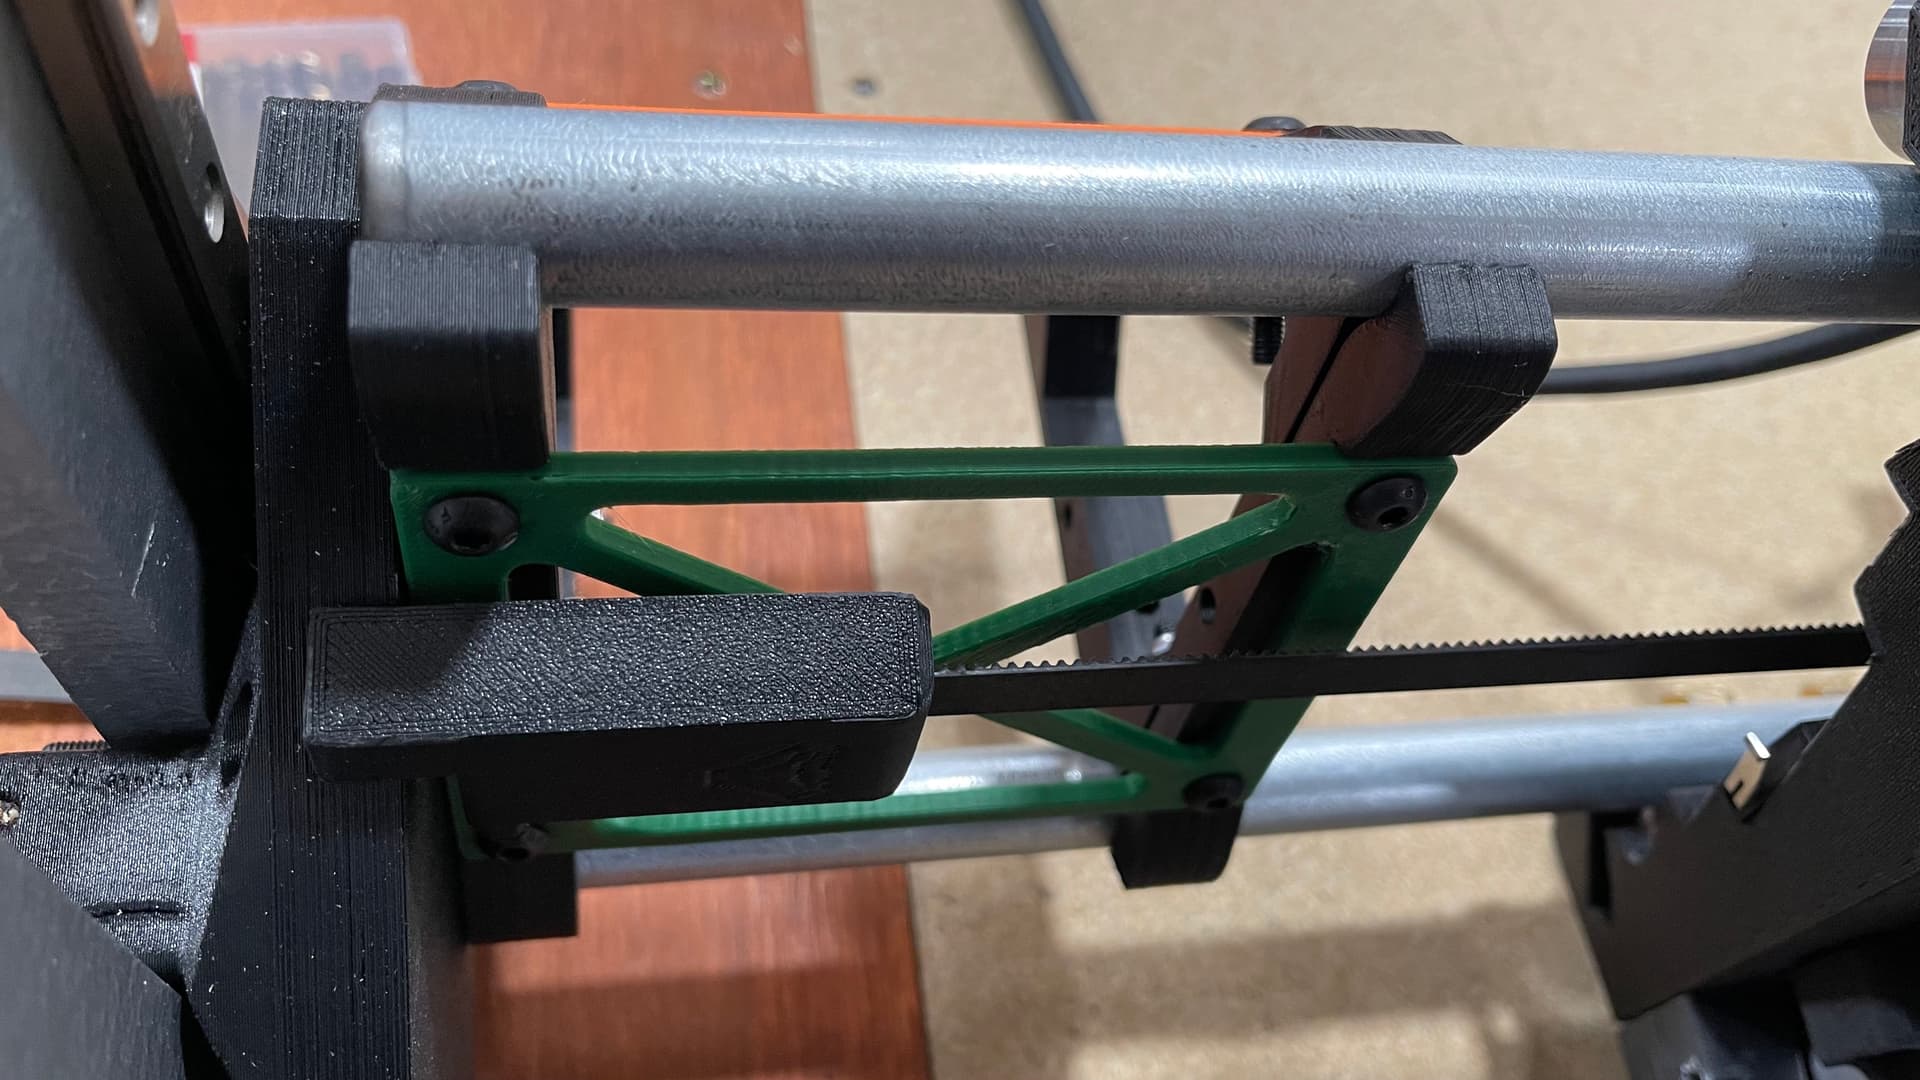
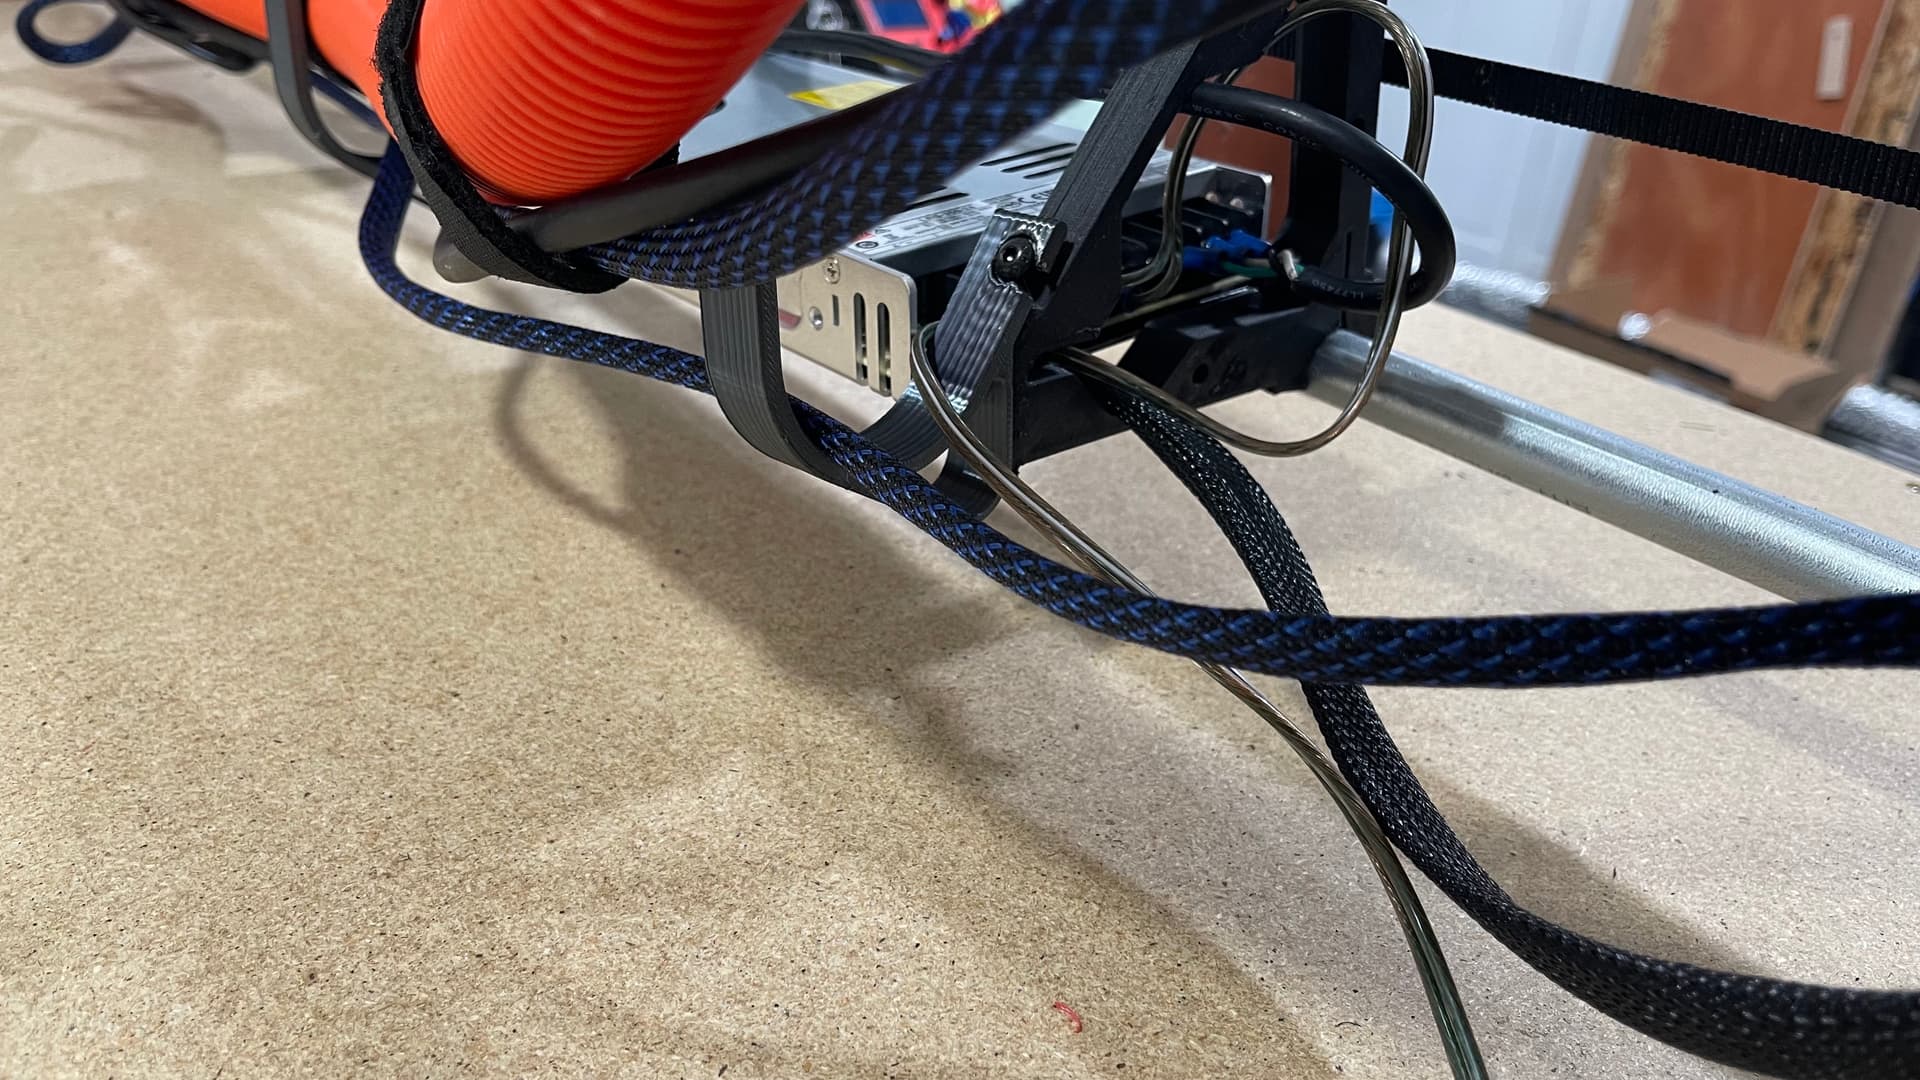
Today I finished the wiring management, well at least until I have the Strut plates, I used some wire sleeves range from 1/4" to 3/4" for the big loom that comes from the YZ-2 side.
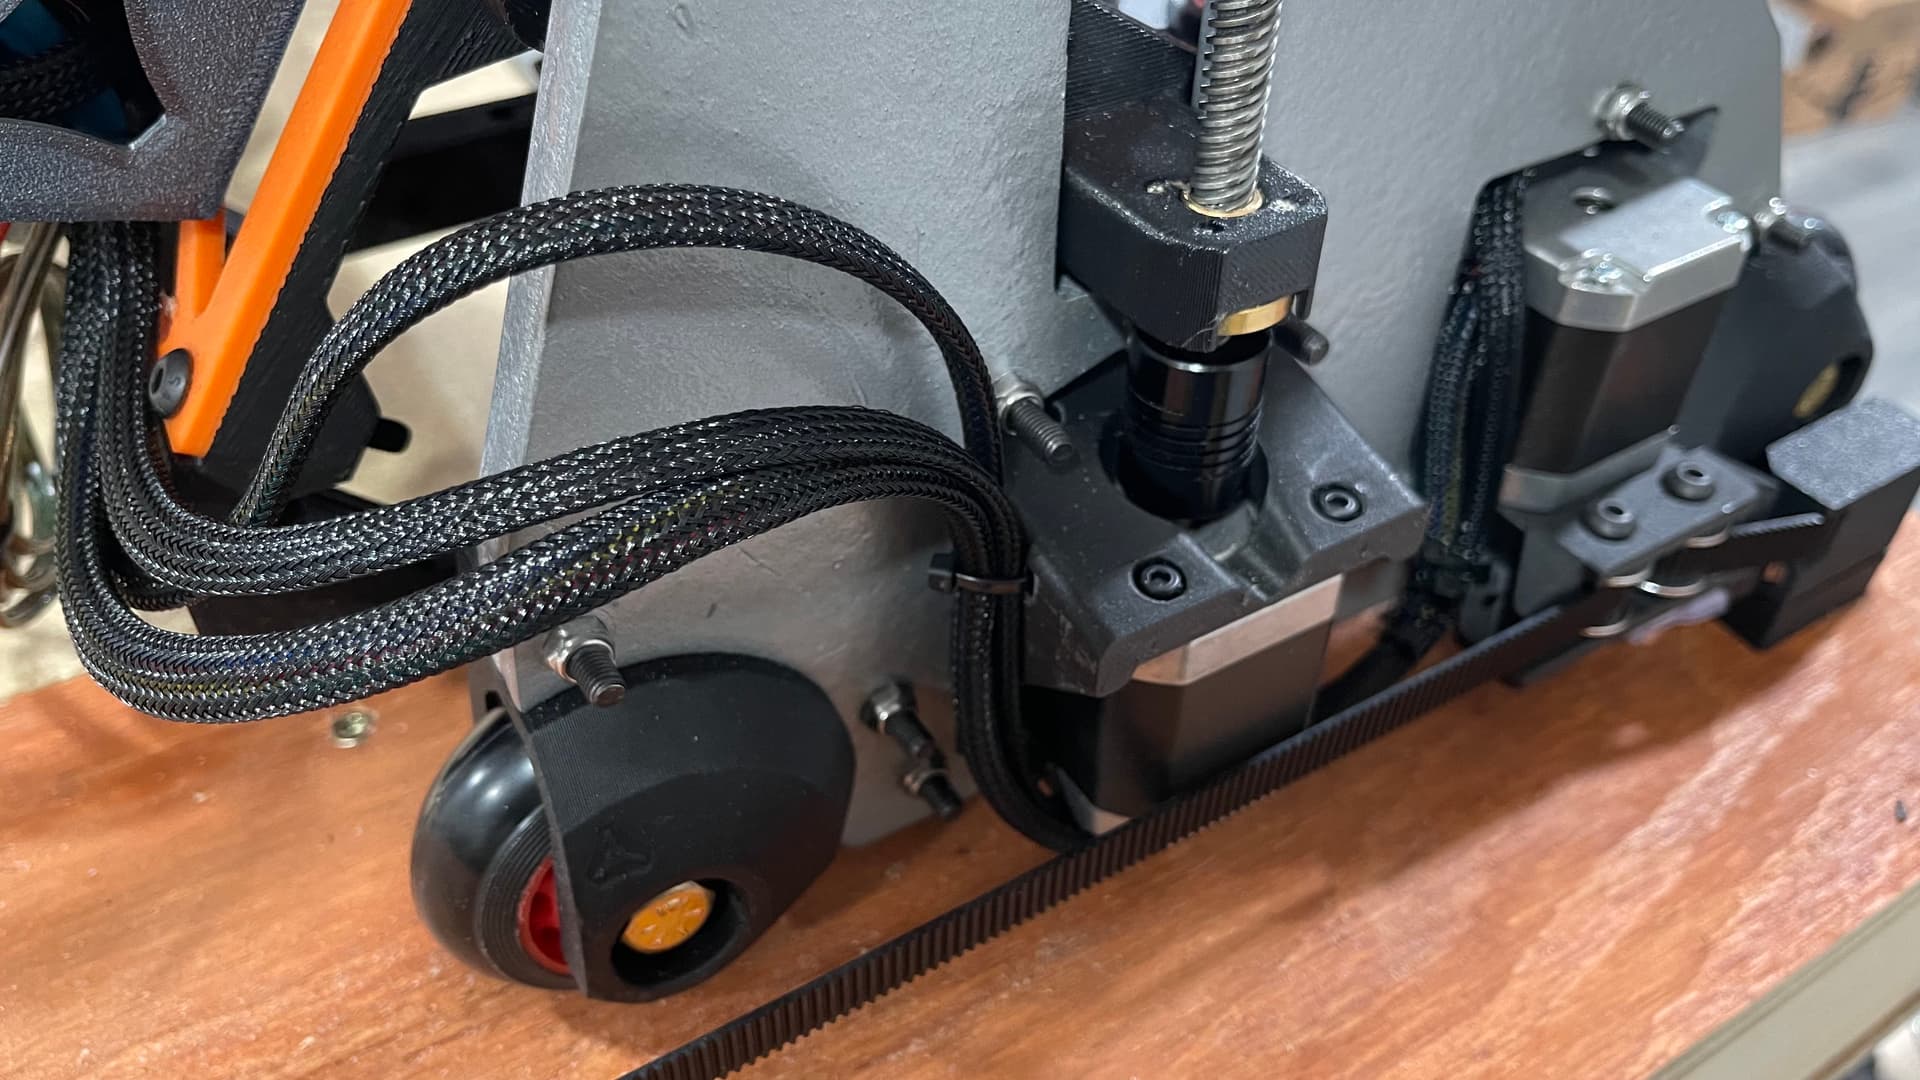
For now, the power supply is tucked inside the braces, tomorrow once I have the strut cut I will figure it out where the power supply will go, I’m planning to add an AC/DC Control Relay to start/stop the router and vacuum at the same time, I still need to look at the firmware part of it.
And finally we have full motion… I ran it at, 3500mm/s for the video.

Tomorrow is the day, I can’t wait to have it making chips!!
8 Likes
Oh man, I can’t tell you how awesome that is to see. I swear I caught myself thinking…I want to make one of those! WTF!!!@?! As long as the performance is legit I think we are making a real winner here.
5 Likes
I do believe you did! The machine is awesome. Can’t wait to see it full assembled and making some real dust.
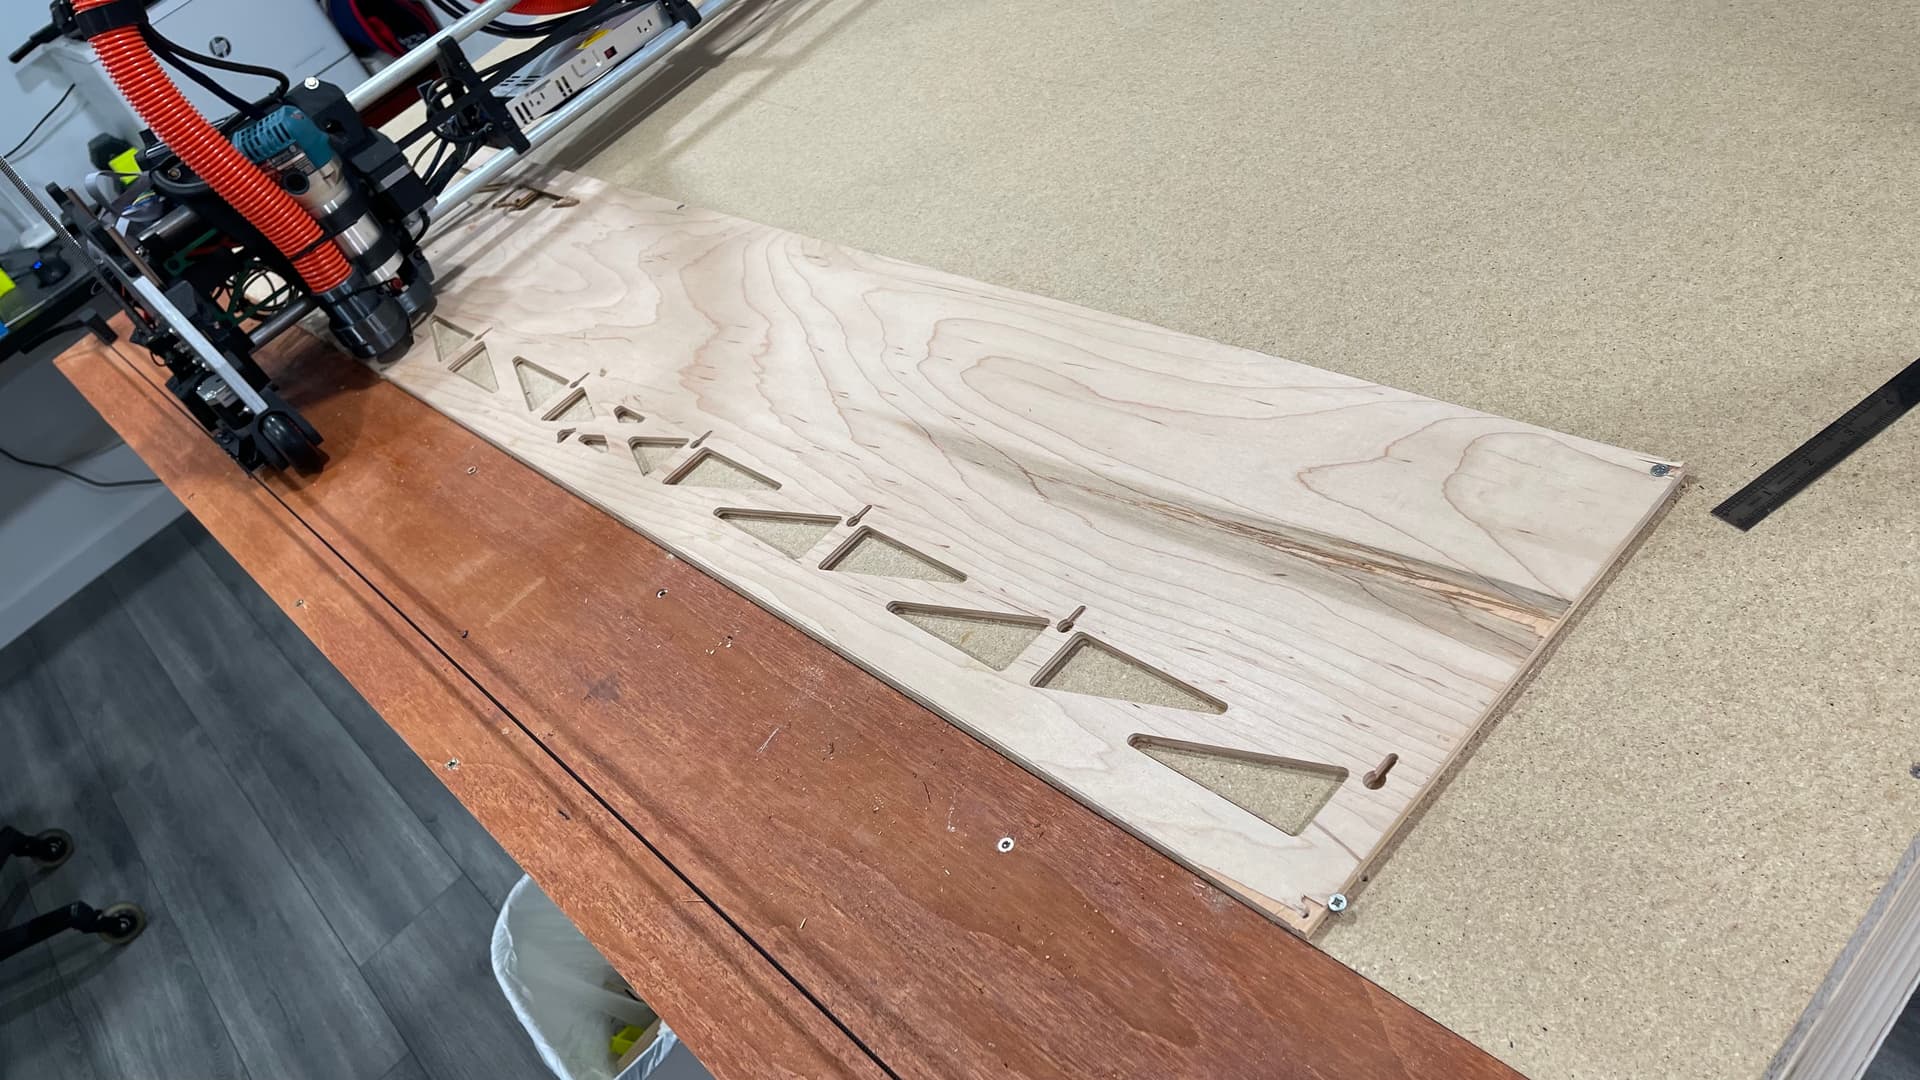
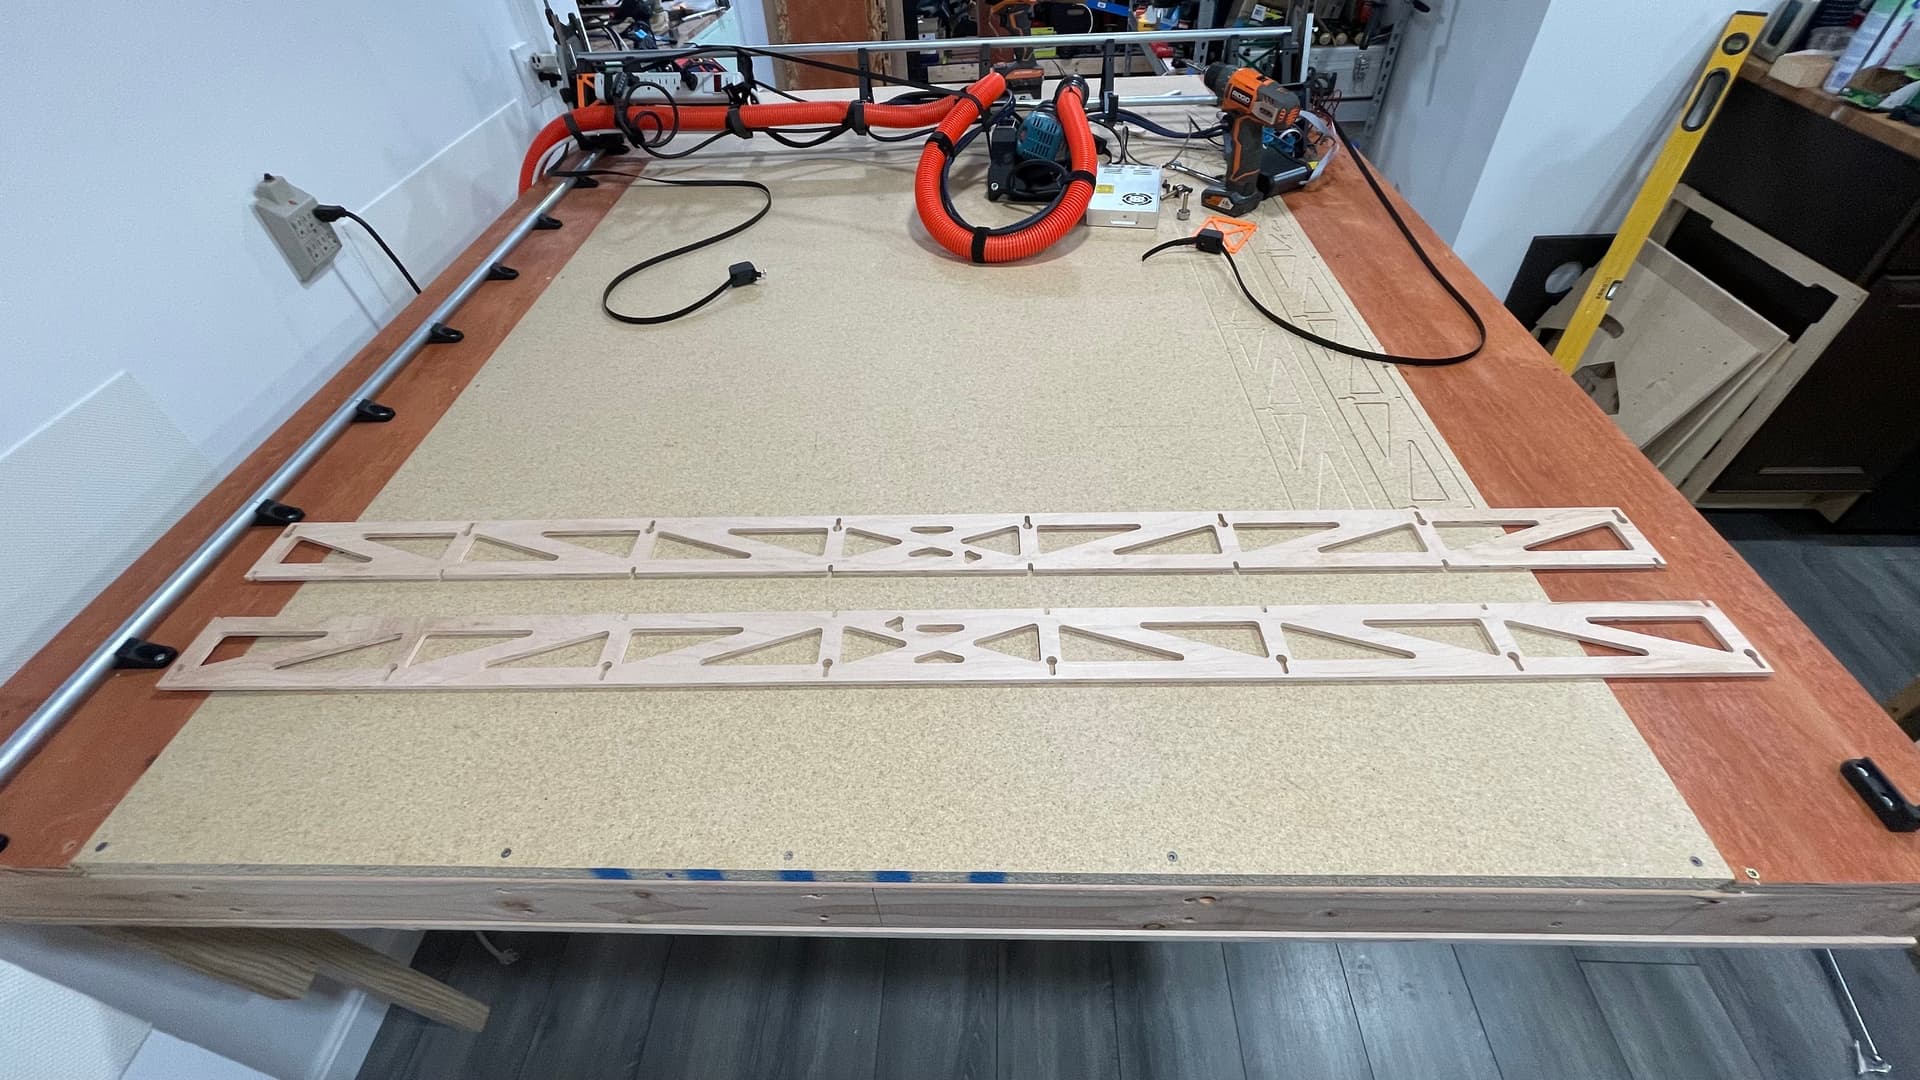
Well I screw up more than once today, was able to cut 2 out of the 3 struts… Cut a piece of plywood 300x1450 and let’s get the machine dirty!!!
I didn’t check the router bit, as it was used to cut the YZ plates and I had no burns or any other issue, looks like it was the best Bit, so start the cut and this happens…

Then I Realize that I was also going a little too fast, well the same speed I cut the YZ plates 20mm/s.
Changed the end mill, drop the speed to 12mm/s and got 2 struts cut.
Watch and see how much dust is all over the table 
The Dust chute that Ryan design works great!
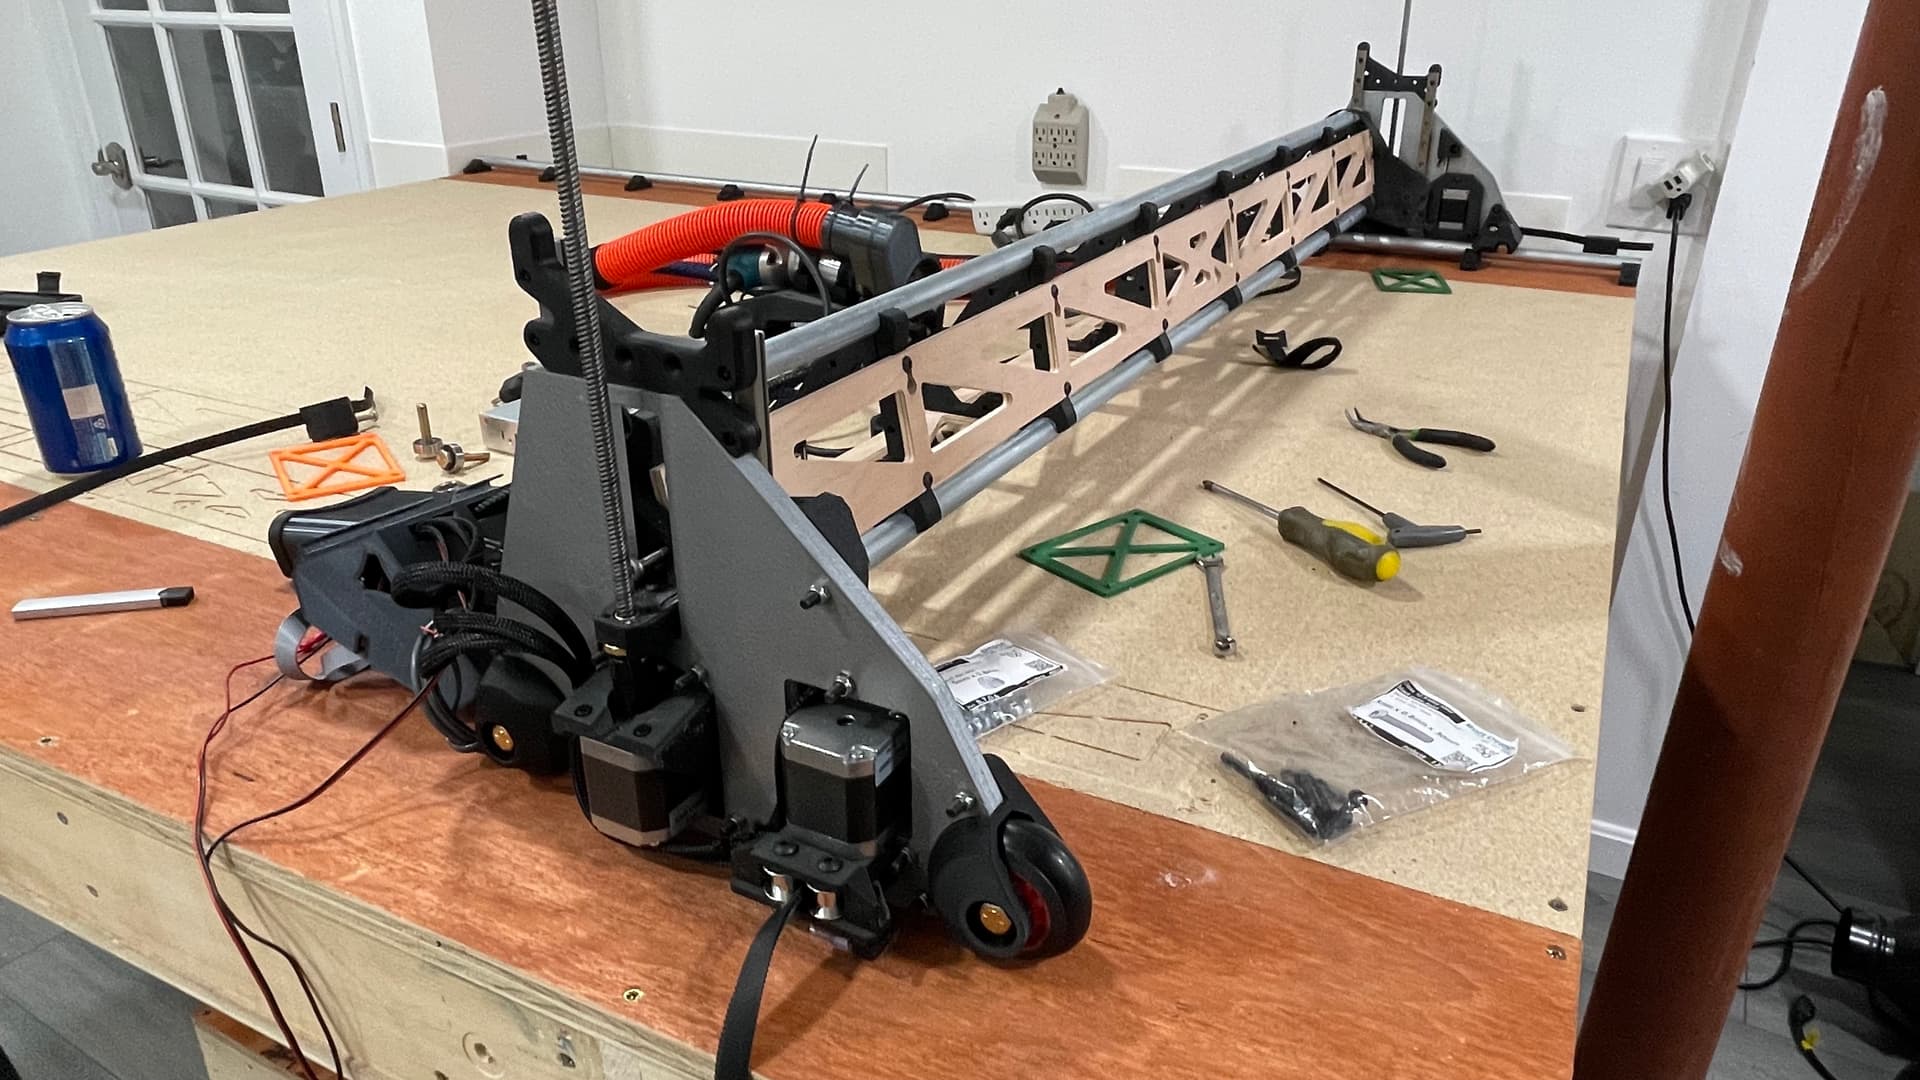
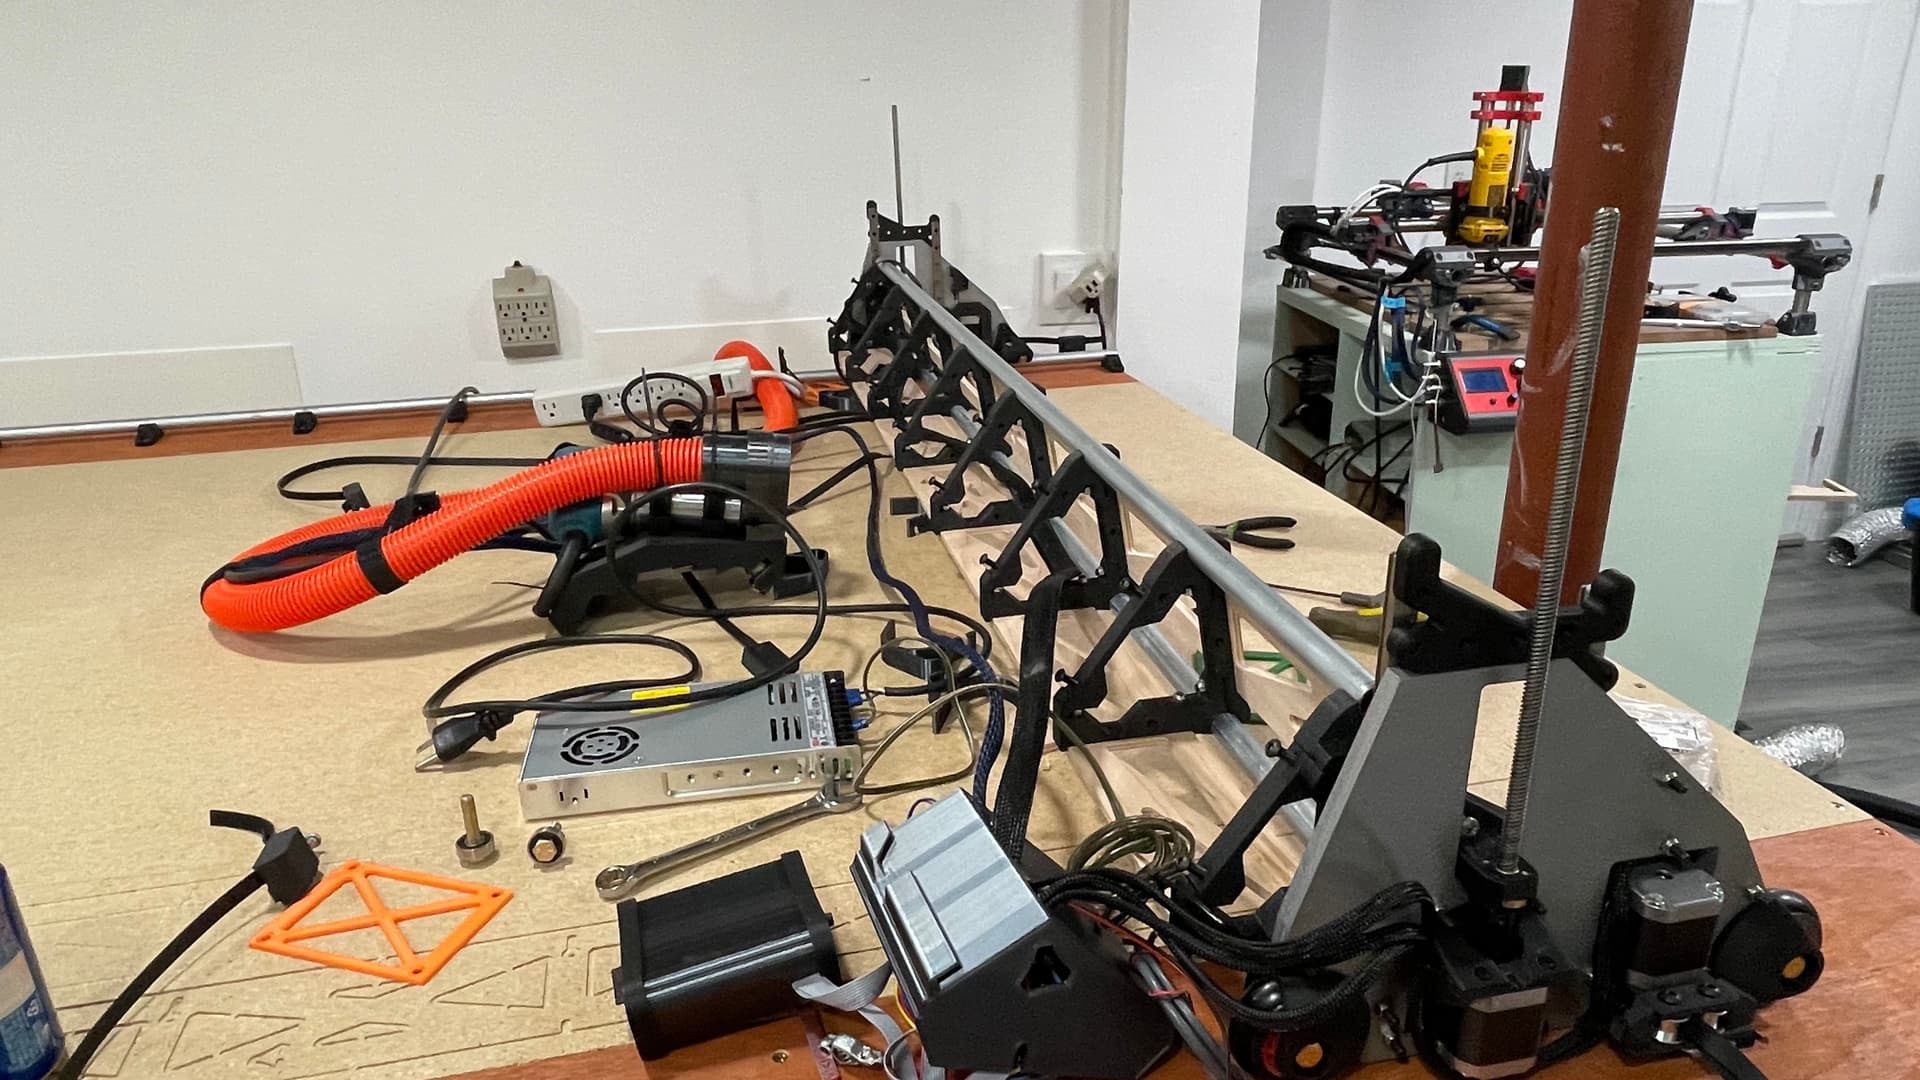
Then was time to take the LR3 apart and install the struts, sorry I didn’t take any pictures of the LR3 totally apart but here are some of the rebuild with the new struts.
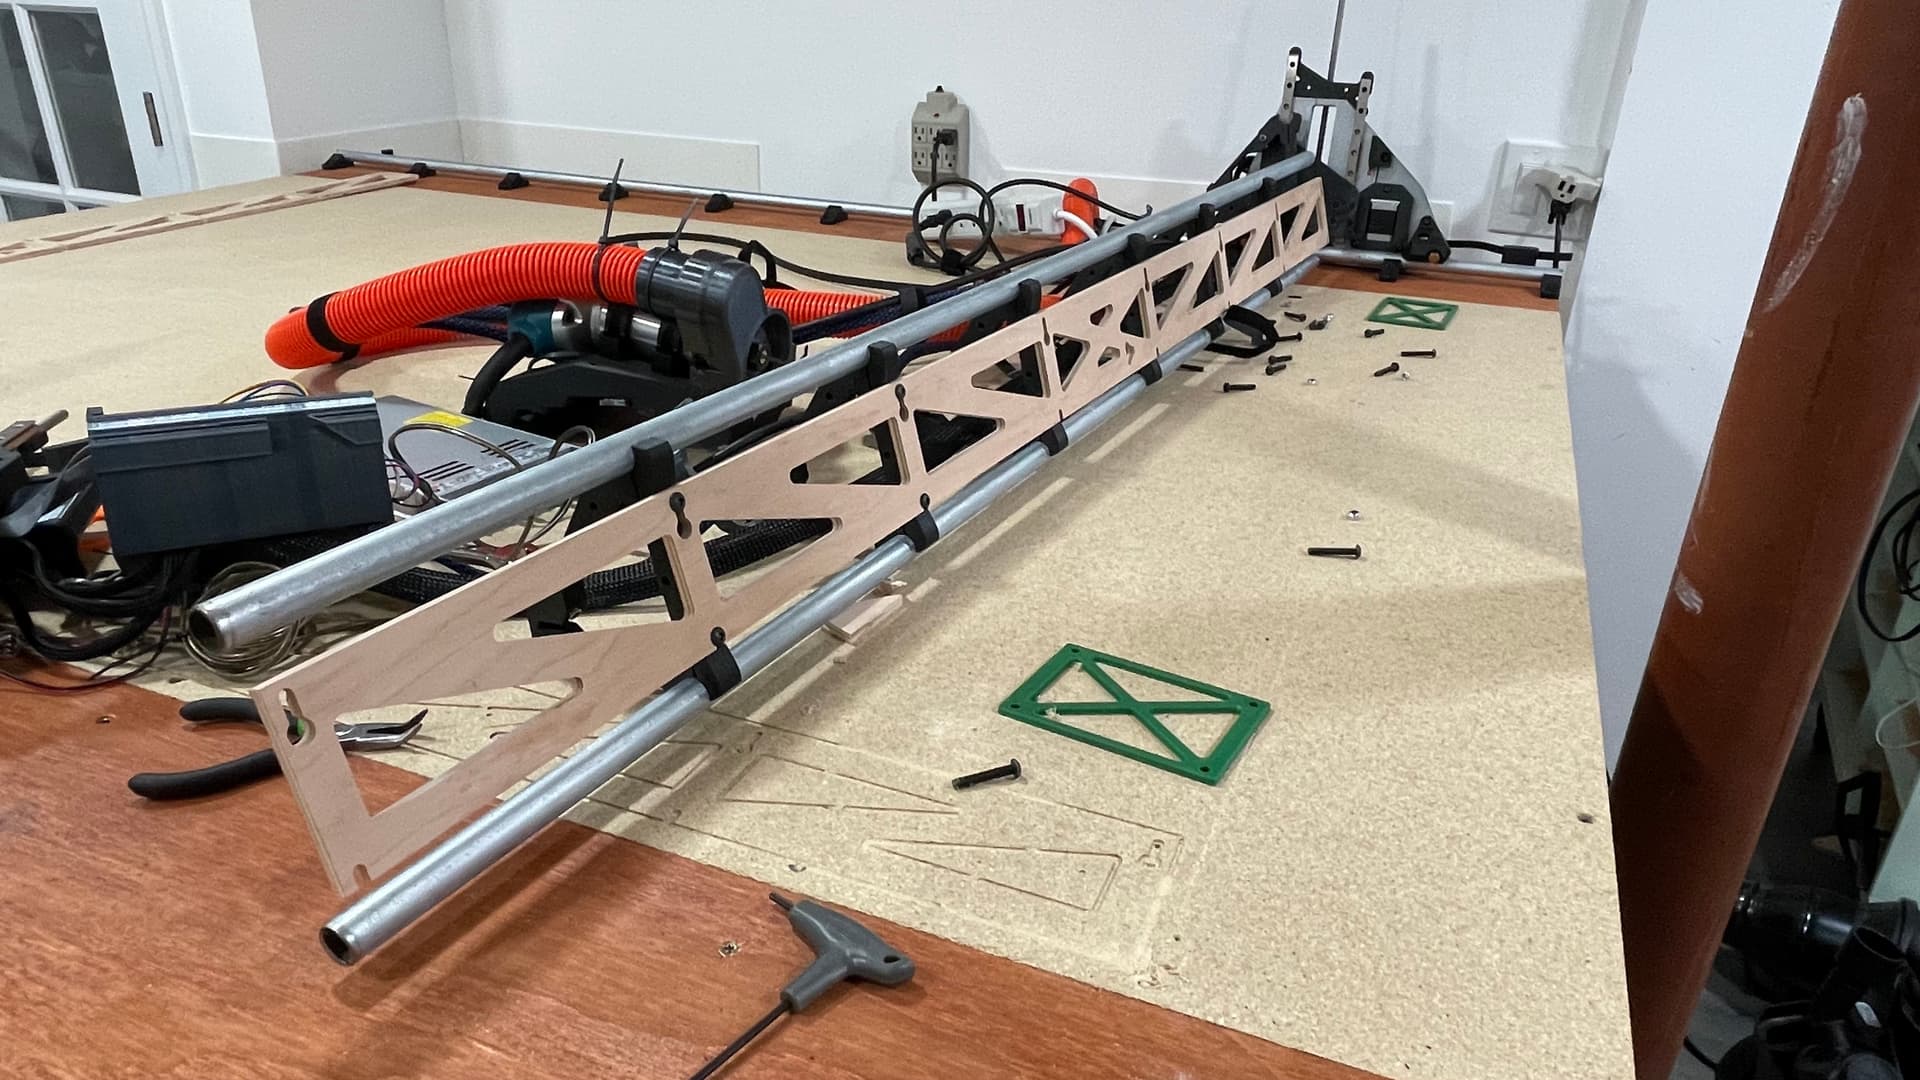
And that is when I realized my second mistake…
The plywood was a little too thick…

So the X belt tensioner does not clear the core as it bends a little, but just enough to hit the core. 


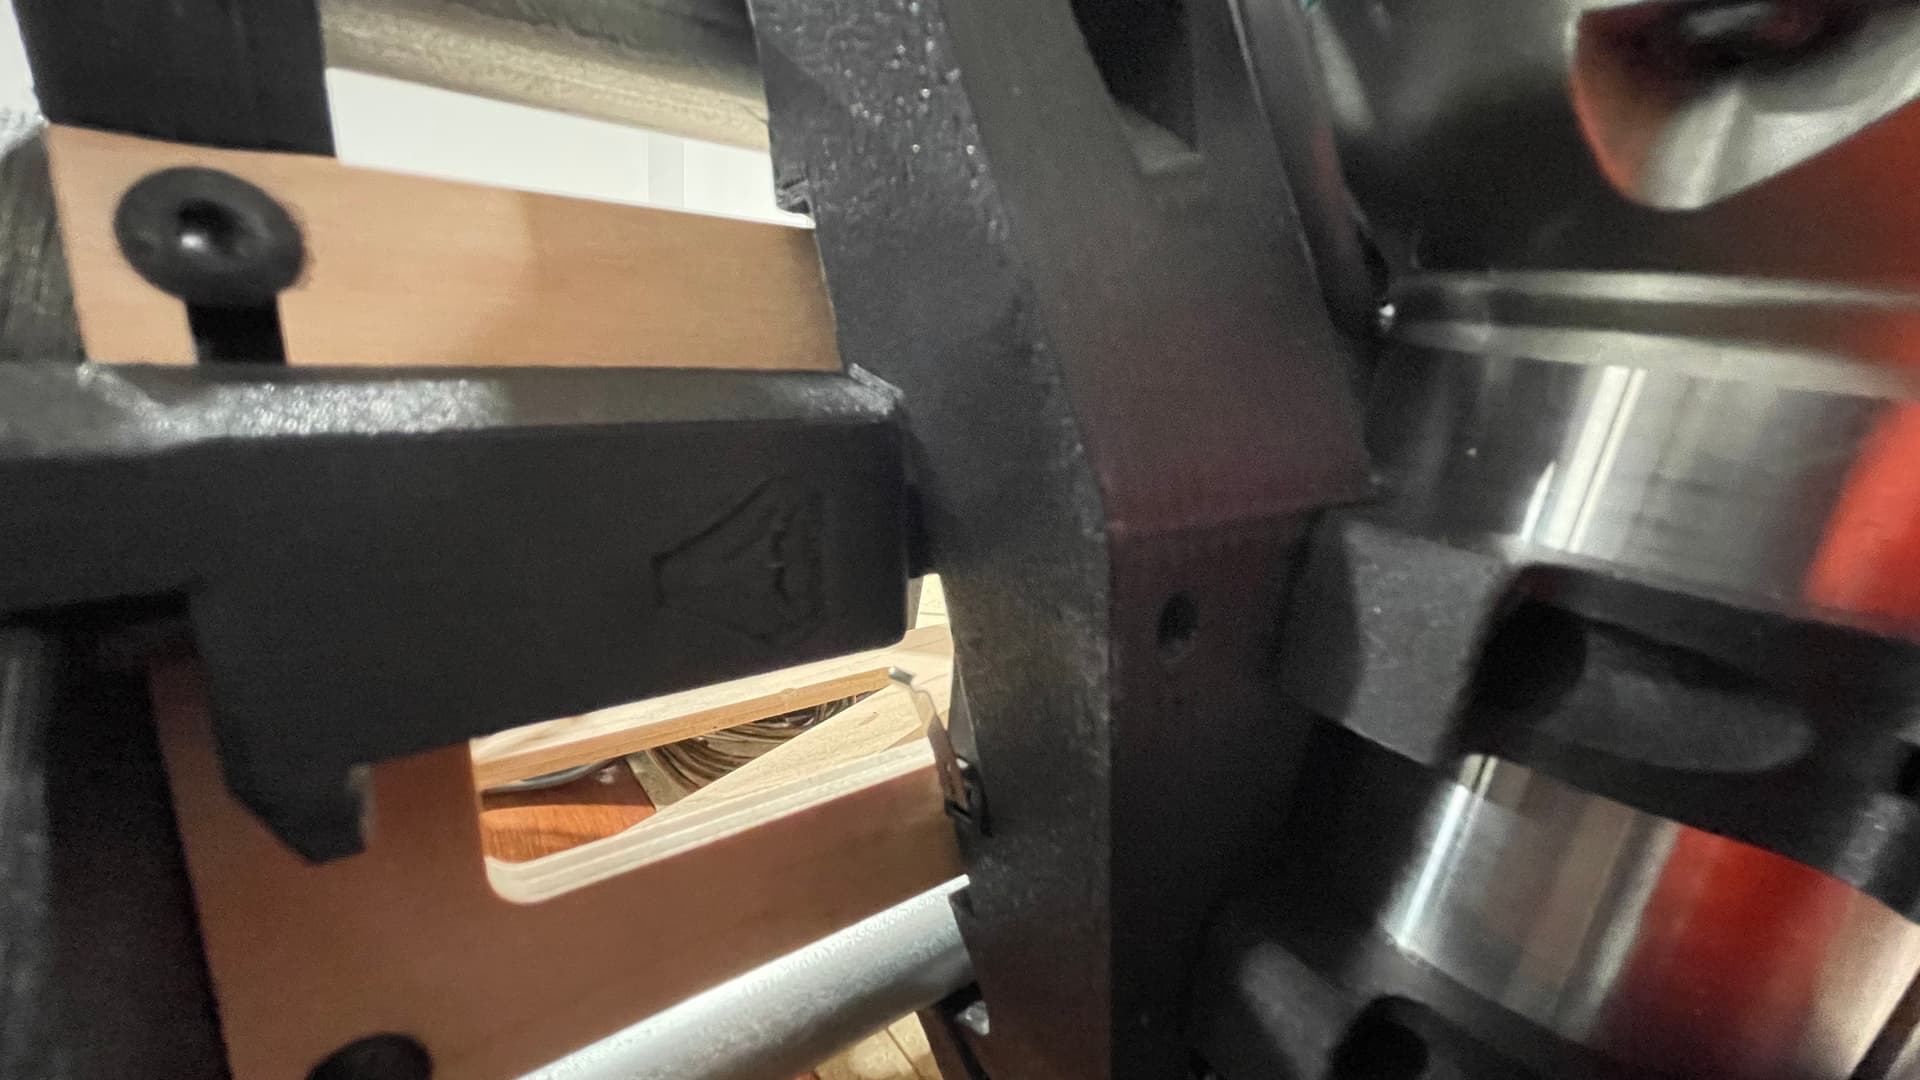
Well… Tomorrow I will take the front strut out, back to the big orange store, get a thinner plywood and cut one more strut. The good thing is that I do believe I can use this thick strut on the back of the machine.
We will see…
4 Likes
Just sand it down right there a bit, no big deal. It is hidden behind that tensioner.
Normally with my screws, the heads would hit before that part would deflect.
1 Like
How is the full rebuild going?
1 Like
Sorry For the lack of update, What was supposed to just be a weekend event in DC end up been a full week of video shoots for CVS Health. I will be back home tomorrow afternoon and I will finish everything on Saturday. All parts are printed and I’m planning to use the 6.35mm struts that I had cut for the first try.
I think it will take me just couple hours to rebuild it.
Had edited the post… I hate replying on my phone
1 Like
No, no rush. Sorry don’t feel that way. I just thought I might have missed it in the other thread or something.
I am still waiting on rail samples and some custom T8’s
2 Likes
I think I should post some more pictures that I share over PM with the beta crew… And update the building thread.
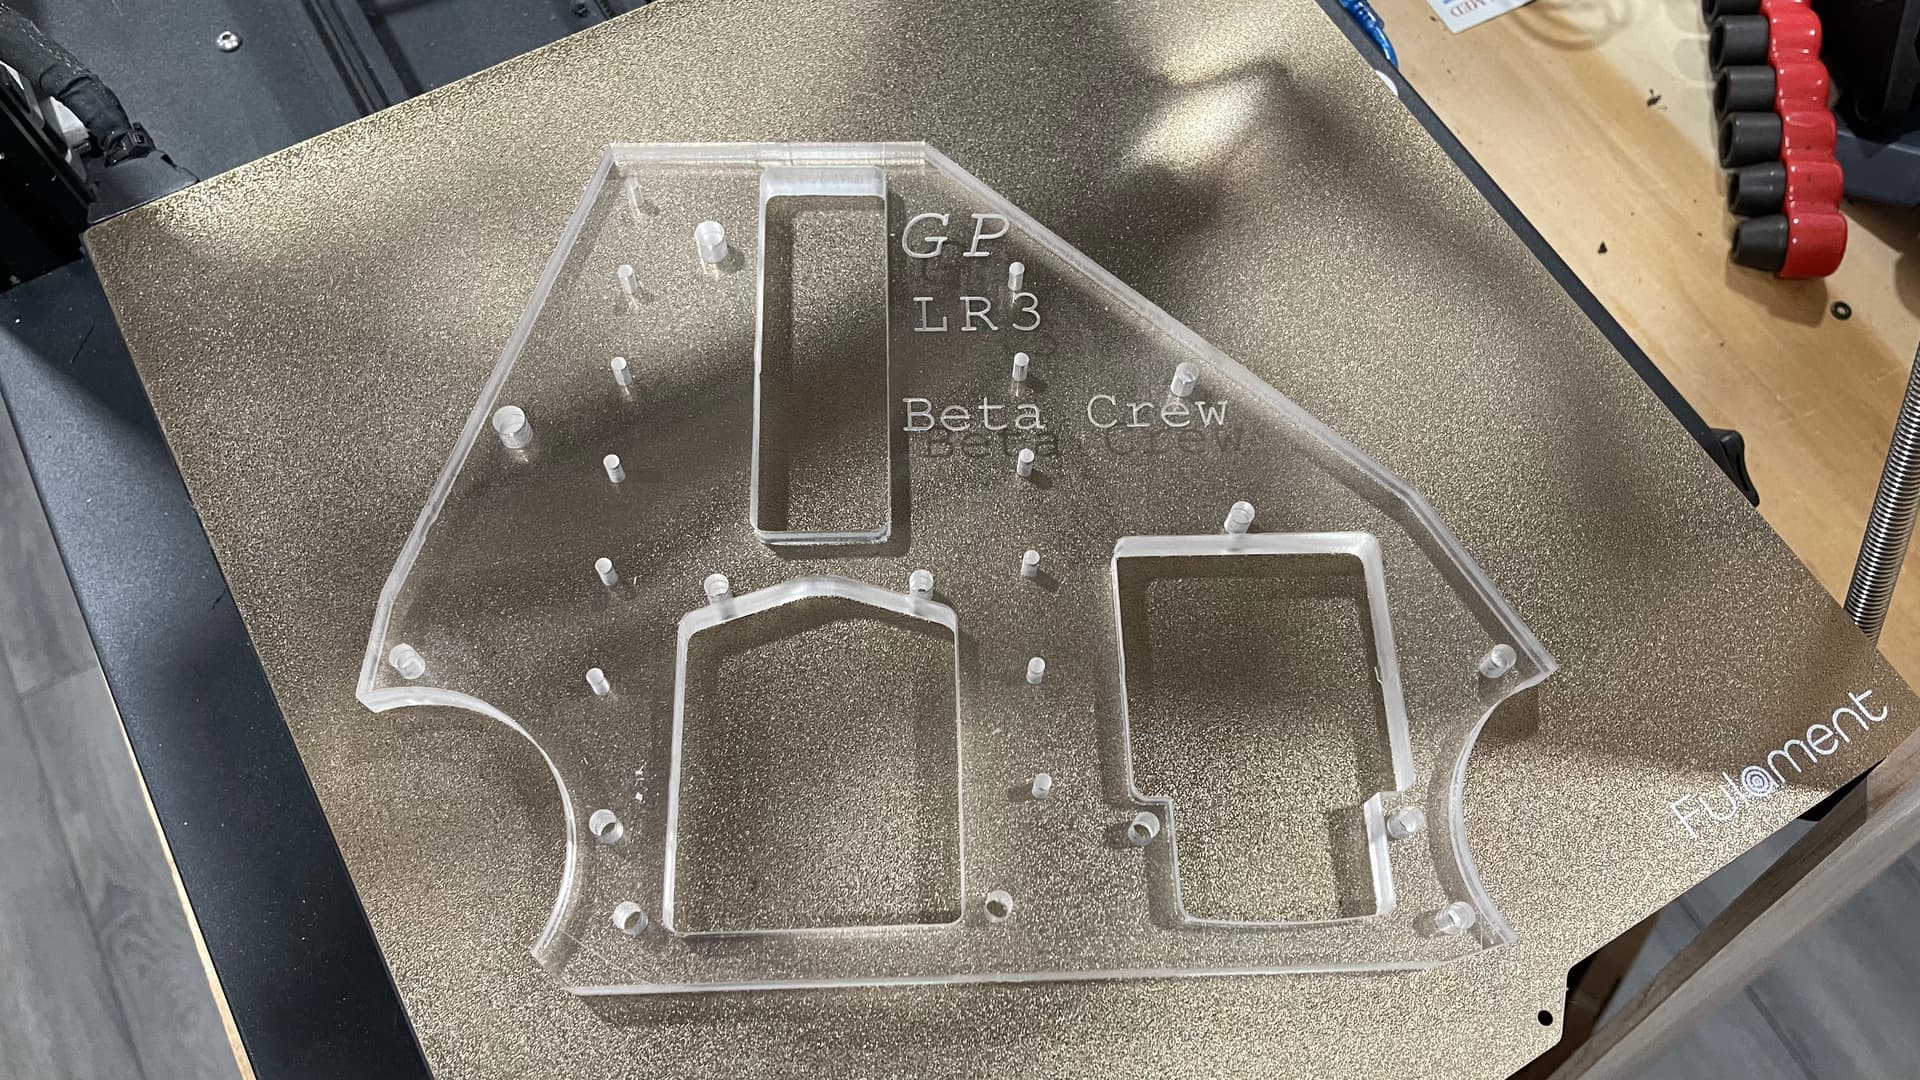
Acrylic plates are ready!!
I forgot how painful it is to peal the paper out of the acrylic 
4 Likes
Little progress today.
But was able to cut the strut the acrylic plate and rebuild one side of the YZ.
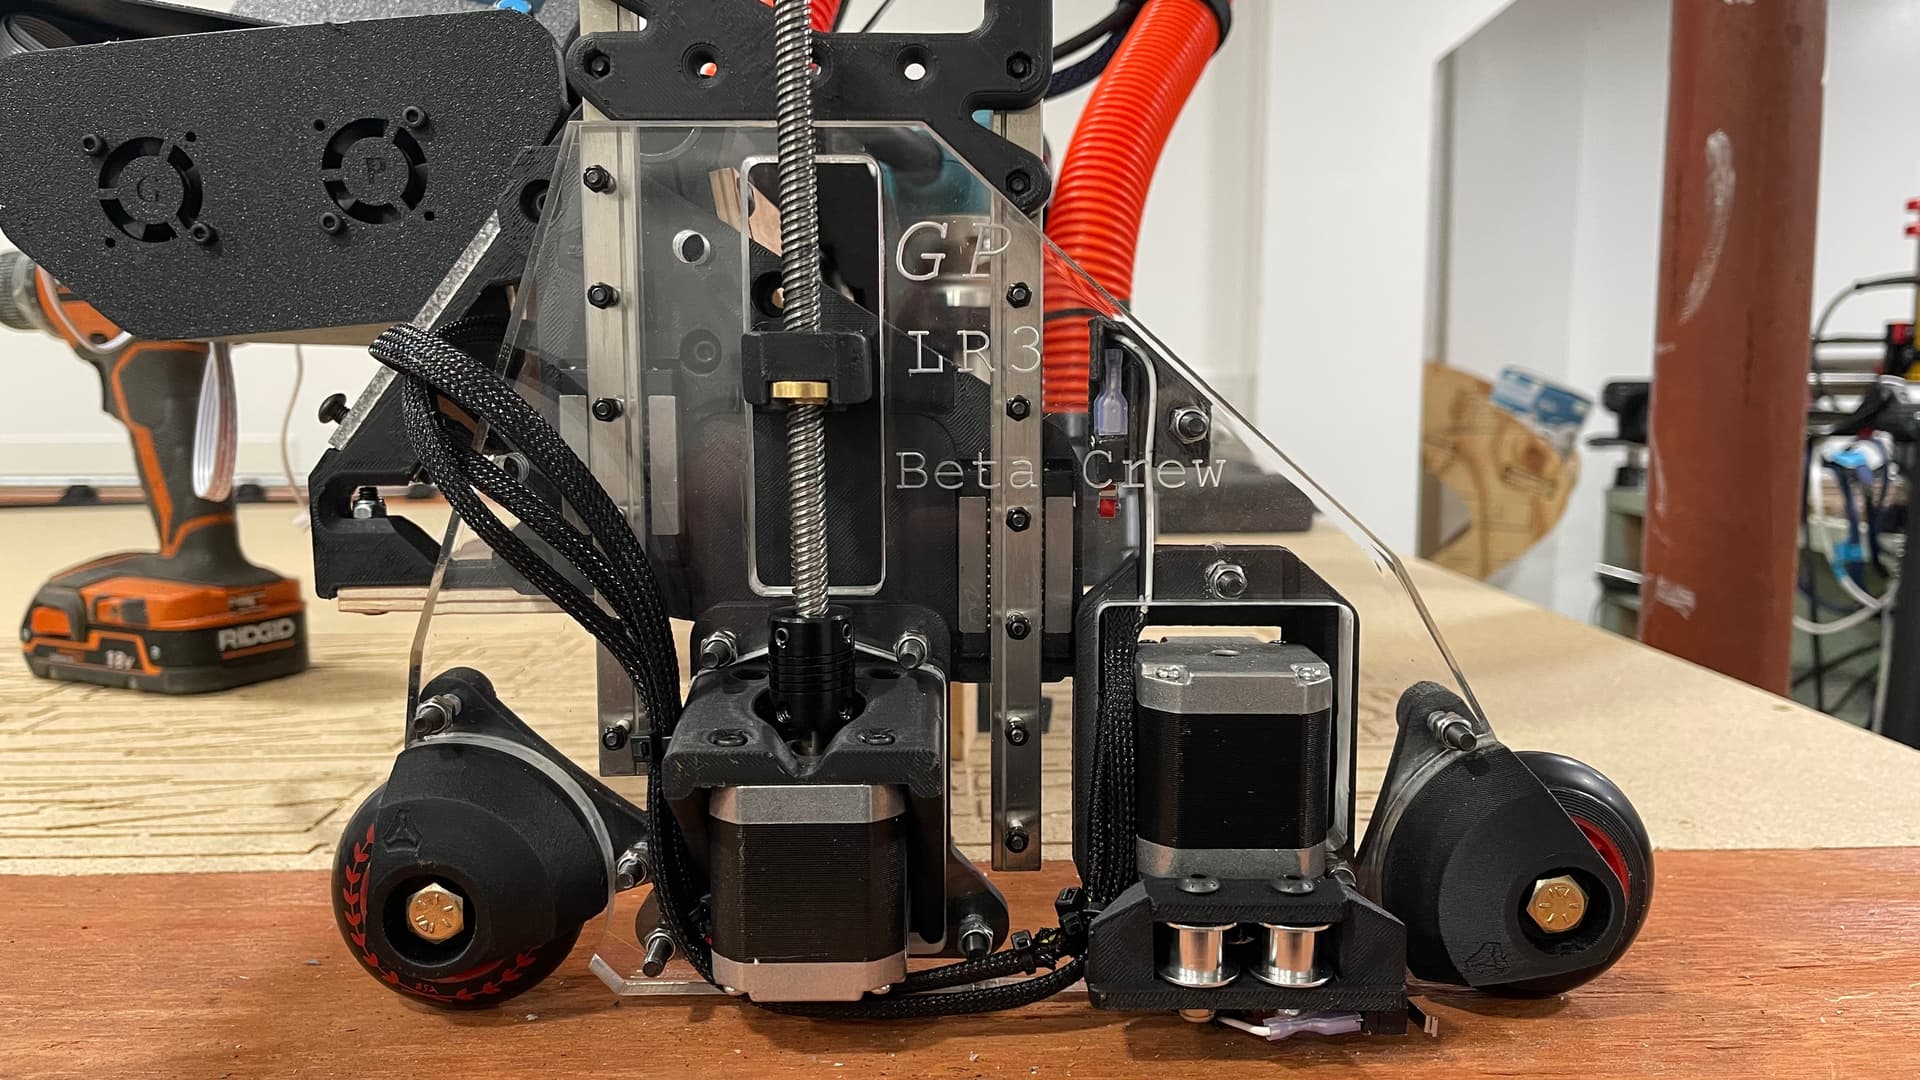
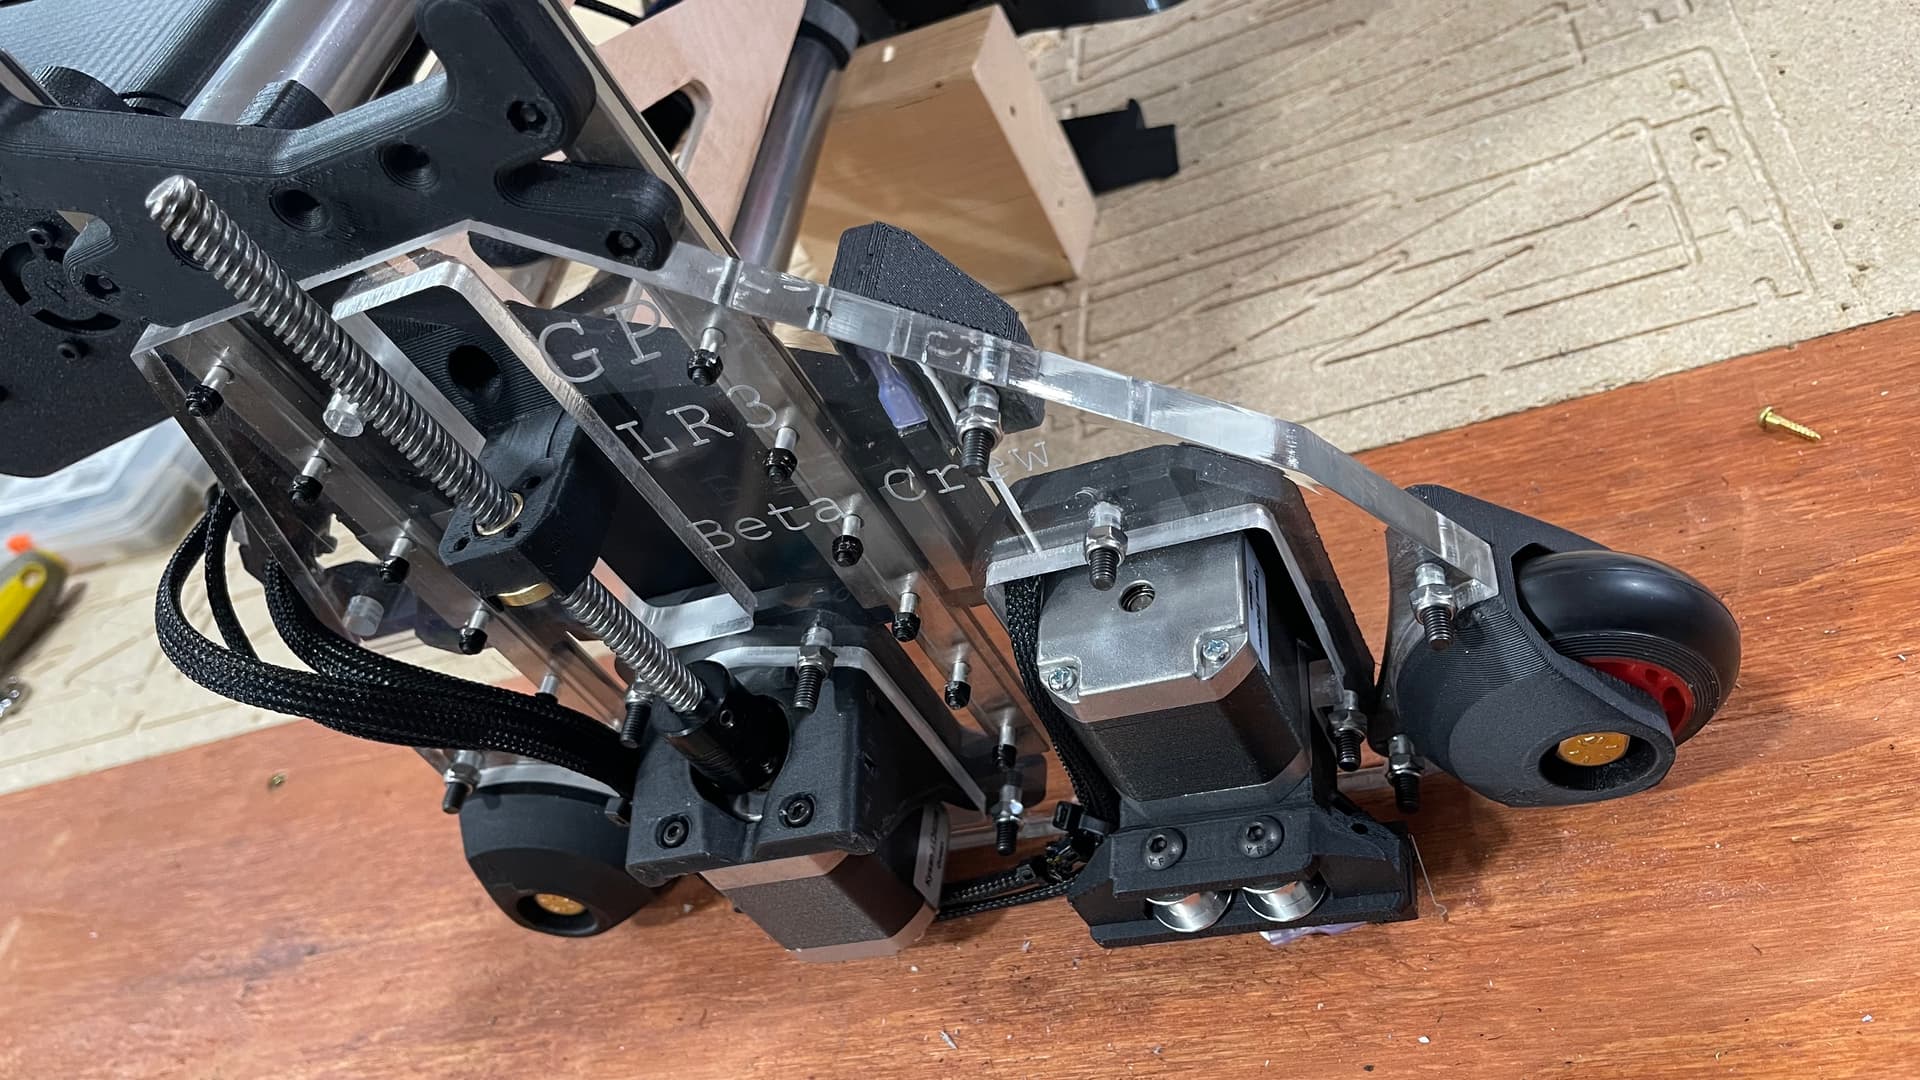
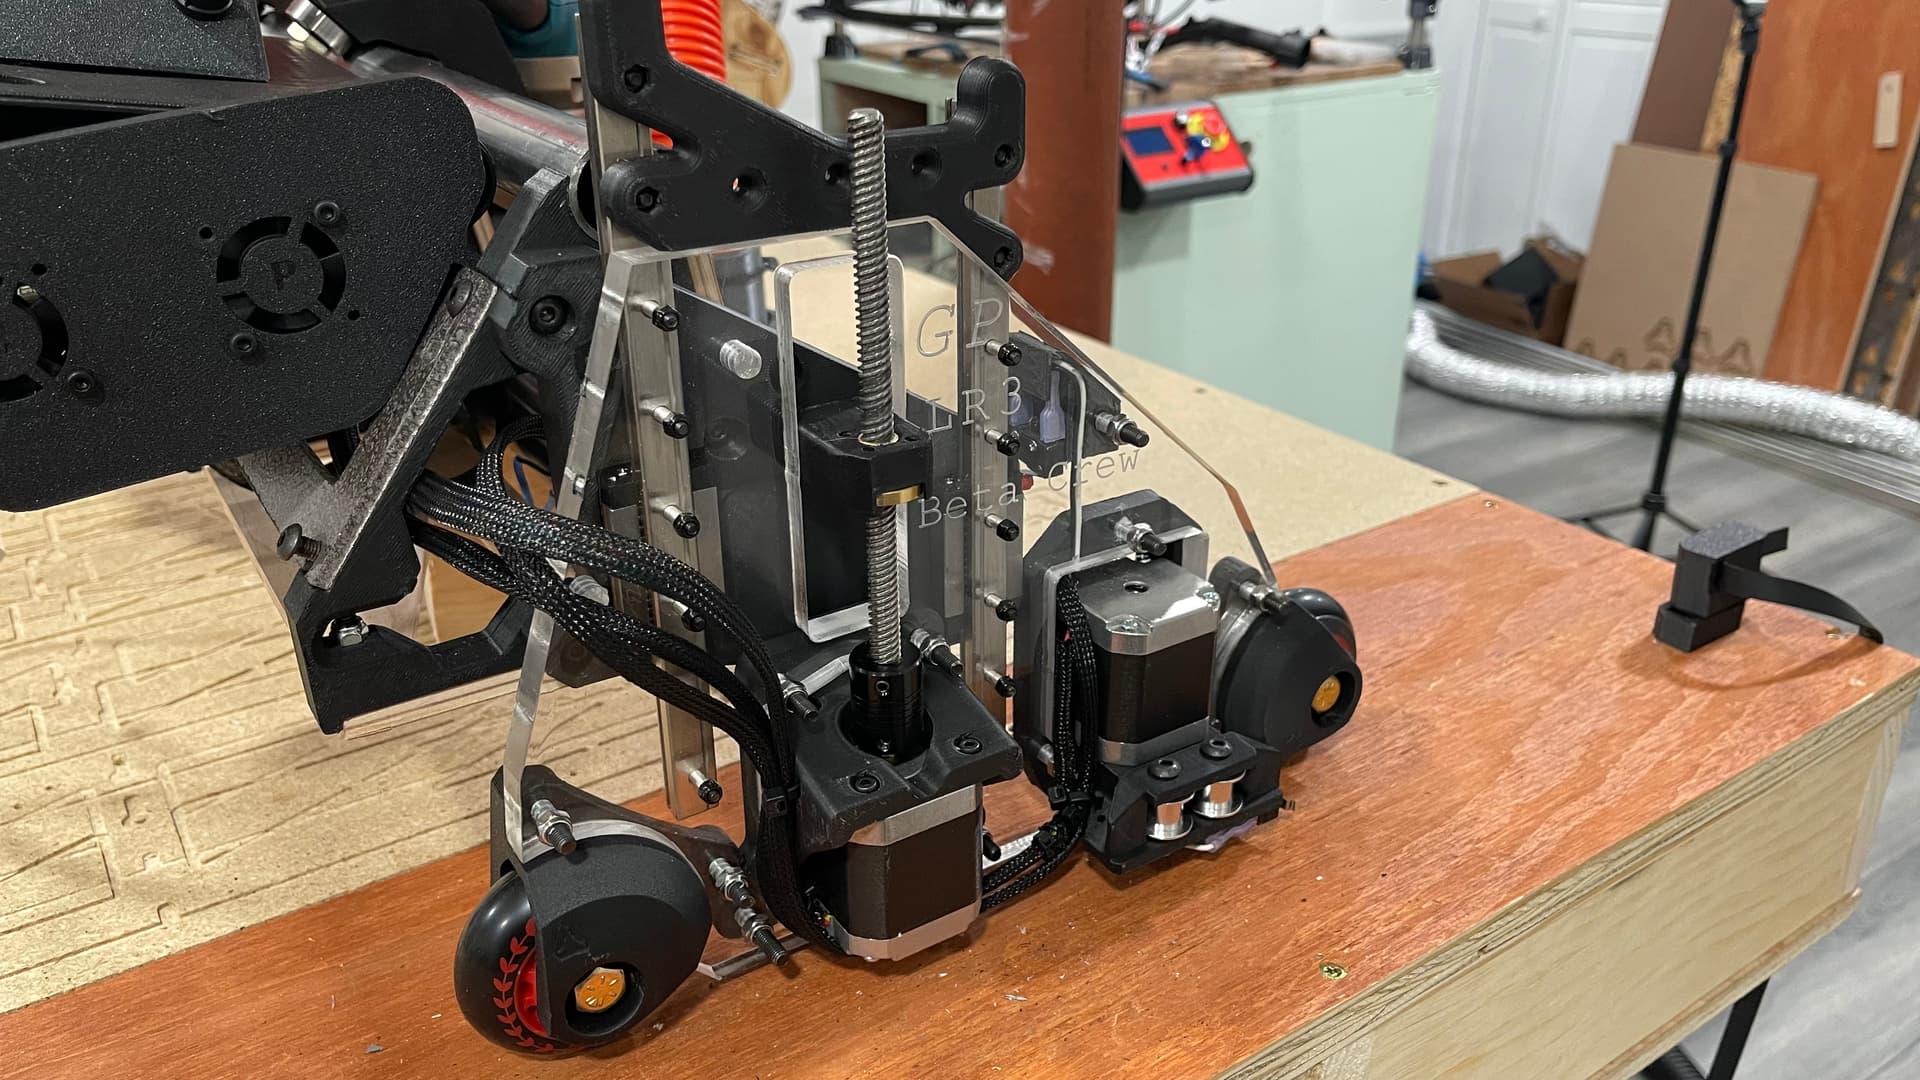
Tomorrow I will rebuild the other side and reinstall the belts.
Nothing wrong with the screws or lock nuts but I’m going to order some M5x25 and some back lock nuts just to make it look prettier

Now I’m wondering how can I mount some Neopixel to lid the edges…
6 Likes