And also…
So , unfortunately, with this adaptation, you can’t run the WiFi and/through the TFT.
I’m glad you got it working so easily. Also I would imagine that it is a one or the other situation since both communicate via serial connection. But you could use an old phone and just leave it always connected via the web ui. Then you have a tft 
I found a post from a French guy with a firmware revamp to give some nice icons although the functionality appears unchanged.
MKS-TFT-24-CNC-icone-en-couleur.zip (960.5 KB)
and
MKS-TFT-24-CNC-icone-thème-sombre.zip (822.1 KB)
although I suggest you keep your config file as his are the Chinese ones…
Another bit of news - if you have homing enabled and the option set that forces an alarm state on boot then the screen is unable to get past it as it does not have any way to send either an $X or a $H so you will have to add at least one of those functions to the configurable icons in the ‘settings’ page. I also find there is a 15 second delay to the nano accepting serial inputs from the screen if the USB port is ‘live’ (but not if the USB is just powered using a power only cable ie. no data).
@Strider_Matic you were right…the wifi adapter is next to useless unless you are using a MKS Robin controller board…oh well!
I really like the Couleur theme, those icons are pretty detailed. I also like the carve icon in the Sombre theme, has a more industrial look to it, like a bigger, badder laser head. Yeah, that power-on locked state I disable before compiling.
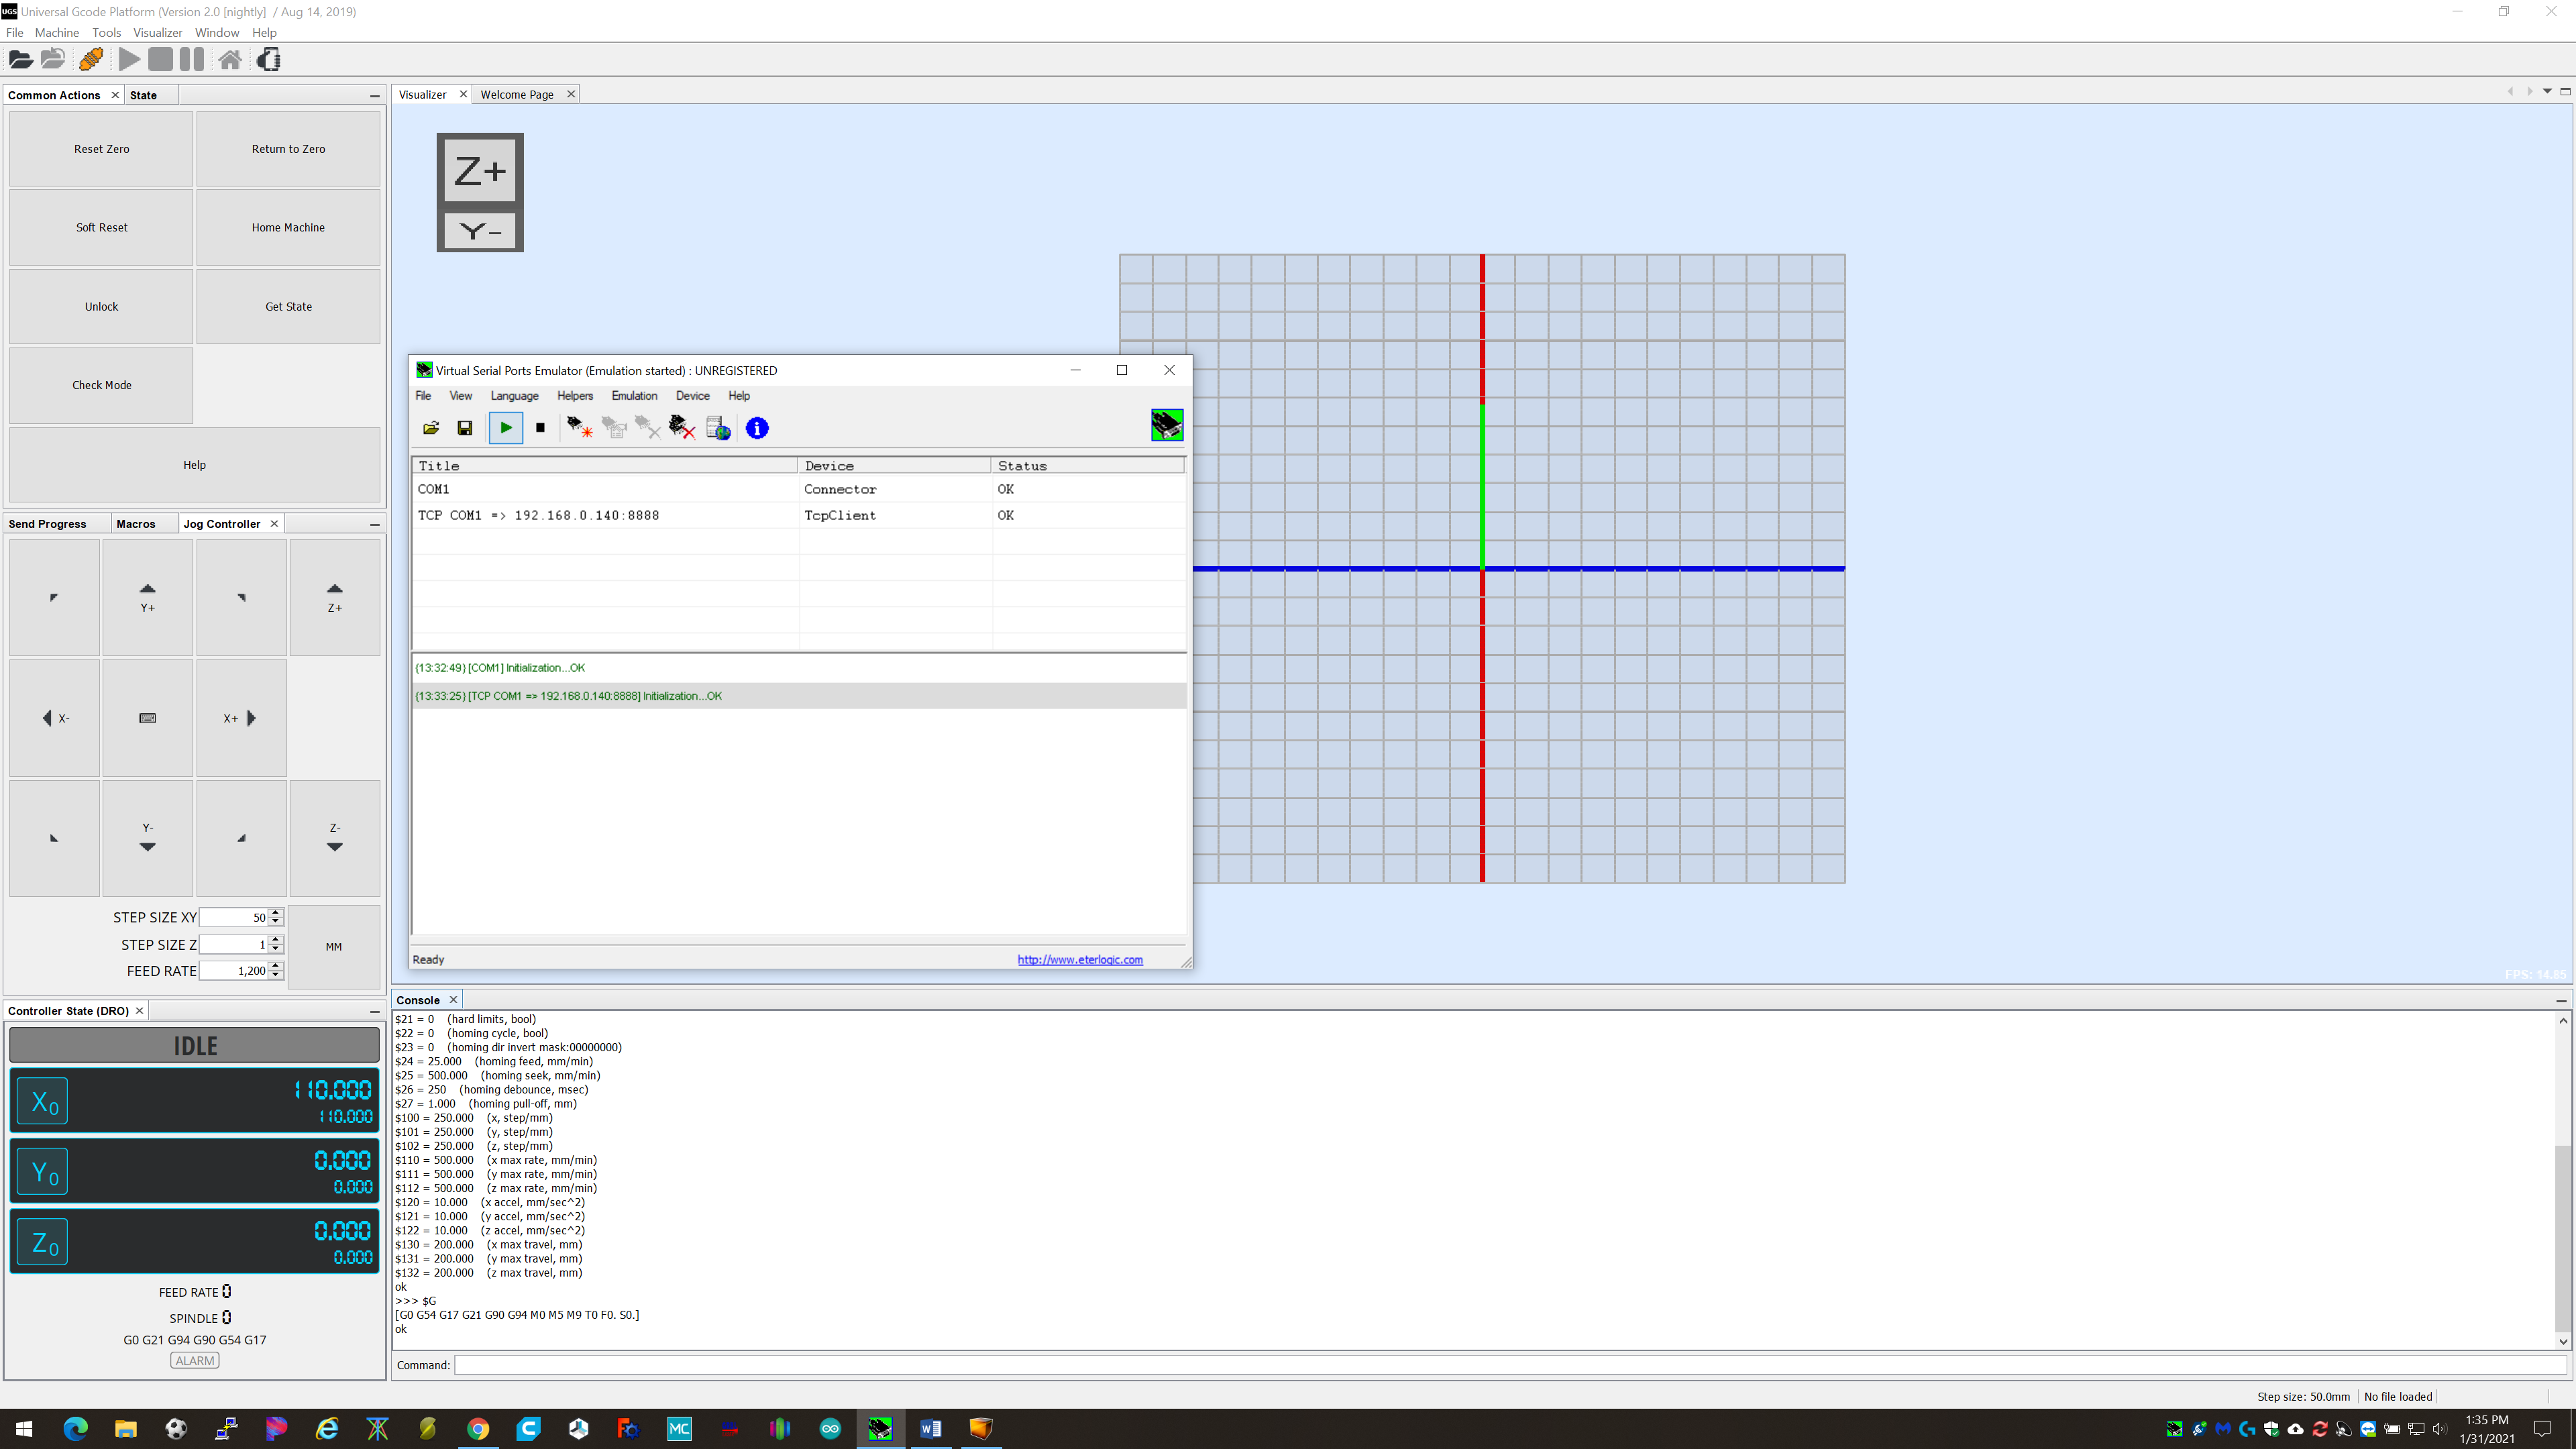
I was able to get the firmware @Atom recommended loaded to the wifi board and when wired directly to the controller worked OK, but after a while I started getting erratic behavior with the communications and having to power-cycle the controller to reconnect. Plus, you need separate virtual serial port software to make it work “correctly” anyway. Although I never did try using the web interface to upload gcode to it, so maybe that works well. Seems like the best way to go so-far for me is cabled, or using octopi like I use on my ZenXY running GRBL.
I am at the same place, the problem I have with the display driving the workflow is the lack of feedback (ironically). The ‘alarm’ condition being the case in point, along with positional data to a lesser extent. Also I just love LaserGRBL software and, as the laser machine is portable, I move it within range of the USB lead. Transfering files by memory card is long winded when you are used to file transfer via RJ45. I use Simplify3D for 3d printing, which has a network file transfer facility with Repetier Server running on an OrangePi Zero to connect to my 3 printers - that just works flawlessly. MKS wifi adapter consigned to the scrap box.
Amen to that. Even if it’s just across the room, it seems an unnecessary step, so to speak. ![]()
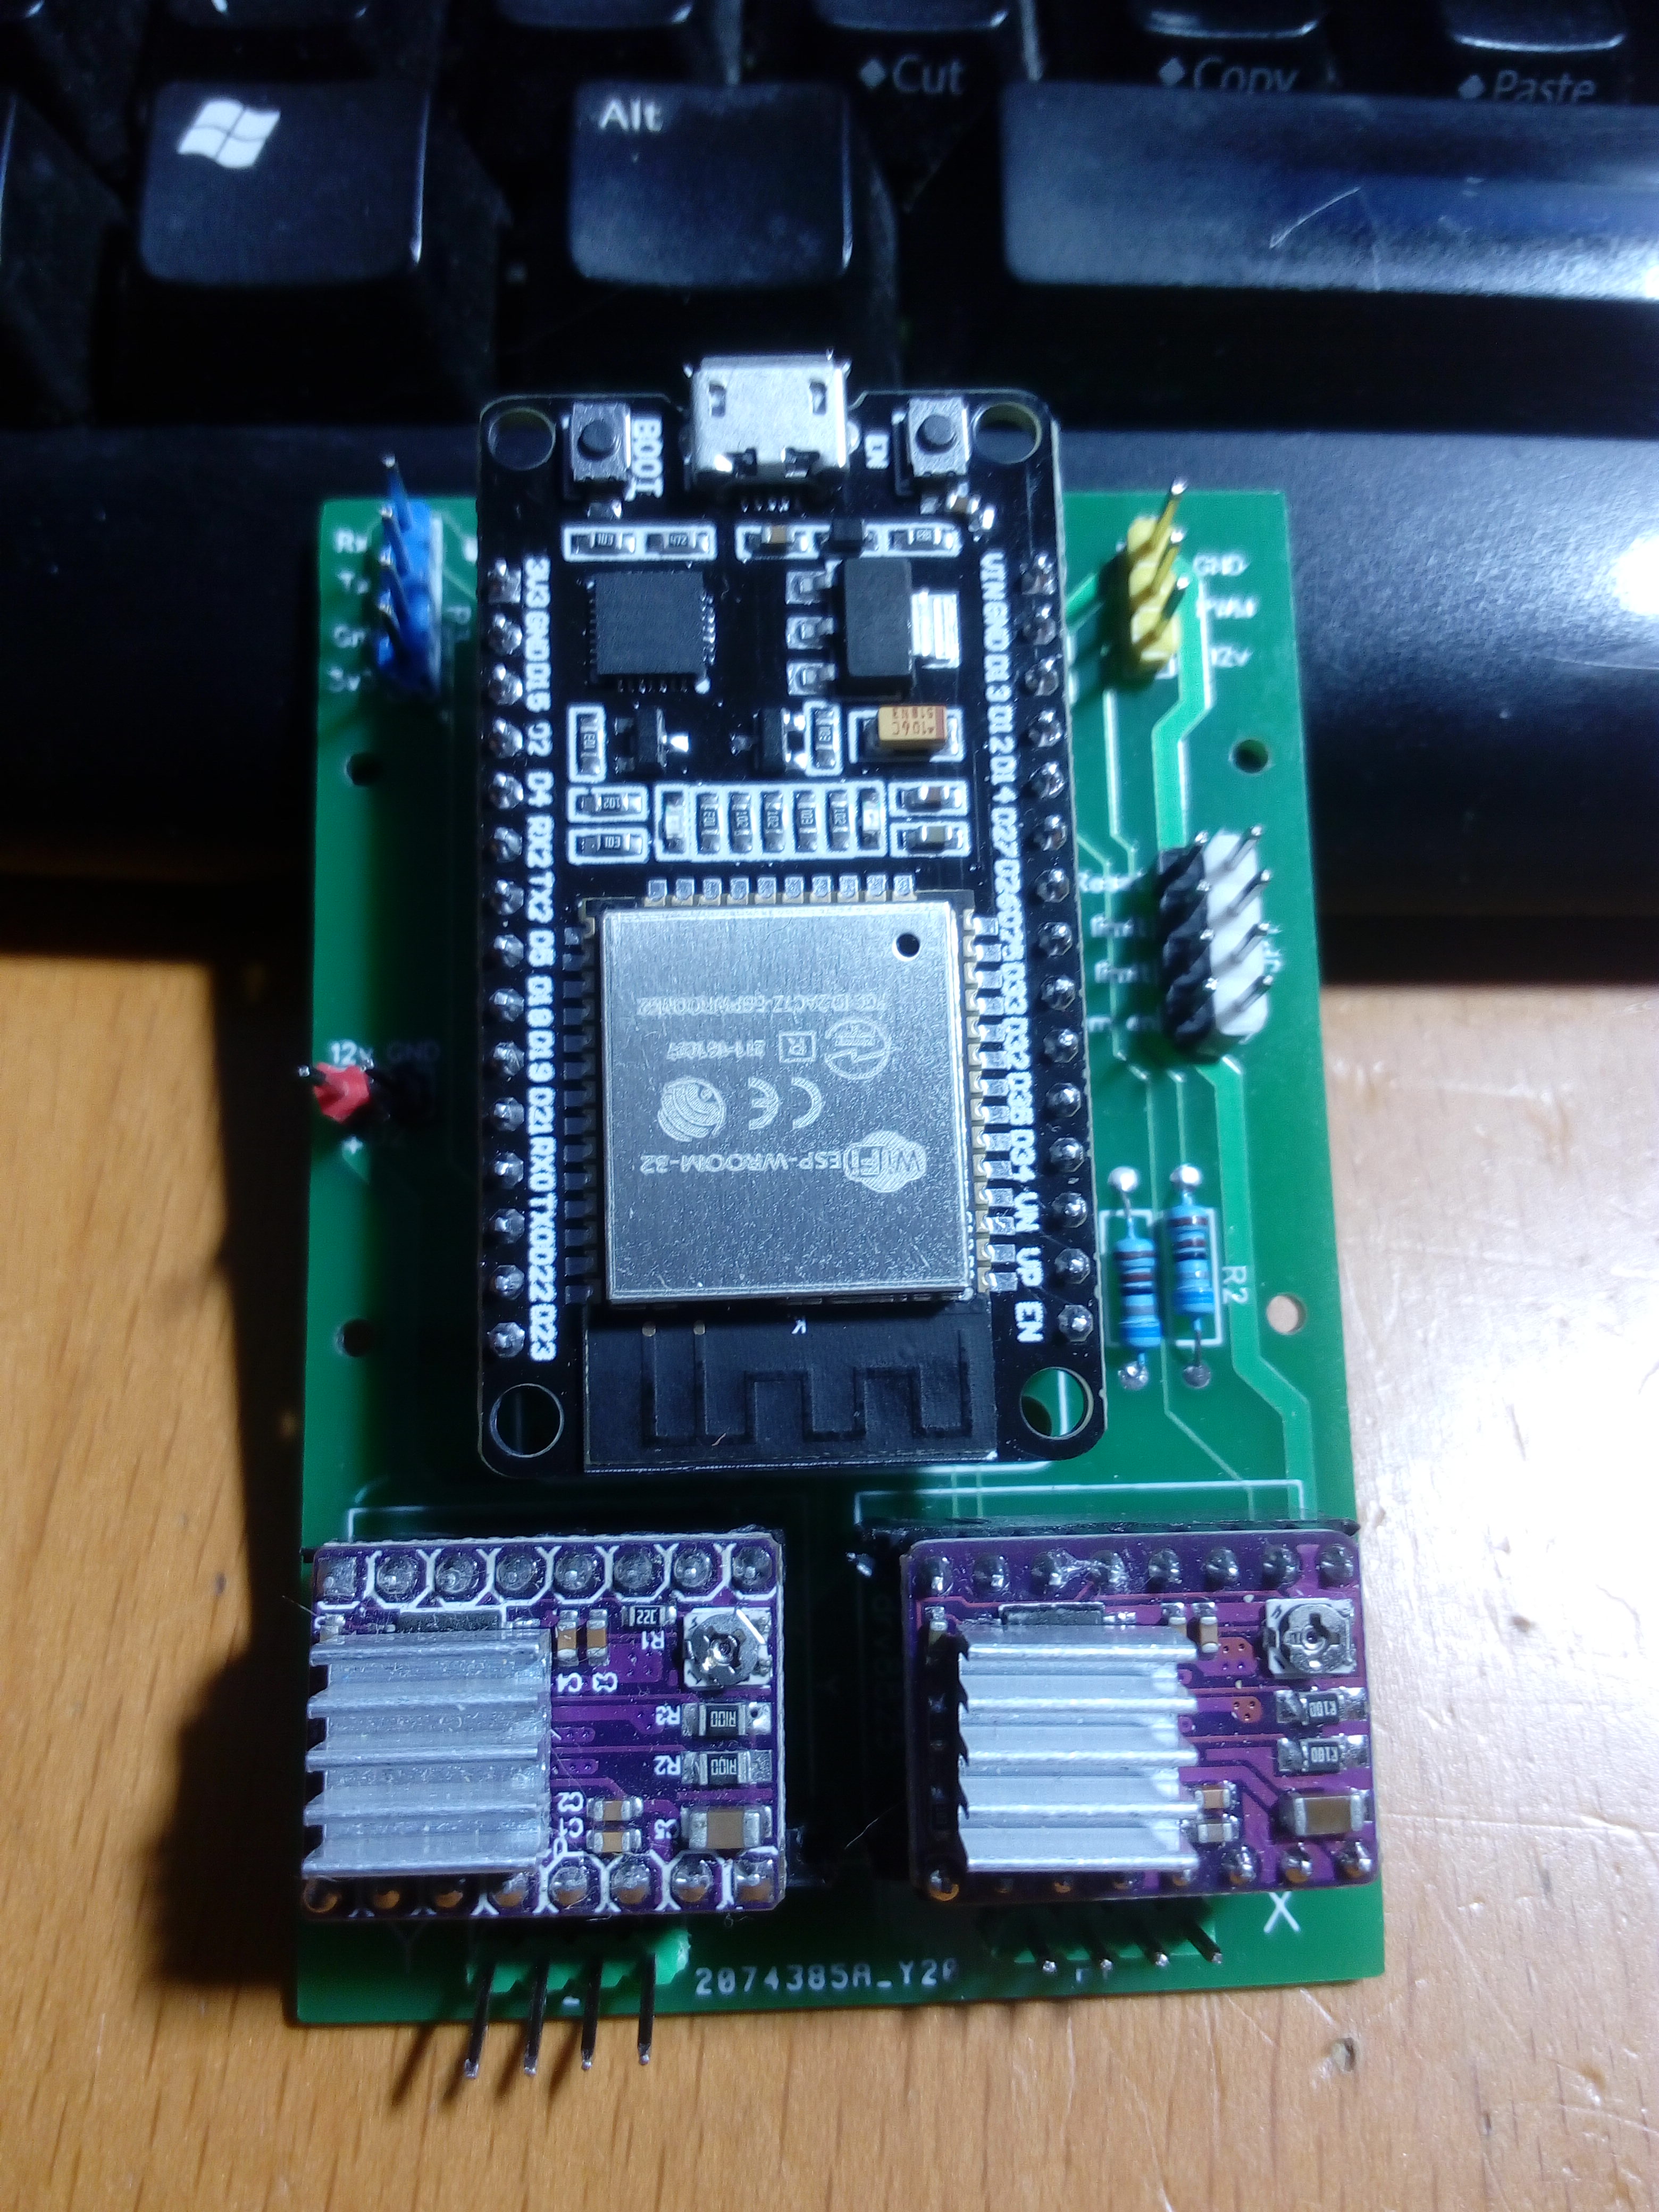
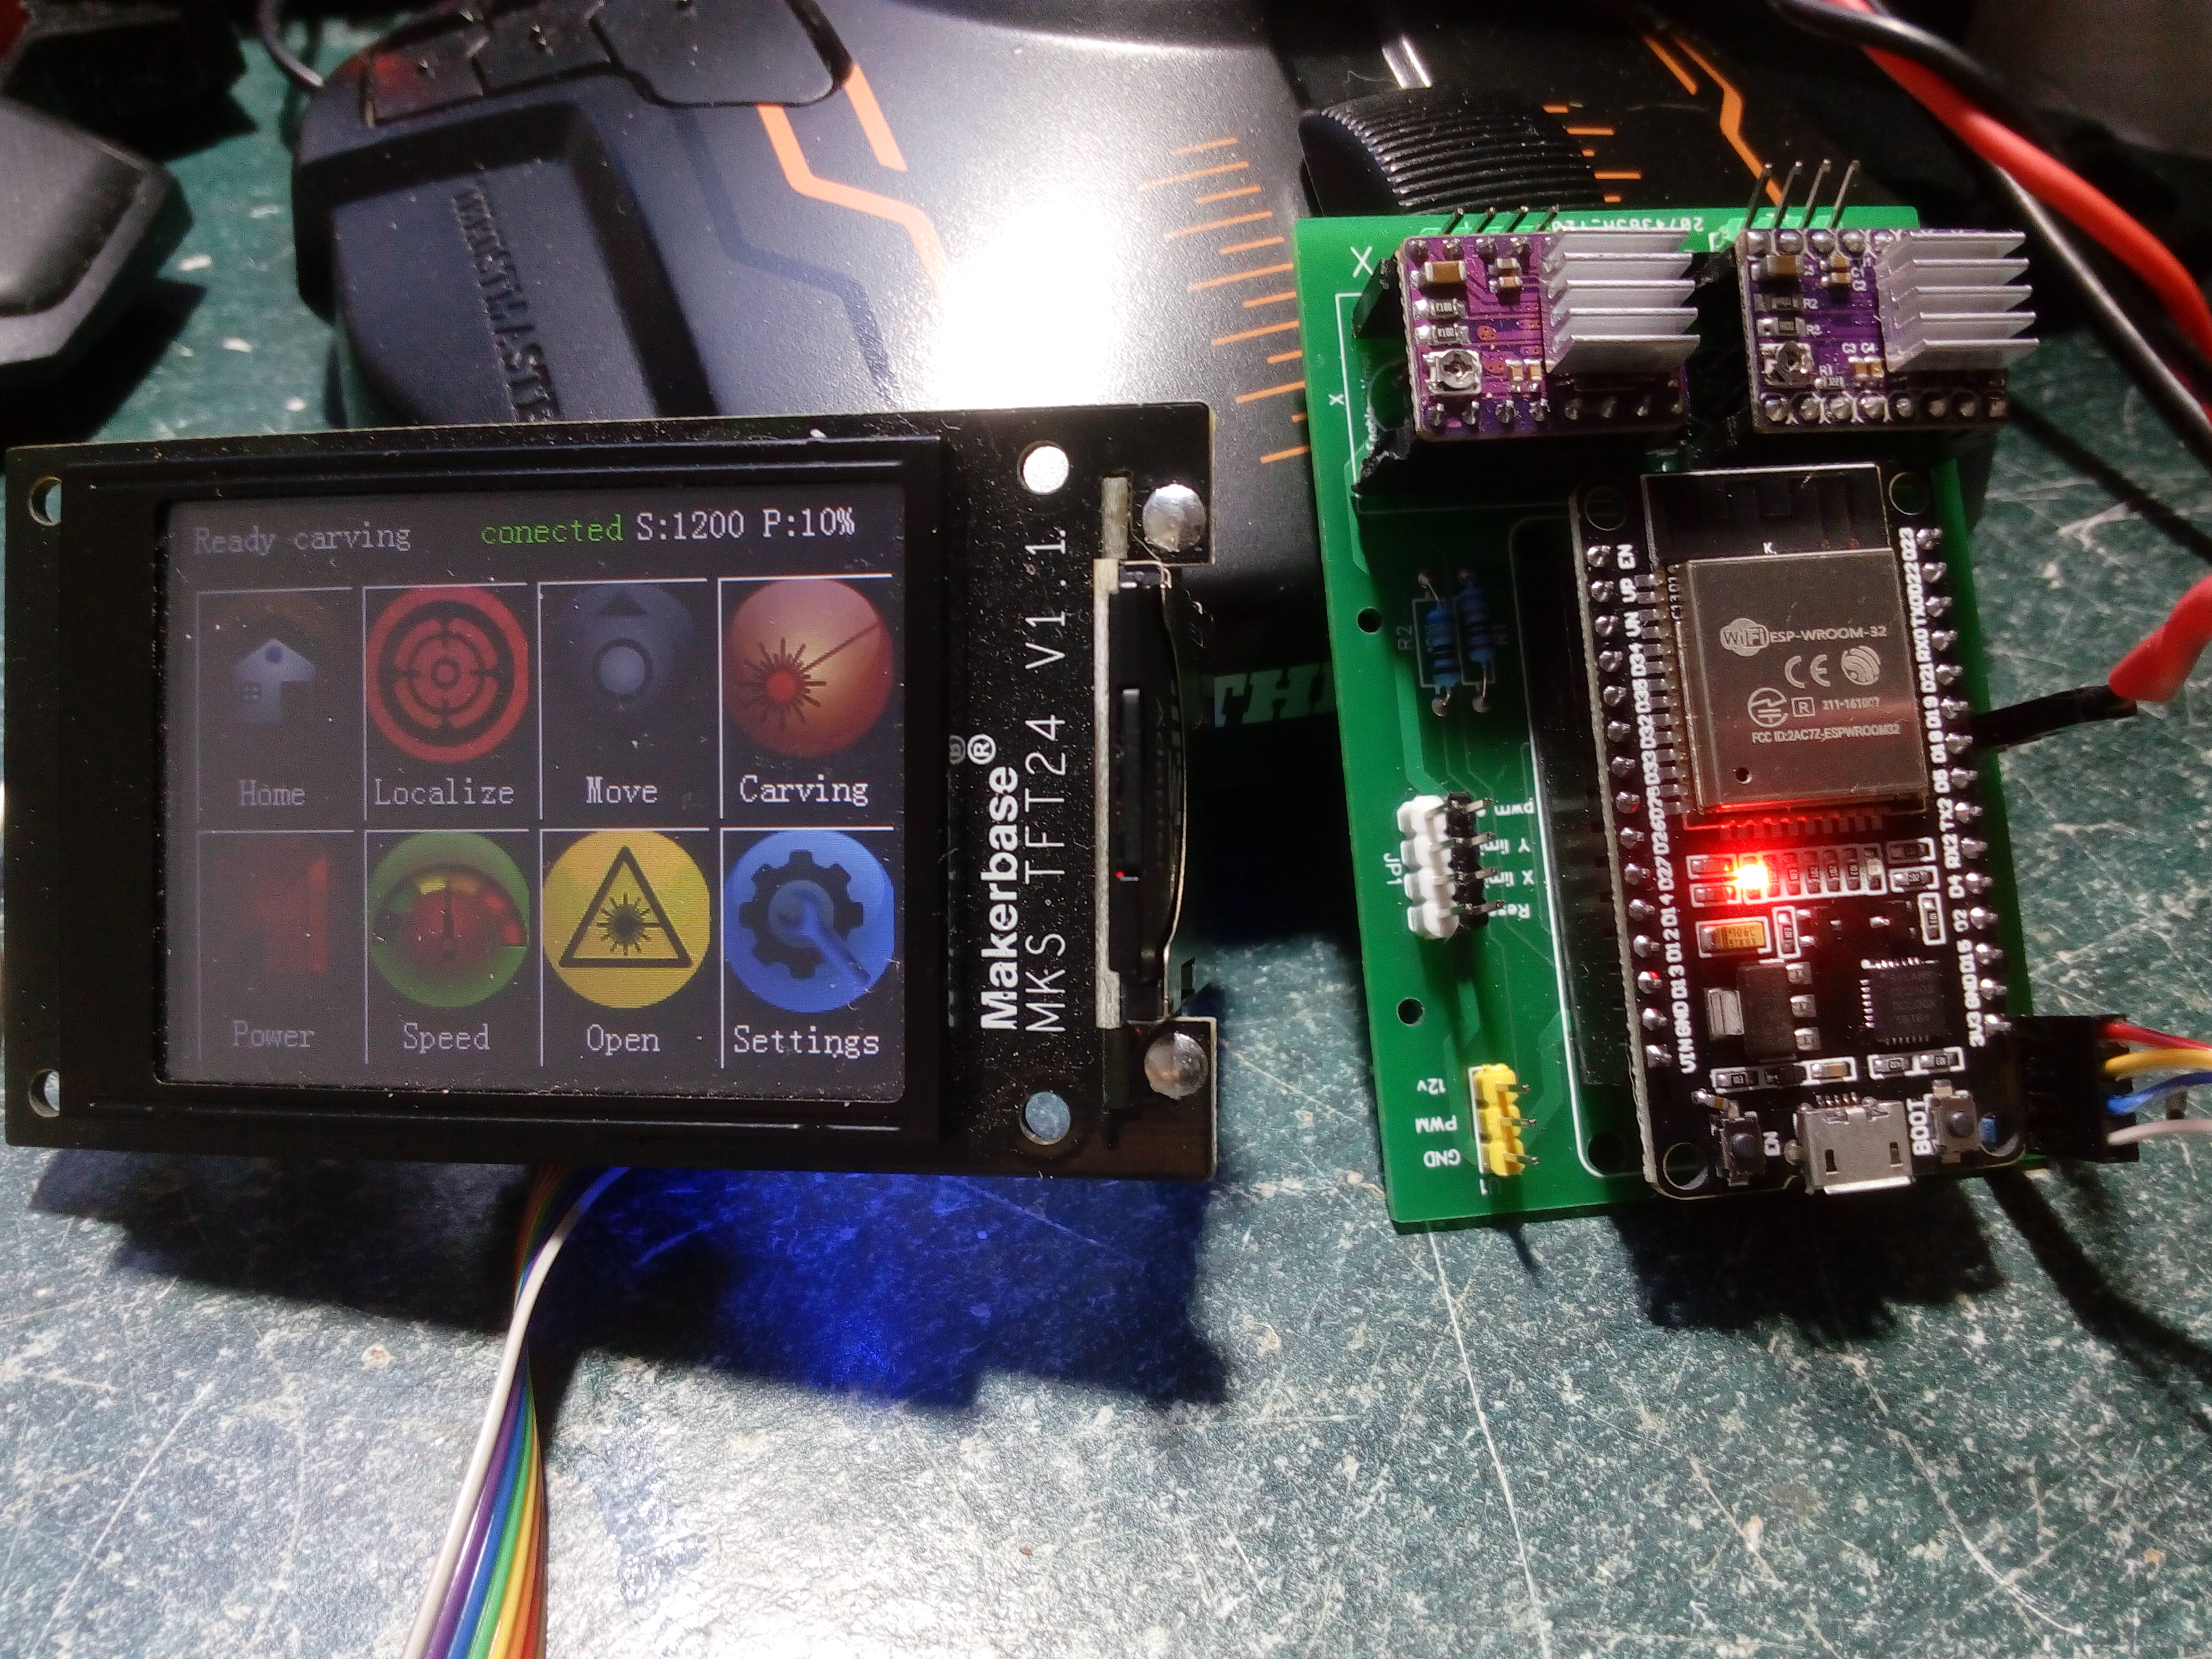
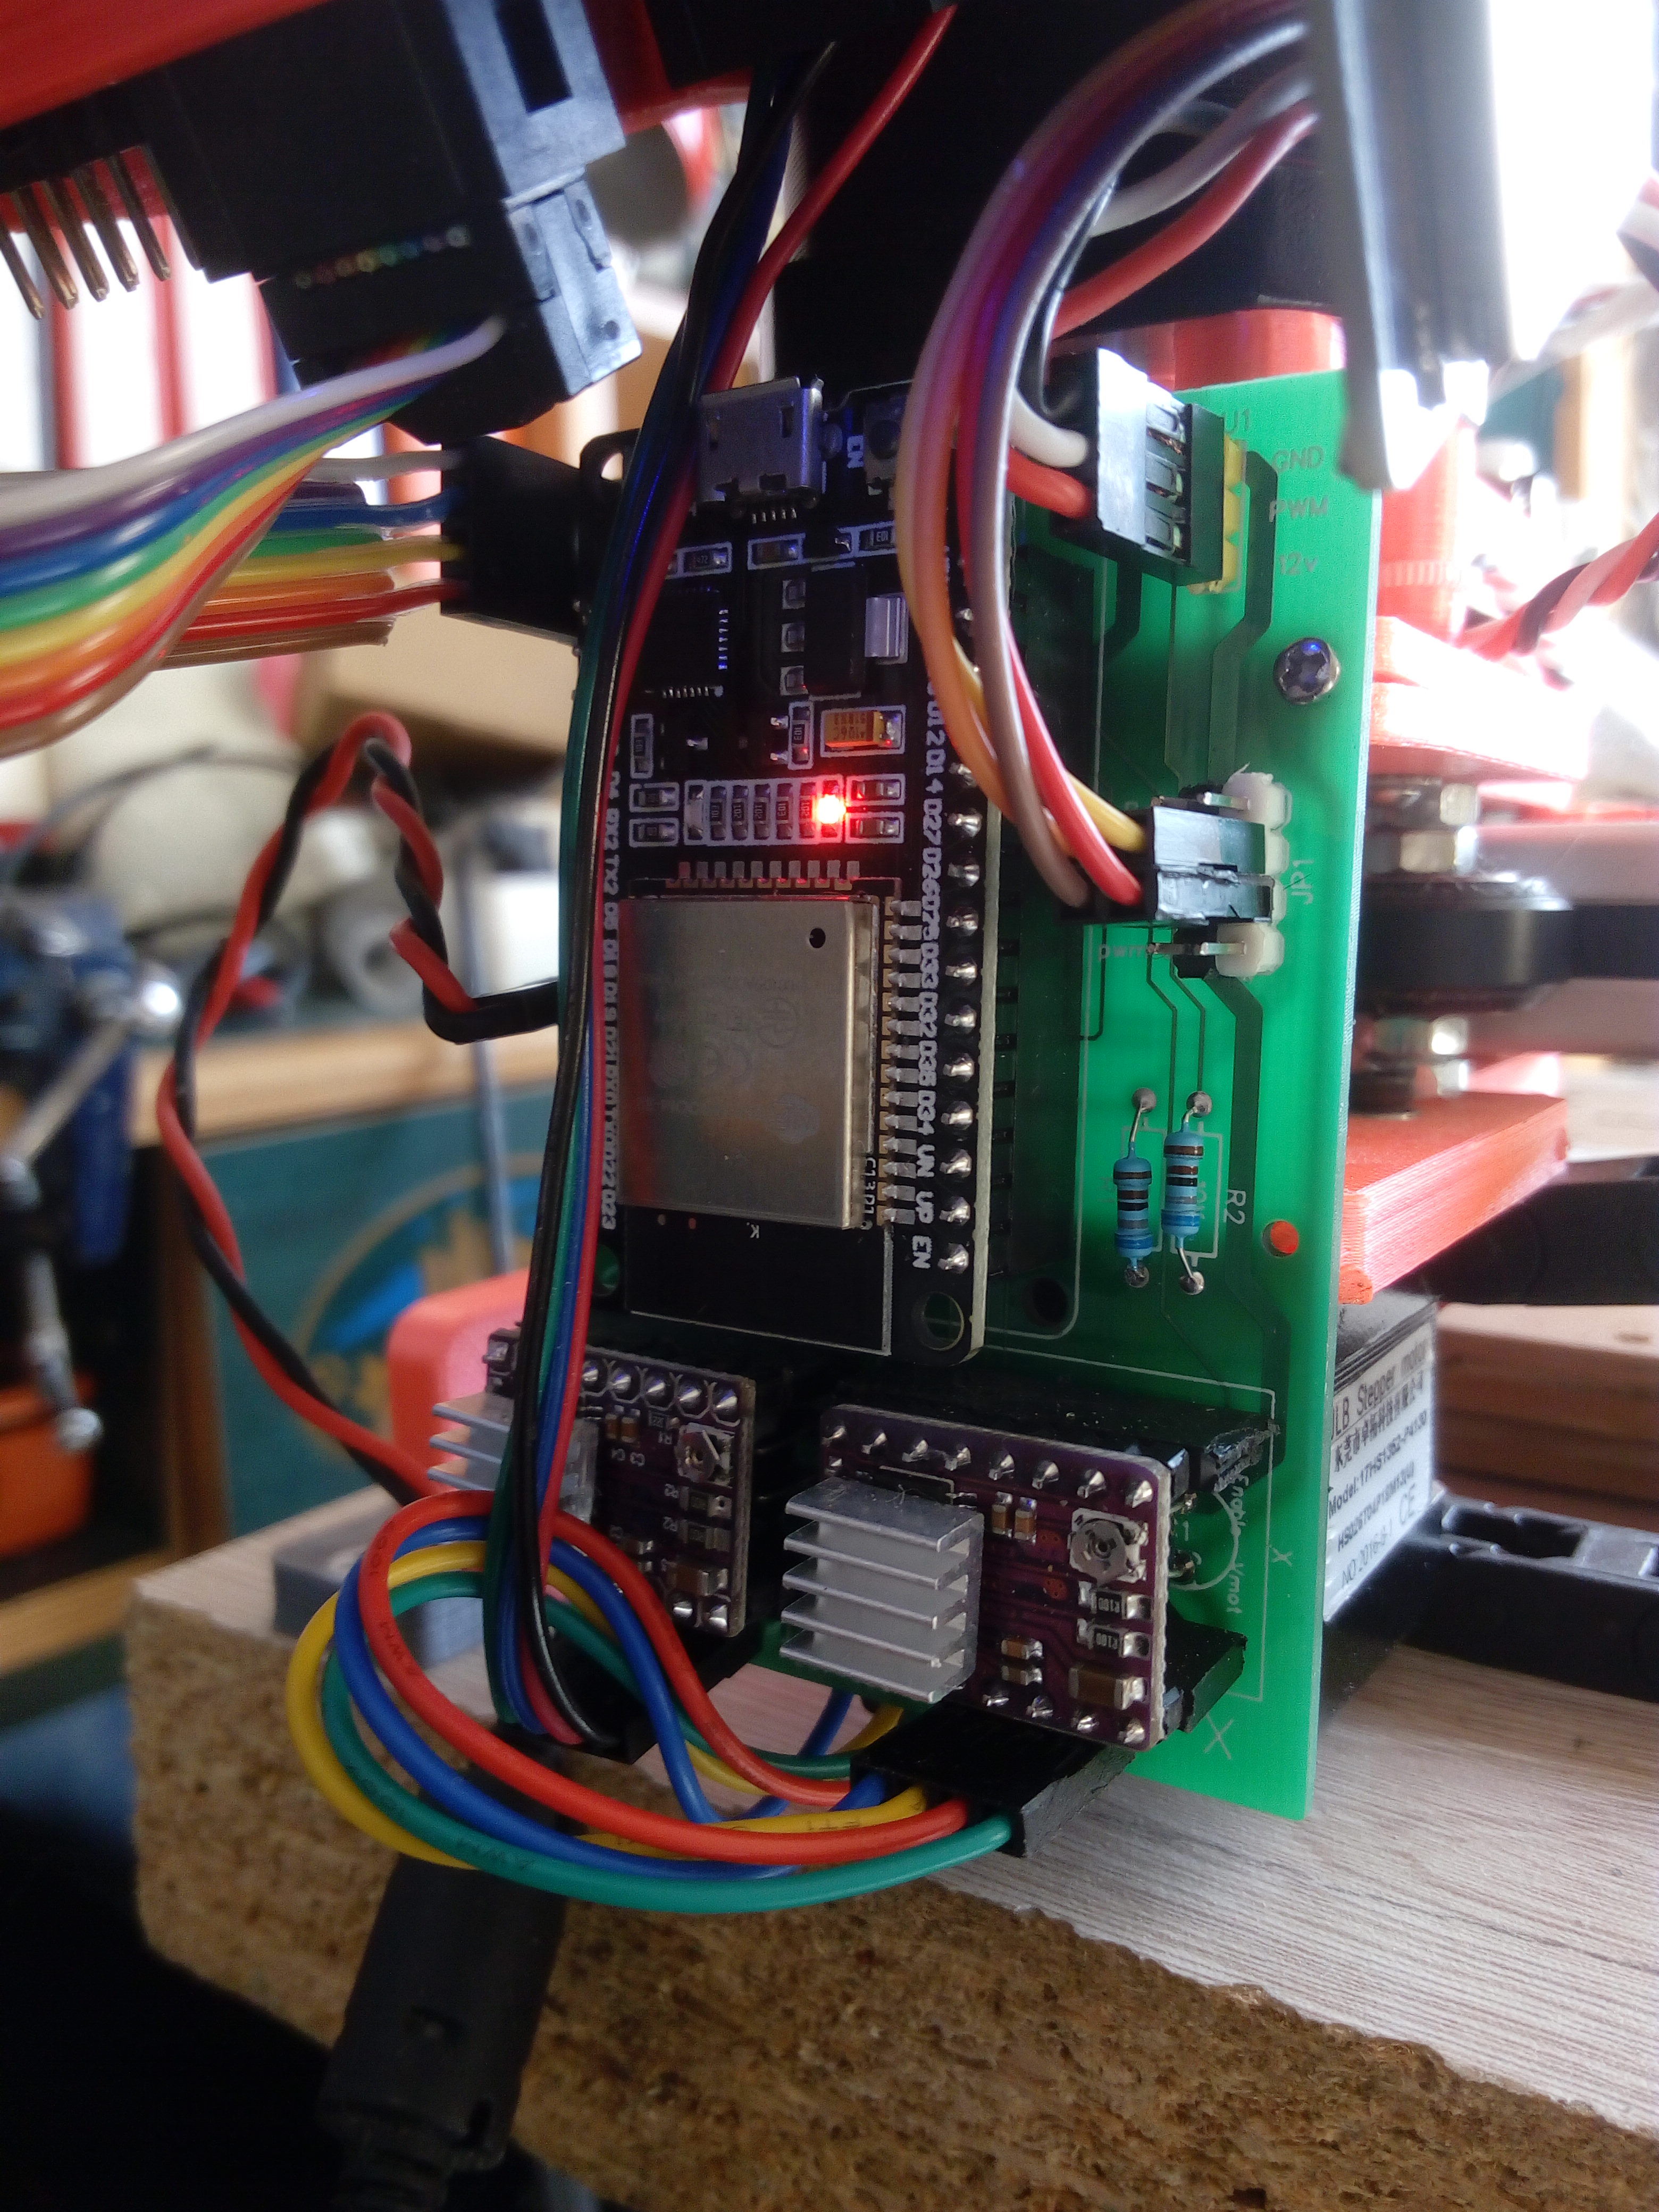
OK…got a bit further, I have got a ESP32 Devkit V1 (DOIT) running now on my cantilever laser board.
I can connect to it over wifi fine but I am still awaiting a tf card holder so I cannot check the file upload option just yet but I can control the board from GRBL_WEBUI in my browser. Jogging works fine, as does the command line but I can’t seem to get the override panel to work. I also have a MKS TFT24 connected to the ESP32 and can issue commands from there ok except the power command to control the laser is not proportional at all, in fact it is all over the place.
Worse still is that connecting over the USB to LaserGRBL doesn’t appear to work either, it connects but if you send any command over USB it promptly disconnects. I will have to try re-compiling the firmware without wifi enabled, that way I may still be able to connect over USB and use LaserGRBL…enough for one day…more experimentation needed.
Mike, do you have any of those boards for sale? I would just need the bare board as I probably have everything else around here somewhere. I’m going to be grabbing some of these anyway…
https://www.amazon.com/Organizer-Development-Dual-Mode-Microcontroller-Integrated/dp/B08FR5Y85W/ref=sr_1_15?dchild=1&keywords=esp32&qid=1613287420&sr=8-15
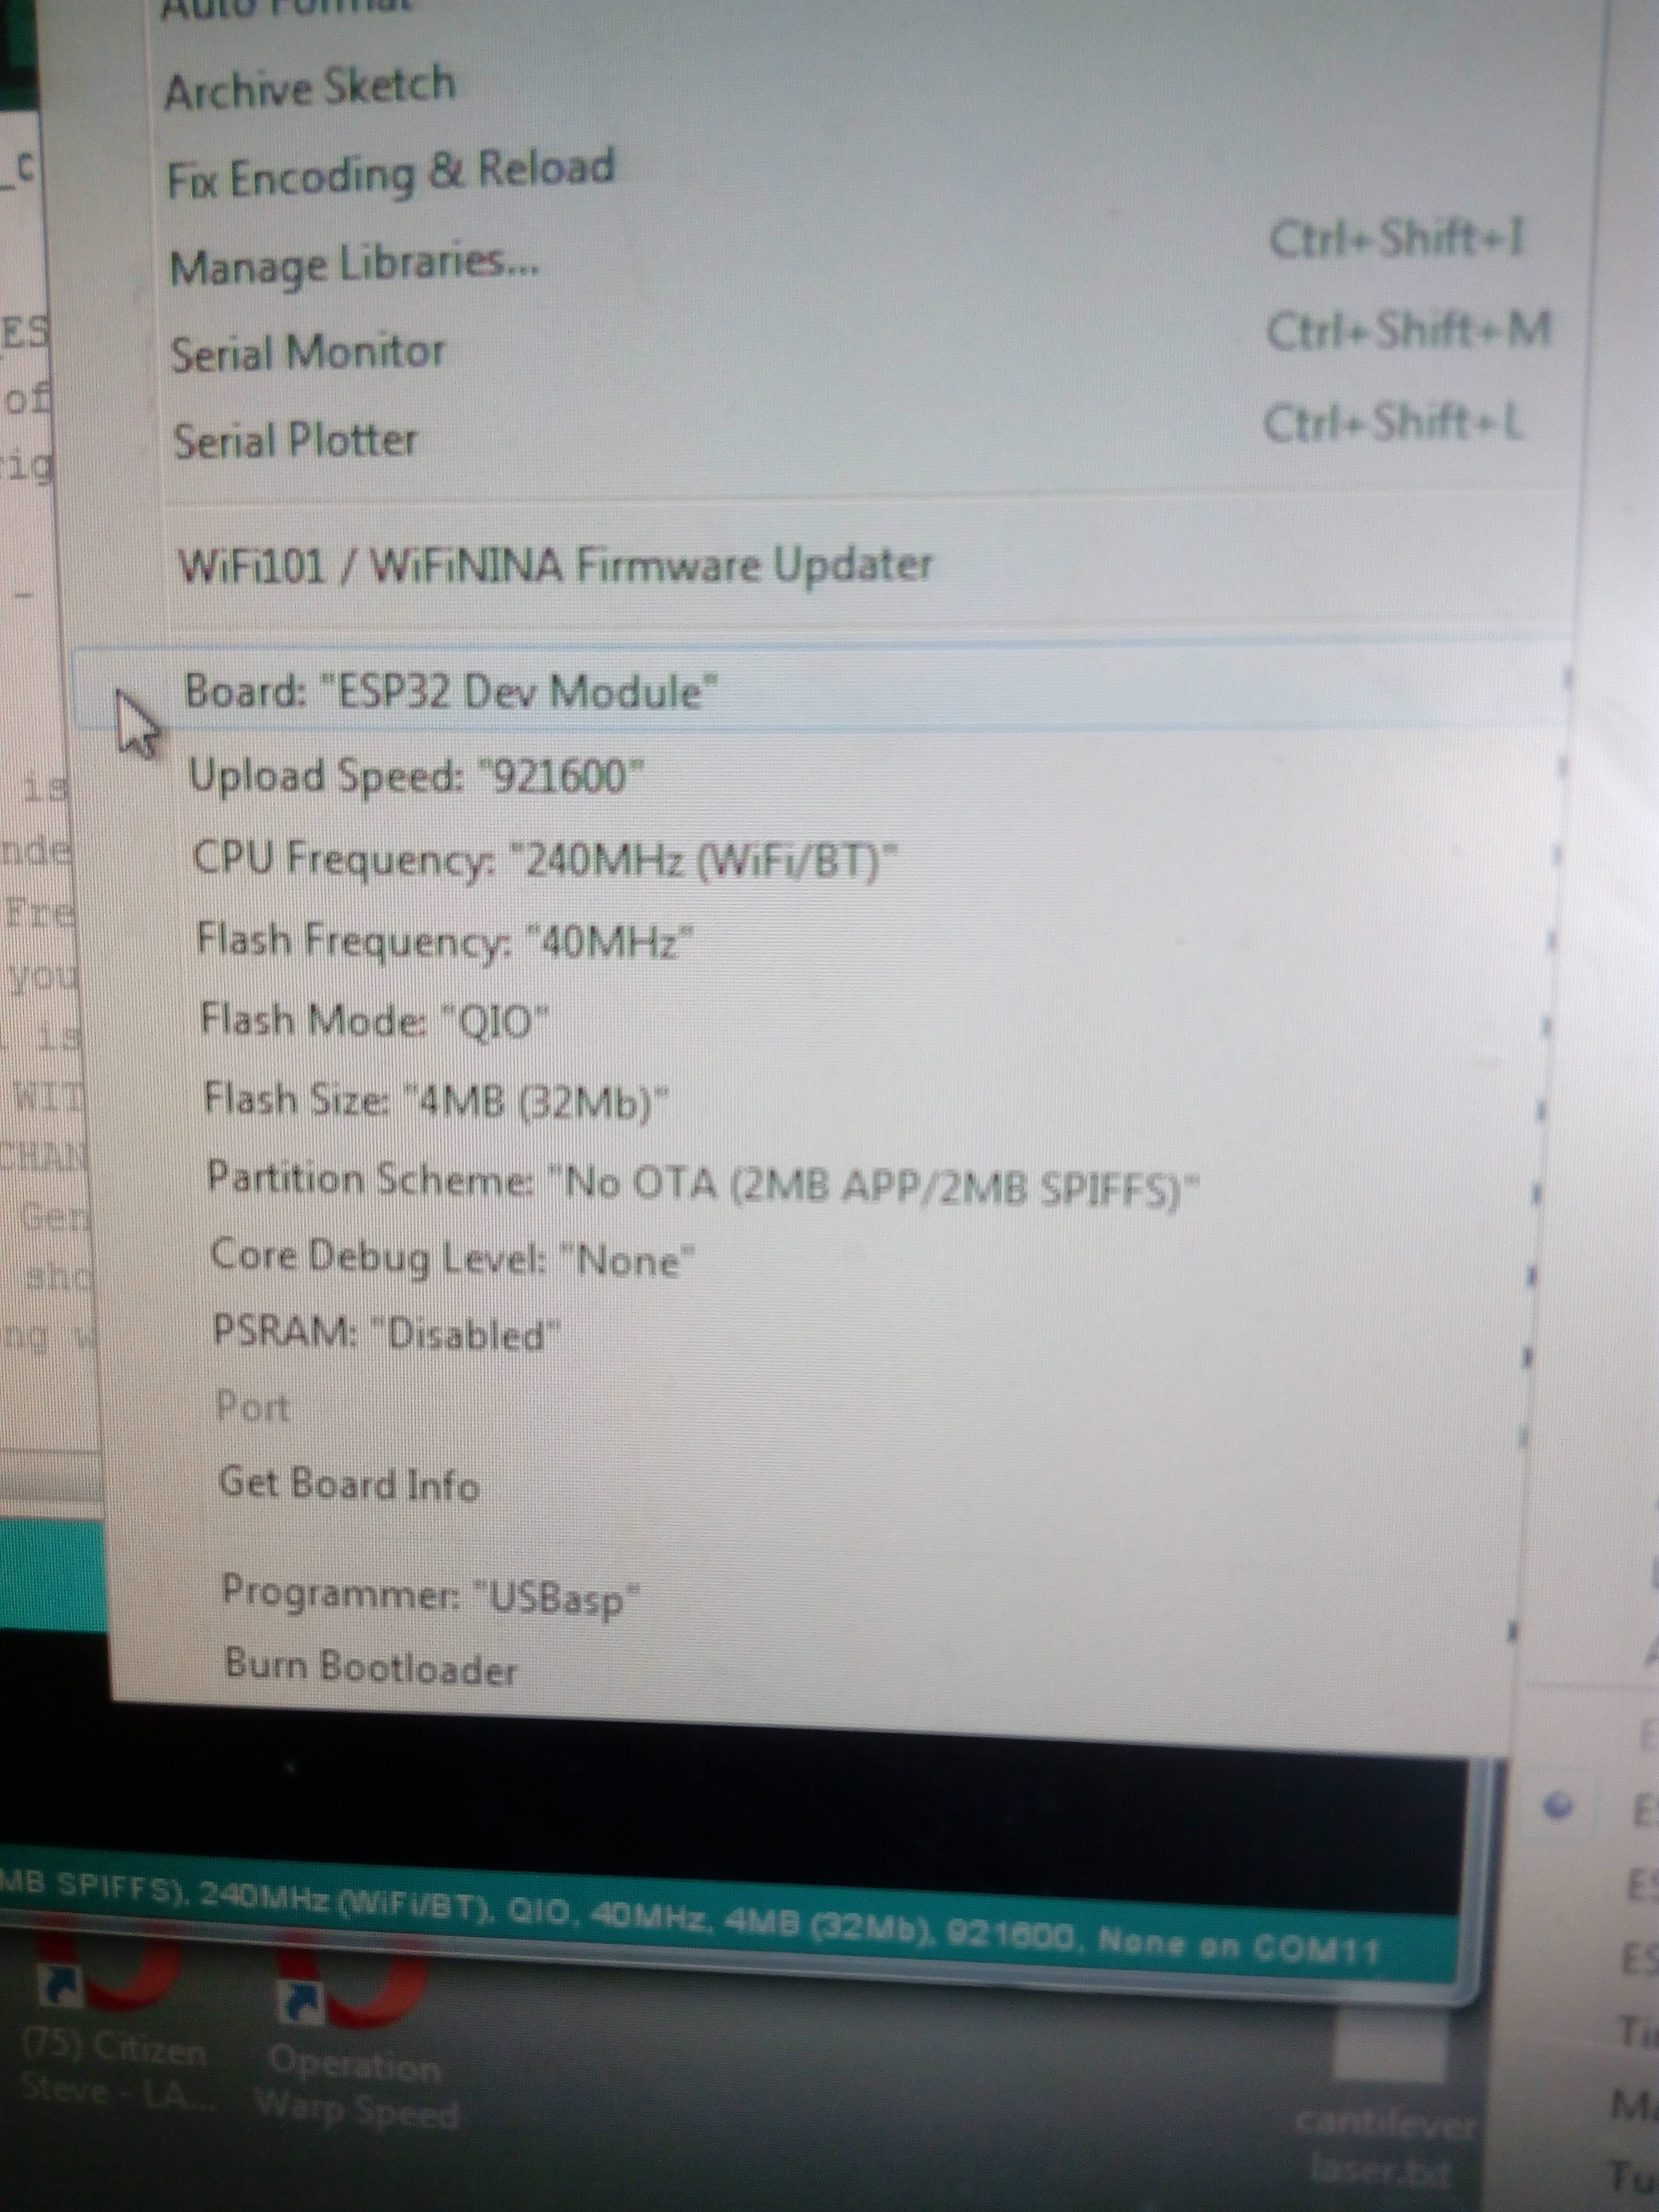
@Strider_Matic… PM sent… Those are actually the RIGHT boards too!  There are a few Devboards, all with different pinouts. I had a problem trying to get ESP32_GRBL onto the V1. In Arduino IDE there are two options for programming the V1, either use ESP32 dev module with the following settings
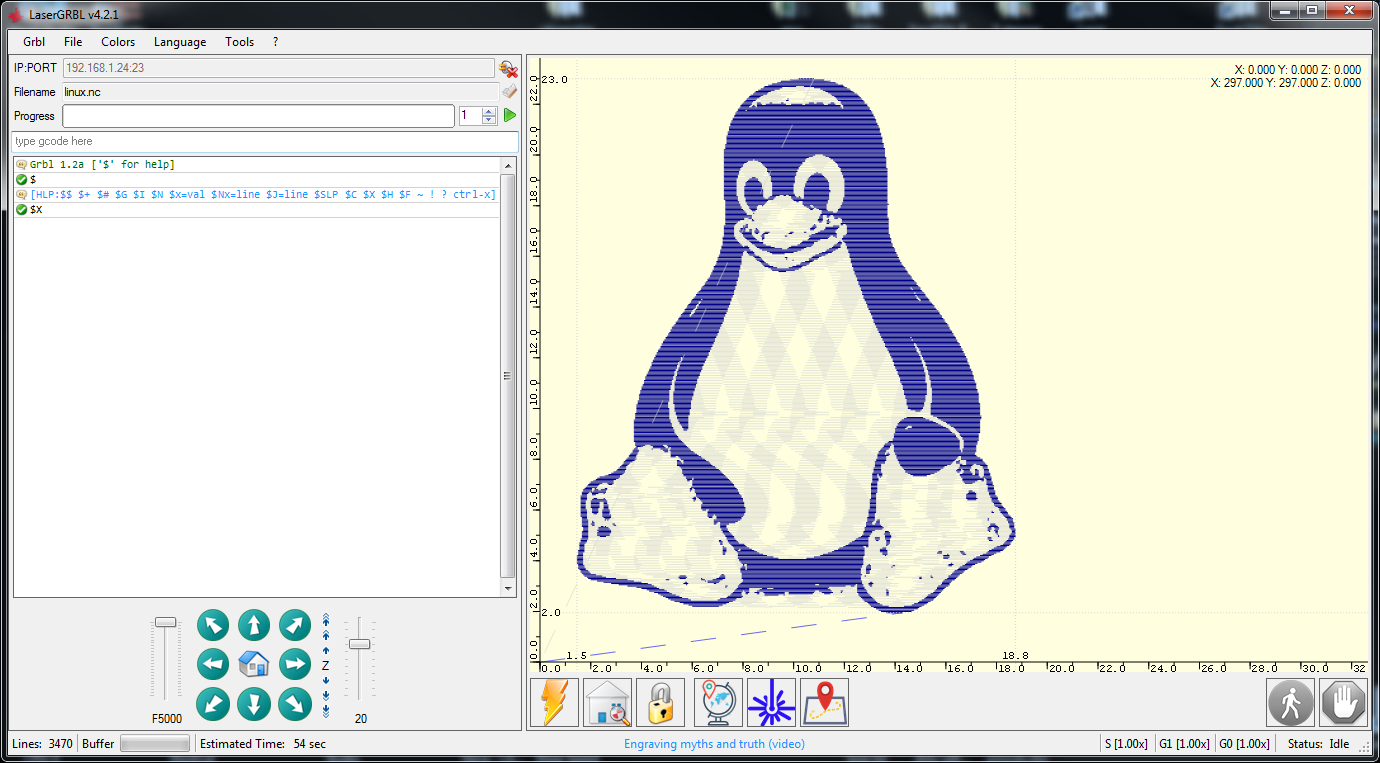
So…a little further again, If I disable the bluetooth and the wifi and compile it then the software does work a lot better, it stays connected, it all seems to work ok, but then I discovered LaserGRBL has had some upgrades…There is a telnet option under Grbl/settings/connection protocol, once that is selected you can enter the ip address of your ESP32 and specify port 23 (192.168.1.24:23) and it works under wifi (once you have re-enabled wifi and recompiled!). I’m not sure of the speed yet as I have not yet integrated it into my laser machine, but it appears to work fine.
I’m definitely looking forward to building a couple of these. It looks like they would be great for the ZenXY tables also.
So the microsd card readers arrived yesterday and, having soldered it in place, the card can be used to hold .nc files ready to be used with the display. However…the speed of lasing over the wifi seems to equal that of USB or sd card - or very close to it, so there is little downside to ‘over wifi’ operations and (for me) LaserGRBL, I just need to try some longer files to prove wifi reliability.
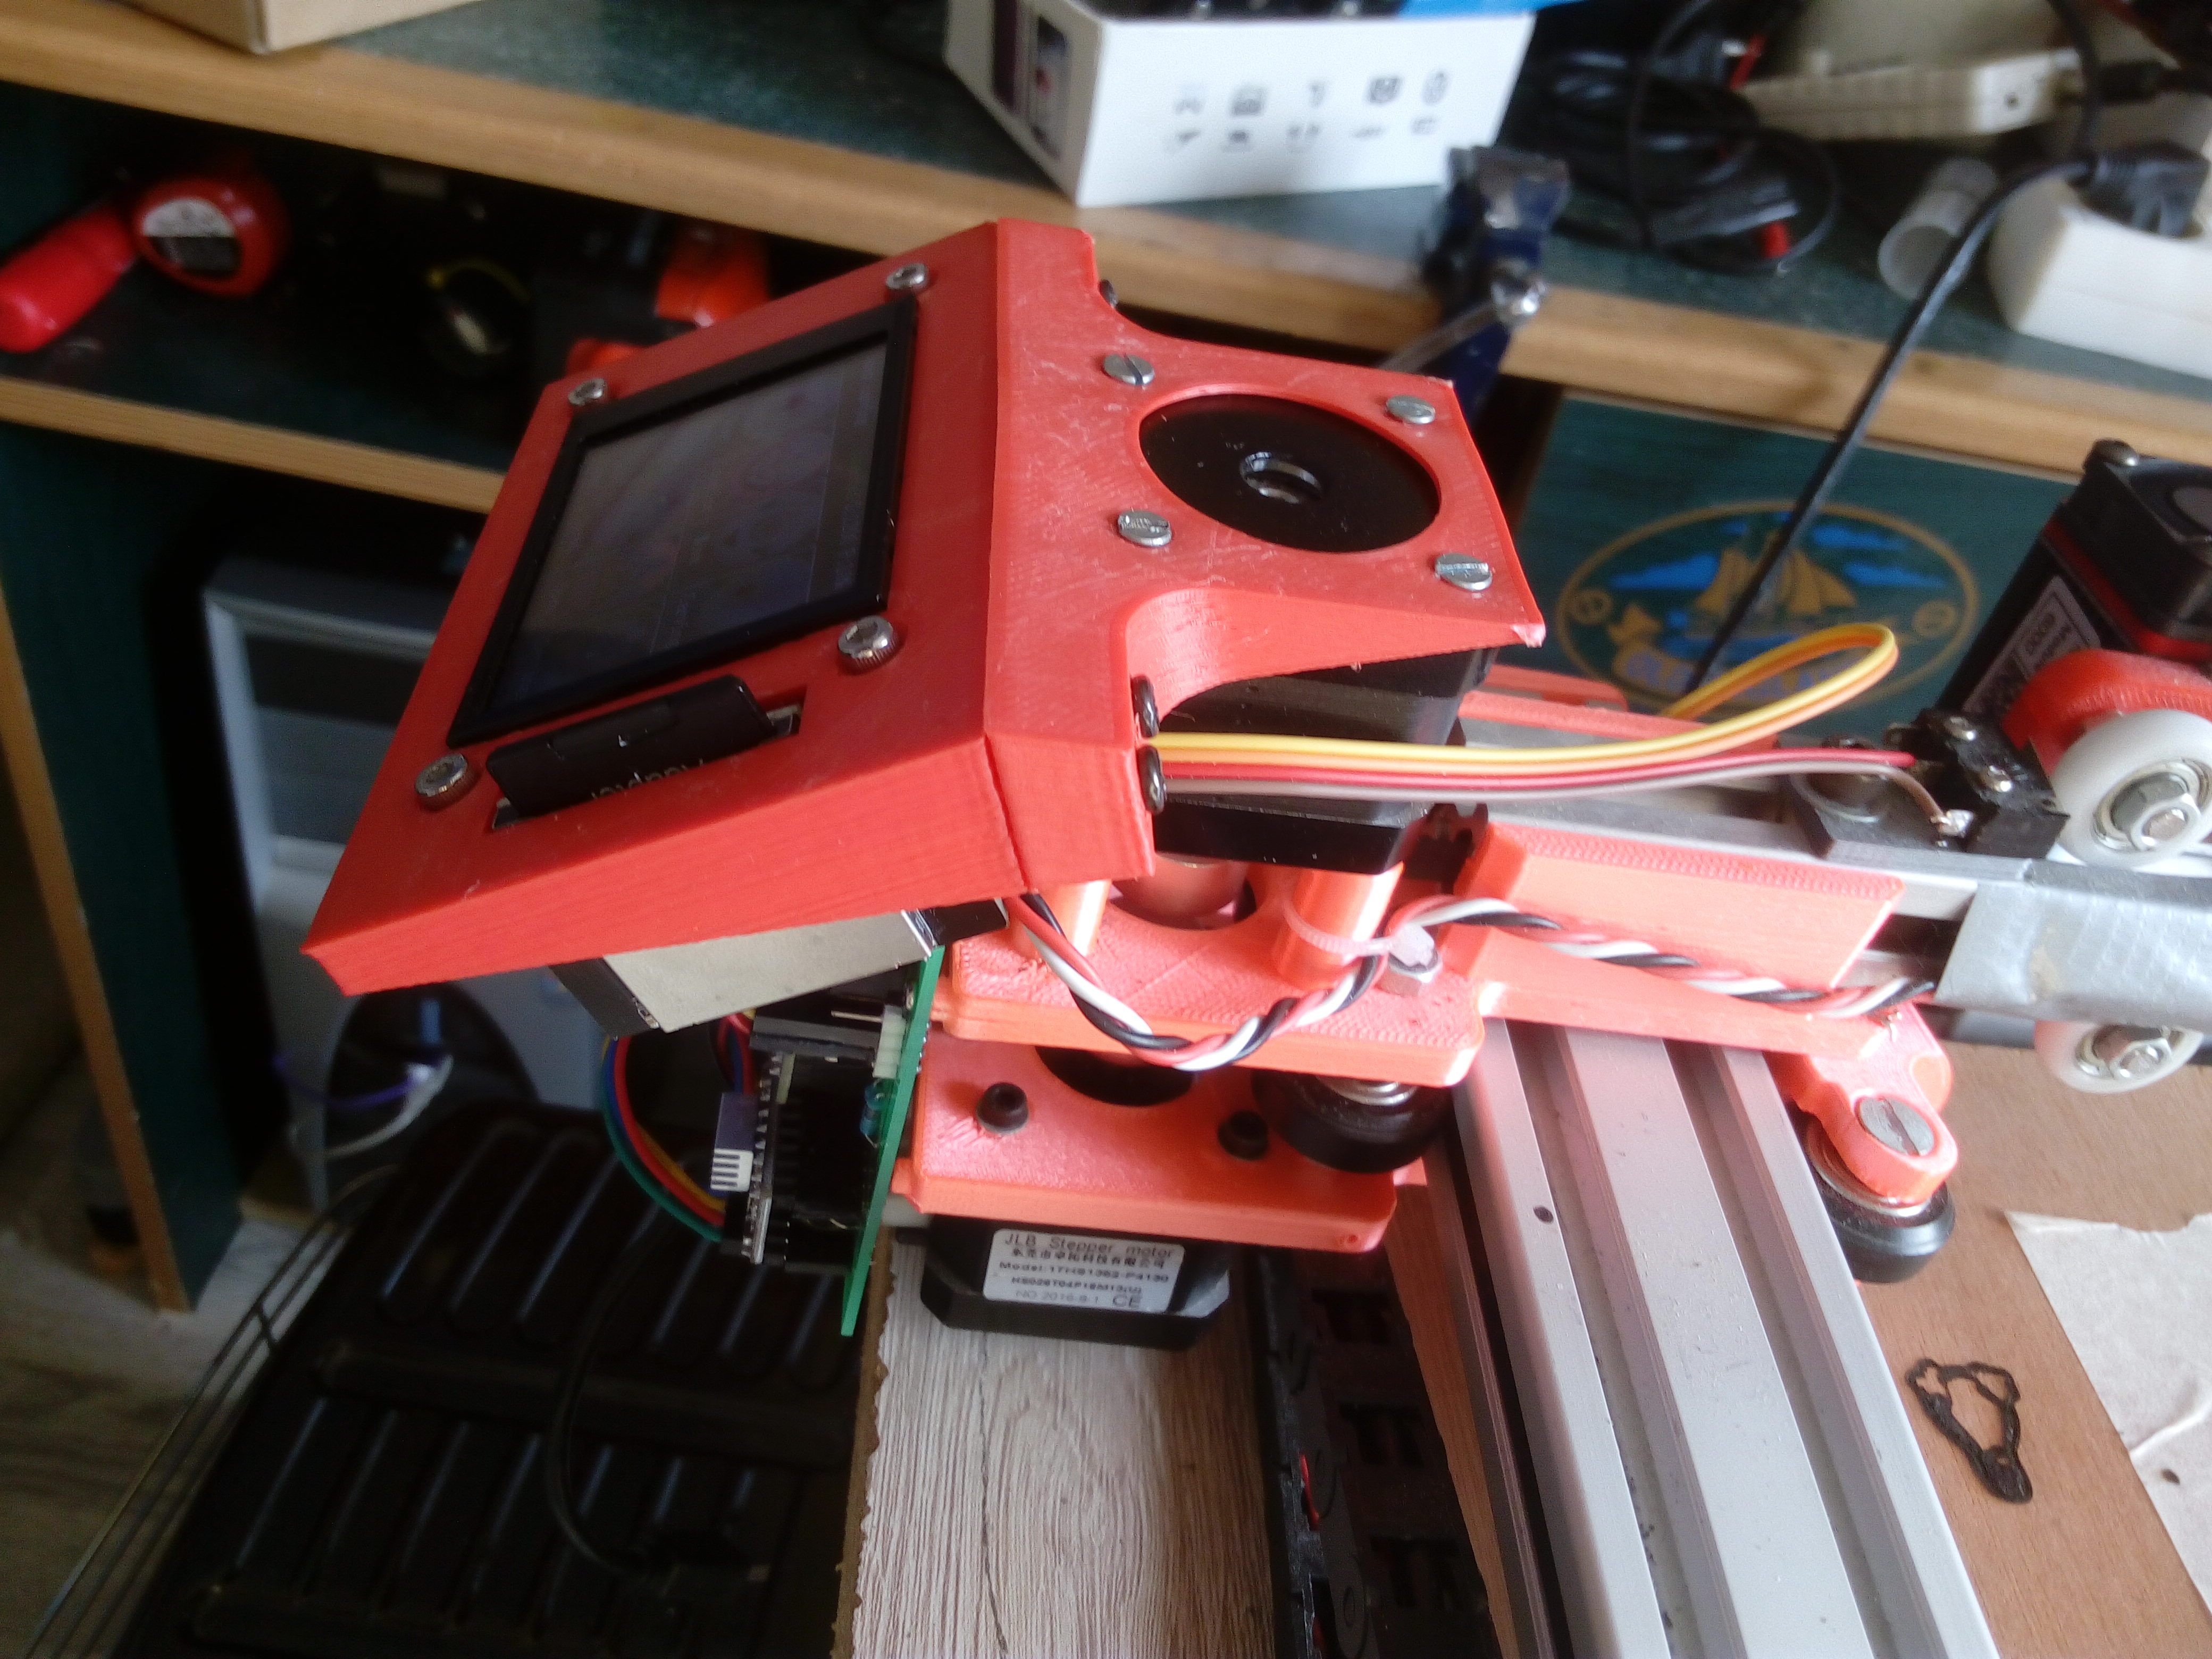
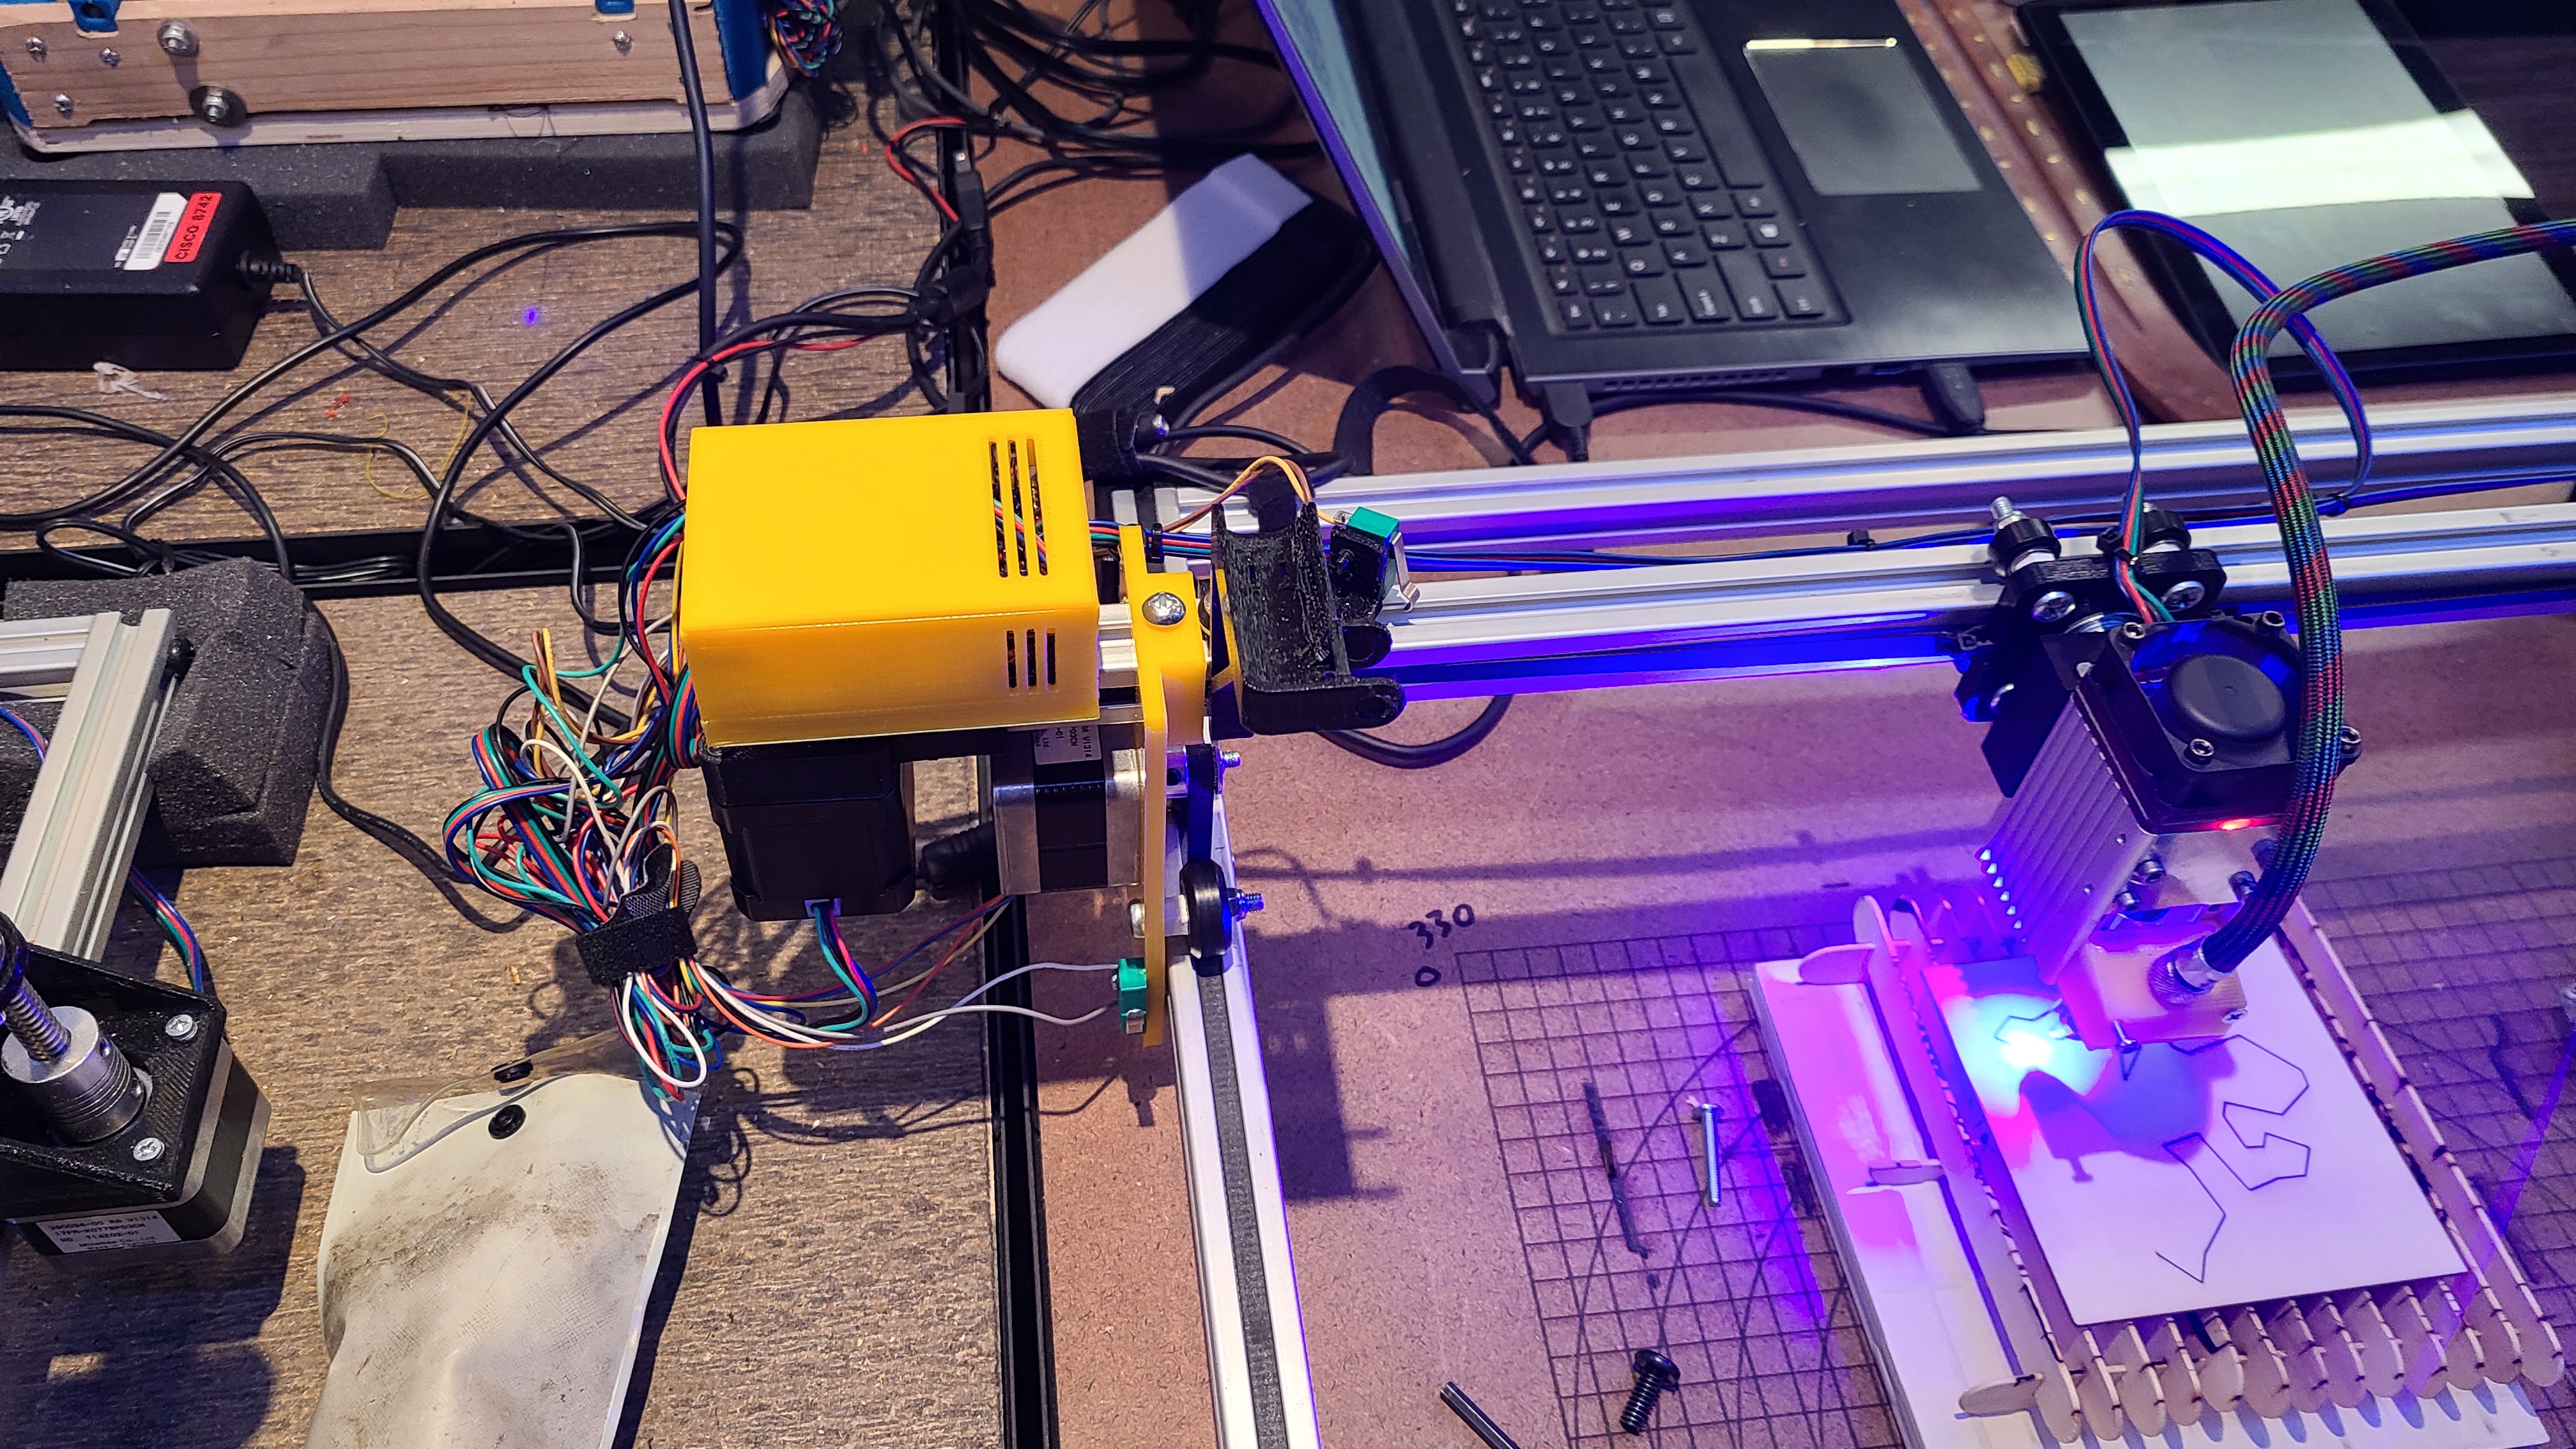
Display mounted on the carriage and the esp32 board ready to do Tux.
@dart1280 That board is working out great! Thanks again! I managed to design an enclosure for it with a friction-fit lid and using the ESP3D-UI to send jobs to the SD card works great. I have some TMC2209s driving the laser engraver now (nice and quiet  ). I’m using a parallel motor splitter for the Y and everything is staying cool.
Why parallel rather then wiring them in series? It’s my understanding you will get better performance out of them if they are wired in series.
Well, one because I had it laying around and I’m a little bit lazy  , and two, these motors are rated at 10v. So when I had them connected in series for another project they would not work correctly. Since there is almost no load on the axes, I can keep the current down because the X axis is the only one I move quickly, so far
It halves the current to wire them in parallel. But on a smooth axis like that, with no load on the tool, I agree it should be fine.
I am not sure I agree with the diagnosis that the motors won’t work in series, but I won’t pick a fight . If it works, it works.
Good enough reason for me XD. I was just curious.
I had tried them in series on a 3D printer project and I was getting poor results.
Hello everyone, I have the MKS TFT32 and MKS DLC which I am hoping to use with GRBL on a small lathe (Unimat 3) I am converting to CNC. I have it hooked up with CNC/GRBL software and it seems to work OK so far. BUT I cannot work out how you get all custom buttons. I could only get 3 custom buttons to work (oddly these are located in settings), the software implies 4 but if you set to 4 then no buttons appear! The MoreFunction buttons do not seem to appear anywhere; software implies you can set up to 5. Can anyone give any guidance on this??
Finally the actual grbl interface seems odd. I have not really tested it out but it gives option of ‘borders’ or ‘figures’ (WTF) before ‘carving’ and uses odd spellings and terms. Sadly the firmware is compiled using Keil which costs thousands of $ so no good for hobbyist. Plus firmware difficult to follow anyway (the BTT TFT35 on the other hand is compiled on PlatformIO which is free and the BTT firmware is fairly easy to work out and mod; however I am unsure how to mod the comms to switch from Marlin to GRBL).
That said the MKS TFT and DLC make for a very inexpensive offline controller. I have added the WIFI and this does allow one to use a phone with the MKS App but as that is really only set up for 3D printers it is not really usable.
Hmm, what kind of grbl are you using? The dlc board looks like an integrated uno+Cnc shield, but not sure if the pin definitions would be are identical. Regardless, I would probably start with the latest grbl 1.1 release, and go from there… it can be compiled with the latest arduino ide so no Keil required.
Regarding customizing the tft firmware for grbl… that would be nice if someone got around to porting it for grbl. However I think the general consensus for now is that tft senders are kinda useless for grbl cnc. They can be useful for starting and stopping gcode maybe, but you will want a more full featured sender to get actual work done with (like estlcam, UGS, bCNC, Linux Cnc, or whatever are decent option… but one well suited for a lathe not 100% sure on that one).
Sorry, only recently noted your reply! I am using a version of Grbl 1.1 (Grbl-L for lathes). You are right about the DLC and it certainly seems to work so far (only now about to test probing function). My real problem was the MKS TFT which was supposed to have Grbl function. It does (sort of) but is really more meant for laser cutters I think. I have now unplugged the MKS TFT and instead connected an HC06 bluetooth module to the serial port on the DLC. So now I can connect it via bluetooth to my PC when testing or to a phone/tablet runnng grbl controller. Seems like a reasonable solution for now and I can use some redundant ‘family owned’ phones. In time I want to try out grbl on an ESP32 (or FluidNC as it seems to now be called).