So far these boards are pretty nice. I have two of them, one each screen size. I’ve been bench testing them working through firmware bugs and suggestions with others on Github. MKS seems pretty responsive to feedback. I’ve even made an enclosure for board and 2.4" screen. I’m planning on using one for my laser rig.
@jeffeb3 The screen code is built in to the board firmware. I’m not exactly sure how, beyond my expertise. The firmware differs depending on if you are using the 3.5" or 2.4" screen. I suppose you can use the 2209 in step/dir mode. I don’t believe they have a feature for spi or uart. They do have firmware versions for CoreXY machines as well as cartesian.
It does run Grbl_ESP32, with a modified version of the web GUI, as well as supporting all of the extended settings too. But yeah, if you load FluidNC it’ll bork the touchscreen.
Thanks for your model reference. That will give me a head start designing one to fit on V-Slot. I will probably make mine a hinged box like my other one. I had been looking for the hole pattern dimensions but had not found them anywhere. I had not looked for STL models yet. I just realized this morning, I have a Bigtreetech TFT24 V1.1 Touchscreen I bought 2 years ago to replace my 2004 screen, but never did. Maybe I will test it on with this board. It has an EXP1 & EXP2 connection on it.
I got the MKS DLC32 V2.1 board yesterday & flashed it with their latest firmware. My Bigtreetech TFT24 did not work with it, but don’t really need a screen on it anyway. Will the FluidNC work ok with this board as long as I don’t use a screen with it? In the FluidNC github, I see there is an example file for the MKS DLC32, so seems like it should. I designed a hinged case for it & am printing it now. I just have to solder up a new laser wire cable. I wish these companies would standardize these laser cable connections.
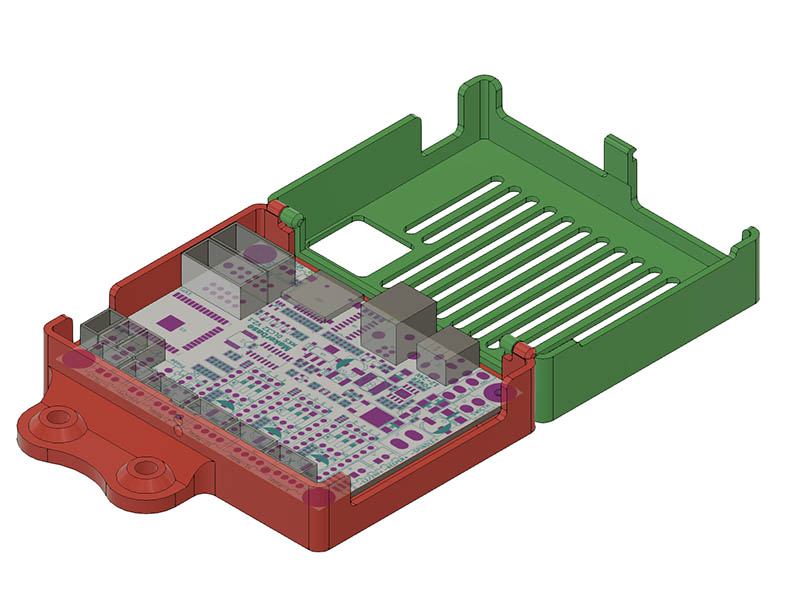
Here is what my hinged board will look like.
I have been building the ZenXY table and it seems that Barts board is not to be had for some time now, so I bought this MKS DLC v2.1 and have plugged it all up with the TFT32 screen that came with it. It connects right up with two motors and operates them with the grbl interface over usb. Now I need to know what changes to make to the configuration for ZenXY. Also what to edit in the software file to be compatible with ZenXY. These things are way out of my knowledge base so nay help would be much appreciated.
Thanks
David Streeter
The steps per mm, max speed, and max acceleration need to be set. The steps per mm should be 100, and the max speed and acceleration are up to you, to a certain extent.
The homing sequence needs to be set. It needs to home one direction first always, and then the second direction, and Ther might be some specific offsets.
I haven’t tried fluidNC with the zxy yet. I am still on grbl esp32. It’s configuration was through config files. I know Ryan and I were both working on it and I think it is posted here somewhere. But I would have recreate it for fluidNC.
I am happy to review what your doing, but you’ll have to do most of it yourself. If you look at the fluidNC docs, these things should be documented there.
You can also ask in the discord for fluidNC. But it would help everyone if you tried poking around a bit first. I guess a lot of the questions are answered in the docs. They are super nice there though.
I was unaware of the change in naming to FluidNC. I didn’t know that was what Bart’s port of GRBLE was for the ESP32. Makes much more sense, now. I kind of wonder if I should update my laser controller. (Not touching the sand table, since it works, and the people using it are somewhat change-resistant. It can just keep working as long as it still works.)
I just got the mks dlc32 v2.1 running with fluidnc and tmc2209 drivers. I burst out laughing when I finally figured out the config. It’s soooo silent! And tweaking the firmware settings is soo simple! I don’t know what my wife will say if I claim to have fallen in love with an electronic board, let’s just say I’m excited! I’m testing it on my eggbot. Only remains to hook it up with a proper gcode sender(I don’t like the simple web interface for production), and making the servo work as z.
Can you share your config file? Since you have the servo as Z, this might work on my rolling plotter. I originally bought mine to use on another laser engraver I haven’t built yet. Think I have DRV8825 drivers on mine.
I don’t understand how the I2S pins are set up, if they are physical at all - or software configured. If they are, I don’t know how - but they are working! I haven’t got the servo working either, but example from the instructions seem decent enough:
It looks like there is a “daughter chip”. The ESP32 is sending commands over I2C and the daughter board is controlling some functions, like the motor enable.
This is one example, the steppers share an enable pin on the daughter board that is pin 0. The X stepper is ok pins 1,2. It doesn’t matter what pins they actually are on the daughter chip, as long as the I2C interprets them as 0,1,2.
I see they added some more example configs since I looked at it last. There was only the MKS_DLC32_2_ABC.yaml for the DLC32 board a few versions back. I will have to play with this once I finish some house projects. @jeffeb3 Thanks for the additional servo info. Using the servo for the z-axis for a plotter would simplify my setup. I was thinking of using a real stepper for this, but this looks promising.
I used the probe pin, gpio.22. Spent a few night getting it to work. Ended up asking Bart Dring himself. It didn’t seem like he was impressed with my troubleshooting skills… a little embarassing - but now I’ve solved it. The servo itself was bust - AND I didn’t have the indents in the config file right! Who would’ve know that a few spaces missing is enough to ruin the whole setup!
I solved it I think there’s a lot of redundant parts in this config, but at least I got it to work! (no tuning/calibration is done yet) Here’s the config code: Untitled (exze705w) - PasteCode.io
Thanks. That gives me a very good starting point. I like the use of the probe for the servo. That puts all 3 connections in the same area on the board. Too bad the DLC32 does not have a servo connection which would have 5v on the center pin rather than ground. I will have to swap those pins on my extension servo wire if I can get the pins out of the connector. I am still waiting on a couple of closed loop timing belts before going further with my plotter. They should be here next week.
Can you tell me what settings I need to change to use DRV8825 drivers for the X & Y axis? 160.0 should be my steps_per_mm since I am using GT2 belt with 20T drive pulley. Under the motor0, I don’t know what I need to change. I will also have a motor1 for the Y axis.
Glad you found your way! The fluidnc seems quite like a young platform, but things are developing fast and I think most options will be covered by time.
What setup are you using for your plotter/laser? I’m still in the thinking box if should go with an axi-draw variant, or an H-setup. What are the pro’s and con’s for these two options would you say?
Mine is kind of different. It is a rolling plotter setup with one axis being essentially infinite. I was using klipper firmware before on a MKS 8 bit board. I redefined the G10 & G11 gcode to do a servo down & servo up for the Z-axis & was kind of a pain since I had to manually edit Gcode. This time around I was going to use a standard small stepper of some sort, but if the fluidnc works to use the servo with a z-axis, I might stay with the servo. Here is my design as it looked 2 years ago. I am in the process of redesigning it now. Rolling Plotter build - Random or Off Topic - V1 Engineering Forum
 I think there’s a lot of redundant parts in this config, but at least I got it to work! (no tuning/calibration is done yet) Here’s the config code: