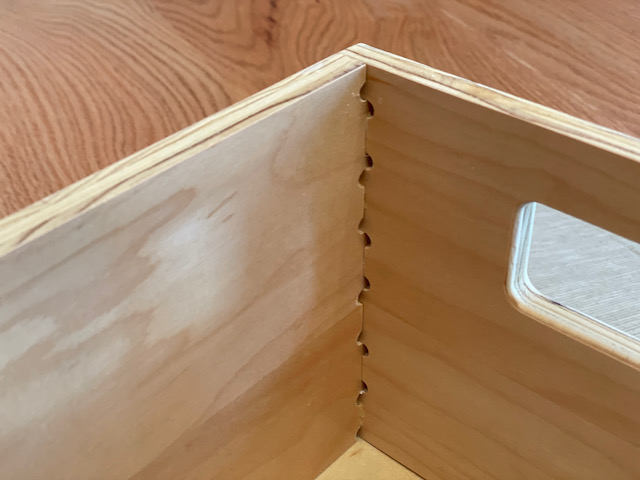
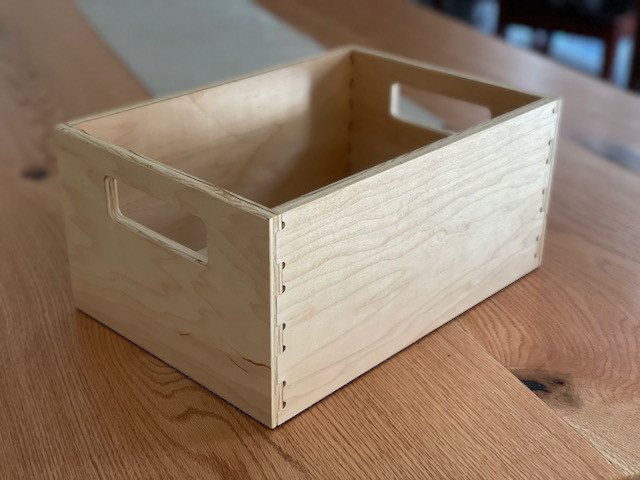
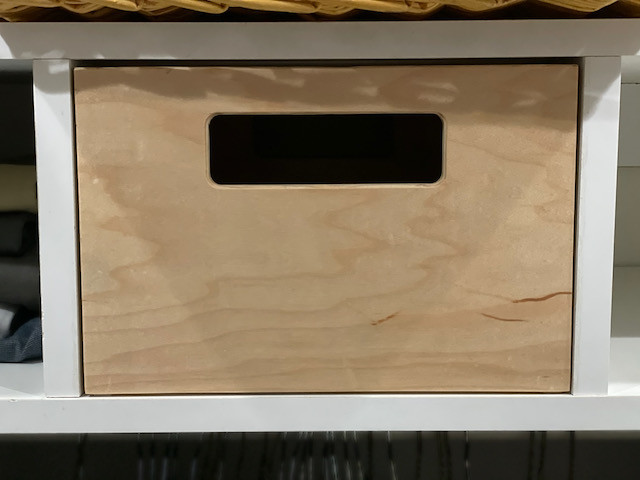
More experiments with the modified lowrider: Need some custom-sized boxes for closet cubbies and tried out half-blind box joints. I may be weird but I appreciate seeing construction details in products, and I like the clean look by default with the reveal of the machined joints when taken out.
Wow, that is great looking from every angle! I bet something like that could really be cranked out in small production. While one is cutting you can be fitting and finishing the previous one. Keeping busy while babysitting the robot. Solid CNC project!
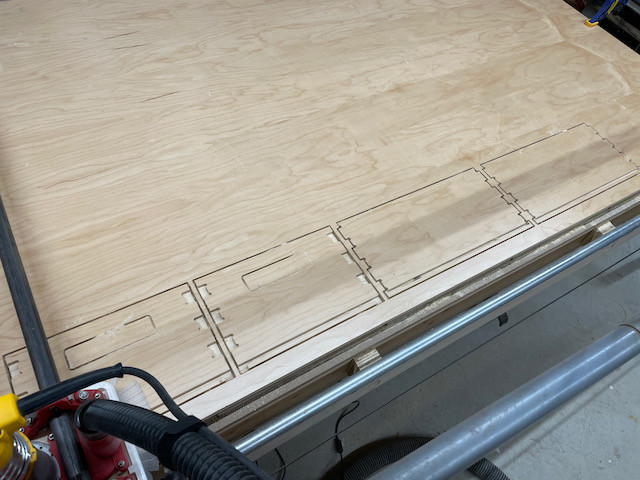
Thanks! Yeah I put that one together and finished it while the next one was cutting. I’m trying to optimize the toolpaths right now and experiment between surface/machine bed z zeroing. I normally do machine bed for through cuts but this requires precise depths from the surface.
It’d be faster to do all of the straight line cuts with other tools and then do the joints and dados on the cnc with a reference jig to clamp to. If I do them for the wife’s closet I’ll definitely go that route to make it go faster.
Faster depends on if you are done or not. If it finishes cutting before you are ready to start working on it it doesn’t really matter. That is the nice part about the cnc, as long as you are busy it’s time is free. But yeah if you are ready for the next piece a jig is going to cut that time way down, that jig can be as simple as 3 dowels drilled into your spoil board with the CNC…
That’s true, and a good idea about the dowels… I was thinking about something unnecessarily more complicated. The large area on the lowrider is definitely nice in that, if you had the time, you could just let the machine run through an entire sheet of plywood and pop pieces off as they’re cut to finish them.
That is kind of how I used to make the LowRider flat parts. I had it cut one set, across the width then I could just start it one set higher. Or I could pop one out and start another or just wait for the next day and leave the board there. Making multiples bring in a whole new set of strategies versus a one off.
I did the same for my Shapeoko but am going to switch to the same homemade T-Track as I have on my lowrider. I was using cam clamps with reference squares on the Shapeoko MFT which was great for simplicity and speed, but I found that when your piece is only secured by horizontal squeezing pressure that it will lift: either on the edges or bowing in the middle. That, and the issue of my most used MFT holes in MDF lost their tight tolerances over time made it kind of worthless for any precision work relative to the stock. I still use MFT on my paulk workbenches because I can stick a festool-style clamp through and into the workbench to secure pieces to it, which I can’t easily do on a CNC spoilboard.