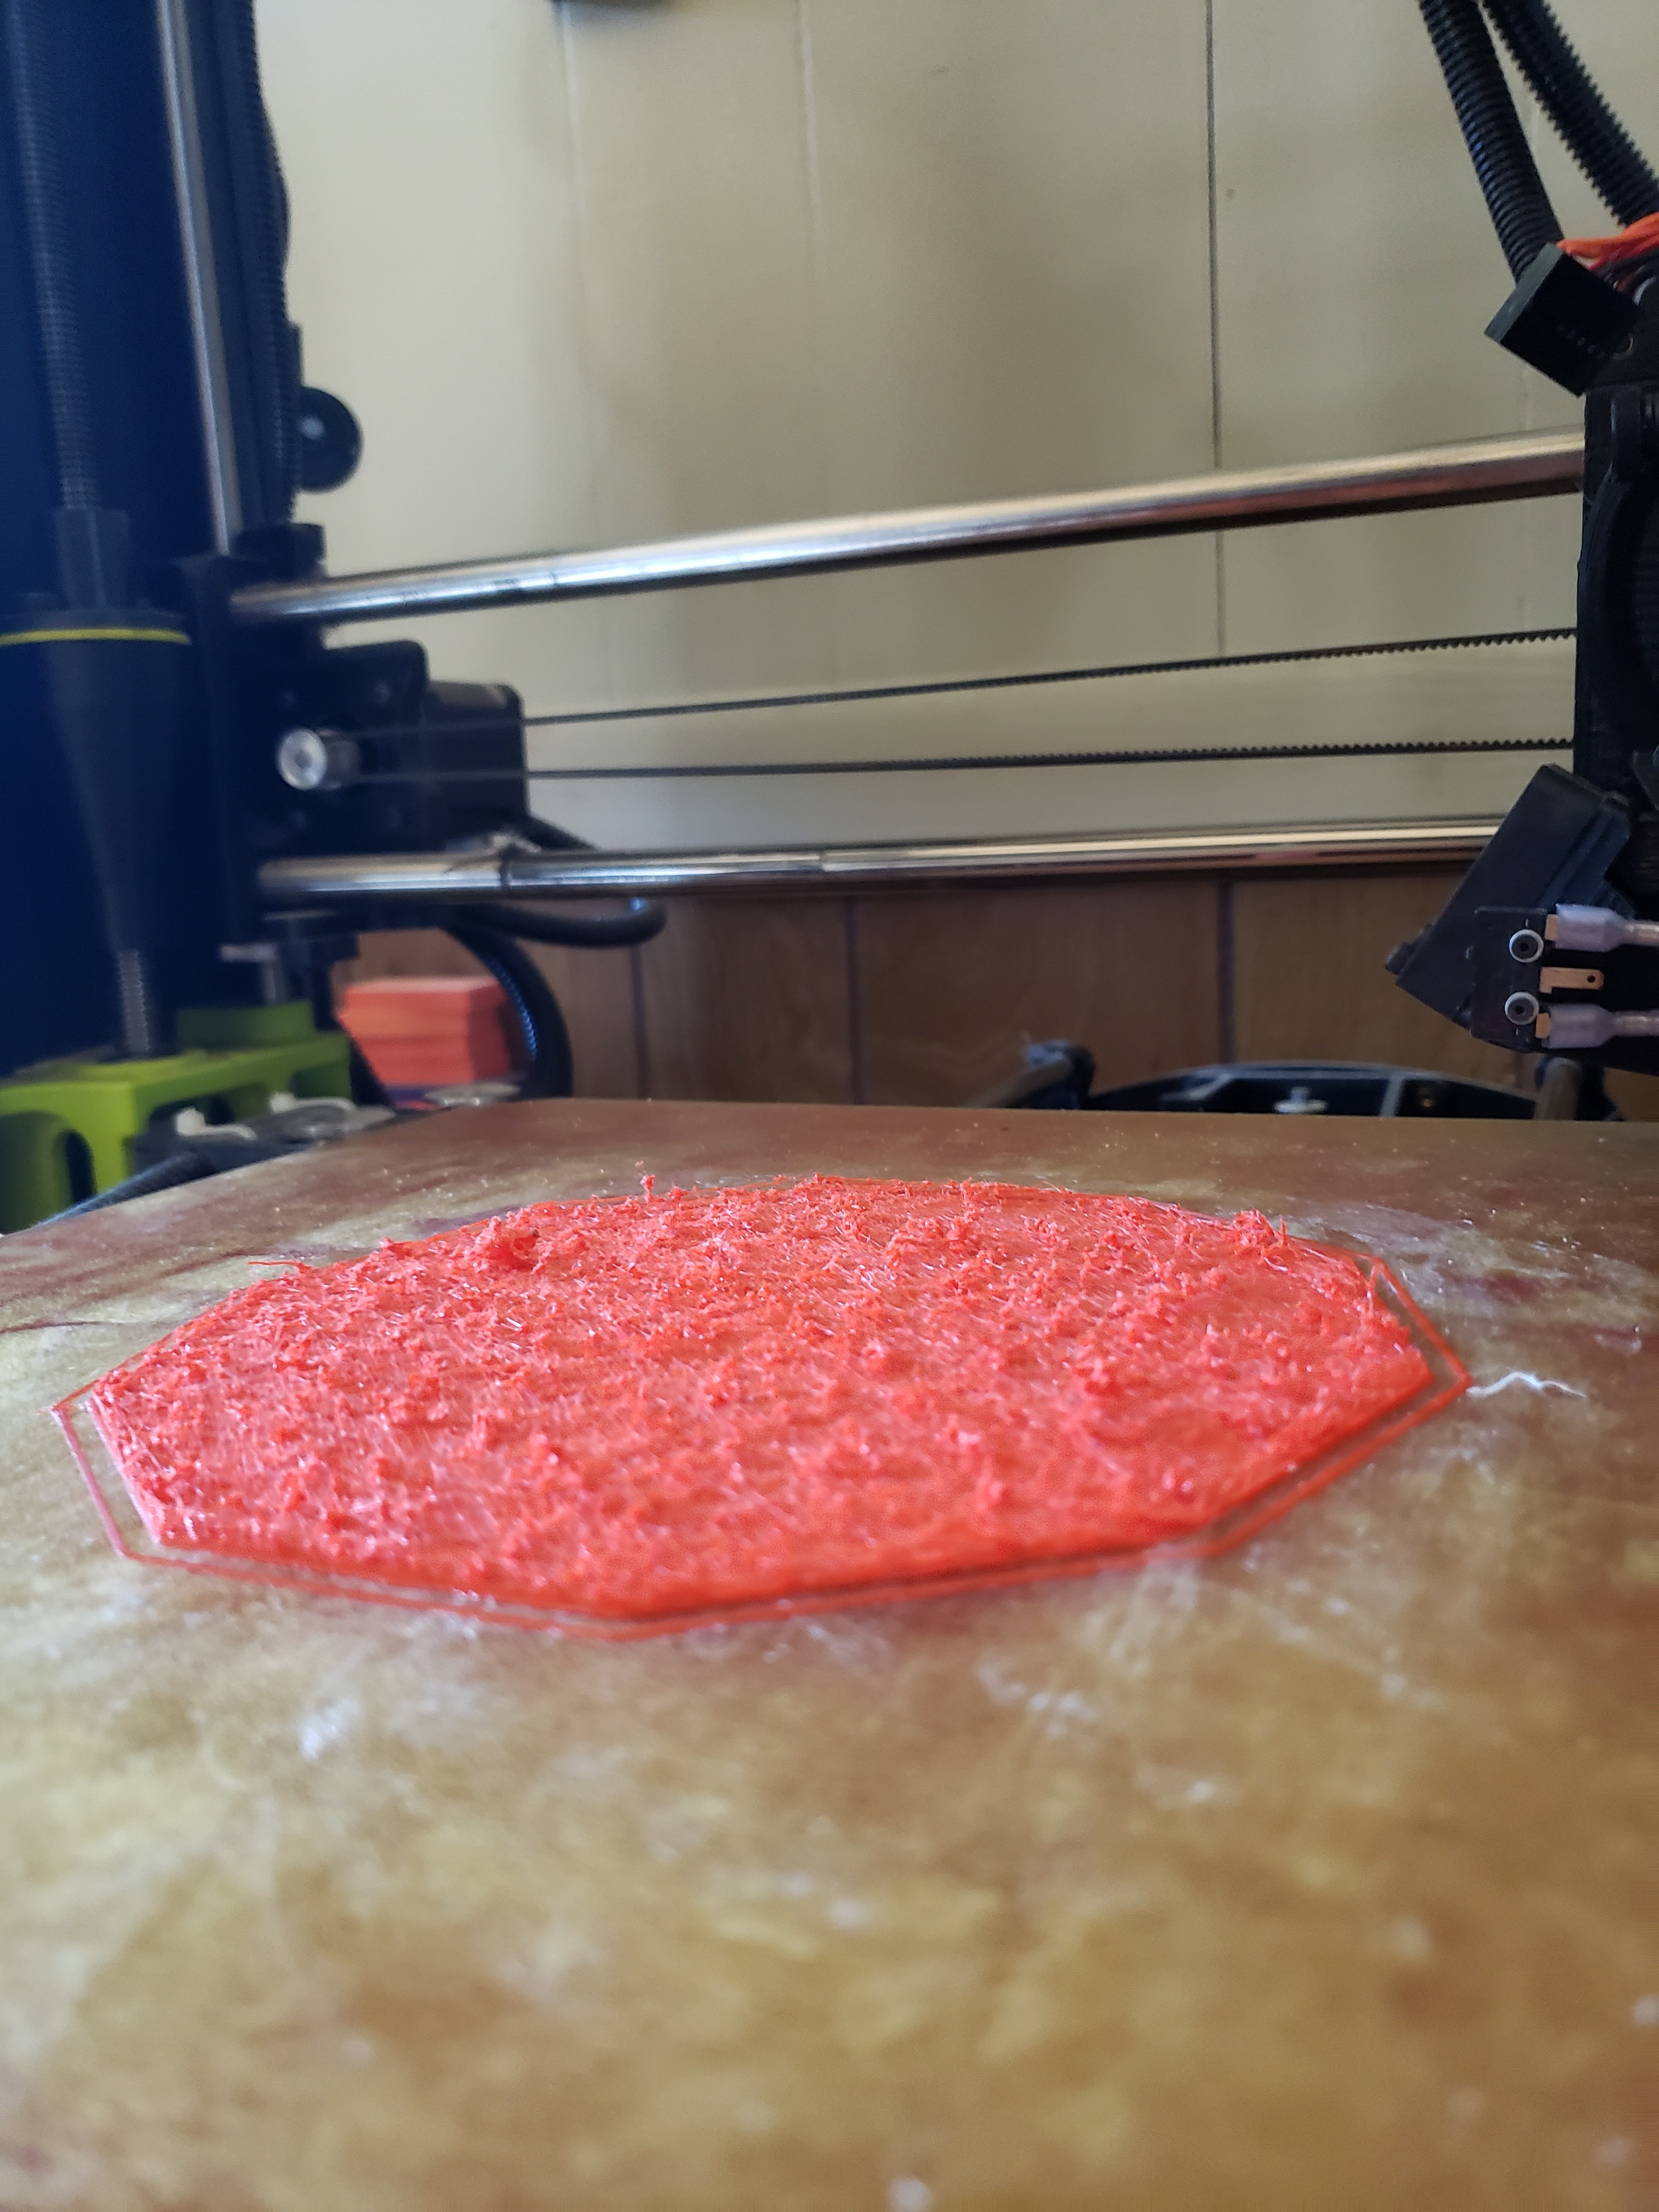
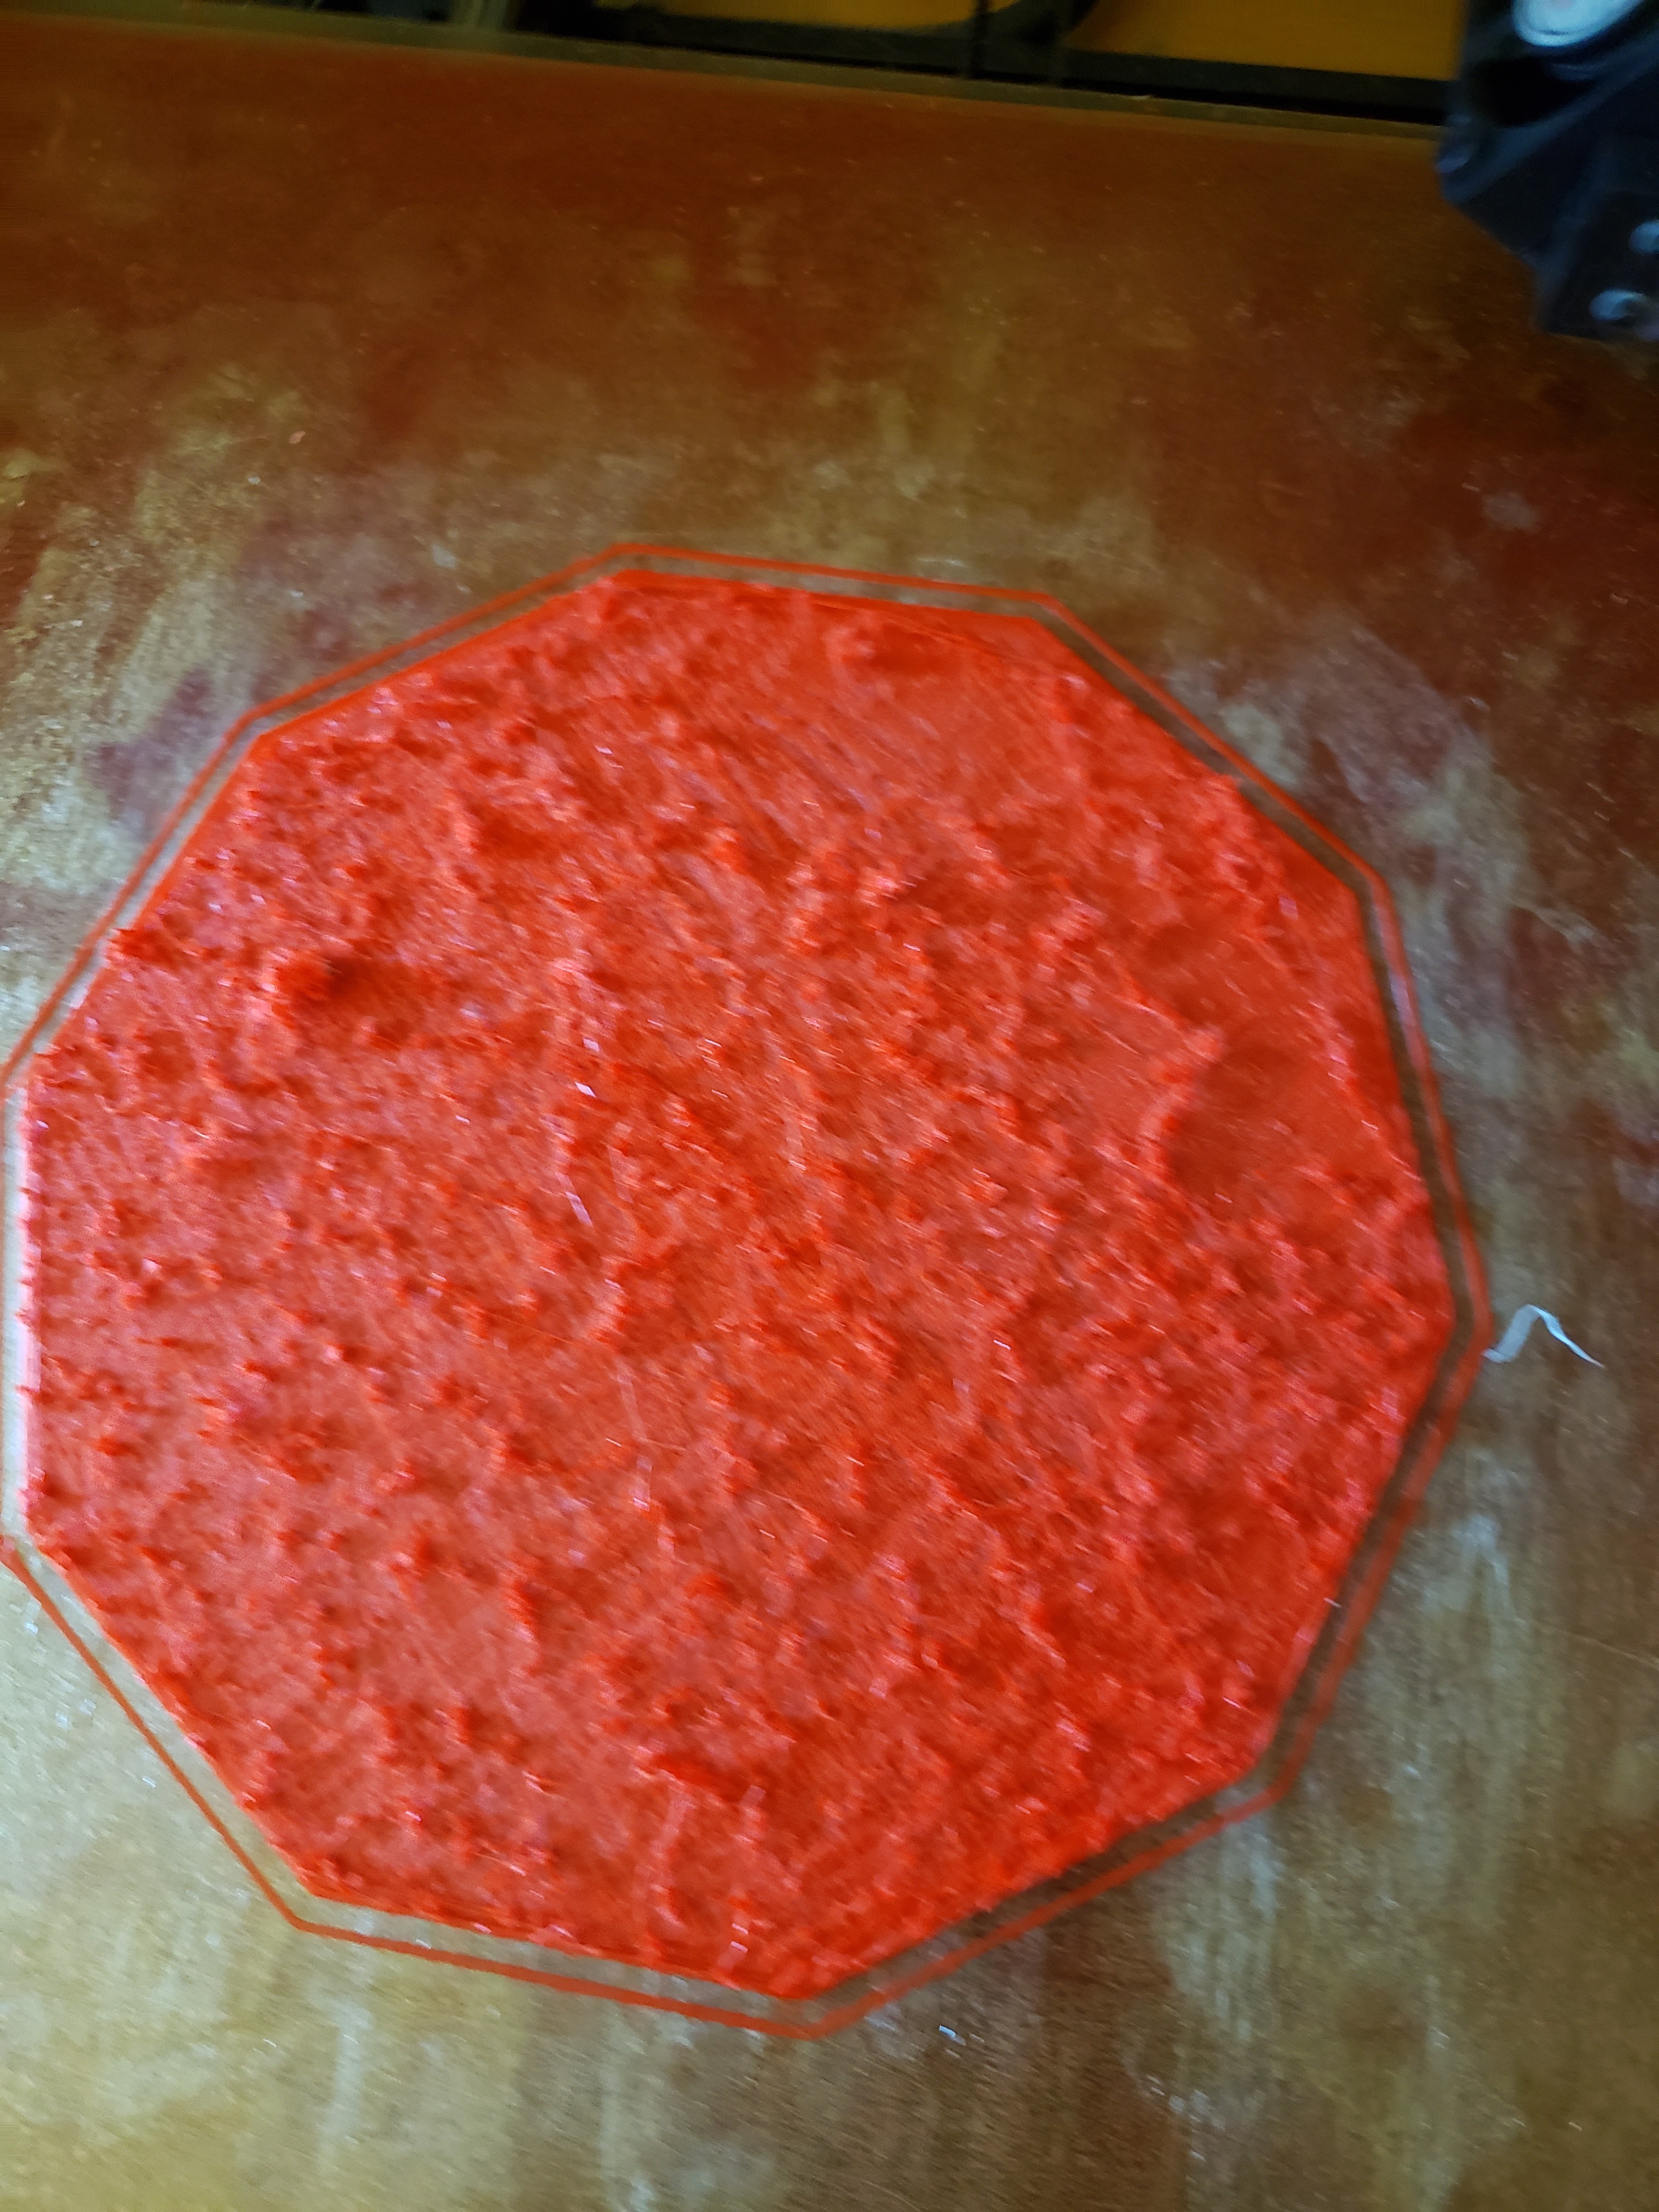
My print looks like crap. Open these and tell me what setting i have wrong. Hot end temp is 175 and bed temp is 85 top pic is bottom of piece

What kind of filament? For PLA you want higher hotend temp and lower bed temp. I would start with 200 hotend and 50 bed. That’s what works 99% of the time for me.
3 Likes
I had a very similar situation when I was printing PETG with the z heigth too low. In my situation I think the filament got squished and gave strange adhesion issues and “waves” across the first layer from the squishing. I adjusted used live z adjustment option on my prusa and changed it .05mm, and it the first layer turned out suprisingly well! 3d-printing is certainly a jungle of error opportunities…
1 Like
As mentioned you may need to play with Z height. It could also be over-extrusion which would be corrected by calibrating the the extruder steps, or short term by lowering the flow in the slicer. If you haven’t already I would calibrate the printer before jumping into parts you intend to use.
1 Like
Yes I am using pla. Thanks ill try that.
If you’re breaking in a new printer or new to 3D printing in general, I recommend working through Teaching Tech’s series of calibration tutorials. You’ll end up with a well tuned printer (extrusion, layer height, temperature, retraction, speed, acceleration, linear advance) and a good understanding of how the various settings can interact.
3 Likes
That picture shows a print that had too much filament smashed into tool small of a space until it jammed up and stopped extruding.
Most likely the nozzle was too close to the print bed when it started. But there may be several other issues as well.
I agree with the getting started videos.
1 Like
There are a lot of isolated articles and videos of tuning a particular aspect of 3D printer behavior. The reason I recommend the Teaching Tech site is that he takes you through them in a logical sequence that minimizes the back-and-forth. He also explains the why, not just the what, behind the settings and approach so you end up with a much better understanding of the interrelationship between settings.
For example, if you begin by tuning your starting Z height, then go back and change extrusion fine tuning, you’ll need to re-tune Z height with the new extrusion settings. It makes more sense to tune extrusion first, then get the correct Z dialed in, but you might not know that when you’re just getting started.
1 Like
If the nozzle is too close to the bed, reducing extrusion to get a good first layer could lead to under-extrusion for the rest of the print. Getting the correct z height before tampering with extrusion levels wouldn’t hurt at least. I think…
2 Likes
@turbinbjorn - to be clear, I meant in the overall initial printer commissioning process, not during a particular print. I remember after building the mechanics of my first printer coming across a number of “getting started” guides that missed one or two early steps and I felt like I was on a merry-go-round re-tuning for a third or fourth time something that was supposed to be a set-and-forget parameter.
The Teaching Tech page is about the most comprehensive guide I’ve seen that hits all the bases in a reasonably logical sequence. In addition, he takes the time to warn you which settings are interrelated, and that you might need to revisit a particular earlier setting if you adjust a later one.
2 Likes
That is an UGLY print…But your skirt looks ok so that suggests its not the Z but an extrusion issue. Other suggestions about temps are a good place to start. Also…
Confirm that your nozzle size matches up with your slicer settings, many have the size engraved on them. They can range in size from .1mm to 1mm. Most printers I’ve used use .4mm.
If the printer has been in use a while you may want to check the nozzle tip as well. If your nozzle rubs the bed it can quickly wear away the nozzle tip which leads to a weird mess kind of like what you are seeing.
1 Like