Yes they are! That is pretty cool.
OK, I’m ready to start cutting tubing. I can hacksaw, bandsaw or used a tubing cutter. It seems the tubing cutter will make a very nice outer edge, and I can bevel the inside to keep the wires from chaffing.
But I have not seen anything on the forum about doing the cutting with a tubing cutter.
Opinions, suggestions, comments?
Mike
The tubing cutter can leave quite a burr on the inside edge of EMT if you get a little too frisky with it but I’m guessing probably not the case with DOM. If I had the material I’d try a cut with the bandsaw and one with the tubing cutter and go with the one I preferred.
And OT but since you’re an instructor, I’m curious if dual is still being given in these pandemic days?
Paul,
I still am instructing. We have very specific protocol’s, approved by the local authorities, at my glider club(s). I wear a mask and we wipe down all the surfaces before and after flight. In my personal glider I fly without the mask.
By the way, I mentioned wanting to use the MPCNC to do glider panels. Here’s a picture of my panel, which was done on my buddy’s CNC:
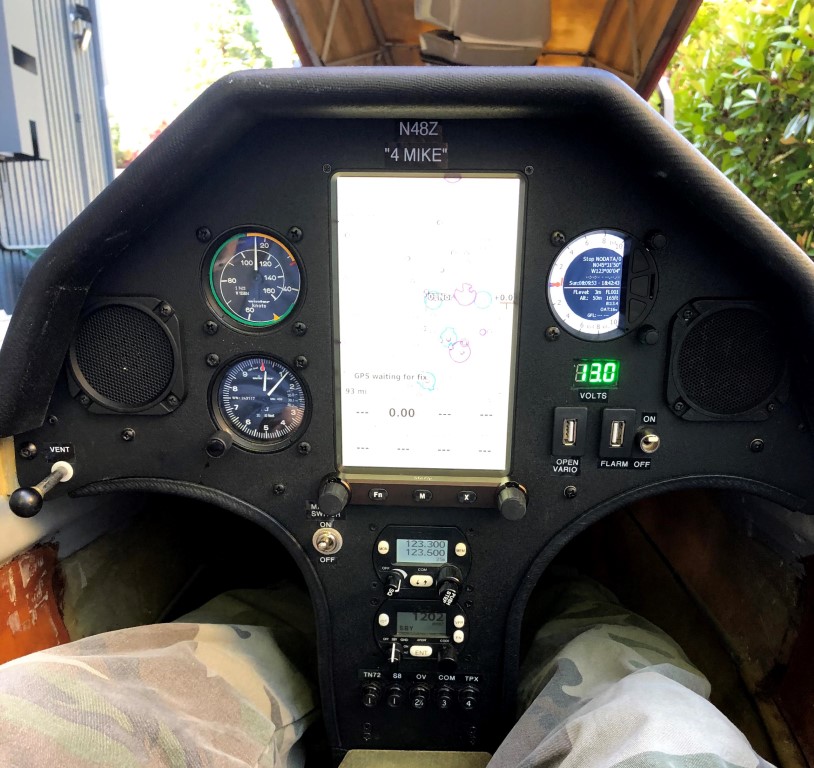
If you want to learn more about my panel we can start a thread on the Off-Topic sub-forum.
Mike
4 Likes
Thanks! I like the panel. I’ve been away from things so long I may not understand everything about it but if yo have interest and start an OT thread I’d definitely read it.
I’ve only had some 2-33 time and a flight in a Blanik years ago but enjoyed it. Sadly I don’t believe there any glider ops within a reasonable distance for me. I have a long lapsed PPL, I’d hoped to find a partner to buy an LSA with but no joy. Haven’t worked up the cojones (yet) to throw caution to the wind and try to do it on my own but I’ve had an interest in aviation for 60+ years and likely always will and will surely follow any projects you get involved with.
Paul,
OK I’ll start an OT thread.
Mike
That’s cool looking. I want one, but just to sit at in my office and play video games on.
2 Likes
Get a deburring tool for the inside of the conduit or tubing. You can use a file for the outside edges if you want also as the metal tends to extrude up a bit with a cutter, or get the outside deburring tool also for pipe.
I have one of those deburring tools and had one I got from HD meant to be used in a drill and actually found it quicker/easier to do the ID with a rat tail file.
You will only pry my Milwaukee cordless 12v mini bandsaw from my cold, dead hands. Indispensable. I sometimes also do not use it to cut animal bones into smaller chunks for demi glace. That would be a terrible idea and way too convenient as a kitchen tool.
1 Like
Randy,
Nice to hear from you. I still remember the flight to SpaceX.
Where did the Cirrus fly off to?
All,
A quick update to the Primo build:
The garage is clean (enough)!

And the workbench is built:
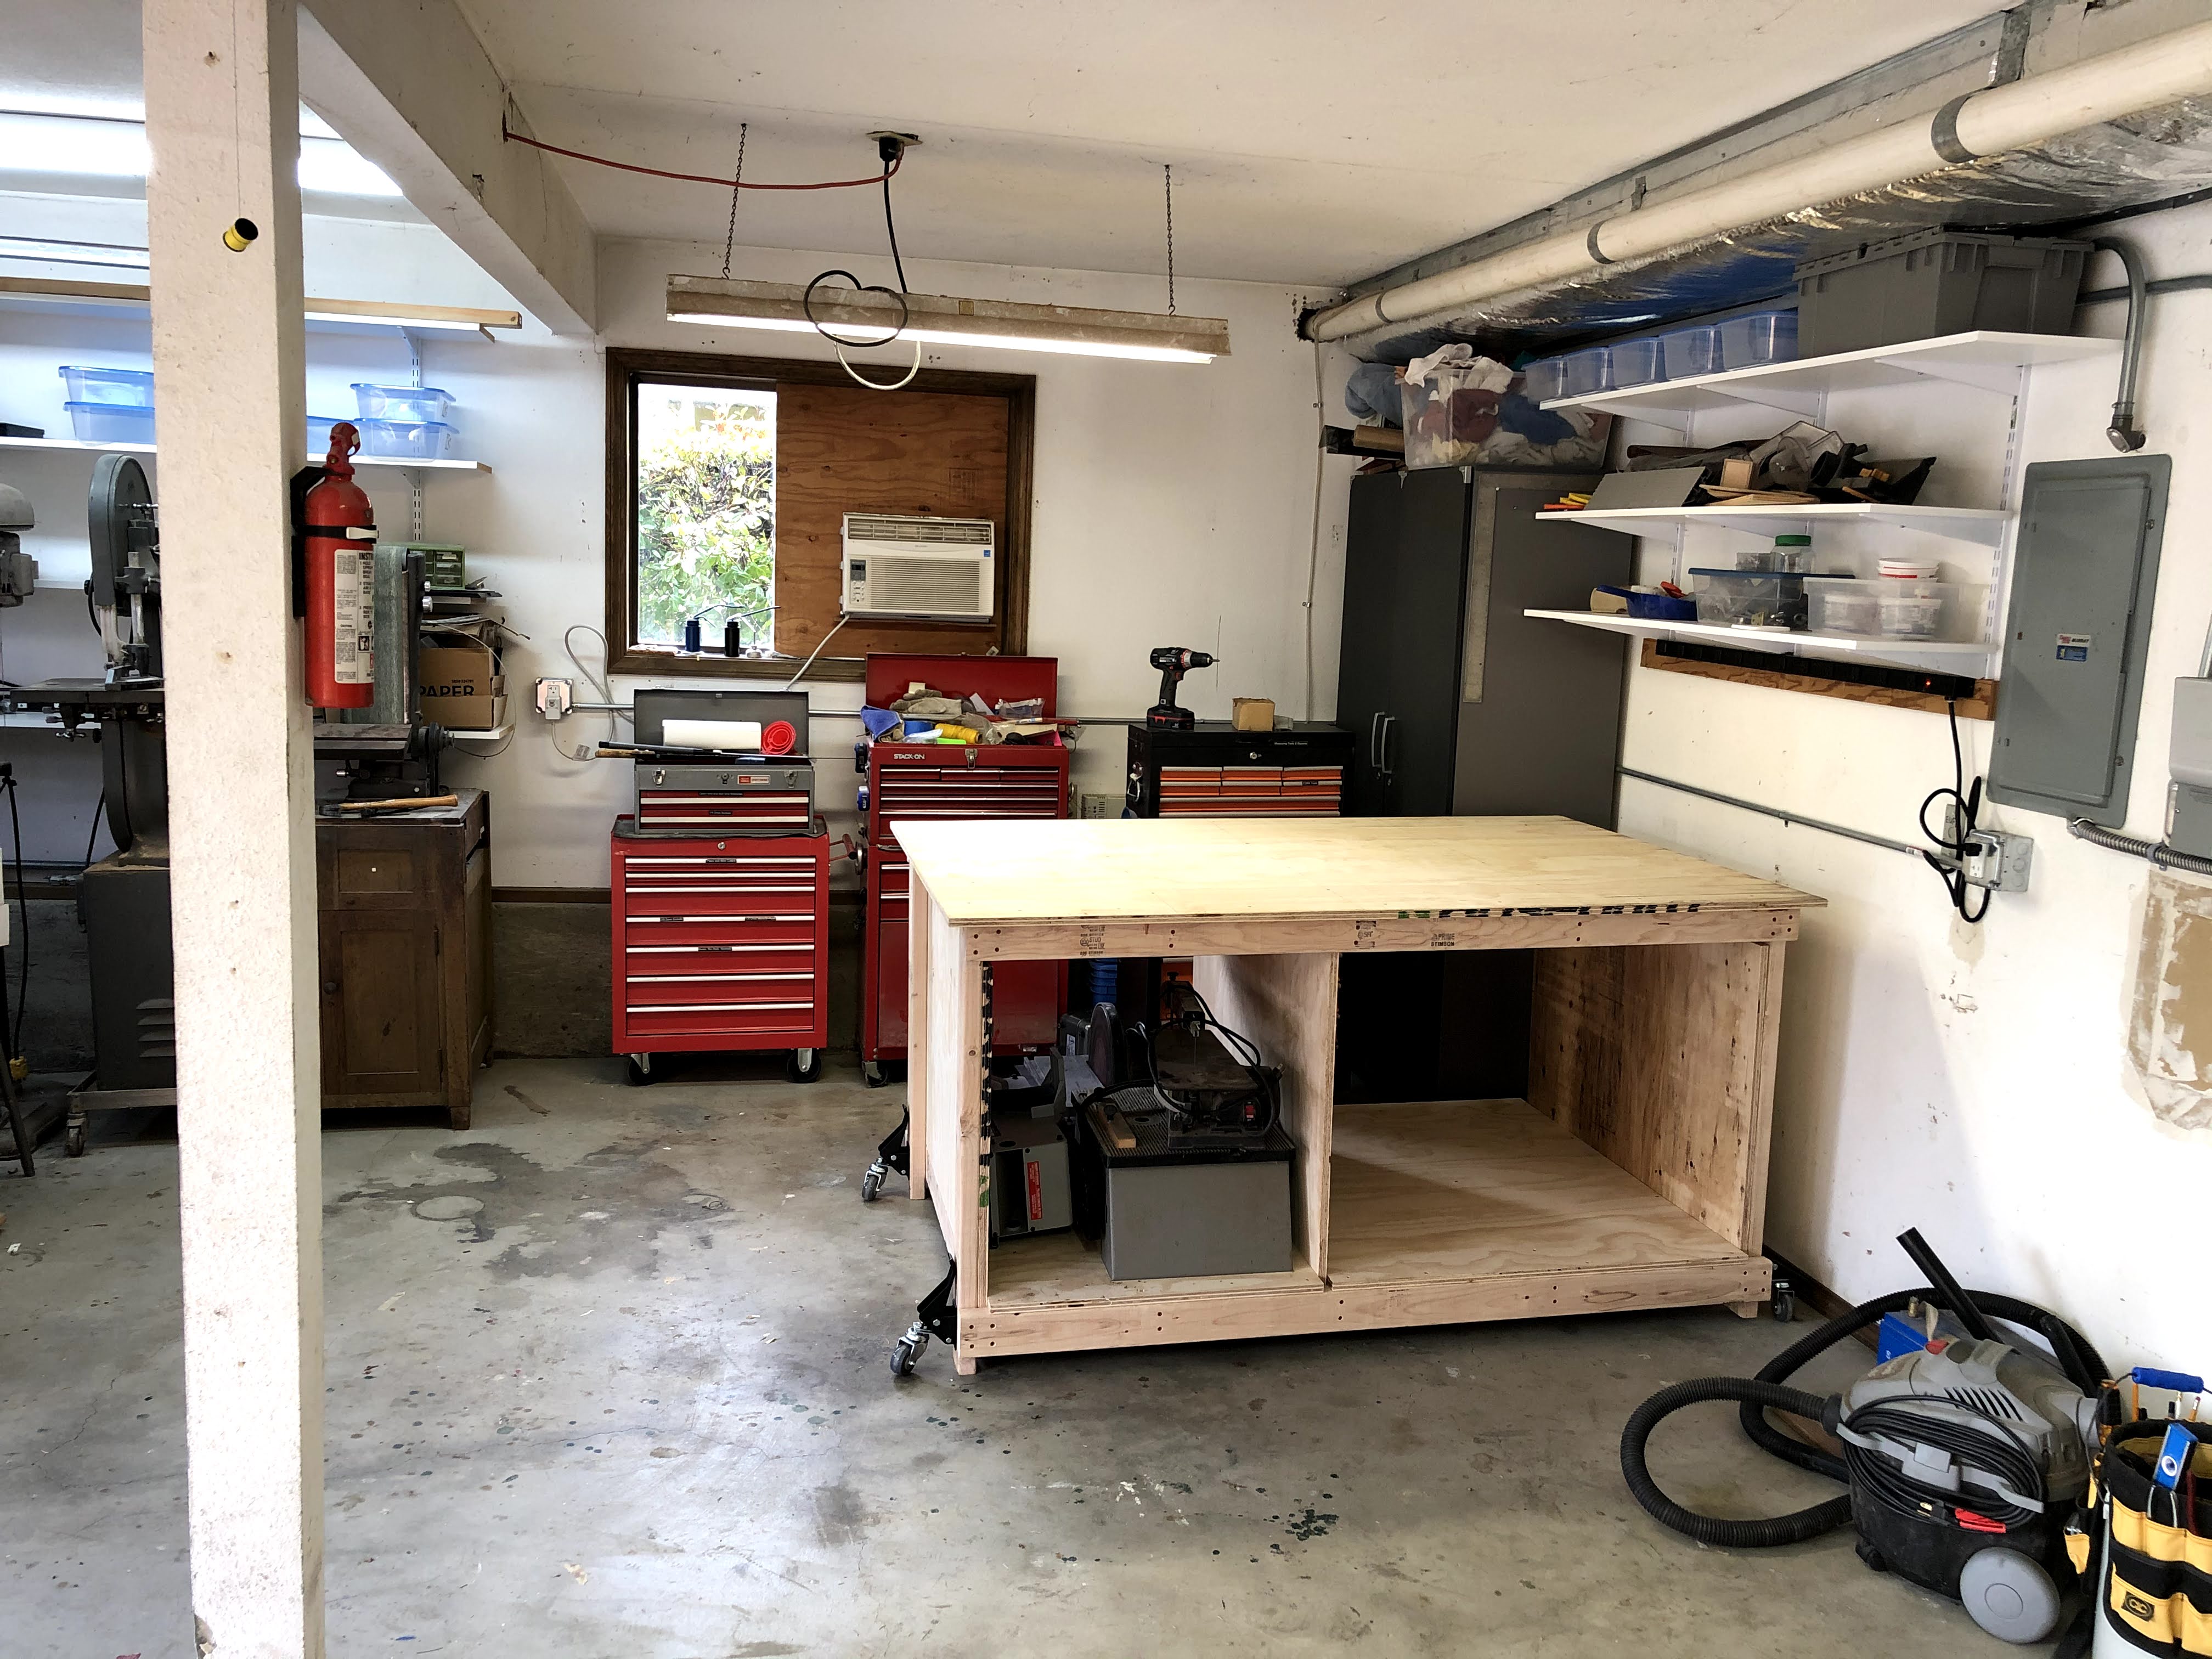
And the process of putting things in the “right” place in the shop continues. Most of what you see has been moved at least once! and you can see from the second picture that I have begun to install shelving on various walls.
I had an electrician come in and add two new 20A circuits so I have POWER!!
Today my brother-in-law and I hashed out the construction of the table for the Primo installation and I think by the end of the week I’ll actually start putting parts on the table.
I’ll post the pictures of the table when we get it done, probably on Wednesday.
Mike
4 Likes
Looking good!
Glad to see someone else in Hillsboro.
I’ll be sure to check back in and see how the build goes!
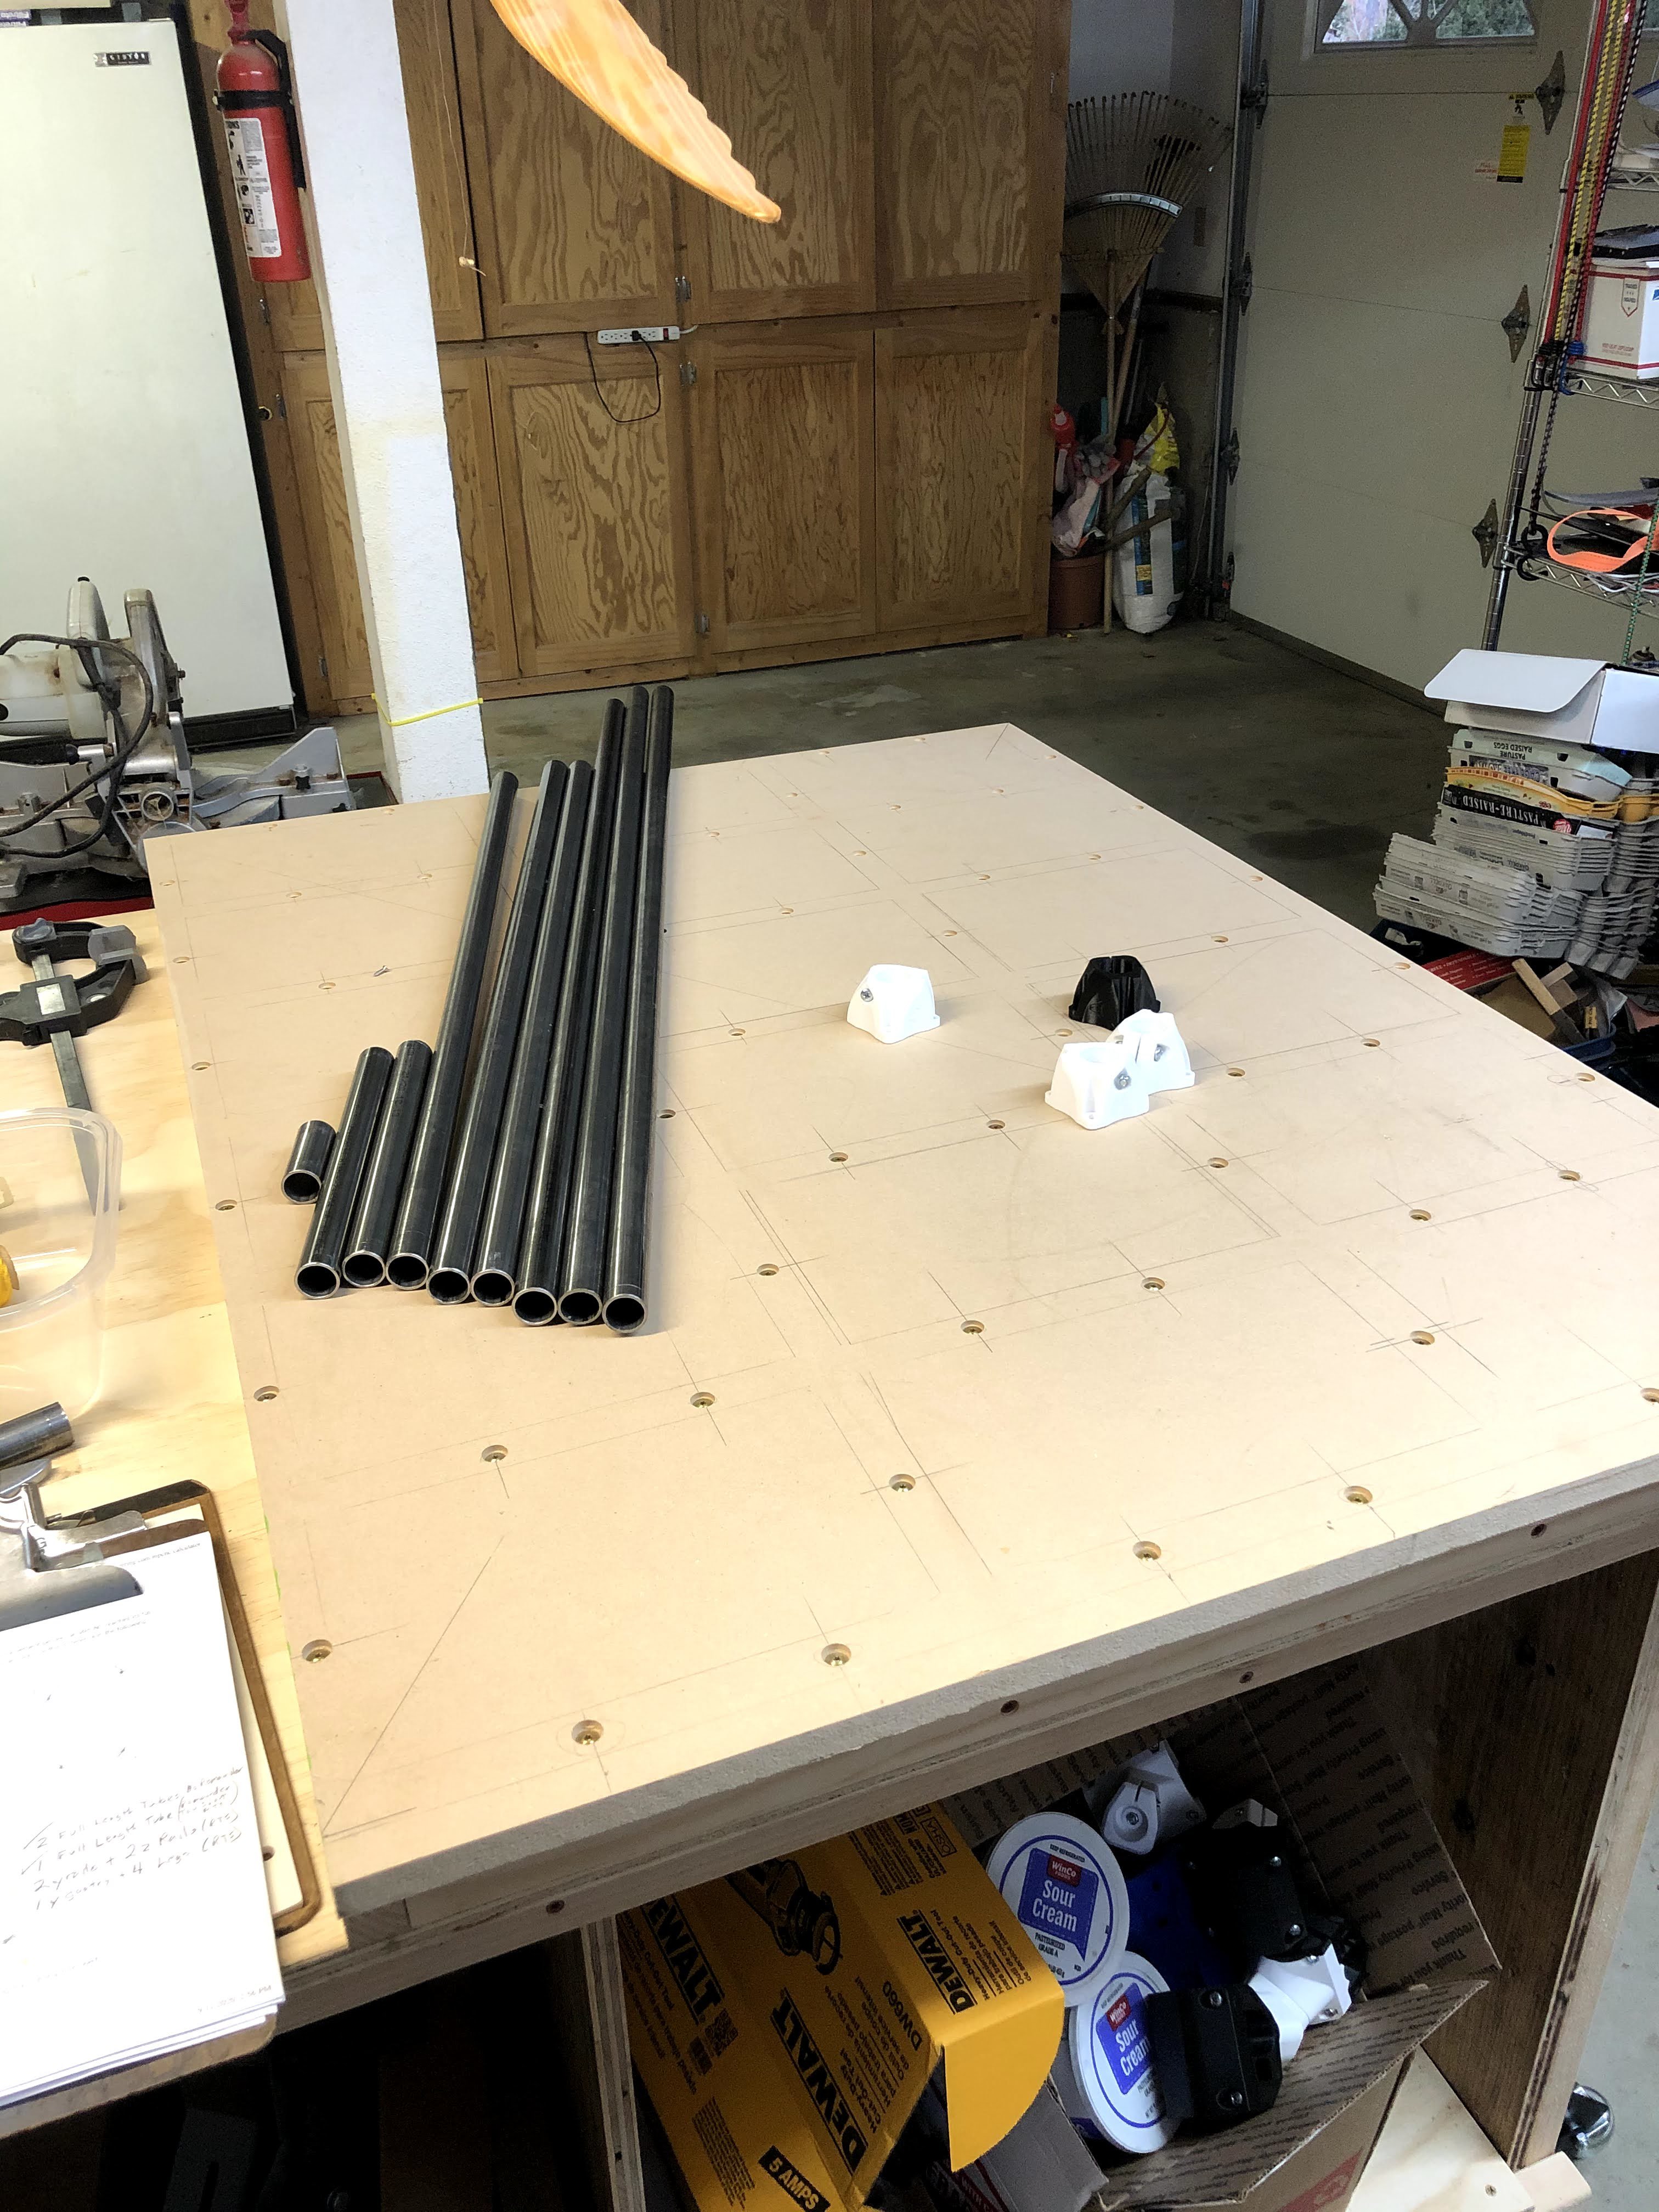
Lots of progress today! Milled, dimensioned table lumber.
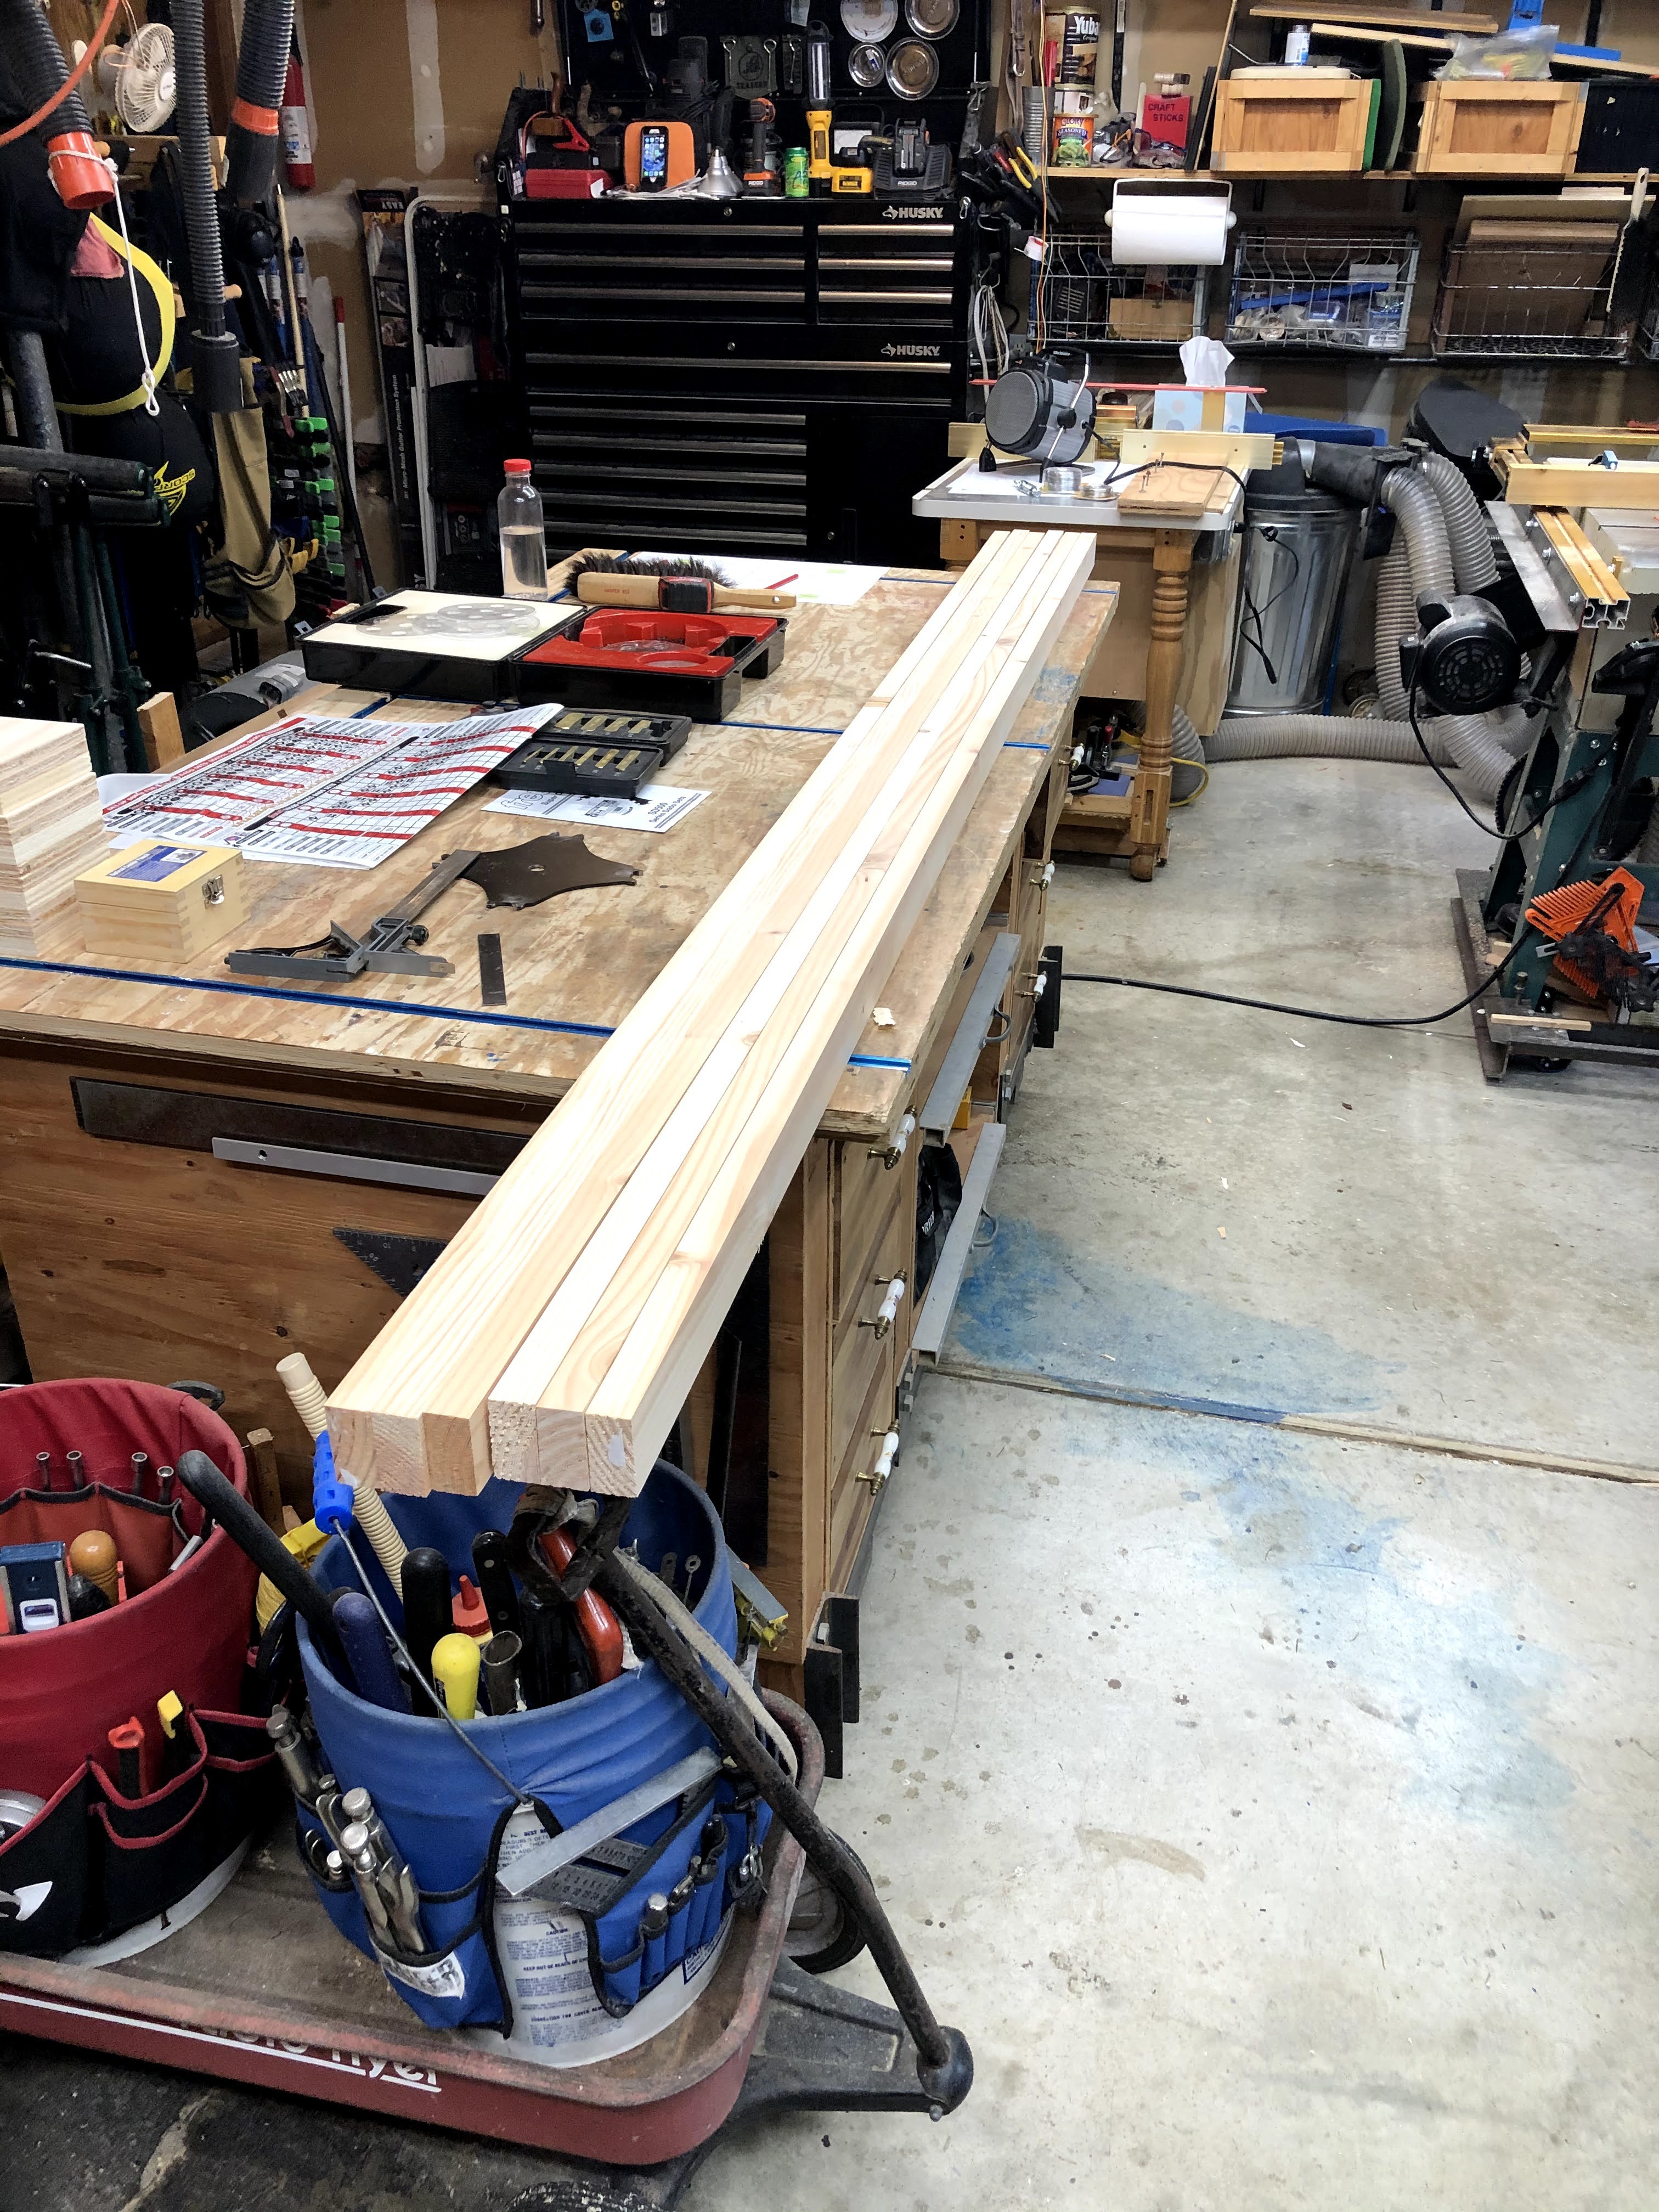
Parts all cut and dry fitted:

Finished router surface (bottom) with mounting blocks for the Primo leg pieces:
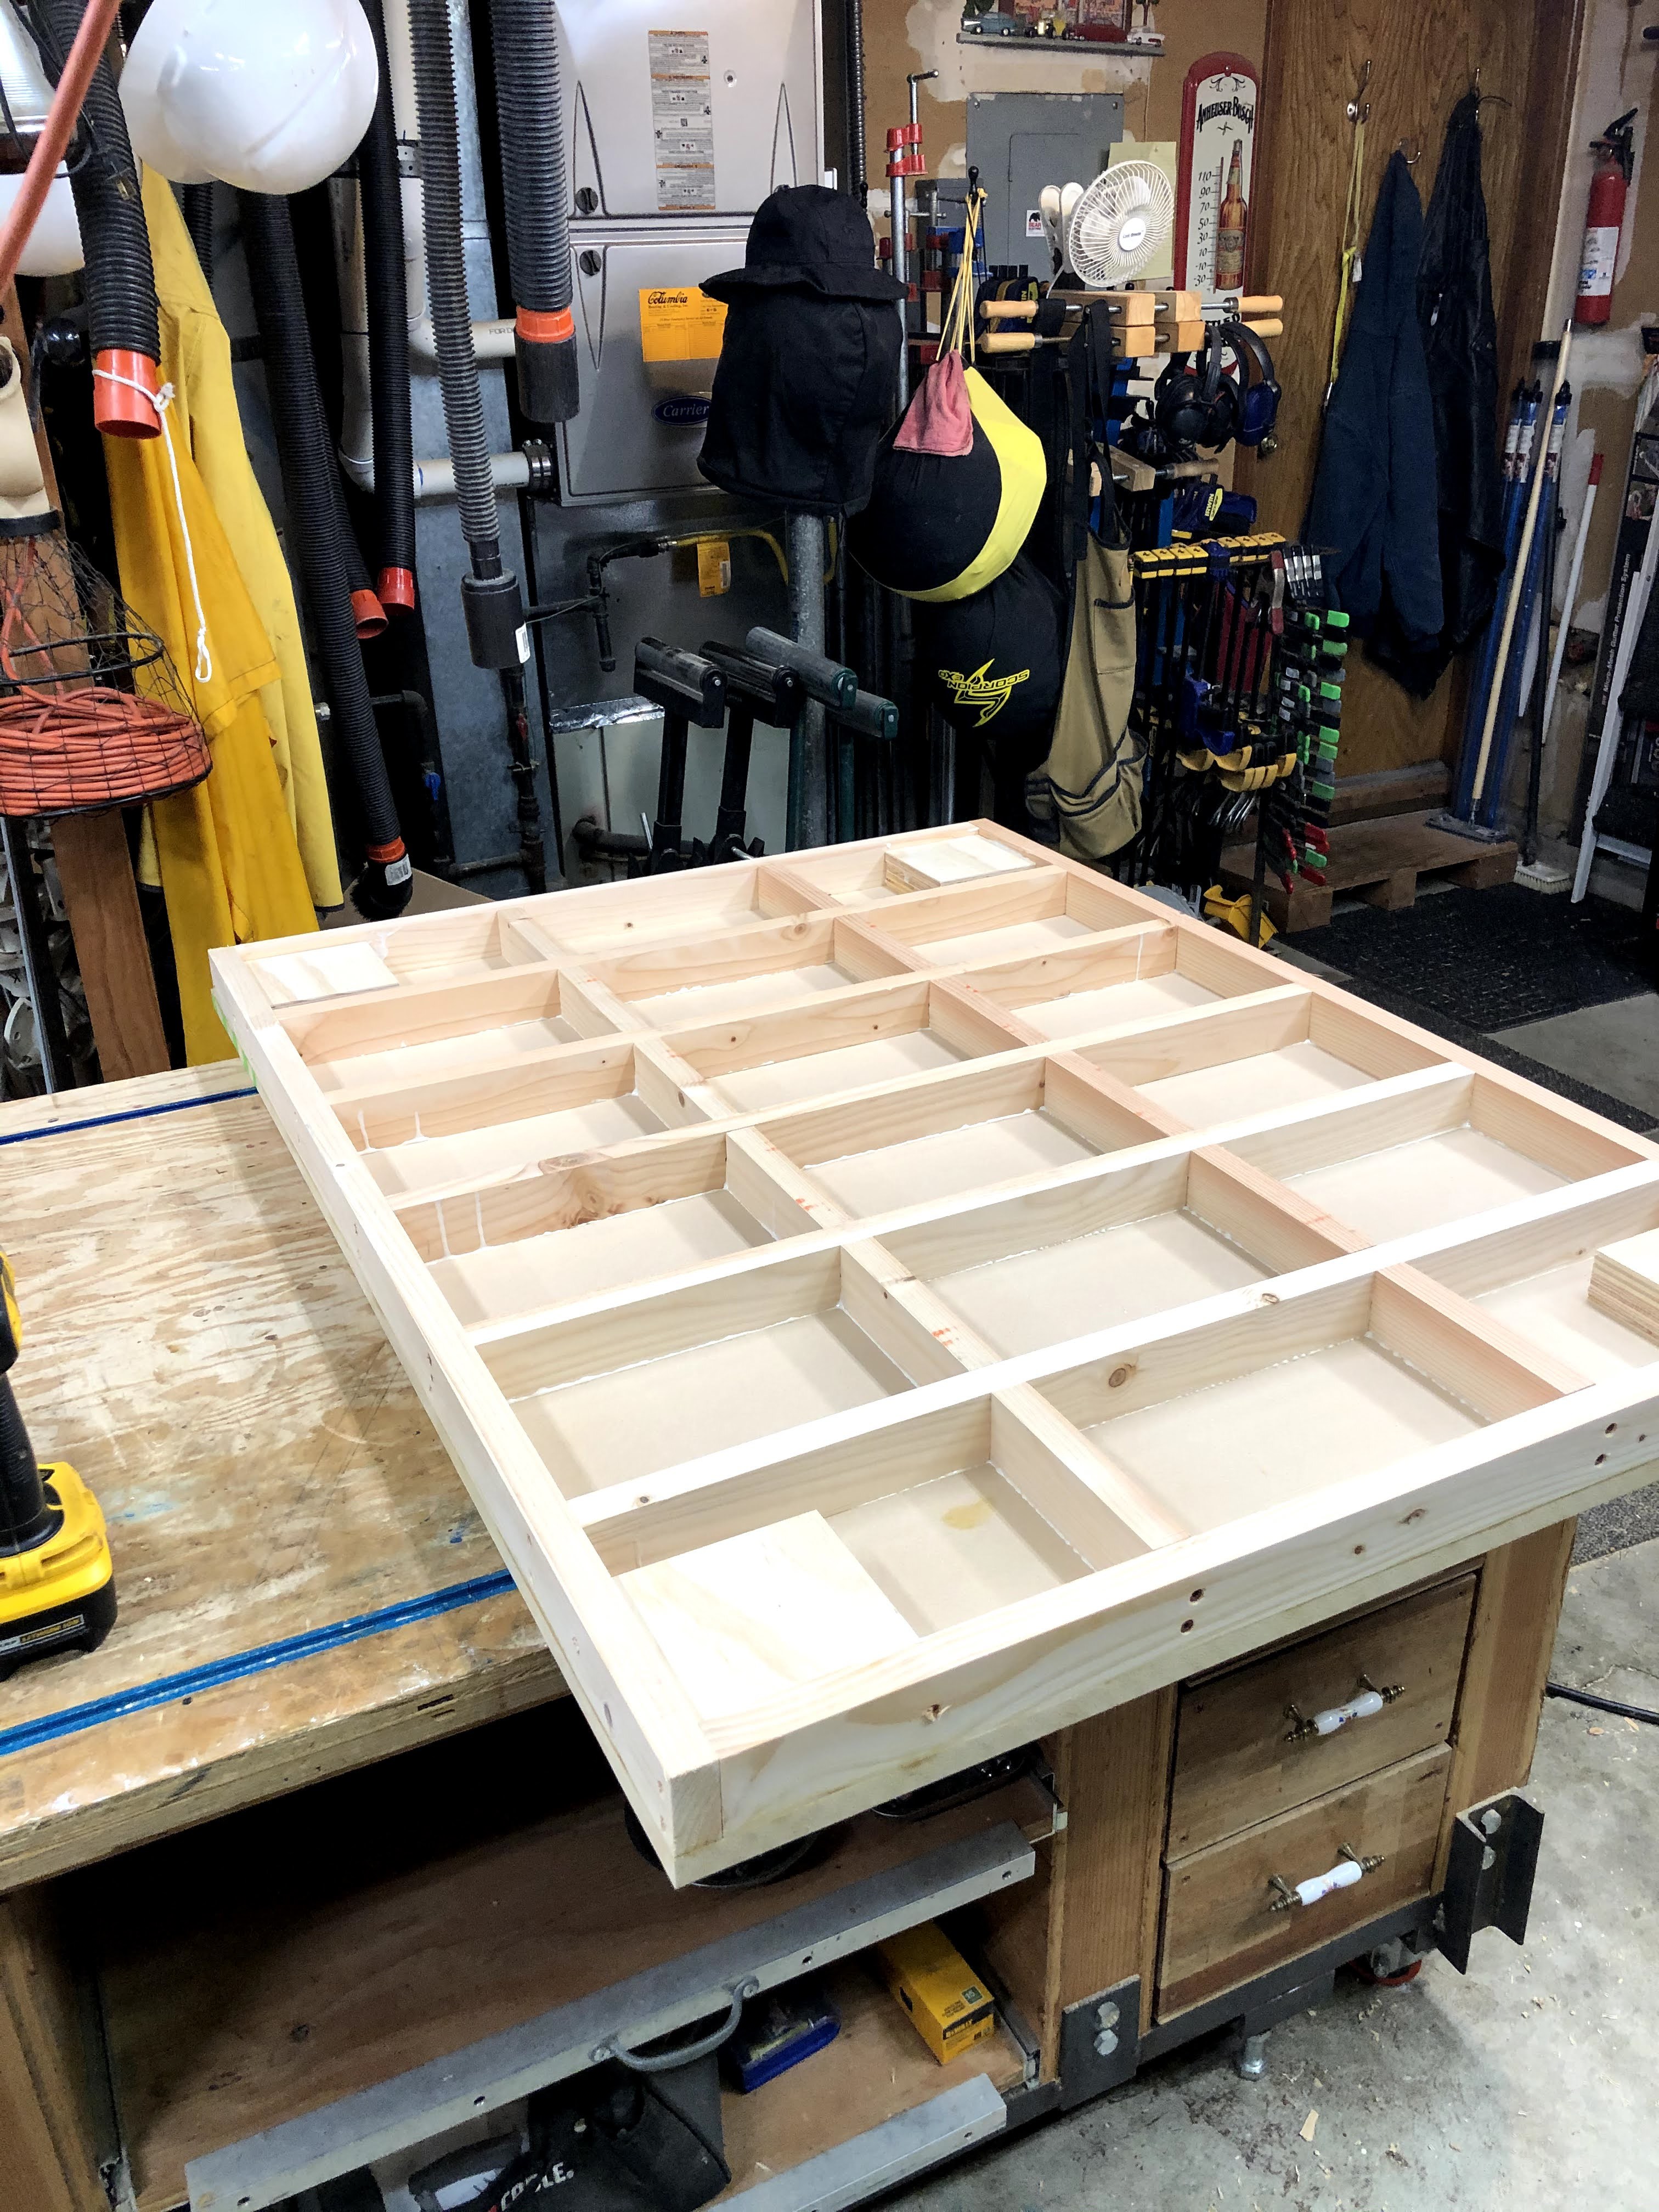
(Don’t you just love my brother-in-law’s shop!) I’m very fortunate to have a B-i-L with both all the tools I don’t have, and the interest and skill to help me get my CNC built.
So this “platform” will be placed on my workbench when I want to do some routing. I sispect that eventually it will have it’s own table base, but for the moment I’m trying to conserve floor space in the shop.
The finished top is 36x48 inches. When we finished the build we measured the two diagonals: they are equal to within less that 1/64 of an inch. Is that enough precision for the table? 
Mike
3 Likes
Here’s today’s progress:
At the start:
At the end of the day (worn out):

I discovered that I must have misplaced a bearing, I need one more to complete the Z-axis. I can’t figure out where it went.
I also discovered that I need to print a Dewalt 660 mount; I originally intended to use a 55mm spindle from CN but it kept being delayed, so I cancelled it. I havd already bought the mount from Ryan, but I guess it’s going to be unused. I’m firing up my little Monoprice Mini to print the mounts.
I should sleep well tonight!
Mike
4 Likes
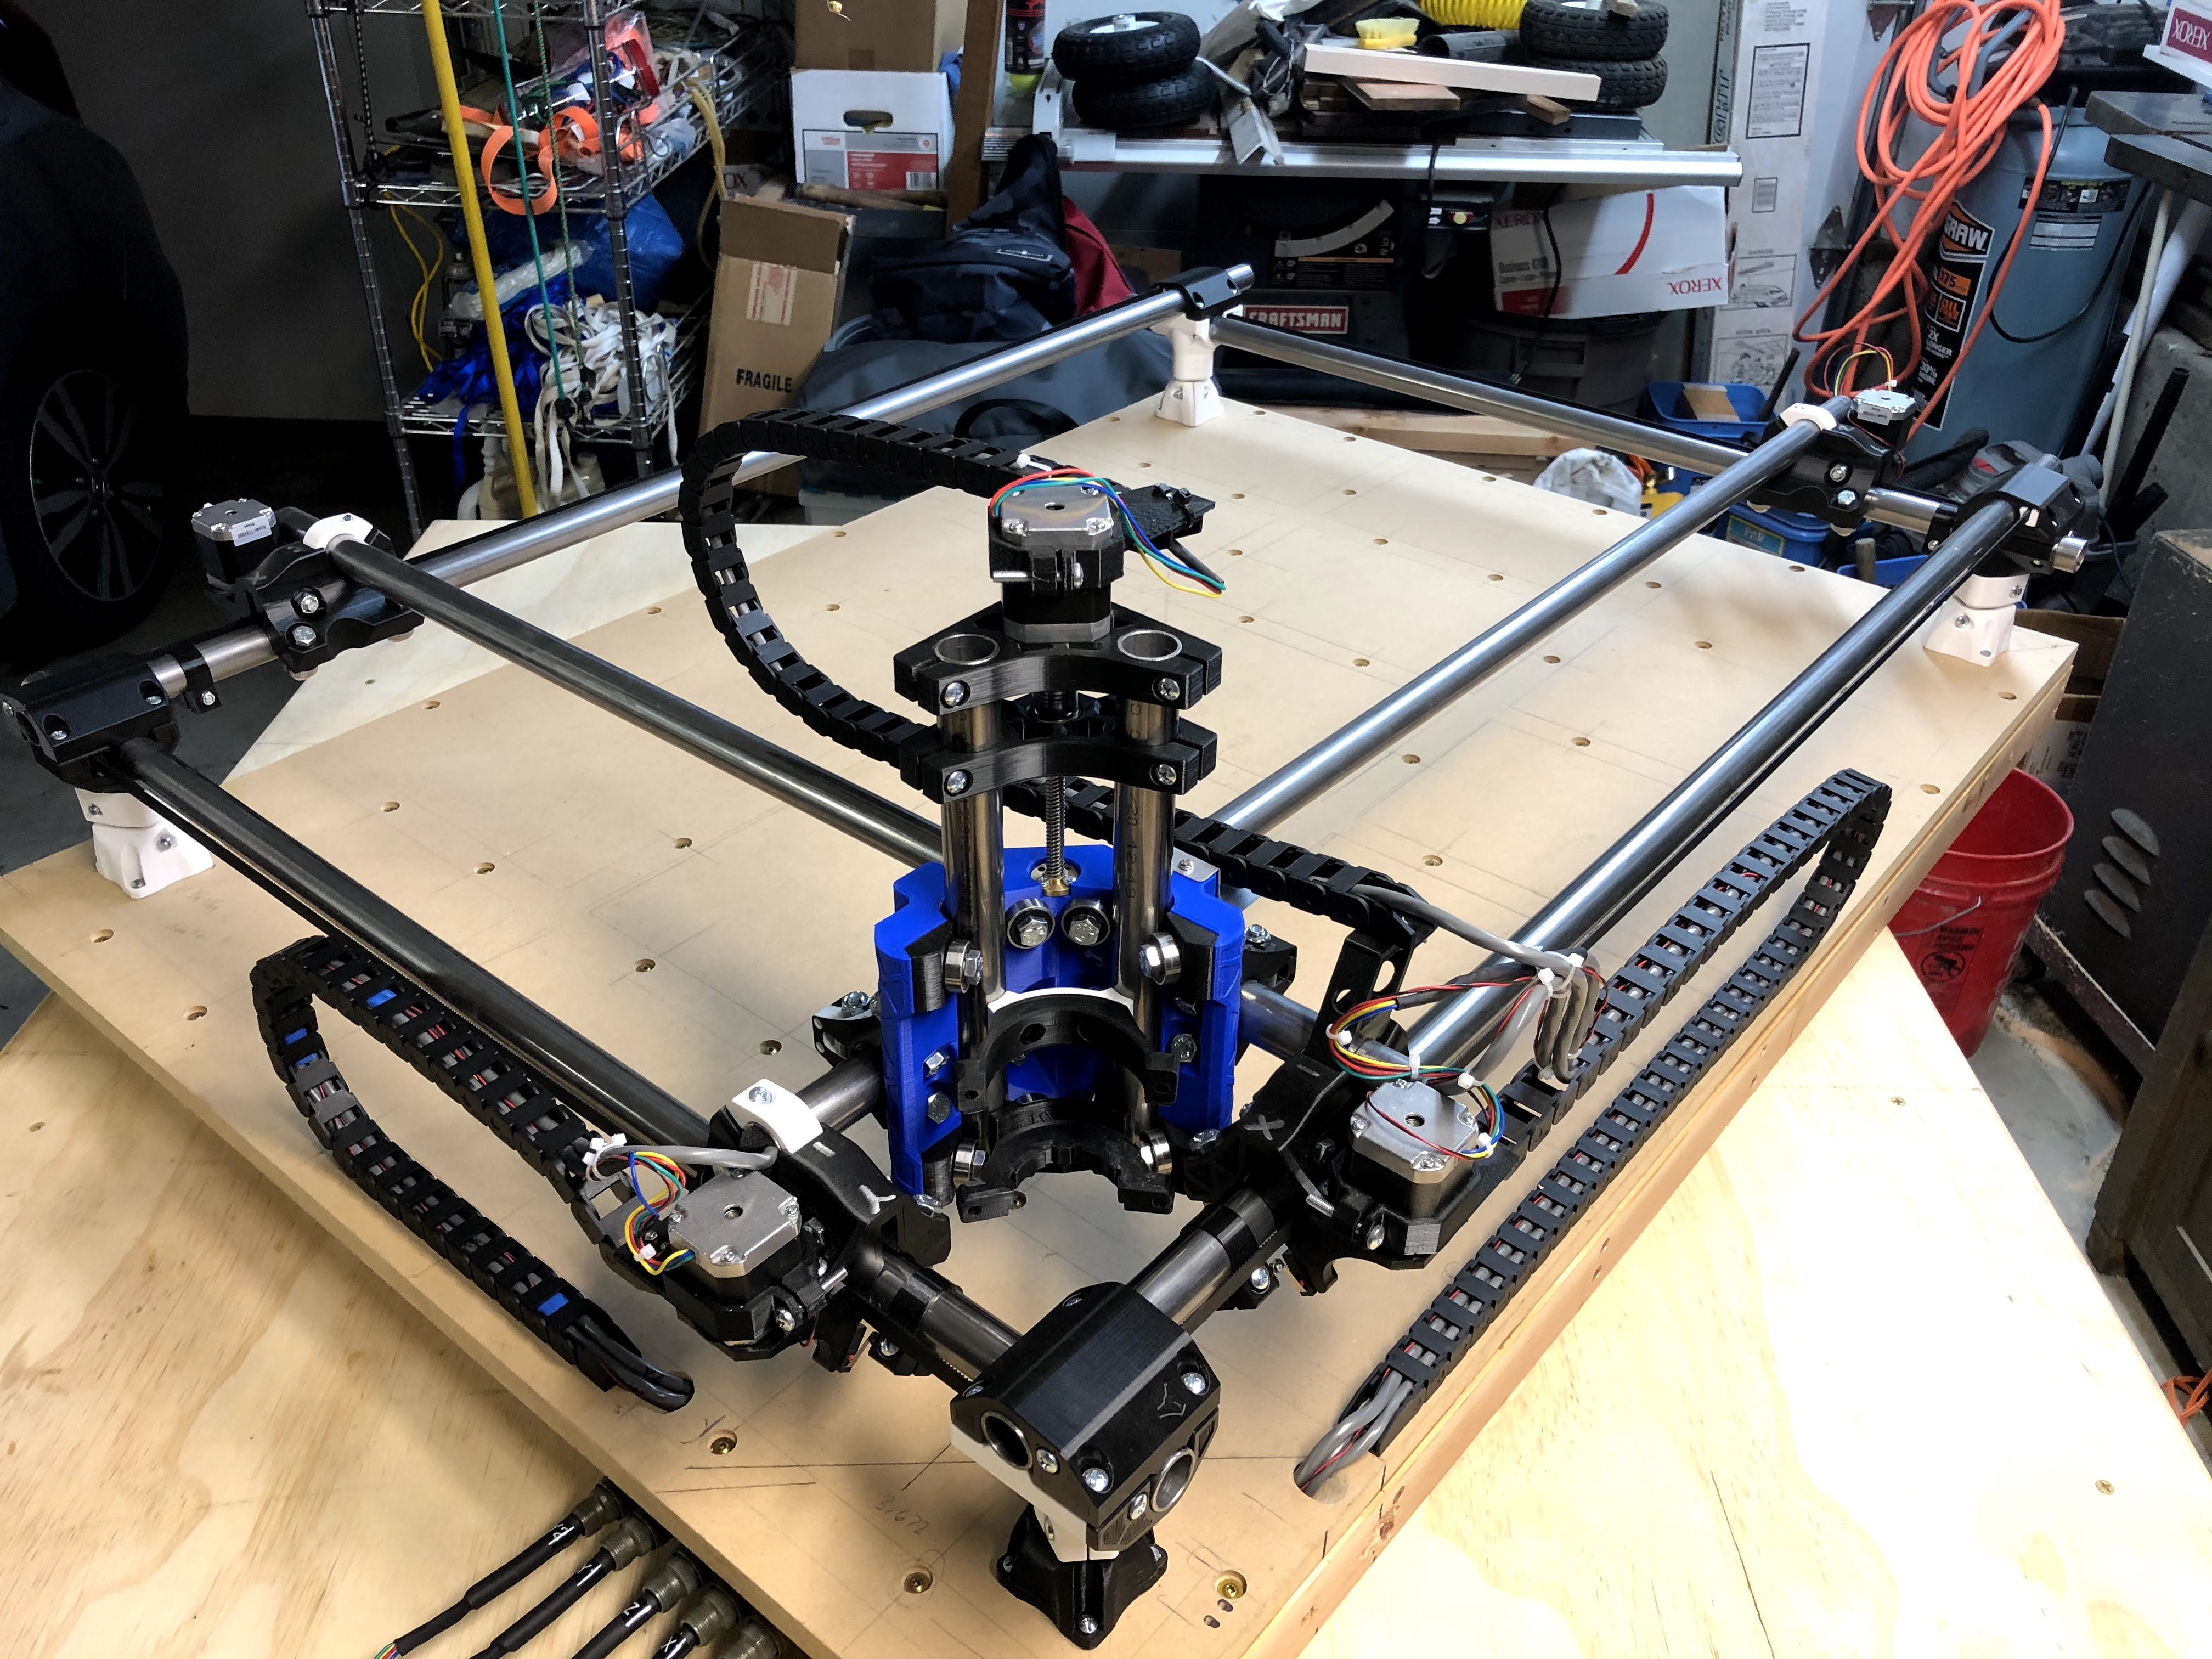
Getting to the exciting part!
It’s ALIVE!

Here is a picture of the completed drawing. I think it looks pretty good.

Of course that’s with just initially connecting all the wiring, just to see it move. Now comes the hard part of getting the wiring loom together an building a “real” system.
Mike
3 Likes
All,
I’ve finally gotten the wiring cleanup done and am ready to make chips!
All the wiring routes to the origin corner, and then is collected in the hollow space under the table.
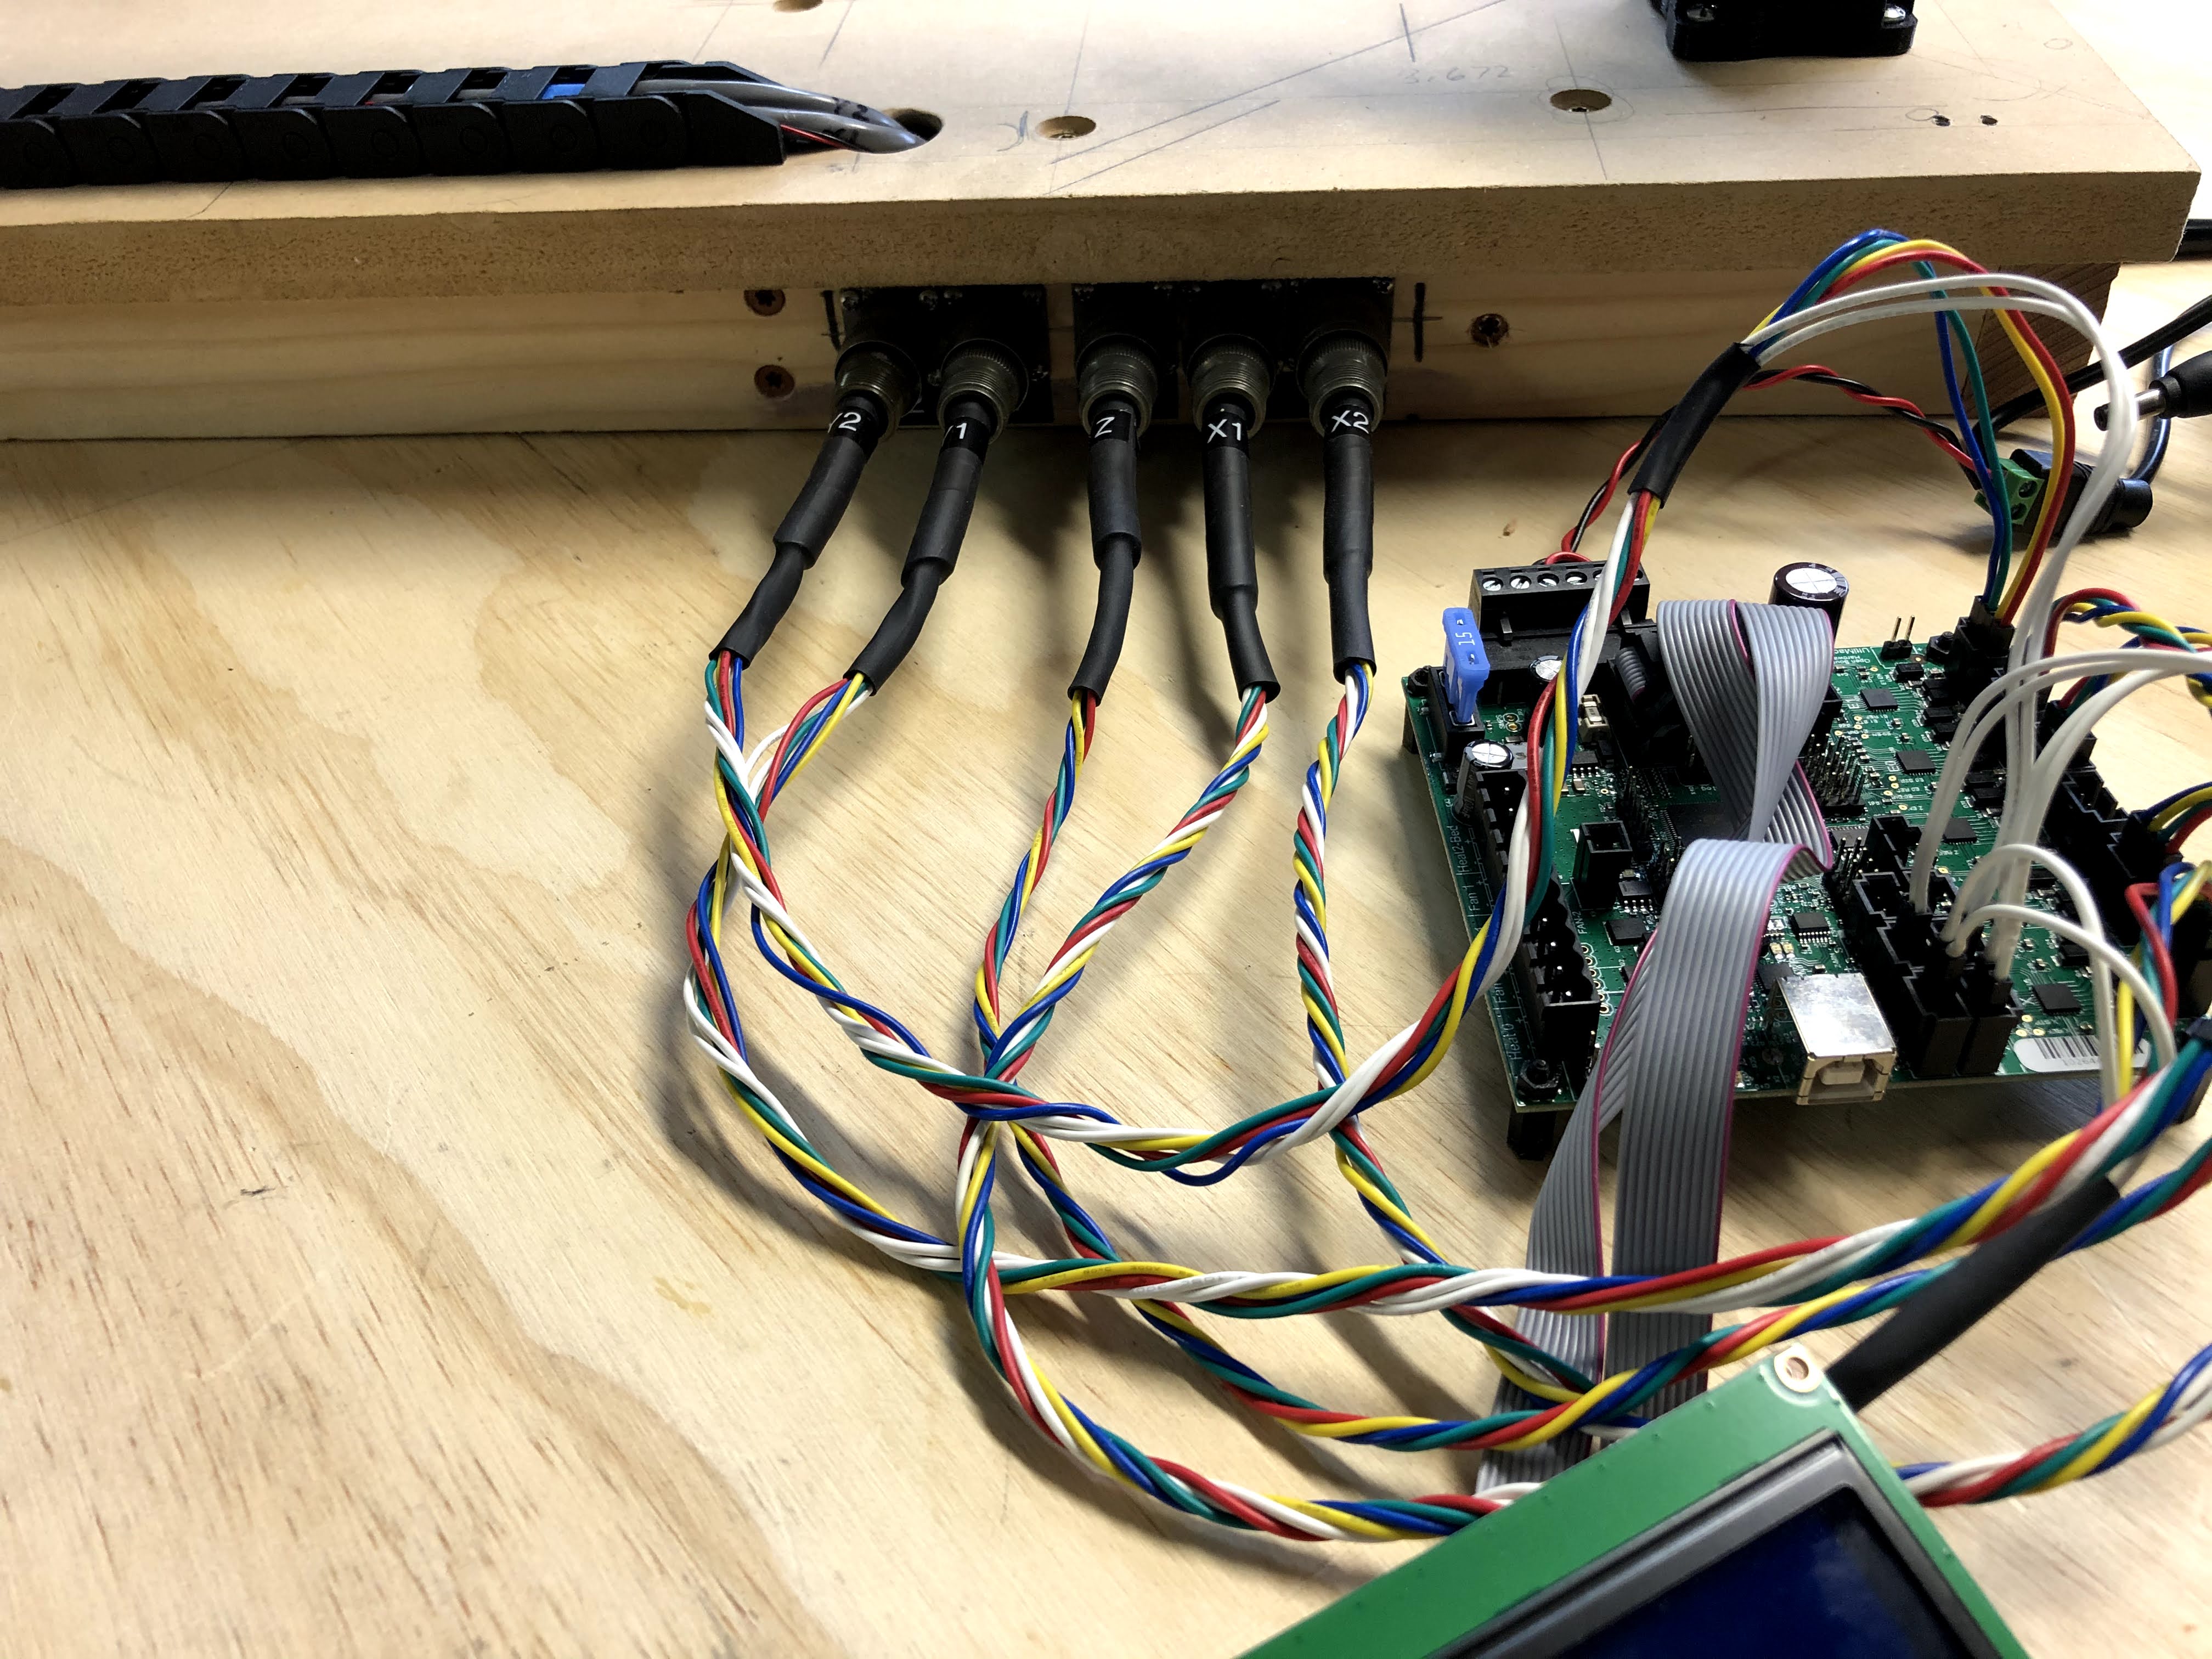
From there it is connected using Mil-Spec 6 pin connectors to the cables going to the Rambo 1.4.
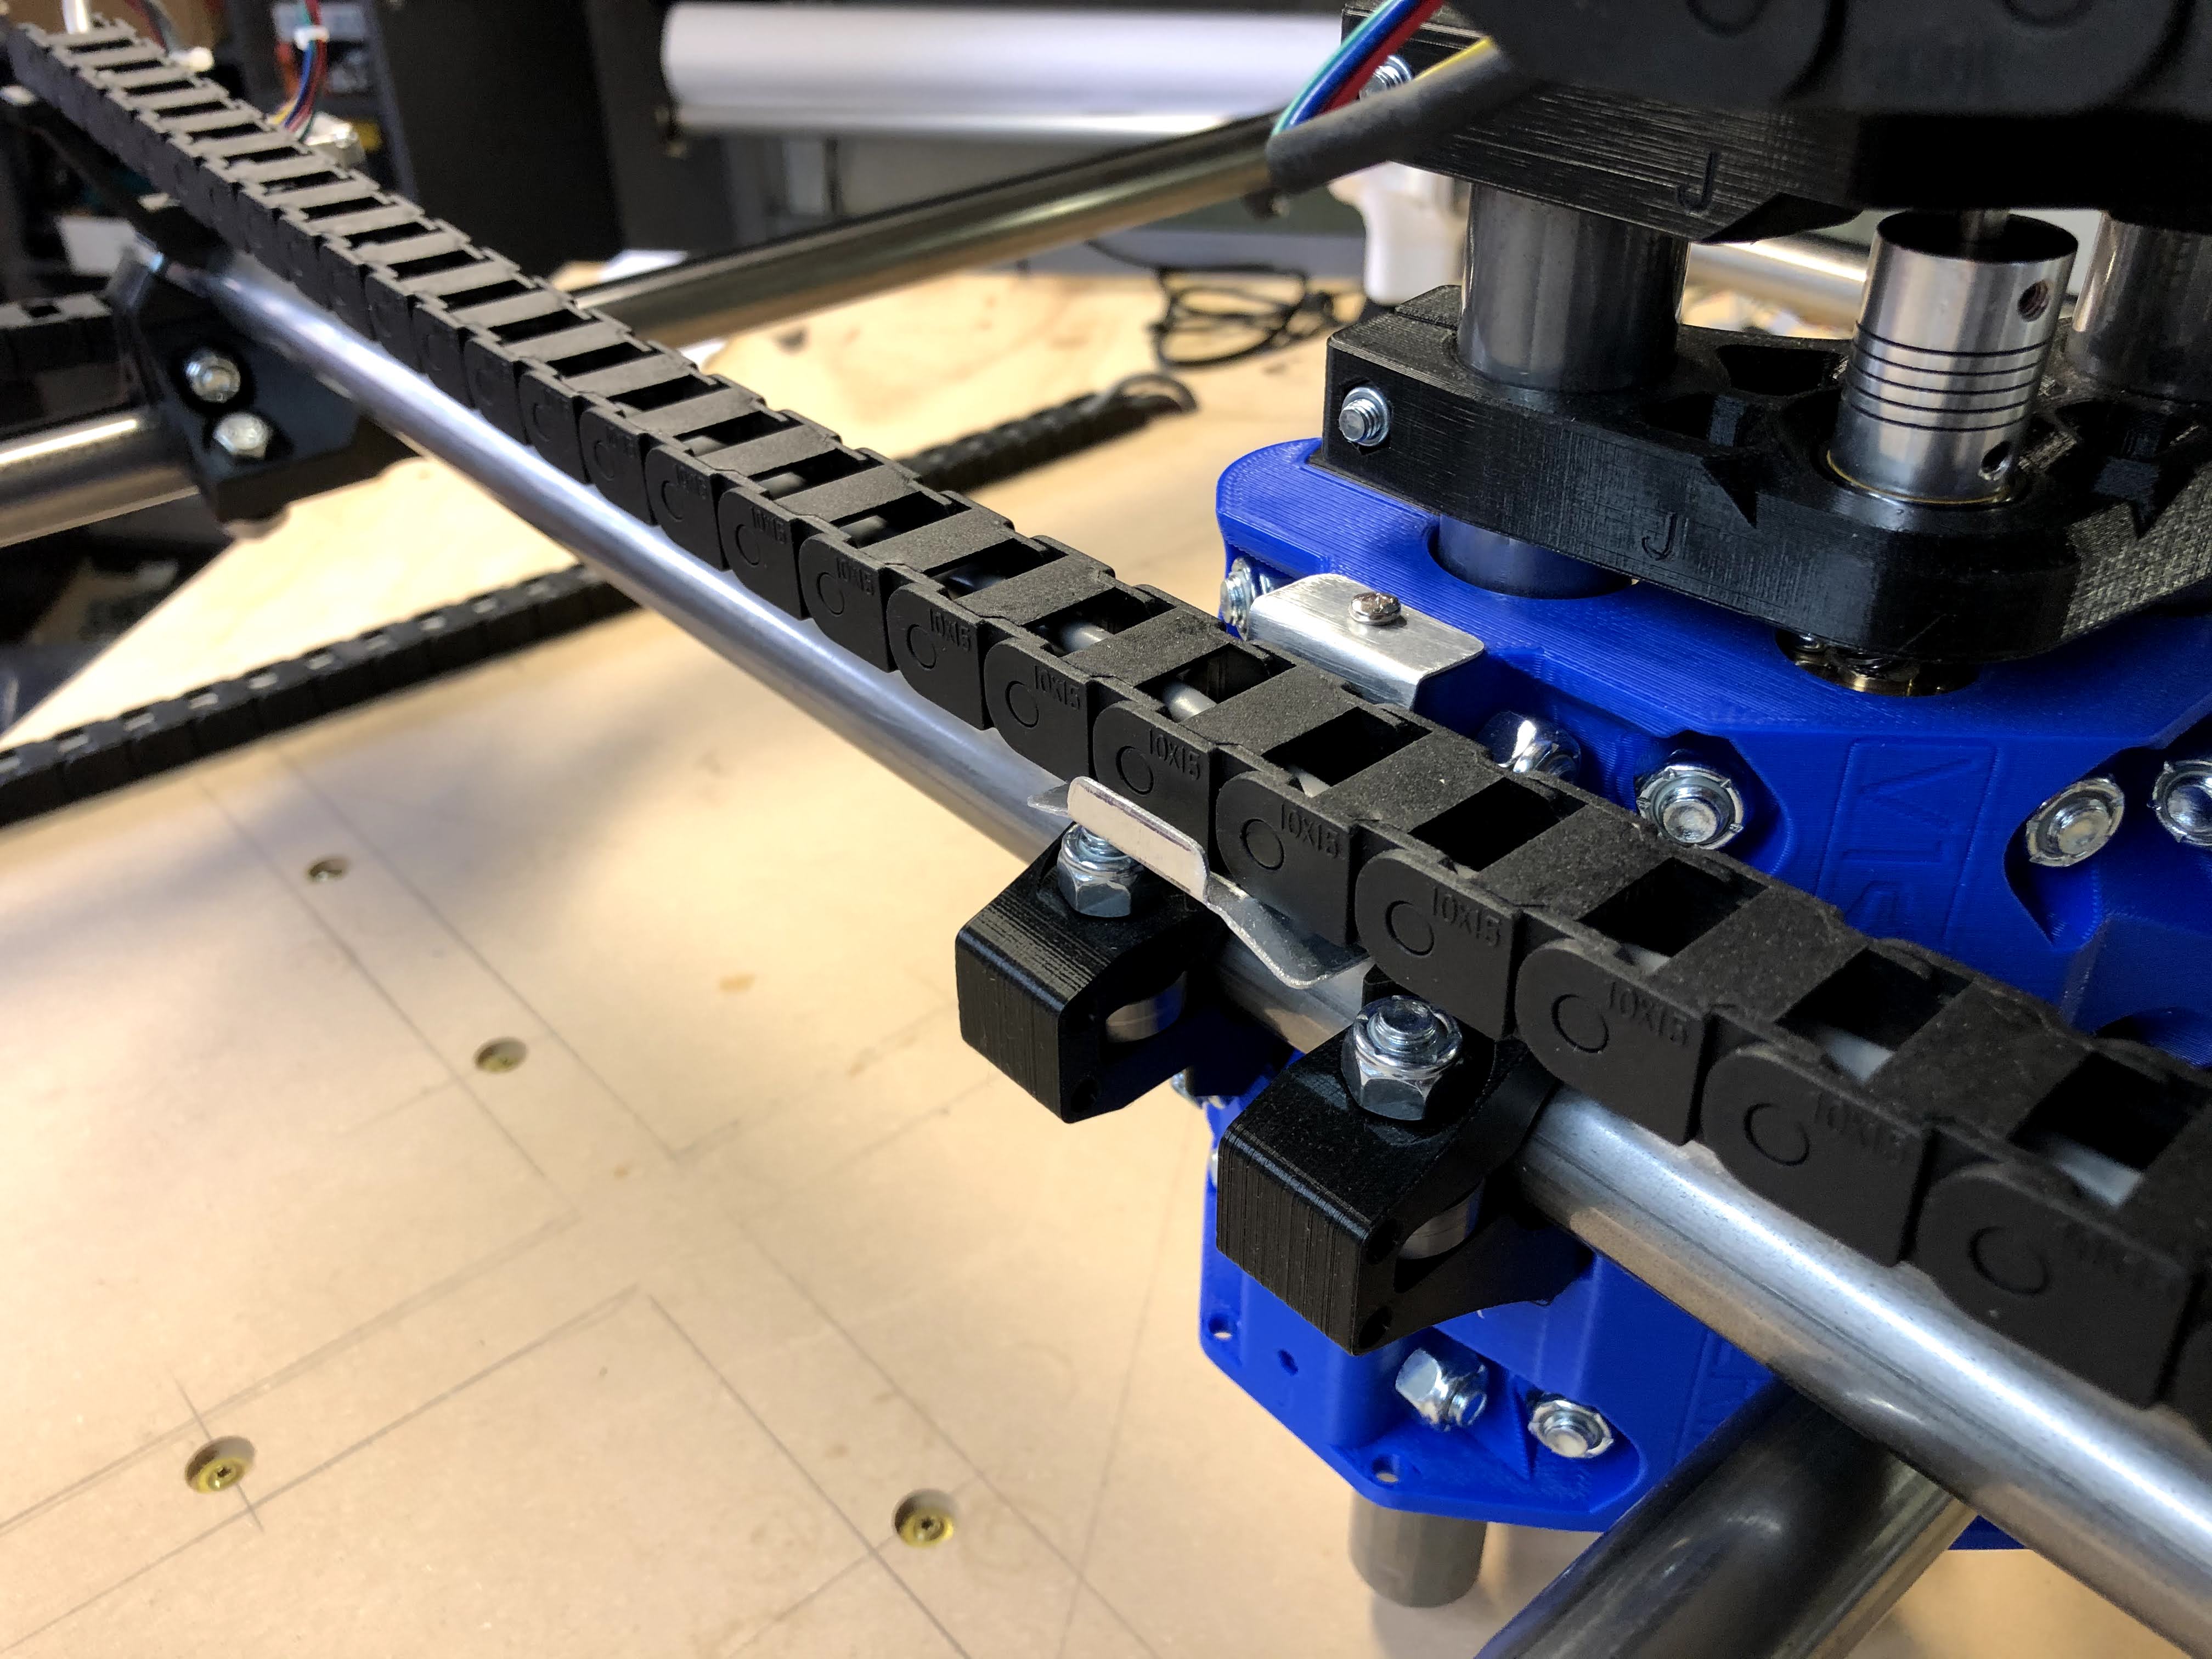
Rather than put a whole aluminum channel on the gantry, I made a little “lifter” that picks up the cable chain before it hits anything.
Using the screen controller I ran each axis out 300mm and measured the length with a steel rule: it looks like each axis is about 0.5mm short. I guess that’s not too bad, but you guys can tell me if that is something I need to correct.
I spend a while today getting more familiar with EstlCAM and did a bunch of “air milling” with the pen holder installed. Tomorrow I hope to really make some dust, and cut the parts for the upgraded MP3D printer.
I have a few questions about that, but I’ll post in the appropriate sub forum.
Mike
5 Likes
Hooray, I’ve been making dust all evening long.
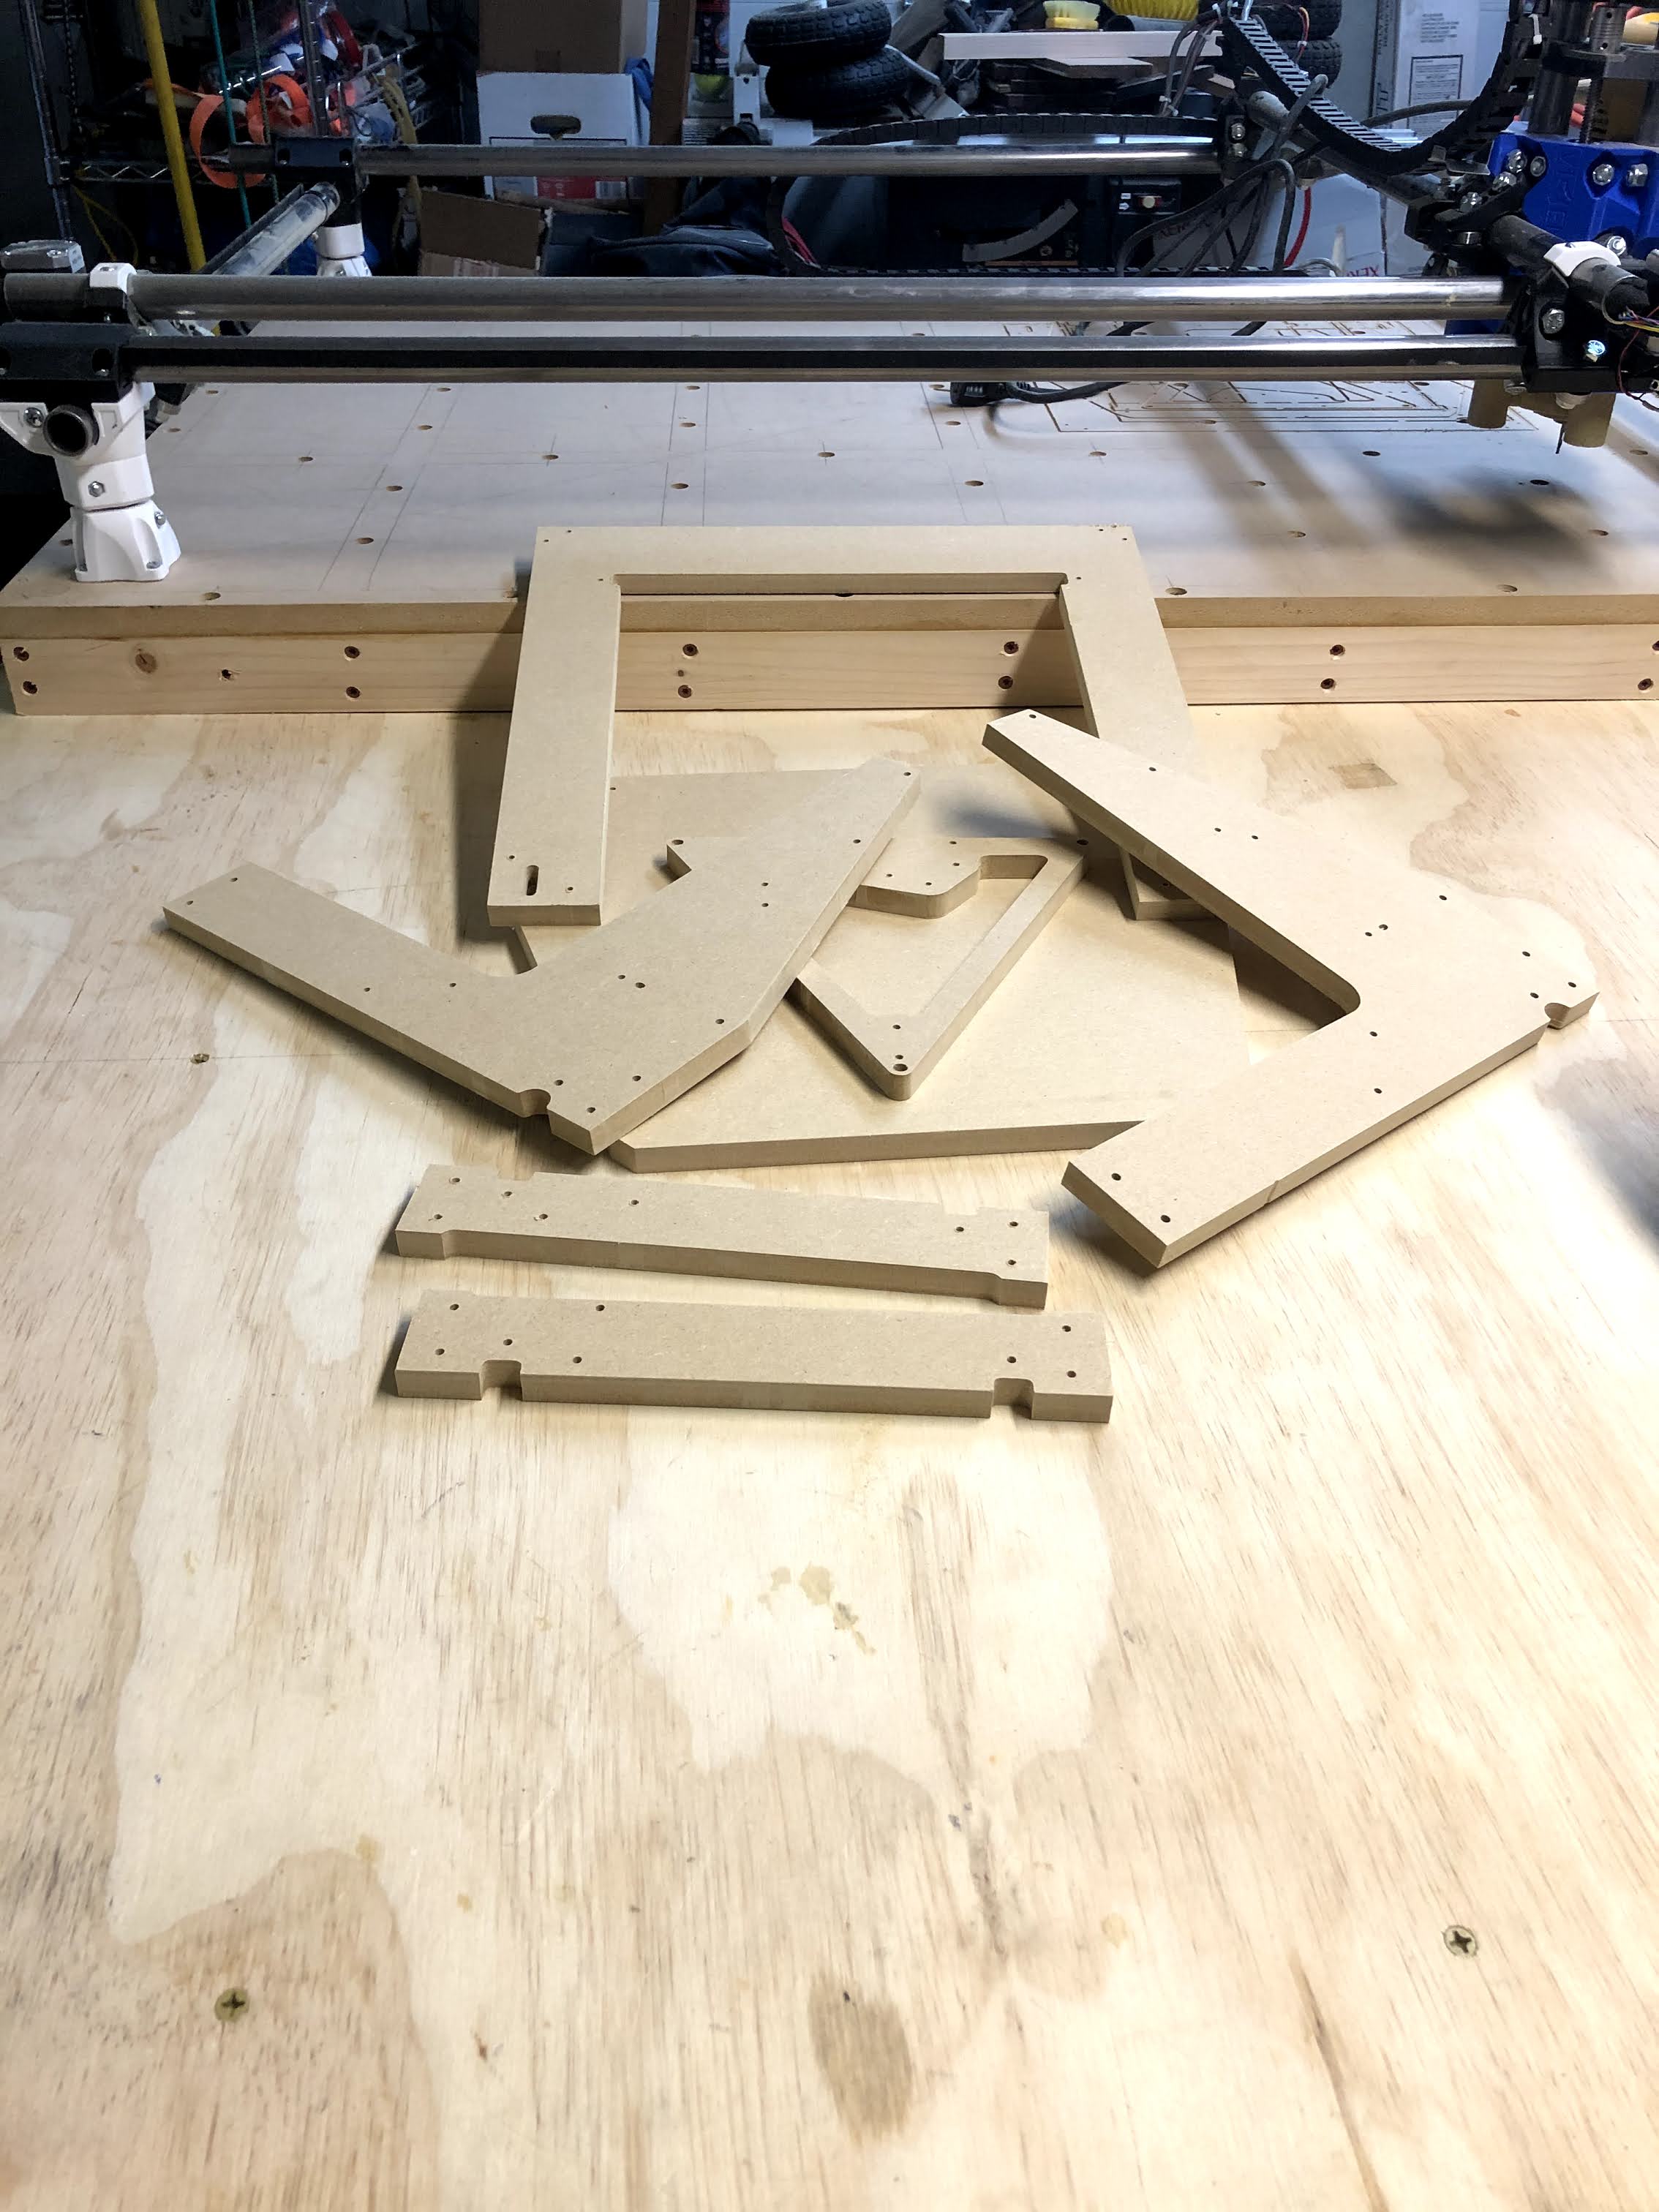
First project is a set of flat parts for a MP3D V2. All done!
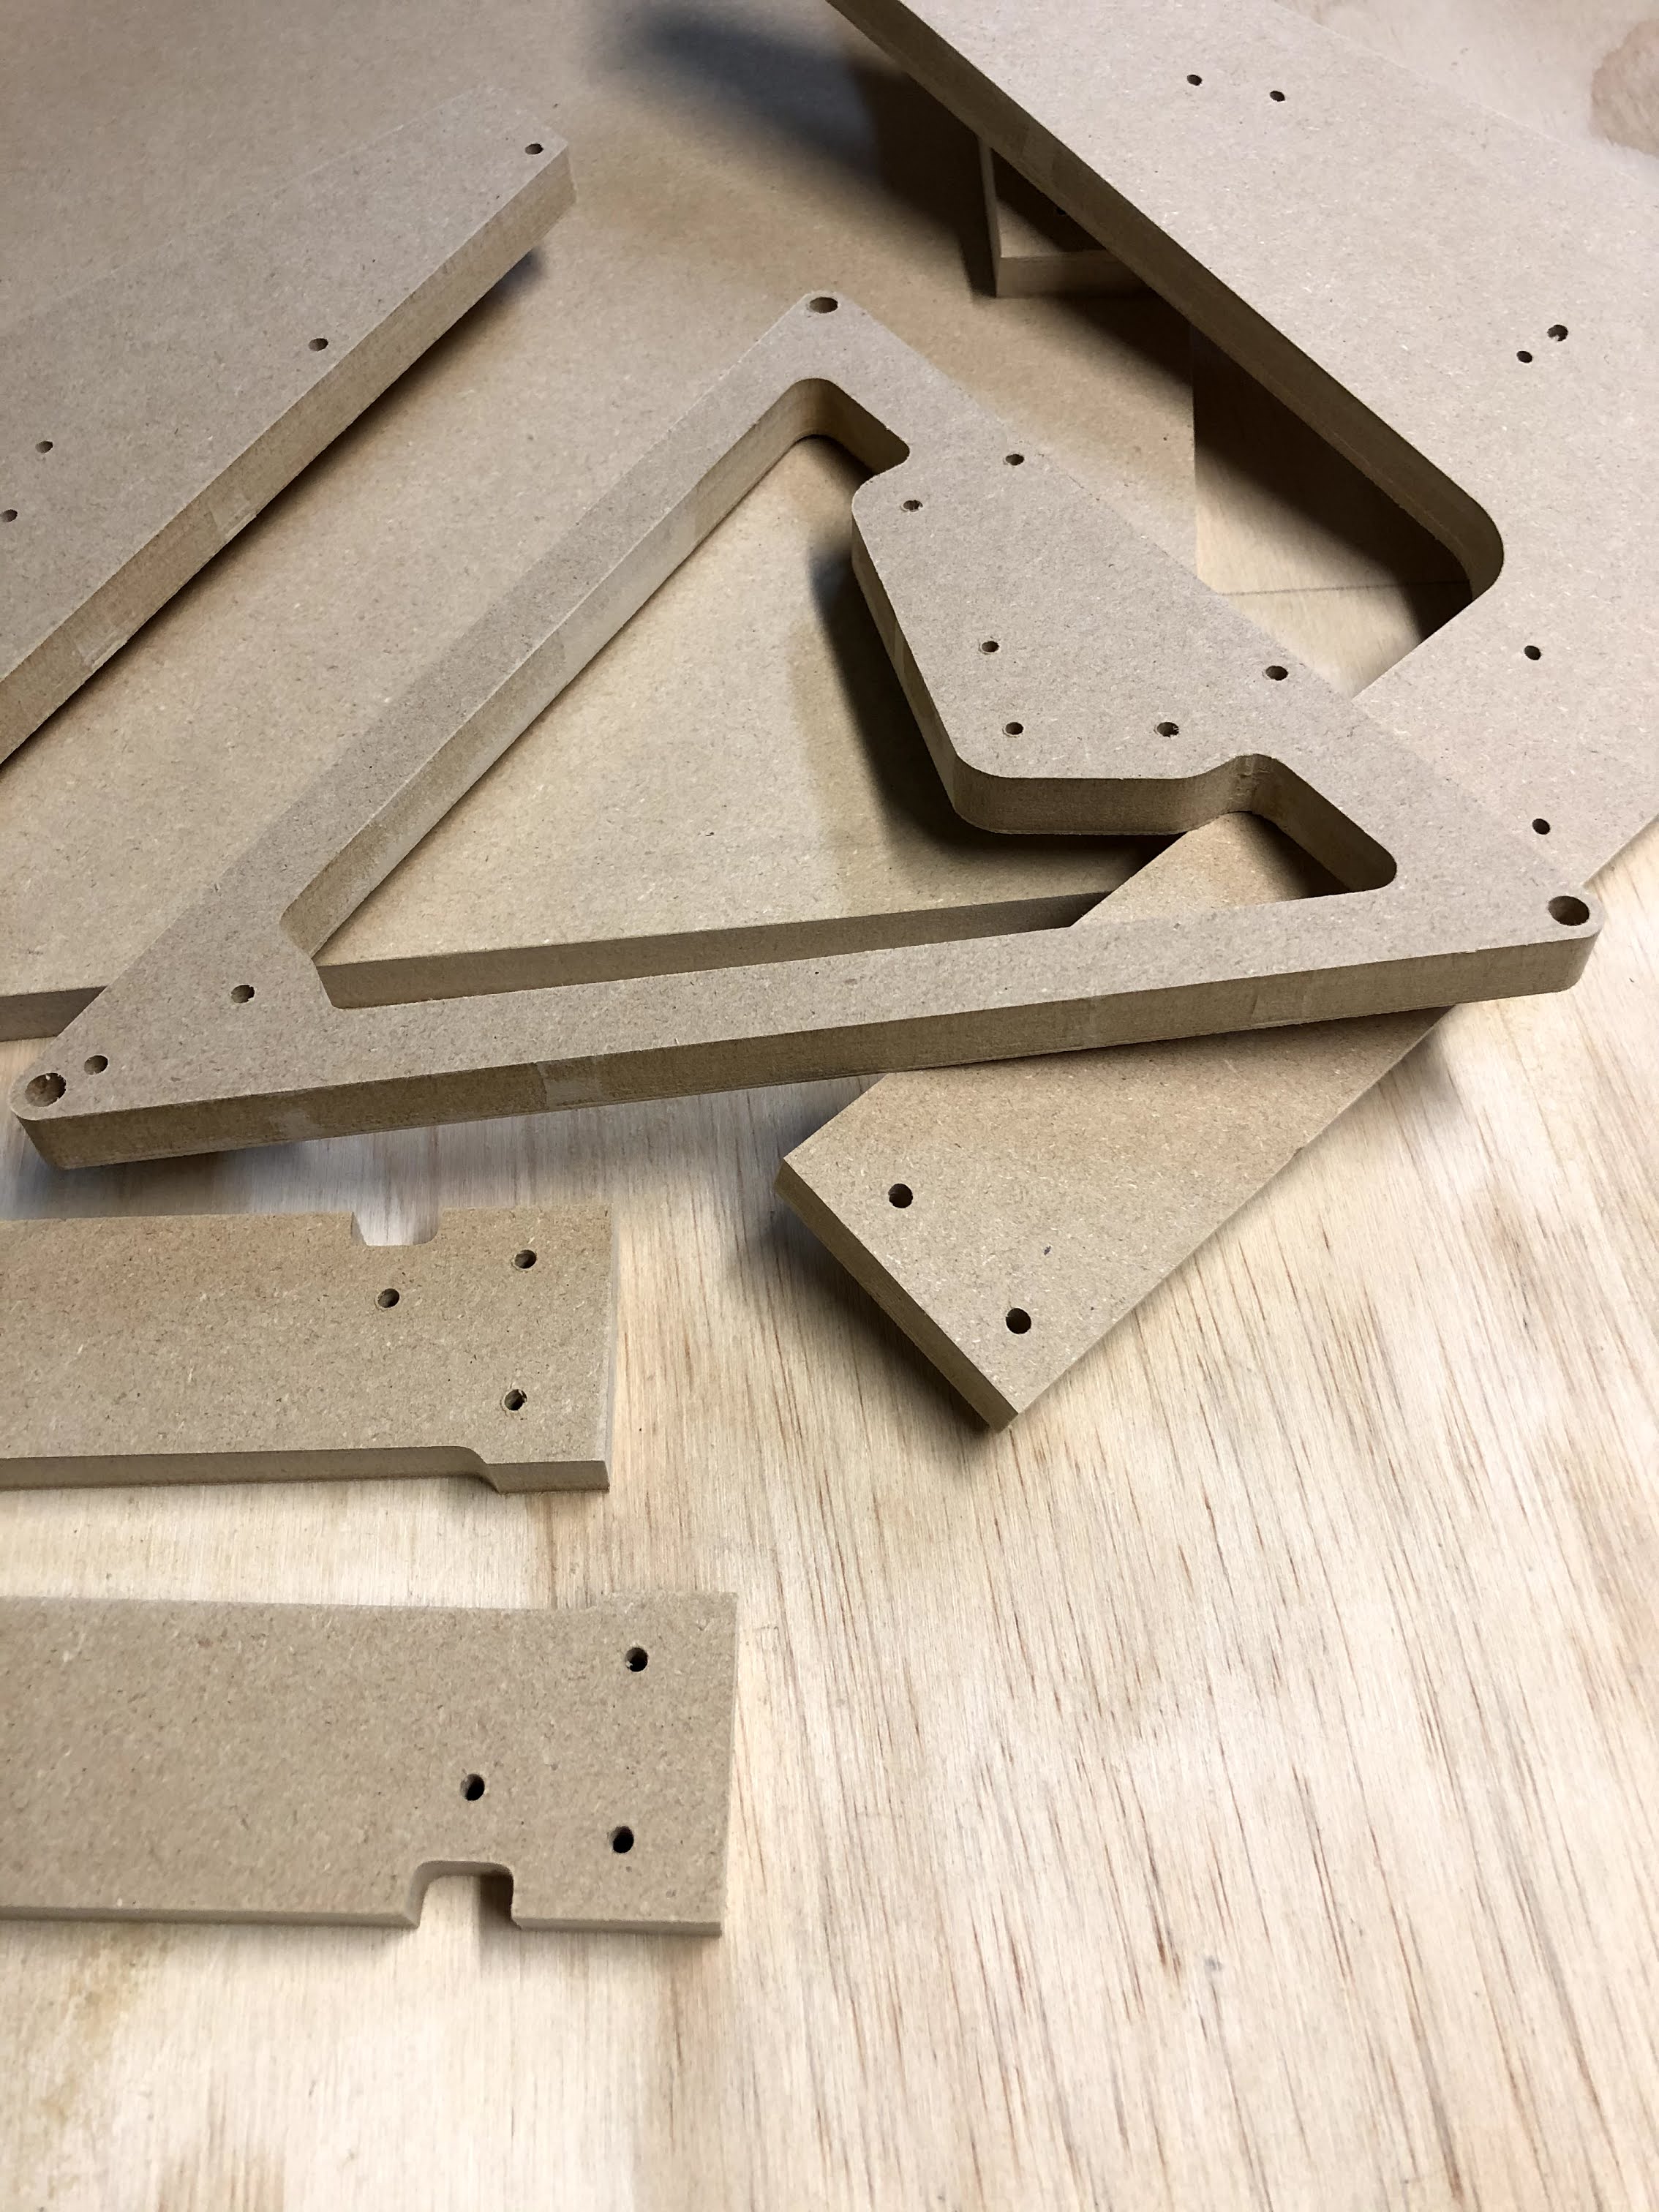
I think they came out pretty good.
Figured out Estlcam basics, I kept having problems with the starting point, especially the Z axis.
I hooked up the Z-Probe and followed a procedure of Home X&Y, then Home Z. Turn on the router, and start the "print’ from the LCD.
I’m stoked to try out some 3d carving stuff eventually, but for now I need to build the 3D printer.
Mike
7 Likes
Congrats on your build. And a clean(ish) garage. I appreciate all the work that takes. I just spent a lot of time starting to organize my shop and it still gets the need for a cleaning.