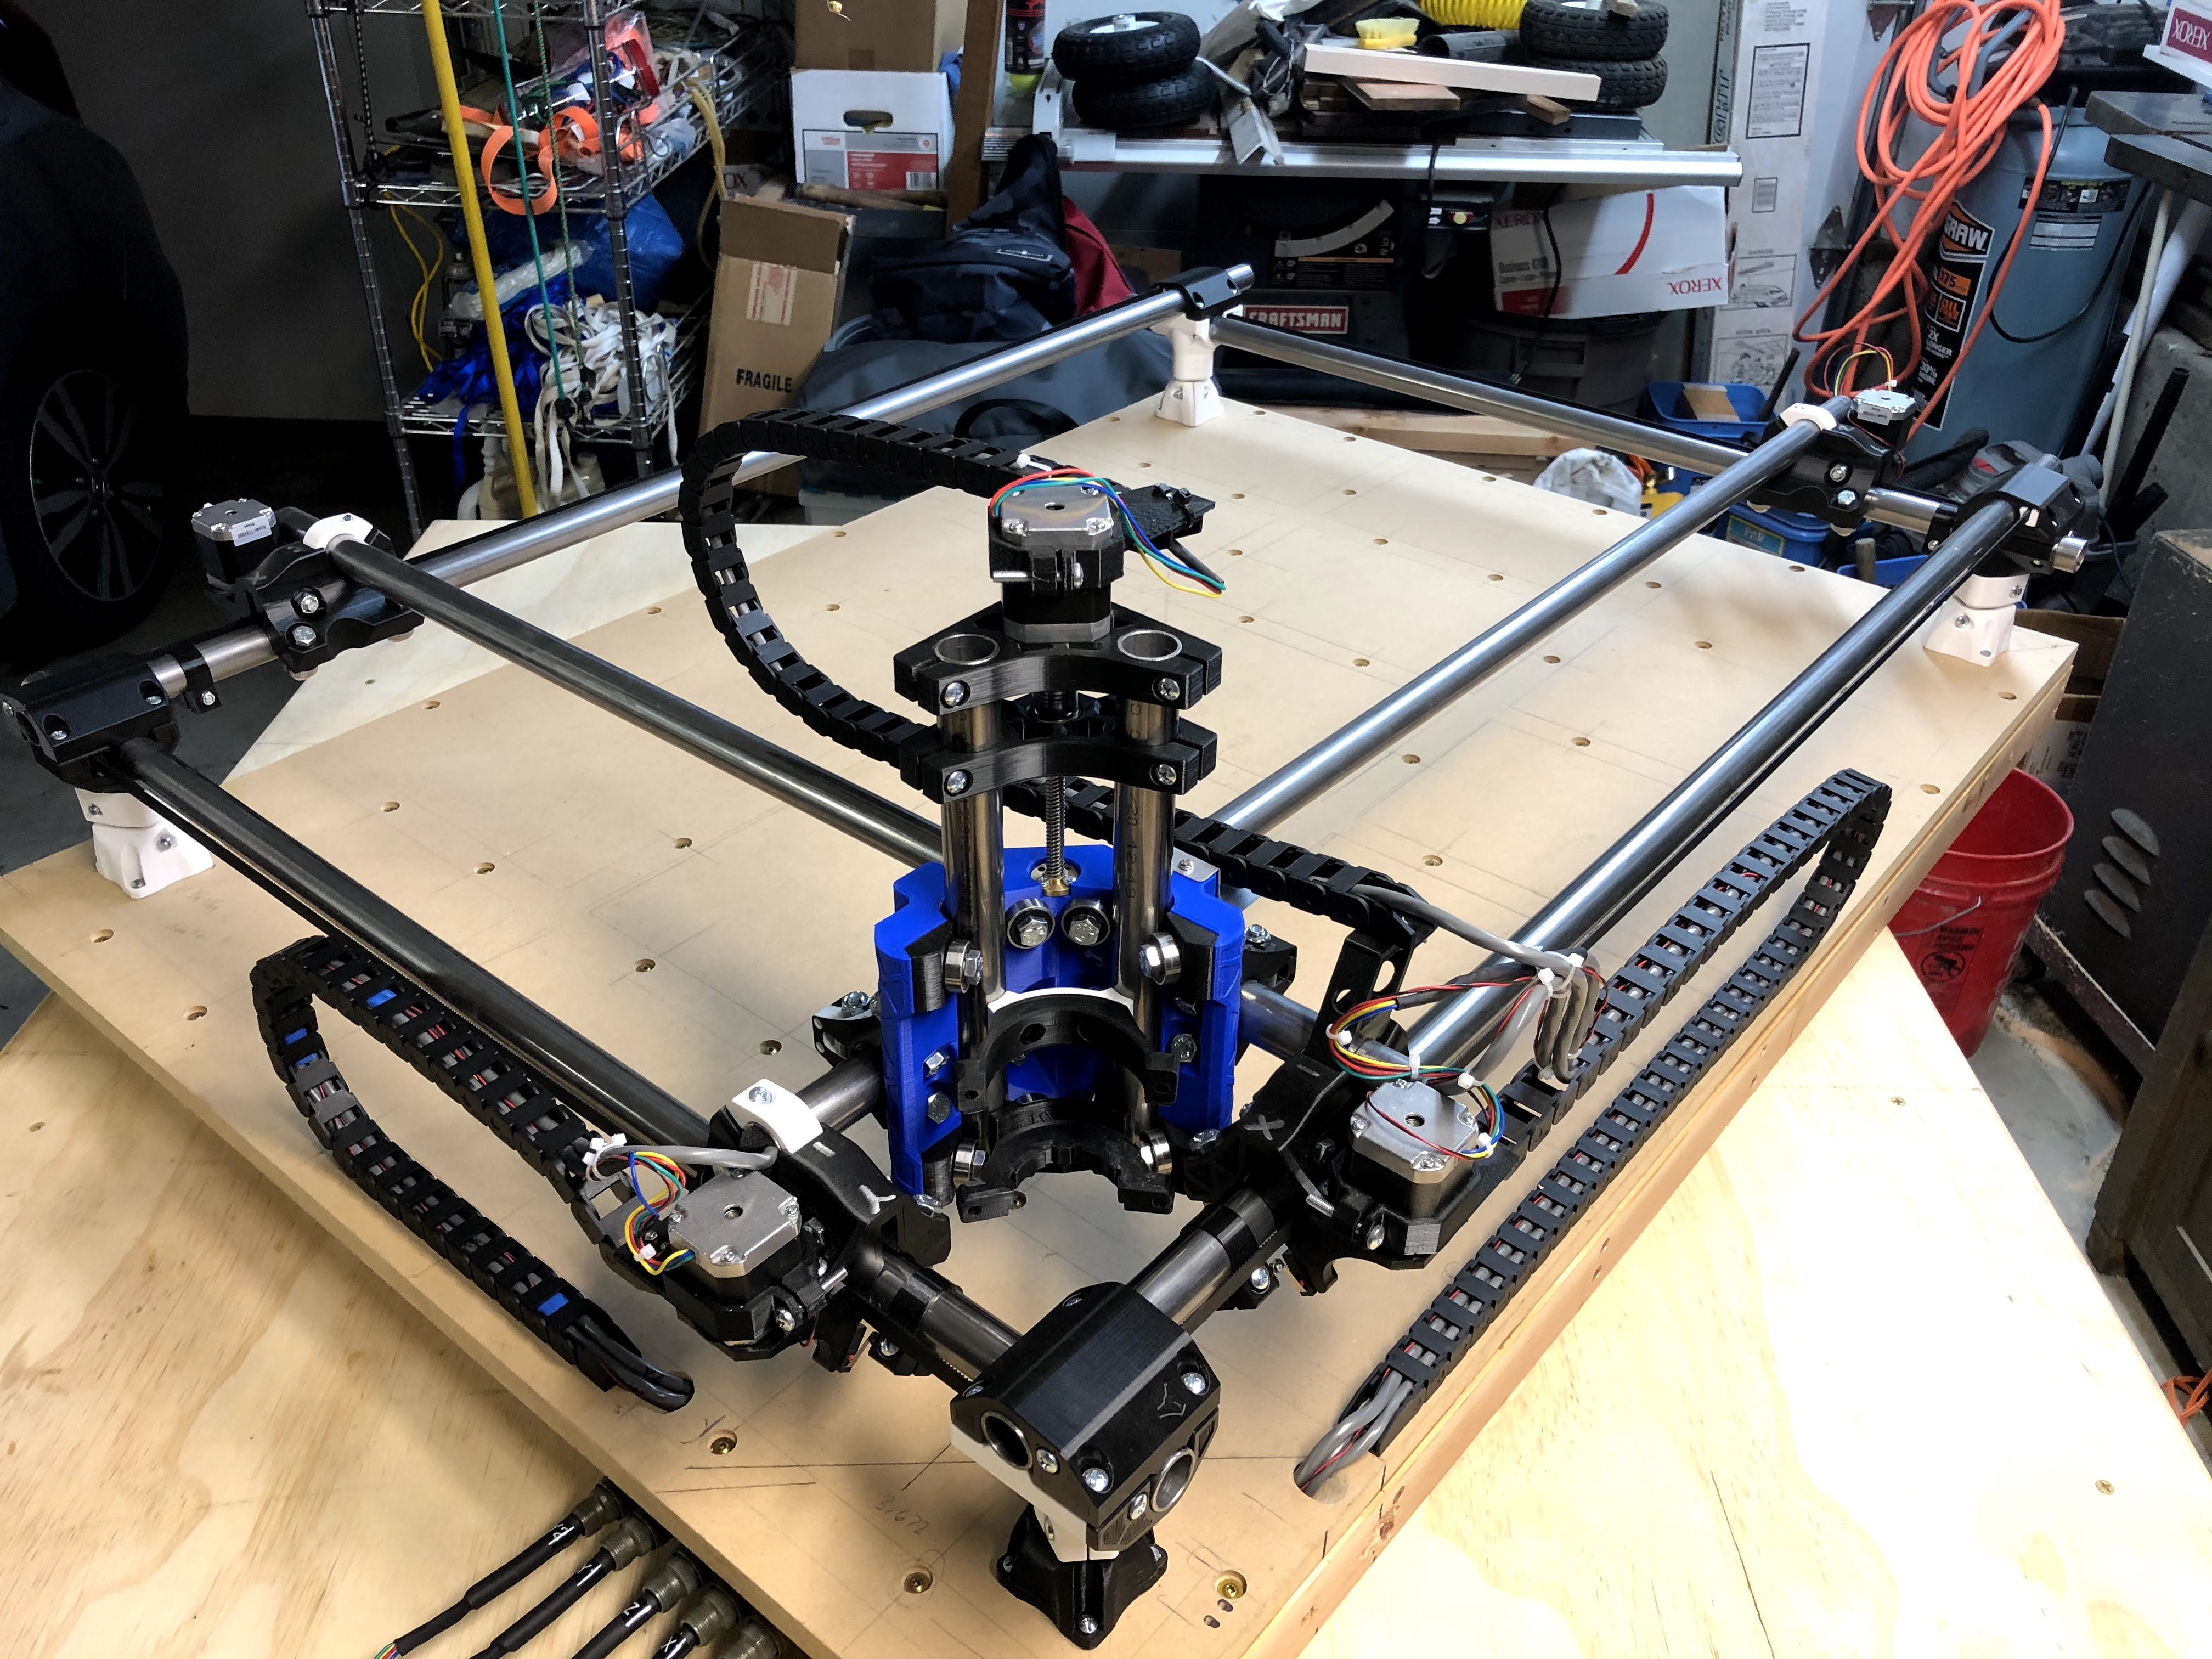
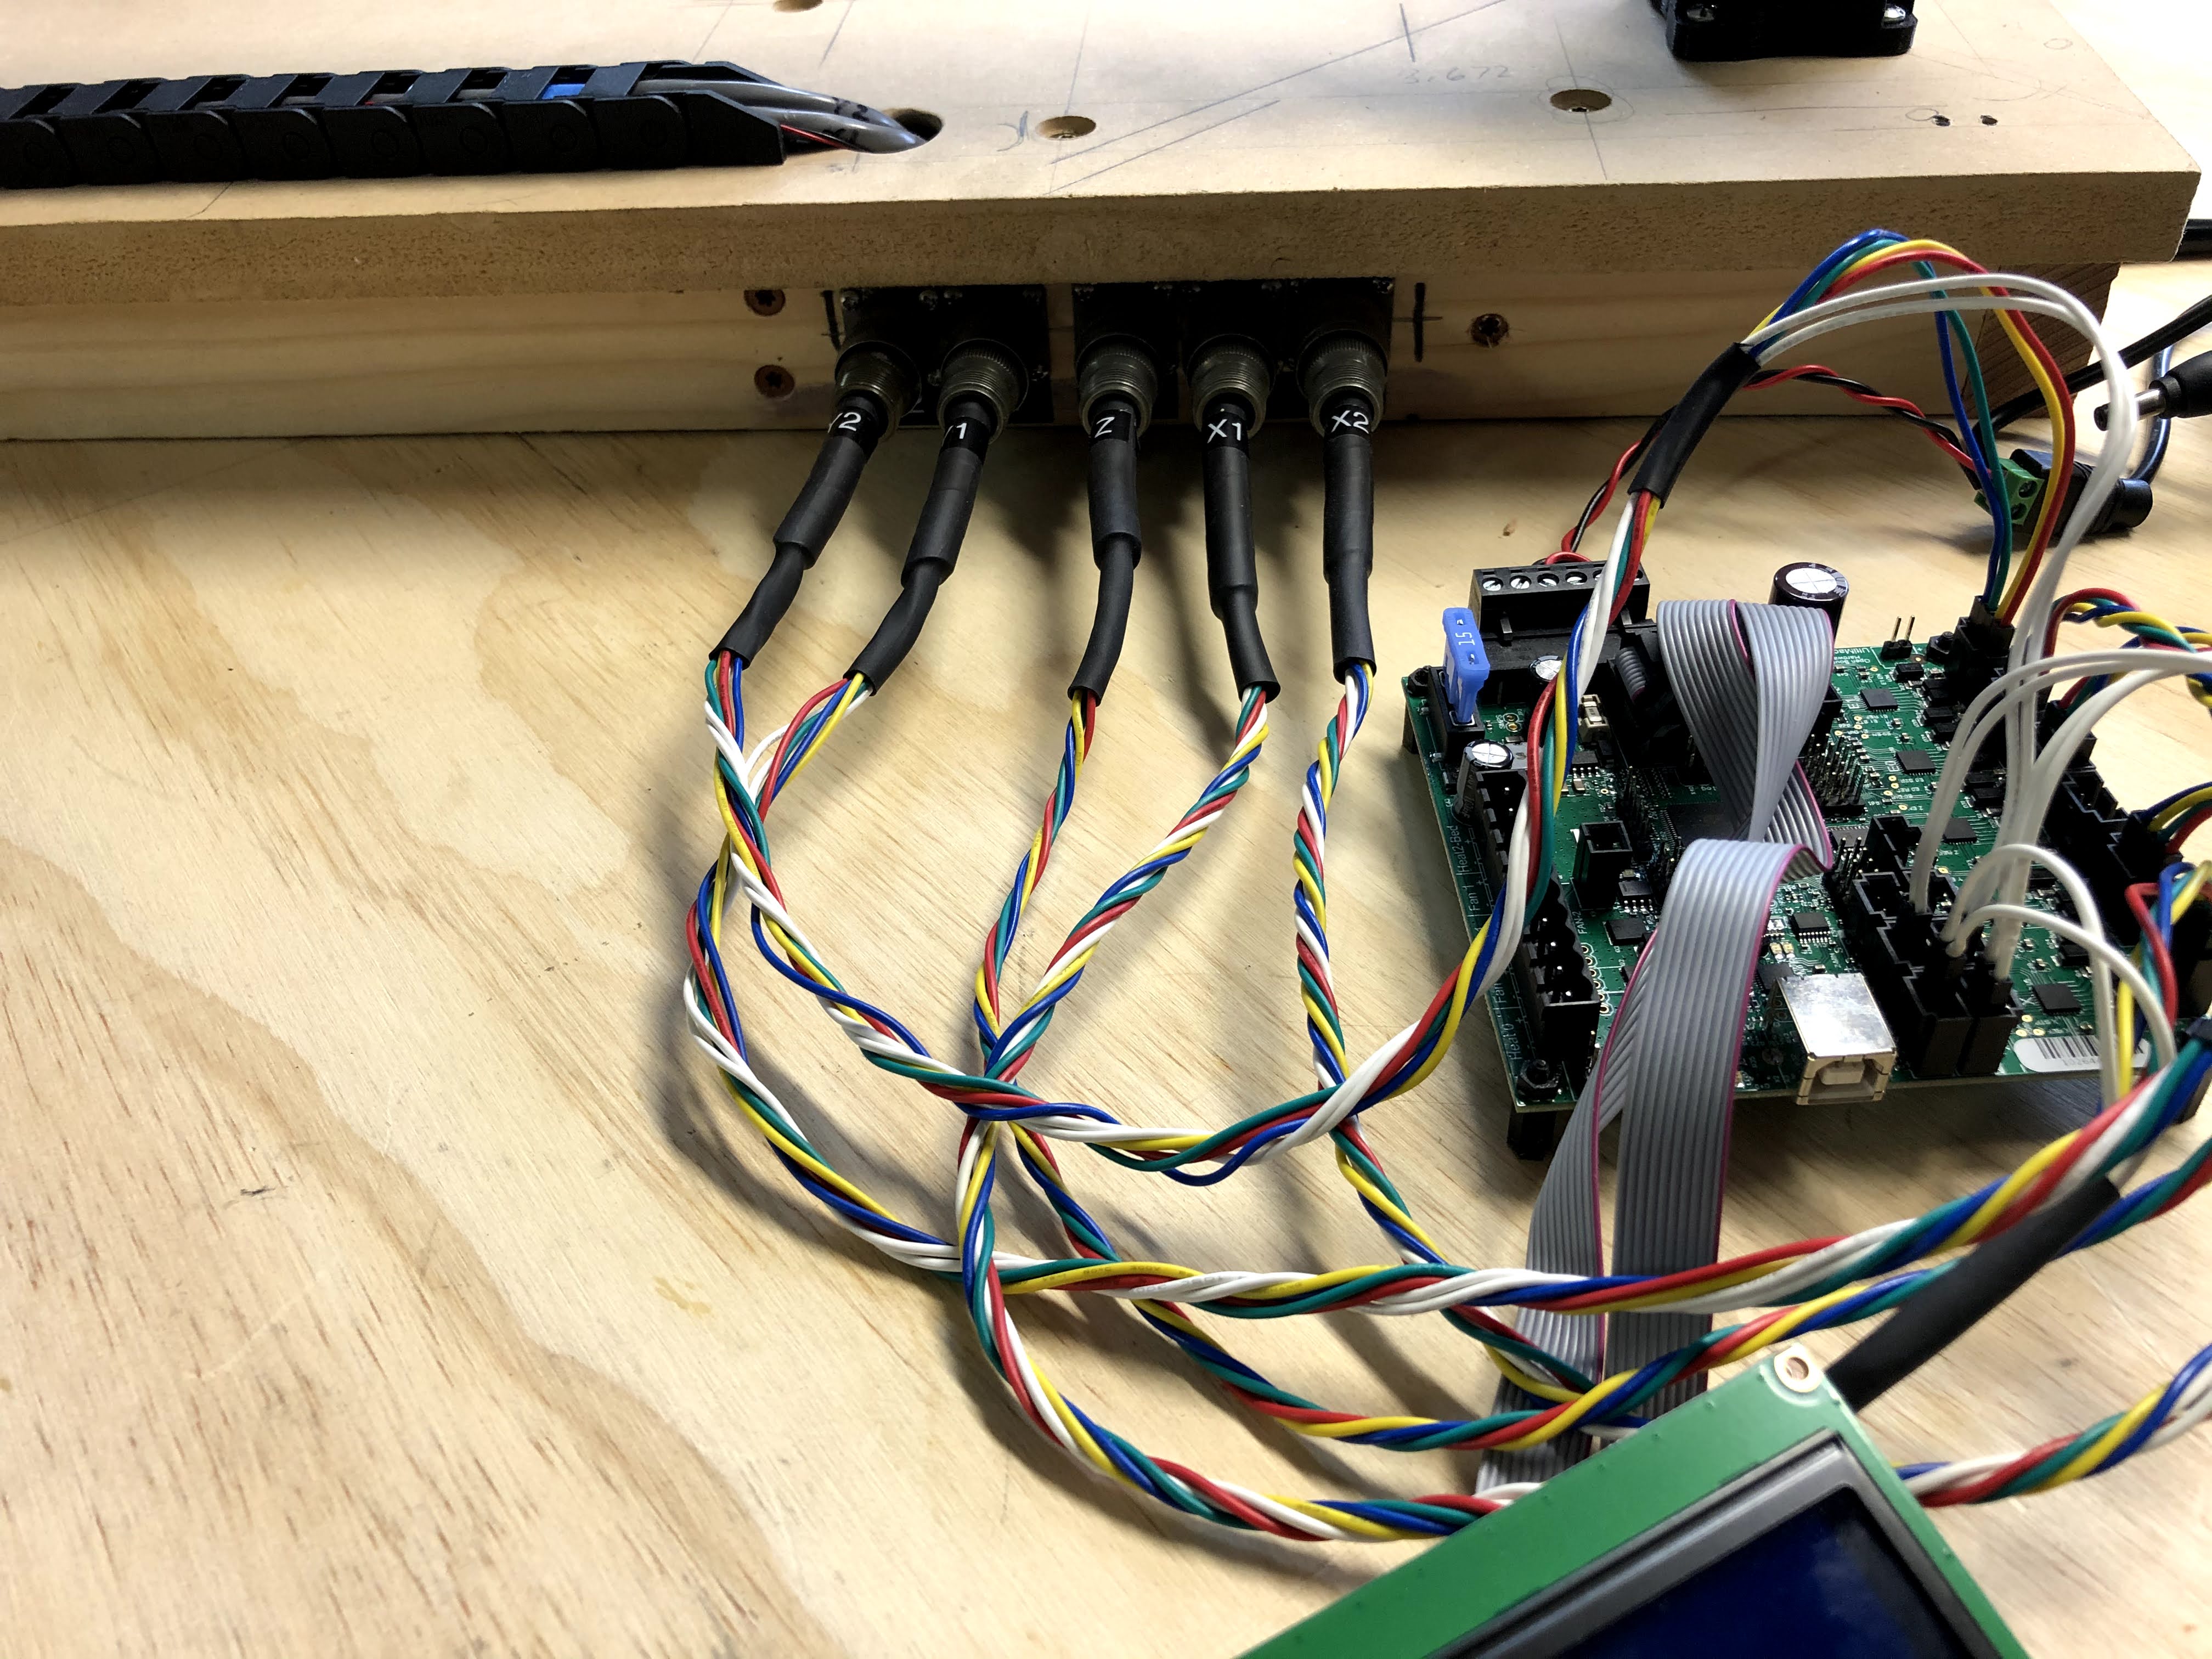
Of course that’s with just initially connecting all the wiring, just to see it move. Now comes the hard part of getting the wiring loom together an building a “real” system.
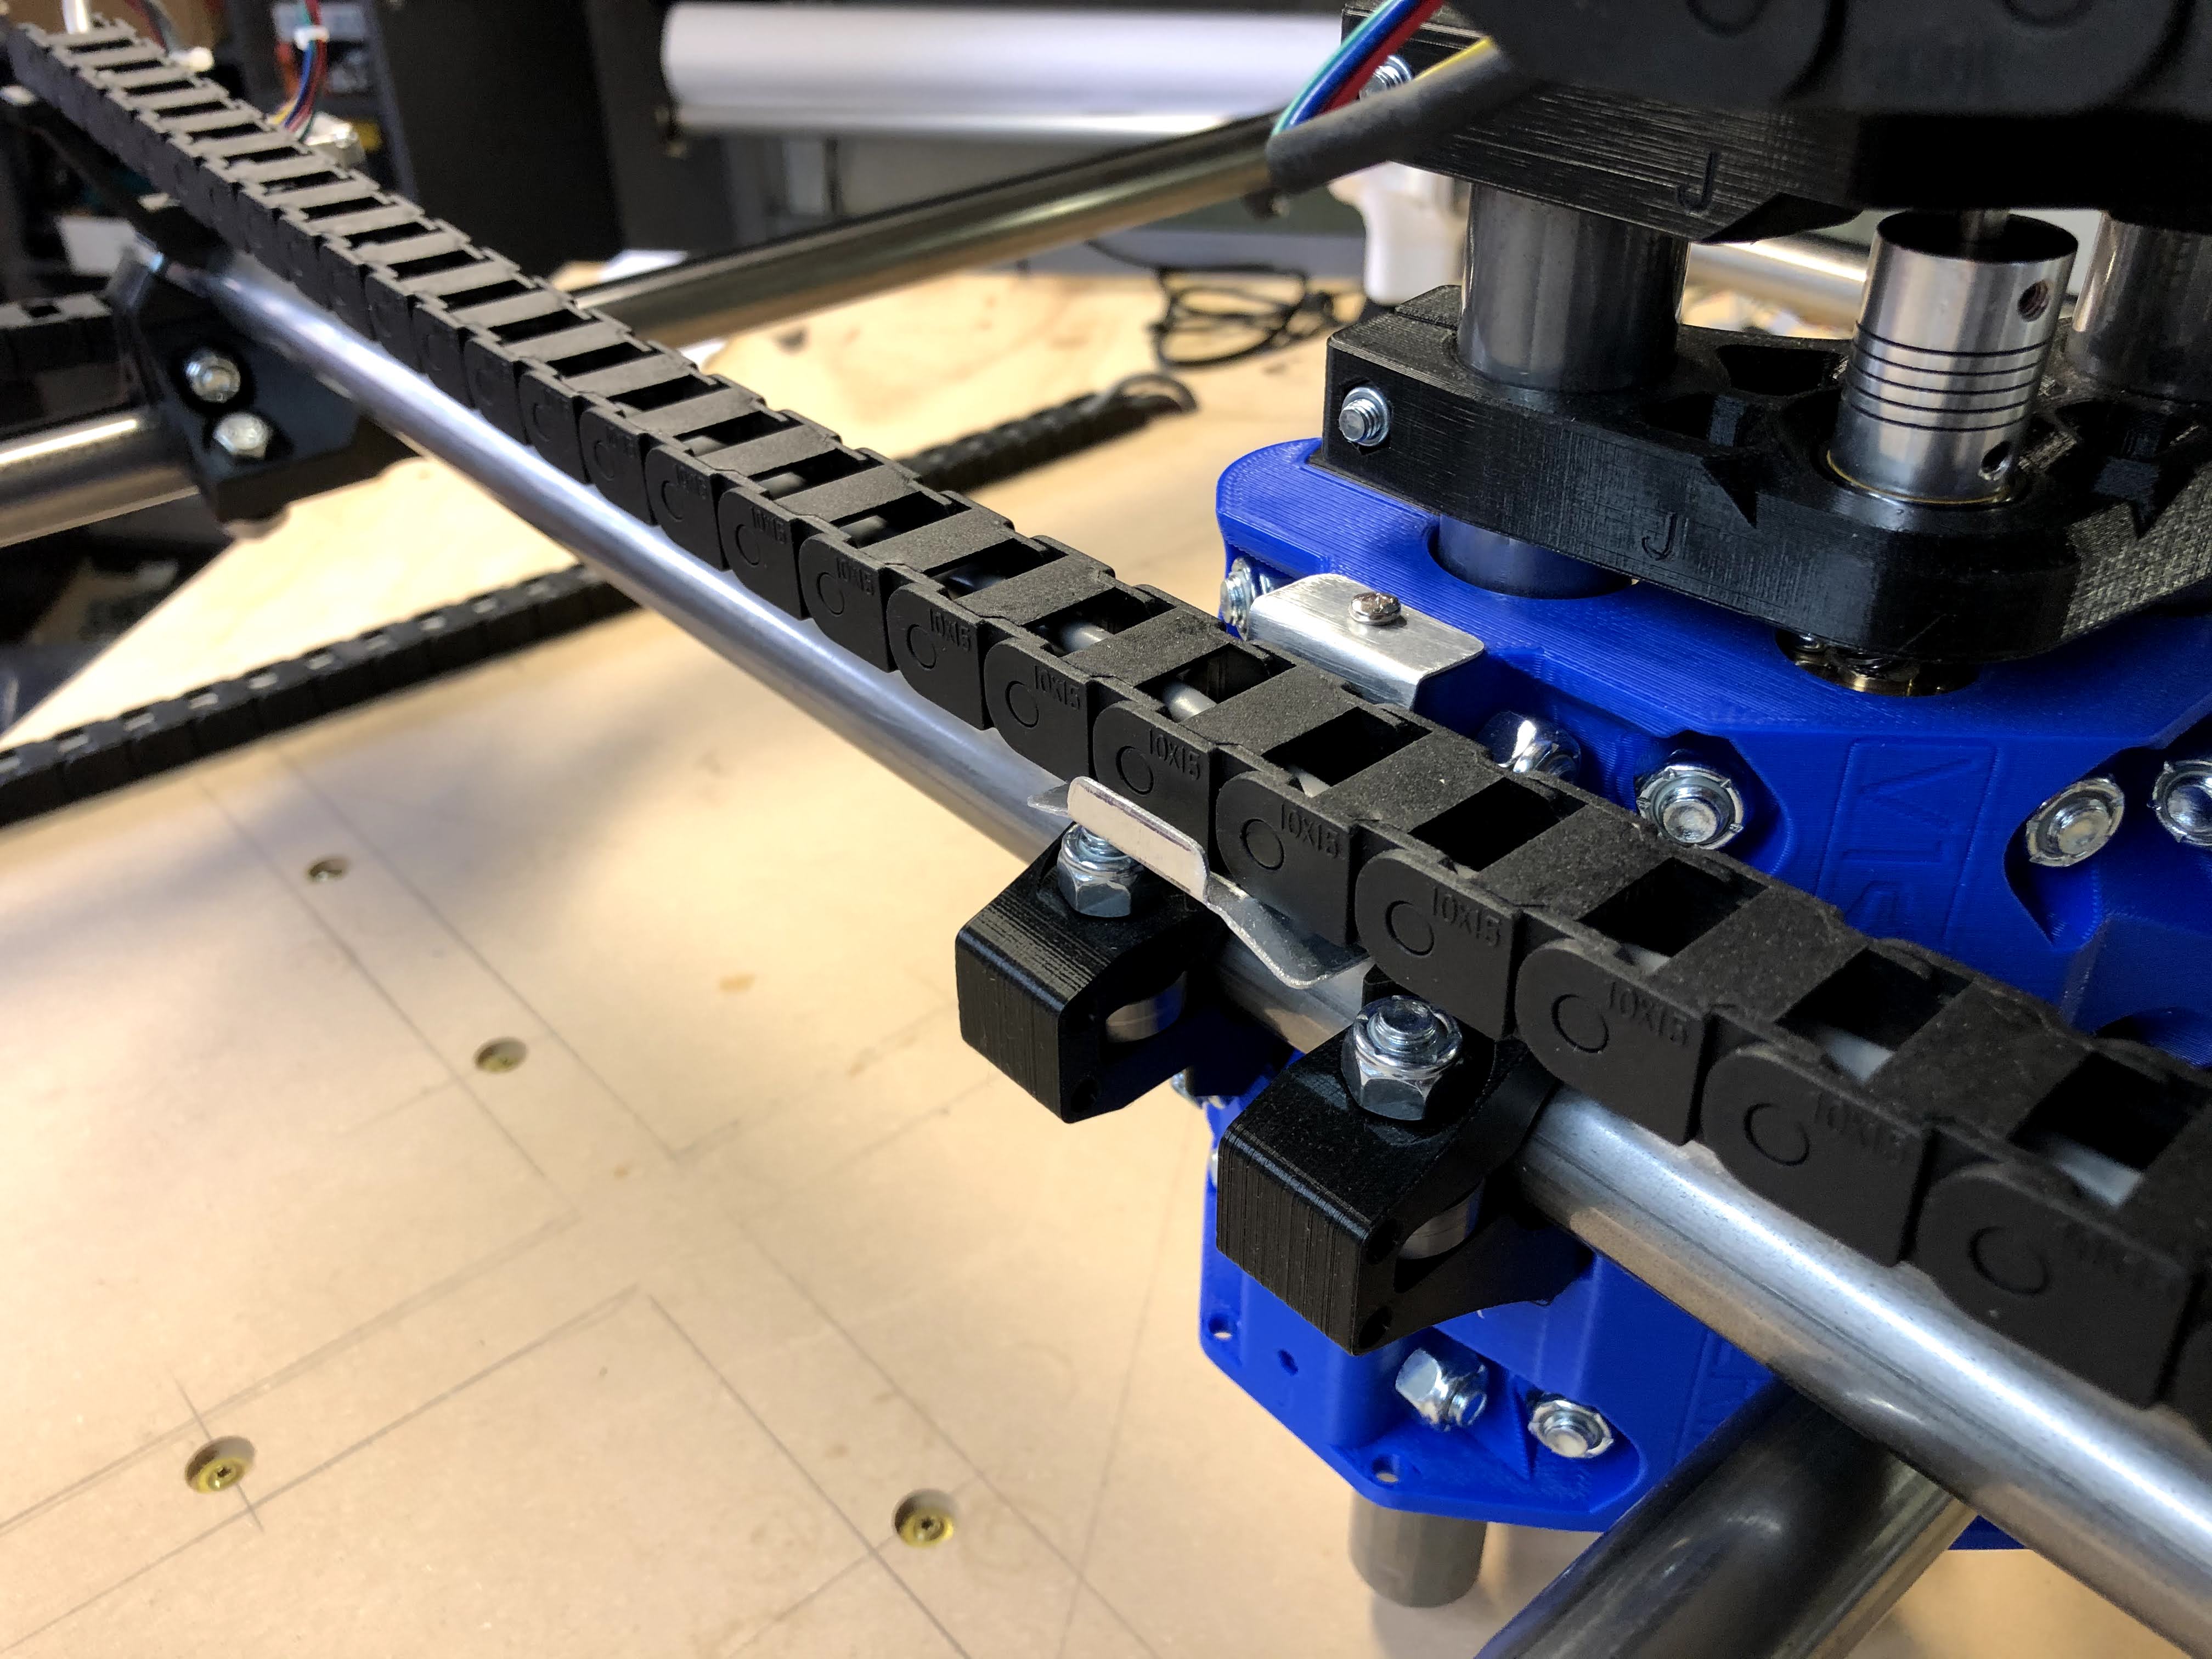
Rather than put a whole aluminum channel on the gantry, I made a little “lifter” that picks up the cable chain before it hits anything.
Using the screen controller I ran each axis out 300mm and measured the length with a steel rule: it looks like each axis is about 0.5mm short. I guess that’s not too bad, but you guys can tell me if that is something I need to correct.
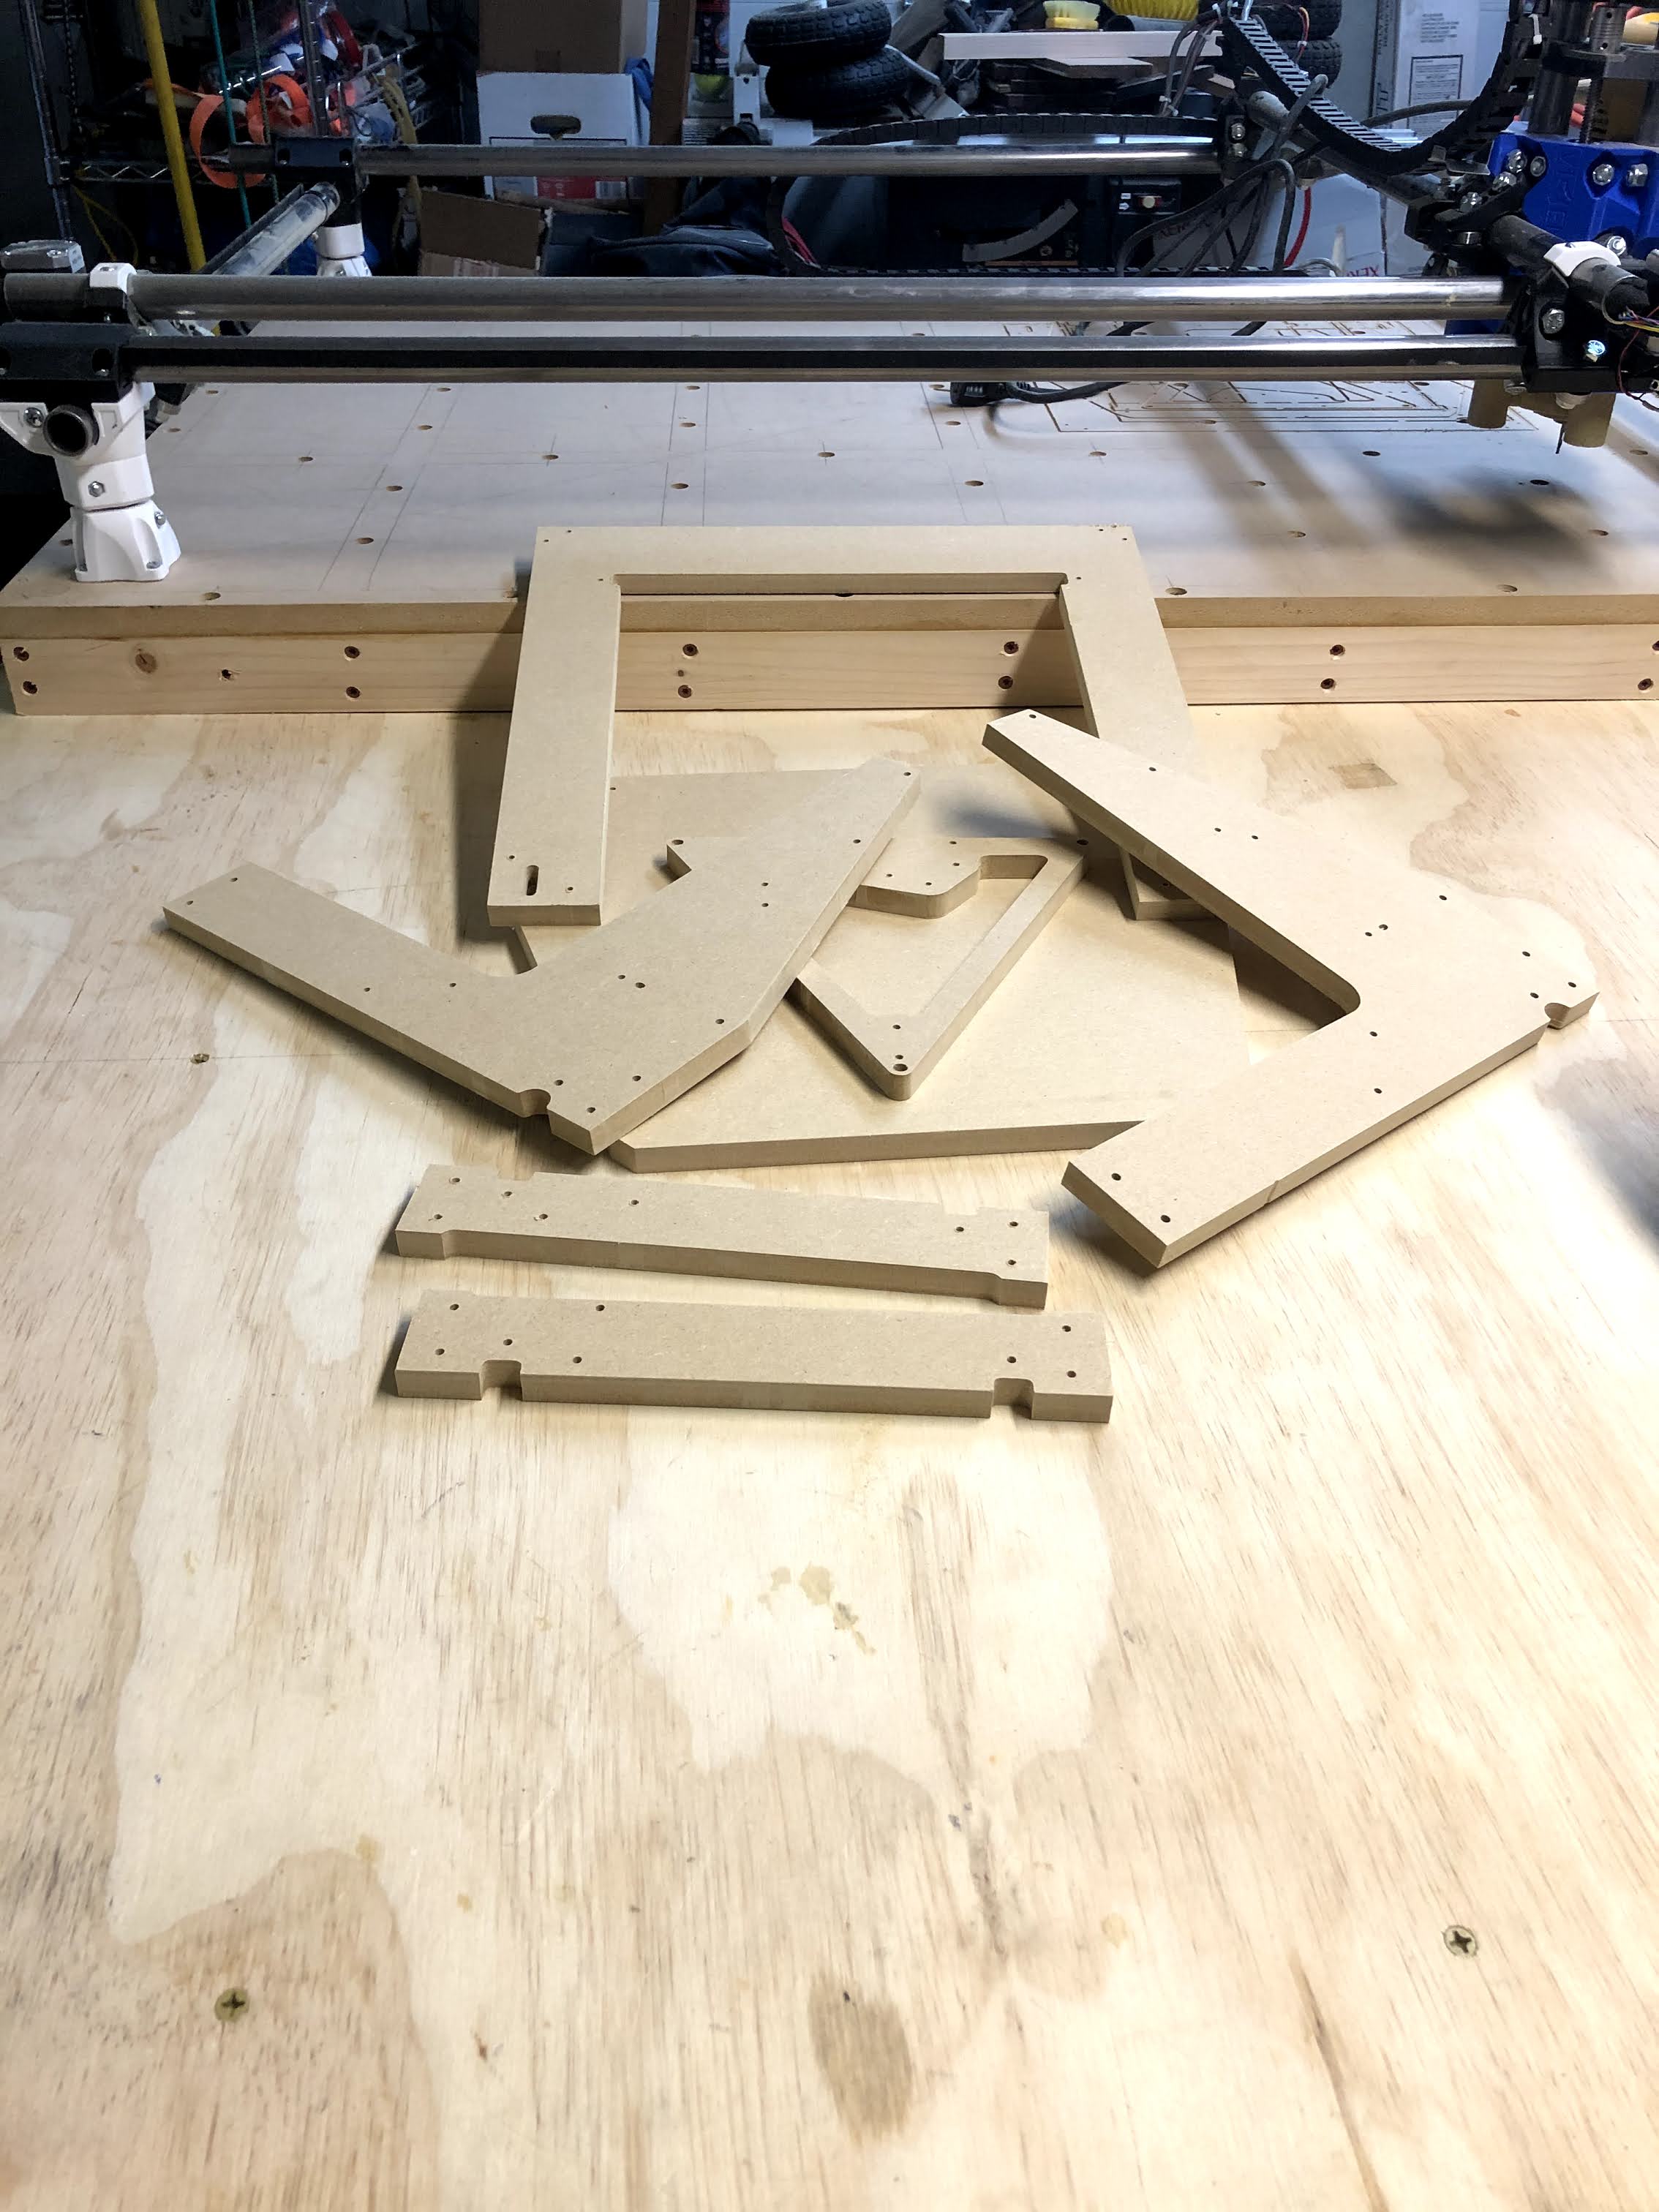
I spend a while today getting more familiar with EstlCAM and did a bunch of “air milling” with the pen holder installed. Tomorrow I hope to really make some dust, and cut the parts for the upgraded MP3D printer.
I have a few questions about that, but I’ll post in the appropriate sub forum.
Congrats on your build. And a clean(ish) garage. I appreciate all the work that takes. I just spent a lot of time starting to organize my shop and it still gets the need for a cleaning.