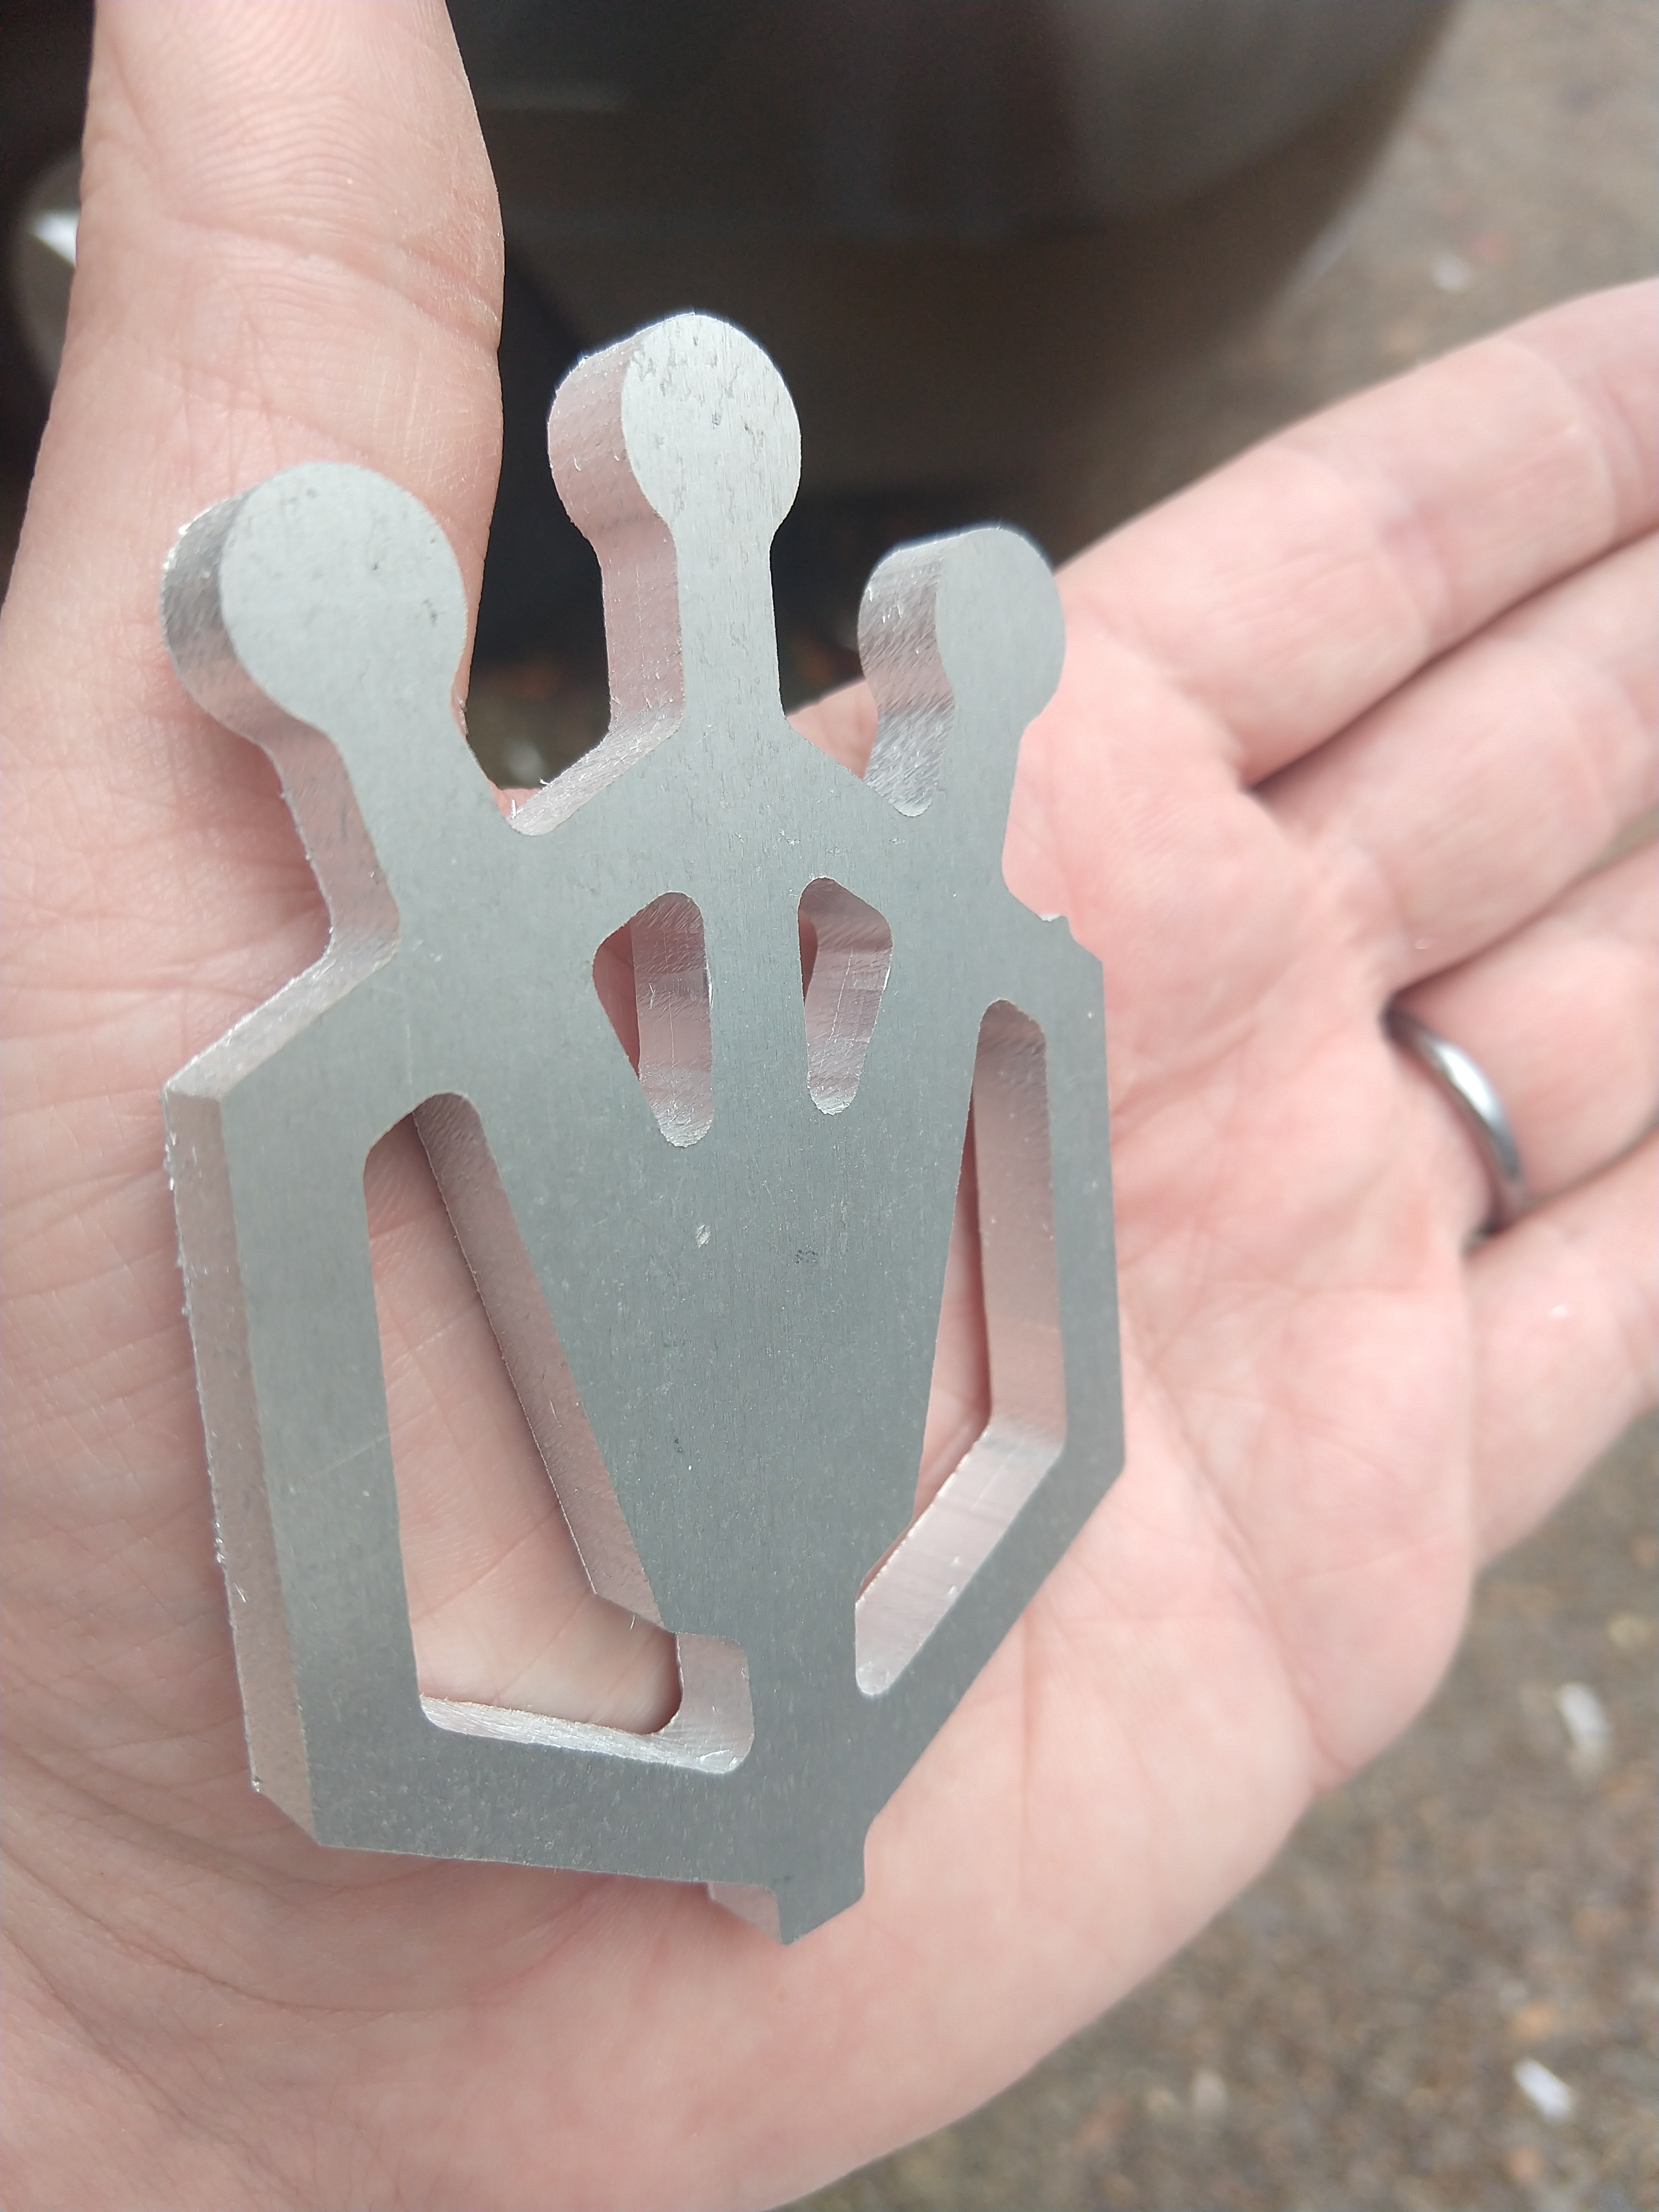
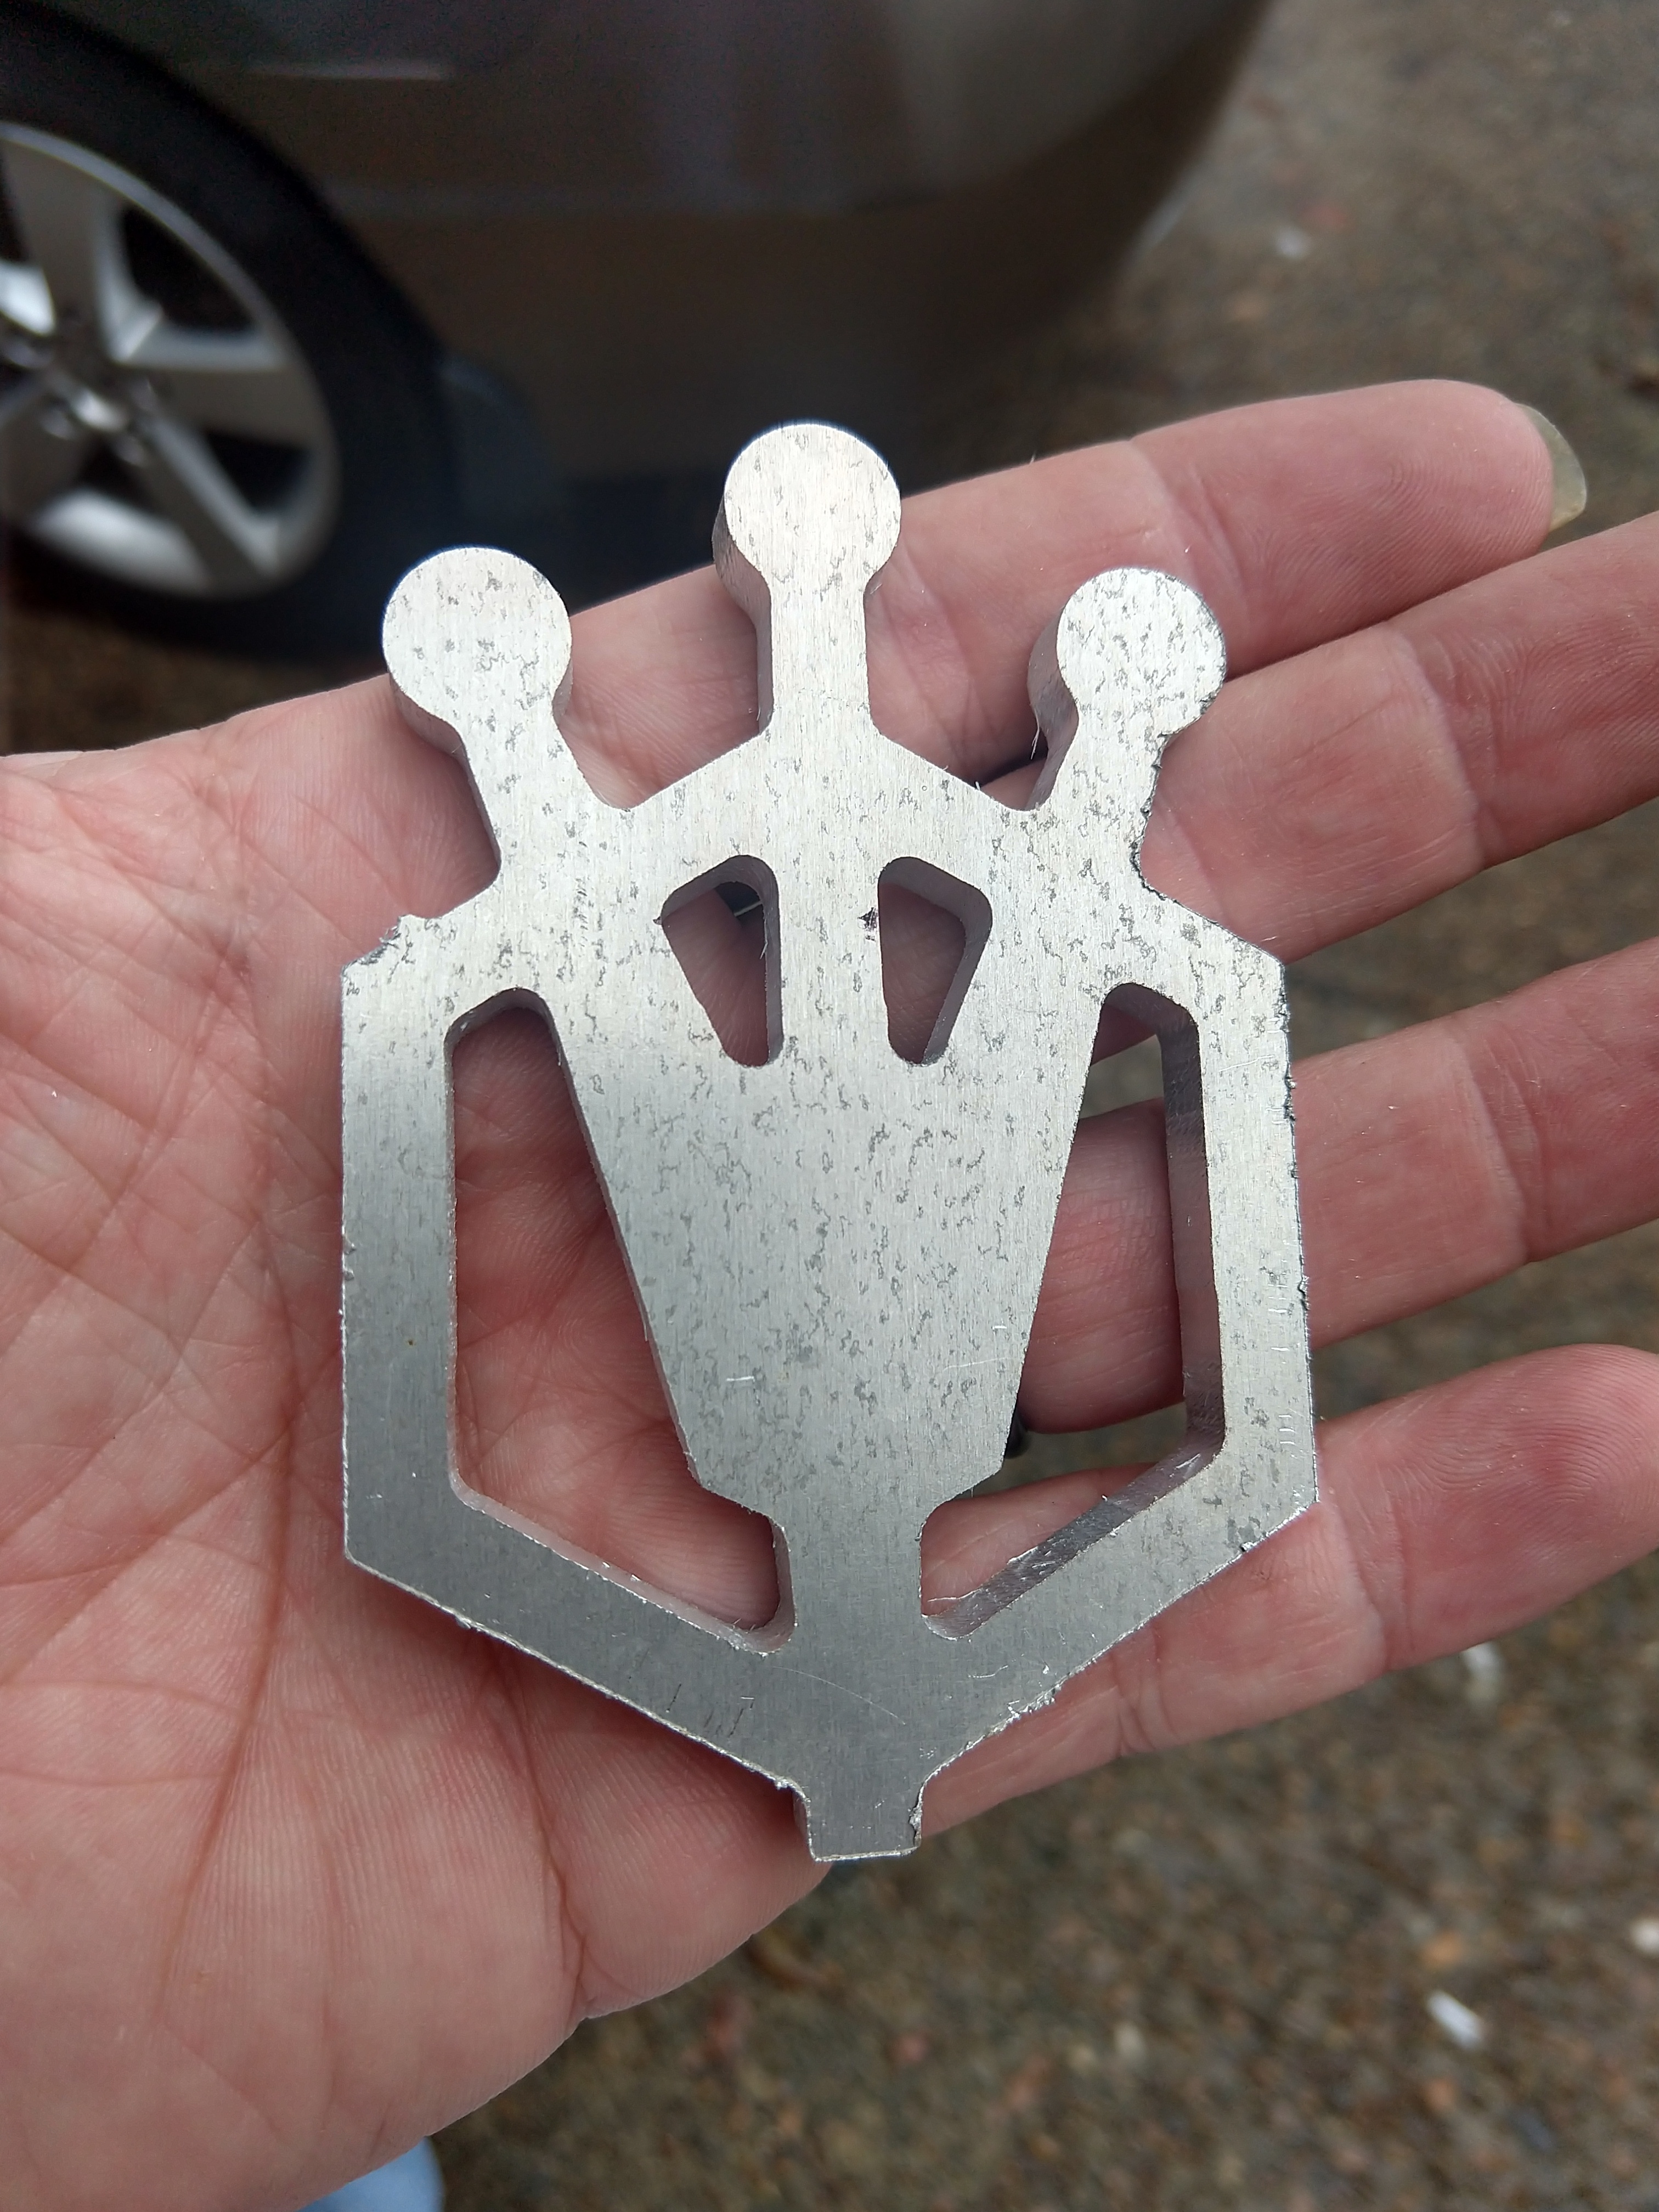
Customer is building a replica of the '79 LTD Wagon from National Lampoons Vacation. I’ve printed multiple pieces for him but he was getting jerked around by a few of the local CNC shops on a couple of aluminum pieces he needed cut (like the hood ornament in the pics) so I figured I’d give it a shot. If you don’t follow me on Insta or Facebook, here’s the run-down:
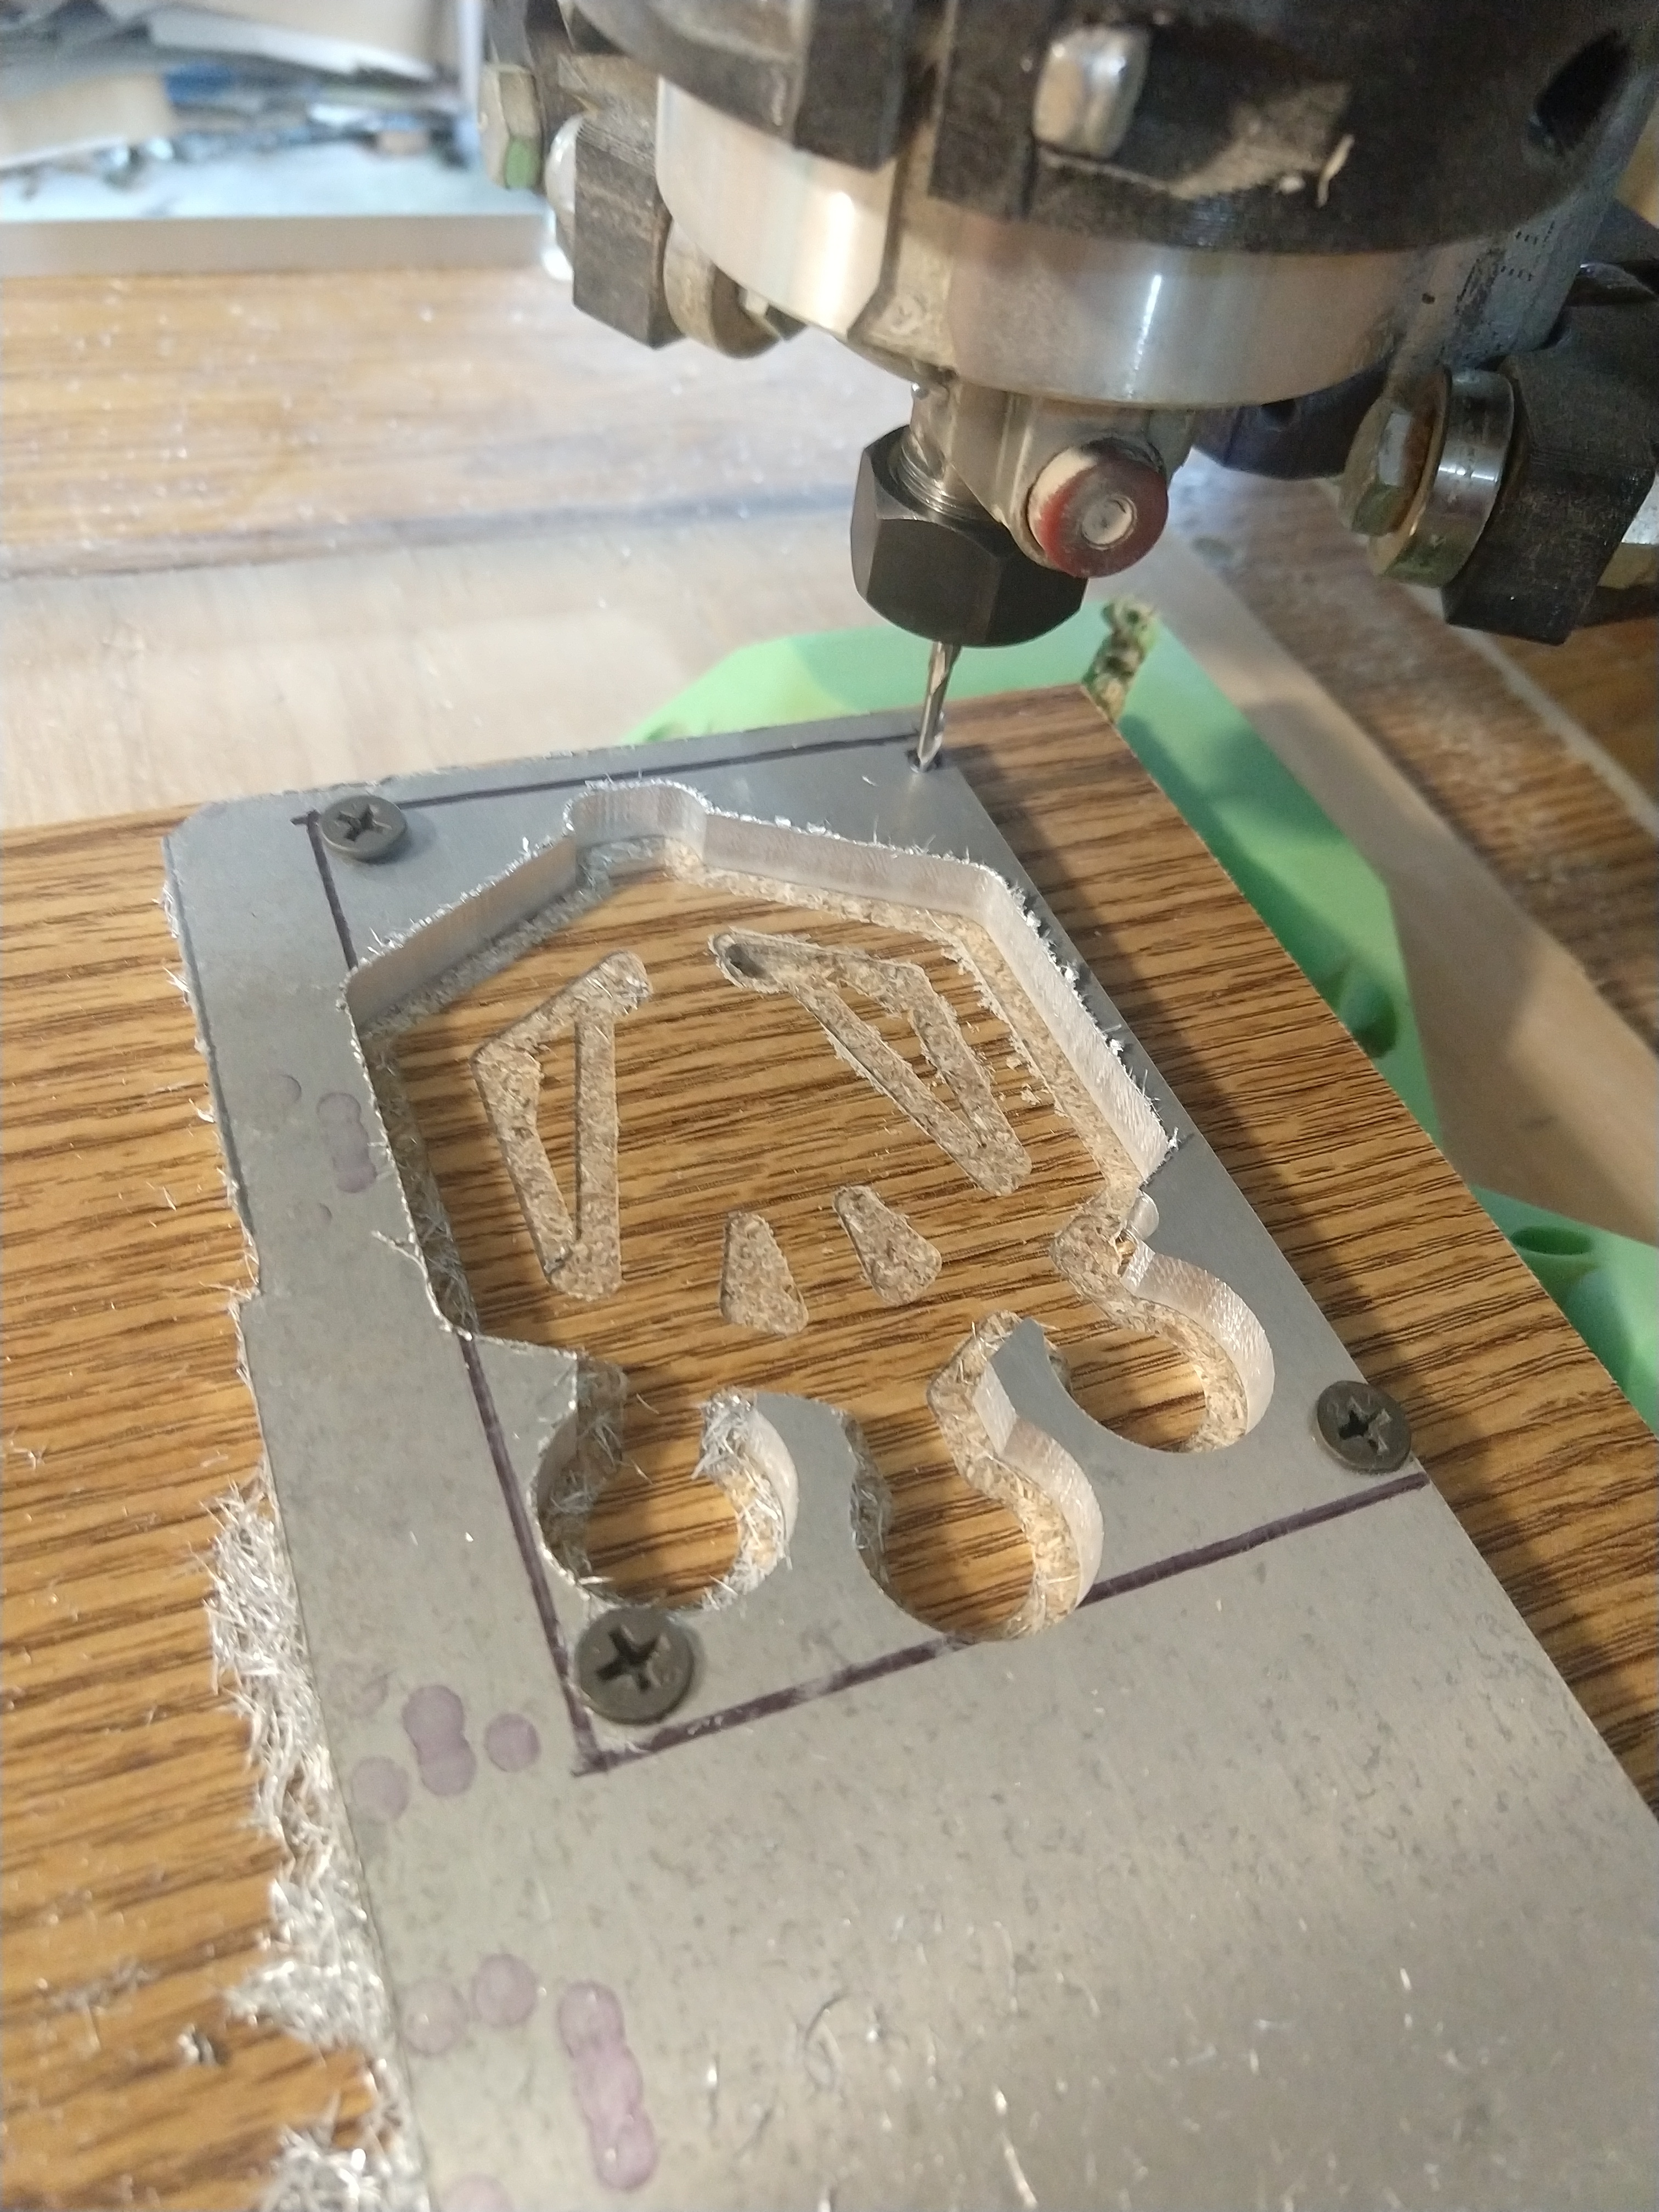
This is 1/4 inch 6061 Aluminum; Makita RT0701C spindle; 1/8th inch single flute flat end (from the V1 shop); I’ll call it “air cooling” but really all I used was my shop vac with a 1" reducer held about an inch from the mill to suck the chips away during the cuts - that keeps the chips from building up in the cuts and also pulls air across the end mill to help with cooling. More details about machine settings below the pics…
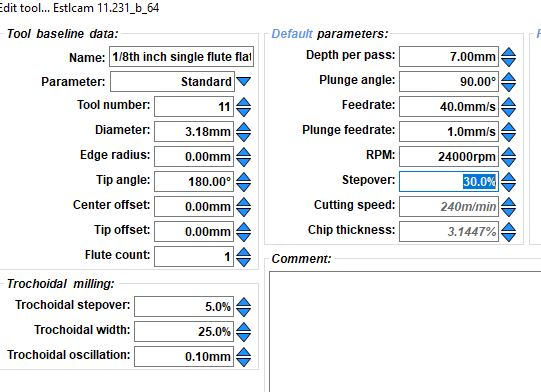
I’m still using Estlcam as it hasn’t failed me yet. It has it’s quirks but what can I say - It’s cheap and capable so it kinda matches the MPCNC imho. Spindle was set to roughly 60% speed (probably about 16-18000 RPM if the dial markings on the Makita indicate linear speed increases - honestly don’t know). I generally go by feel and sound when it comes to spindle speed - if I’m getting funky resonance I adjust up or down until things smooth out. Here’s a SS of the tool settings:
This was cut single-pass using trochoidal milling.
I created a drilling template to make holes for lead-ins and hold down screws, then printed that on my 3d printer, then over-layed that on top of my material and marked the holes first with sharpie, then with a punch to give my drill press a center point for the holes then drilled those out. This keeps the flat end mill from having to plunge. As you can see, I cut it kind of close on one of those hold-down screws - it was a bit of a nail biter for a minute there.
Cheers guys - great seeing some of the fantastic work you’re all doing. Really good stuff!
Nice work! I’ve got some 1/4” aluminum plate in my garage that I’m going to try one of these days. Don’t really have a project yet that needs it, though.
It’s taken me a long time to get 1/4 inch aluminum dialed in. That’s got more to do with my machine being bigger than it should be than anything else. I’ve seen guys running multiple passes on the stuff and getting clean cuts but I have yet to pull that off - trochoidal seems to be the way to go for me. Good luck to you though. Thanks for weighing in
@CNeufeld Rails are 870x780 - you made me get out my tape measure lol.
@vicious1 I gave him a killer deal on the Printed parts with the stipulation that he keep me in the loop as the car progresses. When I get pics I’ll post them. I think it’s cool that he’s doing something goofy with a car instead of just trying to make it more bad ass than the neighbors hot rod lol
A while back, when I was still doing a lot of automotive repair work I came to the conclusion that 10 and 12 mm sockets should only ever be ordered in bulk - at least five of each at a time XD
Then about a month ago I replaced the AC compressor in my wifes Saturn and I decided that 13mm sockets should probably be added to that list lol
Apparently in Hondas (and that particular Saturn Vue that has a Honda engine in it) if you find that you need a 13mm socket or wrench, that should be a red flag that you’re about to open up the AC system lol. Now I know.
The biggest issue I have with aluminum is the 6mm belts have too much play in them. I can pull the gantry a good bit. When I tighten the belts up more to minimize that they break quite quickly.
I’m hoping the 10mm belt is a better solution, it really hinders my cutting ability
@Bobbond000 are you using fiber reinforced belts? I had trouble for a long time with slack showing up in my belts but it was because of the belt tensioners that I was using. Rubber belts will snap under the load but fiber reinforced belts are crazy strong.
I use the belts that came with the kit, and the link he has on the site to additional belts. They are fiber reinforced. They are not that strong. I break a belt every month or so. Straight across the belt.
I have no idea what brand @vicious1 sells in the shop (though I ordered some yesterday) but I can send you the info on the belts that I use if you’re interested. Don’t want to post a link here because I don’t want to pre-empt the V1 shop. I’ve never broken this stuff. I’ve actually tried and couldn’t do it. Is it breaking at the zip-tie connection to the frame? or somewhere in the middle?
The belts are meant to have about 7lbs tension. This is literally the first time I have ever heard of a belt ever snapping. I suspect you are far above 7lbs.
You can not put that high of a load on a 1/8" endmill.
I’m not putting any load on it. Im limited to a max cut depth of .14mm regardless of how slow or fast I cut.
Anything deeper and the play in the belts causes the bit to bounce to the point it breaks.
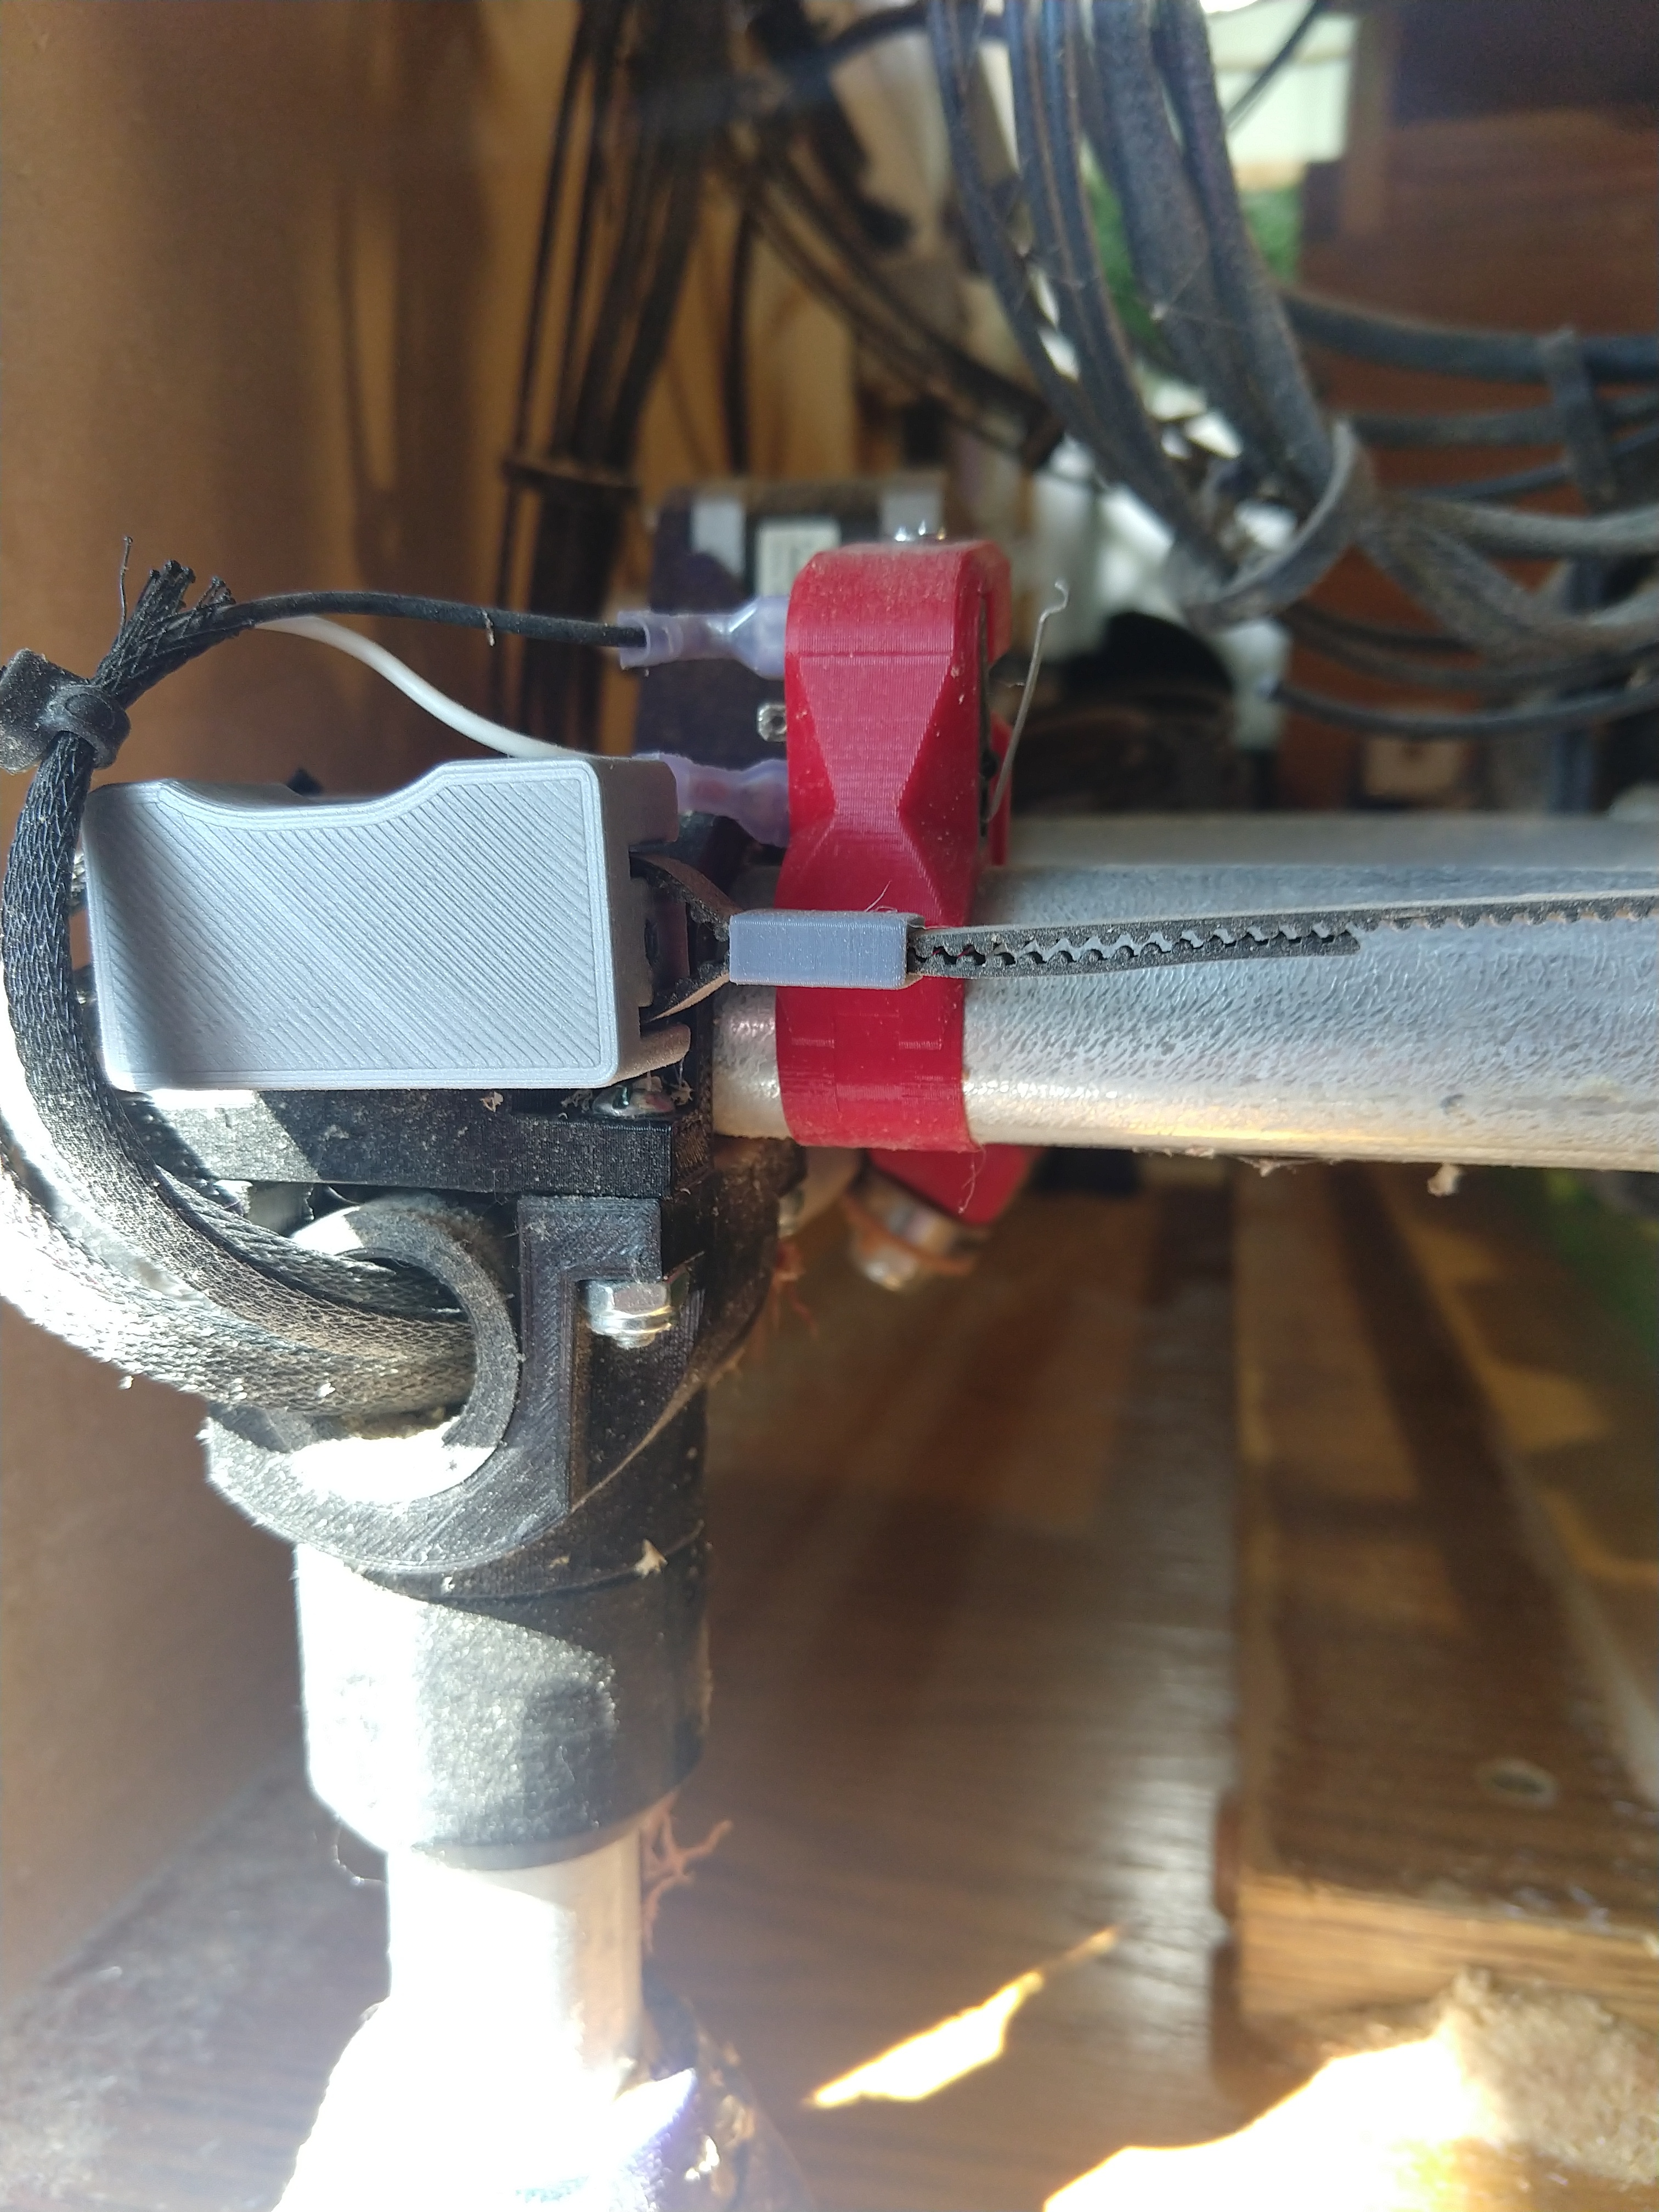
Here’s a video showing the belts when I pull on the spindle. From what I can tell, it’s the stiffness of the belt as my y axis is 12" longer and has more play than this.
The little housing that clips on to the frame corner came from thingiverse but the tensioner didn’t hold tight enough to keep the belt from slipping so I took that part out and looped the belt around and clipped it with another thingiverse part (just search for GT2 belt clip or something like that). It’s all for nothing in a week or so when the Primo upgrade is finished but for now those belts stay properly tensioned and there’s no give. They’re probably tighter than 7lbs but I’m still trying to work out a good way to measure that without spending money on a tool that does it. Generally (my method) is to tighten until they sing a LOW base note and so long as they’re all +/- about half a note I call it done. That’s going to vary with your frame size though.
I’m sure there are better methods for tensioning correctly but that has worked for me.
You’d have to look - watch the zip ties when you move the gantry like you did in the video - if they are flexing then that’s where the play is coming from. That little bit of play is fine for wood but aluminum is going to put more stress on the machine and that little bit of play can mean over or undershooting your cut by a few fractions of a mm - which in turn means that successive passes in the same cut will end up putting a higher load on your end mill which just creates a domino effect ending in a jacked up piece of metal and likely a broken end mill (can you tell I’ve been down this road? lol)
It’s a great case for trochoidal milling though.
The MPCNC was designed to work with that little bit of play in the zip tie connections - the zip ties work fine as a belt fastening technique under most circumstances but cutting metal pushes these machines beyond the original scope of the design. That being the case you might consider the primo upgrade or doing something like I posted in the picture (I suspect you do have the room - that little housing only protrudes a few millimeters from the corner). When Ryan designed the Primo the zip ties went away and were replaced with a more accurate tensioning mechanism.