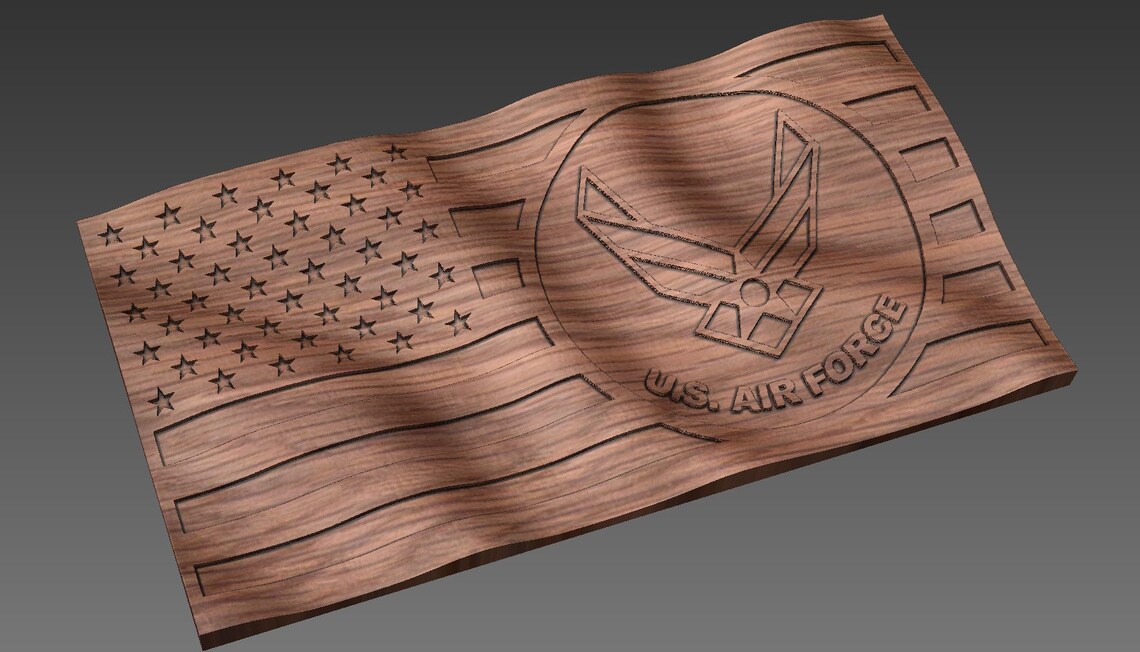
I want to use my CNC to make some American flags that have a wavy 3D look to their surface. Something like the Thumbnail on this YouTube video.
Can anyone think of a way to do this with any free tools?
I have the following:
ESTLCAM
ONSHAPE (including the Kiri:Moto CAM)
Marlin and RepRap firmware
But I can’t think of a reliable way to use these reliably. I entertained an idea of surface mapping a wavy surface before doing a 2.5D Cut. So far that is my best idea but that would have issues with DOC being all over the place.
I just don’t think it is possible with free tools.
Edit: I know that I could simply pay for an STL from people on Etsy. I will probably end up just going that route but I was holding out hope that I could eventually do customized versions with logos or decals.
Oh, wow, so Here I thought I was watching how to do it, bummer. Then I read the rest of your post.
Oh well, now that I have commented, I will get updates if others chime in. I am not there yet, but I was thinking that Estlcam can do this with a 3d print. but you would have to have your flag already set in something like a cad program.
The model of the flag itself can be carved in the personal version (free) of Fusion 360, and I assume it could be done in other CAD packages like Free CAD. The hard part of this specific flag is distorting the relief carved emblem to match the curvature of the flag. If the emblem was a decal or a logo, or anything else that can be represented as a 2D path (like this), then it would also be doable within Fusion 360.
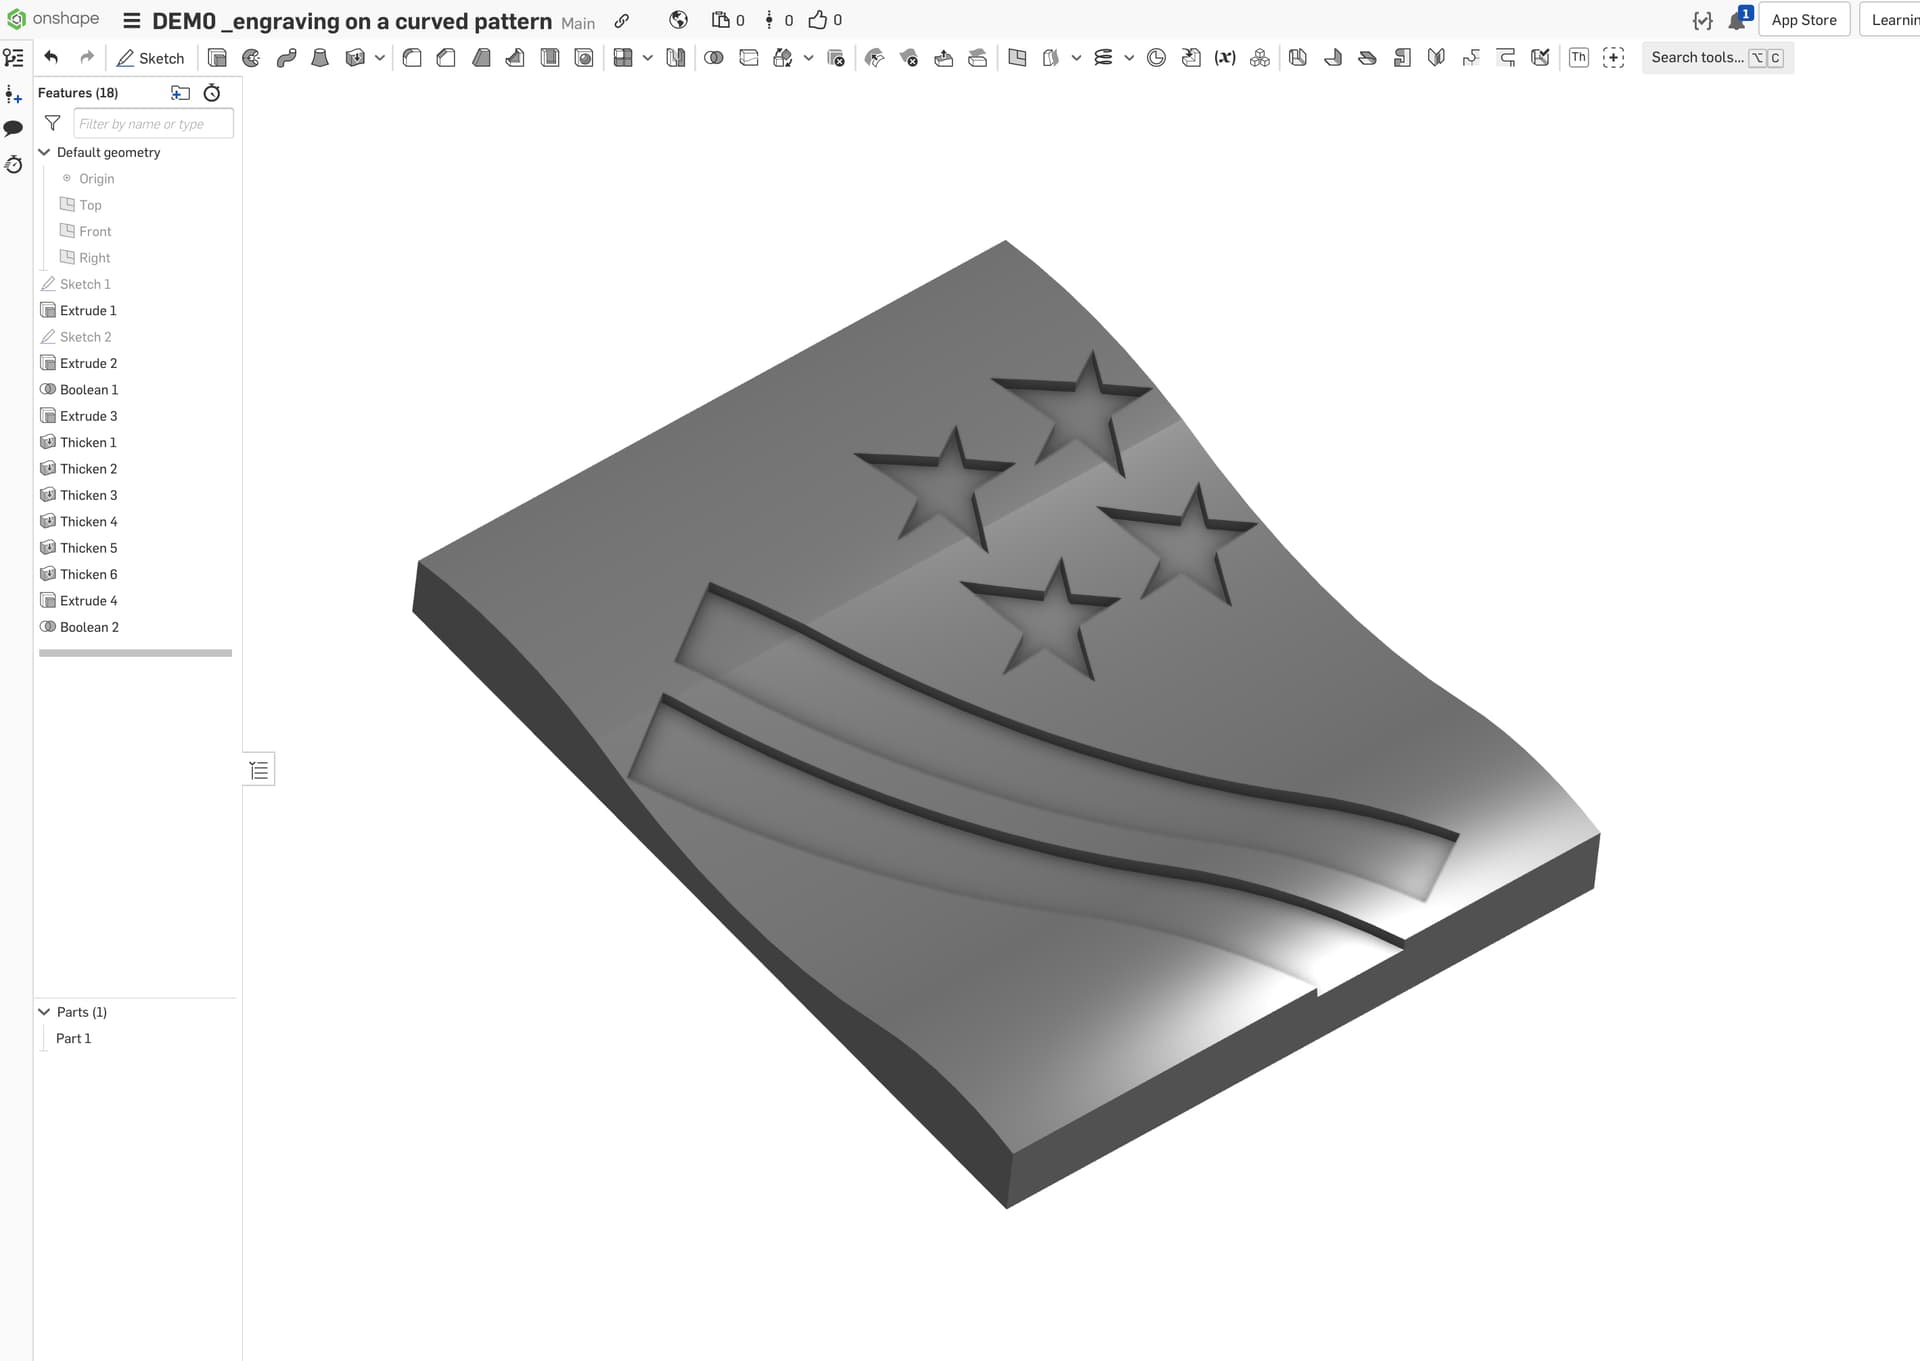
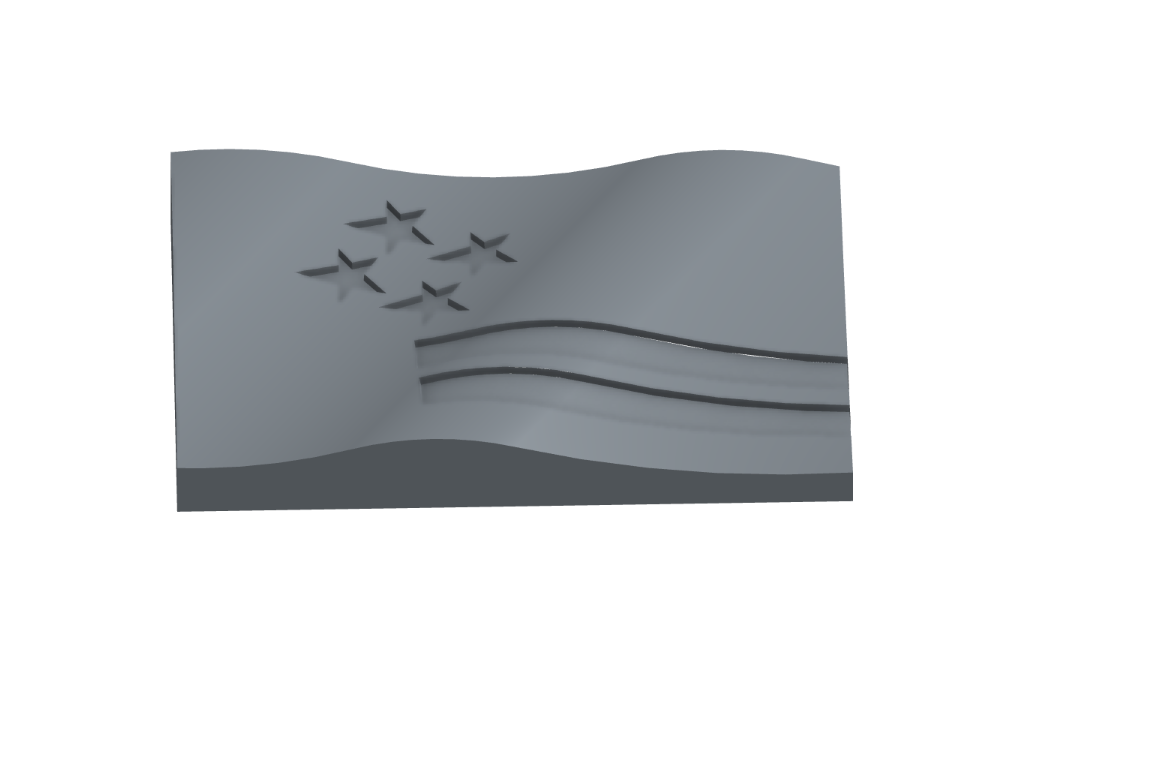
Here we go! Quick and very dirty as a proof of concept.
(EDIT) I’ve removed the link to the demonstration as @mordiev Aaryn has produced a video (below) with a much more elegant solution! Save yourself some reading and just watch that!
The first sketch and extrude are to create the profile of the wave. Note that the first sketch I’ve made a box above the extrude as well to use as a remove in a minute.
Overlay the pattern on to the wavy surface and extrude it as “new” so the stars and stripes are objects going through the wave (flag) and protruding above.
Use Boolean subtract to take away the bits of the flag that aren’t stars and stripes, but leave the star and stripe extrusion in place as Parts.
Now use the “top” profile of the flag (sketch one) and extrude it to cut off the protruding bits of the parts.
Use the “thicken” tool on the stars and stripe parts to “negatively thicken” those pieces. EDIT - I went back to make it a bit more complicated and this time I had to “un-thicken” each piece - one at a time. Not terribly difficult but for some reason I couldn’t select them all.
Use the Boolean function again to join all the parts into one.
You’ll see another extrude at the end which was just me tidying up the end of one of the stripes so we could see into the cut.
It sounds complicated but it’s not really - it took me longer to write this than to work out how to do it. This will give you a file where the recesses have vertical sides with no undercutting. Other methods will give you cuts at right angles to the surface (I can show you that too if you wish, but I don’t think that works for engraving)
Go to my file below and open each part in order you should see what I’ve done.
There’s a second workspace with an angled wave on the flag - just make a bigger wavy bit at an angle and cut out of it what you want to use as a base, but everything else is the same.
Not showing off -I set up another workspace on the same document as a demo of how to get the angle (mine’s very clumsy because I did it after the event - I’d set it up on the angle first I think)
Thanks for this - I’d not give this sort of thing much thought and now I can do it!
You are very welcome although I think if I’d been brilliant I’d have used the “extrude to face” function too! I guess we all get a bit blinkered by the problem and can’t see the forest for the trees.
Same goes for my/our multiple extrudes. If you draw just the object that you are working on, and the plane with the waves in it you only need to “remove” everything above the wave, which will save that step of drawing the outside object and one more extrude.
Now speaking of brilliant - what did you use to produce the video? It was fabulous and I think a great way to answer questions like this. I love the fact that you’ve taken the time to make it and to share the end result.
Now if you can find a way of getting logos and lettering into onshape without having to trace around them, I’ll subscribe to your channel! Thanks!
Ha! Thanks! To make the video I used the windows 10 game bar. It has a LOT of limitations but when you are staying in a single app (like a browser) then it works very well. Since this entire video was a recording of my browser it was perfect. I just clicked windows key - Alt - R to start and stop the recording.
But if you switch apps it will stop the recording.

