my solution was to build a box for it and hang the cables from the roof of the box.
I wanted the box anyway cause cutting Al with Airblast makes a horrible mess without it.
you could technically achieve the same thing with a bar above the machine if you want the sides clear.
put the support uprights in the corners so they don’t get in the way
Yeah, the whole point for this (re)build is so that I can rip out smaller jobs and relocate the whole thing to the driveway or something for jobs that pass-through. I was trying to think of some way to go high with them, but I just can’t wrap my head around it. A box makes it easier to think about, like having chain on the table but upside down. Or maybe to hang out sideways?
One method is to suspend the cable chains. Go to around 6:00 in this video. There is a link below the video to the support he used, and at one time, that support was also on Thingiverse. This is essentially an implementation of what cycloctane is suggesting.
Personally I was not as worried about passthrough as I was of the cable chain getting in the way when I was working with stock from the front. My solution was to run the X1 cable the long way…through the tubing to the back of the machine and then bring it around in a cable chain on the back of the machine. This solution doesn’t provide for passthrough, but it does facilitate having material being inserting and hanging out the front of the machine.
Note if you are considering passthrough, consider making your spoil board just the size of your XY work area and then putting on top of your base board. Your legs would either be a bit longer, or you would put them on blocks. This eliminates the problem of having a pit in your spoil board when you surface it. I found on my Burly that the pit made it difficult to mill things that extended beyond the cutting area, so I used a “raised” spoil board when I upgraded to my primo. Here is an example pic of what I’m talking about..
Edit: I was searching the net for a better picture example of a raised spoil board, and a picture of my machine somehow came up. The router can reach all corners of the spoil board, so it can be surfaced without creating a pit.
Have you seen my solution? I can pass material in from the sides no problem at all. Basically, bolt slotted angle to the sides of the machine and run the drag chains from there. This leaves the edges of the machine free to have a pass-through solution where I can mount stuff much longer than the actual machine in either axis.
Yeah, that’s what I’m talking about when I say sideways. If I’m being honest, it rolls backwards to what I was thinking (towards the machine) but with the benefit of your pictures i can see it kinda HAS to be that way.
I don’t know if I said it before, but I’m REALLY bad at visualizing solutions. This helps me a LOT. Thank you.
Funny, I’ve seen pretty much all of those at some point, likely over the last week aa i looked for how other folks did this. My biggest constraint is that my legs are minimal. I’ve been using these for almost 3 years now, and I’ve never cut on anything over 2 inches thick. I have, however, had extremely long run times. I needed around with a really small burly (8x10x3) and got GREAT feed rates and MRRs, so this size is really me trying to get the y just big enough for most of my projects and the x just short enough that it doesnt impact the rigidity significantly. I spent about an hour in the garage just pushing down on tubes, lol.
It’s probably not super clear in the picture, but i have tnuts going outside the work area. On my other machine, i borked up the spoilboard because it’s some faulty drivers (diagnosed with the gracious help I found here) so I’ve just been pin nailing or screwing everything in, and I like it. With the help of those extra tnuts, I’ll be able to bolt down spoilboards and surface them as needed. If everything goes well, I’ll be able to cut the locating holes, reliefs, and remove a bit of material outside the work area on the OTHER machine(so it doeant stick up too high), then surface it on this guy, and have something that i can remove and reinstall when i need it without TOO much warping. Worst case, i just cut a few spoilboards at a time and have a stack ready to go.
You don’t have to change your leg length or give up working height to get a raised spoil board…just put your legs up on blocks of MDF. There is lots of room before these block is big enough to impede the spoil board.
6 of 1, half dozen of the other. I have a whole stack of tube i could cut for legs, NBD.
Specifically, though, i was referring to the leg-mounted cable chain mounts. I probably wasn’t super clear because that’s just a problem I have, lol. For my typical work project, i have plenty of room for an extra spoilboard or two.
Looking at pictures (I’m away from my machine), I see some potential ways of having a raised cable chain with little or no tubing exposed. If pass-through milling is a rare thing., there is another approach. You could unscrew your cable chain where it is mounted to your spoil board, put your stock under the chain, use double-sided tape to affix the end of the cable chain to the stock, do your milling, then reassemble. I did this once with my Burly.
My plan is to run aluminum angle parallel to the tubes along the back and one side. I’ve got the angle, and there were some models posted of 3D printable brackets that would “plug in” to the support tube ends. My thought is that this would not require any changes if/when I change leg height. I just haven’t had the time to get it all put in place. I’ve got 6-conductor shielded cable for the motor and end stop wires, so I don’t think cable chain would add much benefit as long as I can secure the cable half-way along the angle - zip ties to the rescue.
I’ll try and post pictures when I get the supports in place.
I used the tape measure trick and arranged it so the wires are above the bottom of the trucks.
Ignore the white cables running on the table since those will eventually be under the table. I keep doing projects without finishing the wiring.
I should have cut the tape measure pieces a little longer because it lifts/twists a little when it get to the full extended end (opposite side of the position shown in the photo above) but it has been working well so far.
I haven’t started working on my enclosure yet but the plan was to have the back wall bolted on so I could easily remove it if I need to do longer boards.
I’m planning on doing some engraving on a few picnic tables for my wife’s preschool. I will remove a 2x6 board from each bench to add their school logo. I’ve done some test runs with success and now I’m just waiting for the winter break when they won’t be in use for a few weeks.
My portable MPCNC has all cables and hoses raised up on wood angle moulding in cable chains. [Have a look!] (https://youtu.be/ztcMPmEYCmw)
I can pass long pieces through along X or Y.
Hey, I’ve seen your video before! Somebody in the Facebook group just linked it as an example for portable cncs. I think it’s probably the best example for portability I’ve seen, really.
It’s a little hard to see how you have the angles mounted, but I’m going to end up not too far from your solution.
I slightly altered the clip of the truck to add something to screw the moulding to, for the tray that moves with the Z assembly.
Here is a photo: https://photos.app.goo.gl/m2UNHmijL4z8zbBV9
The stationary tray is screwed to wood wedges I hammered into the ends of the Y tubing.
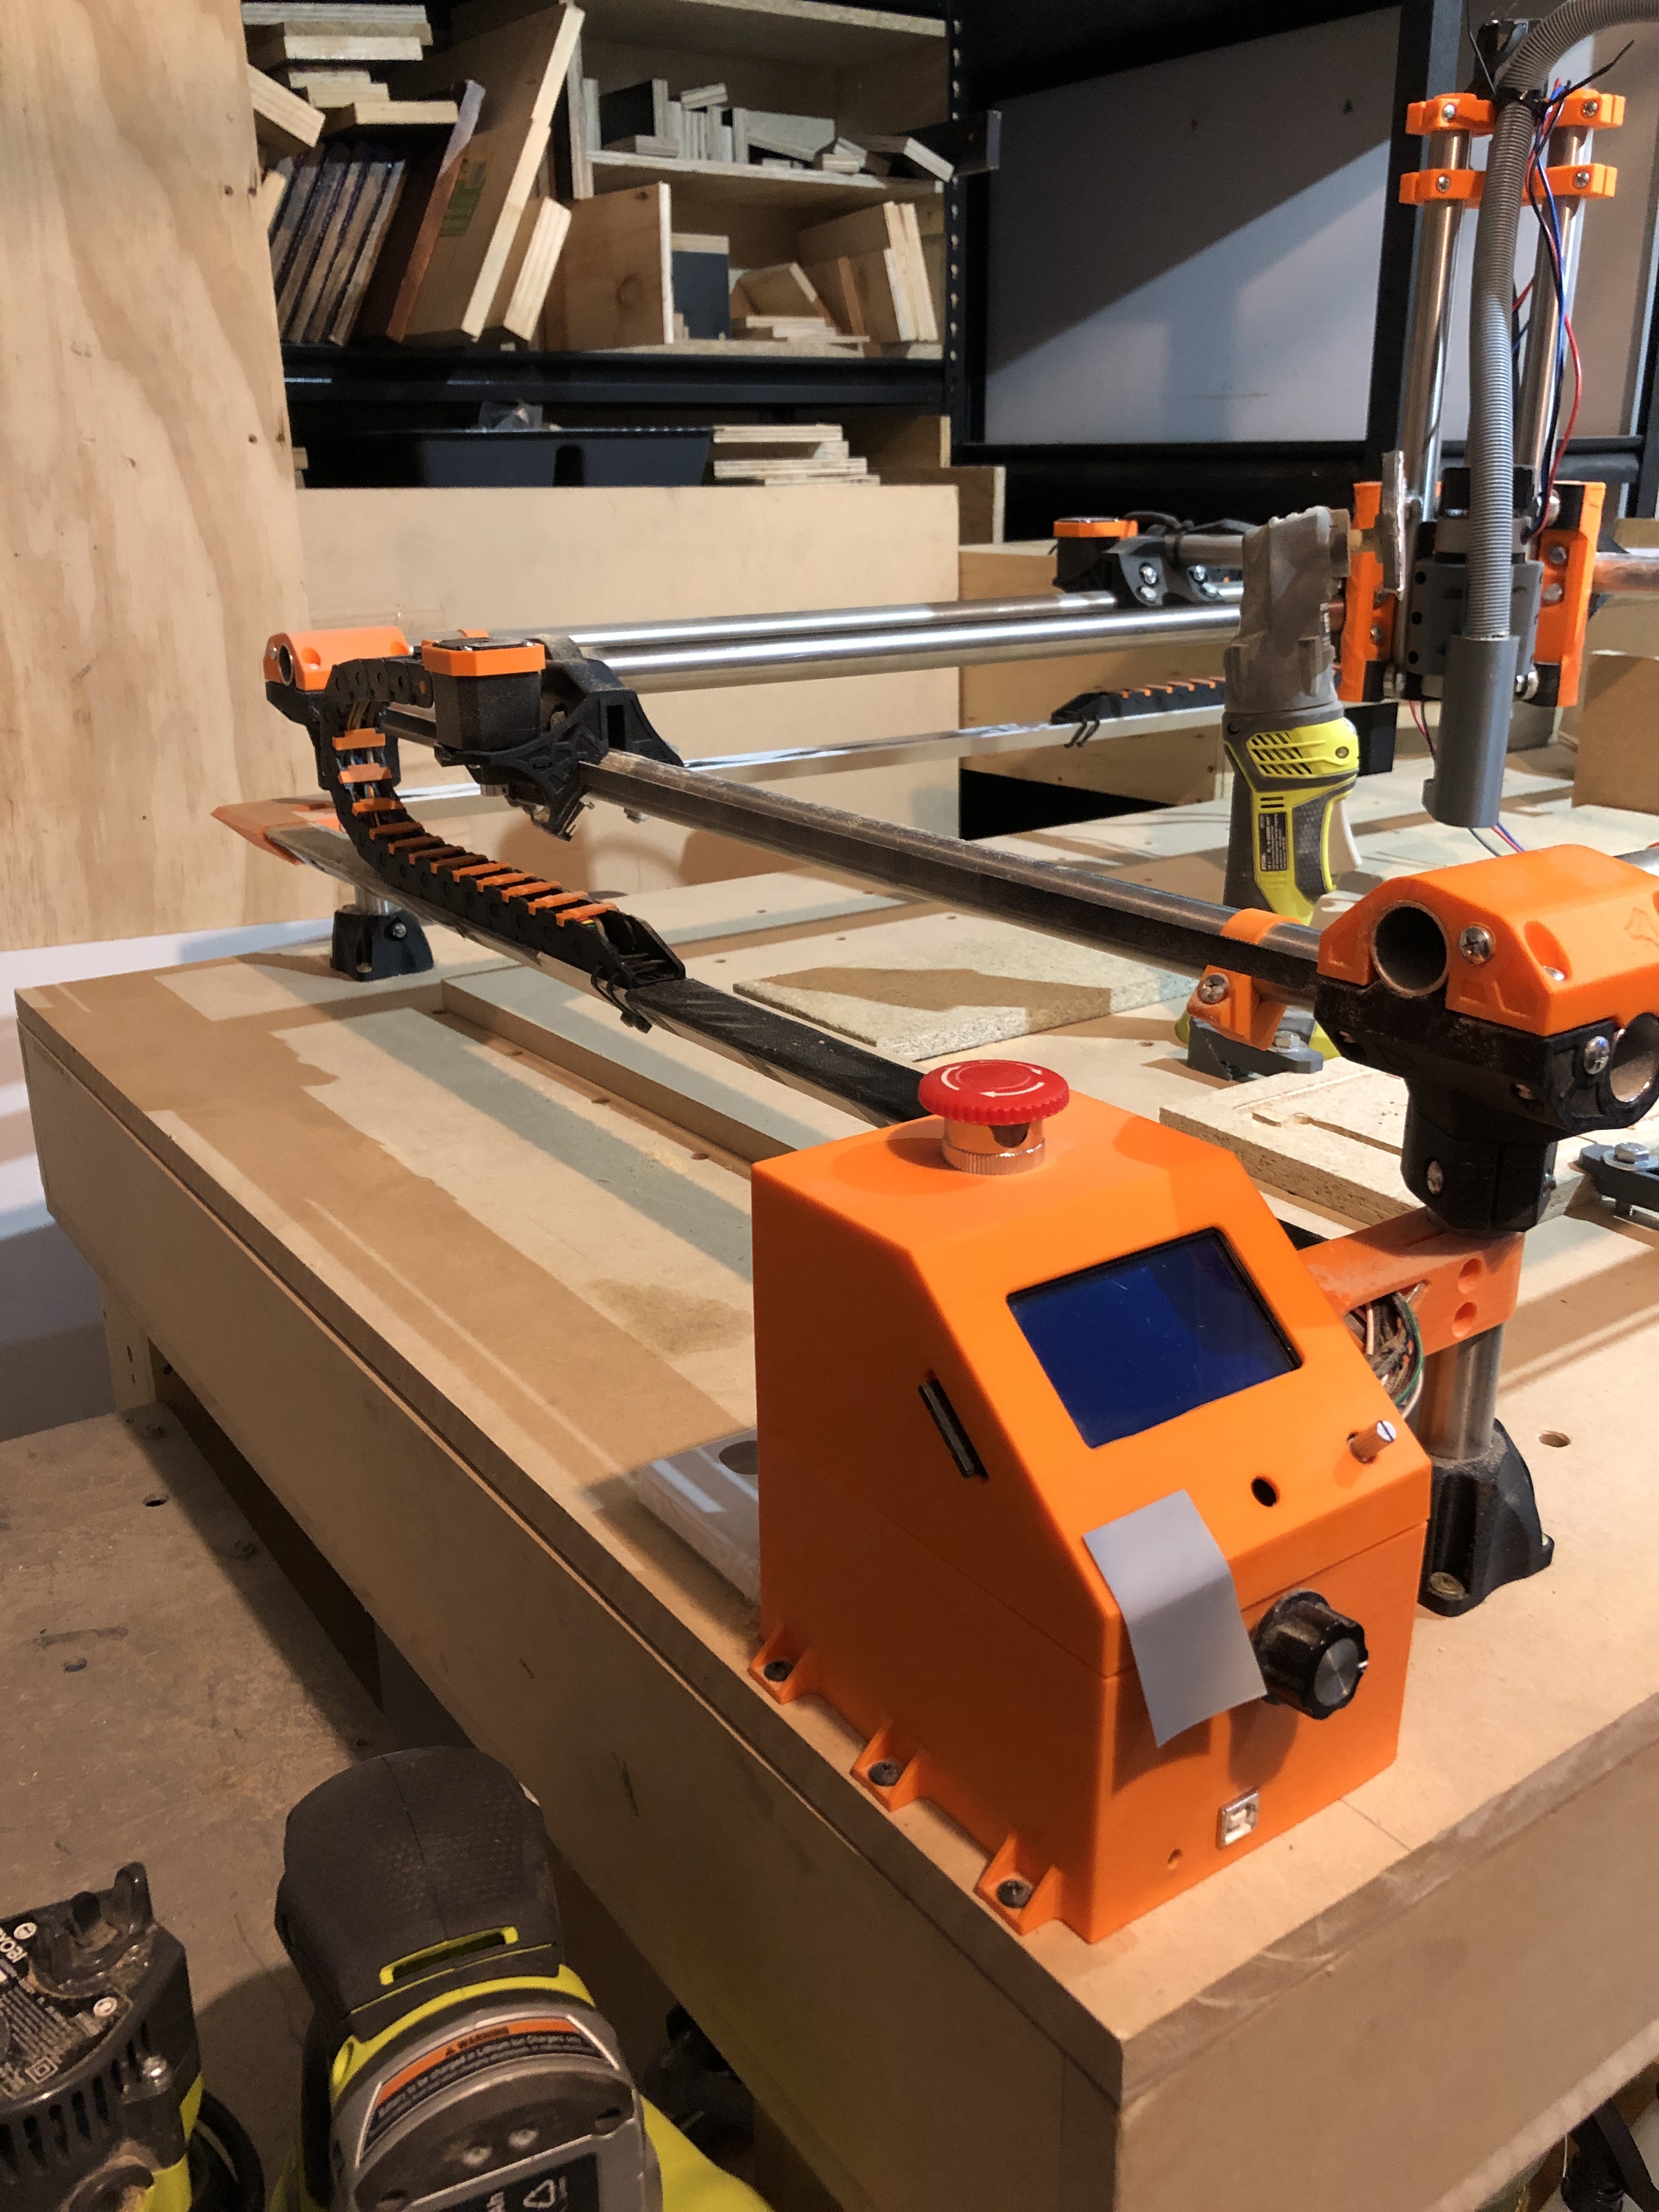
I designed some brackets to support some right angle aluminium extrusion that clamp to the uprights and also support the cable chains. Let’s me work on large sheets in sections if I ever need to…
I also made a torsion box (table) for my machine to sit on to try and get the most solid flat surface possible - I decided to go big. The cables go into the control box you can see in the bottom right go down into the table and are nicely tucked away.
