Ahh ok, thanks for sharing, nice setup!
I meant, how long are the tubes of the gantry? 60"? More?
I actually started typing that and then I thought u might not have meant that haha.
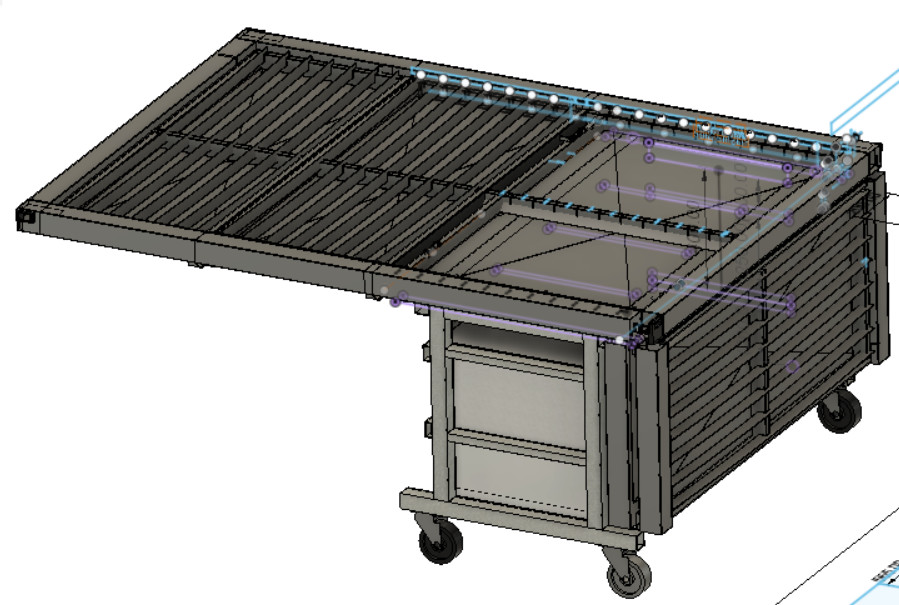
Table width is 1500mm, so they would be a little longer than that, its 1350mm between the inside of the y rails, which gives me about 1220-1225mm or so to work with.
It looks much wider than long at the moment as its just the first phase / part, the next extensions will be swinging off on hinges, but I hope to use the table to more accurately and quickly manufacture the extensions.
1 Like
Ah, ok. It is just the perspective then. It looks a lot longer than that, which would add a lot of weight.
Love the table, I played with the drop leaf idea when planning my table and it scared the hell out of me as I lacked the cad skills to visualize it. I look forward to seeing your end result. There are a lot of us trying to squeeze a full size CNC into the corner of the garage.
Hey @vicious1 any chance we could get a Table subcategory for the lowrider?
1 Like
Yeah, we might have another idea brewing that fits a little better. If it takes to long ping me and we will make a new category.
There is a tag for #lowrider-v2-build. There are a lot of builds that don’t have the tag though, or a thumbnail.
It seems there is still about 2mm difference in sides when doing z moves ( I think the main difference is when the motor starts from resting position). Some have recommended trying a new coupler (which I would have to order). I’m playing with the idea of ball screw z axis which I’ve seen good things about on other CNC machines. Anyone had experience with this on the lowrider?
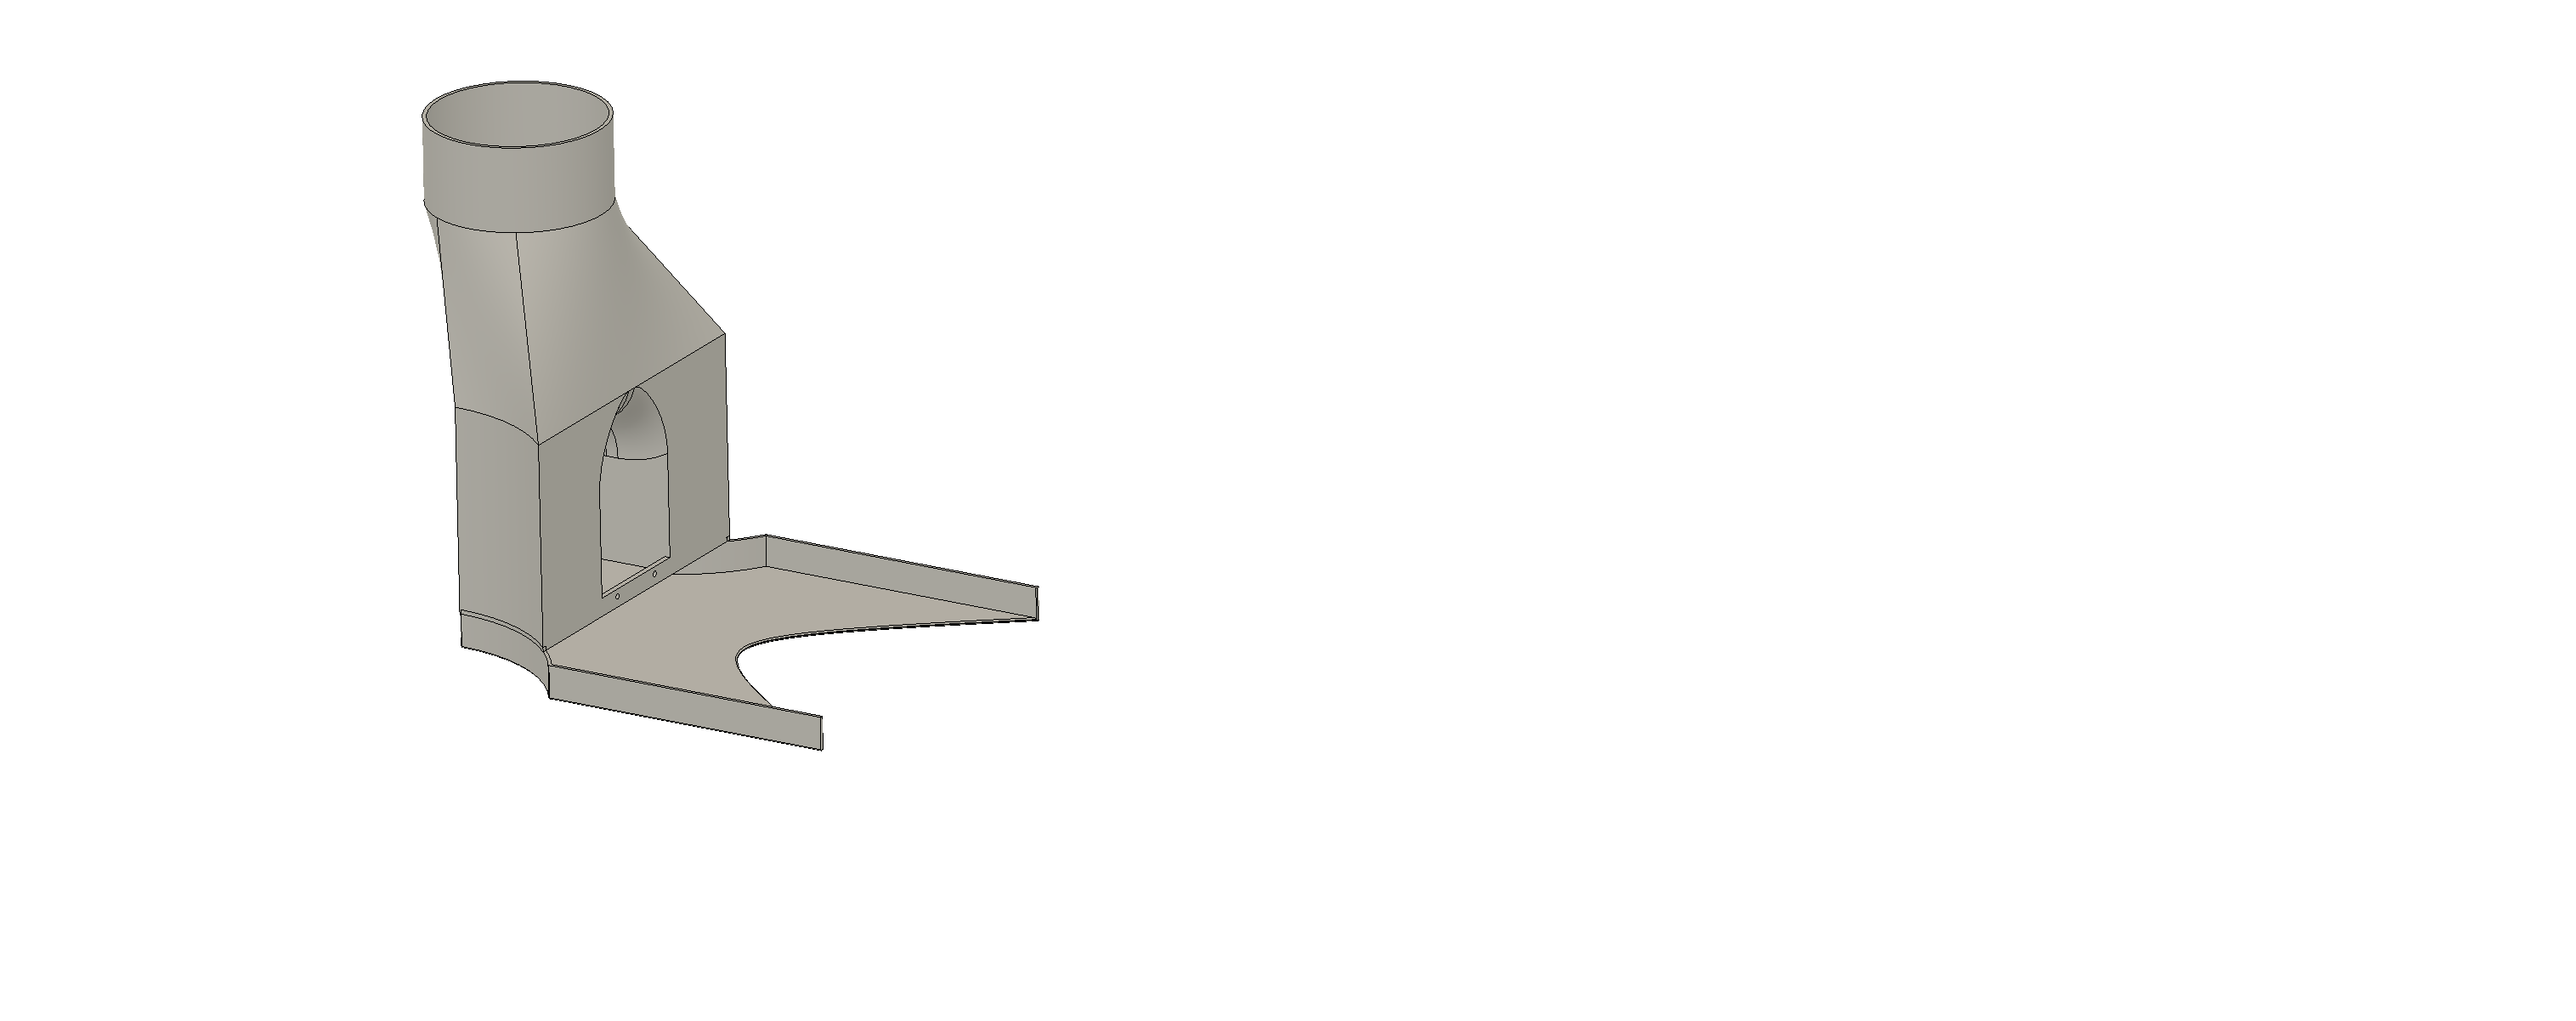
Additionally, I seem to have an issue with the vacuum connection. I hooked up my shop vac pro 40l to the adapter and it barely sucks up anything at all. Thinking I might have to design an adapter that shoots in at more of an angle…
That’'s a problem with the lowrider, unless you are really close to the work surface the vacuum is pretty much useless. IMHO I ordered some brush material ( about 10.00 from amazon) and will put that around the whole plate.
There are a number of vac attachments lurking around. I concur that adding bristles or craft foam around the perimeter makes a huge difference.
I came across a vac attachment version which hung off the side and created a tunnel underneath the x carriage plate. After some heavy modifications I settled on this:

You might want to try using it differently.
You should never really be much further than 3/4" away from the surface. 1/8" and even a lot of 1/4" endmills are not any longer than that. So unless you are hanging your router out the bottom of the plate further than needed at 3/4" or less the vac works really well. In fact Barry has to add some distance or his vac keeps sucking his router into the work surface.
Adding bristles means you need to hang out your router so they clear, that also means you are running the Z axis higher than needed (=less rigidity/accuracy).
1 Like
Interesting Ryan. I found this very helpful.
I was trying to go higher so I could see (but cant really see anything anyway). Now I’ll go low.
Tom
1 Like
I think because I have the spindle, I need some stickout in order to get spanners in to change over the bits.
Does Barry have a very powerful dust extractor? The shopvac isn’t super powerful, but I don’t want to have to buy something else.
I think looking into a vac shoe might be a good next step for me and see how that goes.
When I did it, I was hooked up to a rigid shop vac. My big dust collector actually has less suction.
3 Likes
I’m also running my router with lots of stick out and am just using a regular ridgid shop vac 5hp. I made a small dust skirt that is held on with magnets and it works great. I’m not using the 3d printed parts just a piece of PVC through a hole in the 611 plate. It works well so yours should work even better. I have a dust separator in line with the vac so I lose some suction but it’s still good enough
So I gave the shop vac a clean and have now hooked it up without the head and attachment adapter, and also made a dust shoe for 3 of the sides and it seems to help a fair bit.
I think also adding in an air assist on the open side will complete the formula.

Consider adding a “second stage” separator to your shop vac solution. A 5 gallon bucket with a Thien baffle could keep your shop vac filter clean a lot longer, leading to better dust collection at the source and better filter performance long-term.
1 Like
The flaps really help to just slow down the chips and dust. The vac can’t seem to grab them while they are shooting out at 20mph. Once they slow down, the vac has a decent chance of picking them up. That is my amateur, anthropomorphizing opinion.
I honestly don’t think its powerful enough to add any more inline stages to it, its only a 1100w (1.5hp) motor.
Going to try and get a new pair of couplers tomorrow to see if this helps to improve it going out of alignment.
I’m considering getting rigid couplers instead of flexible, is there any reason why i shouldn’t do this?
I would imagine it would only just have less tolerance for screw up’s moving below the axis limit.