What you really want is a mount that has both the router and the laser on it. That way, you can cut out a part with the router and then go straight to burning it with the laser (with an appropriate tool offset) so you don’t have to figure out how to recenter an oddly shaped part 
1 Like
I could just bolt on another router base . Then I could do the same with dual routers!
1 Like
That takes the ATC to a whole nother level.
2 Likes
I hope I’m wrong, but if what I’m seeing is your router base with your printed laser mount bottomed-out in the base and my air-assist nozzle on a Neje A40640 laser module… and that’s all gonna be bolted down to your LR tool plate of some several millimeters thickness… I don’t think you’ll be able to get close enough to the workpiece to obtain focus, with everything positioned as shown.
I made the nozzle to extend about 15mm IIRC below the module’s housing skirt and with the fixed focus distance on the A40640 at 20-22mm, that would put the actual focus point at just 5-7mm below the tip of the nozzle… and I don’t think you can get there from here.
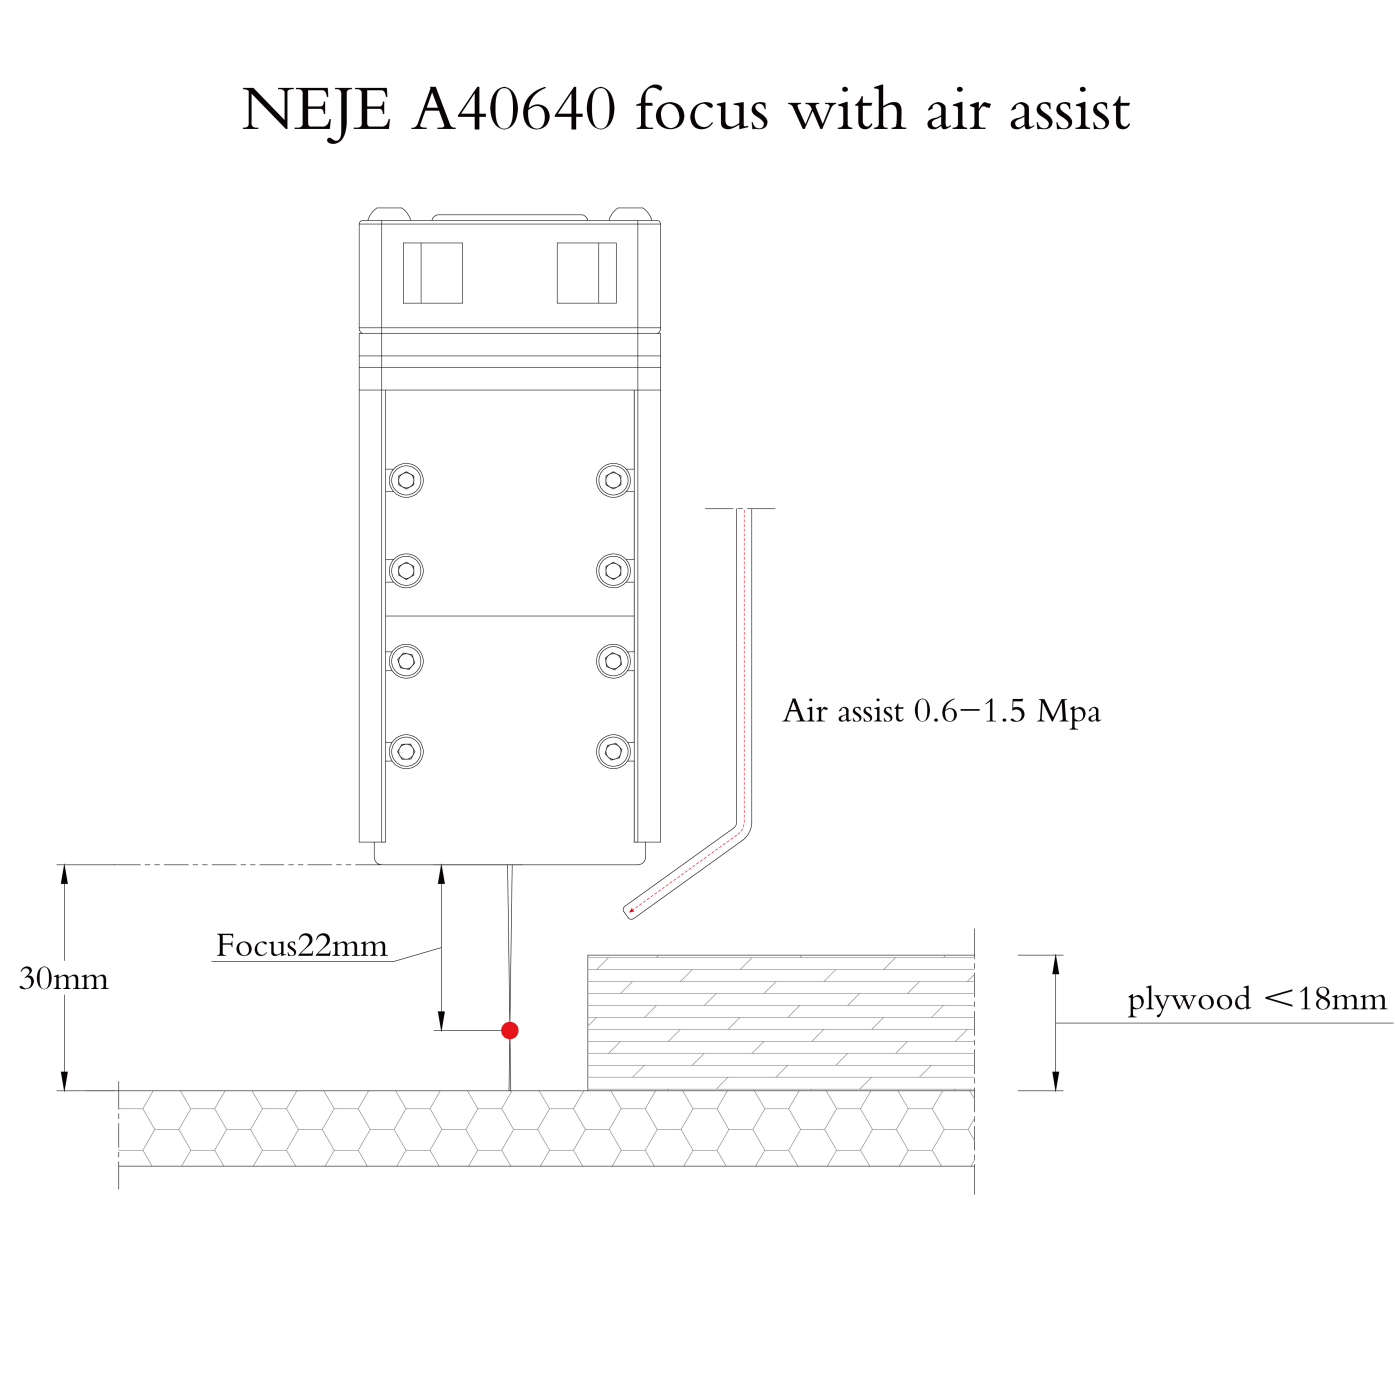
I don’t have any idea how much up/down adjustment you have in the mount… but you’d have to get the nozzle’s tip even with or below the underside of your LR toolplate just to get 5-7mm from the workpiece surface. Do you have that much adjustment? Maybe in the router base itself?
Again, I sincerely hope I’m just a senile old man… speaking with no understanding. If so, please forgive me.
– David
1 Like
That’s close to what I’ve been thinking of making for my makita mount! I hope that one day I’ll go from thinking to actually MAKE it 
1 Like
Laser mount for the Neje N40630
I printed up @robertbu 's mount last week. I don’t have the NEJE laser yet though. I did shorten it a bit, so it’s only 60mm tall, but it goes into the mount perfectly.
3 Likes
Don’t worry about it. I can always print another one. I don’t think extra reach will take any time to CAD.
That pic is very helpful. I saw no movers like 17-22mm, but I wasn’t sure where those were measured from.
I still think I am going to be ok. But if not, then this prototype is enough to get the correct measurement. I want to shoot for nothing sticking out past the bottom of the gantry, because the LR has a tendency to sit down when I unpower it.
I will go check it out when I get a break today.
1 Like
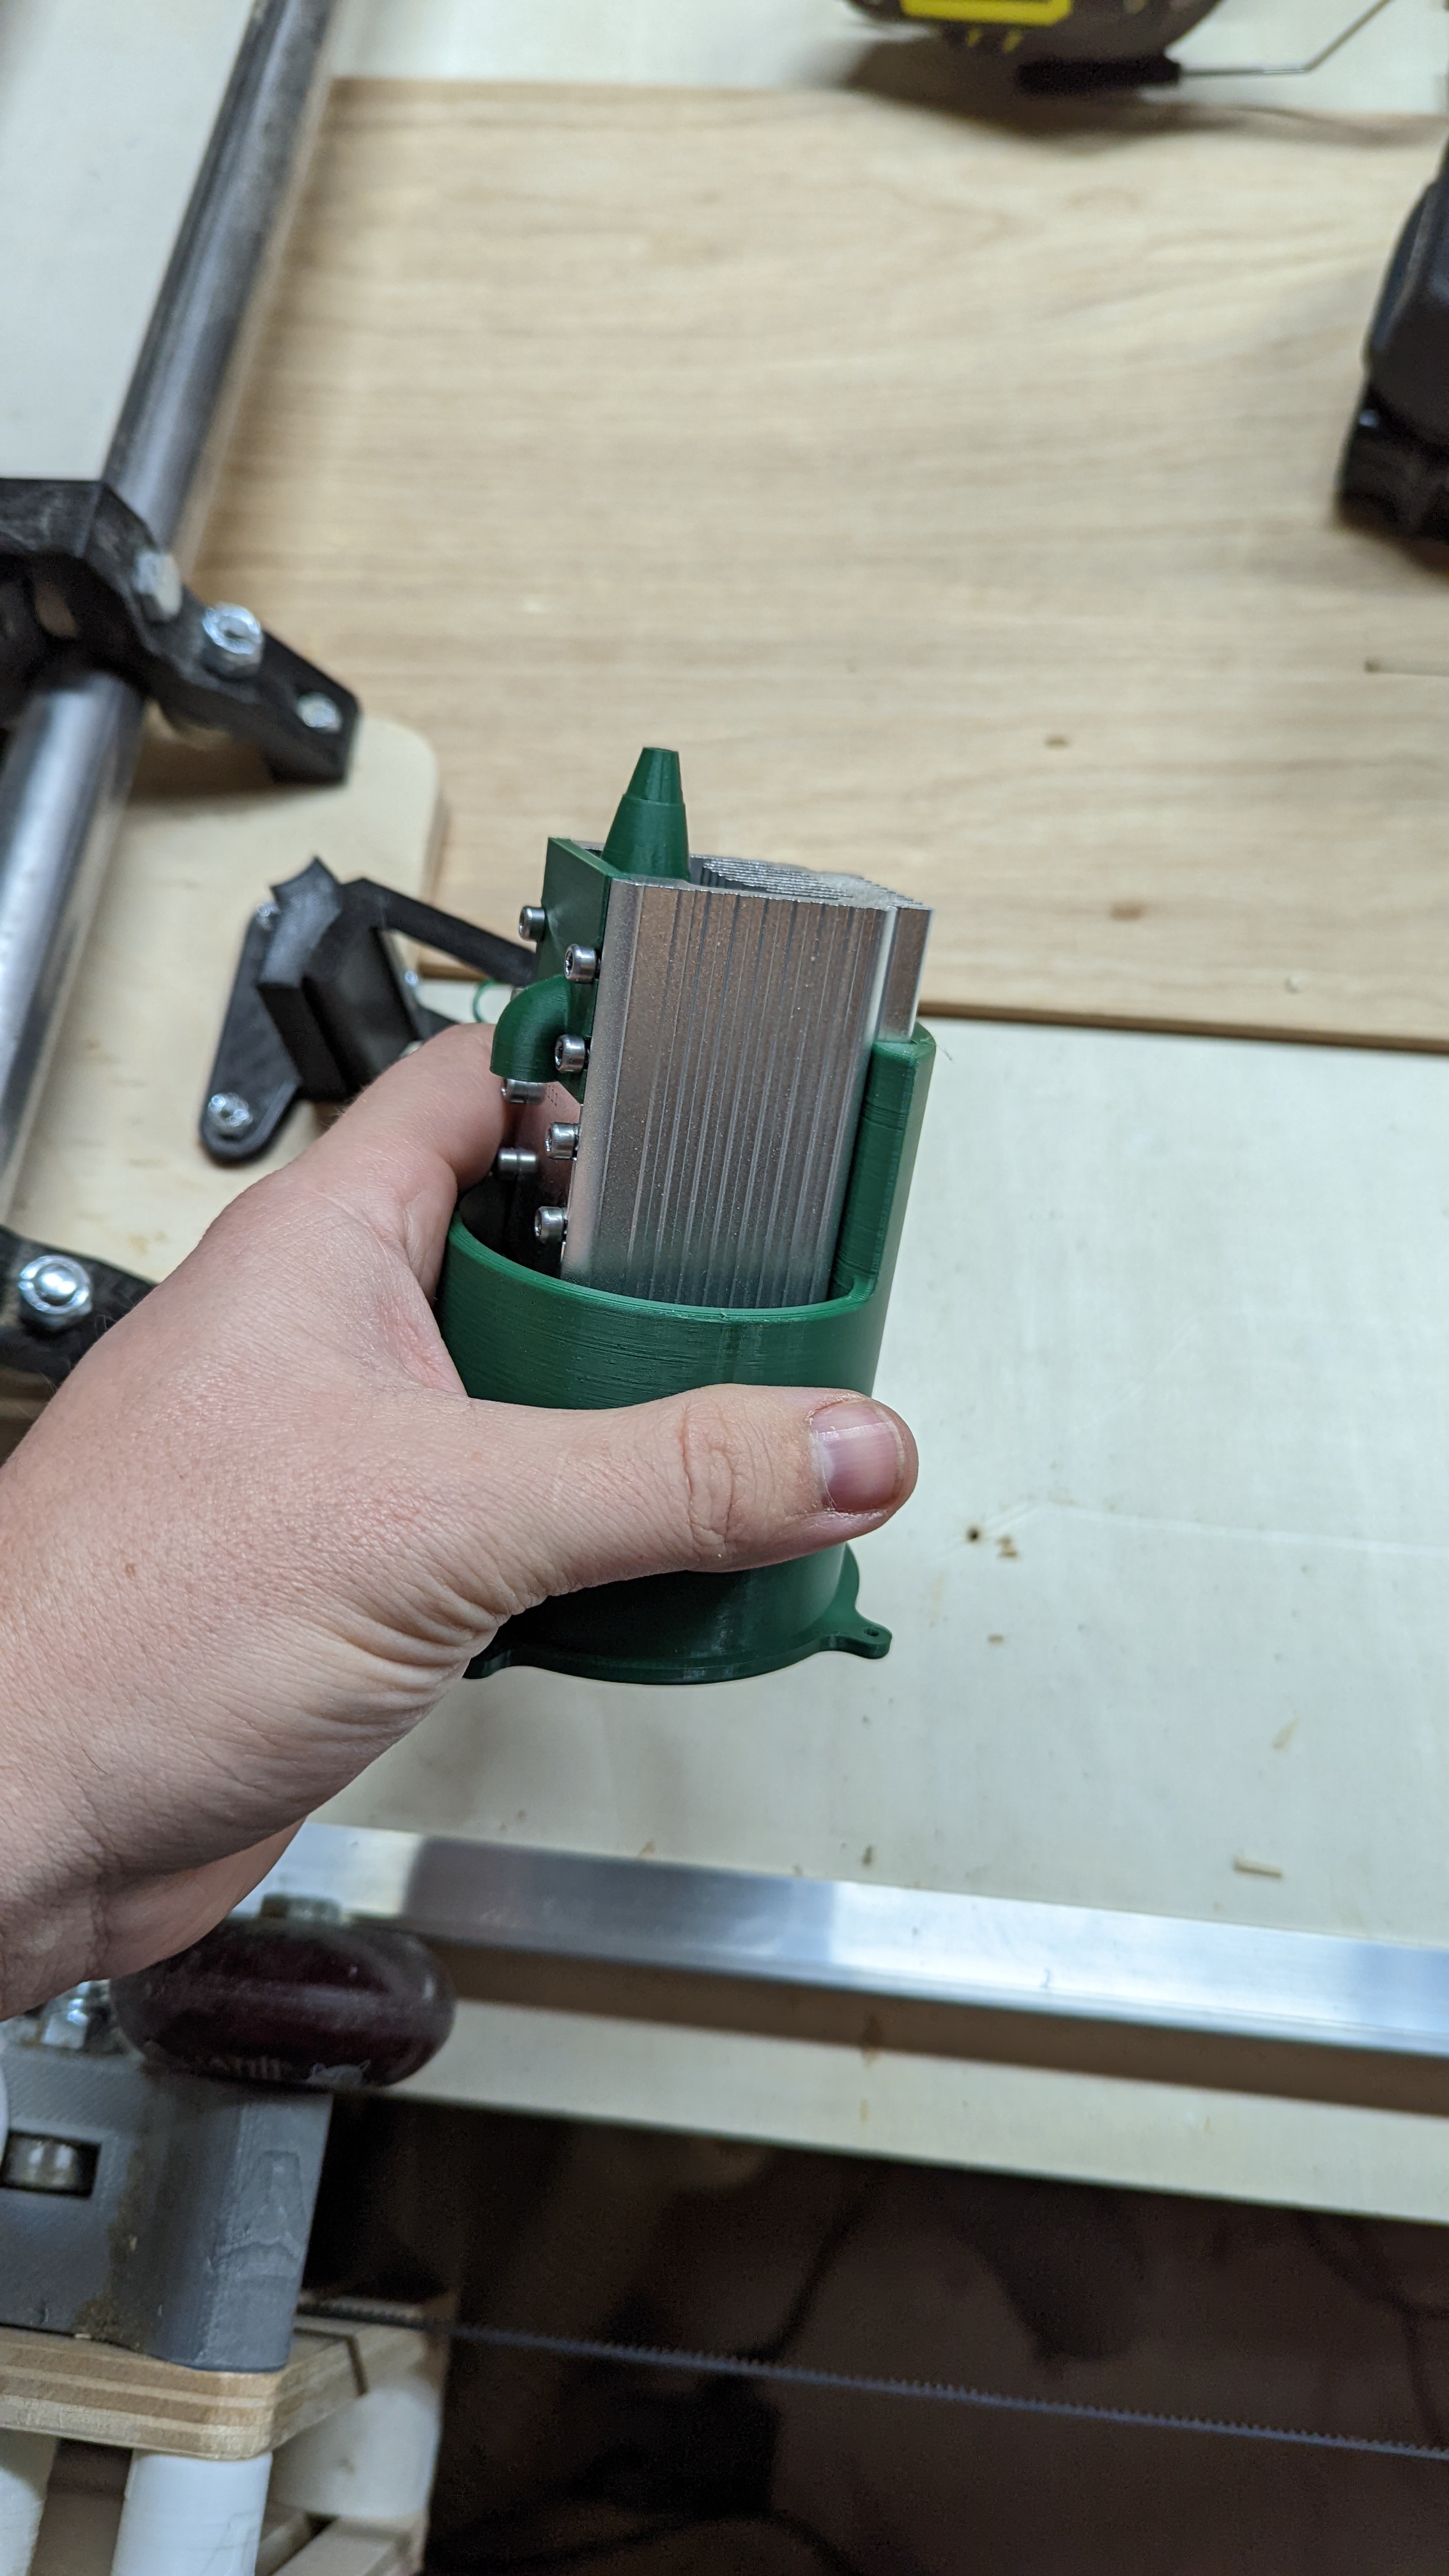
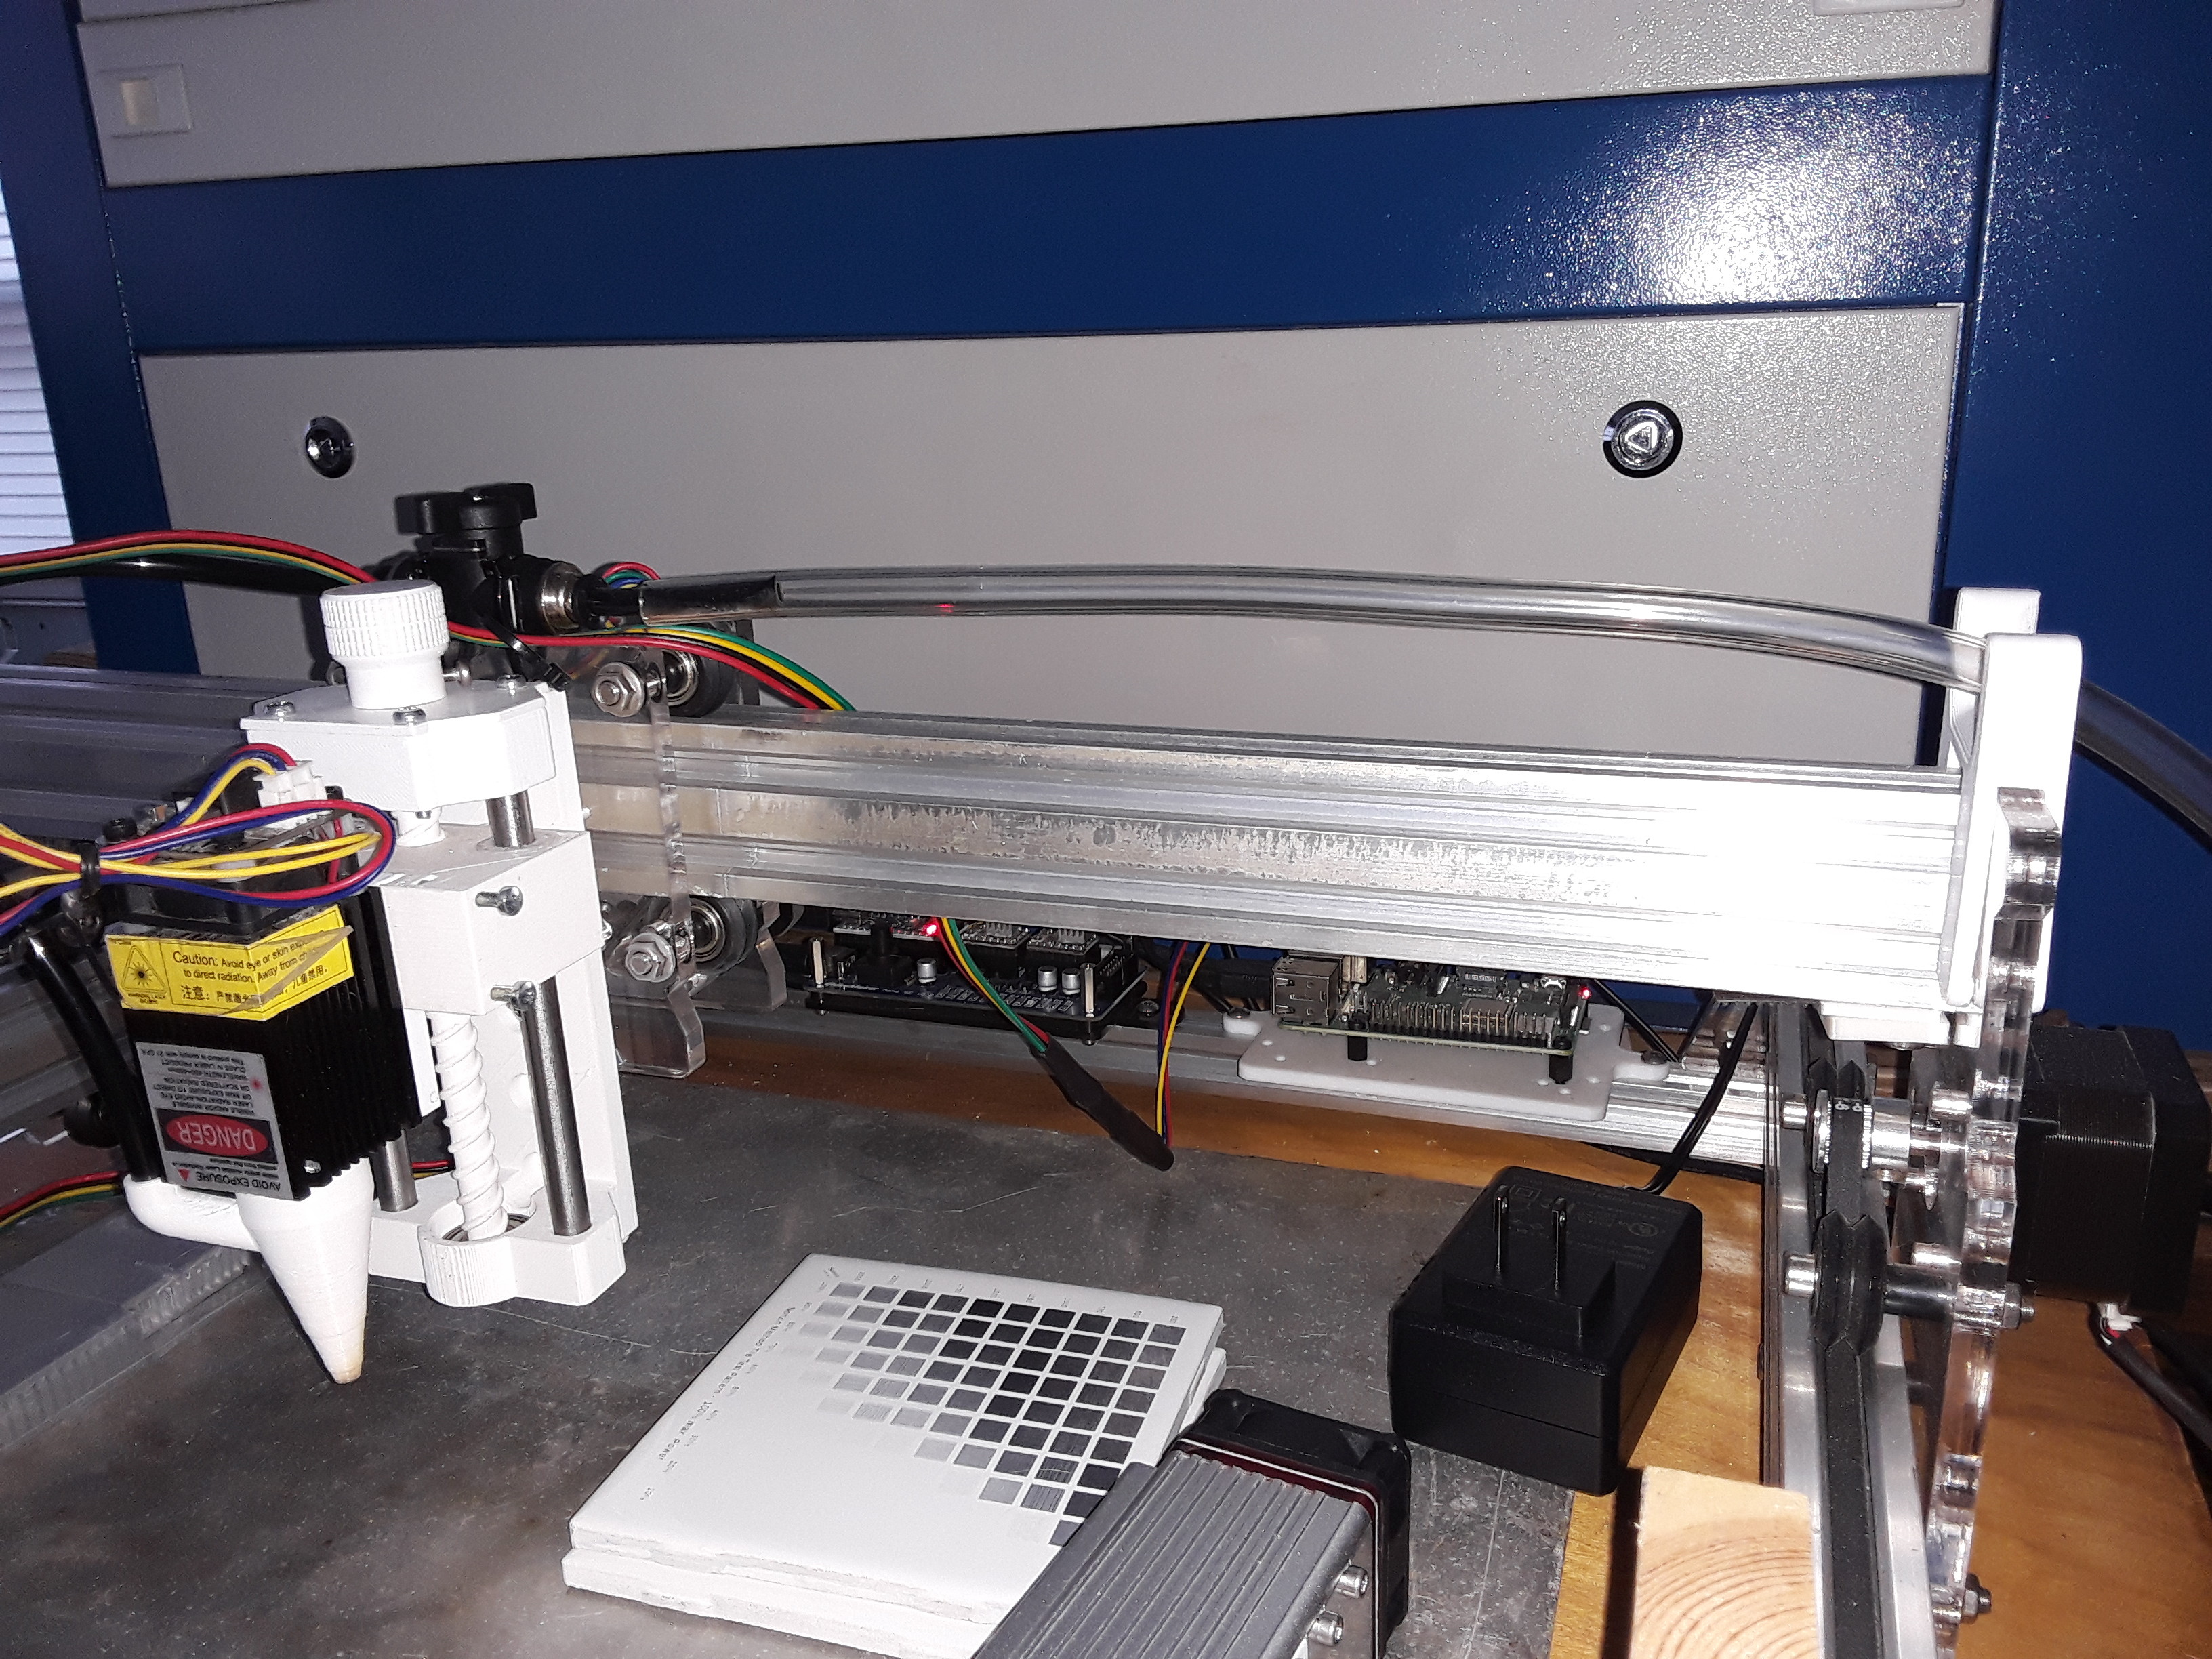
I have enough stick out. It sure does grip it tight. Maybe too tight. I hope I don’t have to move that much anymore though.
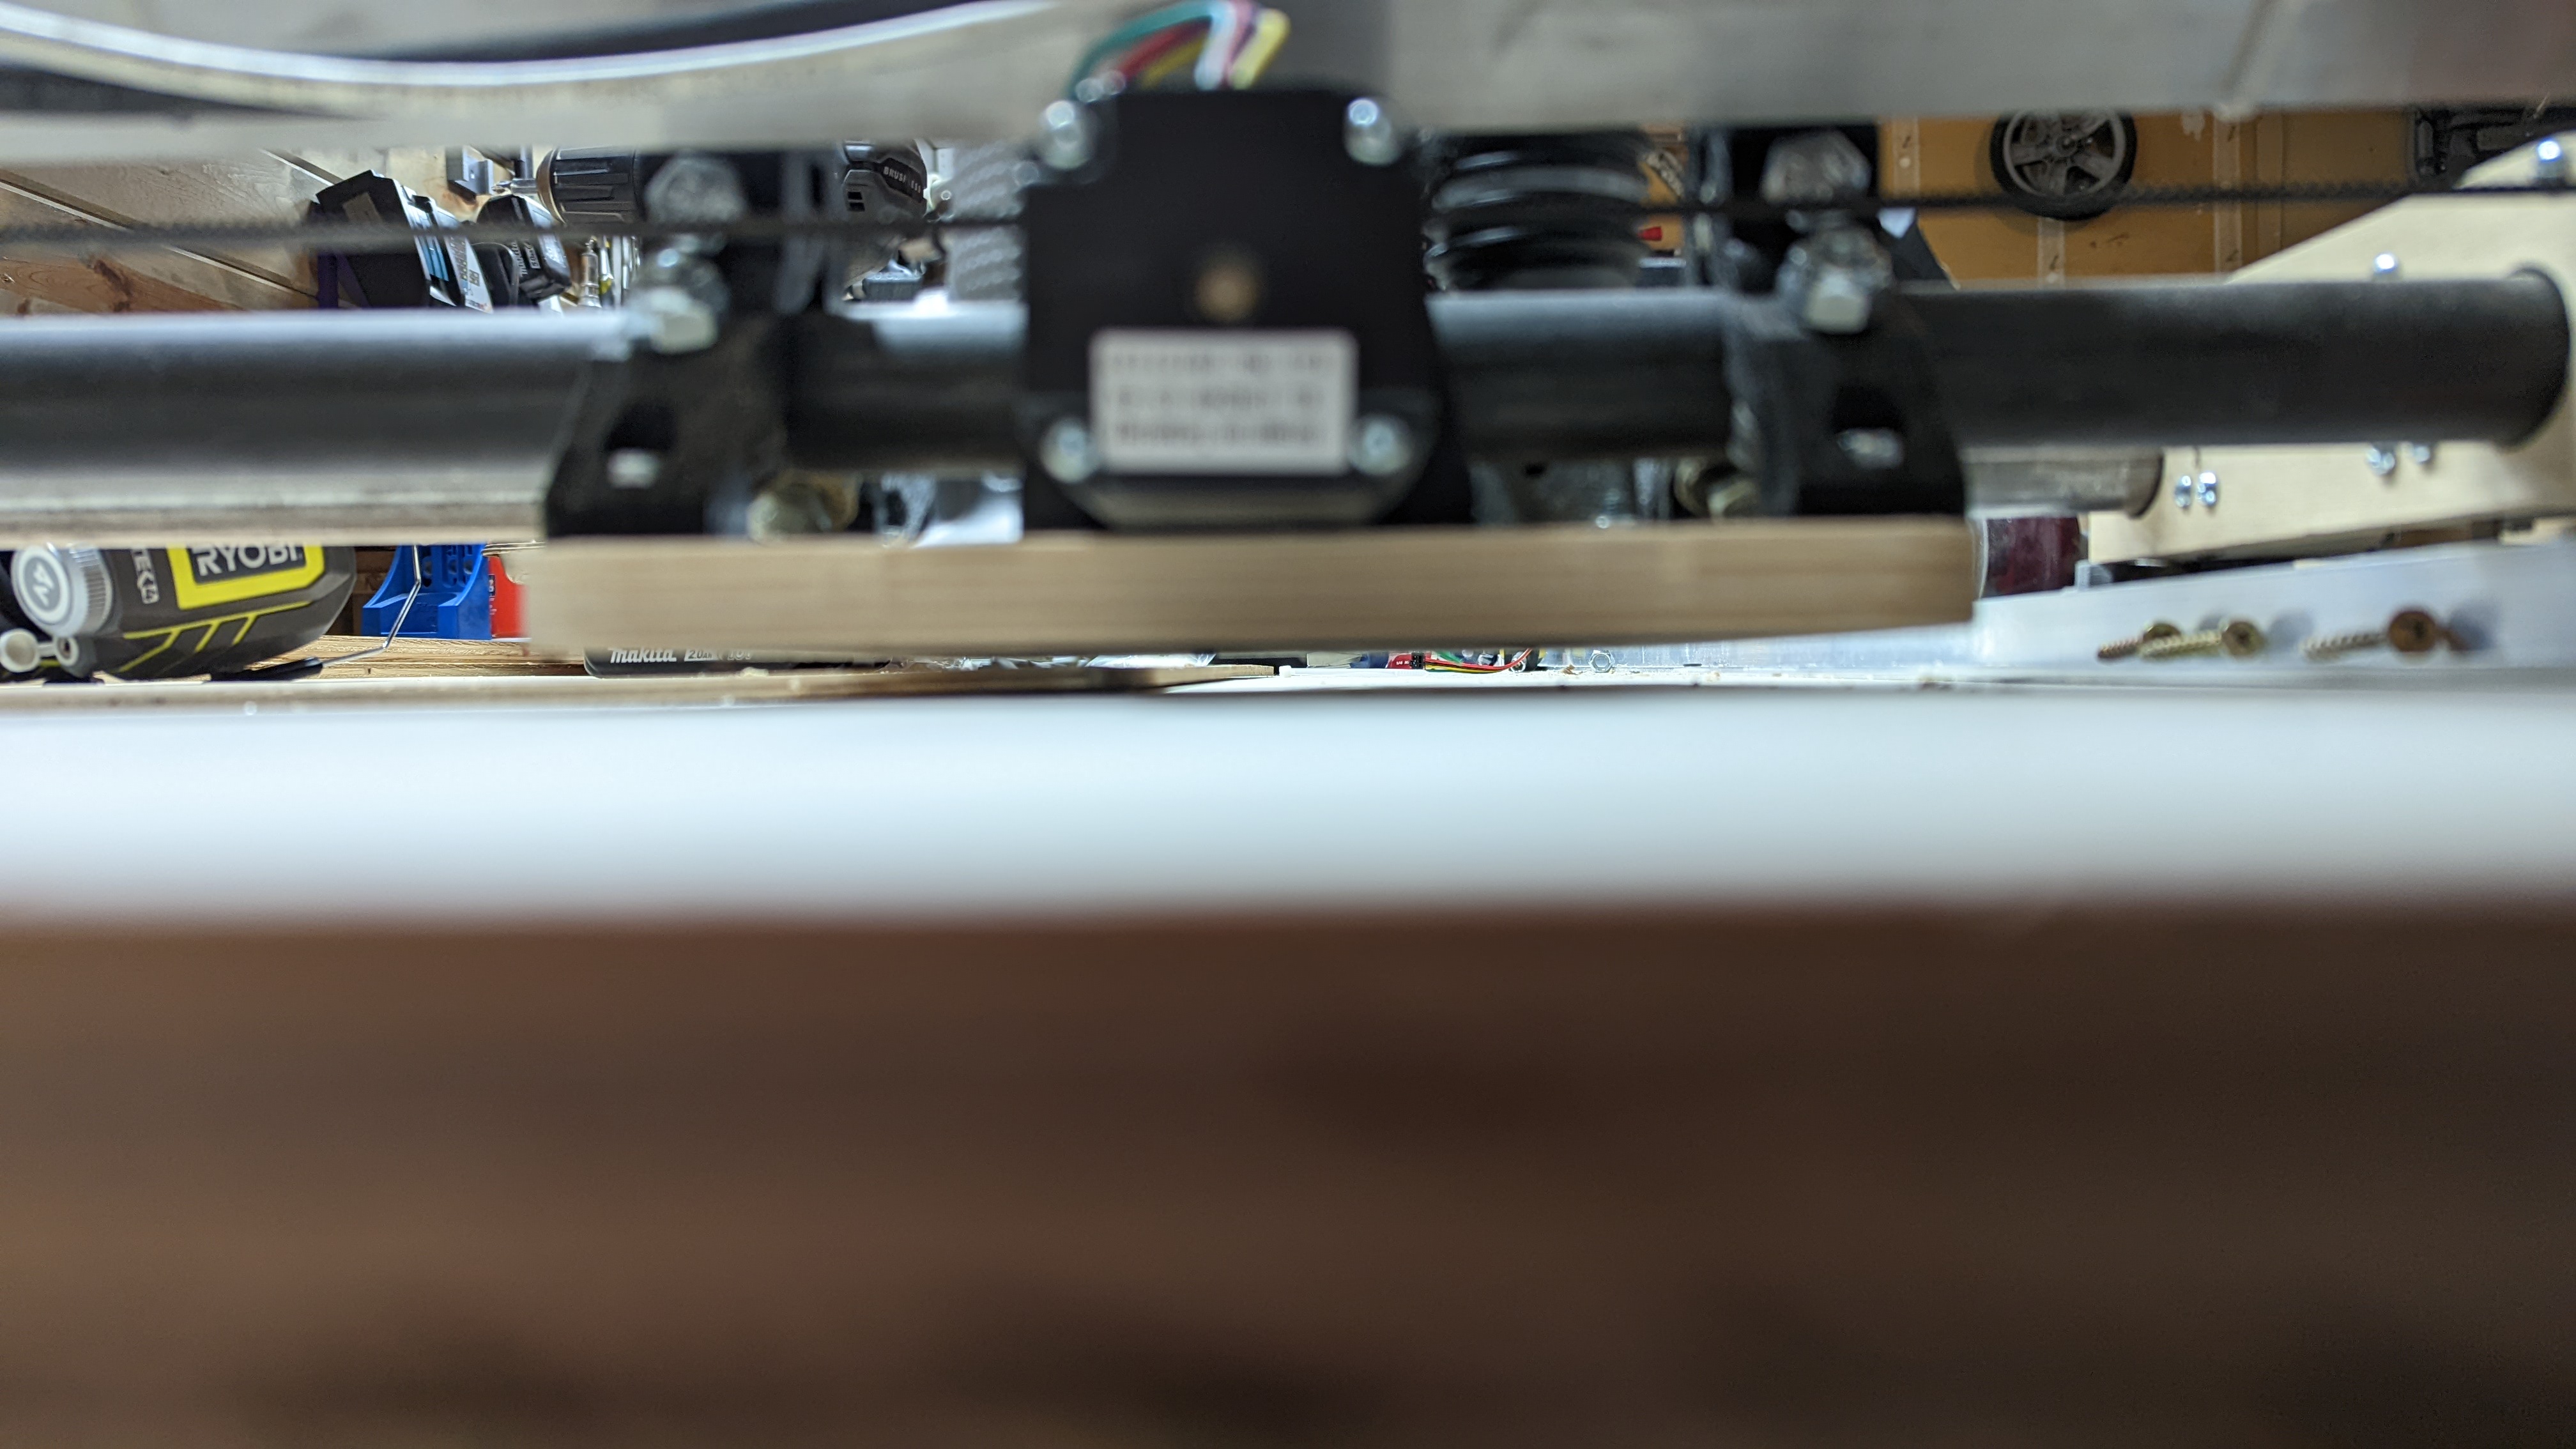
I can just barely see the tip of the air assist poking down under the plate. This picture is terrible. But it less than a mm.
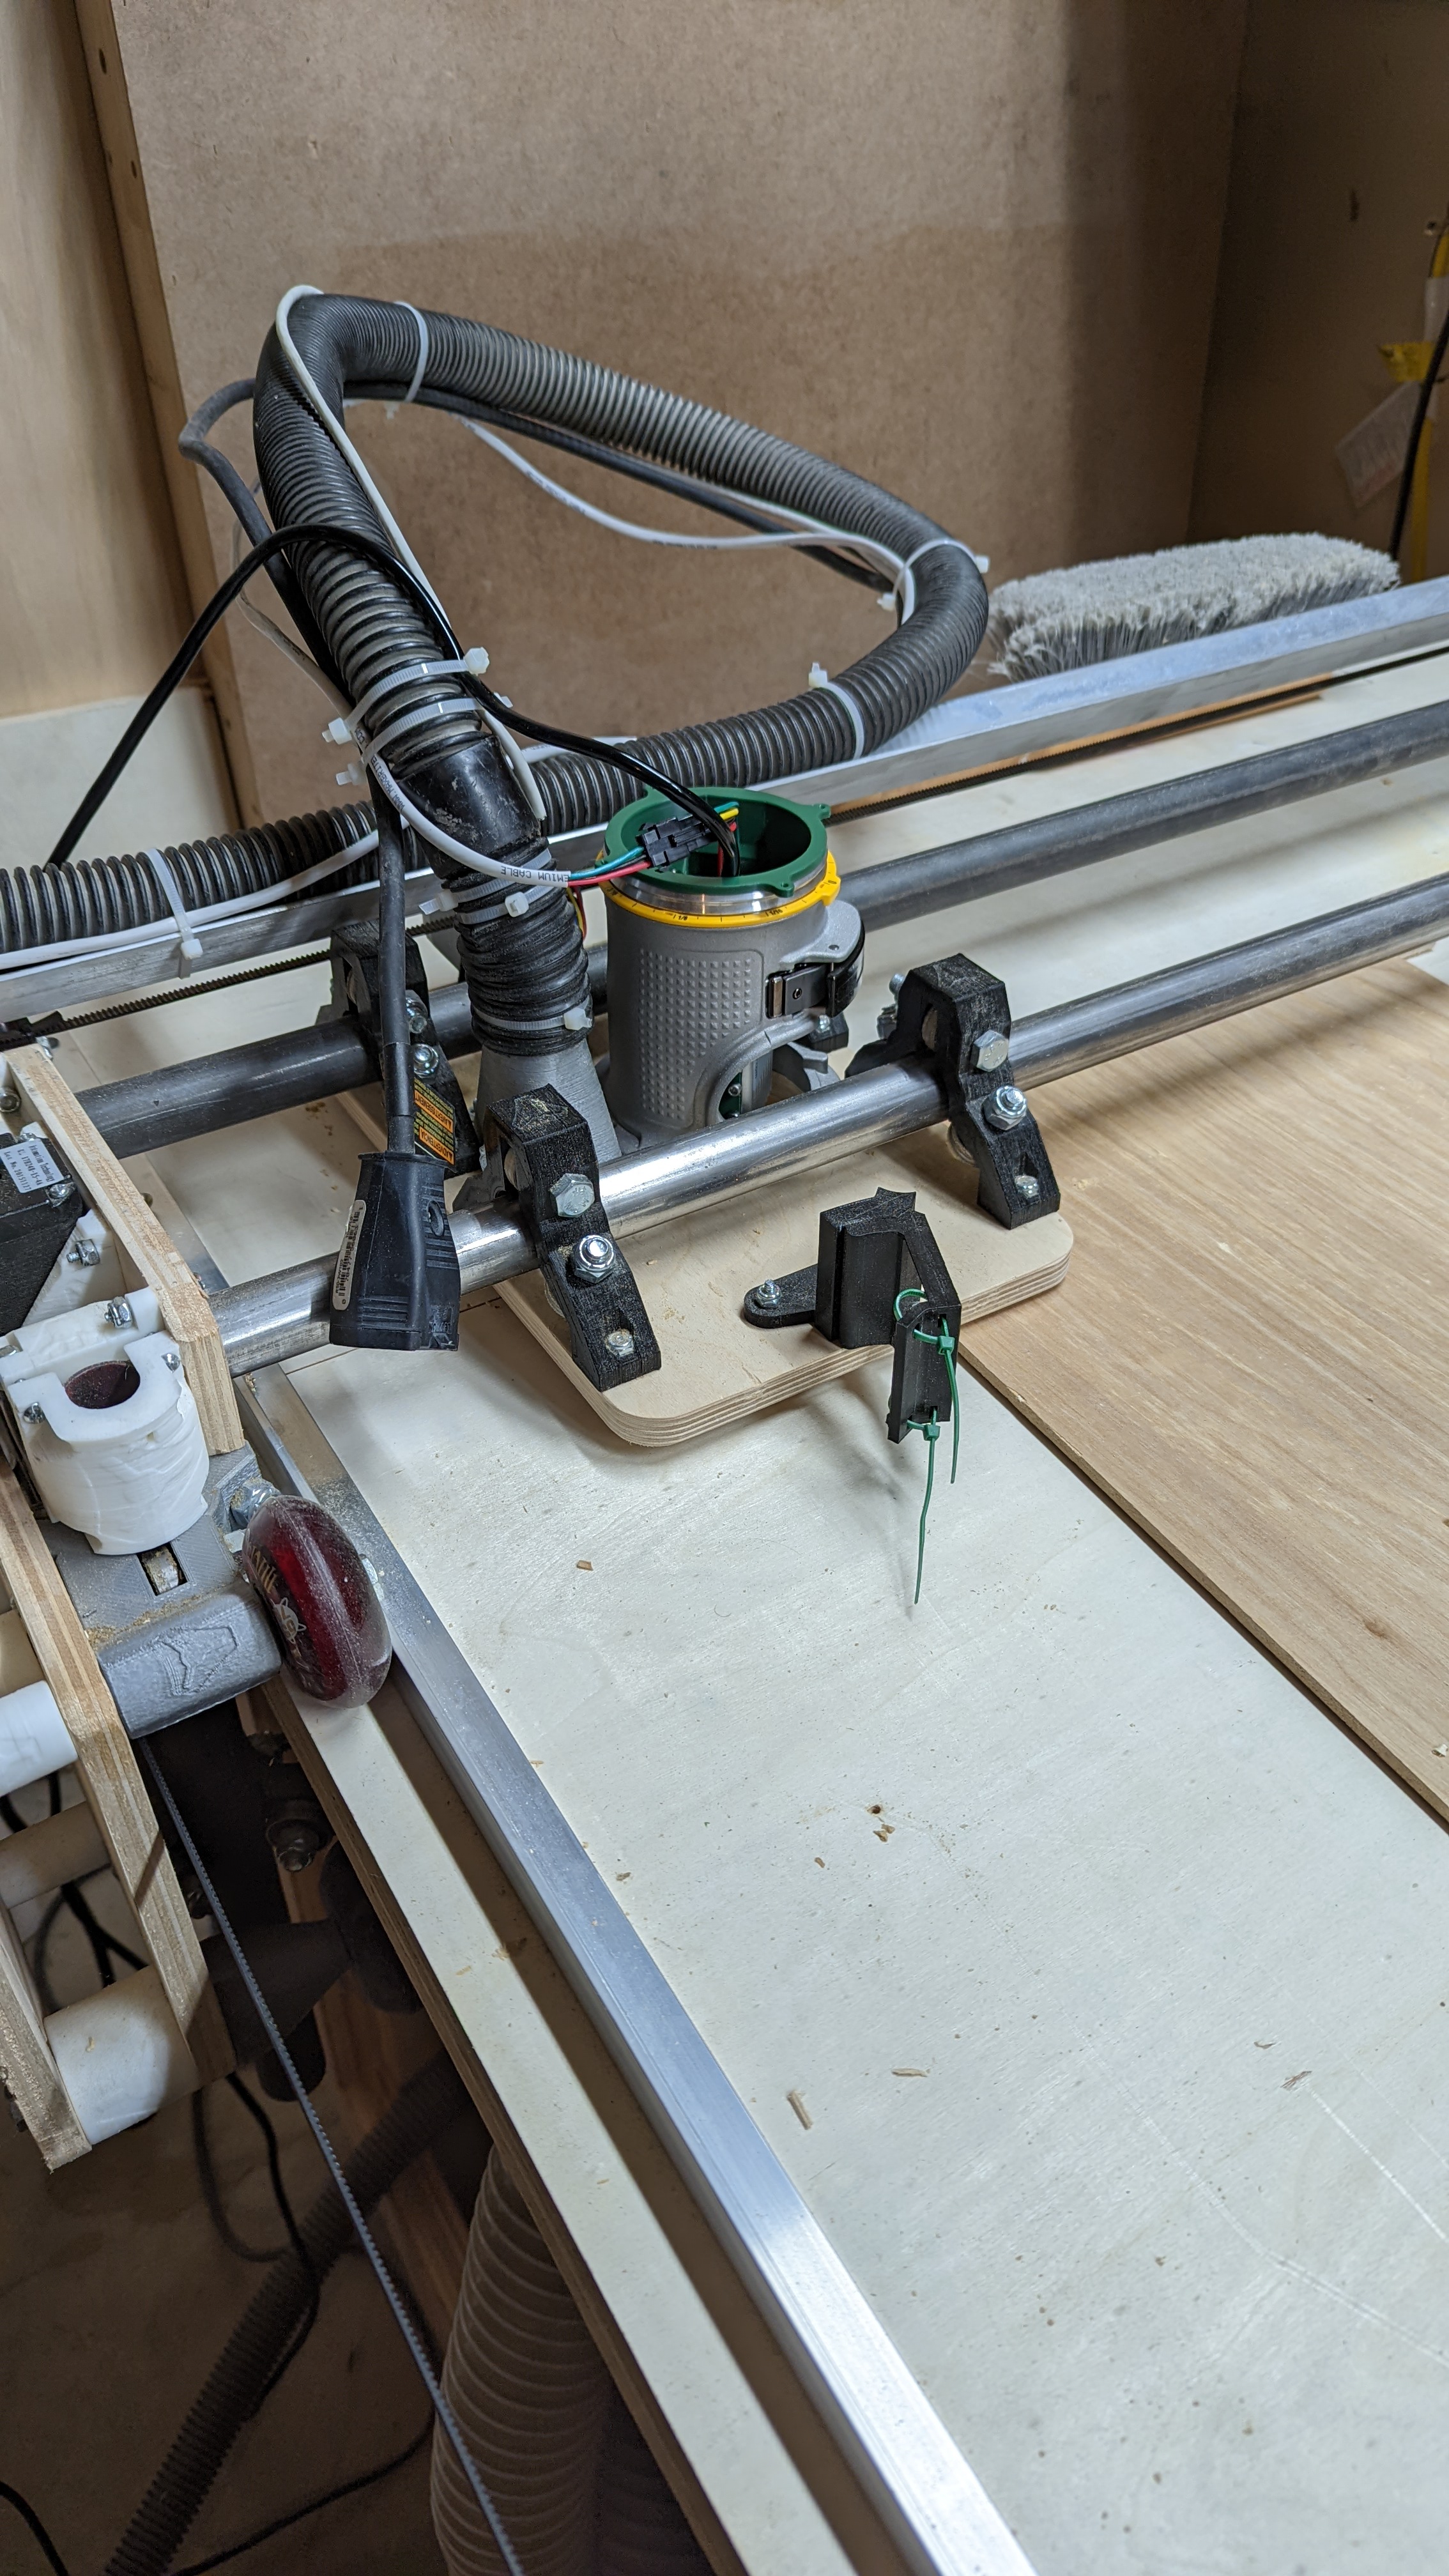
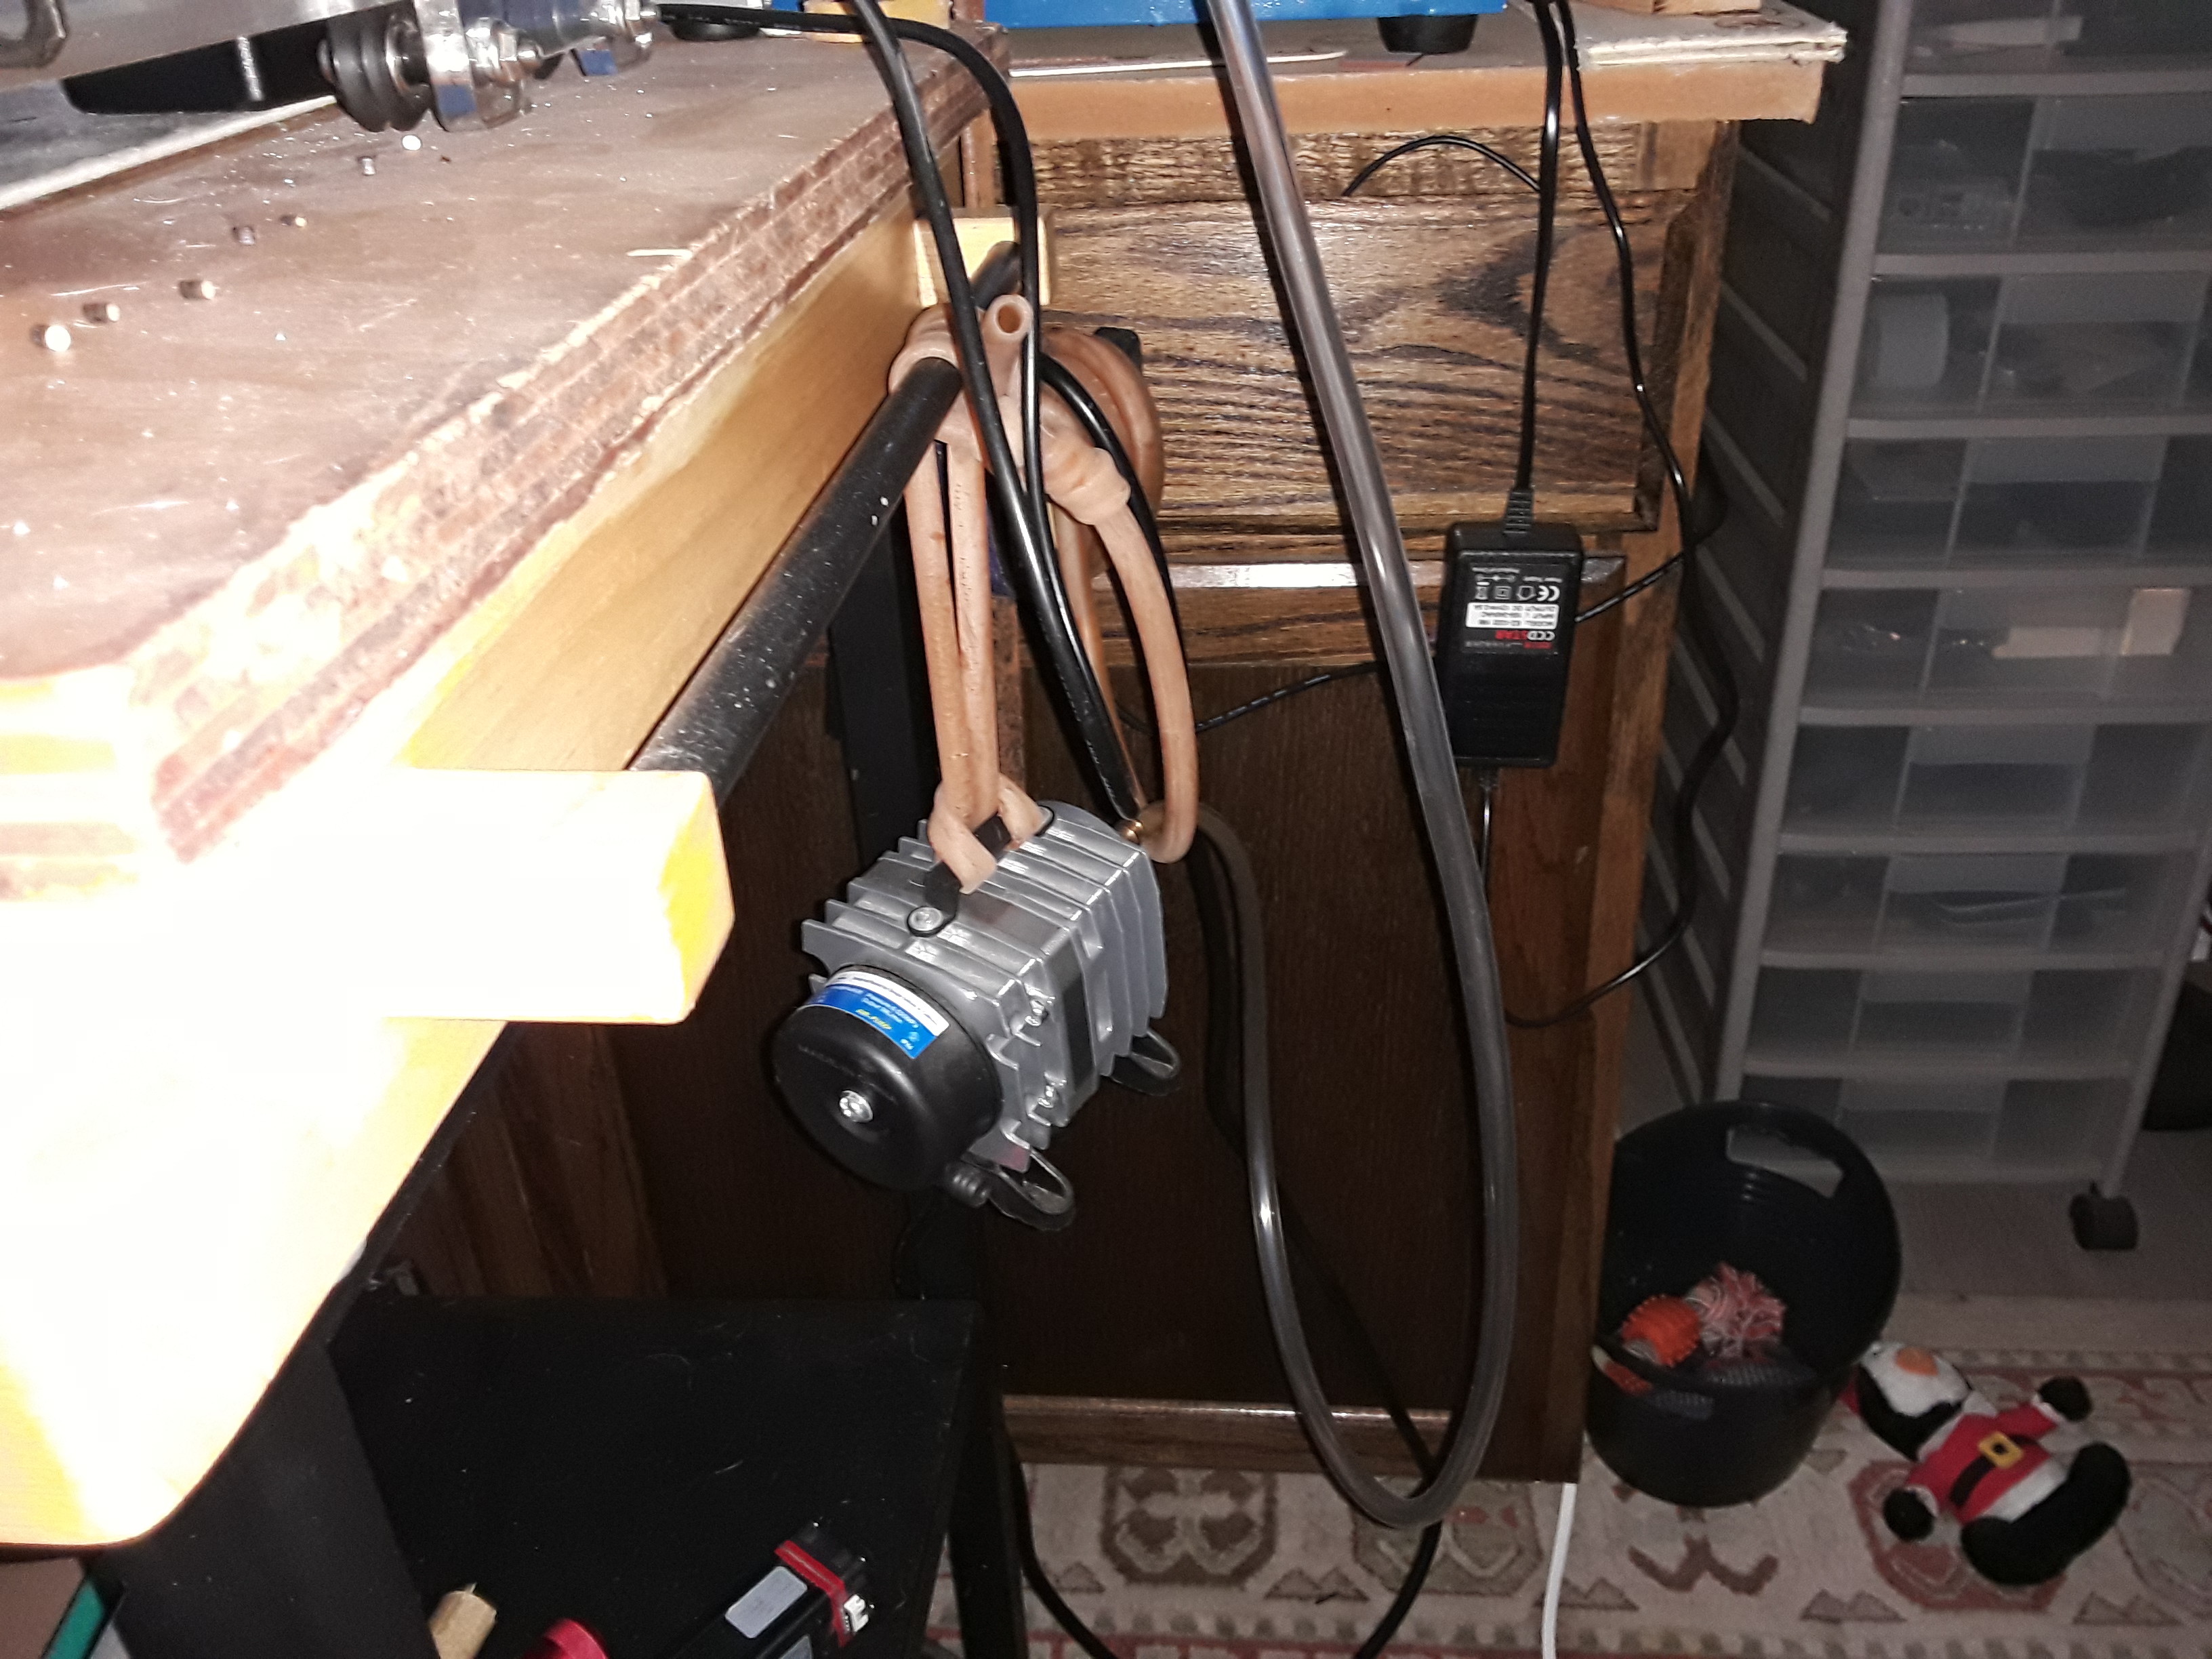
A farther away picture of the gantry. I haven’t decided if the air hose (shiney black) should go with the other cables, or hang it from the ceiling. I will glue it to the nozzle though. It keeps popping out.
You can see my previous attempt hanging on the close side. I use that for pens too. But I may make a router base mount for pens as well.
The can part of the mount is actually an ellipse, so it holds in place with a bit of a spring action.
4 Likes
I went through a couple different riggings/routings of my air assist line. I use a larger aquarium pump for my air. I noticed the longer runs suffered a substantial pressure drop compared to the shorter runs. I imagine that a LowRider will require even longer runs, but that could be offset by using a compressor instead of an aquarium pump and/or by using larger tubing. But one thing I considered doing which would work to keep runs short for a LowRider was to hang the pump above the middle of the work surface. This would keep the air assist lines shorter. I initially ran across the idea of hanging the pump as a suggestion for making an aquarium pump quieter. In the end I went a different route, but it stuck with me as an interesting out-of-the-box solution.
1 Like
I can assure you that it works wonders to quieten (a word?) the pump… I have it hanging from a length of surgical tubing. At times, I literally have to go touch the pump to see that it is running…
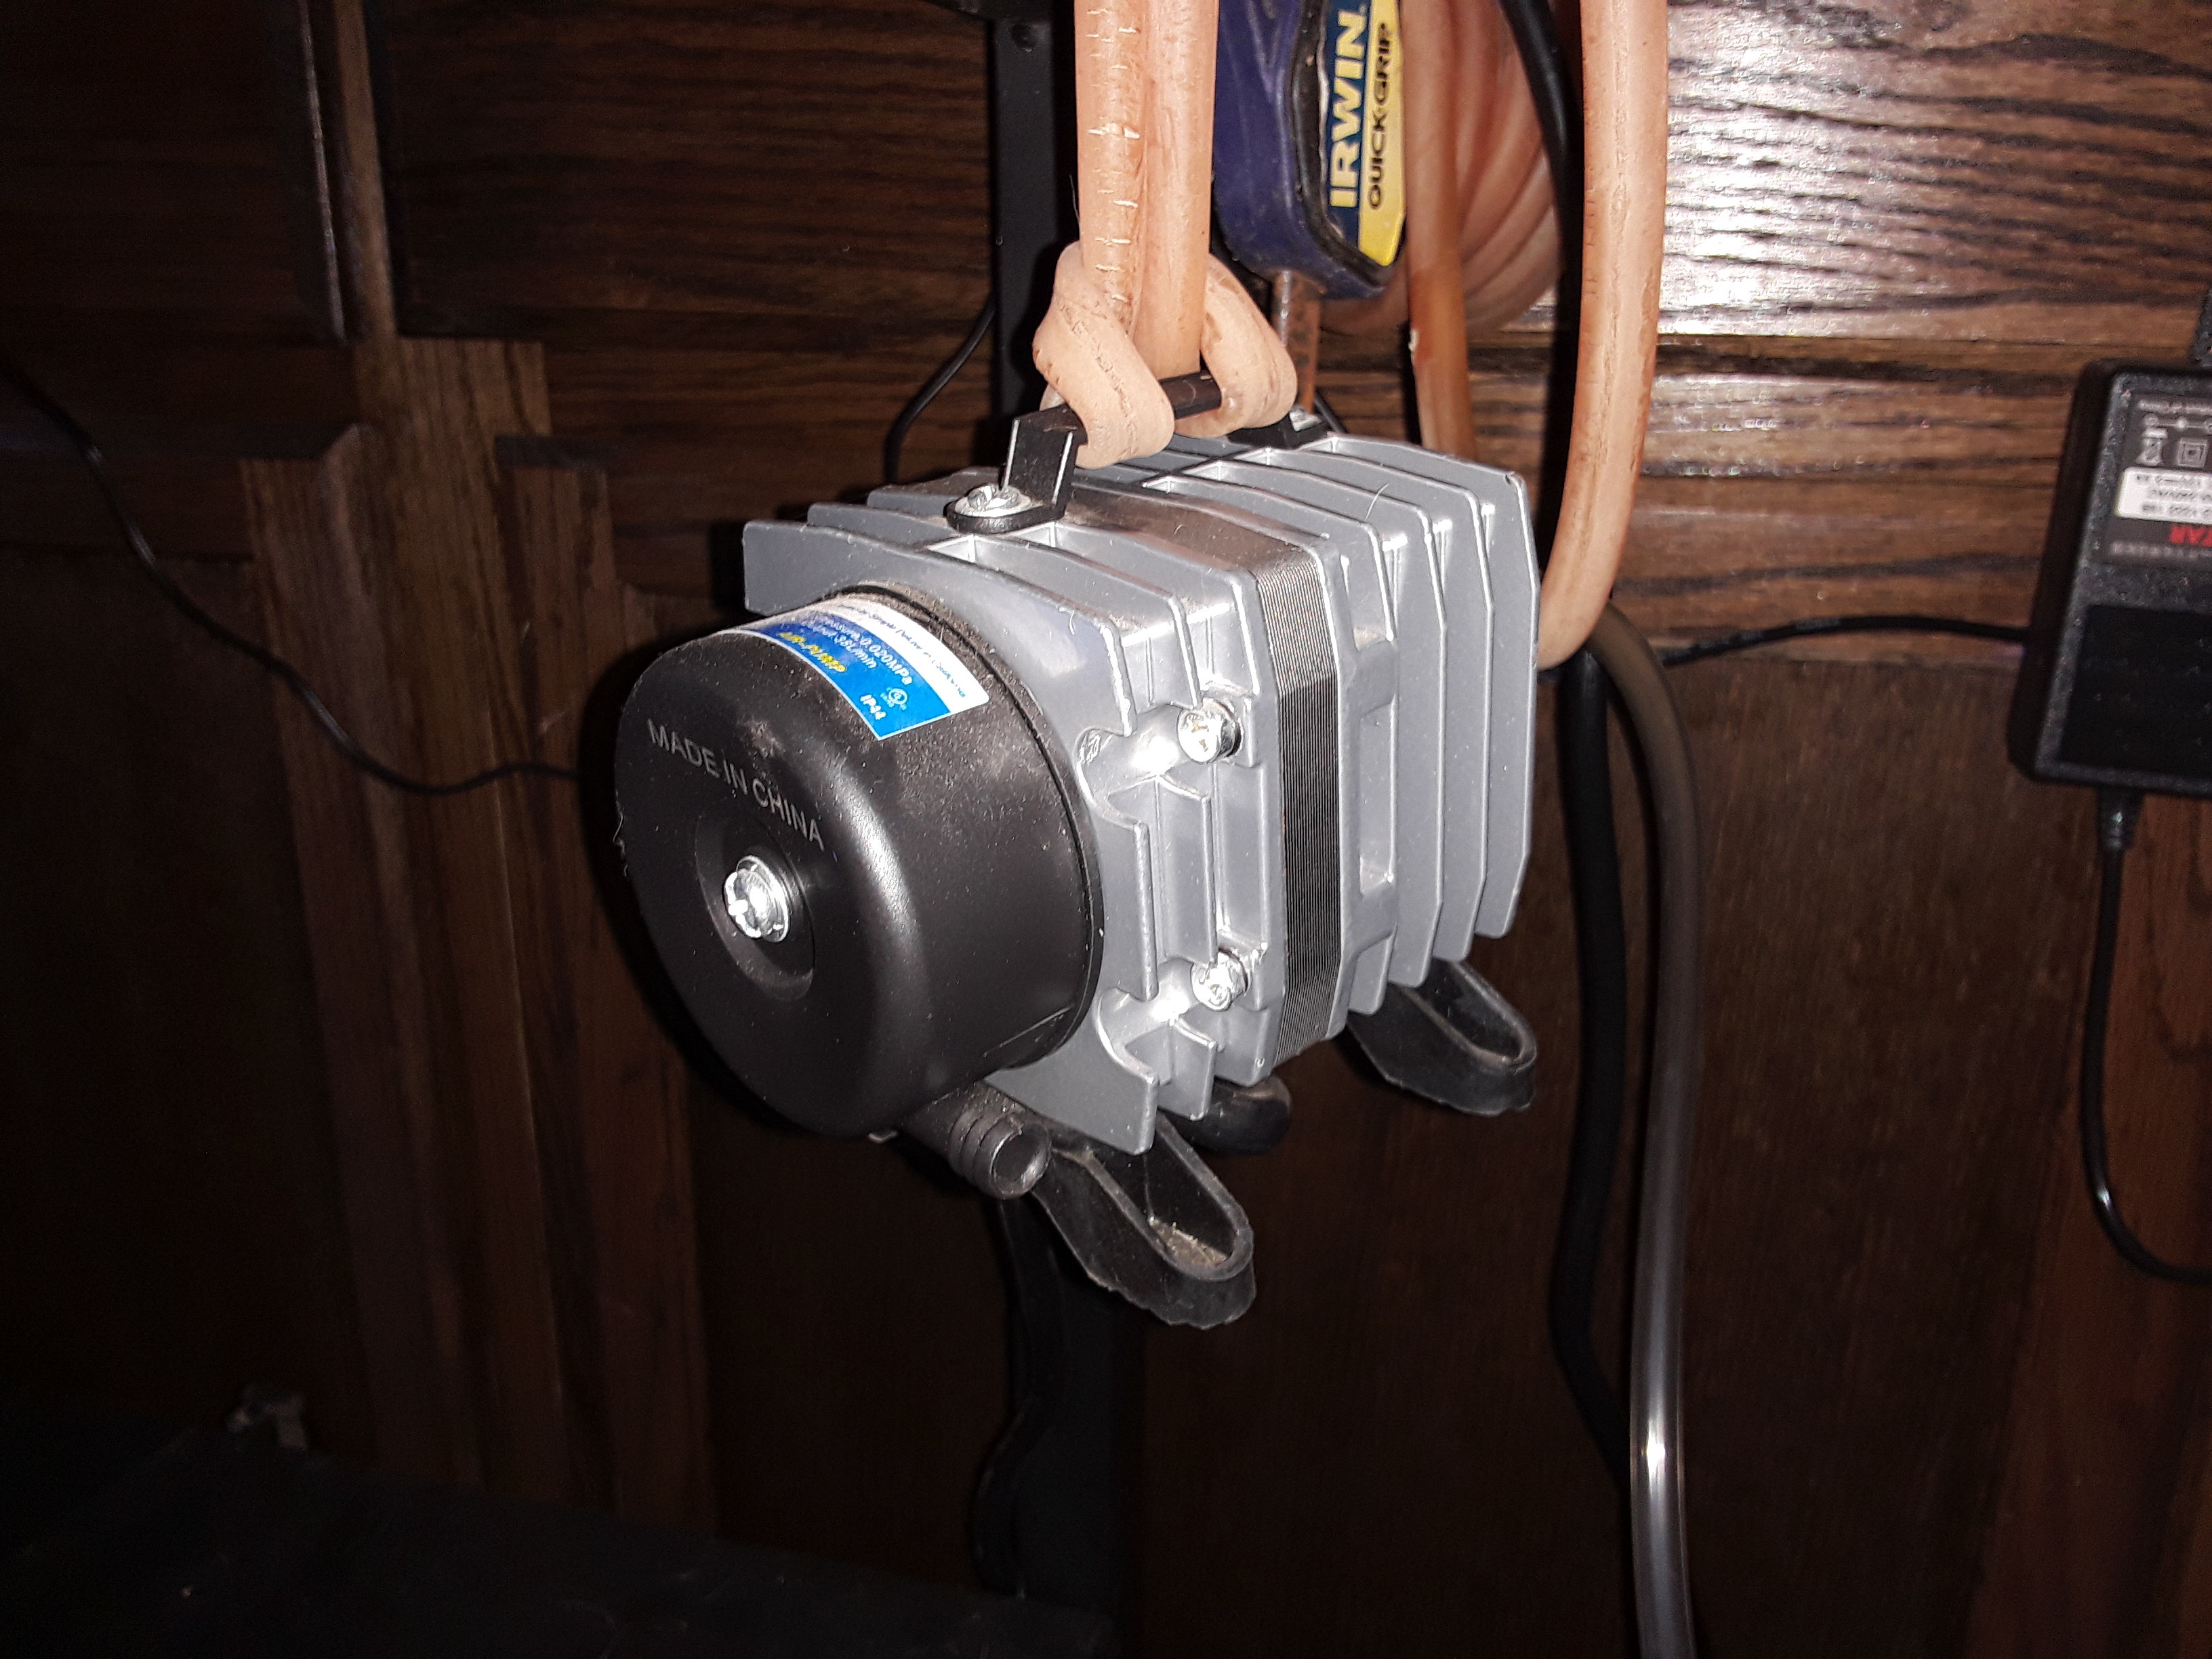
I also noticed longer runs suffered substantial pressure drop so use a larger diameter (~6mm ID) length of vinyl tubing to get as close as possible to the ball-valve and nozzle…
– David
4 Likes
I get my air from a compressor in a adjacent room. Works great, the noise is fairly dampened by the walls. The only thing is that the outlet builds up ice on cold days… the compressor is in an uninsulated room. So after running the laser for a while, air starts leaking because of the ice buildup. And if I unplug the hose, the autovalve doesn’t close and the tank empties with one hell of a noise…
2 Likes

I took a few minutes and tried the focus script in light burn. It is very similar to the focus script from Ryan, but it has these nice labels.
I let it choose the defaults of 50mm/s and 20% max intensity. 0-10mm Z. I started with the air nozzle touching the board and I set that as Z=0.
For some reason, it is mirrored. My machine isn’t mirrored. At least I am pretty sure I have that right.
There is also some very pronounced on/off pattern. Either this speed is too high (50mm/s), or more likely, I need to increase the PWM frequency on this board. Maybe both.
As I said in the first post, I have a very early grbl_esp32 board made for the MPCNC. There are some tricks to swap X and Z to make it work for the LR. I have done all of that and checked it out. But it was a while ago and I don’t see some of the modern laser features in the terminal. So I think the next step is to probably try to flash new working firmware and test it out again. While I am at it, I may try to swap Y and X too, so the LR cords make more sense for where I stand near the machine.
Does anyone have an idea of a good PWM frequency? I don’t think I have unlimited choices, but I can get it close.
Alternatively, I could try dropping the speed to 10mm/s or so and trying that again. The dots would just be 5x closer.
Even with all of that. I think I have about 3.0mm or so for a good focus distance. That makes me wonder if I did something wrong. Like maybe it wasn’t really touching the board completely, or the board lifted when I wasn’t looking. Based on Dave’s analysis, I thought 5-7 mm was more like it.
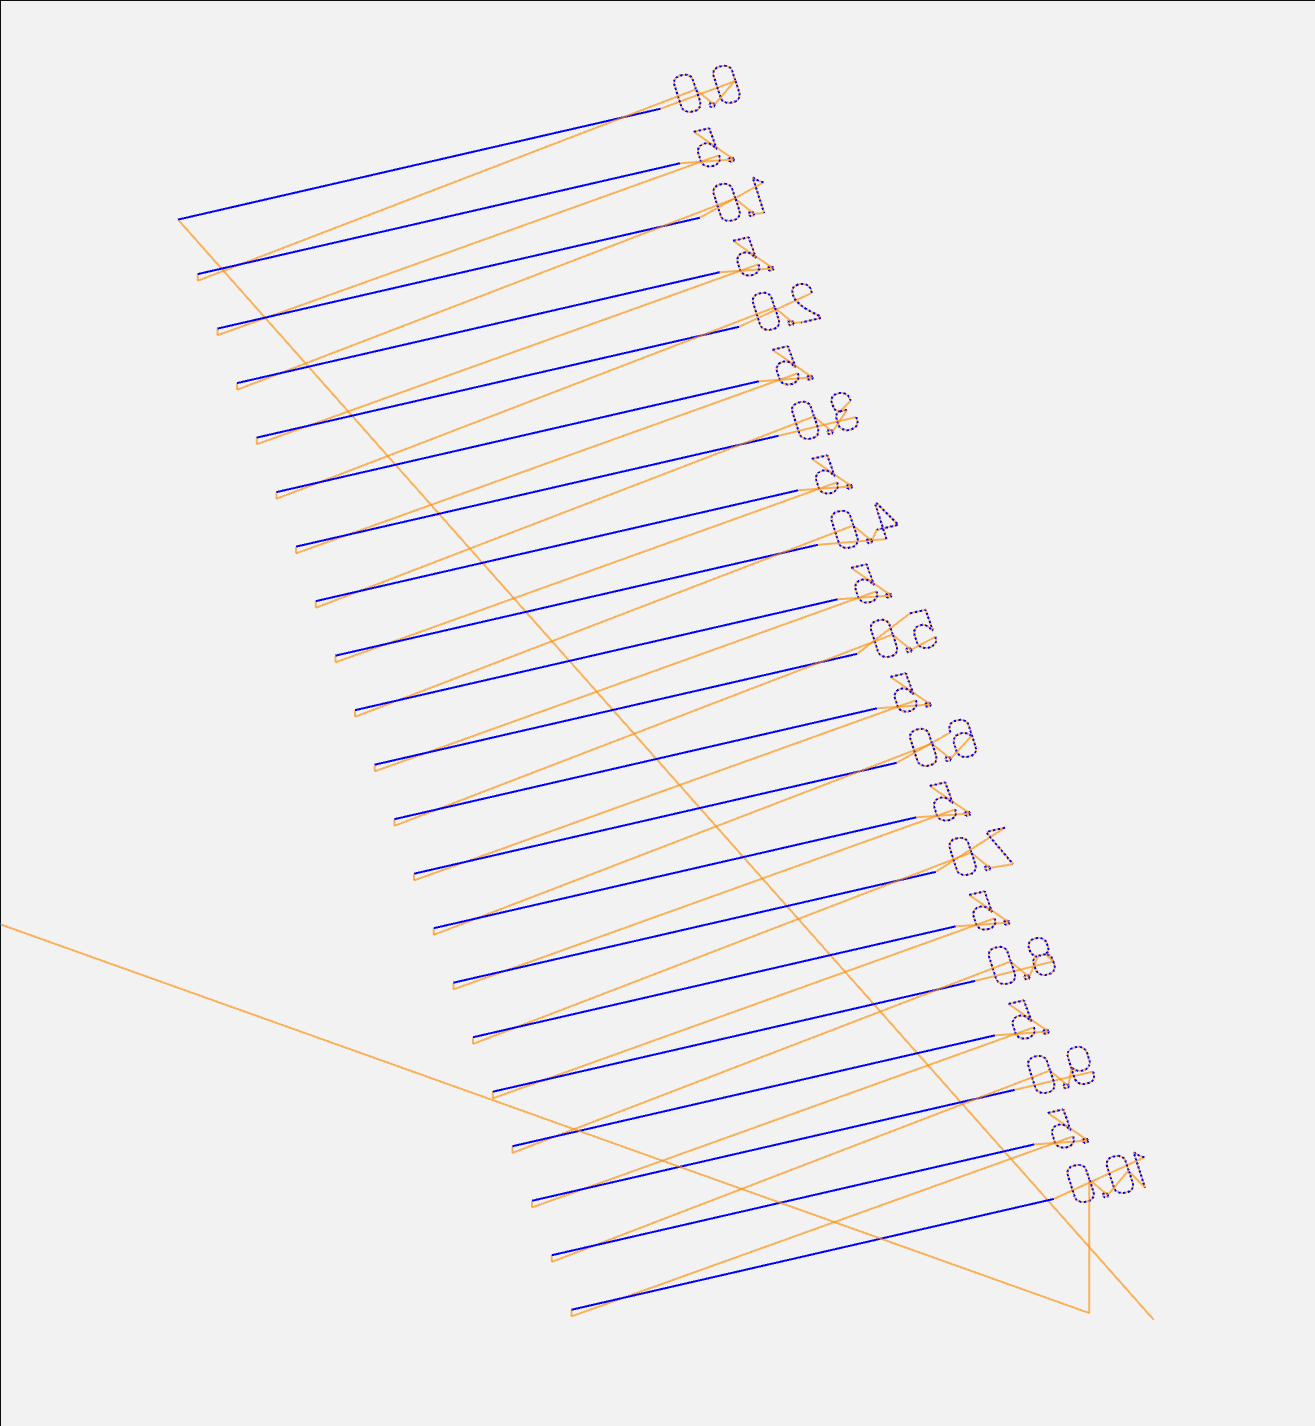
I’m not crazy. This gcode is mirrored. I think it is because I chose a non-default origin location in lightburn. It was also trying to draw at 420,620 or so away from the origin (which I noticed and fixed with work offsets first).
TODO:
- Change LB back to normal origin
- Update firmware and check motion
- Swap X and Y so the place I like to start the gantry is 0,0
- Increase PWM
- Focus script again
1 Like
I think the dark ends are the constant vs dynamic power during accel/decel… M3 vs M4.
The origin stuff can be tricky to get set… and I’m sure are responsible for the mirrored images. There are a couple of different places in LB where machine/user origin(s) can be set… I usually use lower-left.
I’ve got a bidirectional M4 version of Ryan’s focus script that seems to work well…
Oh… are you using Marlin?
1 Like
Nope, this is grbl, but forked a long time ago for the ESP32.
I agree. It is setting the laser on with M4, and then using S200 in the G1 commands. I think that looks ok, but I think it is varying the duty cycle of the PWM correctly, but the PWM frequency is too slow, so it is off for 10ms or something, and then on for 2ms or less, but that results in very wide gaps between the dots. Instead, if it was on for 2us, and then off for 10us, it would be super tiny dots that would be a lot smoother.
That’s just my guess. I have really just been skimming the laser posts in this forum. I have no idea if the neje laser can even toggle faster than the current PWM (but I suspect it can).
1 Like
I have been caught sleeping. There is a new version for the ESP32s that Bart has been working on. FluidNC. I will see if I can get that working instead. It looks pretty slick:
1 Like
I’m having a bit of trouble concentrating so please forgive if I go off the rails. Been puny for the past week – tested positive for Covid, quarantined for 5 days, just tested again… NEGATIVE! But still have cold-flu or respiratory infection to deal with… still puny.
Not familiar witih LB focus test and confused by “dots”… should be constant powered for length of line. LB has “constant power” button on Cut/Layers window… does that have an effect?
I think you’d have better luck with Ryan’s focus script… it’s simple and easy to understand. I’ll also try to find my M4 version…
That’s a bummer. I hope you feel better soon. Thanks for paying attention to my post while you are healing.
I think it is a problem in the firmware, not in the gcode from Lightburn. Let me paste some lines for you.
M4
...
G0 X420 Y590
G0 Z0
; Layer
G1 Y610 S200 F3000
I added some spaces to make it easier to read. It is going from Y=590 to Y=610 (and the laser was previously turned on with M4, the power is set with S200 and the feedrate is 3000mm/min, or 50mm/s). You can see in the actual burn that the laser is turning on and off over that move, at a fixed time period. When the gantry is moving slow (at the start and end of the burn) the dots are close together. In the middle, they are a little farther apart. I don’t think there is anything that Lightburn could be doing differently in those lines of gcode. The responsibility has to be with either the laser or the firmware. My guess is firmware. Specifically, I think I need to configure the PWM frequency to be higher. That may be something that isn’t a problem in Marlin or grbl (because the default is fast enough). It may not be a problem in the newer FluidNC either, I have to update to find out.
1 Like
I think this is the one I’ve been using…
; LightBurn 0.9.16
; GRBL device profile, absolute coords
; Bounds: X0Y0Z0 to X50Y10Z20
; Cut @ 1000 mm/min, 50% power
G00 G17 G40 G21 G54 G90
G92 X0 Y0 Z0
M4
; Line1
G1X50S512F1000
G0X50Y1Z2
; Line2
G1X0
G0X0Y2Z4
; Line3
G1X50
G0X50Y3Z6
; Line4
G1X0
G0X0Y4Z8
; Line5
G1X50
G0X50Y5Z10
; Line6
G1X0
G0X0Y6Z12
; Line7
G1X50
G0X50Y7Z14
; Line8
G1X0
G0X0Y8Z16
; Line9
G1X50
G0X50Y9Z18
; Line10
G1X0
G0X0Y10Z20
M5
2 Likes
That looks pretty succinct. It doesn’t have the number labels on it, but it is doing something similar. The big difference is the 50% power and the 1000mm/min. It also is scanning left and then right, instead of always right in my script.
1 Like