I have got the router bit
now
How do i using estlecam and fusion 360 make the router bit go down and then sideways
and then come back the same way?
I have got the router bit
now
How do i using estlecam and fusion 360 make the router bit go down and then sideways
and then come back the same way?
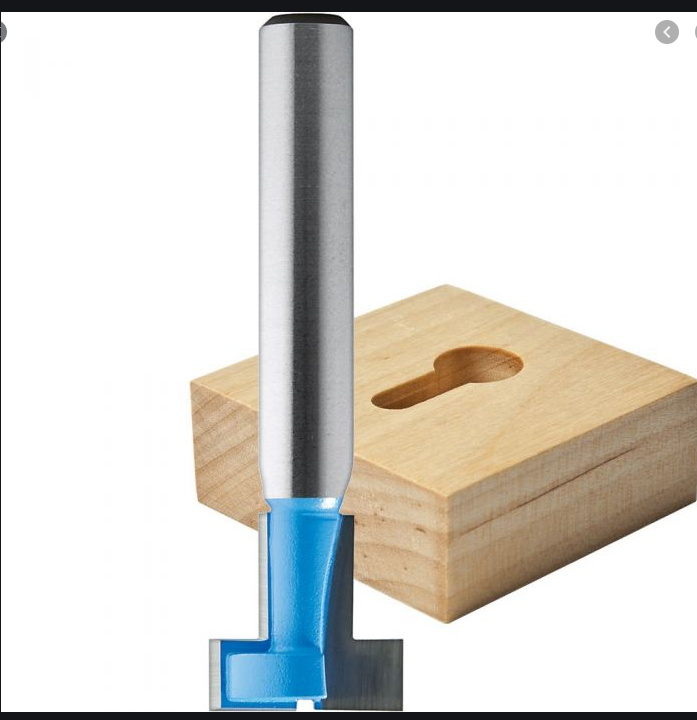
I think you can do this in Estlcam with lead-in and lead-out. Something like you add a drill first at the beginning of the line, then you use engrave on the line, and then select lead in and lead out to both be at the bottom of the line. You also need to be careful that it cuts it in one go, and it will be a tough cut to make. Looking at that bit in particular, it can’t cut directly in the middle, so you’ll need to pre-drill a hole anyway.
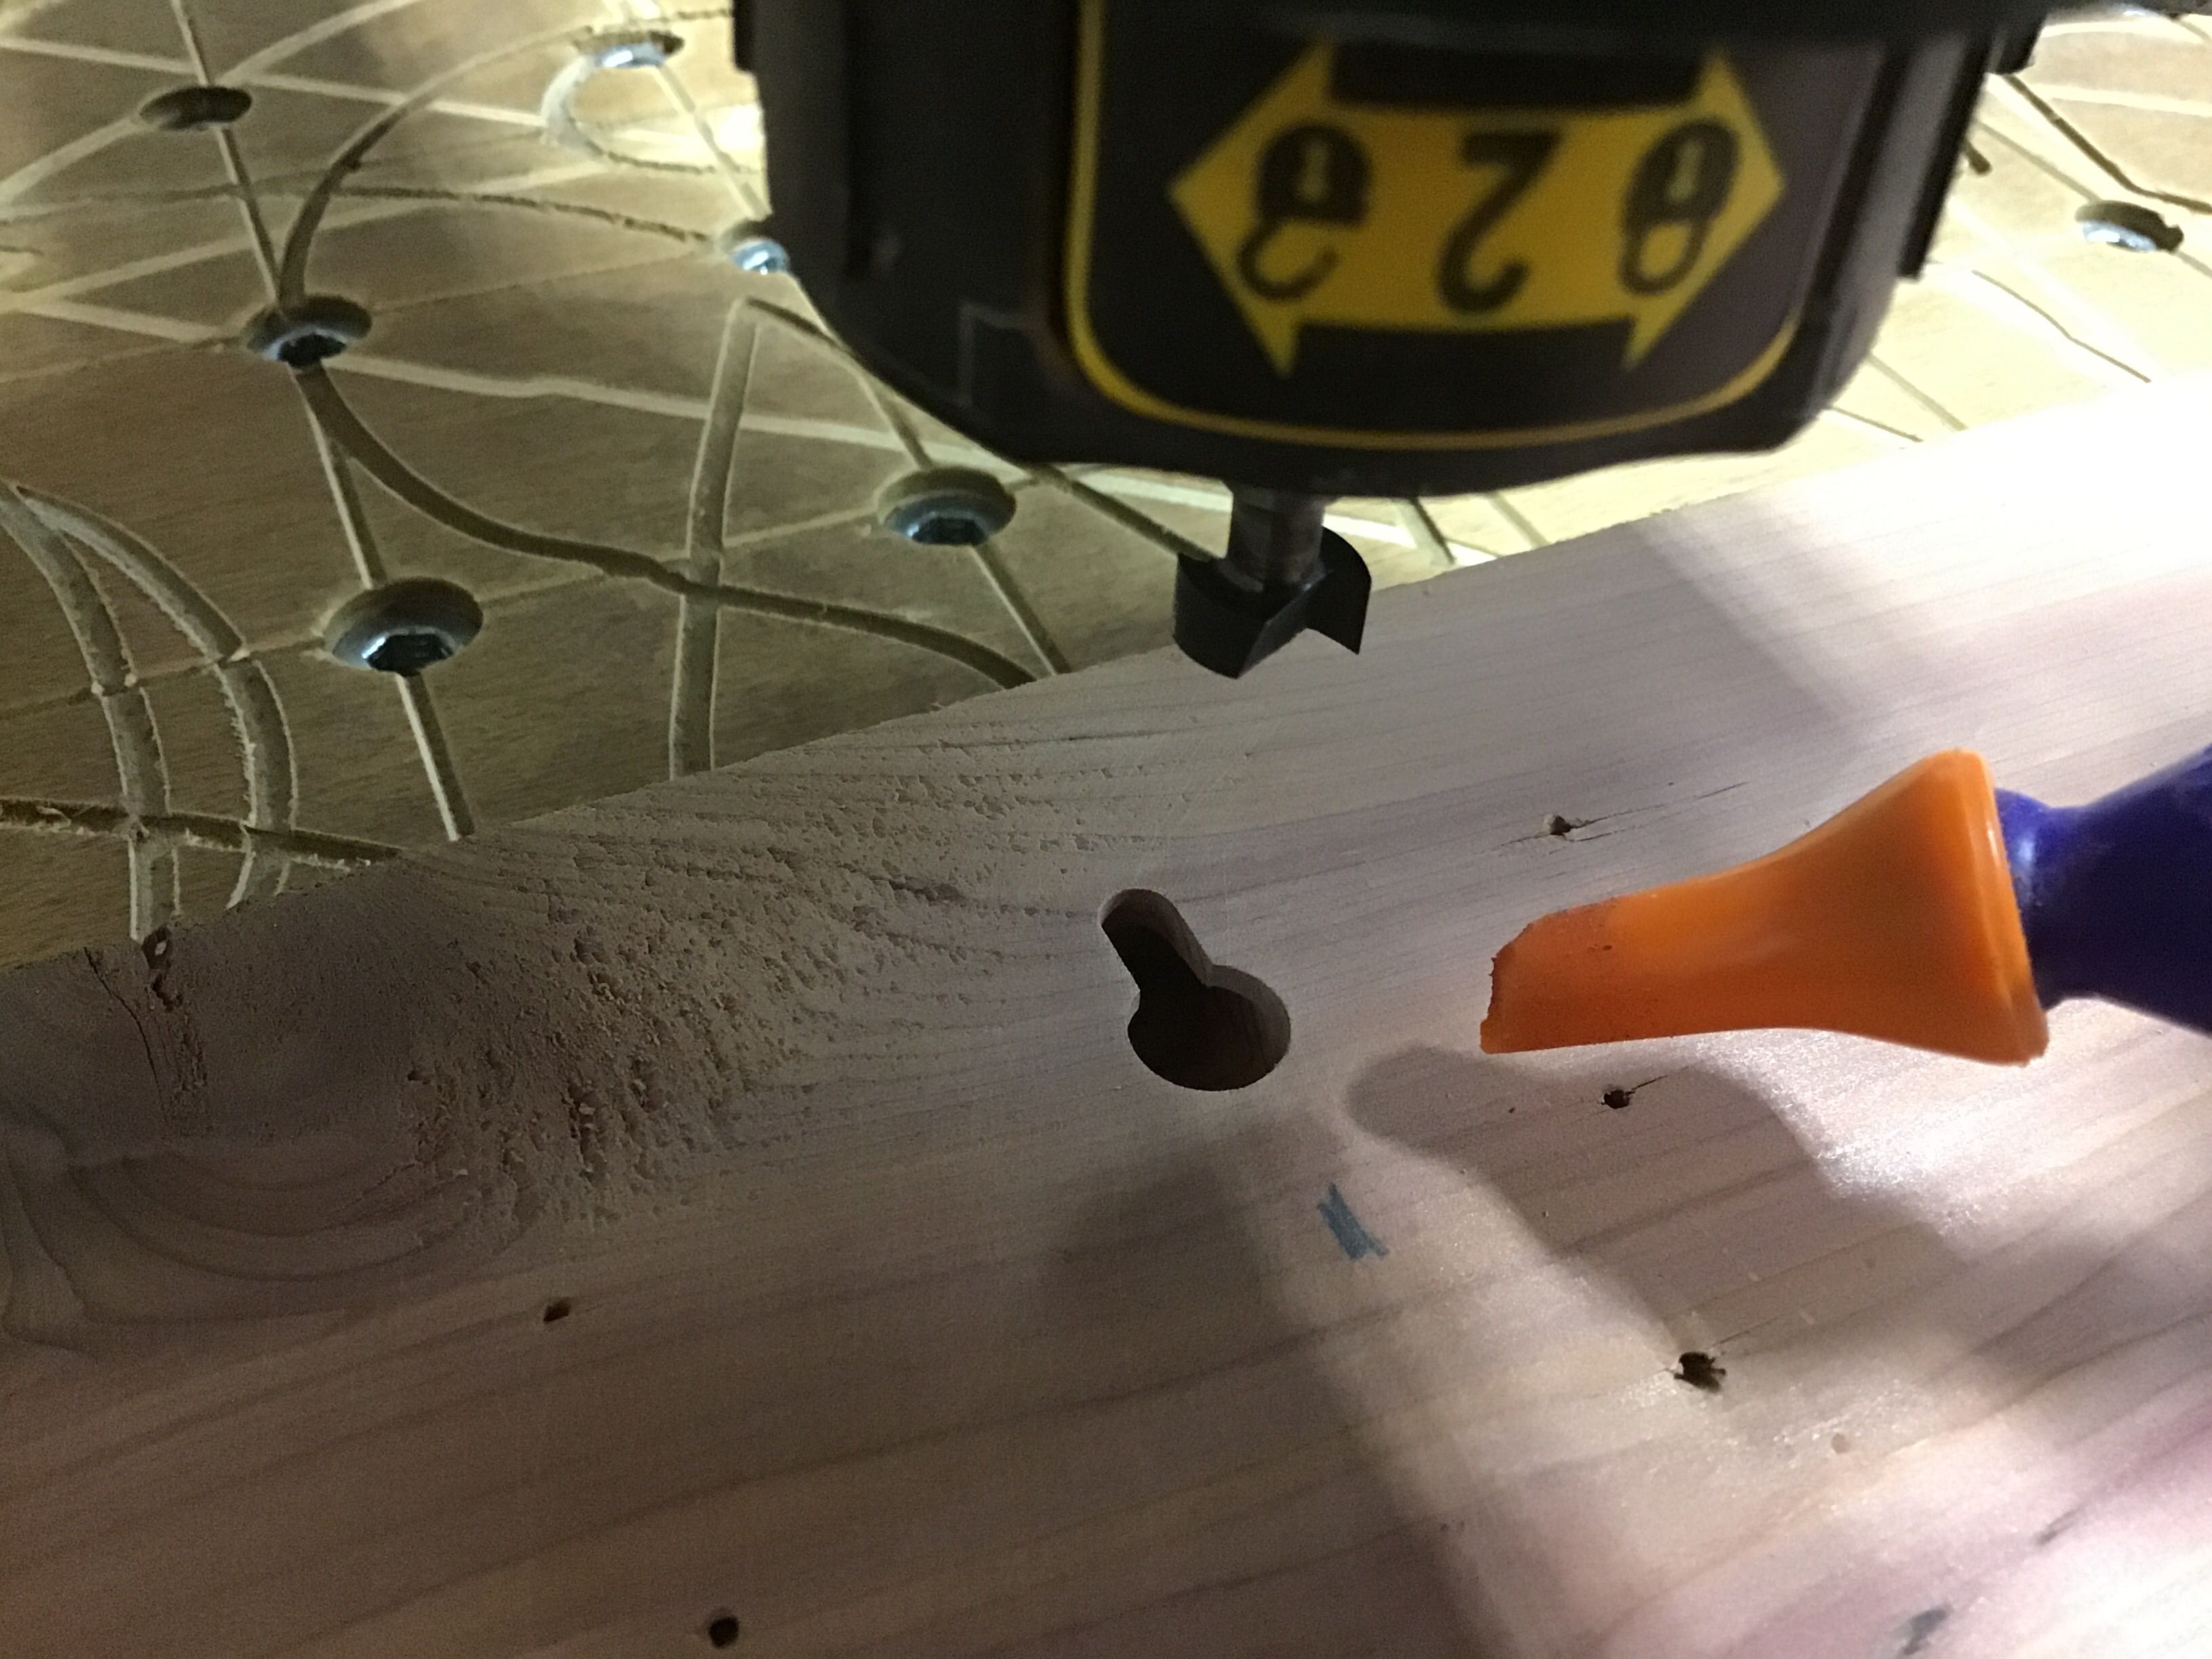
I thought that those keyhole bits had big labels on them basically saying “Don’t use in a CNC machine!” They’re really designed for either a plunge router or a router table where that over-constrained bit has the freedom to shimmy the router or wood around if it needs to. If you have decent hold downs, and that bit decides to stick or bind or whatever, something’s going to give, and likely violently.
Plus, chip clearing is less than ideal once you get past the initial plunge. You’re hogging out more material than the slot is wide. You’d probably want to have a tool change with a straight bit making a clean slot first, then going back to get the wider slot afterwards.
EDIT: It appears that some keyhole bits are made for CNC machines. But they all seem to have 1/2" shanks (or larger), and my guess is they are designed for industrial-class machines, not hobbyist machines. To be clear, if you really want to use one in your MPCNC, it’s your shop. I would just warn you to use extra caution, and keep your hand near the eStop/circuit breaker/first aid kit… 
I just wrote my own g-code for my keyhole paths. Made a custom button in CNC.js to run it, but would be just the same as any other g-code file.
What I do:
What it does is sets the current pos as xyz 0, raises a bit, then turns on router, lowers bit until my desired depth, then goes in +Y direction for say 20mm while -Z for another few mm, then does all in reverse. Reason why I have the Z depth tapered a bit is so that when you hang on the screw, it self tightens to the wall and will not have any wobble.
I will say it took me a bit to get the Feed speed right, and still doesn’t quite seem to like it entirely. I think it is the chip clearing problem. I may figure out a way to have in slightly spiral during plunge and tricodial during Y movement. When I get back to my shop I will upload my code here if wanted.
That makes sense to me. It seems like finding a pretty small bit would help give you room to do tricks like that, without making a hole big enough to fit a 5/16" bolt.
The code would be great
Even if it gives me half a clue on how to manually produce G-code
Check out the docs on gcode. It is much simpler than it looks. Maybe this will help you read Melvin’s gcode:
I hate those bits
Ruined a perfectly good project with one because a clamp holding my material loosened while I was using a palm router to cut the key slot.
I also don’t recommend using a palm router without a plunge base. Trying to keep the bit vertical by hand while plunging was not easy.
I was going to suggest this. Glad somebody already did it.
Unfortunately I am quite busy for the next couple days. So I won’t be able to post anything quick.
However, I have done tons of these with Inkscape and Estlcam. No coding. Maybe I fluked into it.
Works great for me, but is a solution still required? If so, I will try an post mine.
I never tried the following cause I use my MPCNC. But I have this as a backup.

Oddly enough. That’s the palm router I have… or at least, I have the corded version.
Okay, finally made it into the barn. Here’s what I’m using set up on a custom button in CNC.js. I will try to add a small wobble to help clear chips, but this works good. This code only works on Marlin, I have adapted Grbl code if needed.
M00 CONFIRM ROUTER ON; confirm router button on at top of router, reminder
G90 ; confirm absolute postitioning mode
G92 X0 Y0 Z0 ; zero all axes
G1 Z10 F600 ; raise to start
G1 X1 Y1 ; activate xy axes, if you dont add this, y axis will drift because motors arent on
G1 X0 Y0 ; return to xy zero
M106 ; turn router via relay
M106 P1 ; turn on cold air blaster via relay

G1 Z-7 F100 ; plunge
G1 Y10 Z-9 ; create 10mm slot
G1 Y0 Z-7 F600 ; back out
G1 Z2 ; raise
M107 ; turn off router
M107 P1 ; turn off air blaster

G1 Z30 F600 ; raise for clearance

M18; disable steppers, optionalLooks good to me. You have an air blast. I think that’s probably helping you clearing those chips. Otherwise, the plunge might be better as a peck, like:
G1 Z-1 F100
G1 Z2
G1 Z-2
G1 Z2
G1 Z-3
G1 Z2
G1 Z-4
G1 Z2
G1 Z-5
G1 Z2
G1 Z-6
G1 Z2
G1 Z-7
This is true. Hence the nice dark colour of my keyhole bit before I had the cold air blaster.
Air blast or not, I’d peck anyway because I’m a chicken 
I see what you did there.