Did someone make a GRBL version of this code?
……
okok, 18 to 26 mm 600 mm/s 70% (mine was spot on @ 21mm)
grbl-focus.gcode (497 Bytes)
Did someone make a GRBL version of this code?
……
okok, 18 to 26 mm 600 mm/s 70% (mine was spot on @ 21mm)
grbl-focus.gcode (497 Bytes)
M3 inline 2mm Z steps test file
You can use this and replace the “Z2” with a smaller number to really try to dial in your focus.
G1 X50 F750 S255
G0 Y1 F6000
G0 Z2 F2000
G0 X-40 F6000
2mm focus.gcode (933 Bytes)
Is this linked in the docs?
Not yet. Still messing with it. Not sure if inline is the best option yet. Each one seems to have trade offs.
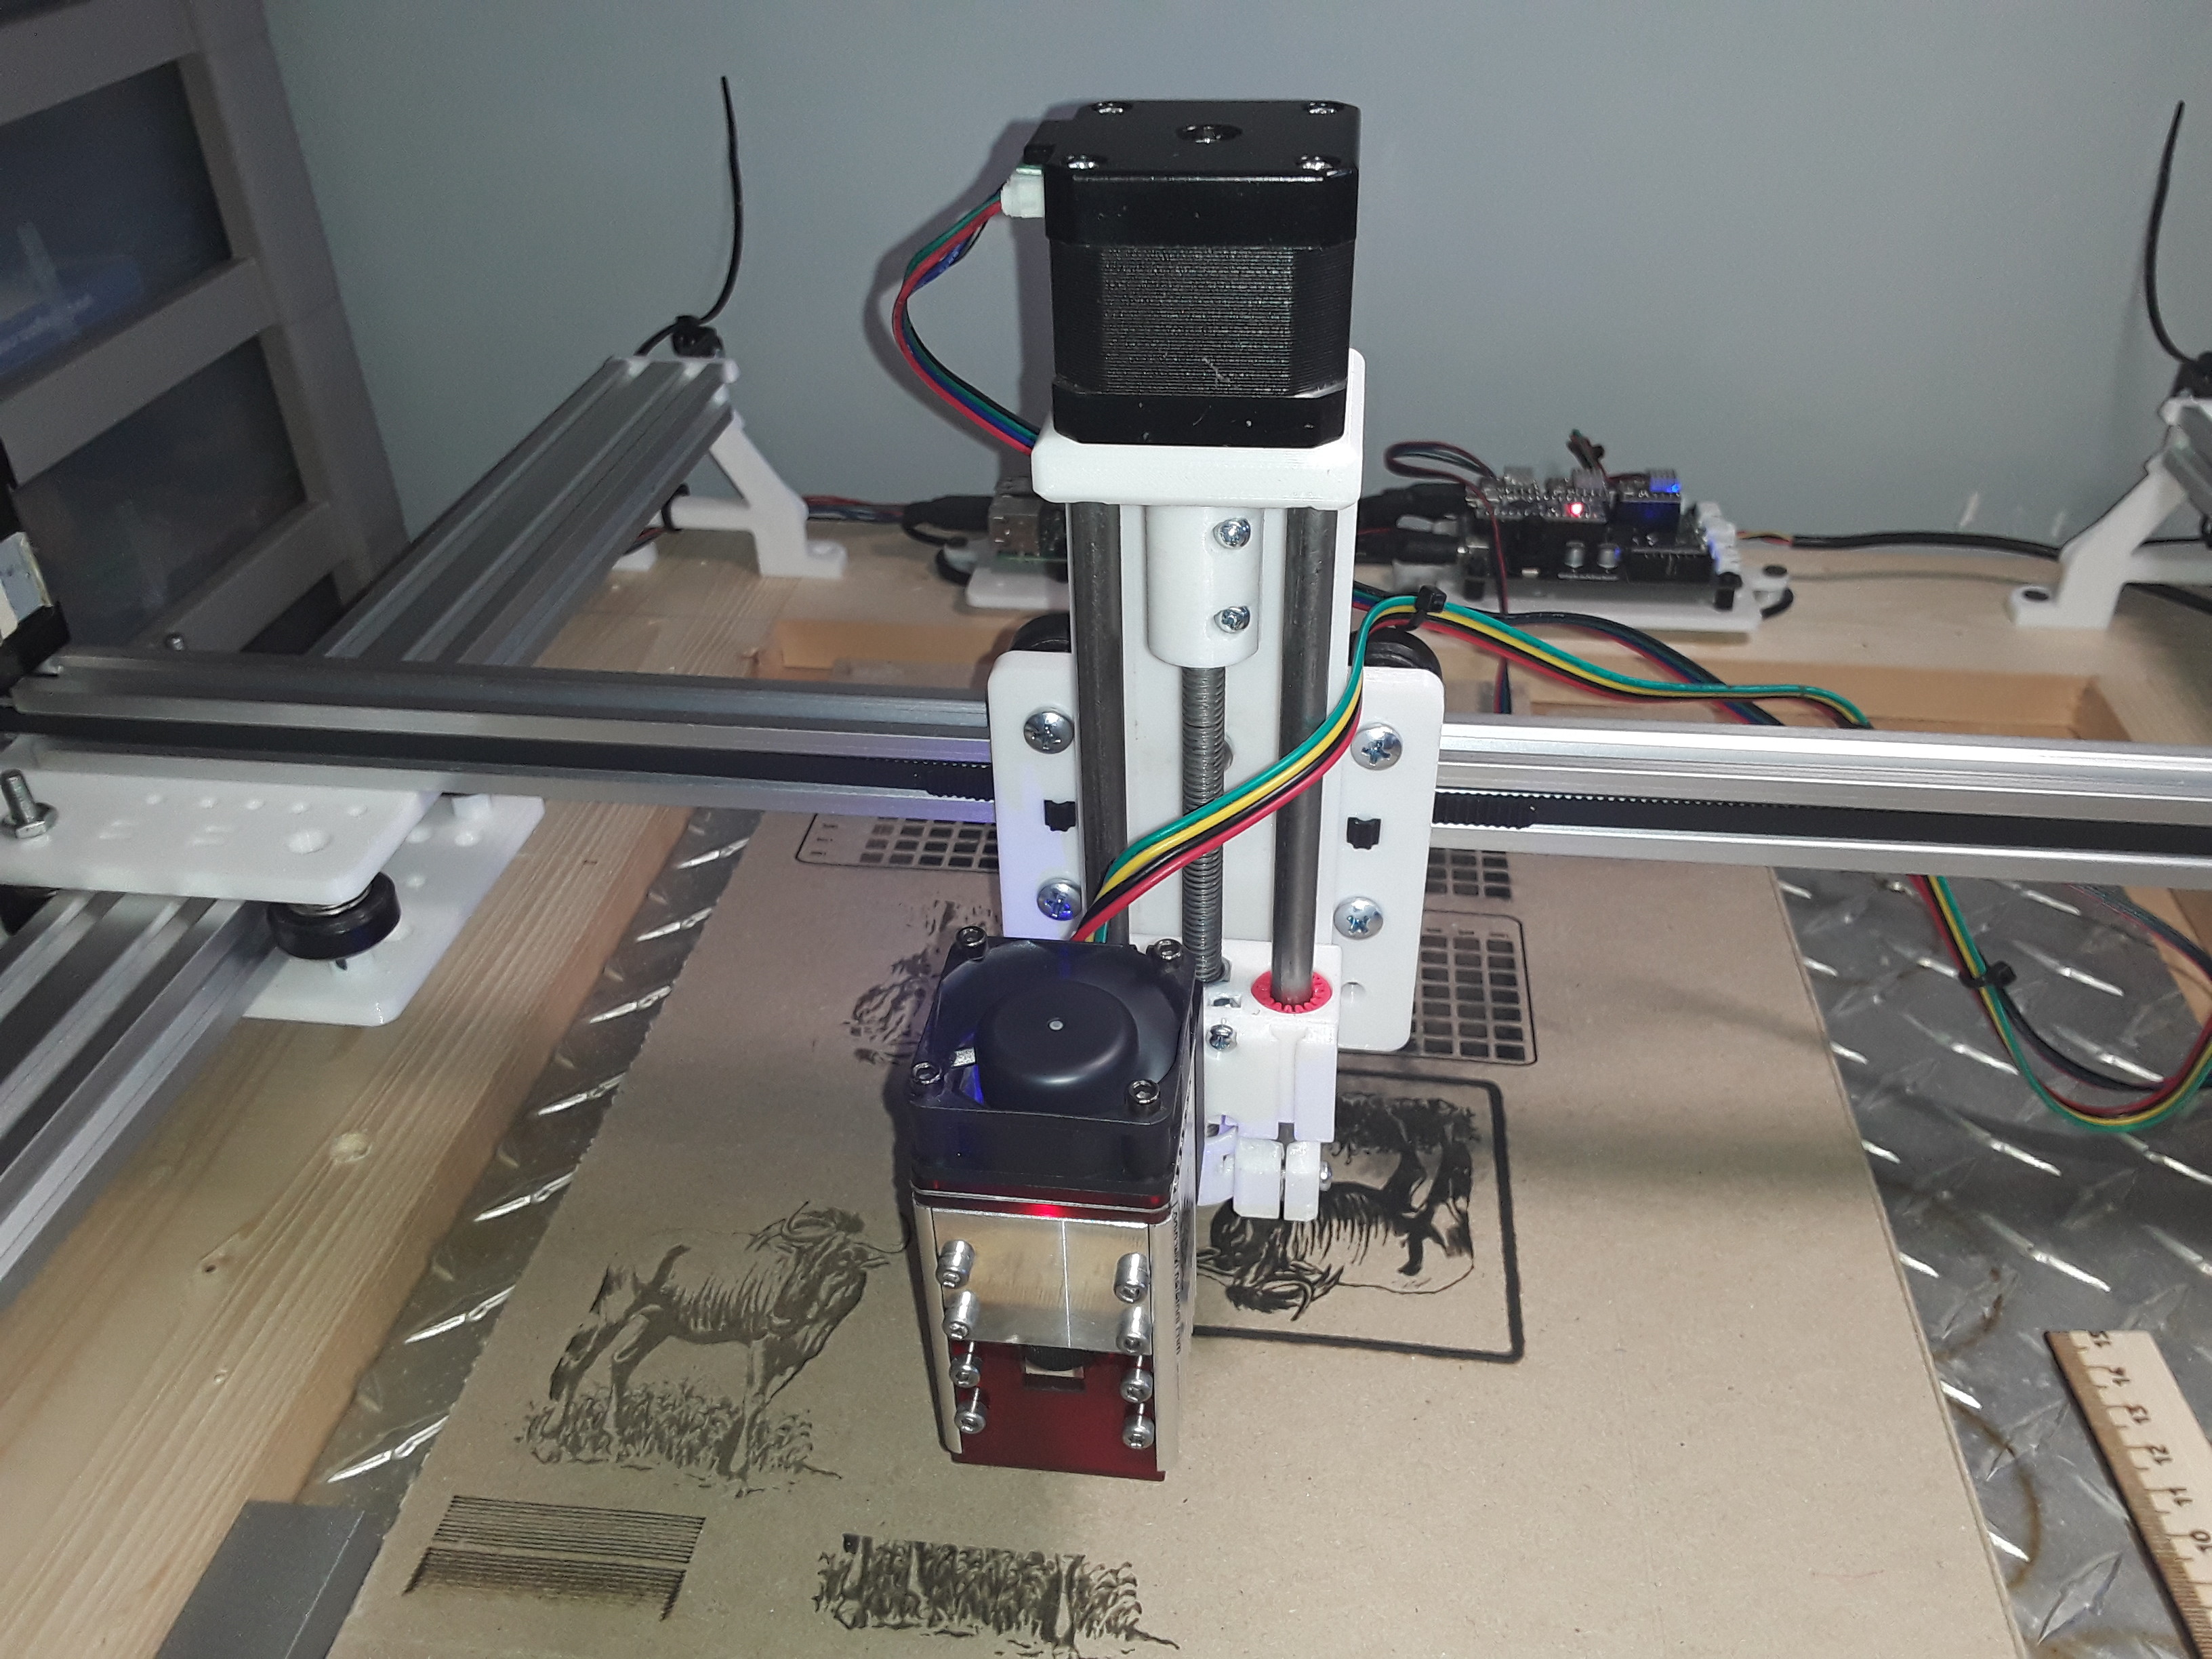
I tried using Kees’ script, and had to make a few changes to work with GRBL laser mode ($32=1) and M4. If MPCNC is headed toward esp32 and grbl, using M4 is the proper way to script for laser IMHO. I also realized the workflow of operating a laser, is easier if a simple height jig is used to set z0 before starting a job. That being the case, the lens has to be tuned for a specific height, which means the script works best if it repeats the same height range around z0.
Before I run my script, I set z0 to the desired focal length (my 40mm custom lens cap/jig). Then I run the script, looking at the lines and tweaking the lens between runs, until the center Z=0 line (easy to spot as it is 5mm longer than the rest) is centered in the sweet spot.
Besides making the script look cleaner, and not having the starts/ends of the lines look overburned, using M4 allows me to keep my airbrush compressor from toggling on and off between each line. I use a spindle relay for my router and my airbrush compressor. Since M3/M5 toggles the spindle on/off, the compressor goes on off together with the laser. Using M4/G0/G1, the compressor stays on until I call M5 at the very end of the script. Lightburn does it the same way for GRBL. On a side note, M8/M9 is also needed in my case to open/close an air valve. I have a single set of airlines I use with both the airbrush compressor (for laser) and a larger regulated compressor (for alum mist). So while the valve isn’t needed for the airbrush compressor, it still is in the way and has to be opened when it turns on. Another side note, GRBL currently defaults with a max spindle value of 1000. So 255 is actually burning at 25.5% power, unless you change the max spindle rpm in settings from the default 1000.
I was thinking how to get more precise… maybe once you get past 1mm steps, reduce power until it only cleanly etches the center lines, then up the resolution to like 0.5mm or even lower. That way seems like it would work better for human eyes to see a clear cut difference at finer resolutions… keep reducing power and looking for cut/no-cut until you get down to only one line at 0.1mm. That said, 0.1mm may stroke my OCD, but the difference between the center few lines at 1mm is hardly noticeable… so not confident that focusing any tighter than 1mm has any advantages.
laserFocusScript.gcode (947 Bytes)
I have a Grbl/M4 (laser mode) script that is used exactly as Ryan’s original script… and assumes the lens assembly has already been positioned for a desired focal length (no further adjustment required) and you have a fully-implemented, gcode-controlled, Z axis.
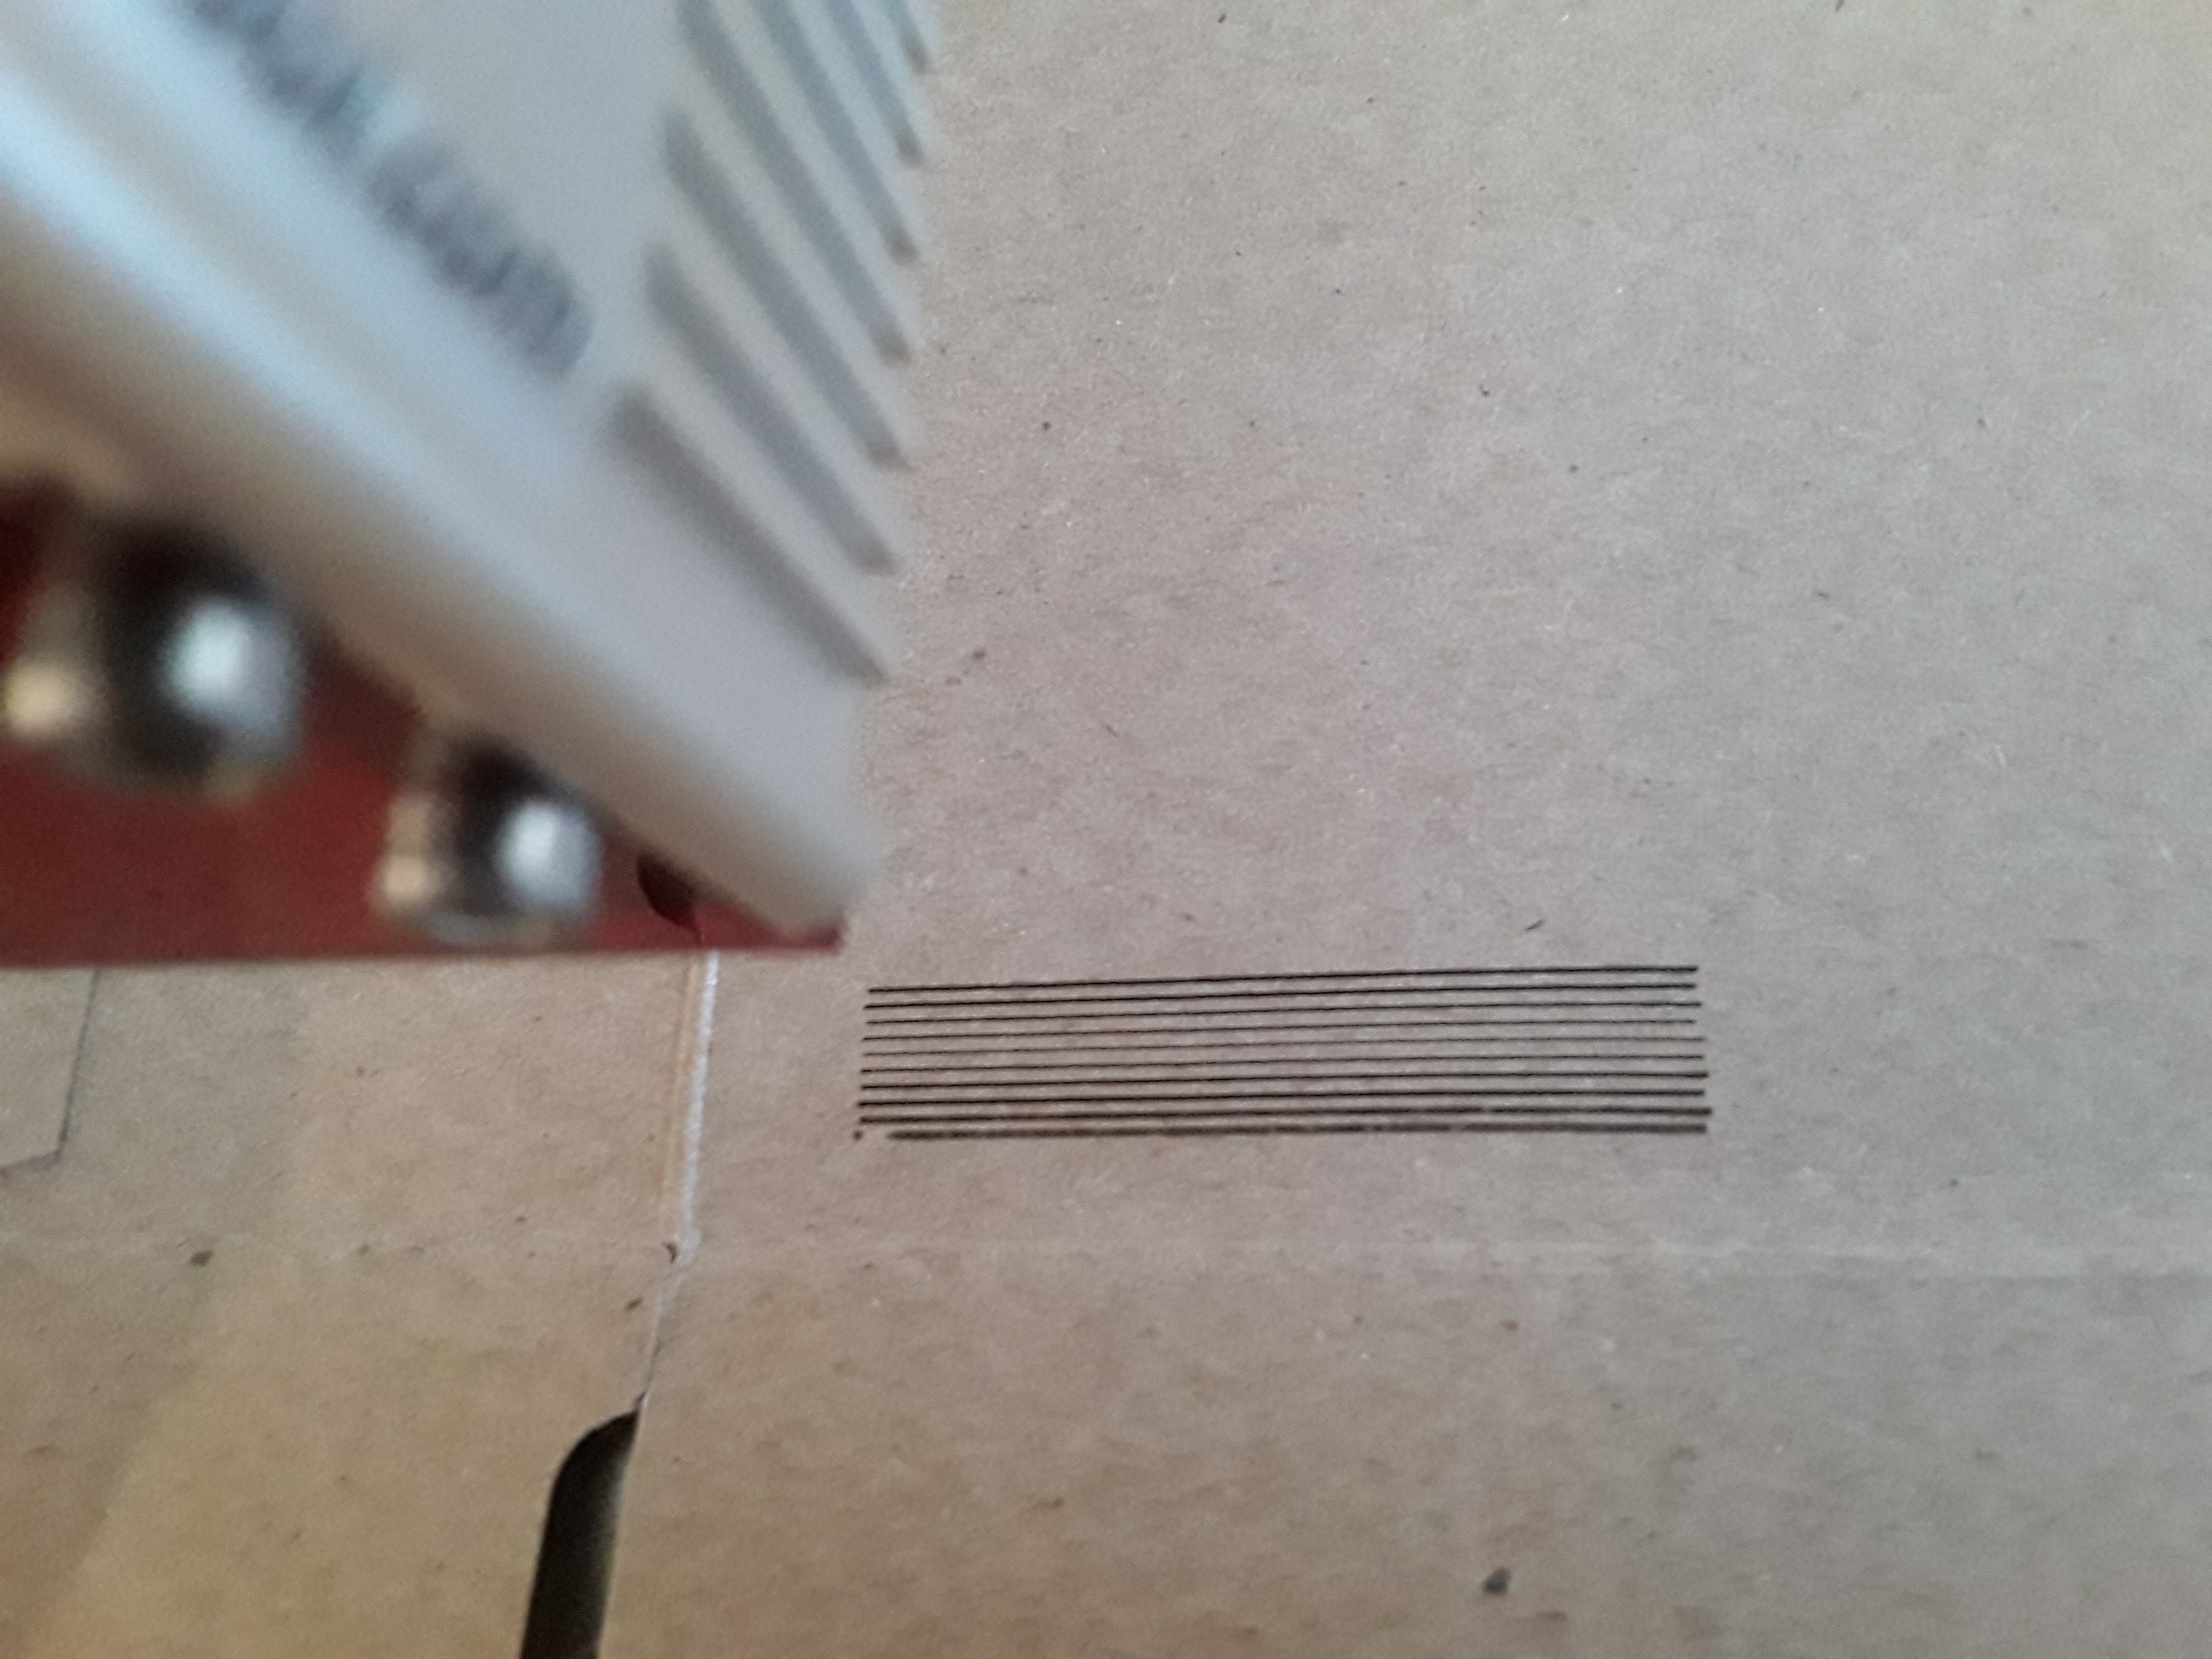
To use… initially – and intentionally – set Z “too close” to the material surface for proper focus and then run the script. It draws a series of 10 lines… with each line displaced 1mm in Y and 2mm in Z from its neighbor. At script end, you are 10mm in Y and 20mm in Z above where you started. Now, simply count lines back to the finest/thinnest (best focused) line and multiply by 2mm… and then lower your Z axis by that amount for best focus on the surface of the material.

Here the 5th line from the top is finest/thinnest (to my old, tired, eyes)… so I lower Z from its current position by 10mm (5 lines X 2mm) and I now have “best focus” on the surface of the material.
The script is easily edited to change speed and power for your laser and material… here, it is set for 600 mm/min and 25% (S250) power.
M4Focus.zip (473 Bytes)
– David