Hi there, it’s been a while since I have posted anything. Back when I built my MPCNC I have used it for wood work and with a needle cutter as well. I am going to add a laser this week and I have updated my firmware to the latest using a Rambo 1.4 board. My questions are. 1. It is going to be a 12v laser what pins do I use? 2. Can it be fully controlled i.e. power levels and on/off? 3. What is the best software to generate burn files with that are ready to use?
So there are two separate inputs here. One is the voltage to power the laser. The second is the voltage or voltage range your laser accept for the PWM signal to control the laser. The V1 maintained firmware for the Rambo board uses pin 45 to provide the PWM signal to the laser. This is a 5V pin. If your laser requires a different voltage PWM signal, you will have to either modify the firmware to use a different voltage pin, or install a voltage level converter. Most lasers accept 5V PWM signals. As for powering the laser itself, you can either provide a separate power supply for the laser, or, if your power supply to the Rambo is big enough, power both off a single, 12V power supply. If you use a separate power supply, you will need your laser and your control board to share ground. For most hookups, this happens “automatically” by the cable provided.
Can it be fully controlled i.e. power levels and on/off?
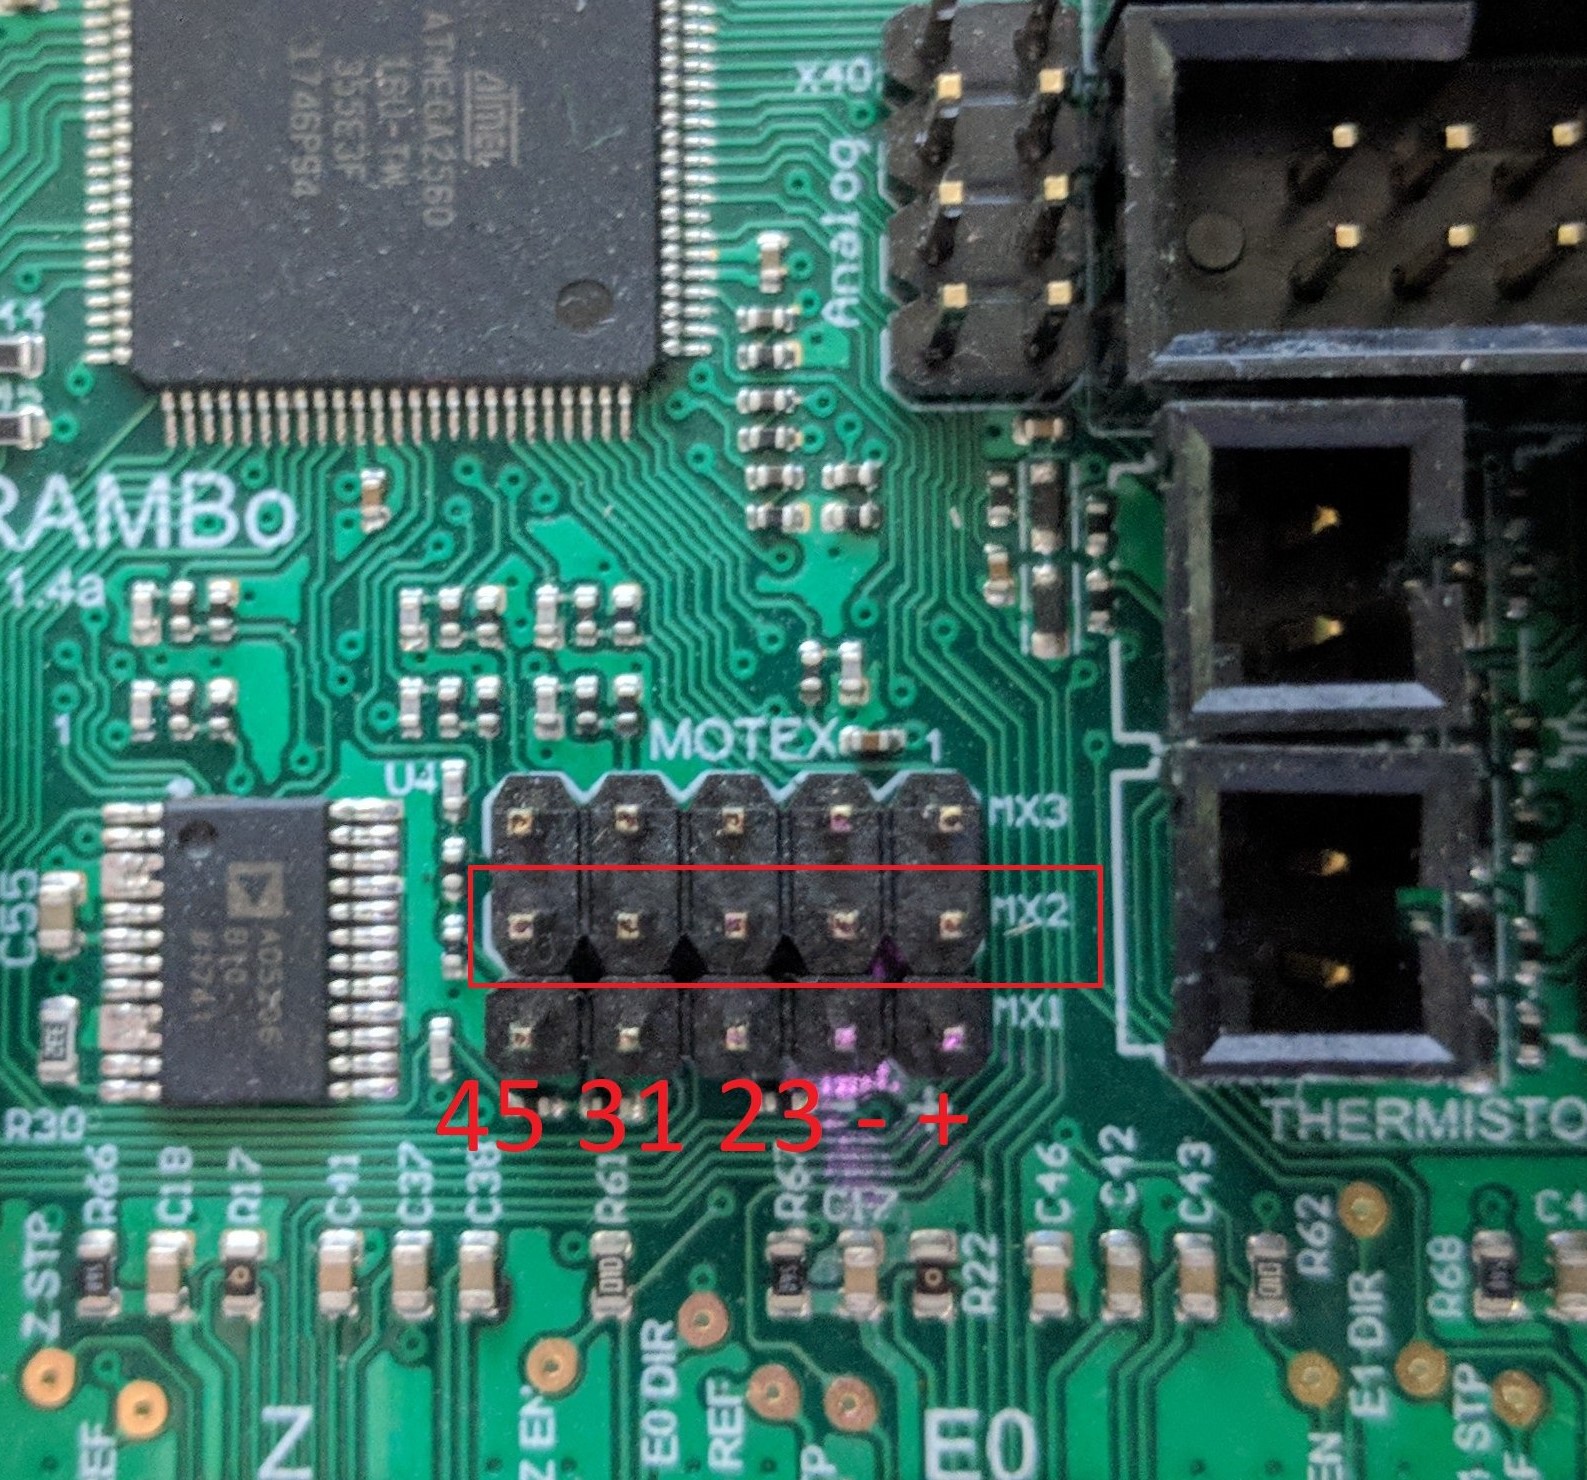
The PWM signal can set the laser be set to any of 256 power levels from 0% to 100%. There is a separate enable pin (pin 31 on the Rambo) that can be used. I don’t use the enable pin on my setup, but it is a bit safer to use it if your electronics provides for an enable line.
What is the best software to generate burn files with that are ready to use?
I highly recommend LightBurn. I think it costs $60, but that is a one-time fee and includes updates for a year. While there are free ways to generate g-code for a laser, I found them cumbersome and limited. LightBurn has a two week, fully functional trial.
Thank you for this information! Very helpful. If I was to use one of the 12v fan pins like Ryan mentions on the lasers page do need to make a firmware edit or can I use the firmware as is? Like the Fan 0 or Fan 1 pins?
The answer about the fan pins is complicated. First there is the issue of how to control the laser in g-code. Traditionally a laser on MPCNC machines was controlled using M106 and M107 fan g-codes. Recently laser work was done in Marlin, and V1 enabled and tested that laser work on the Rambo and SKR Pro boards. This new laser code controls the laser using the a’ parameter in the G0, G1, G2, and G3 g-codes, and there is substantial quality improvement in the laser cutting using the new method. So you can use the fan pins without firmware changes if you use the old method of controlling the laser using M106/M107, but if you want to use the new method, you would need to change the pin assignment for the laser code from pin 45 to one of the fan pins in the firmware and re-flash the board.
The electrical side of using the fan pins is also a bit complicated. First, it will only work if your laser module accepts 12V PWM signals. Second, the fan pins on the Rambo board use ground-side switching, meaning for the PWM signal turns the ground on and off rather than the more traditional method of turning the hot pin on and off. For some lasers you need to add a resistor to the circuit to make ground-side switching work.
According to the the sales page, “If you own other brands of engravers such as Ortur, NEJE, Two-Trees, etc., you can also install our Atomstack M50 laser module, which comes with a free adapter in the box.” I’m guessing that the “free adapter” will allow you to hookup your laser to the 5V laser pin.
I just saw they have a reference to a manual on the sales page. In the manual they show “Input B” for other laser manufactures. This is a two pin input, and almost certainly will handle a 5V PWM signal since a lot of other manufactures use 5V PWM. Connect the TTL pin to pin 45 on the Rambo and the ground to a ground, and you should be good to go.
I don’t understand the question. If by “goose controls” you mean “g-code commands,” then the answer is probably no. Older documentation uses M106/M107 fan commands to control the laser. Pin 45 is controlled by inline commands but M03/M05 will also work. The first post at the top of this forum topic has a g-code file attached that has in-line commands.
If you follow my advice and get LightBurn to control your laser, you will want to setup your laser as inline:
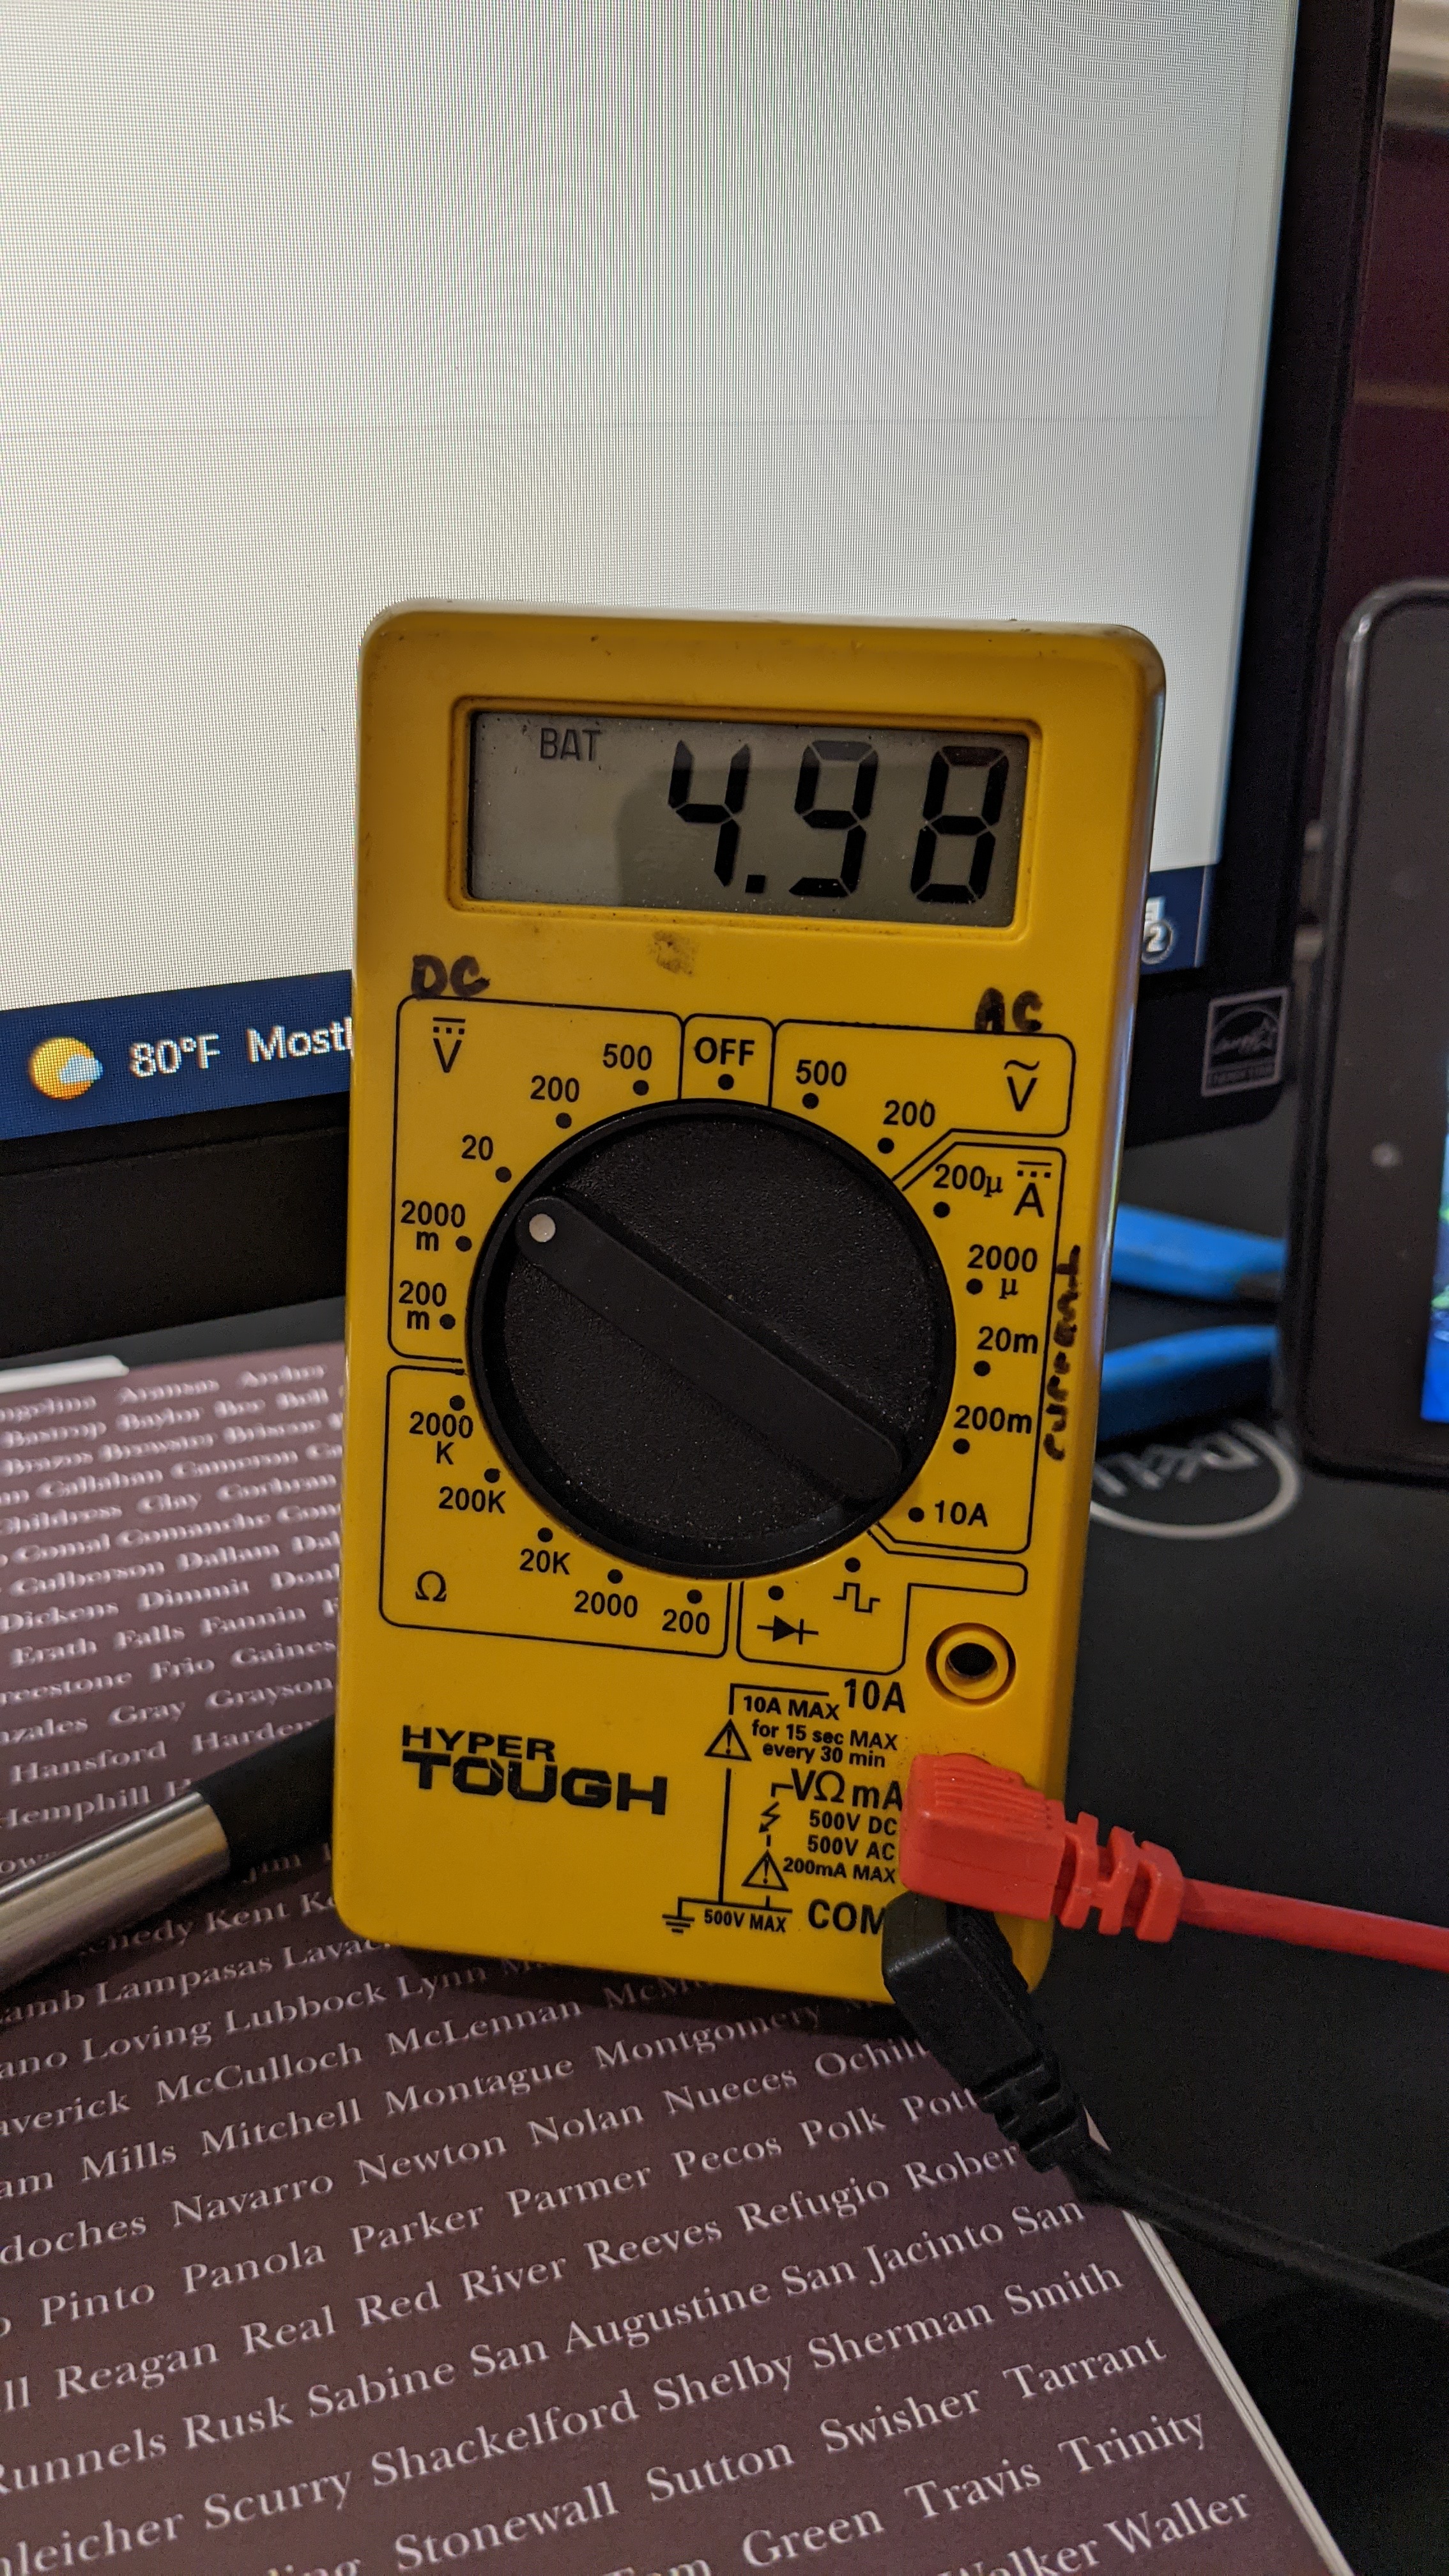
If you have a voltmeter, you can (carefully) test pin 45 before your laser arrives. If you have the LCD for your Rambo board, you can use the LCD to turn the pin on. The wording is funny. I think you have to turn the laser off in the menu in order to have manual control of the power. I’m not near my machine to check the exact method. Or you can send g-code commands. “M03 S255” turns the laser on full power, so you should see 5V on your meter. “M03 S128” is half power and the meter will read around 2.5V. “M05” turns the laser off.
Apologies I corrected that typo, yes I meant the “gcode” commands in my last post. I tested pin 45 earlier and it has 5v on it constantly. Should it not e constant? I do have a voltmeter and I do have an LCD on my Rambo board as well. I will take a look. But I will try to test it out with commands.
You’re right, I was just testing the + and - pins only on the MX2 row. I just tested pin 45 and the - pin and it shows 4.98v at full power. See picture attached.
No g-code modification is required. Note it took a few YouTube tutorials before I understood how to setup LightBurn in a way that mimicked my CNC workflow where cutting is relative to the piece.
You don’t want to drive a 3.3V PWM device from a 5V source, but I’m guessing the adaptor board they should have provided will allow you a 5V PWM signal. You need to read any materials that came with your laser module and/or contact the manufacture about driving the laser from 5V. If 3.3V is required I think a simple voltage divider circuit using two resistors would do the job safely, but you should run the idea past someone on the list that knows more about electronics than I do before implementing a voltage divider.
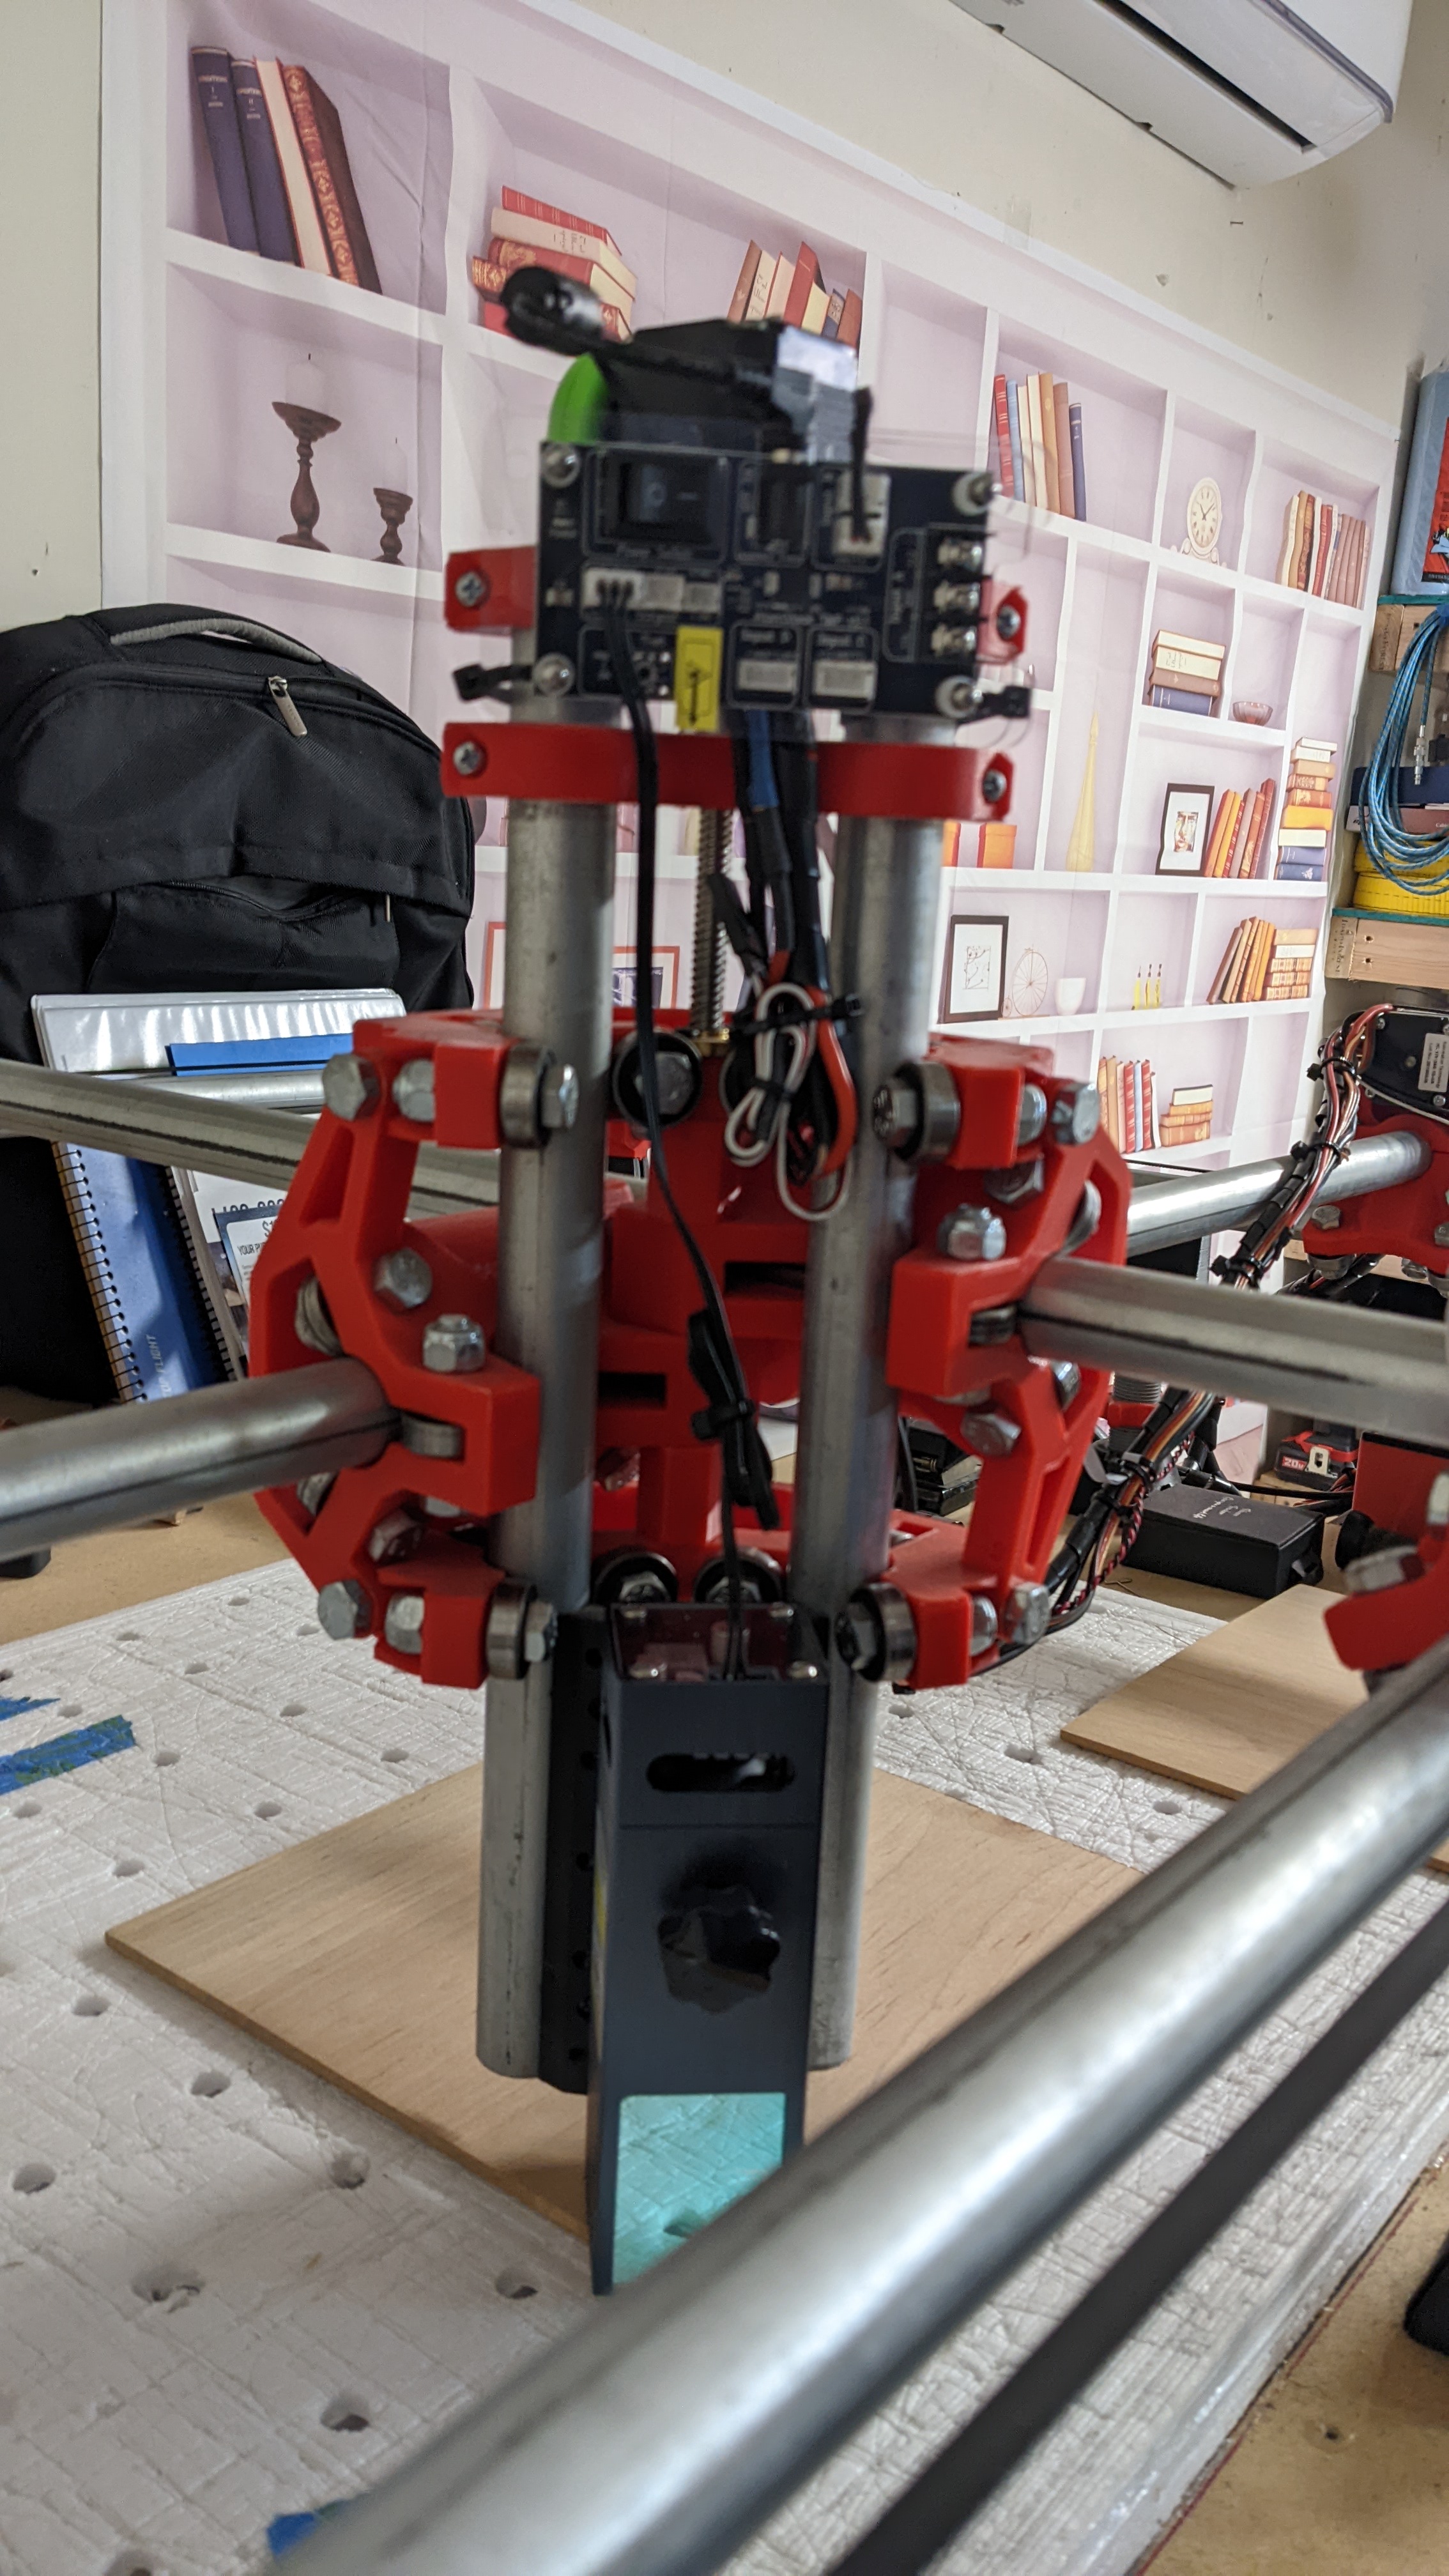
So I finally for the Atomstack M50 laser mounted up and wired, I did test fire and it seems to be working as intended. I will try to run my first test burn tonight or tomorrow!