Saved this puppy from the landfill along with an old all in one printer that I managed to salvage 2 good steppers from.
Guess a sand table is my next project.
Saved this puppy from the landfill along with an old all in one printer that I managed to salvage 2 good steppers from.
Guess a sand table is my next project.
Good idea! I’ve never imagined that I’d build the zen, just because I have way too much going on already. But if I found a suitable second hand table, things would quickly be otherwise! 
It’s round.
Mister obvious here. That could be good, or it could be interesting, depending on your plan.
Yeah probably not a zen but I’ve got a plan
So, I started my design for my round sand table last week. As Jamie pointed out:
pretty much sums this project up so far.
As I start most projects I start with project goals so I don’t go too far afield as I build. This projects criteria:
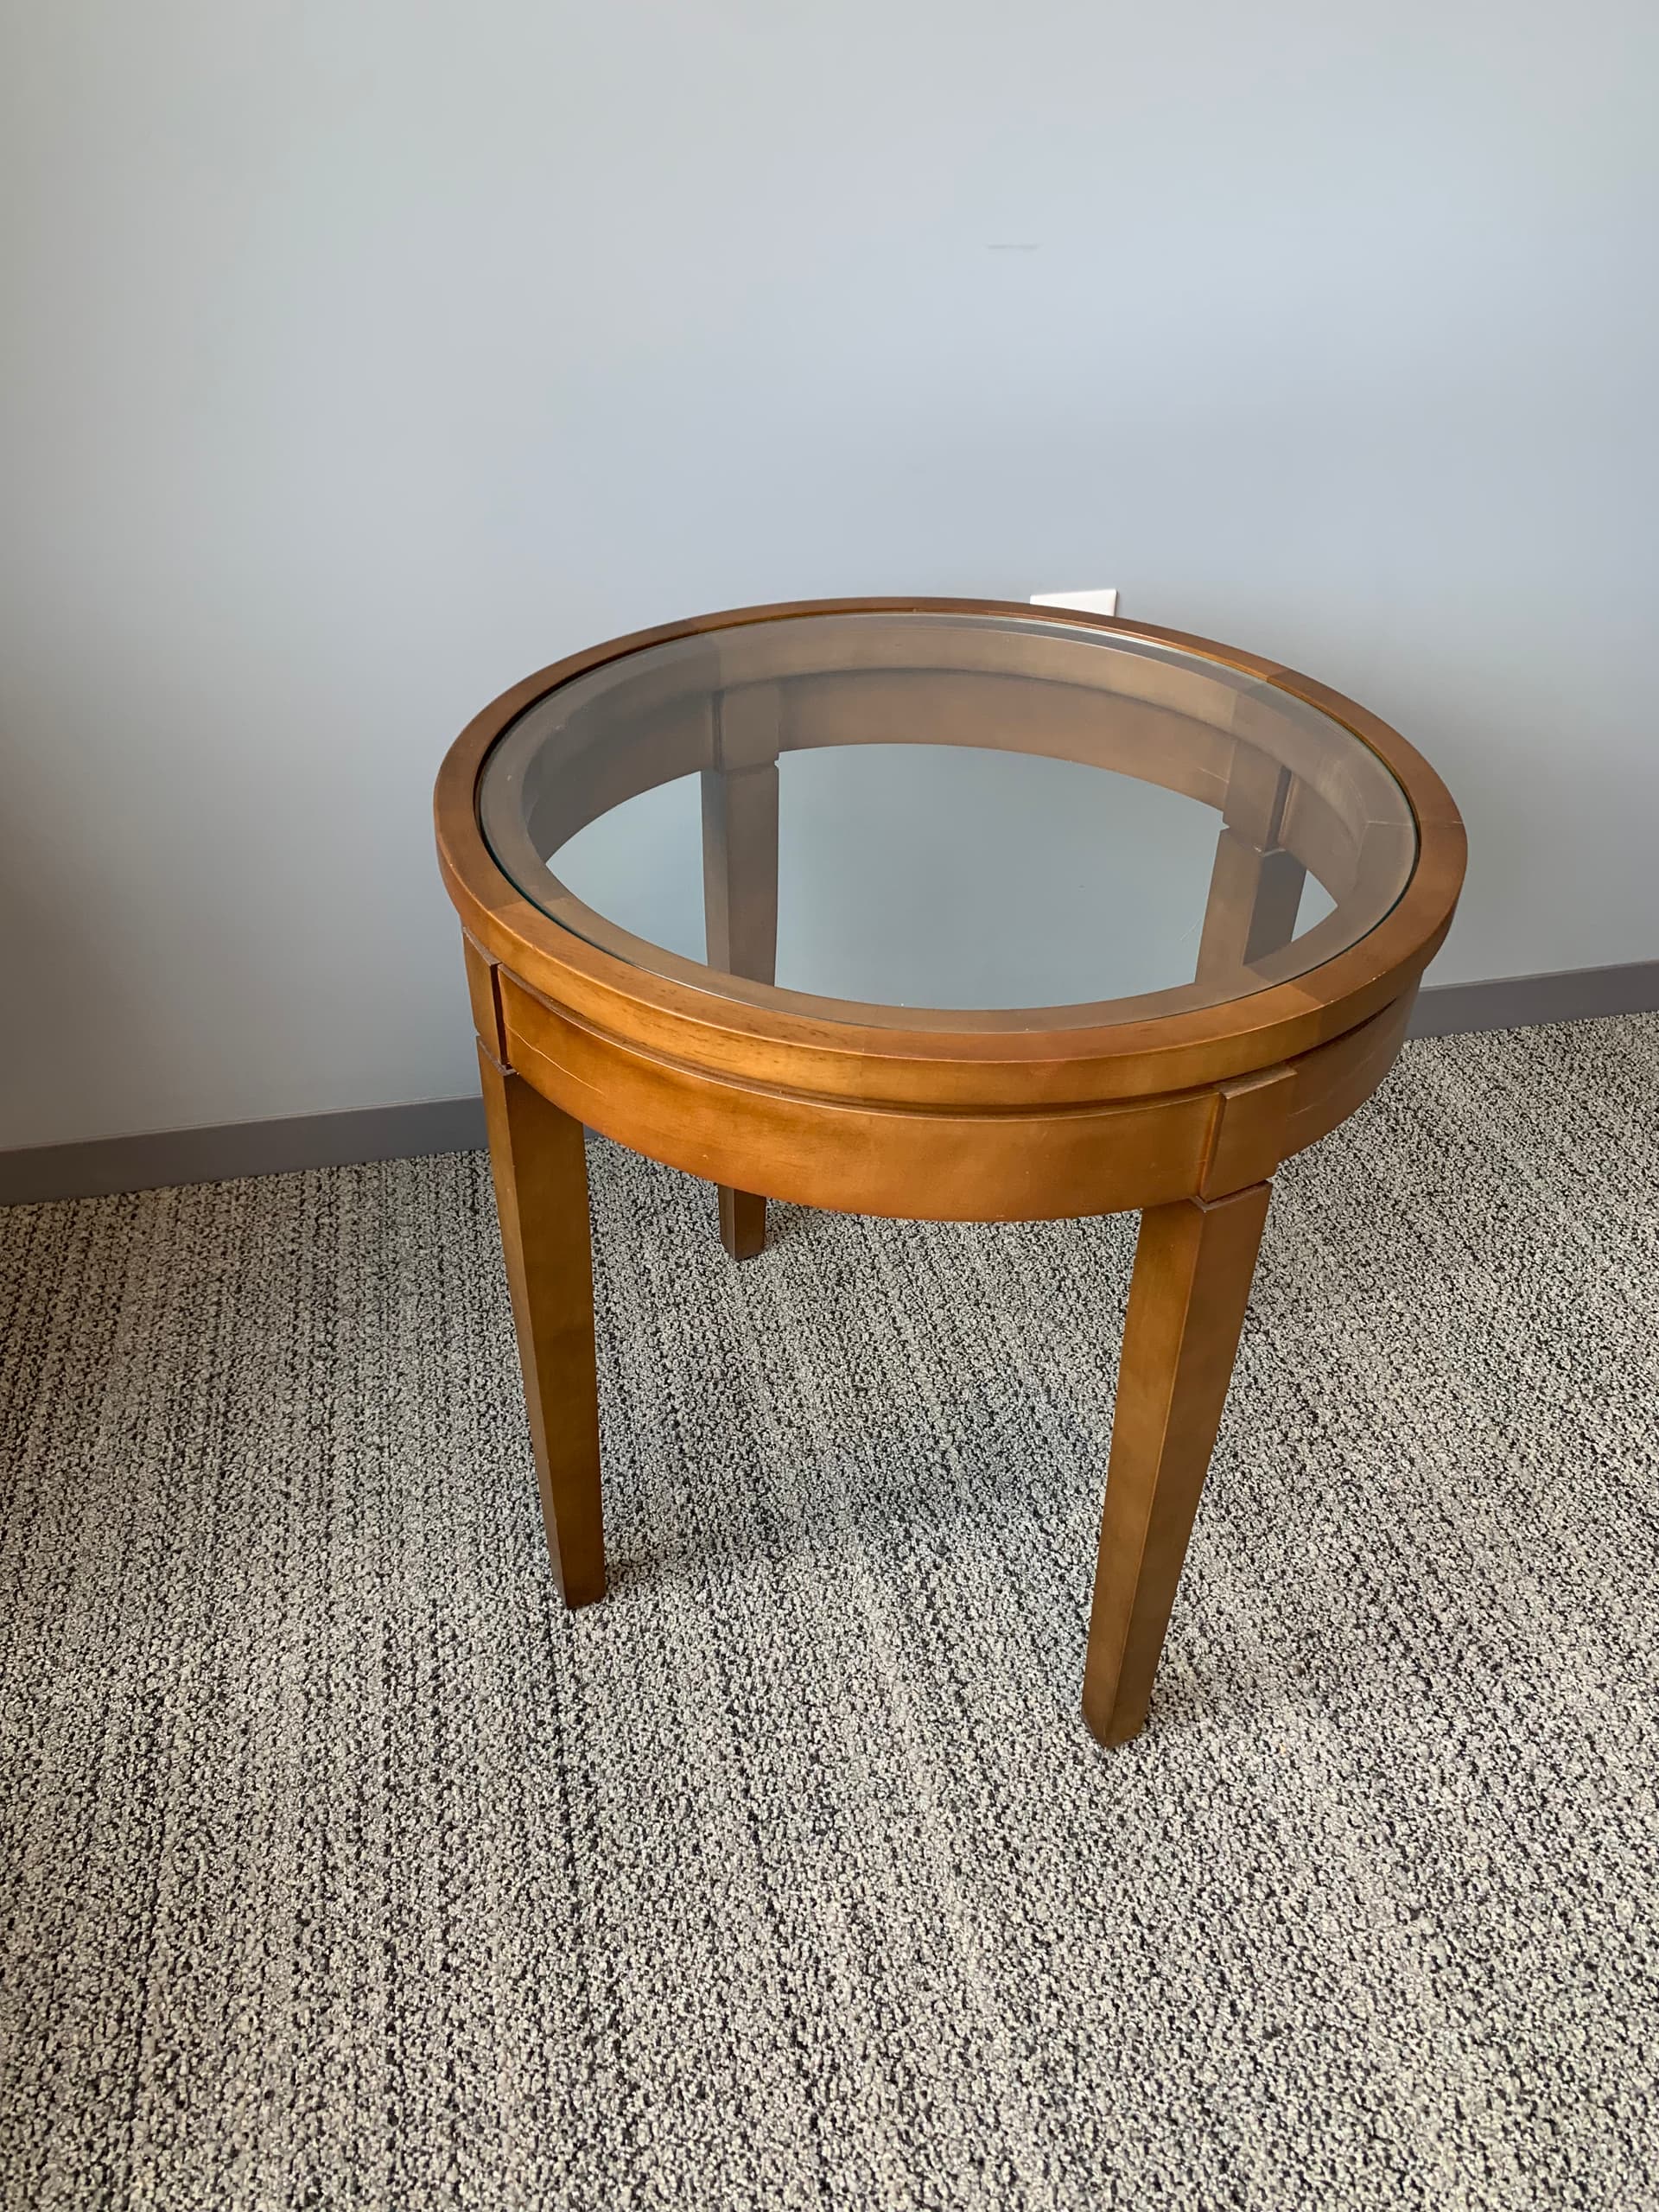
Must use as many recycled or on-hand parts as possible as there is no budget for the project. I found a donor table and tore apart an all in one printer which yielded steppers, pulleys, screws, and belts to the project.
Mechanical portion must fit in a 62mm tall area of the table in order to be hidden. The sand area has its own 20mm of clearance.
Wirelessly controlled and be able to play Sandify gcode.
It should be quiet and not draw attention to itself when running.
Should be table independent and scalable as I view this as a prototype for a larger 42-48 inch coffee table.
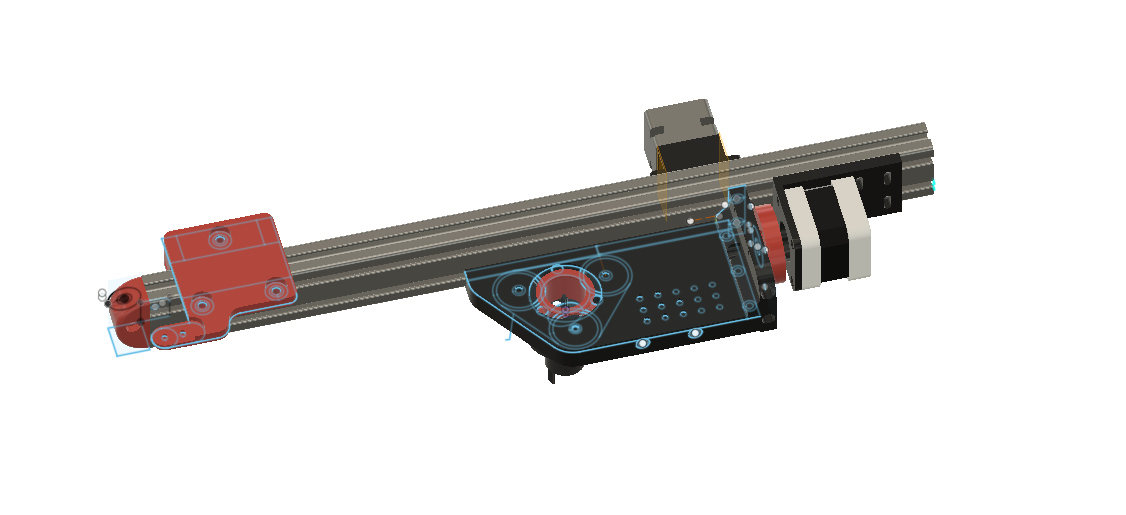
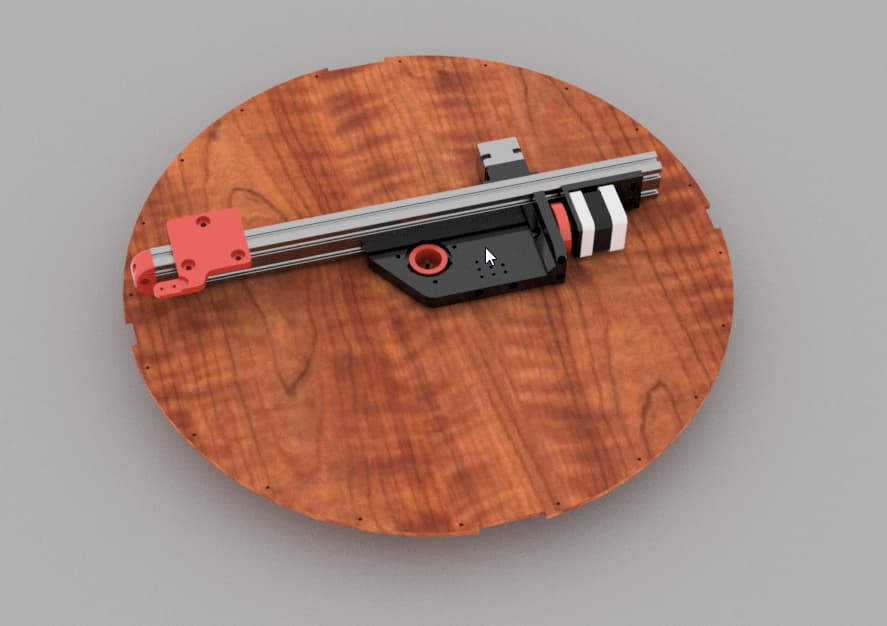
The idea behind this design was to have a rotating 4020 “stick” that pivots around a central axle and using a slip ring to run wiring… As I didn’t have a big enough bearing on hand , I improvised this one using 3 POM wheels in a grooved axle:
I’m attempting to have a drive wheel (red) just be a plain wheel that works with friction. My prototype is using a GT2 belt superglued to a hub which gives pretty good friction. As a fallback I may need to use a large beveled gear as a track. Kind of like a circular rack and pinion.
The sand level will be placed above this device so basically
------------------------------------ Glass
xxxxxxxxxxxxxxxxxxxx Sand
xxxxxxxxxxxxxxxxxxxx
------------------------------------ Sand Support
^^^^^^^^^^^^^^^^^^^^^^^^
^^^^^^^^^^^^^^^^^^^^^^^^
^^^^^^^^^^^^^^^^^^^^^^^^
^^^^^^^^^^^^^^^^^^^^^^^^ Machine
------------------------------------ Machine Support
I did have to buy a controller which is Bart Drings Fluid NC Pen Plotter Board running TMC 2130’s. It has built in WiFi so I don’t need to throw a Pi into the build. I was impressed with the build quality.
Anyway the last of parts is printing now so wish me luck! Will update as I build it.
No. The polar feature just limits the movements to a circle. The export formats are what determine the number format.
Thr is a list of theta (angle, radians), rho (radius, between zero and one).
Gcode is currently only cartesian. X and Y are used the same way they would be in a cnc machine.
Scara is still gcode, but it is for scara arms. The firmware is dumb, and thinks it is controlling an enormous cartesian machine, but sandify outputs X and Y to control the shoulder and elbow joints of a scara machine.
What we could do (and this is how the scara code started) is to make a short script that would read thr files and output gcode for your geometry. It should be pretty simple, because the theta is proportional to your rotational motor and rho is proportional to the radial motor. The thr is the best starting place, because it solves several issues for polar machines (converting straight lines to curves).
Ok so what machine specific parameters would the script need?
Distance from center of table to drive wheel and diameter of drive wheel for X I assume. Anything for Y?
In theta rho: Theta represents radians.
In grbl, a certain number of steps will make the machine rotate a single rotation. You will have to compute that using the mechanics you’re building and just set it in grbl.
In the gcode, we can pick arbitrary units. The gcode units can go positive, or negative, and get huge (so degrees are probably too big). Radians would work fine, but they are just a bit tricky to do in your head, so I prefer making 6 units equal one rotation (details here)
So if we keep that decision, you just need to adjust the steps per unit in Marlin for the number of steps to move the machine one sixth of a rotation.
There are related settings, like min/max speed that will be using those units.
There is a similar story with the linear axis. The values will always be between 0 and max. If we are using units close to radians for the rotation, then the linear axis should have a max close to 1. The reason is that you will set the feedrate (which is a combination of rotational and linear movements) to units per minute. If you set feedrate to 60 units per minute, then you can make 10 rotations in a minute, which is reasonable. If you linear max is 1, it can go from the center to the edge in 1s (which is just as reasonable). If your linear max was 180mm, it would take 3mins to go from the center to the edge.
So we can define the script to just convert theta rho to X and Y, assuming X is in 6units/circle and Y goes from zero to 1 (or we can make those configurable).
Then the grbl firmware just makes sure the settings for steps per unit, max units per second, and max units/s/s are in those units. You can change these parameters without recompiling the firmware.
I’ll have to read that a few times before it sticks but I think I’ve got it.
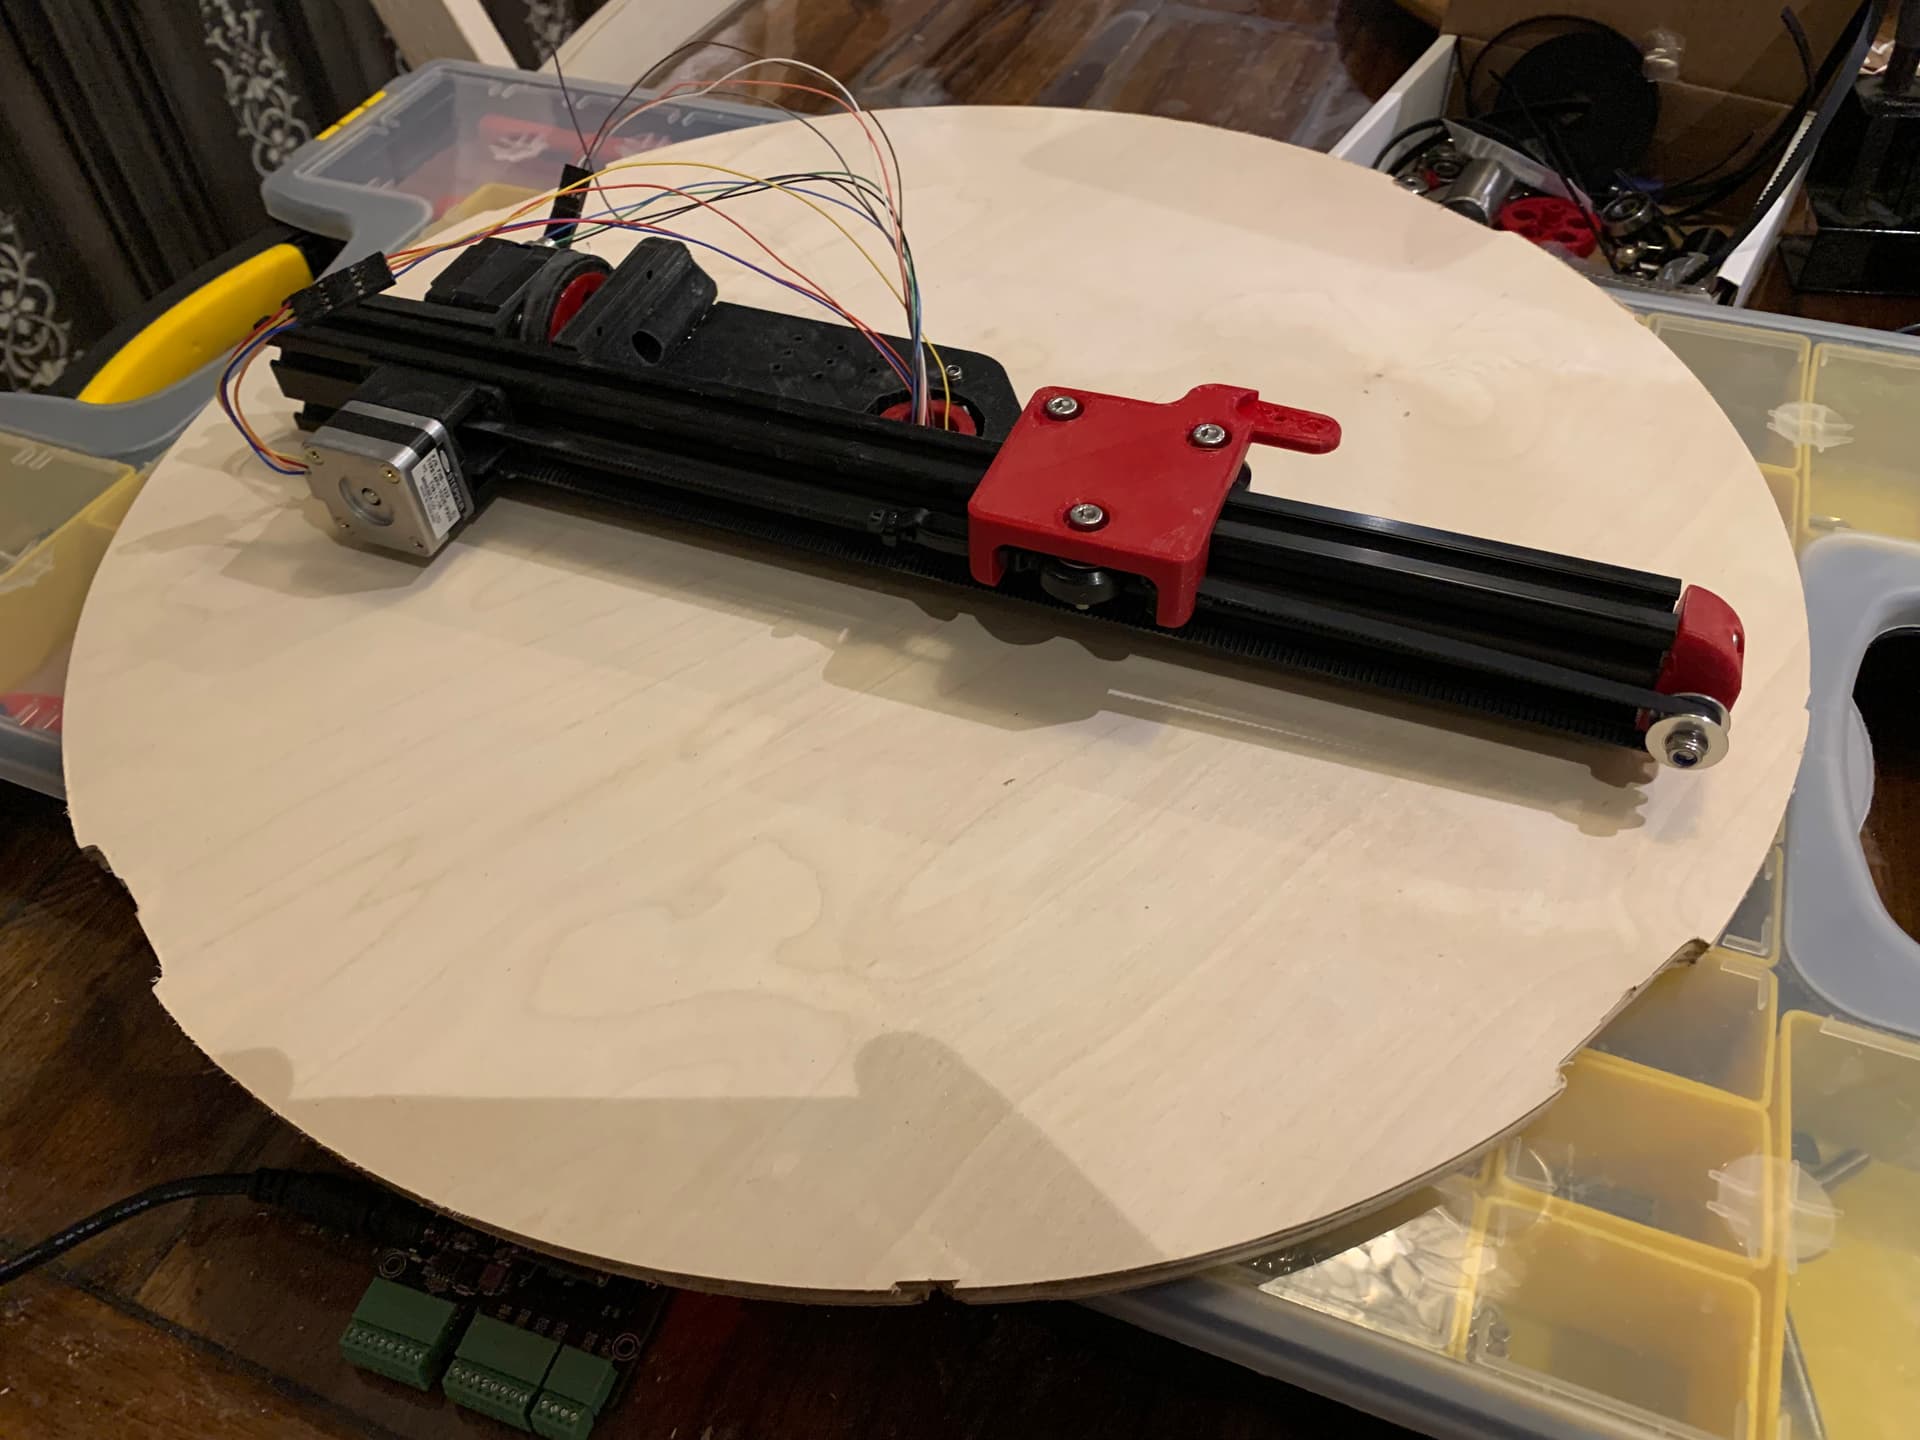
Started assembly today. Need to cut the work table before I can wire up the motors to start taking measurements.
Thanks for the help!
It’s Alive!
The parts went together reasonably well and it moves the way it’s supposed to via fluidnc.
Need to get the unit stuff @jeffeb3 suggested ironed out and I’ll be ready to start testing!
@jeffeb3 I think I’m ready to try your script whenever you are. The “x” axis spins one rotation per 6 “jeffies” the y axis moves from zero in the center to 1 at the perimeter.
Still need to get homing finished but getting close!
That was fast! I will cook something up when I get a minute.
This is a repl.it. it is just an easy way to run python code. If you don’t have another way to run it.
You can either just open the code and copy the main.py to run it somewhere else, or fork the project and use the browser to run it.
It opens a file sandify.thr and outputs transformed.gcode. in repl.it, it is all in the browser, so you have to upload a new thr file and download the gcode from that workspace. If you’re running it locally, those two files will be where you ran it.
I don’t know what your coding experience is, but I tried to keep it simple enough so anyone can read it. Obviously, if you’ve never seen python, there are details that won’t be clear.
import math

# Config
THETA_UNITS_PER_ROTATION = 6.0
INPUT_NAME = "sandify.thr"
OUTPUT_NAME = 'transformed.gcode'

# Open the files.
with open(INPUT_NAME, 'r') as infile:
  with open(OUTPUT_NAME, 'w') as outfile:

    for line in infile:

      # First, separate by content and comments
      parts = line.strip().split('#')

      if len(parts[0].strip()) == 0:
        # This line doesn't have anything that isn't a comment
        outfile.write(line.replace('#',';'))
        continue

      else:
        (theta, rho) = parts[0].split()

        # Here, we're actually doing the math.
        x = THETA_UNITS_PER_ROTATION * float(theta) / (2*math.pi)
        y = float(rho)

        outfile.write("G1 X{:0.03f} Y{:0.03f}\n".format(x, y))

    # We just moved each motor a bunch. A whole lot.
    # When we start the next file, we don't want it to unroll
    # So we will make the current coordinate something that is small, but the same.
    xmod = x % THETA_UNITS_PER_ROTATION

    outfile.write("G92 X{:0.03f} ; Reset the coordinates\n".format(xmod))
IIRC, the thr file in there is a square that gets bigger and bigger.
That’s awesome! Have kids activities most of the day but will check it out this afternoon.
Thanks so much Jeff!
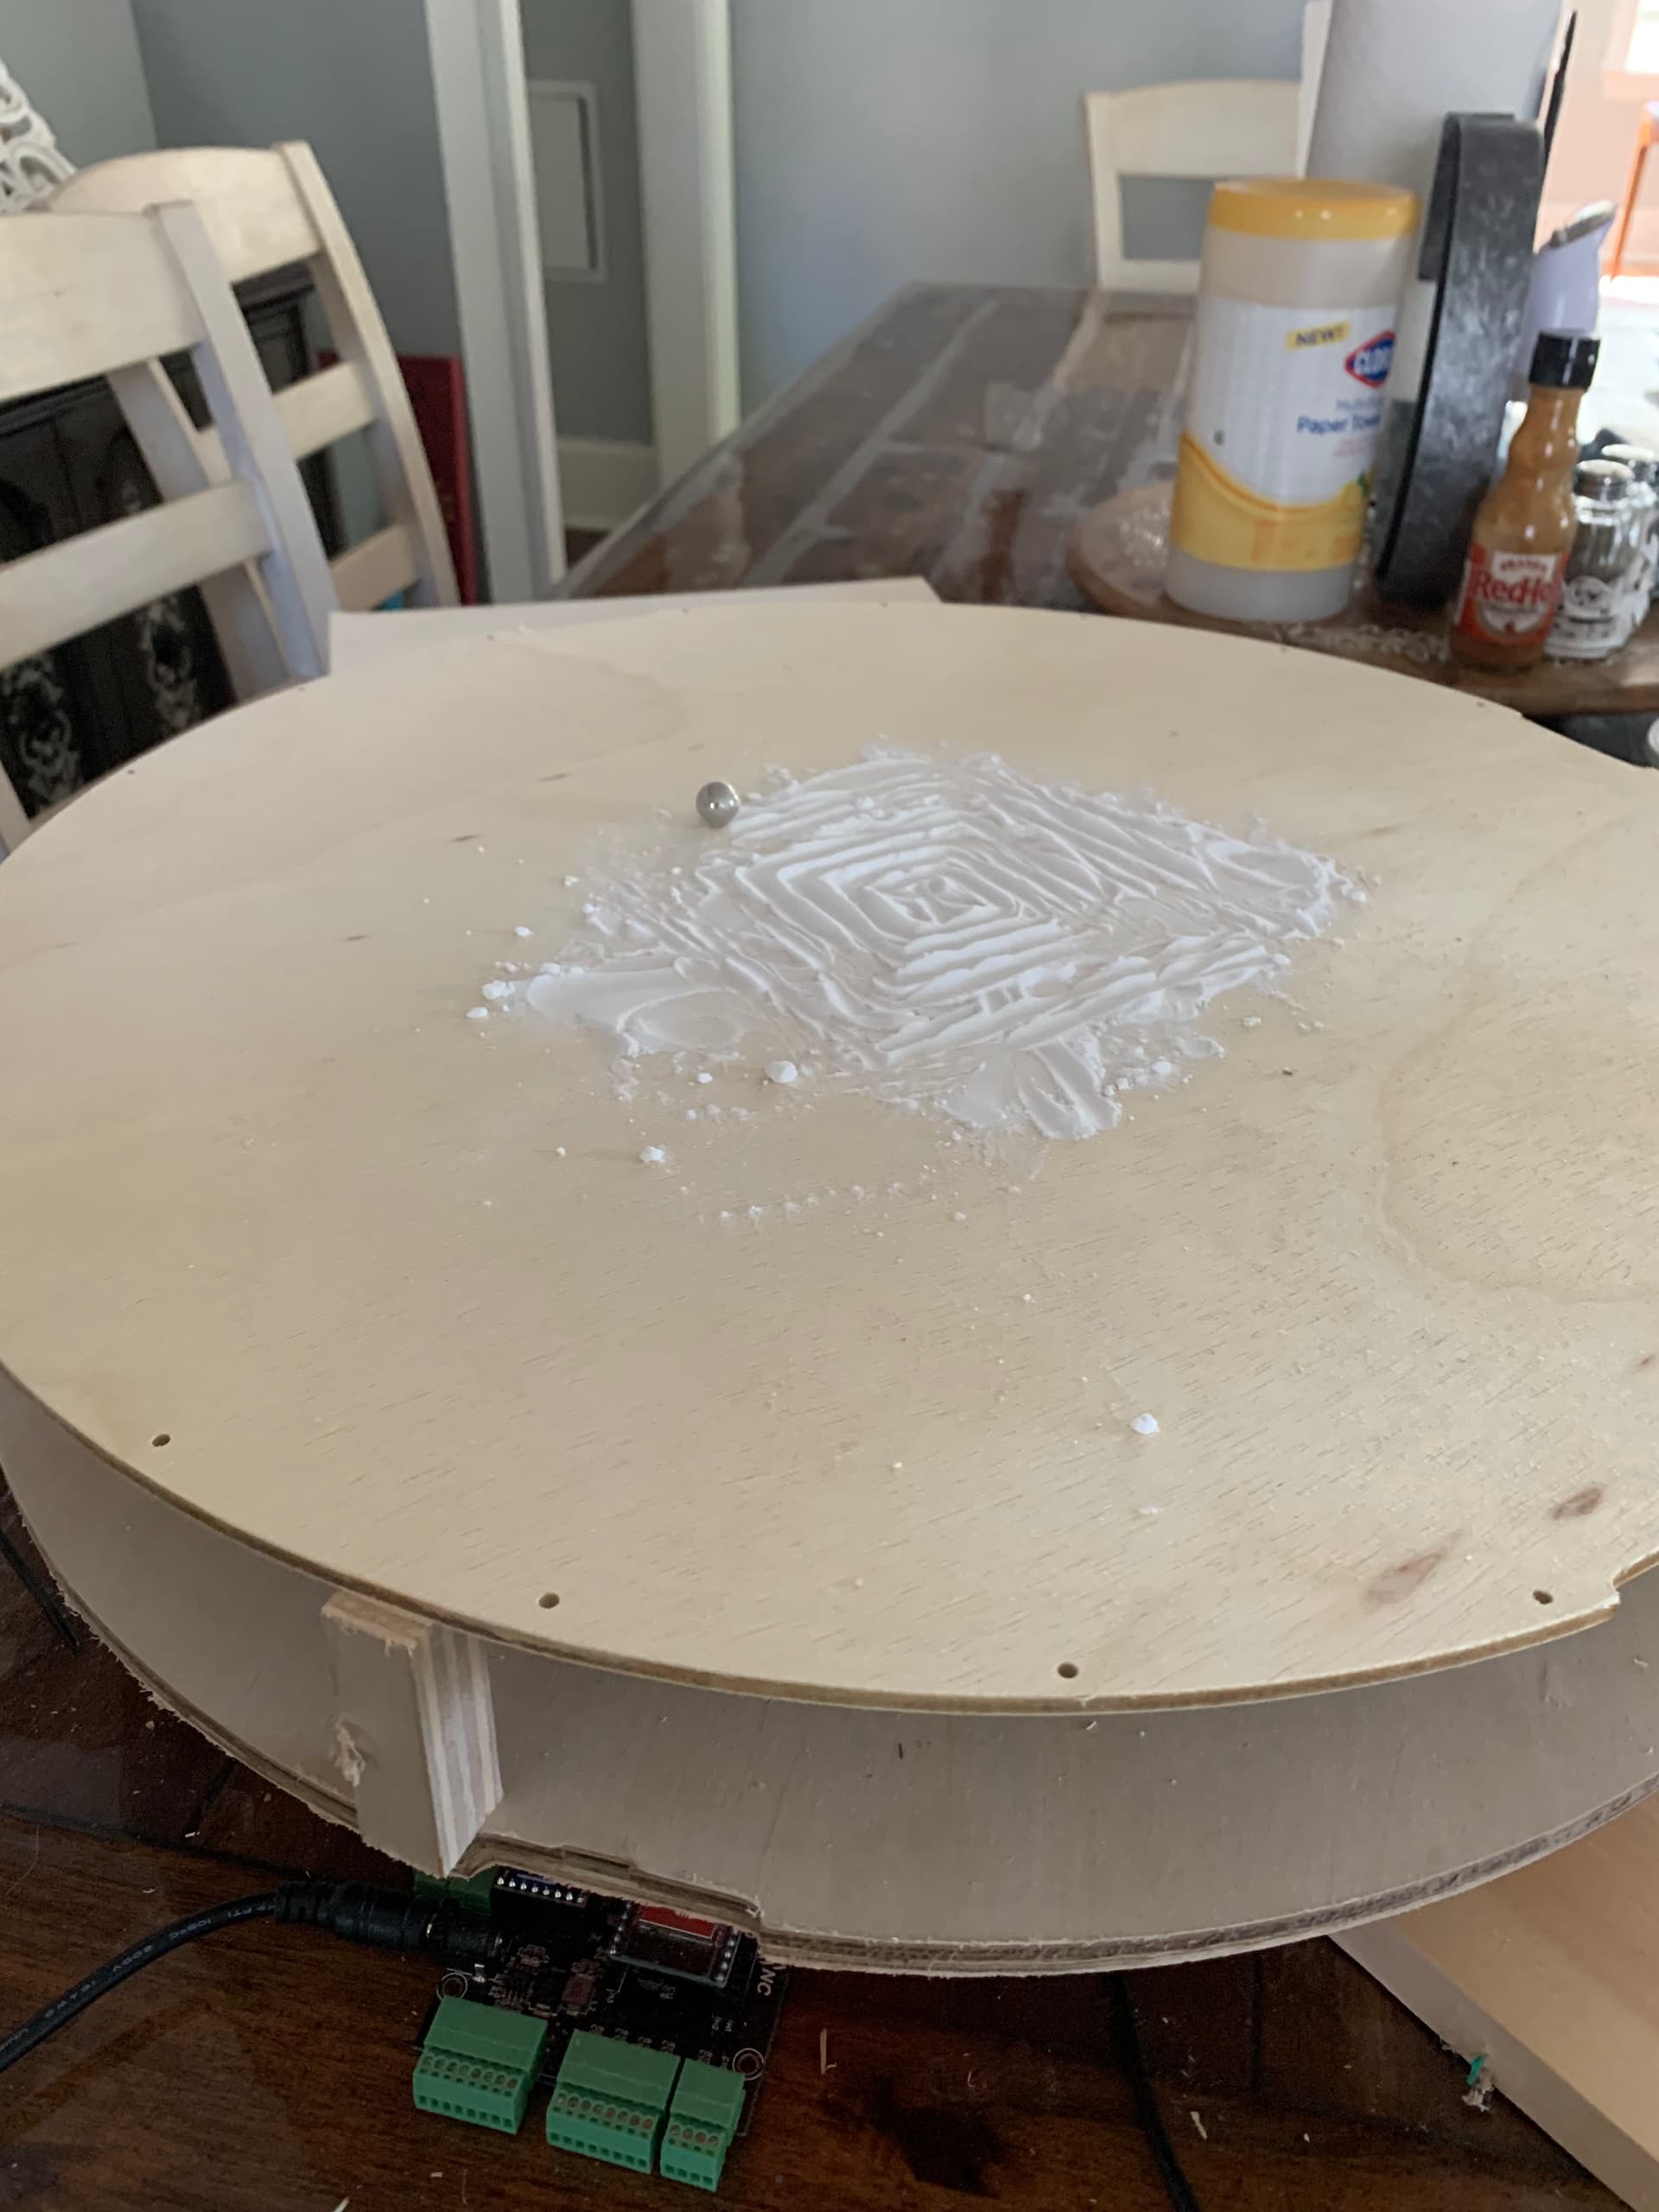
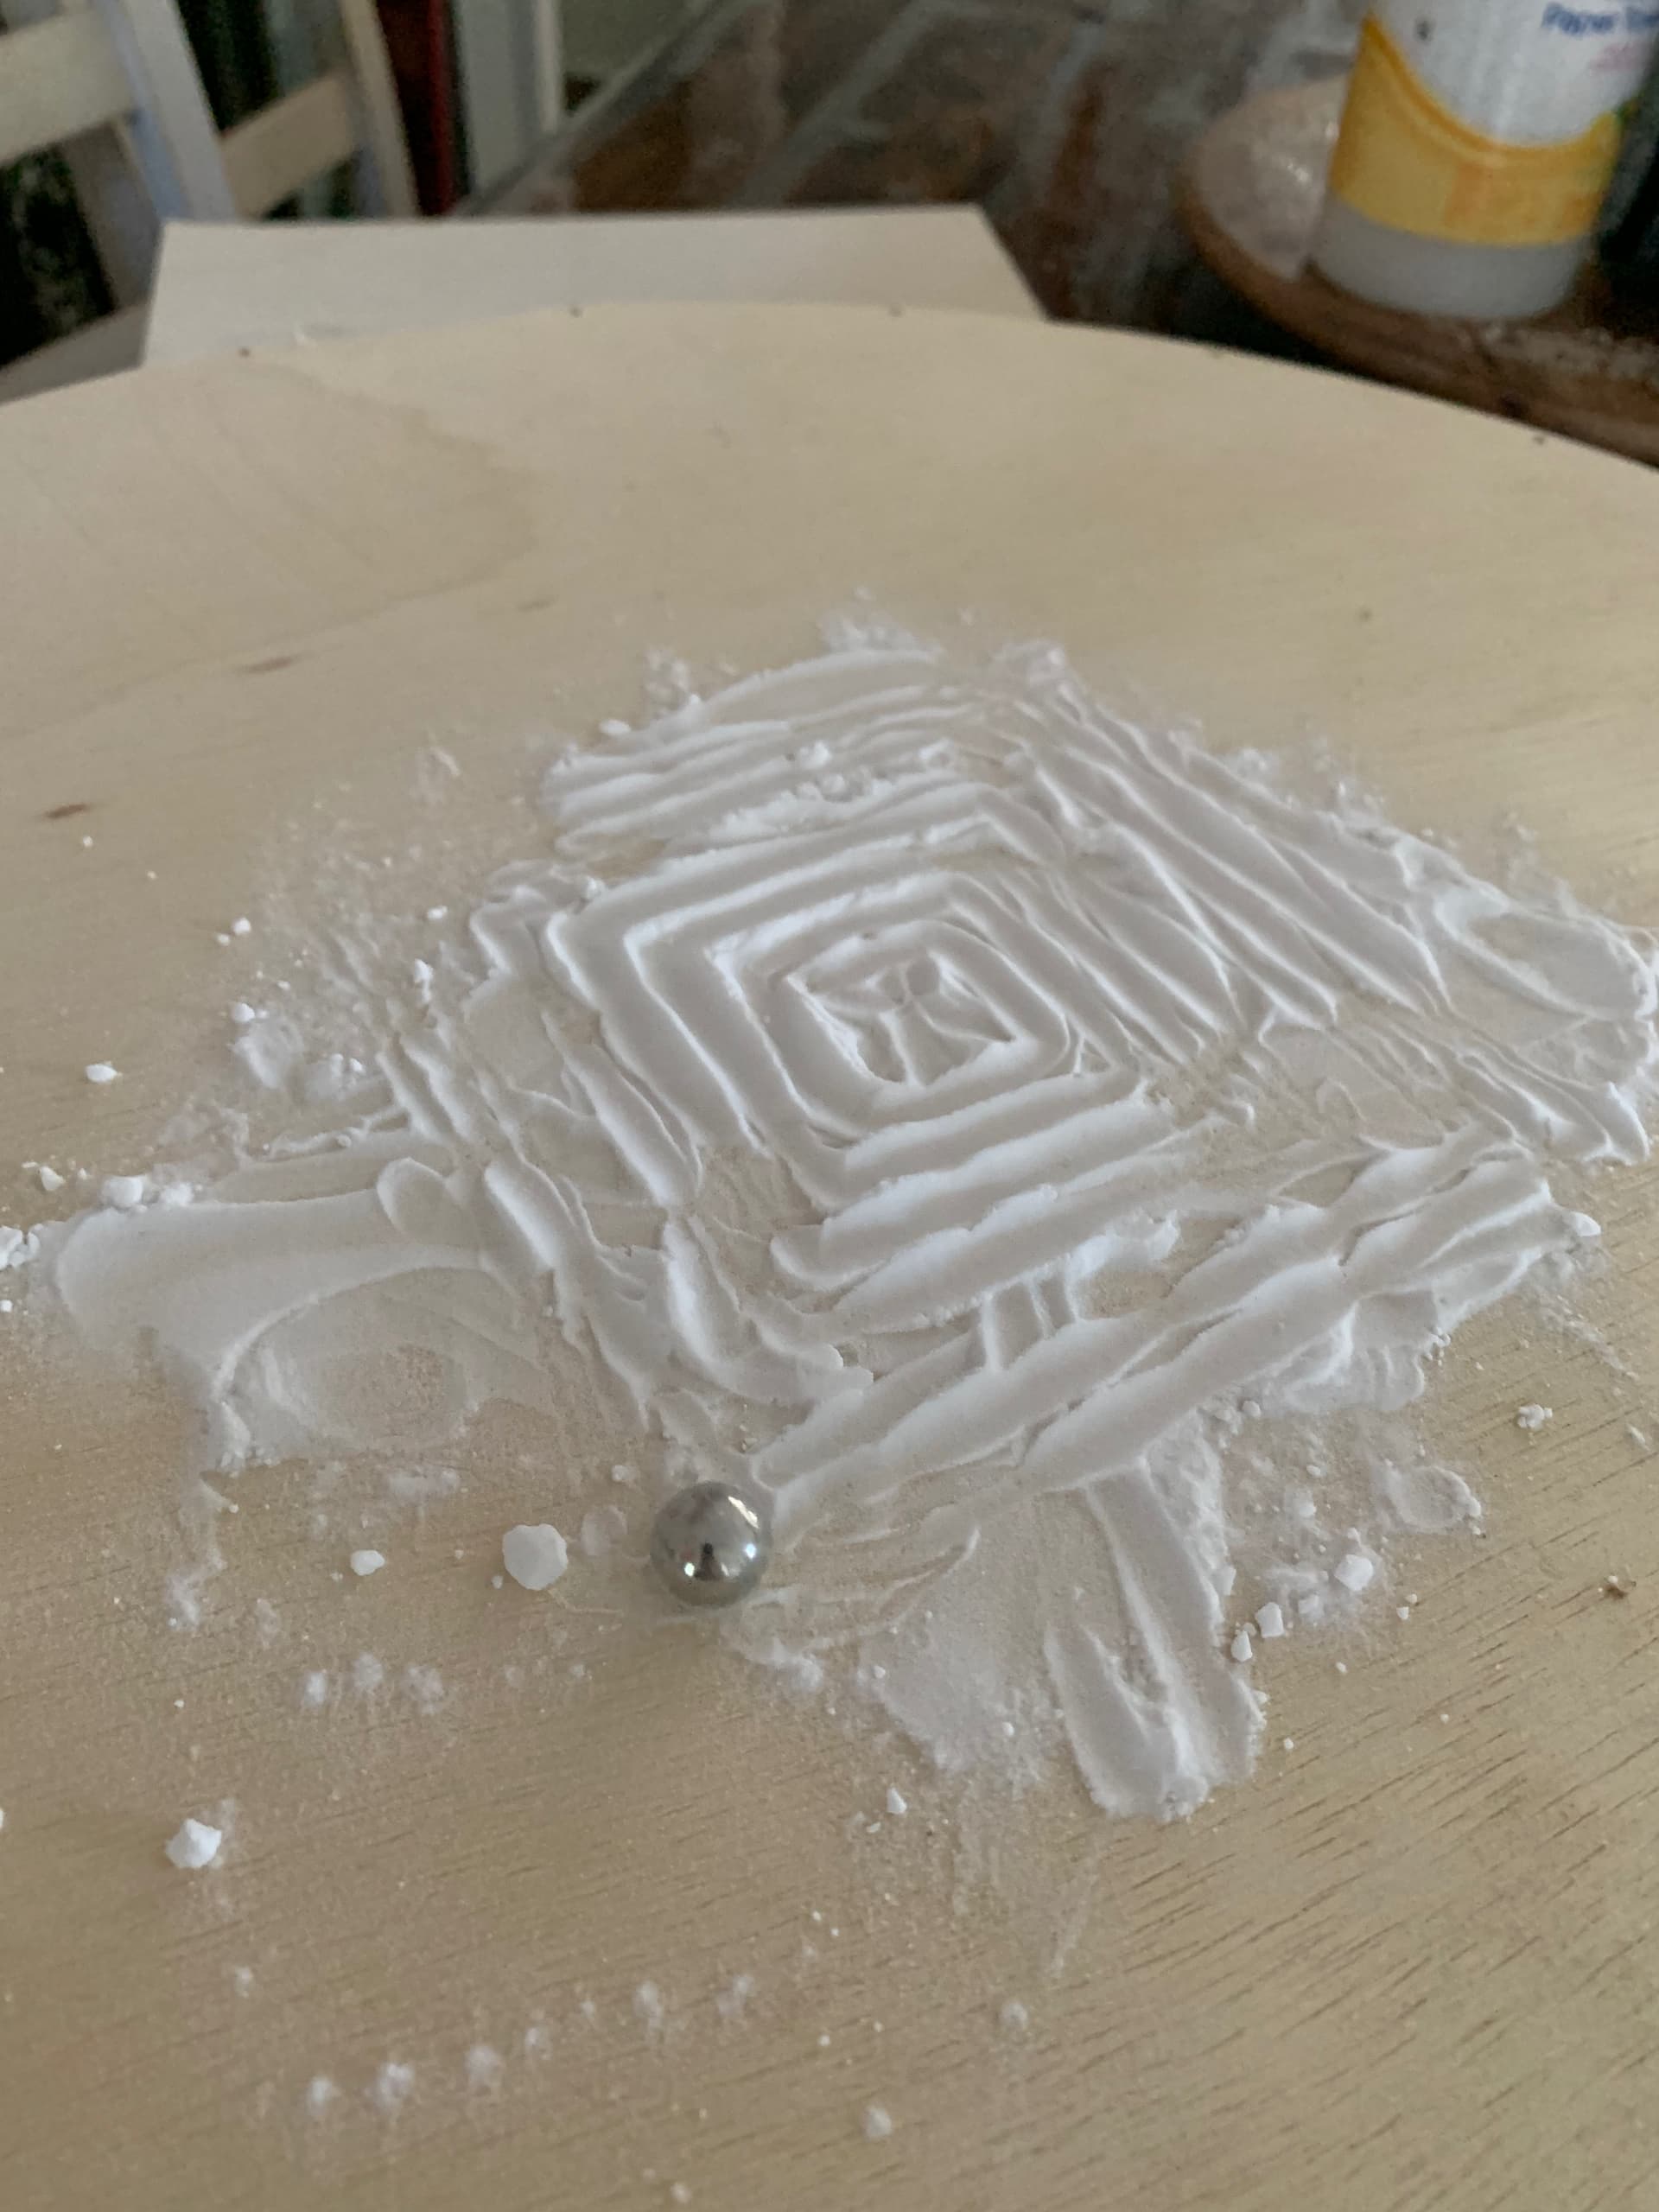
The code seems to work. My test was using a hand held piece of cardboard over the machine so no idea how accurate it is but the pattern appeared squarish.
Having a working sand table awesome…
Having your wife walk into room as you play with white powder with a credit card… priceless.
Very nicely played!!
@jeffeb3 is there any way to scale feedrate with the current diameter (rho) up to whatever the max feedrate is set to in the firmware so the ball moves at the same rate on the outside of the perimeter as on the inside? I get that when its close to the center the feed rate would be unattainable but it would just hit the firmware max anyway.