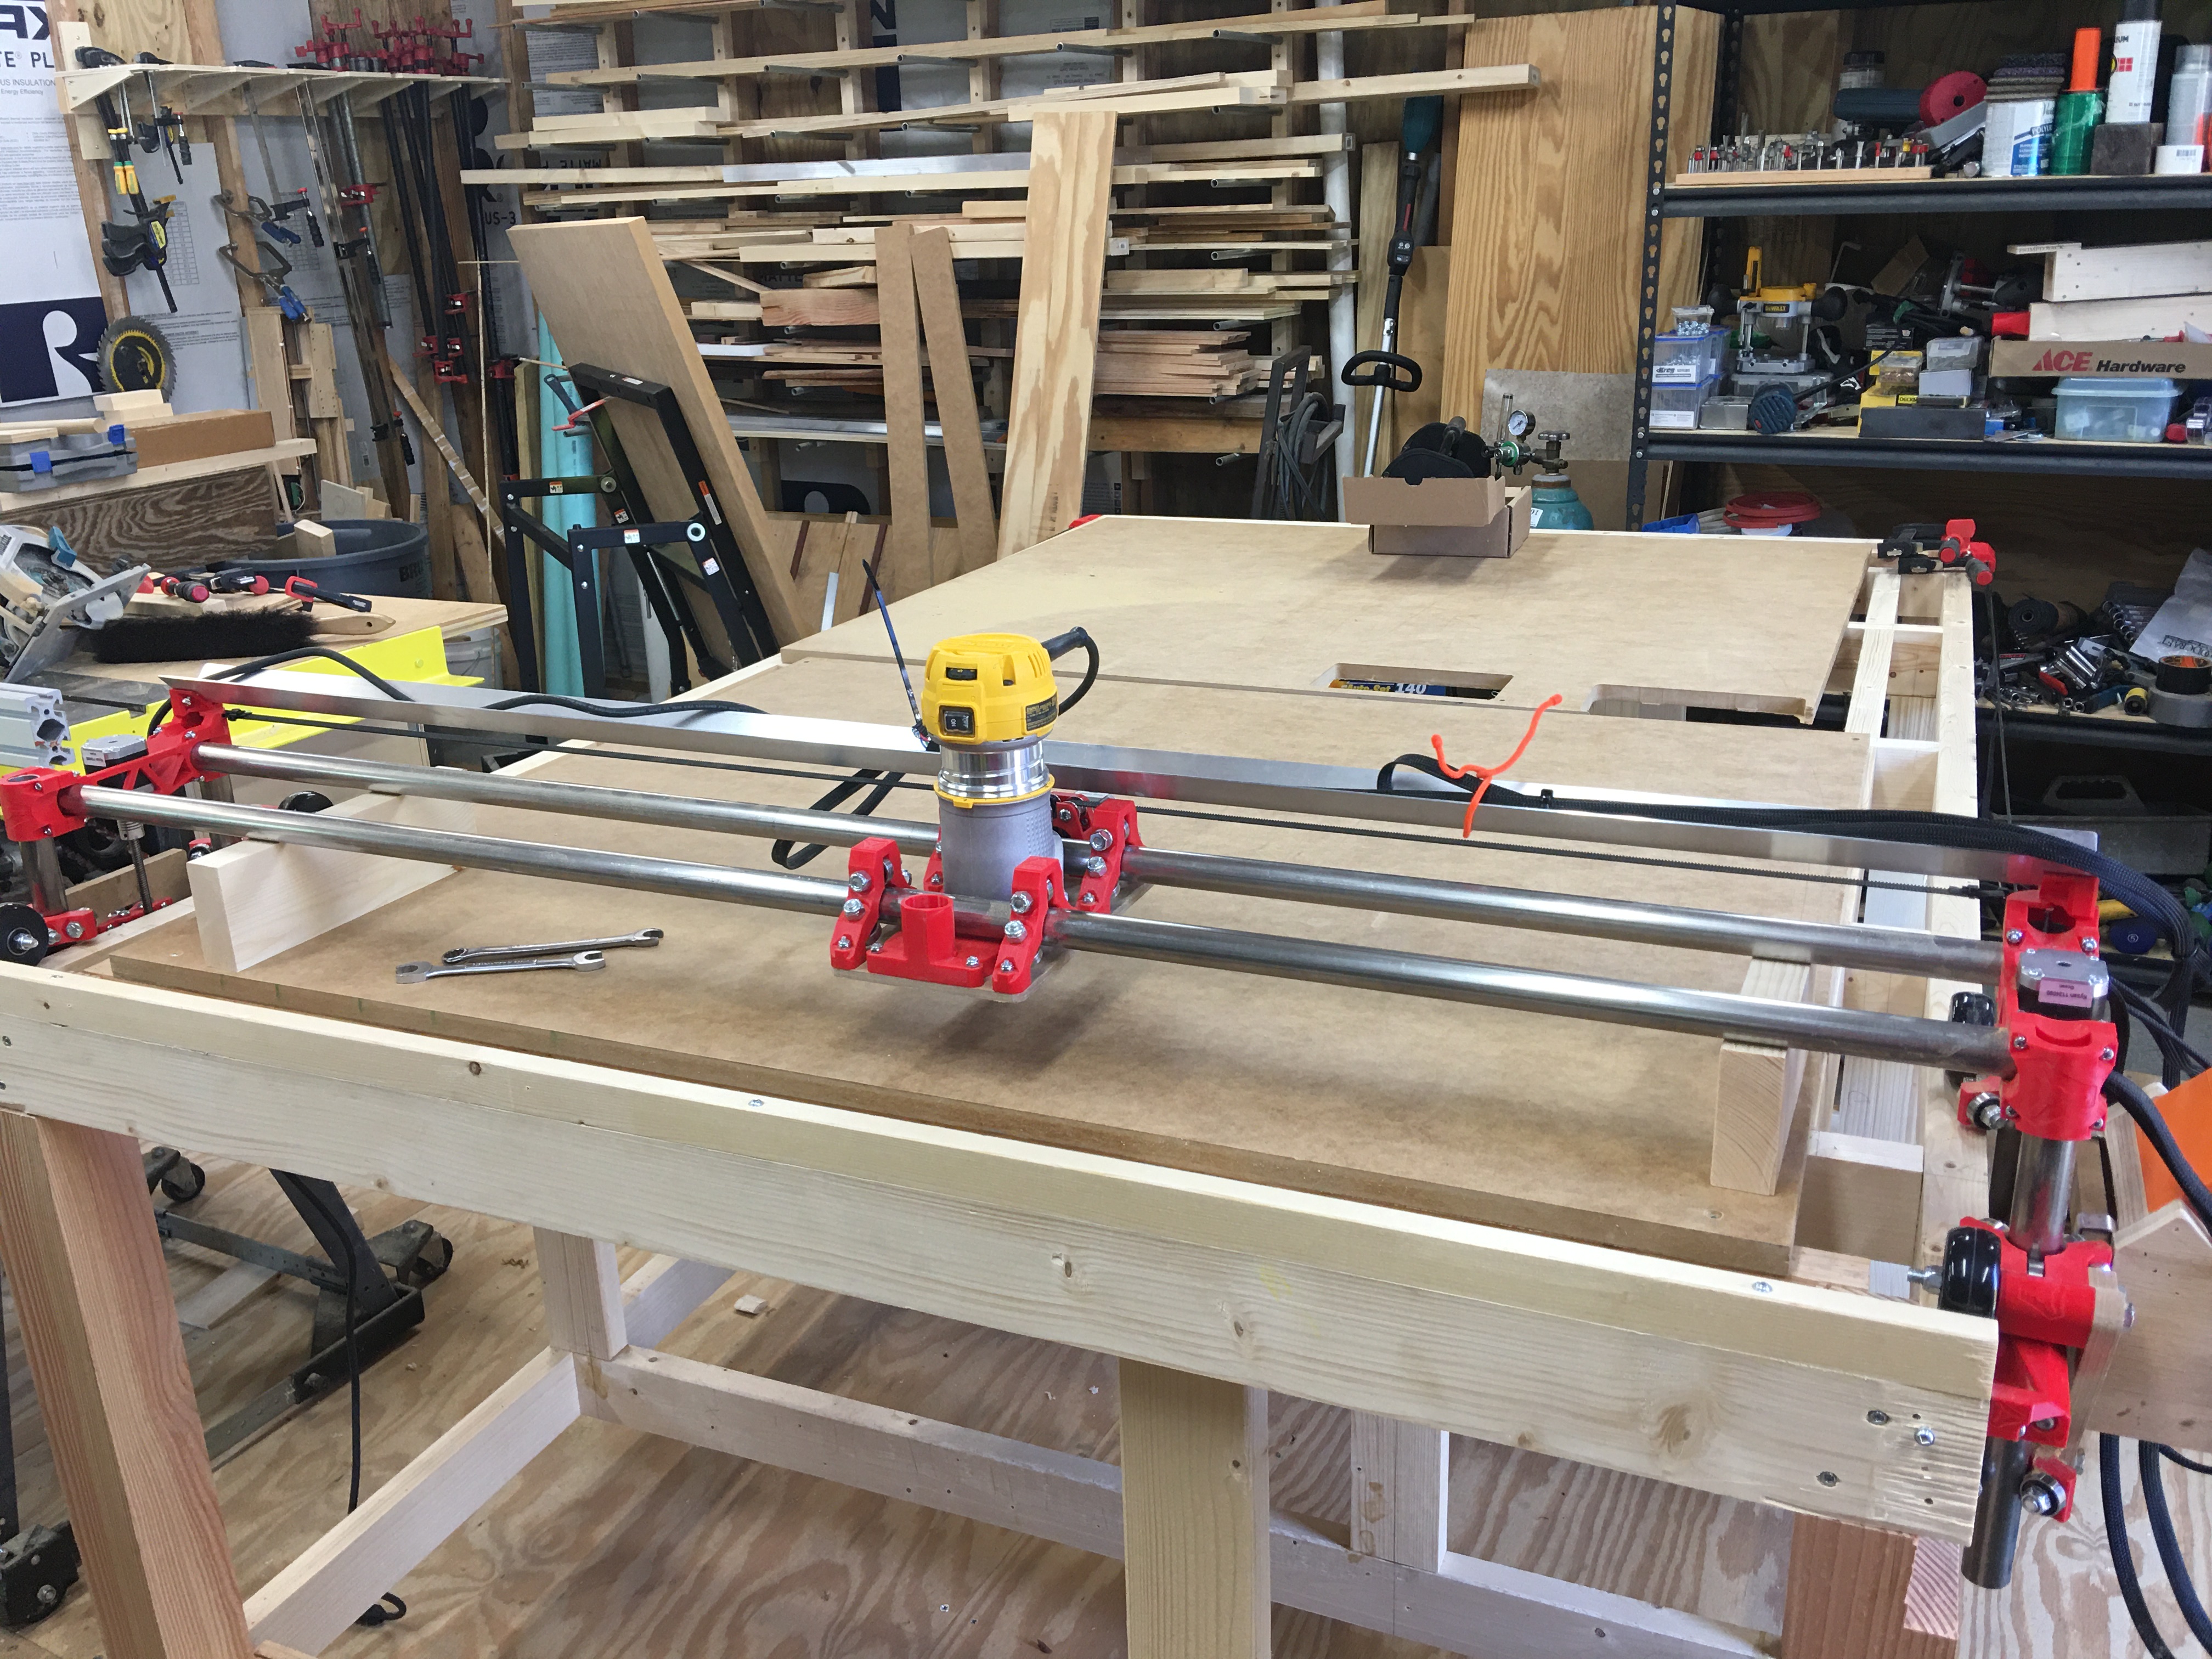
Ok, have all the parts printed and assembled to the flat boards.
Next is to build the table, but first want to get the SKR V1.3 and TFT 3.5 V3.0 boards set up and working.
Whats a good starting point for the firmware?
Ok, have all the parts printed and assembled to the flat boards.
Next is to build the table, but first want to get the SKR V1.3 and TFT 3.5 V3.0 boards set up and working.
Whats a good starting point for the firmware?
Assembler messages:
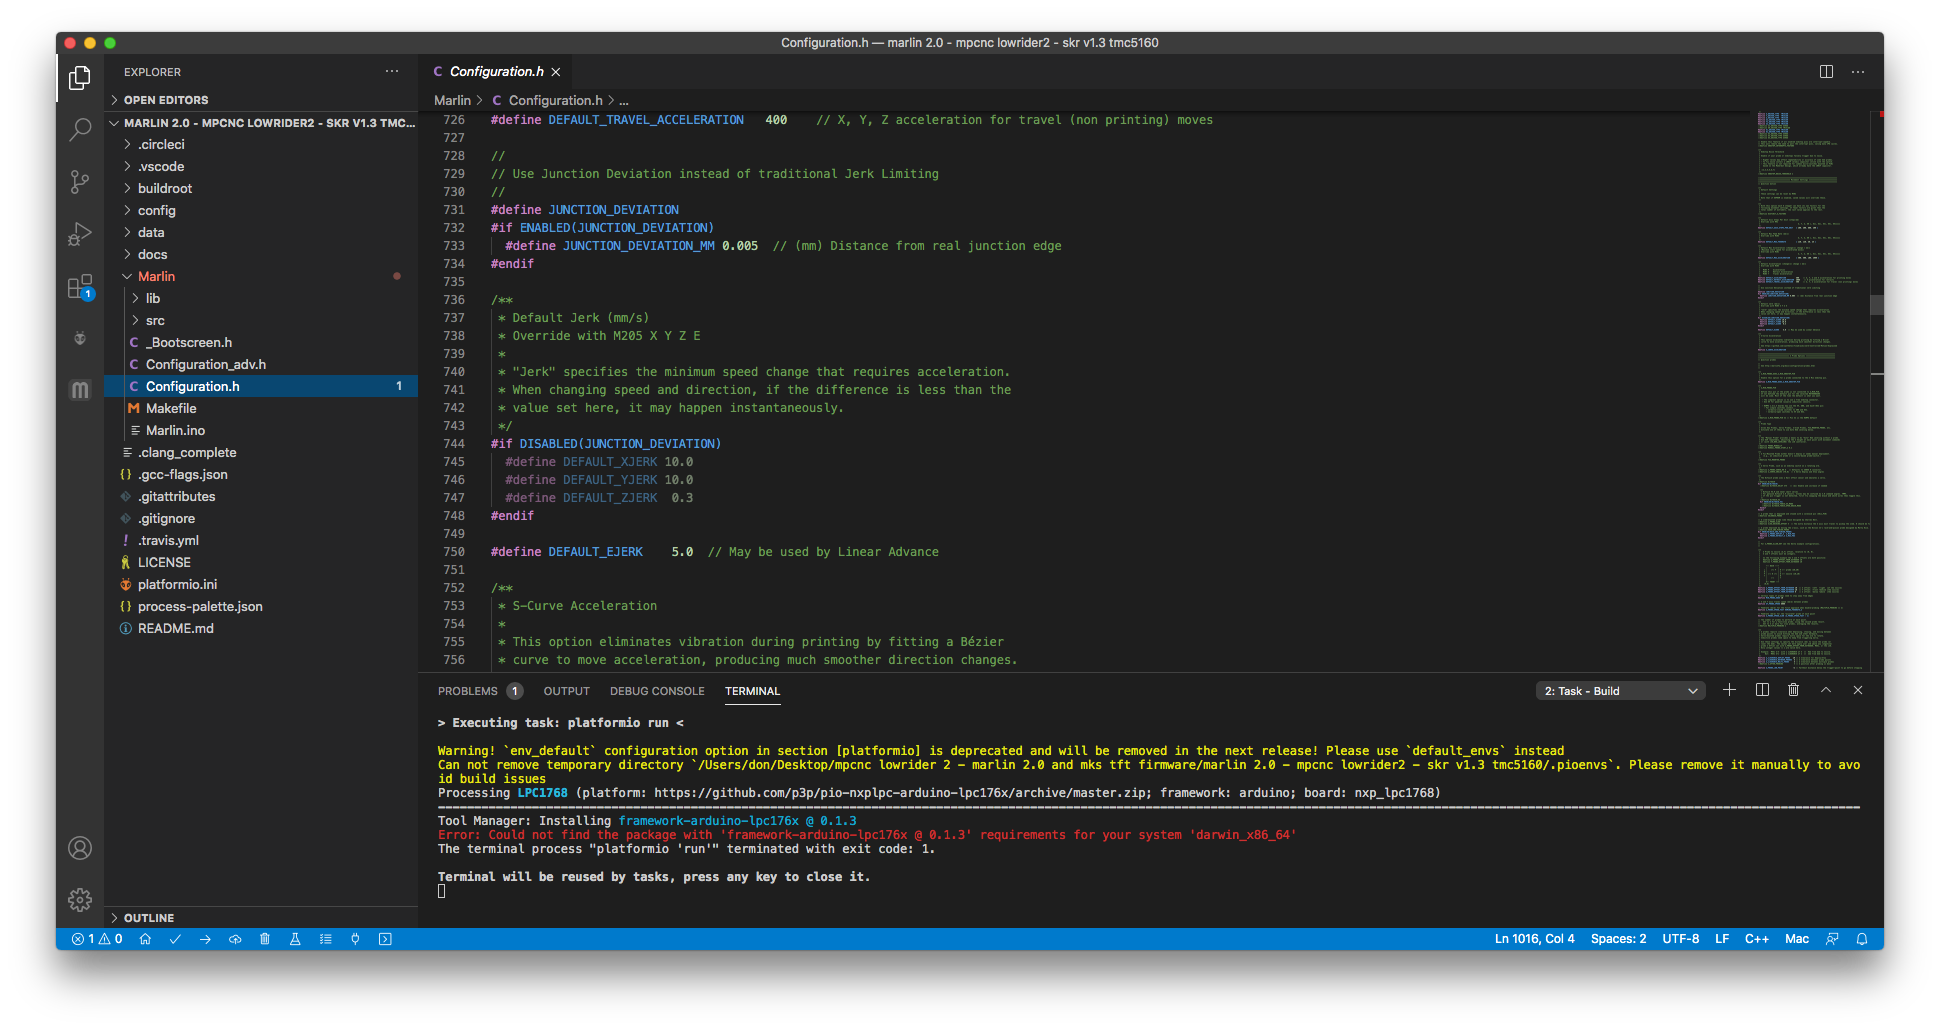
Fatal error: can’t create .pio/build/LPC1768/src/src/gcode/control/M280.cpp.o: No such file or directory
*** [.pio/build/LPC1768/src/src/gcode/control/M280.cpp.o] Error 1
Assembler messages:
Fatal error: can’t create .pio/build/LPC1768/src/src/gcode/control/M226.cpp.o: No such file or directory
*** [.pio/build/LPC1768/src/src/gcode/control/M226.cpp.o] Error 1
Assembler messages:
Fatal error: can’t create .pio/build/LPC1768/src/src/gcode/control/M350_M351.cpp.o: No such file or directory
*** [.pio/build/LPC1768/src/src/gcode/control/M350_M351.cpp.o] Error 1
Assembler messages:
Fatal error: can’t create .pio/build/LPC1768/src/src/gcode/control/M380_M381.cpp.o: No such file or directory
*** [.pio/build/LPC1768/src/src/gcode/control/M380_M381.cpp.o] Error 1
first compile error… these .cpp files are in the marlin/src/gcode/control folder
that was with Mariln AutoBuild… using the check mark build at bottom worked fine… no errors
auto build also now works… made no changes from the first try… go figure
Ok… progress…
loaded firmware to skr board and came up fine.
also loaded firmware and font directory to the display board. got some icon errors during the load.
can switch display from “marlin mode” to “touch mode” by holding the knob down.
v1 logo comes shows up and am able to control a stepper plugged into the x driver. but only from the “marlin mode” of the display. the “touch mode” of the display says “no printer attached”.
after power recycle… getting “illegal flash app”
You probably need to change the baud rate, which us in the menu setting in the tft.
The marlin builder zip comes with a preconfigured firmware, so you could have just put that on the sd instead without building it again in platformio. But glad it is working.
Thanks Jeff, you guys are a great help.
I needed to change the drivers from tcm2209 to tcm2208, that’s why the build in platformio.
Used the file BIGTREE_TFT35_V3.0.26.x.bin from the “Copy to SD Card root directory to update - Unified Menu Material theme” directory.
Was able to change the baud rate to 250000 and it works fine.
Thanks again!
I had that same issue last night Don. I had to update some of my files as it worked great 2 days ago and I played with setting up my firmware.
About to get back to this build. Had several things that took up a lot of time.
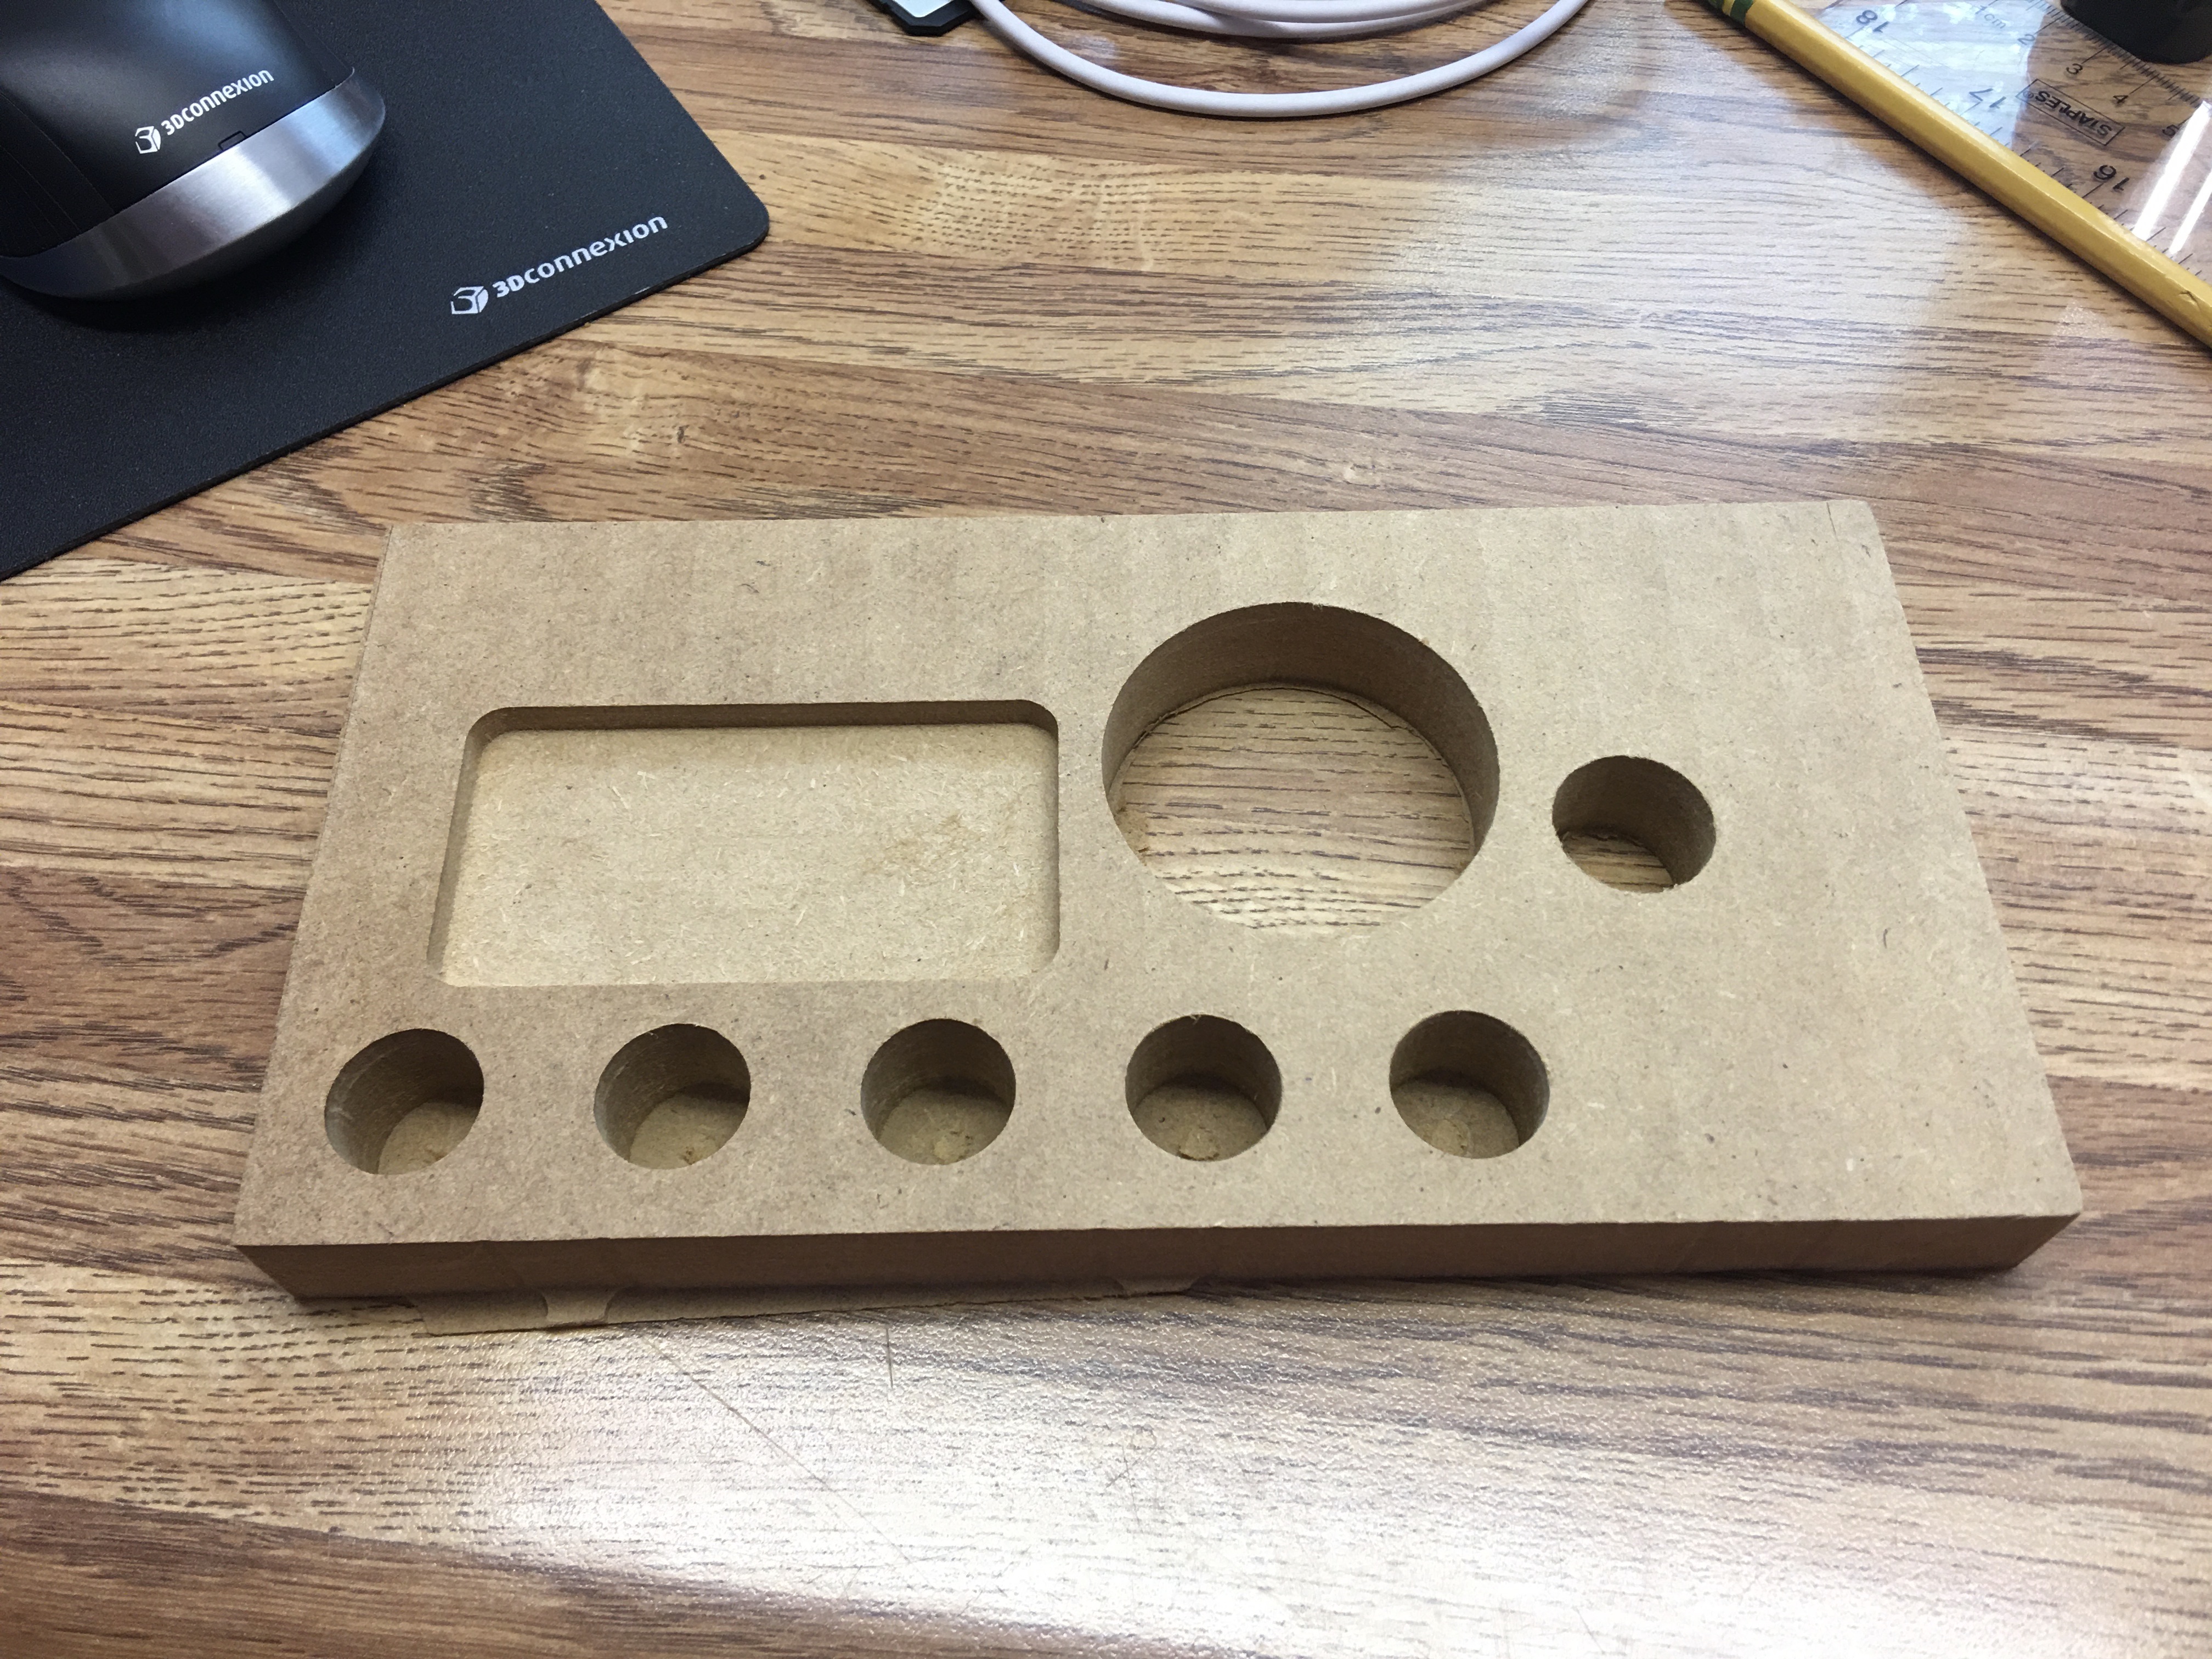
Looking for 3d printable case for skr v1.3 and tft35 v3.0… any good suggestions?
Made a fusion 360 model for a case to hold the skr v1.3 and the tft 3.5 v3.0 and an old pc cooling fan
And this is the first cut… just a test thingy… holes are too small and length and width are just over.
Next is dual end stops…
Dual end stops will have to wait. Need to make it cut square first.
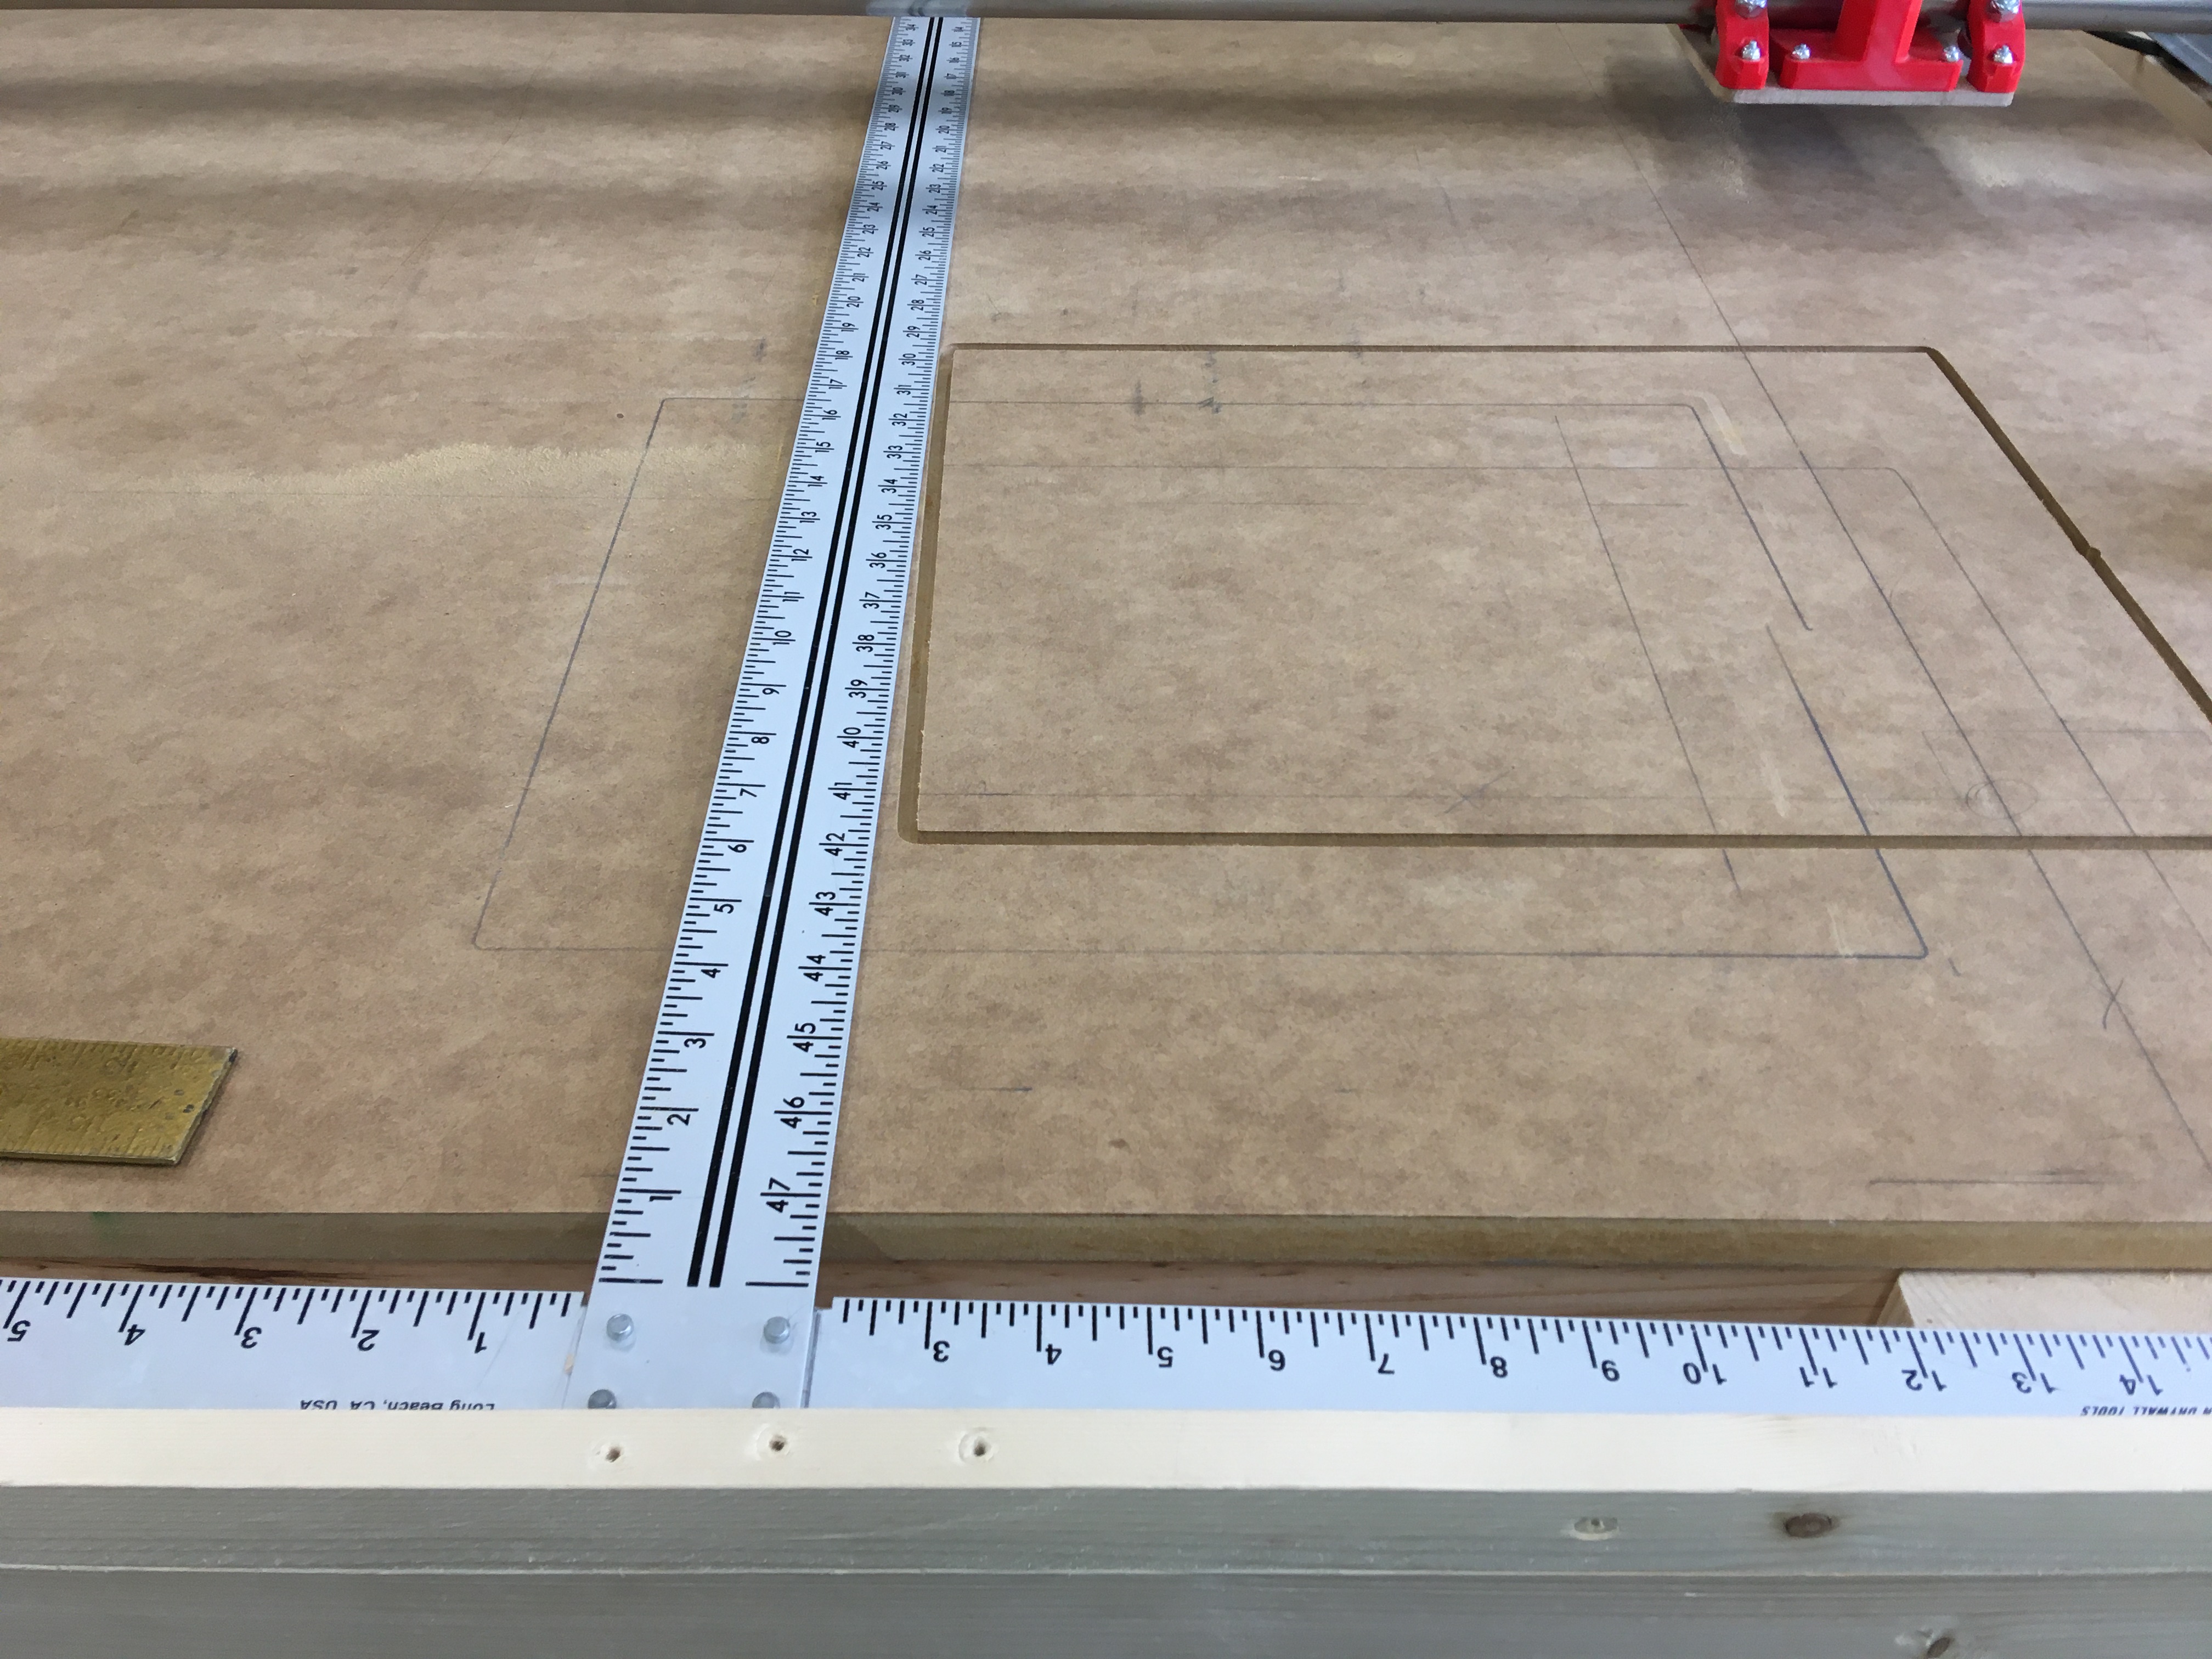
On my machine X is the long axis, Y is the short axis. The table is quite square and flat.
Jogging without router is square. Jogging with router not cutting is also square.
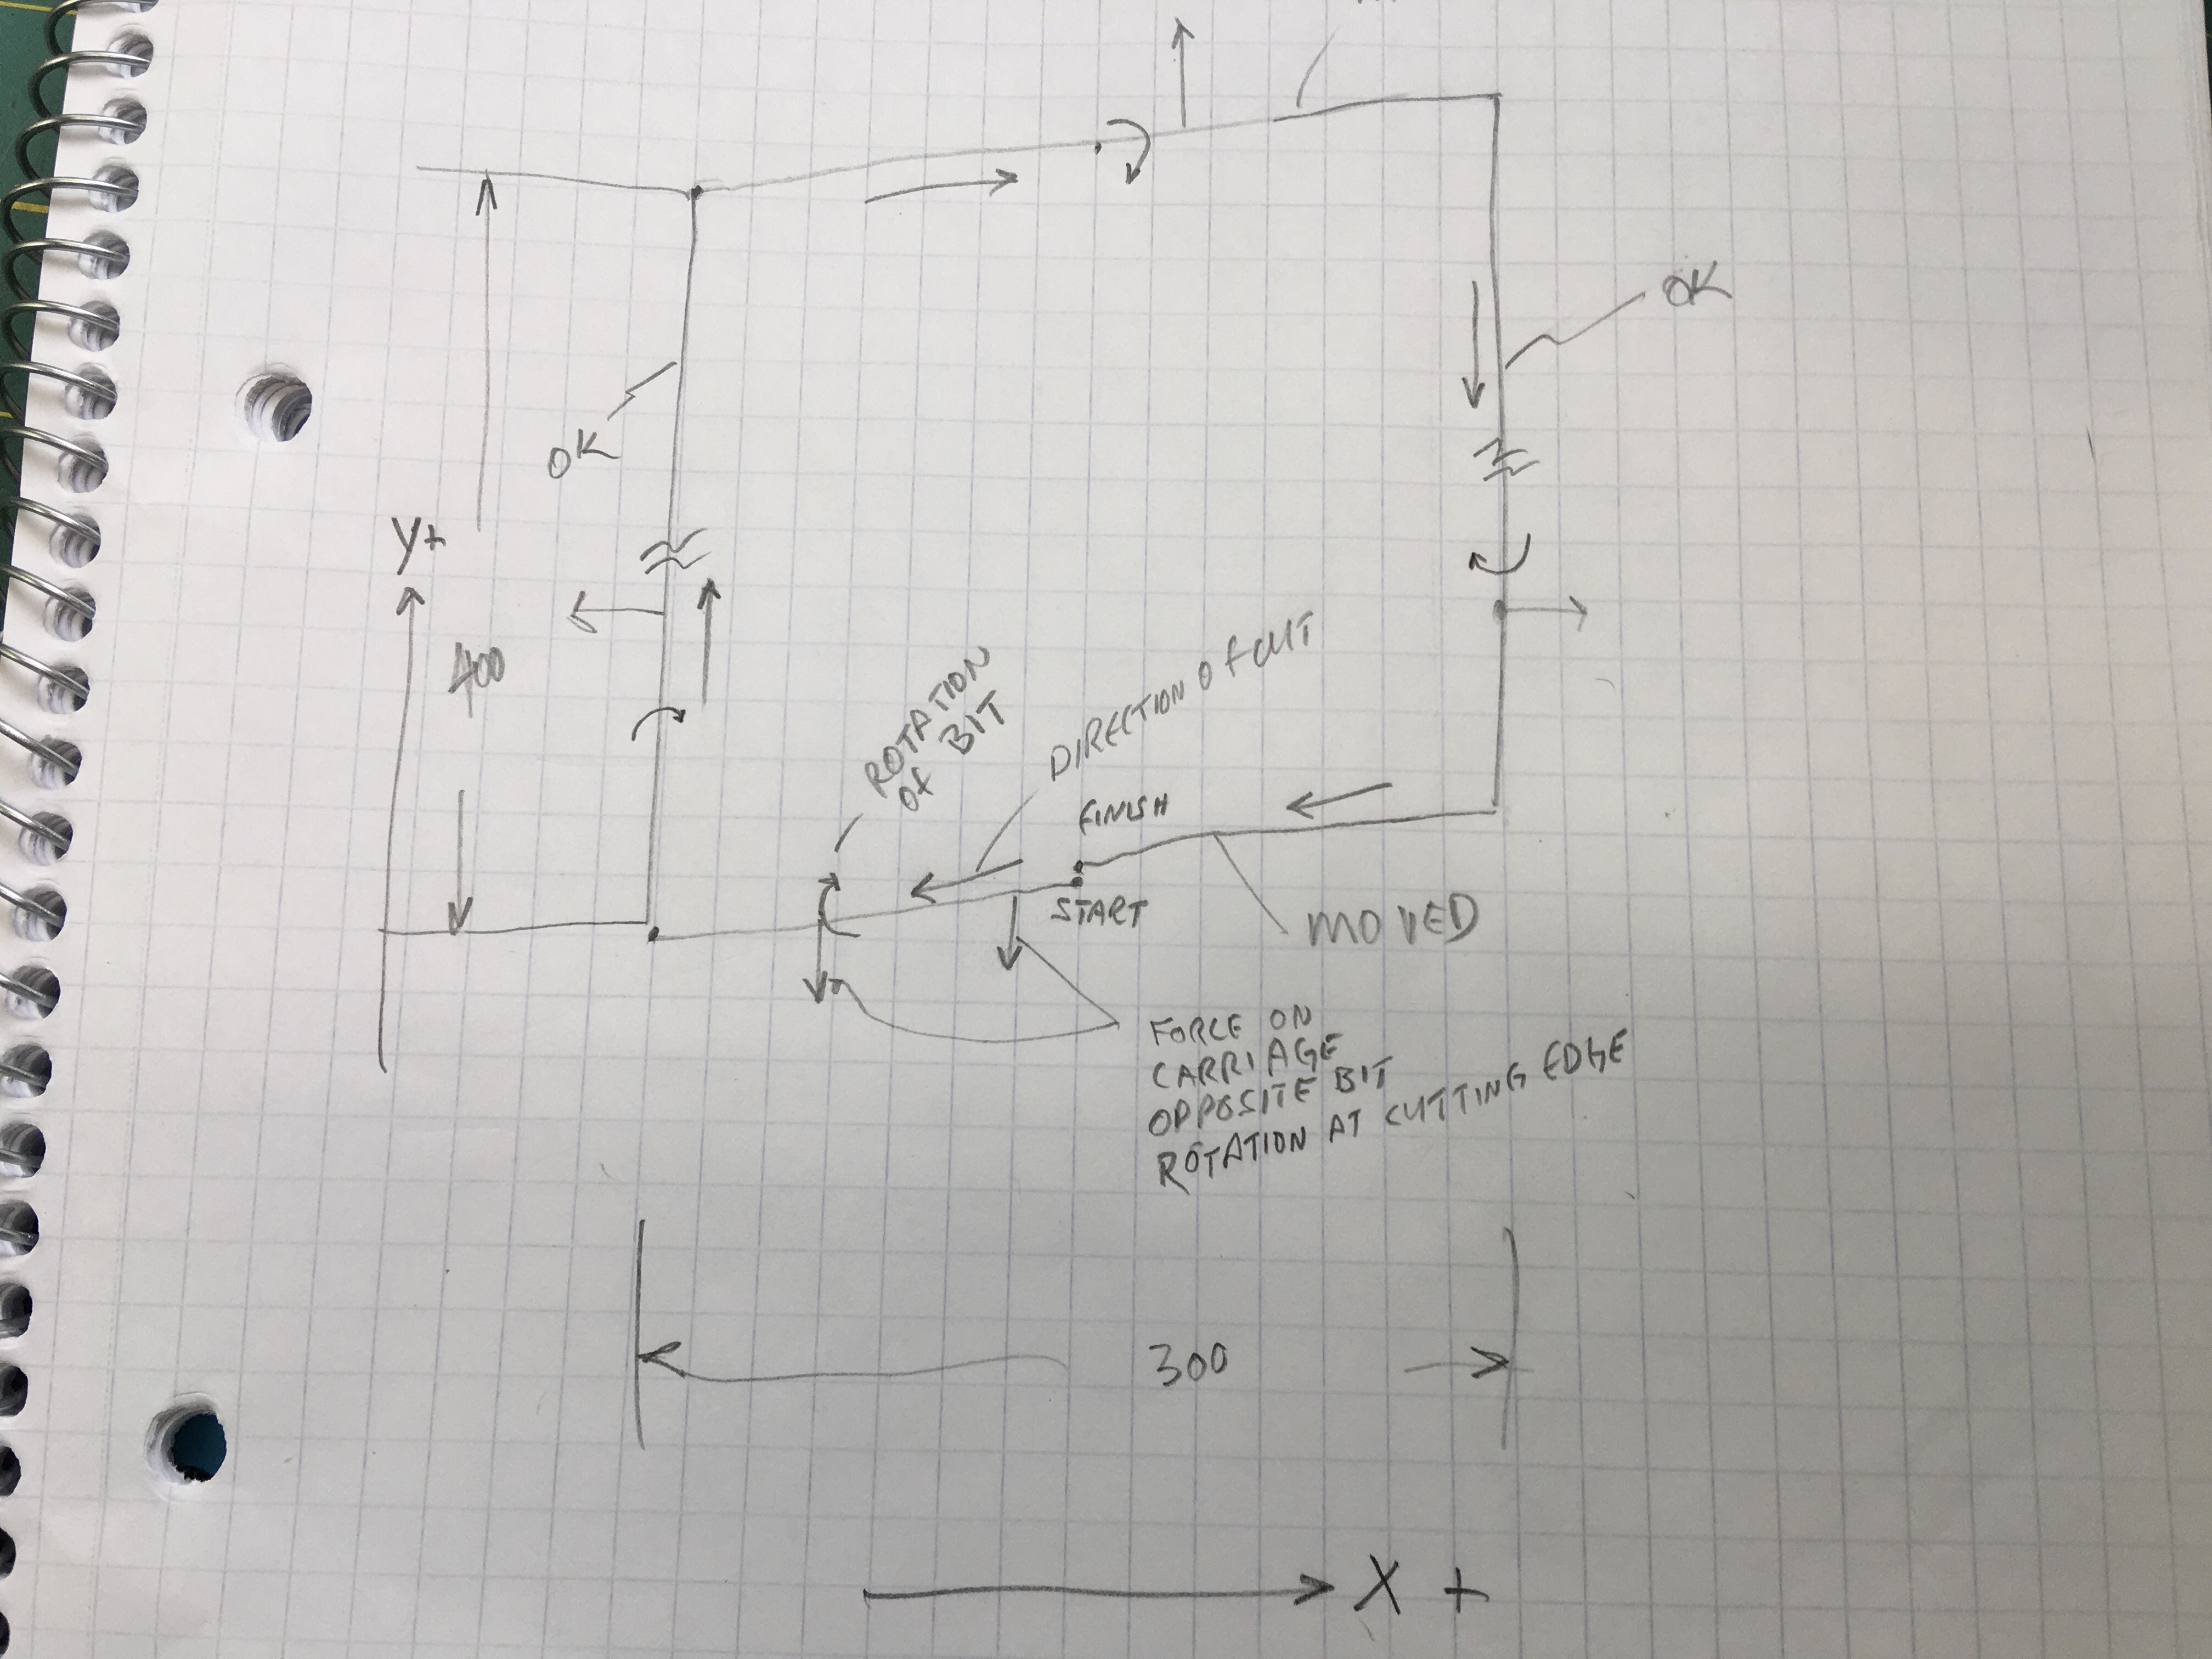
Using router to cut a 300mmx400mm pocket is not square. I can see the bit pulling the carriage in the Y direction as it cuts in the X direction.
This must be why others have installed a rail to guide the rollers. What seems to work best? I’ll post a pic when I get back to the macbook in the house.
I used 3/4"x3/4" strips in my first version. I just redid it though, and I didn’t have any stock long enough, so I went and bought some 3/4" aluminum angle. Not as easy to work with, but it is rigid and the wheels move smoothly.
here is pic of the groove cut… notice the drift along the straight edge which is square to the table
And this is what I think is happening…
Unfortunate that pic and drawing do not line up in X and Y axis… sorry about that.