Can you all recommend a good forum for Fusion 360? We are having issues getting the g-code the way we would like from Fusion, and this site may not be the best place to discuss. I have 3 guys here that are all pretty good with Fusion, but none of them use it for the CAM side of things, so we are struggling a bit.
If you’re not already using it, look for the latest updates to the MPCNC Fusion post processor. It takes the gcode that Fusion puts out and adjusts it for MPCNC or LowRider machines. Last time I looked into it, everyone was using Guffy’s, but I believe someone else has been doing the most recent updates. I don’t use Fusion myself, so I can’t point you to the proper link, but someone here will hook you up.
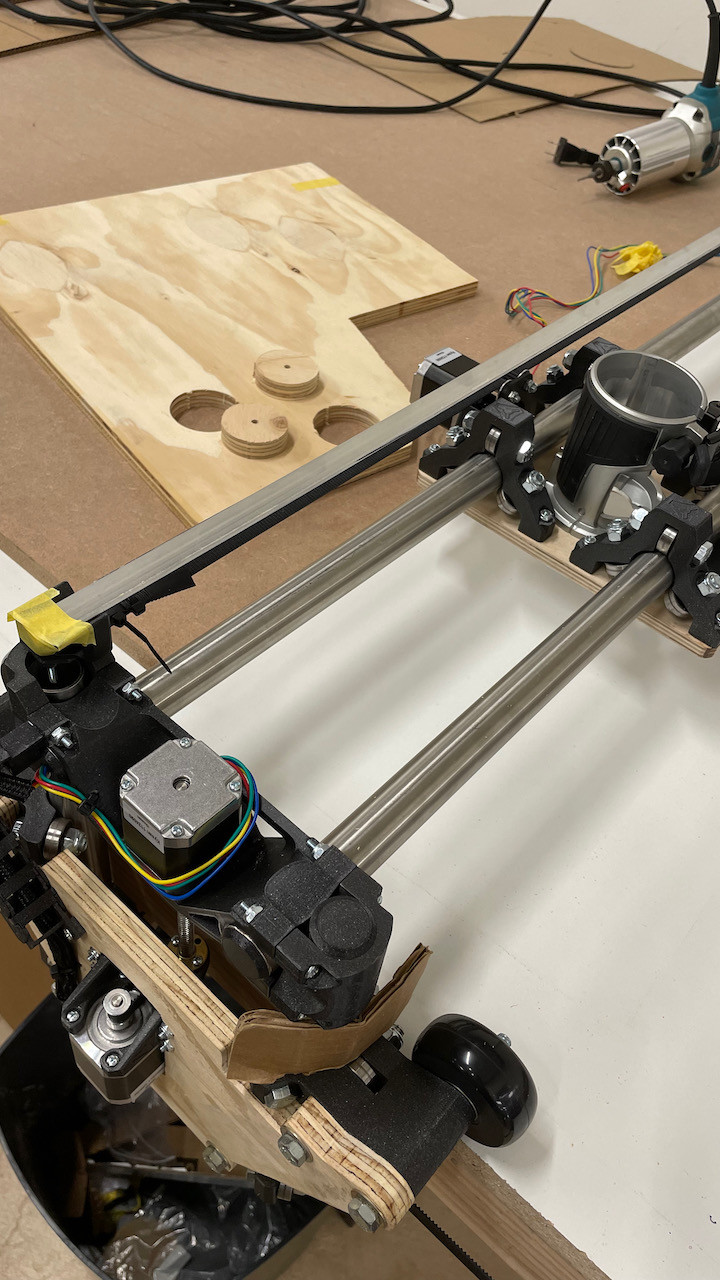
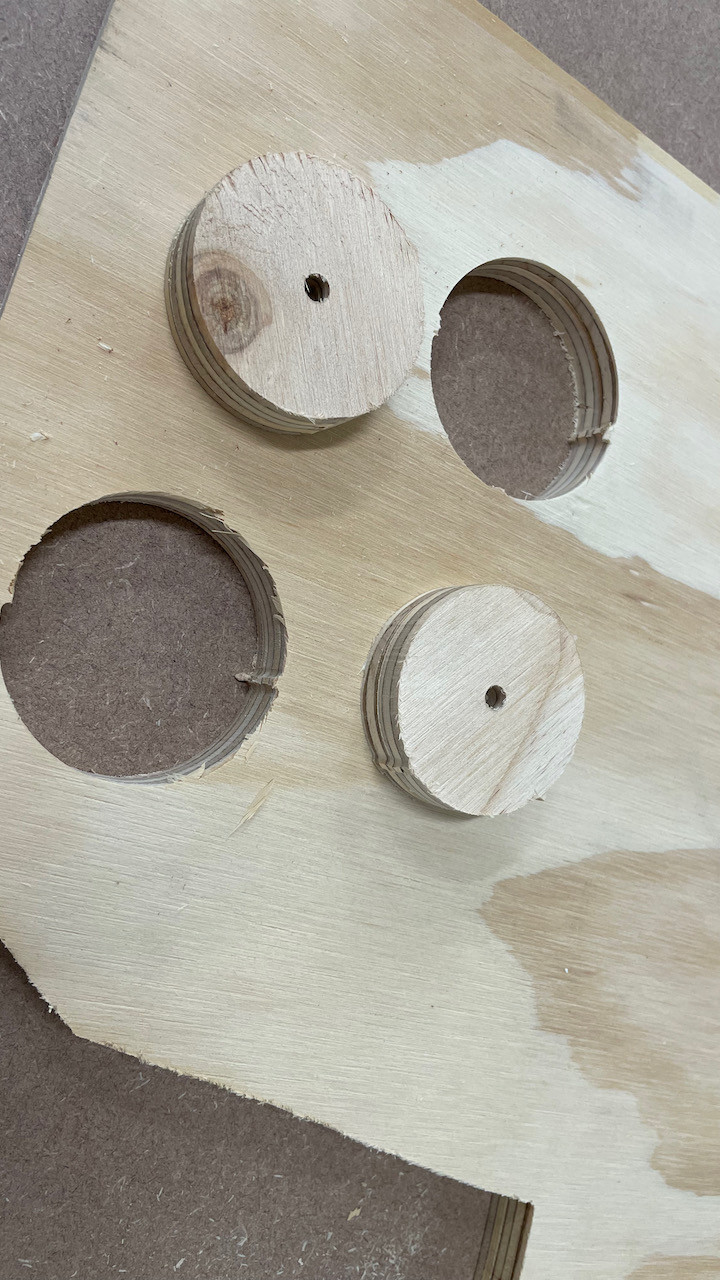
Getting closer and closer. One of my guys started using a program called Aspire and was able to get things going with the drag knife. Well enough that we can complete the CNC build. So we need to work on the vacuum table. This means cutting wood, so time to do some wood testing. Pulled out some scrap plywood and started playing.
We had it running rather slow just to be safe, but very pleased thus far.
So, time to go hunting for a better vacuum supply. Anyone know of a quiet vacuum source? Something better than a shop vac? I remember watching a video comparison where a guy was testing various vacuums for maximum vacuum pulled and he also recorded sound levels. An old Dyson won that by pulling pulling a deeper vacuum and doing so with less noise. Since this will be for our vacuum table, that might do the trick, a couple of old Dysons…? Kind of compact too, can chop them up to meet our purpose. They will not be used for anything but the vacuum table.
You may want to look at a staged vacuum system. As I understand it, you need to move a lot of air to start with to get things held down, but don’t need near as much to maintain the hold once the vacuum is established.
I’d look at a shop vac or dust collector pulling through a one-way valve for the initial, then maybe a smaller vacuum, vacuum pump or venturi on a (remote) air compressor. I think the most quiet vacuum source I saw was built from an old refrigerator motor/compressor.
There are systems for vacuum bagging veneers or fiberglass layups that may serve as starting points. I expect the cardboard will be more porous than the plastics used to seal those layups, so you may need to keep some vacuum source running the entire time.
We will have to do some testing, but I imagine we will need a fair amount of volume all of the time. I do have a commercial vacuum pump for refrigeration systems, but seriously doubt it will have enough volume for this task. We will be laying out the vacuum area into 3 or 4 sections so we can use just part of the table at a time as needed. We can do some testing to see how much volume is needed. My concern with the Dyson idea is that it may not have enough volume for this application. But after listening to my shop vac screaming it’s little heart out, I’m happy to give it a try.
We can always build up a sound box for whatever we come up with to help reduce the noise. I have seen a few “quiet” vacuum advertised out there, but no experience with them.
Starting to think some old canister vacuums off ebay might be a good option. Pretty cheap and generally pretty quiet. Something like an old Electrolux. LOL
One of the dangers of using a shop vac like this for long periods is that the same air carrying the dust is used to cool the motor once it has gone through the filter. When using it to pull a vacuum, the airflow will be significantly reduced, so you may want to consider adding cooling airflow around the brushes.
I had the brush frames heat up enough to deform and stop the brushes from sliding once when using a wet-dry vac for an extended period of water pickup.
We may skip the vacuum system all together. We just cut a box and used some double stick tape to hold the cardboard in place. It worked great and we didn’t have to listen to a vacuum try to kill our hearing. This is a good thing as this is located in a shared area in our warehouse. Avoiding the extra noise would be great. We will continue to play, but thinking a little hot glue or similar may do the trick nicely.
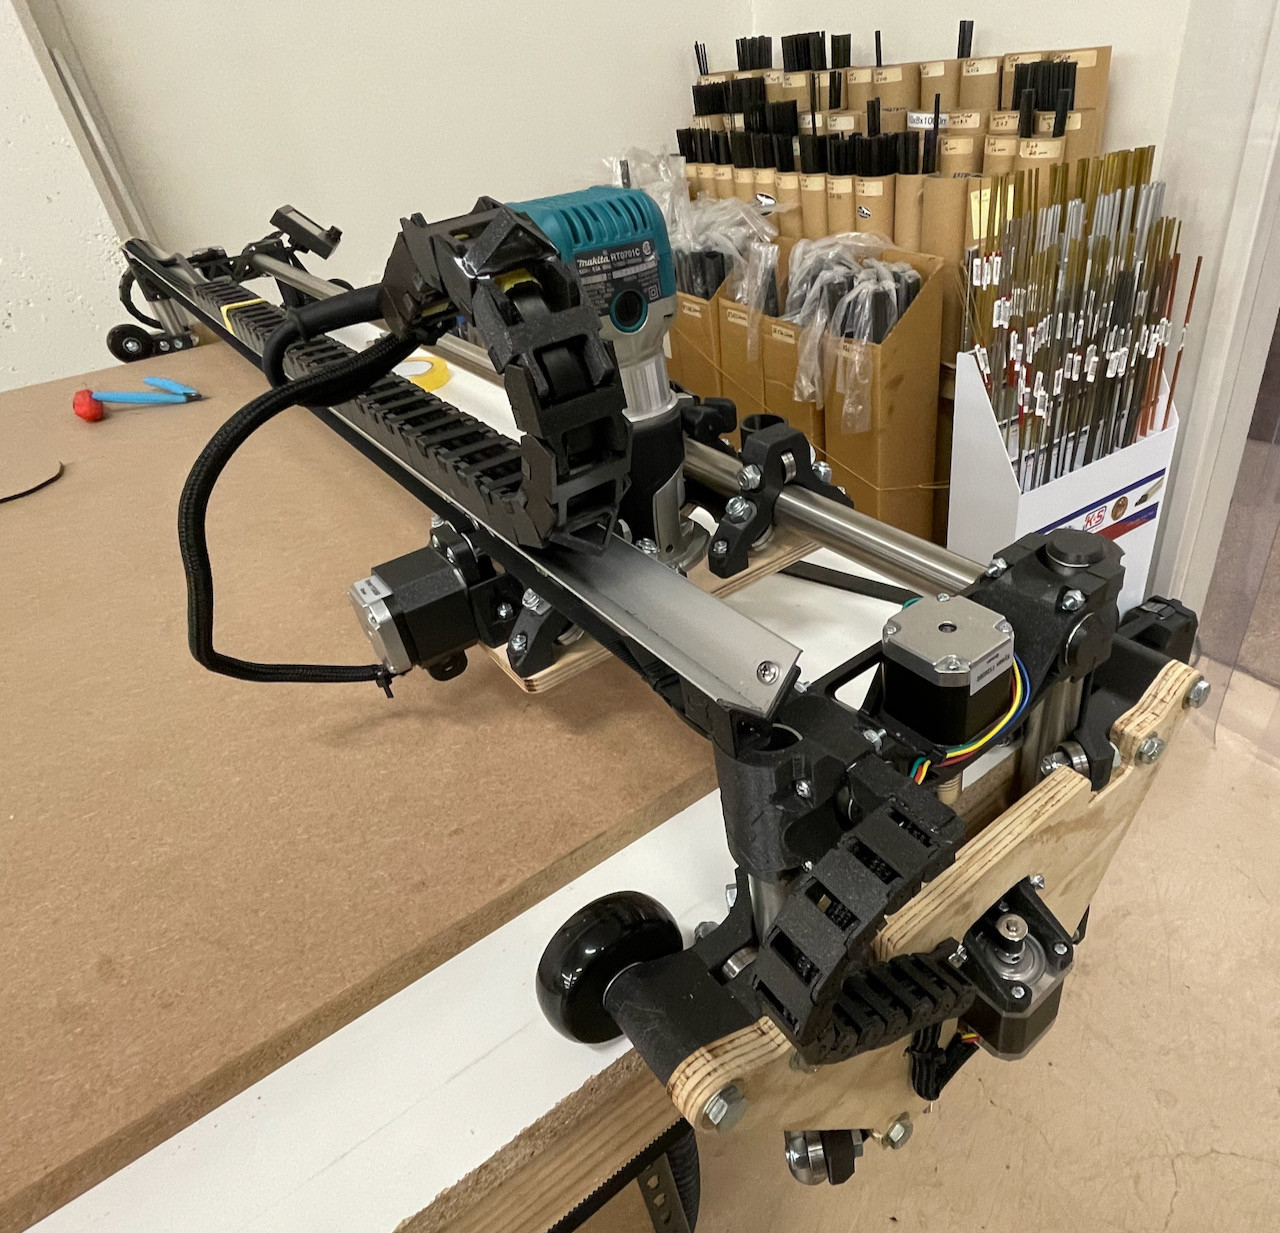
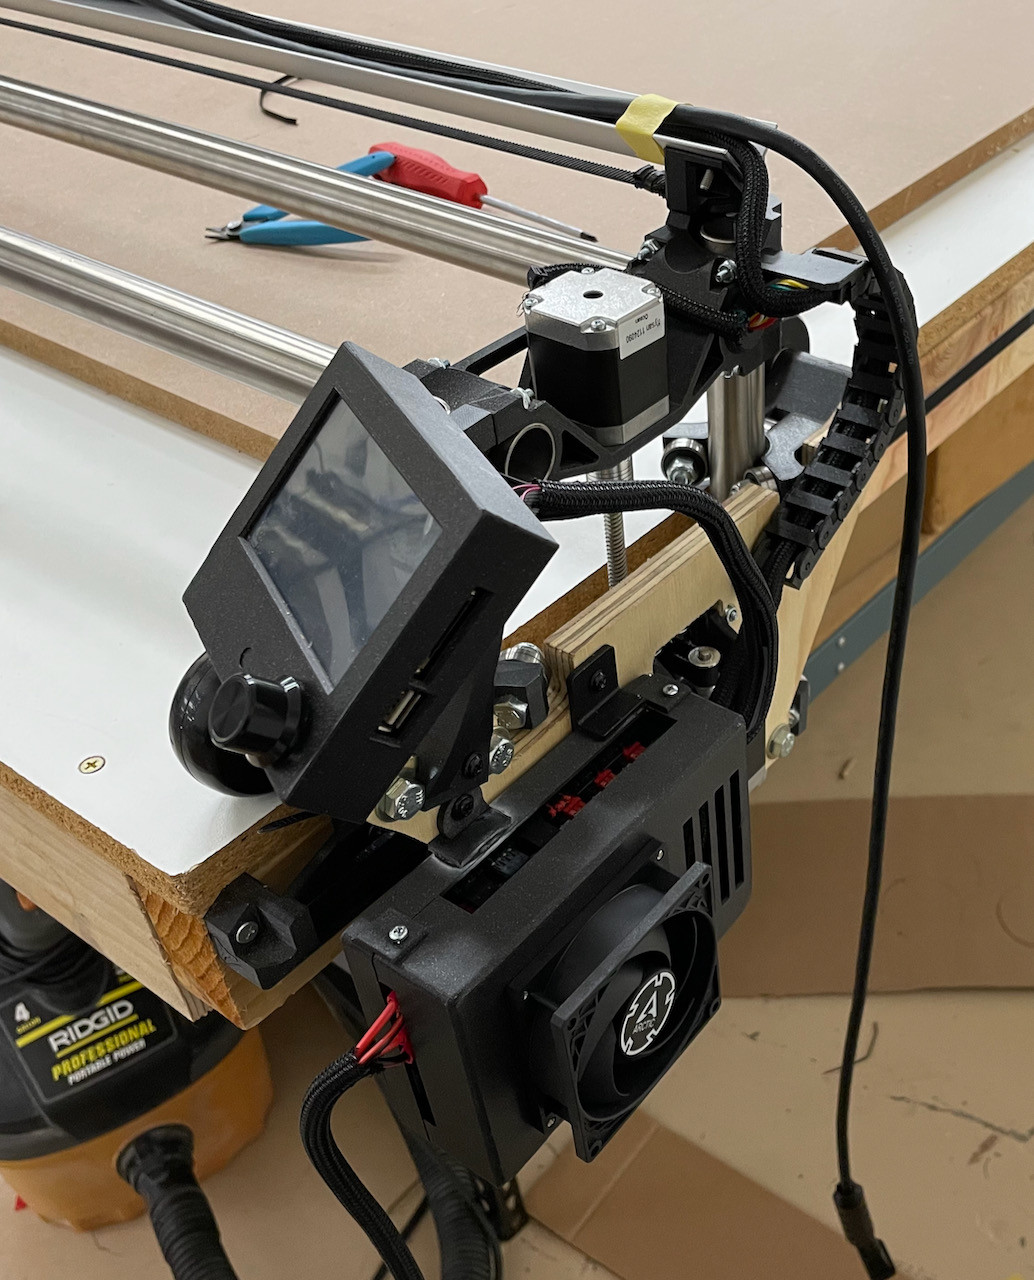
Thought I would show a picture of how the machine is coming together. Been cleaning up the wiring and other odds and ends. Still some printing to finish the attach points for the big cord chain. We will be putting the router cable on a connector very close to the router body as we do remove it from time to time and don’t want to mess up our wiring each time.
Pretty quick into this we learned to make sure that router bit is really tight. It sucked itself down through the work surface, didn’t snap, and we actually found it!
Cutting grids for a vacuum setup. Yeah, back to the vacuum idea. Time will tell.
It’s resting. We are a hobby shop, we have a few planes around here. LOL That is what we need the box cutter for. Not so much the foam planes, but the composite gliders.
Ran into the issue of the lowrider shifting side to side while cutting. That is a large design flaw IMHO unless I am missing something in the design. Guess we will try the aluminum angle fix to lock the wheels into position. Other ideas?
I’ve got a Burly, not a lowrider, so this is second hand from an interested observer.
Some machines track straight “right out of the box.” Others find they need a guide. Guide options I’ve seen mentioned here on the forums include:
Steel or aluminum angle
Wood cleats cut at an angle to minimize contact area between the guide and the wheel.
Routed groove for the wheels to ride in
Using the edge of the spoil board as the guide
Unistrut on sides of table so wheels run down along the edge rather than on top of the table surface
If I recall correctly, levelness of the table was identified as one possible contributing factor for tracking straight. Differing belt tension was also suggested as a possible cause but I don’t recall anyone “tuning out” the drift by tweaking their belts (but I could have missed it). In addition, there were suggestions that adding a guide along one side was often sufficient, and removed the need to ensure parallelism between a pair of guides.
Check that your Y plates are flat. Mine had causing toe in. My original solution was simply to use some mdf trim as a guide. It worked pretty good. Install one side as straight as possible and cut a single piece of wood to set your width, then screw down one end of the other side using the wood as a spacer, slide it along the secured rail and add screws to your second rail always using the spacer to set the width. Just use a square to make sure the spacer is perpendicular. This is an easy way to make them parallel without measuring
Thanks - Yes, we made up our own chains, and yes the triangles were just glued onto the bottom of the chain here and there as needed. This way we didn’t have to do anything complex for the 3D printing. We also added an XT-90 connector to the routers power as we will not be using the router for all operations, and didn’t want to open up the chain for the switch out.
The machine runs nice and straight, that has been confirmed with lots of playing around with a pen. But when the router is on there cutting, the wheels allow the entire assembly to shift about 2 or 3mm side to side until it hits the side of the table. (X axis?) I don’t know why, but I really had not taken this movement into account. We will be adding some 3/4" aluminum angle between the work area and the wheels on both sides. This will also help to keep the dust out of the wheels. We have added some teflon coated plastic to our rubber wheels where it will rub against the aluminum. (Some 3D printer bed material we had kicking around.)
Going to try using a used Miele canister vacuum as the suction source for the vacuum table. Total experiment, probably will not work. Why am I trying it? They are said to be very quiet, and one popped up for sale locally for a good price. (This will run in our warehouse and don’t want to drive our staff insane with shopvac level of noise.)
Every job becomes a job. But yes, we do try to keep things fun and challenging here. But it is mixed in with a lot of normal work. These days the airplane hobby is more of a technical support job at times.
Moved the CNC to a different part of the warehouse for a little more space and better venting options… More on that later. Picked up the Miele vacuum, seems promising and probably half the noise of our shopvac. See if it has enough volume for the vac table.


 That is what we need the box cutter for. Not so much the foam planes, but the composite gliders.