Now if it plays Daisy I’m out here😃 Dave
1 Like
Wowzers, that is a heck of a cool project. Congratulations!
1 Like
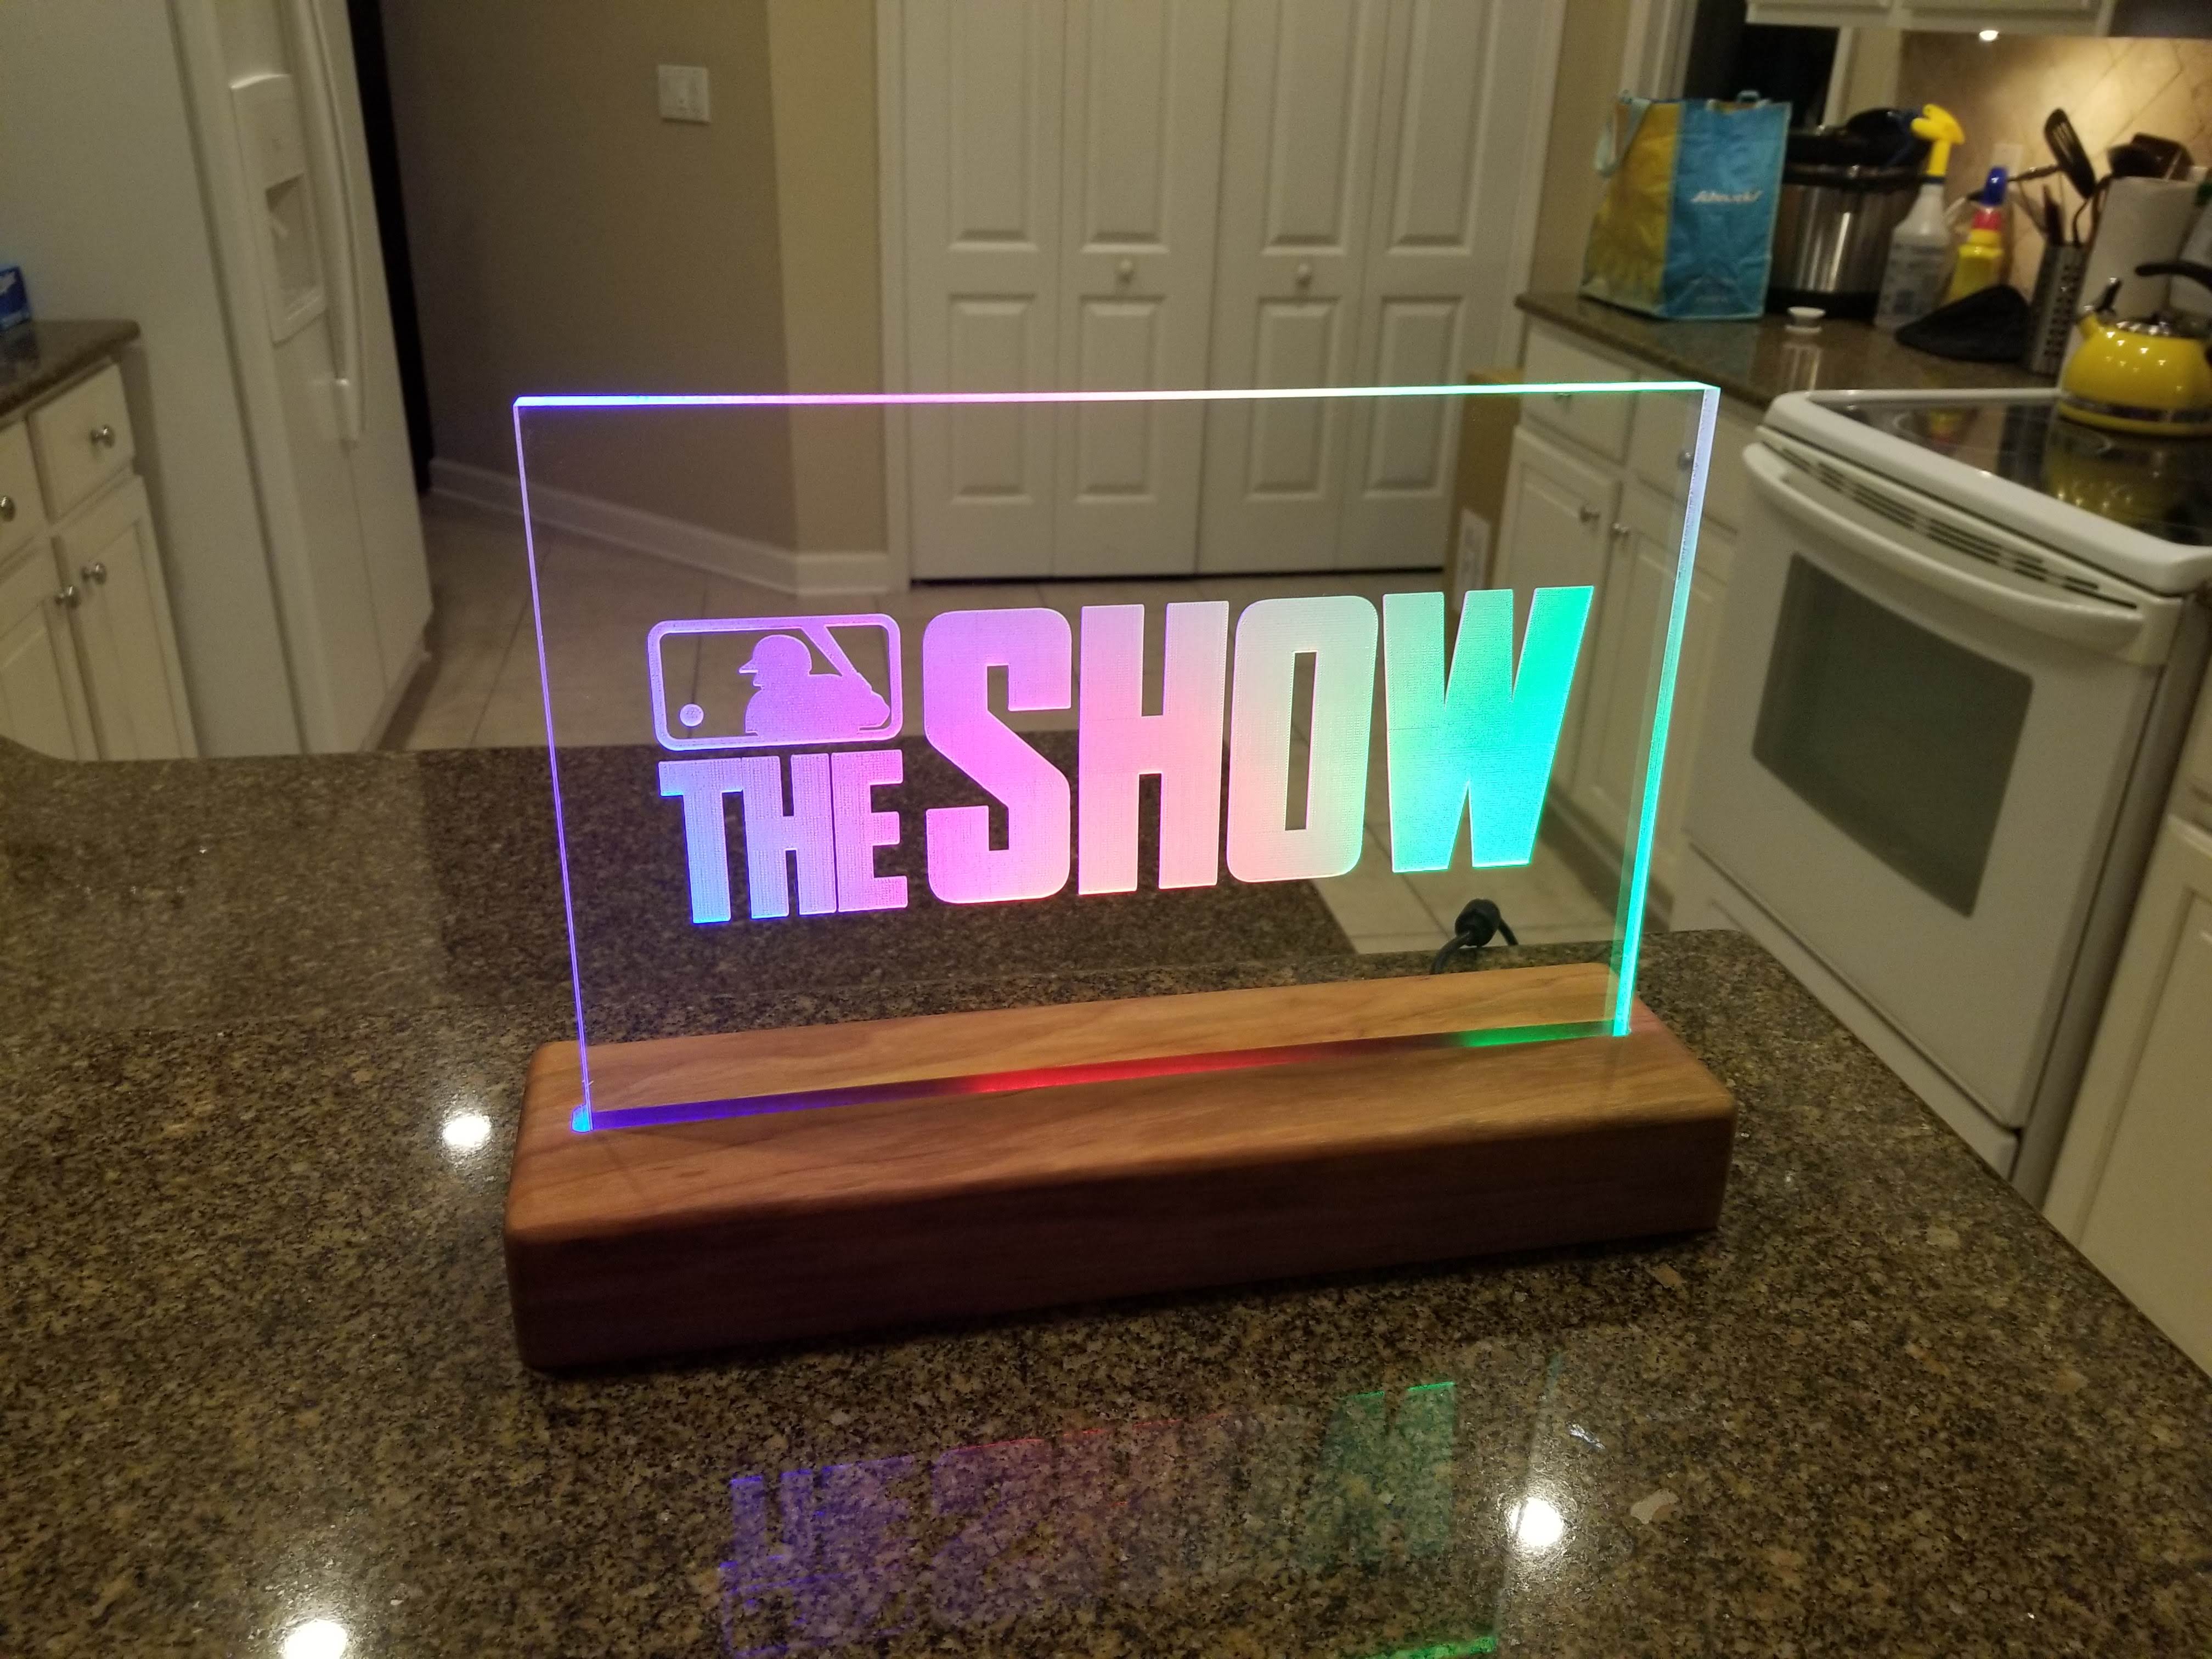
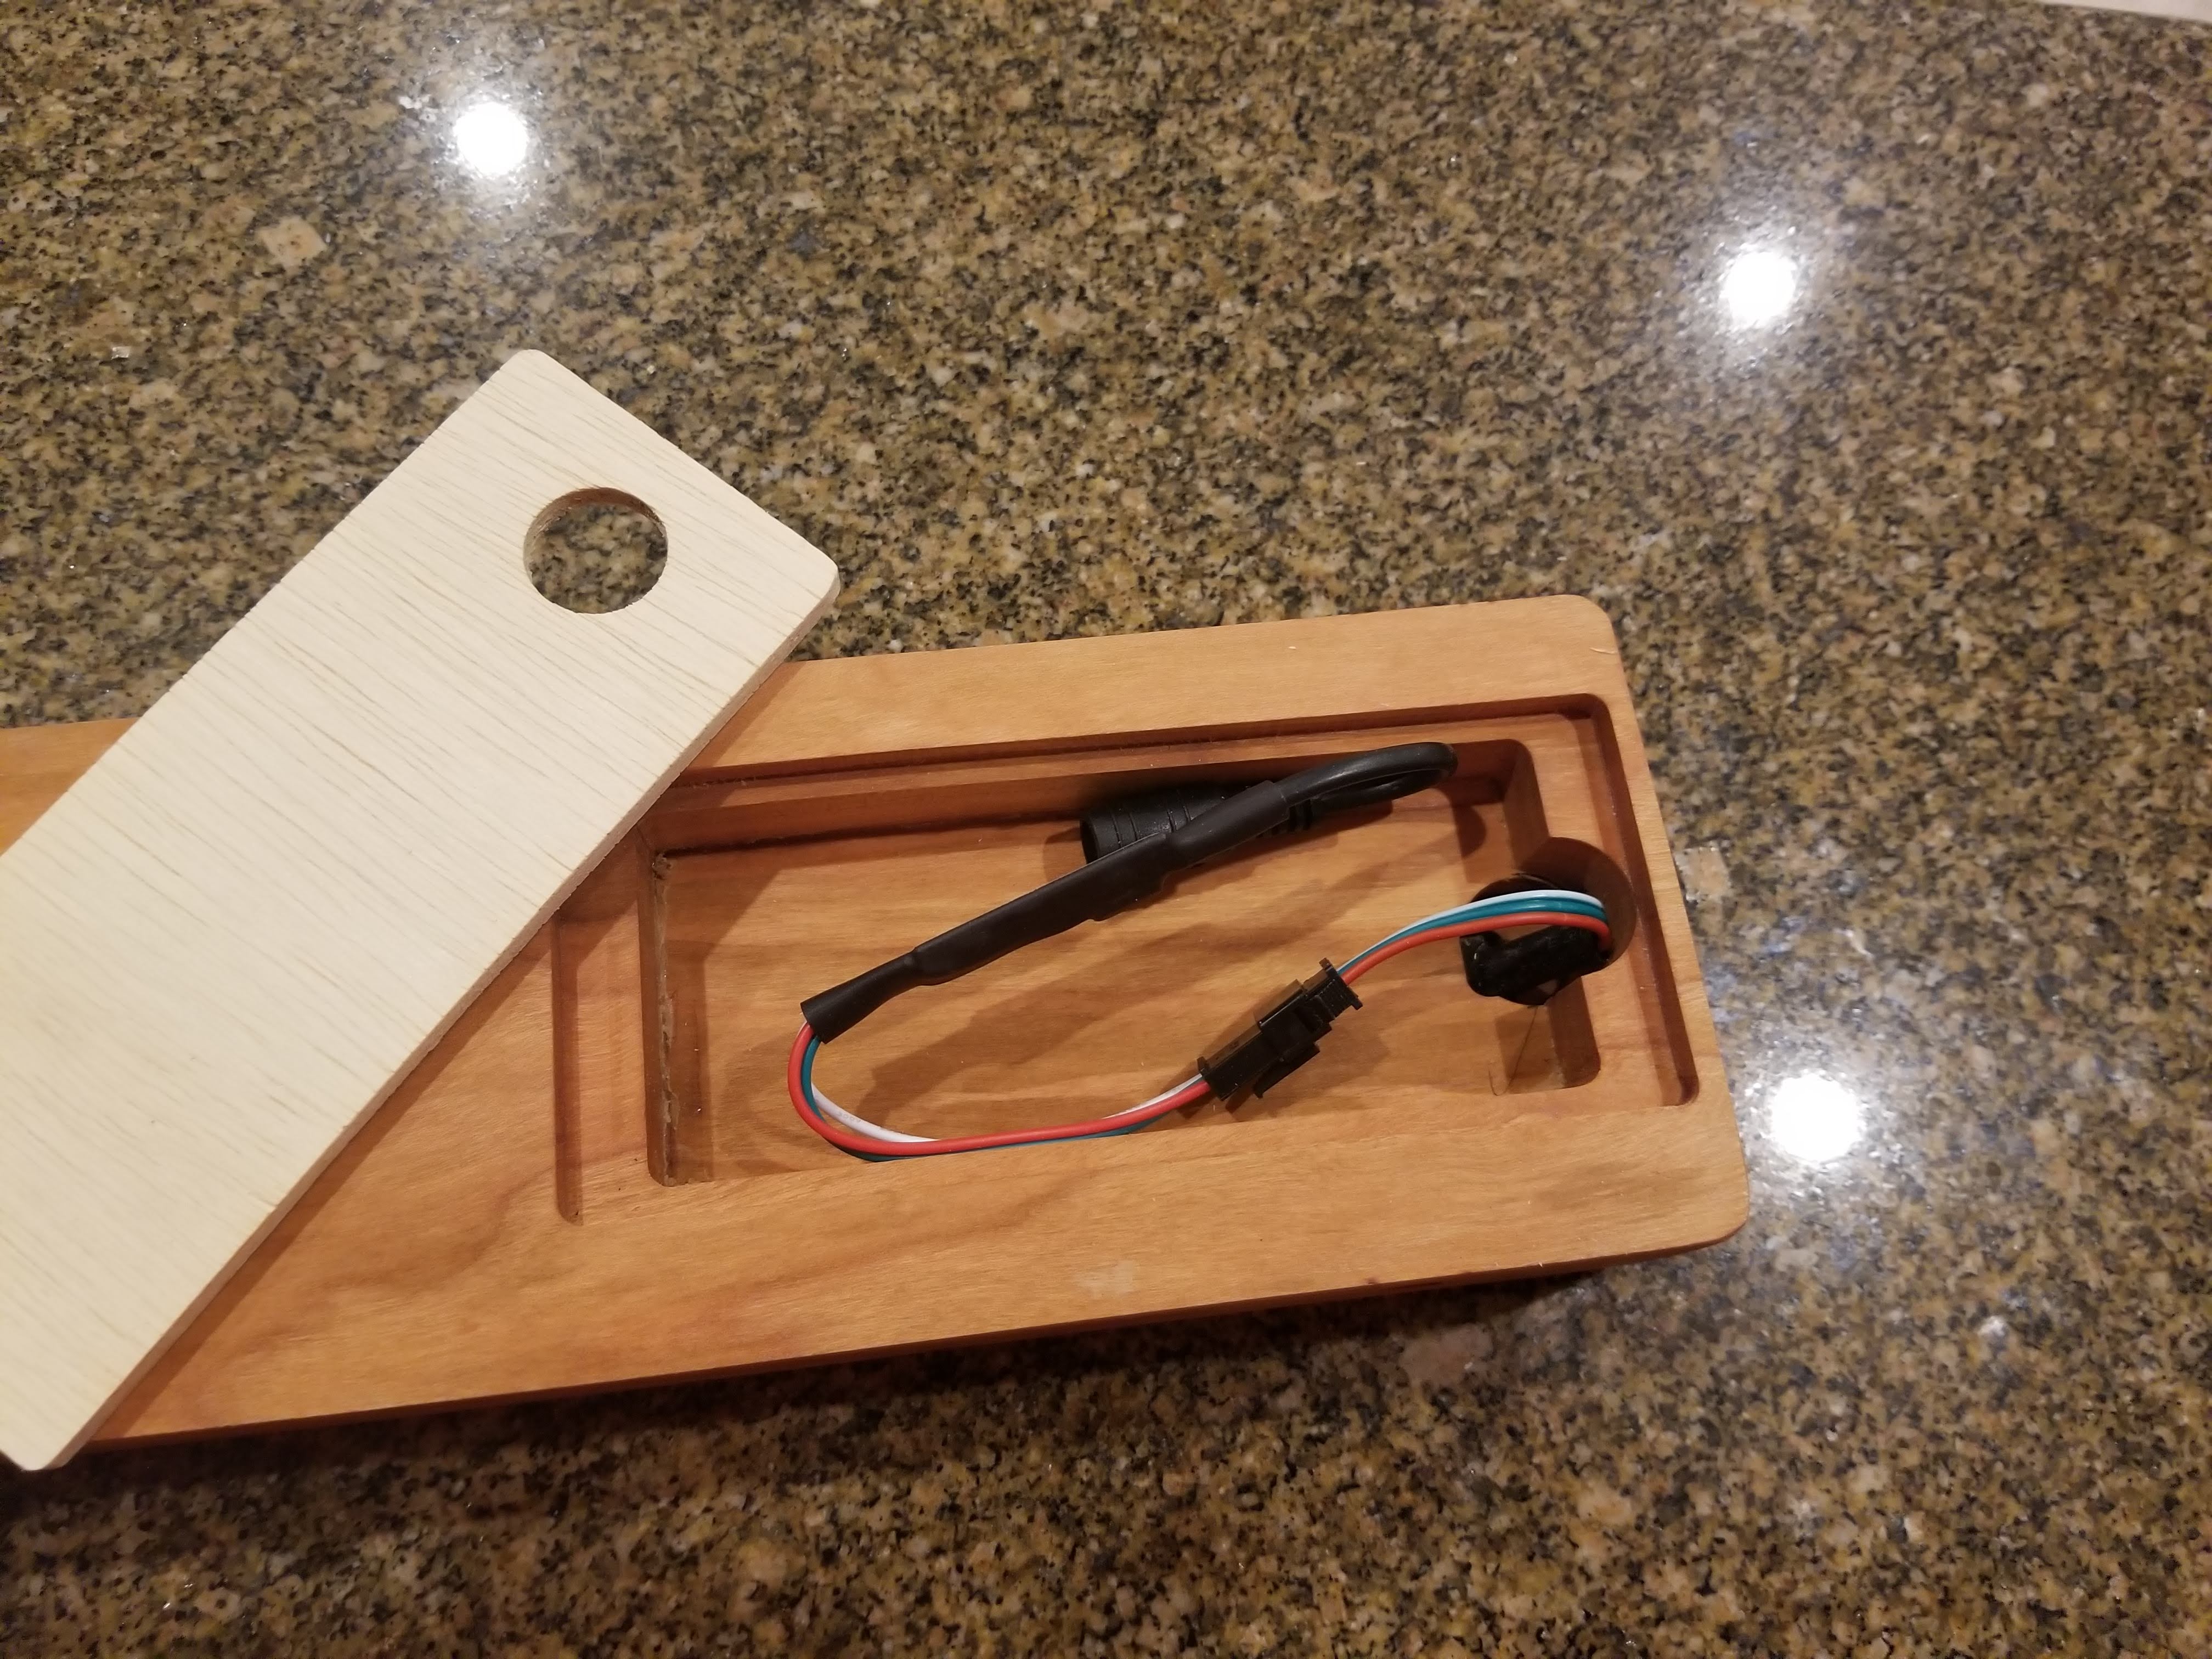
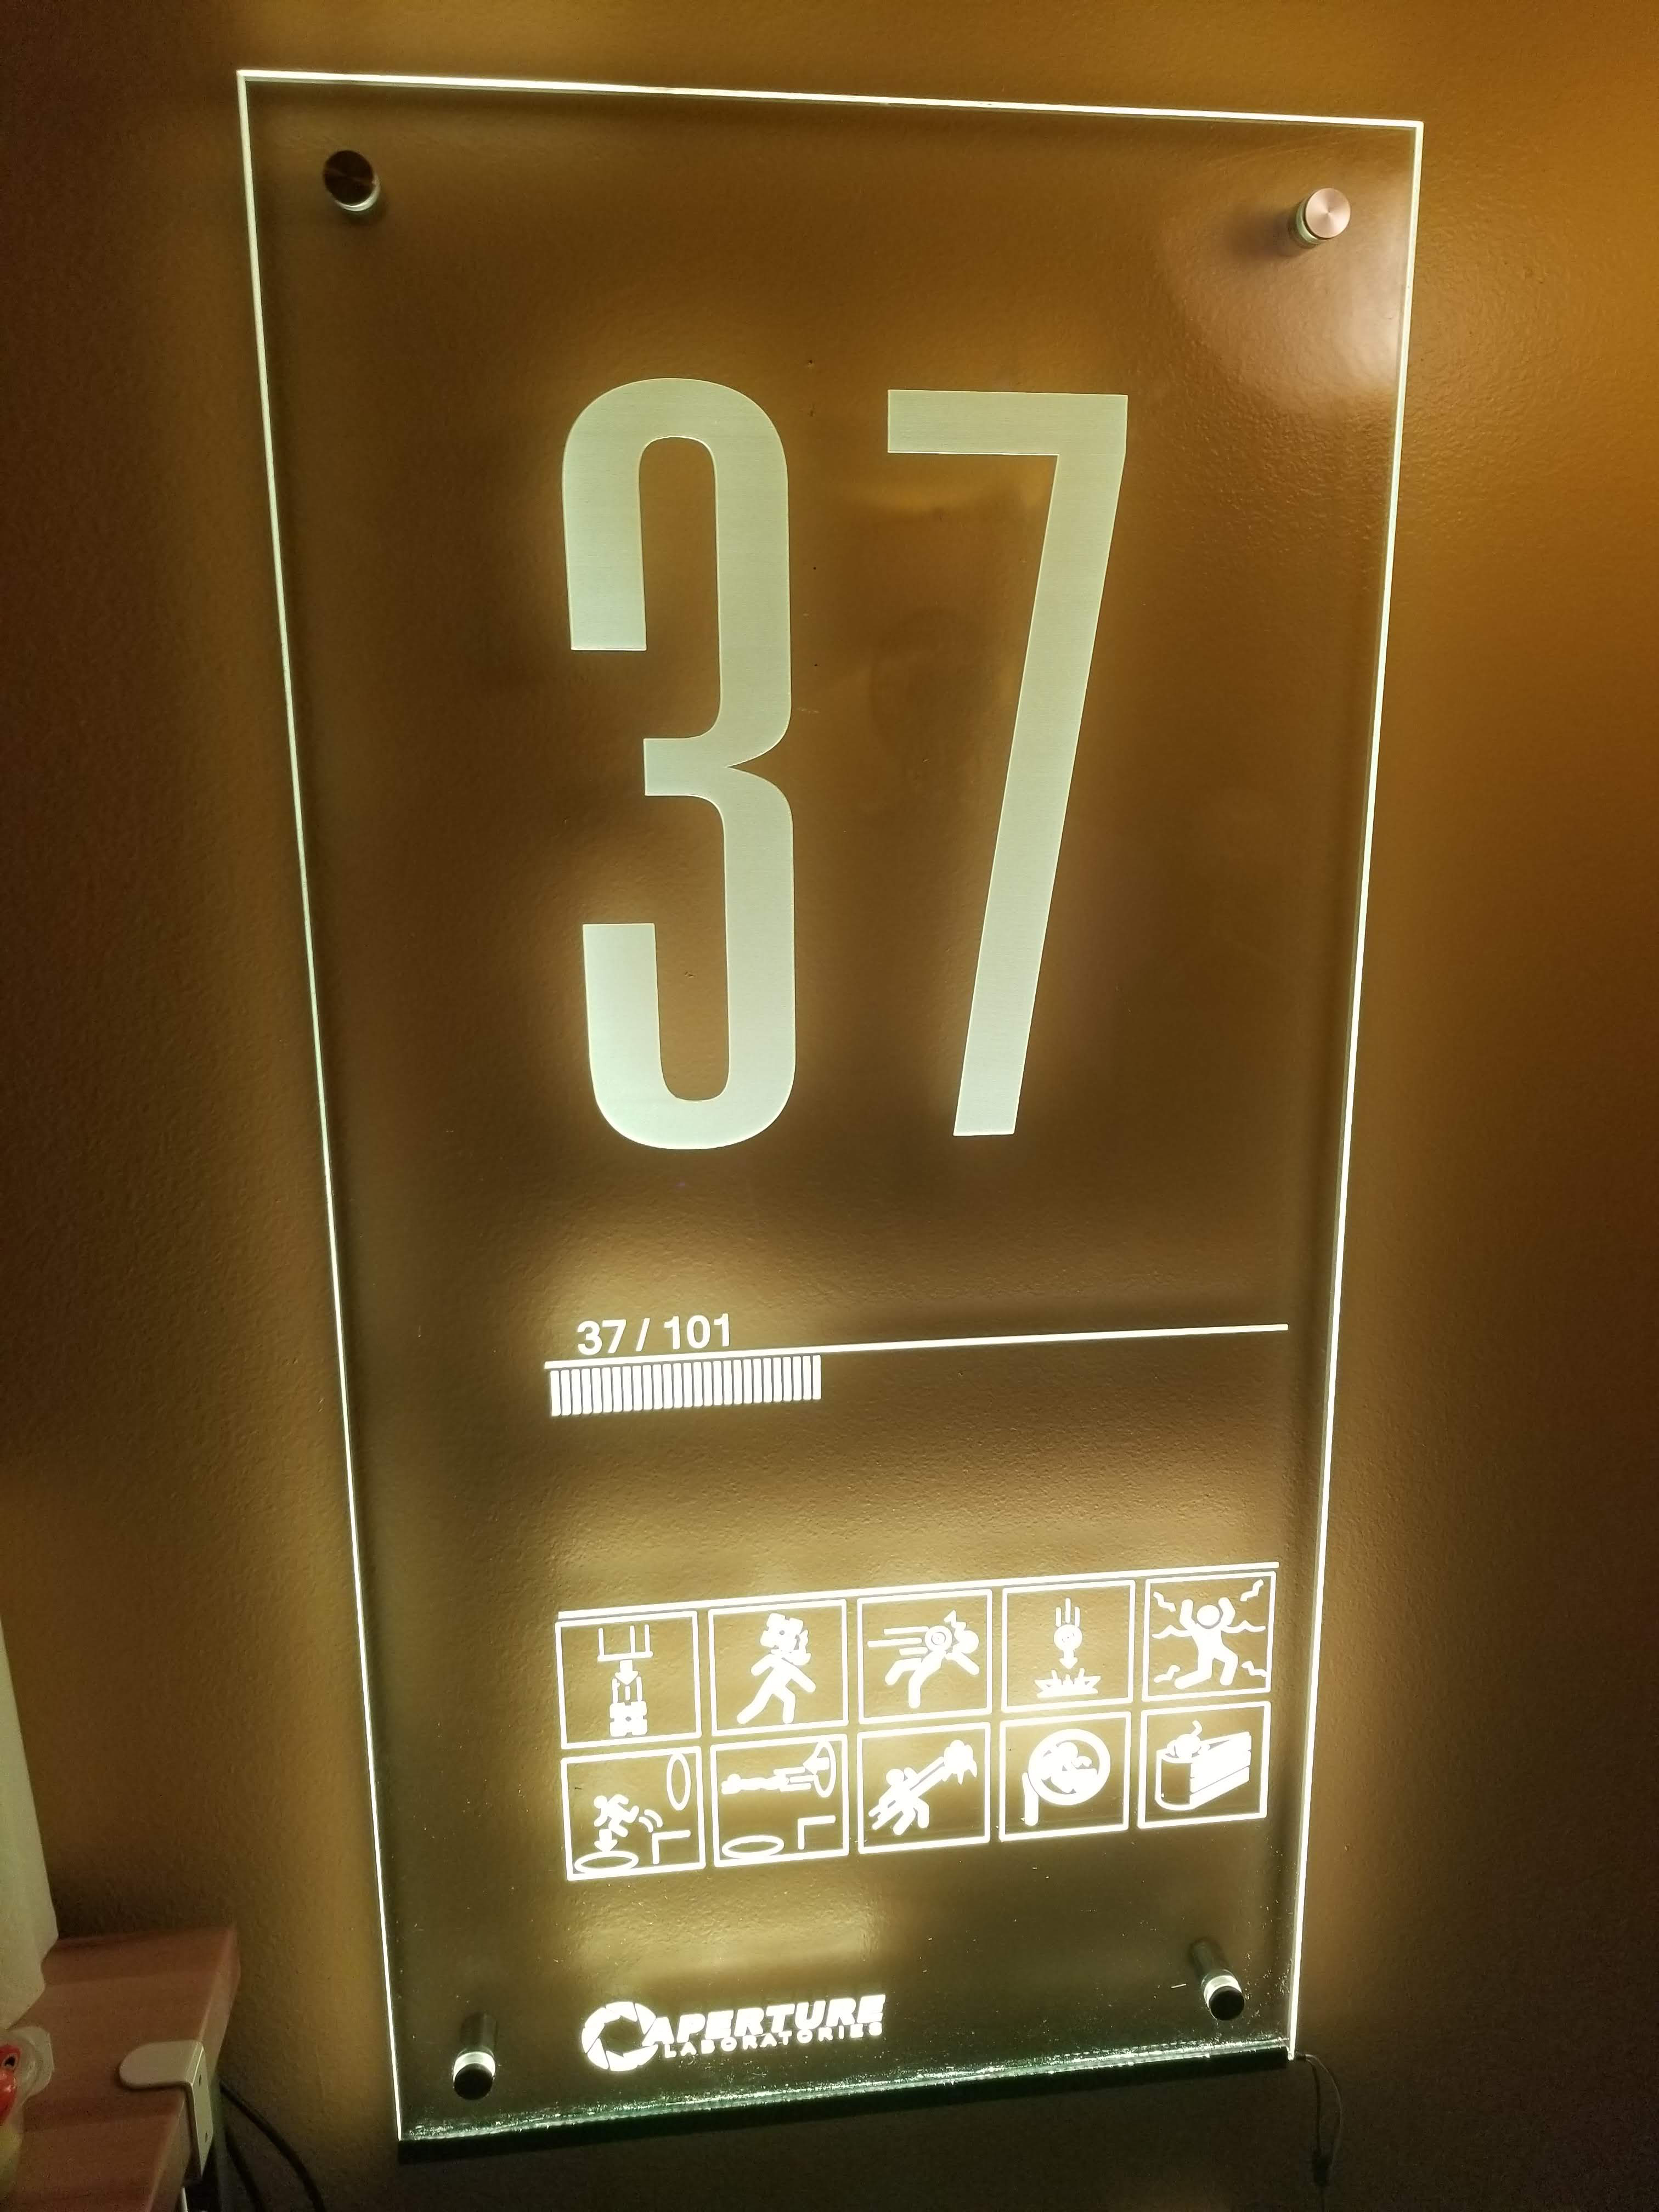
I seem to be going through an acrylic phase. Here are a couple more things. In both cases below, the acrylic was engraved with a 1mm end mill on the back side of the acrylic in mirror image, leaving a perfectly smooth front. The LED strips are set up with a simple controller and remote—for easily changing the colors and patterns—and powered by 5V DC.
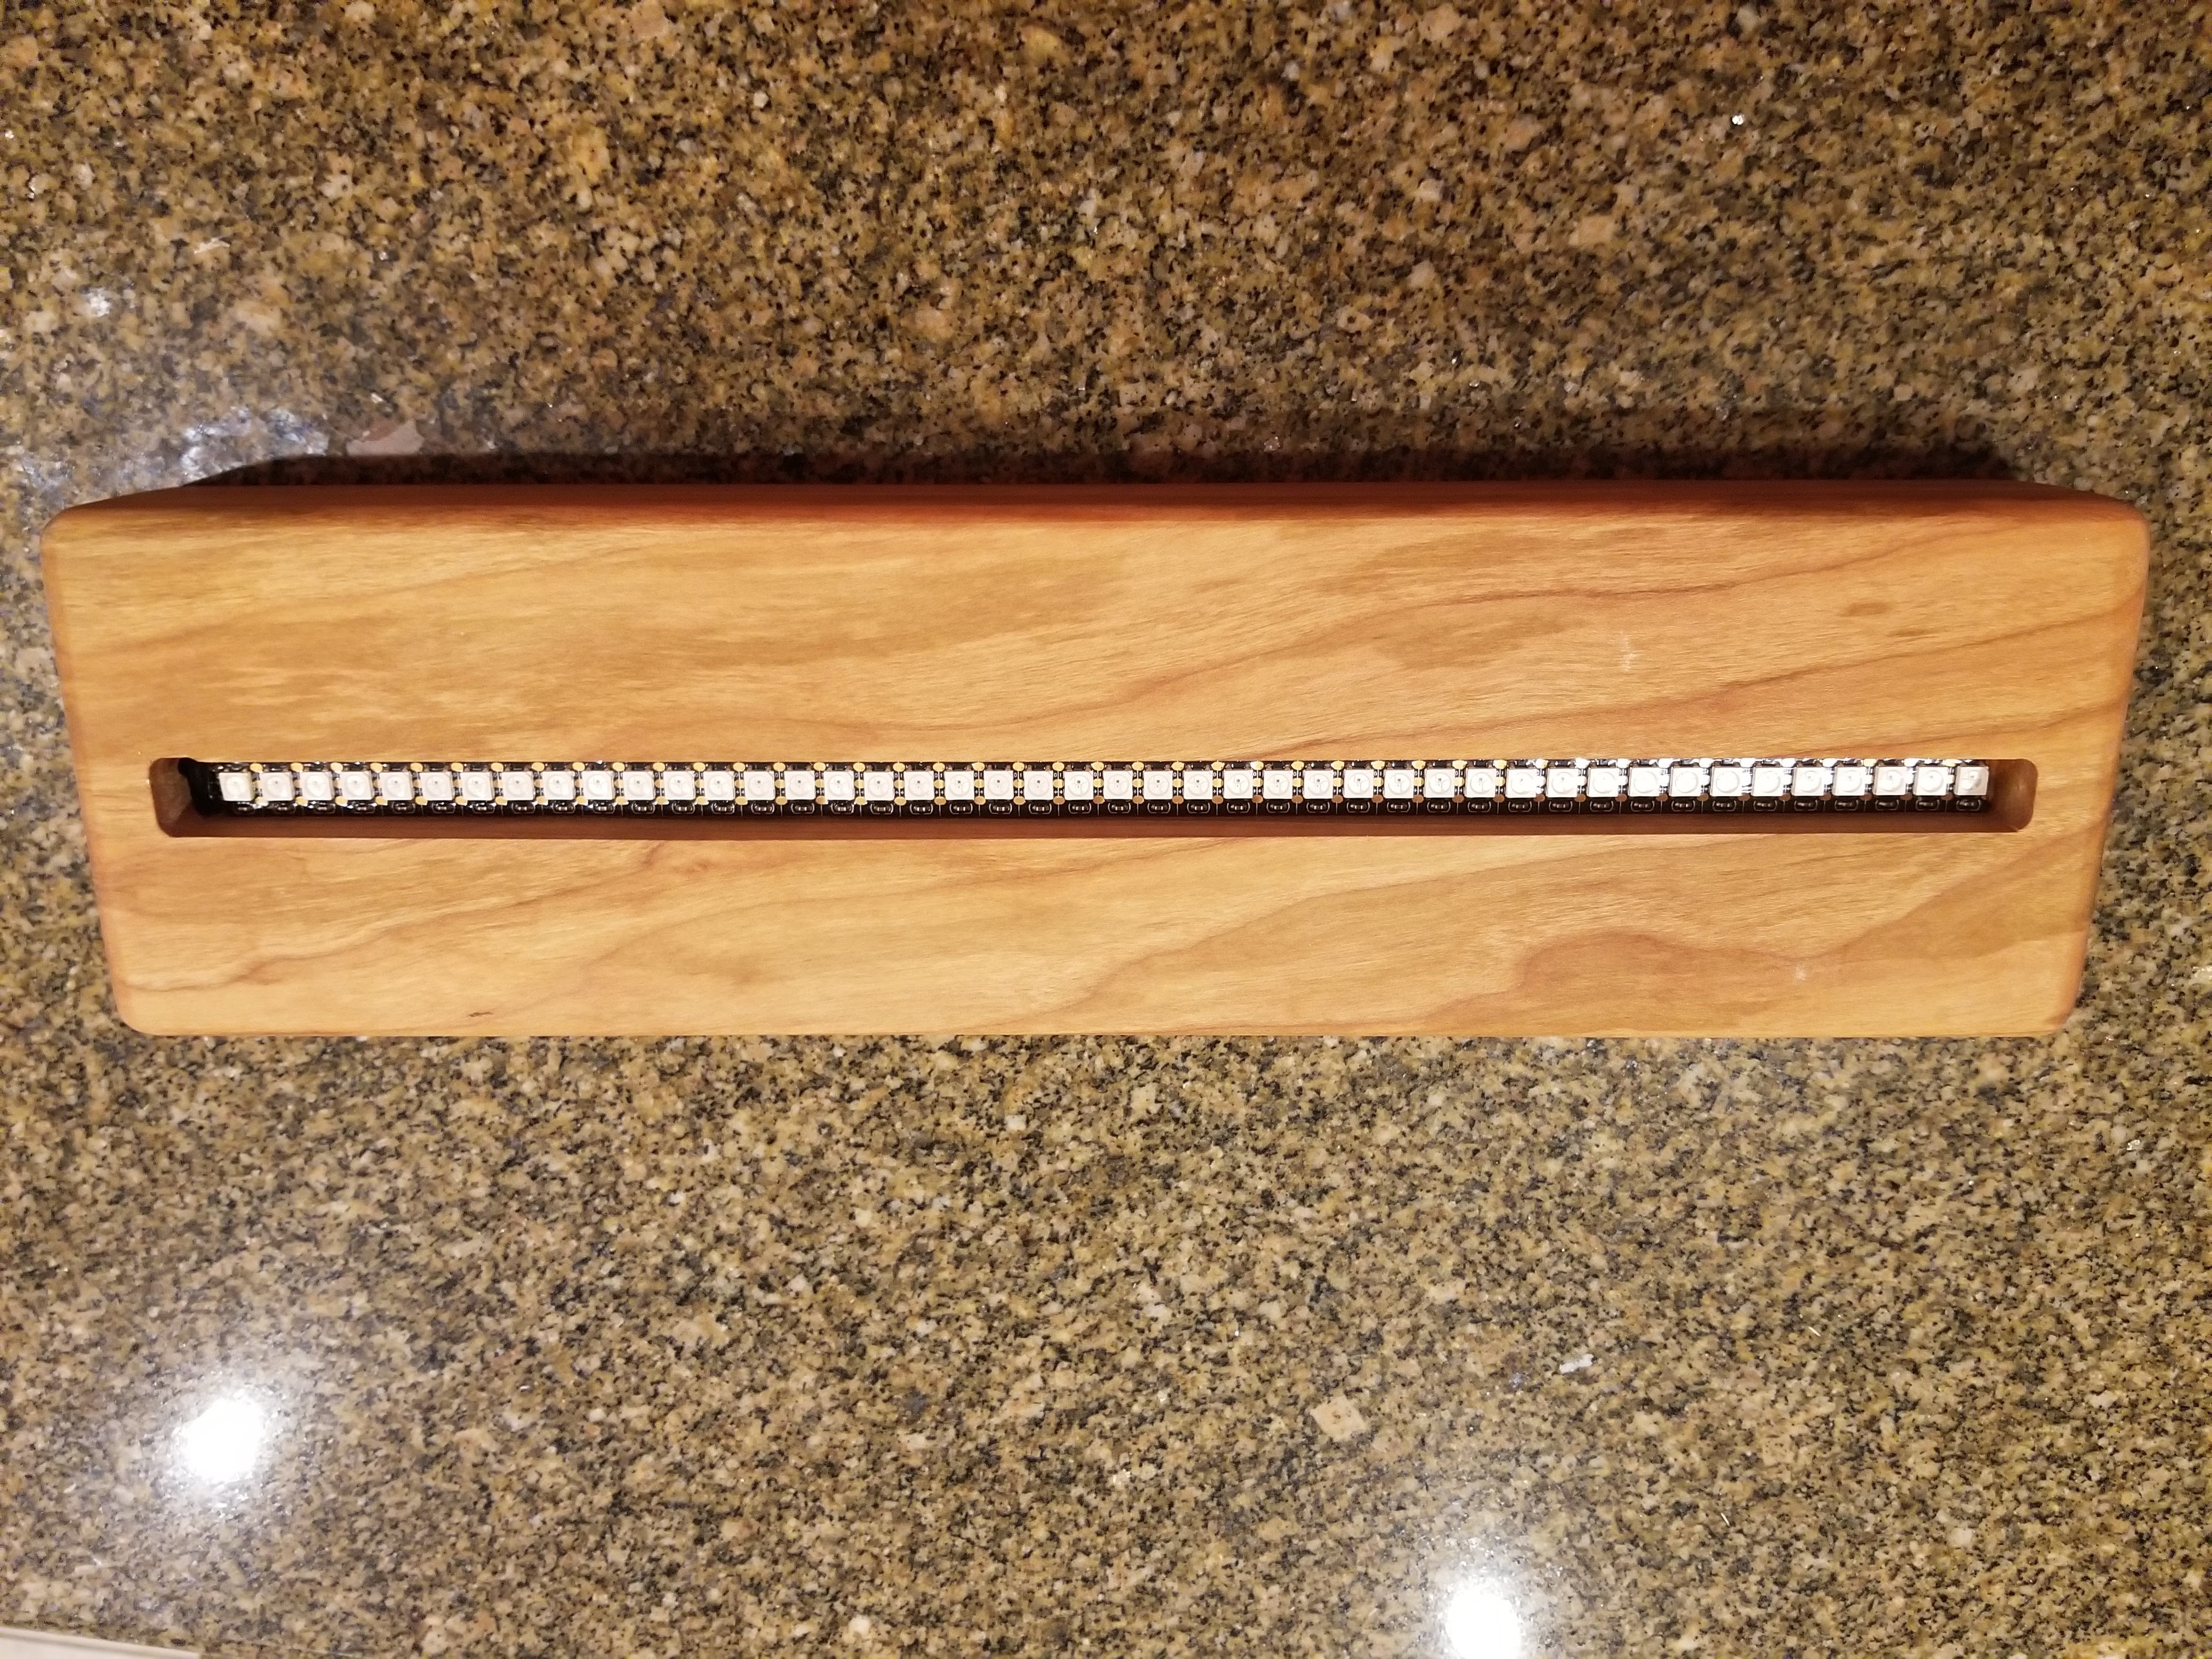
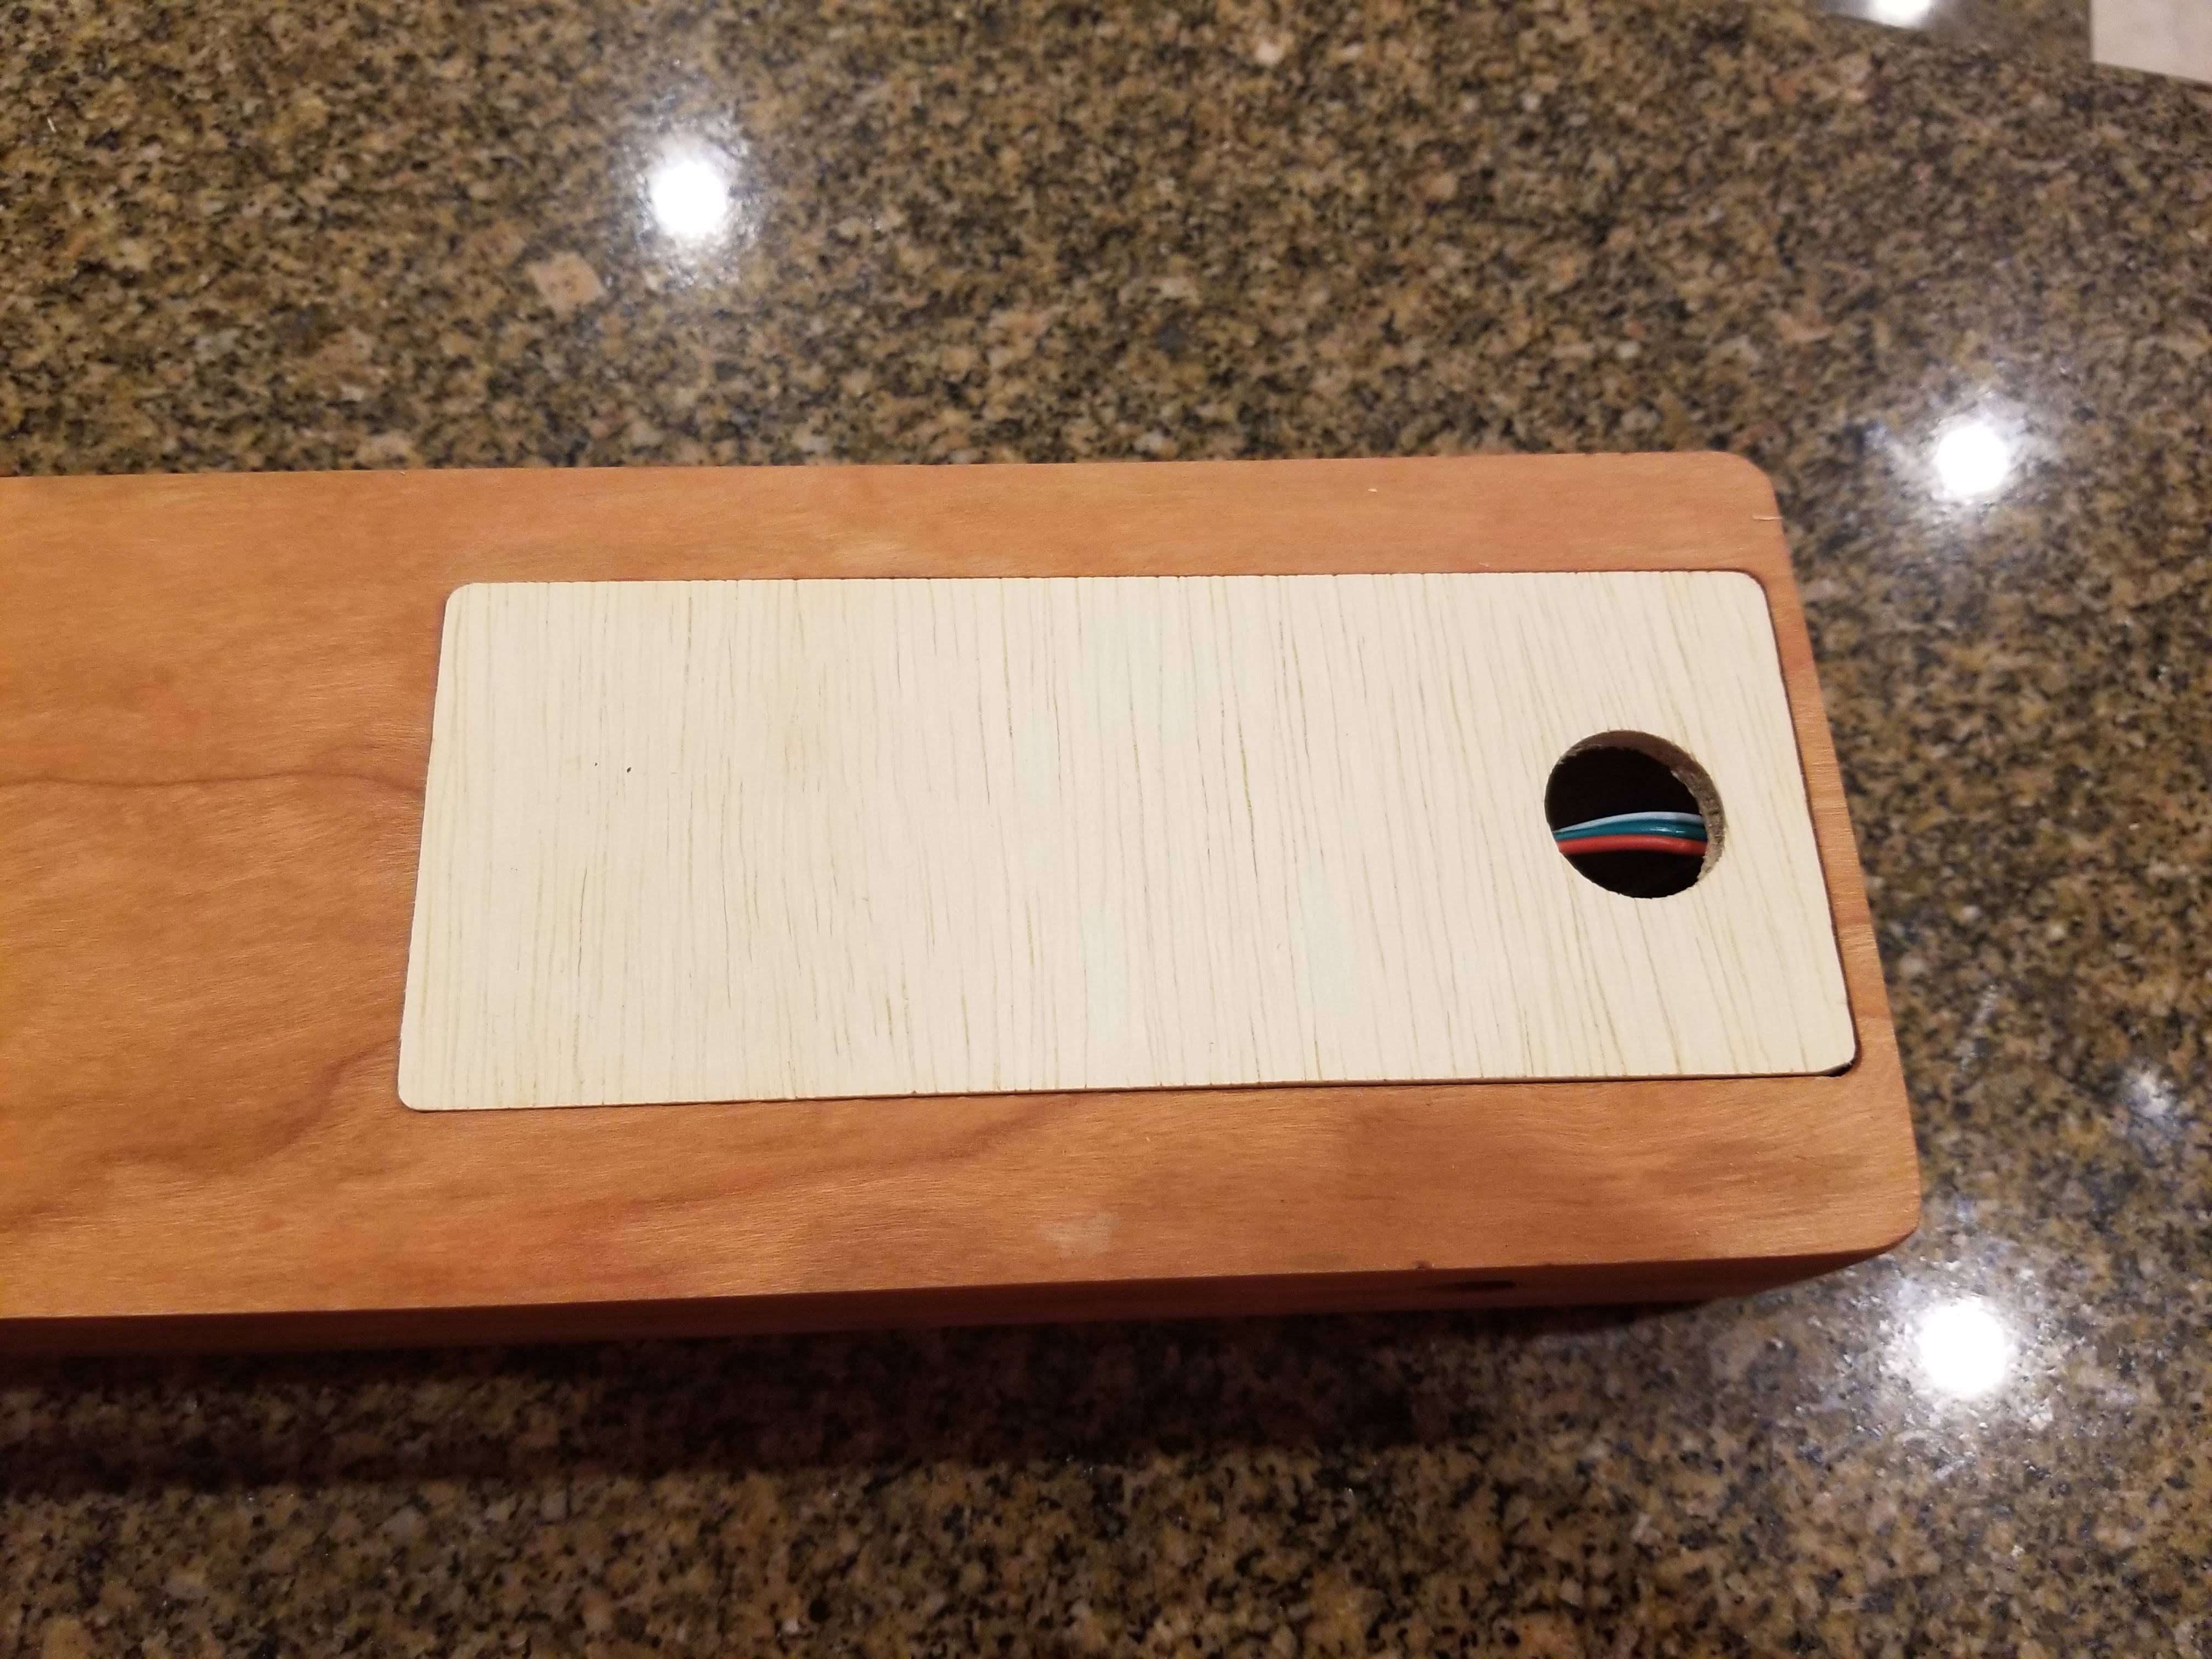
This small sign (12" wide) is a nod to my nephew’s favorite PlayStation game, MLB The Show. His birthday is coming up soon. The base was milled from Cherry with a slot on top for the LEDs and acrylic, and a cutout in the bottom for the controller. I went with the most tightly packed LED strips I could find for maximum brightness and the least amount of banding.
This large sign (24" x 48") is a nod to the Portal series test chamber sign and is now mounted in my gaming area. Don’t mind the lint at the bottom.
Thanks for looking!
18 Likes
Amazing!!! I also like acrylic A LOT…
Thanks for sharing!!
1 Like
I love the Portal sign!
What settings do you use for acrylic? Is it just a shallow pocket, or do you have to texture the bottom of the pocket to make it light up?
I can see a little grid-like texture in the first sign (on the ‘THE’) but I’m not sure if it’s just a photo artefact, or necessary to make it light up…
3 Likes
I used this 1mm end mill to create a 0.02" (~0.5mm) deep pocket. I did nothing special with my settings. Feeds were set to 900mm/min and the dial on my Dewalt 611 at just over 2.
The engraving was done with a parallel strokes along the X-axis. Everything you see below is from a single engraving pass. I can’t really explain why the texture appeared this way, almost like individual drill marks. Maybe vibrations from the machine? I did not add any further texturing. This was a surprisingly easy project.
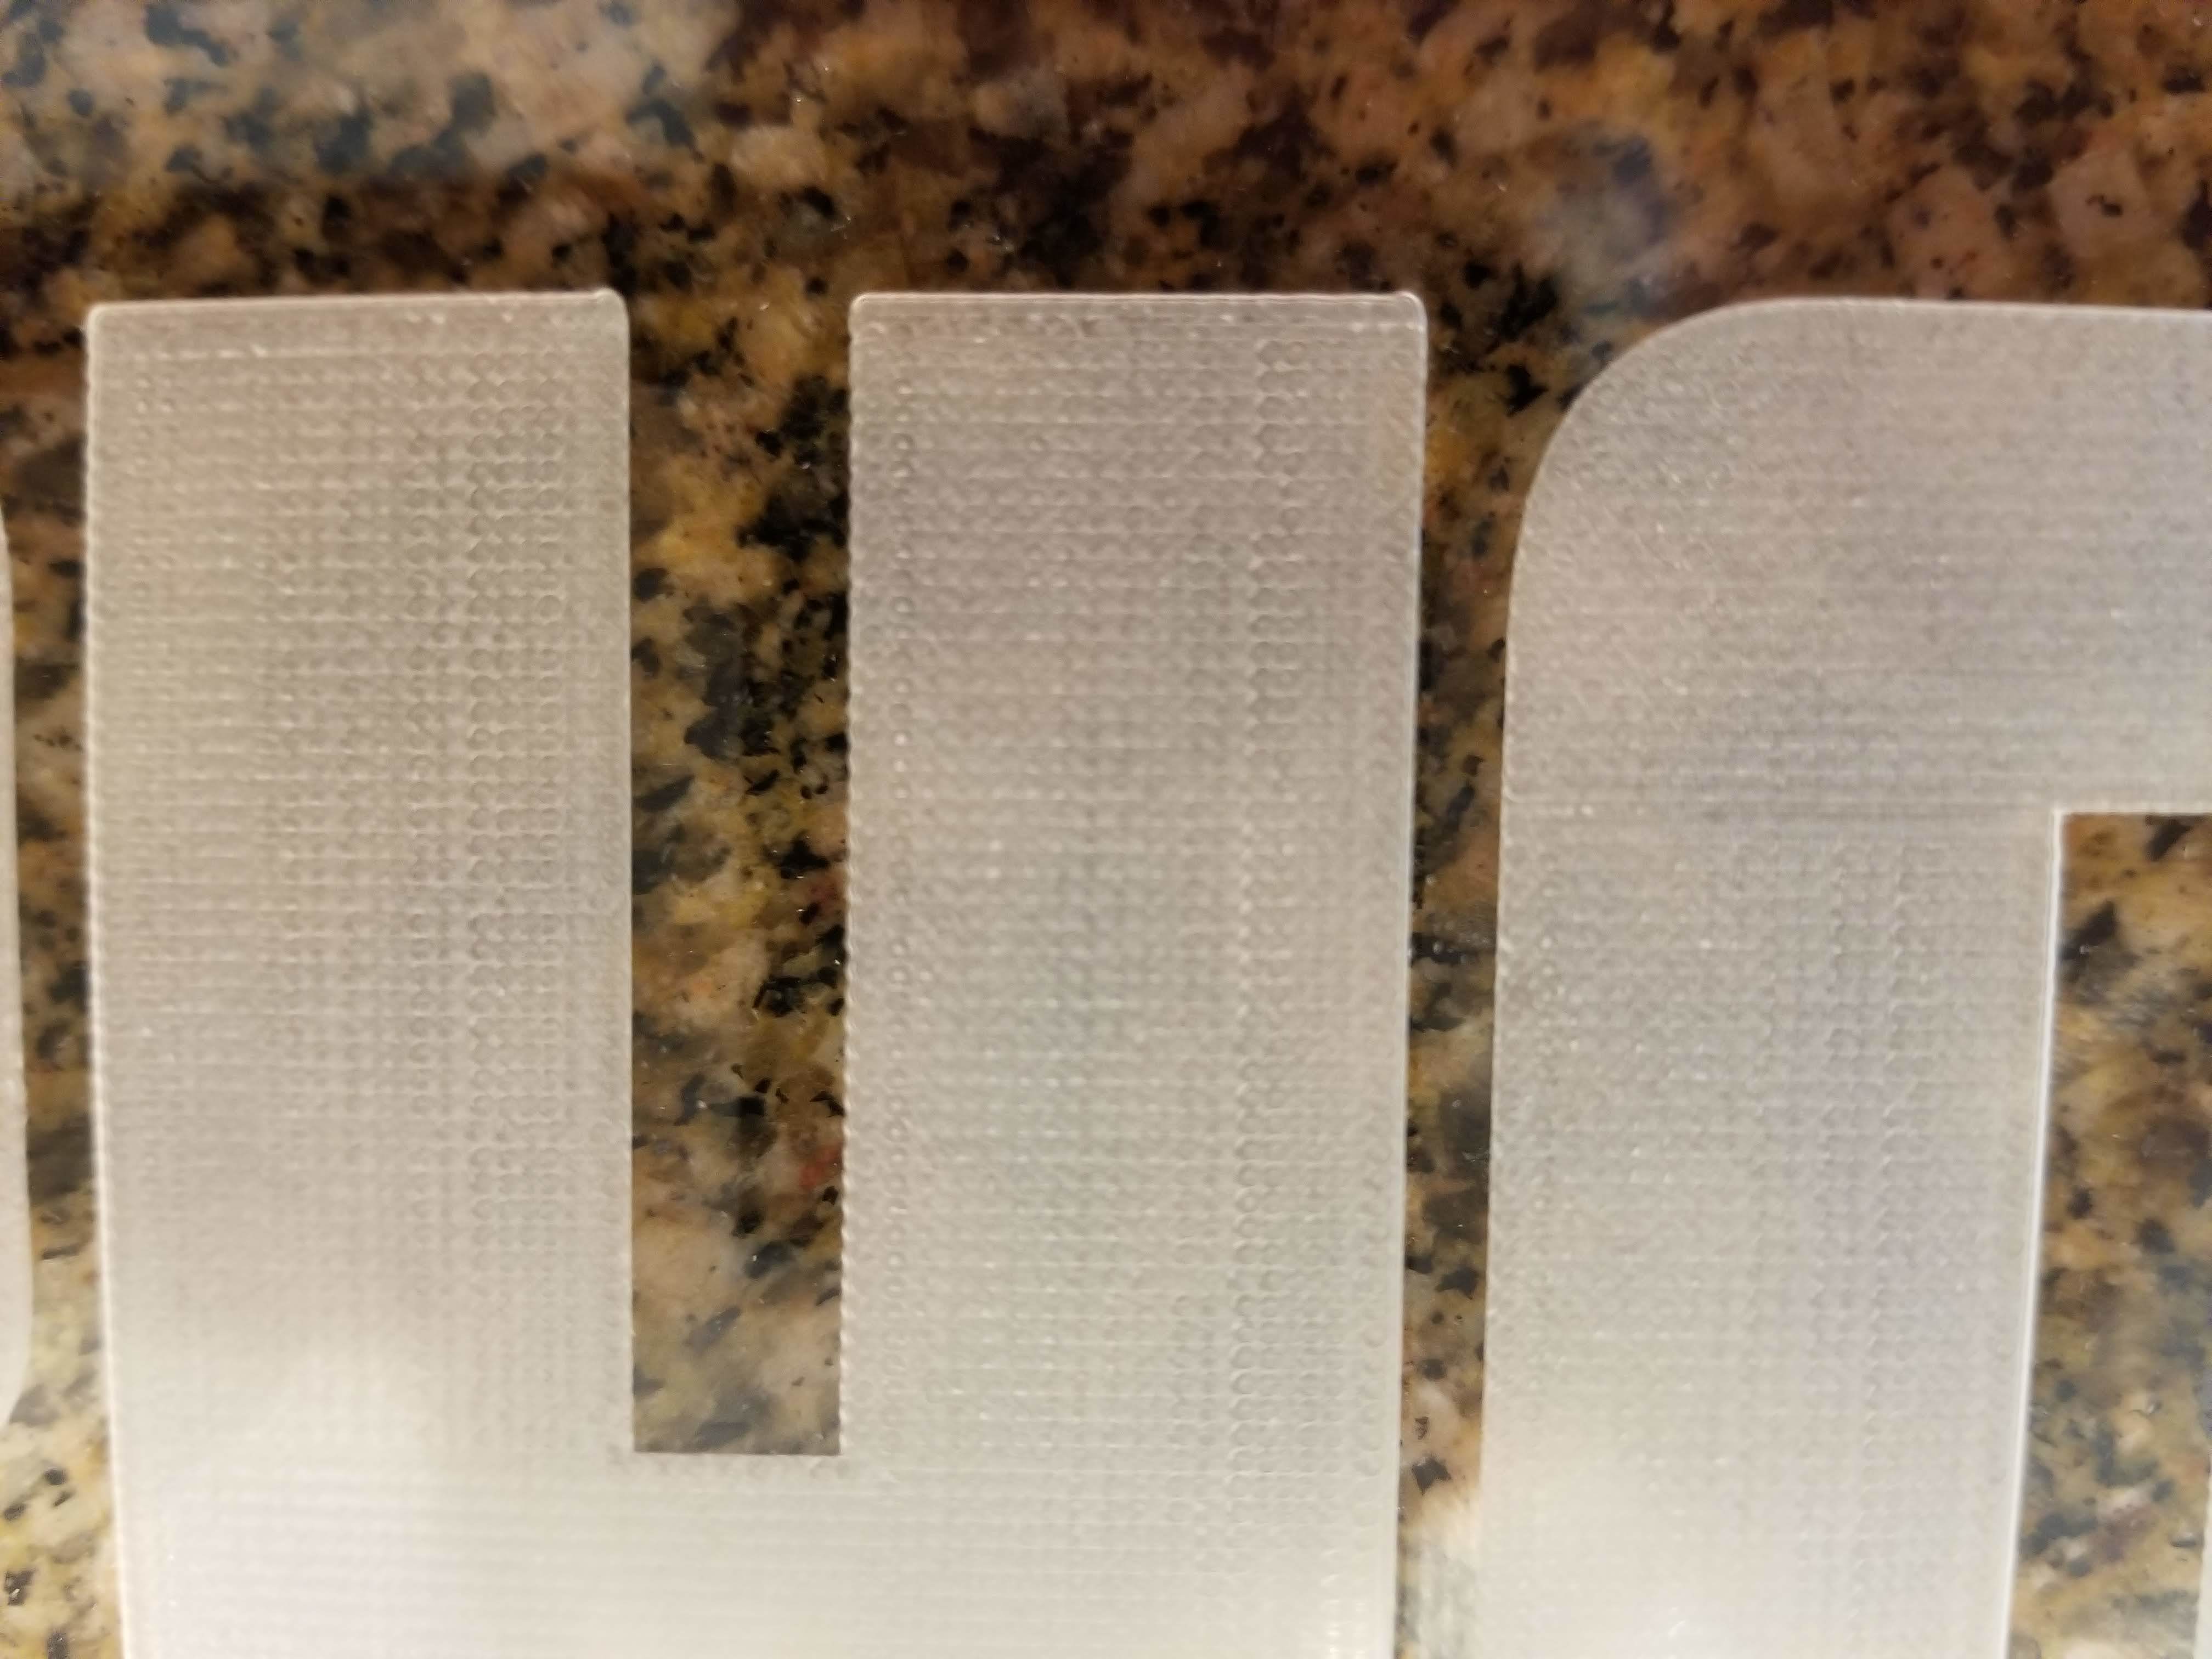
Also, the light is playing tricks in the image because the outline is flat, not wavy — this seems to be due to reflections along the edges of the pocket and is hard to explain if you can’t move the piece around to look at it from different angles.
2 Likes
Looking at the top right corners of the H, it looks like the bit did bend slightly - but then it’s amazing that a 1mm bit can cut anything!
It looks like the cutter is leaving tiny but variable amounts of fluff at the edge of the cut, in exactly the same pattern on each row, but I don’t know what causes that in acrylic - it’s quite interesting to see it so close up!
With such fine cuts, could the texture be due to unevenness on the galvanising on the tubes? That might explain why it’s exactly the same on each row. Then again, CNCs are very good at doing exactly the same thing repeatedly, so it could be anything…
How much step-over can you use with such a tiny bit?
1 Like
Most likely the endmill isn’t perfectly flat on the bottom. None really are, that’s why you get the swirl patterns.
1 Like
So, a happy accident perhaps!
I set the bit to a 40% stepover; however, when using the Quick Engrave feature in VCarve, there is a separate stepover setting which overrides the bit settings. This was still set to zero (0) from using my laser and I failed to update it. This accounts for why the lines are so defined, as there was no stepover. The upcut bit is likely contributing to the “fluff” by raising the edges slightly to help create the texture. But I can assure you the final product is solid and cannot be rubbed or brushed away.
I also like Barry’s accounting for the swirl pattern. Sounds feasible to me.
1 Like
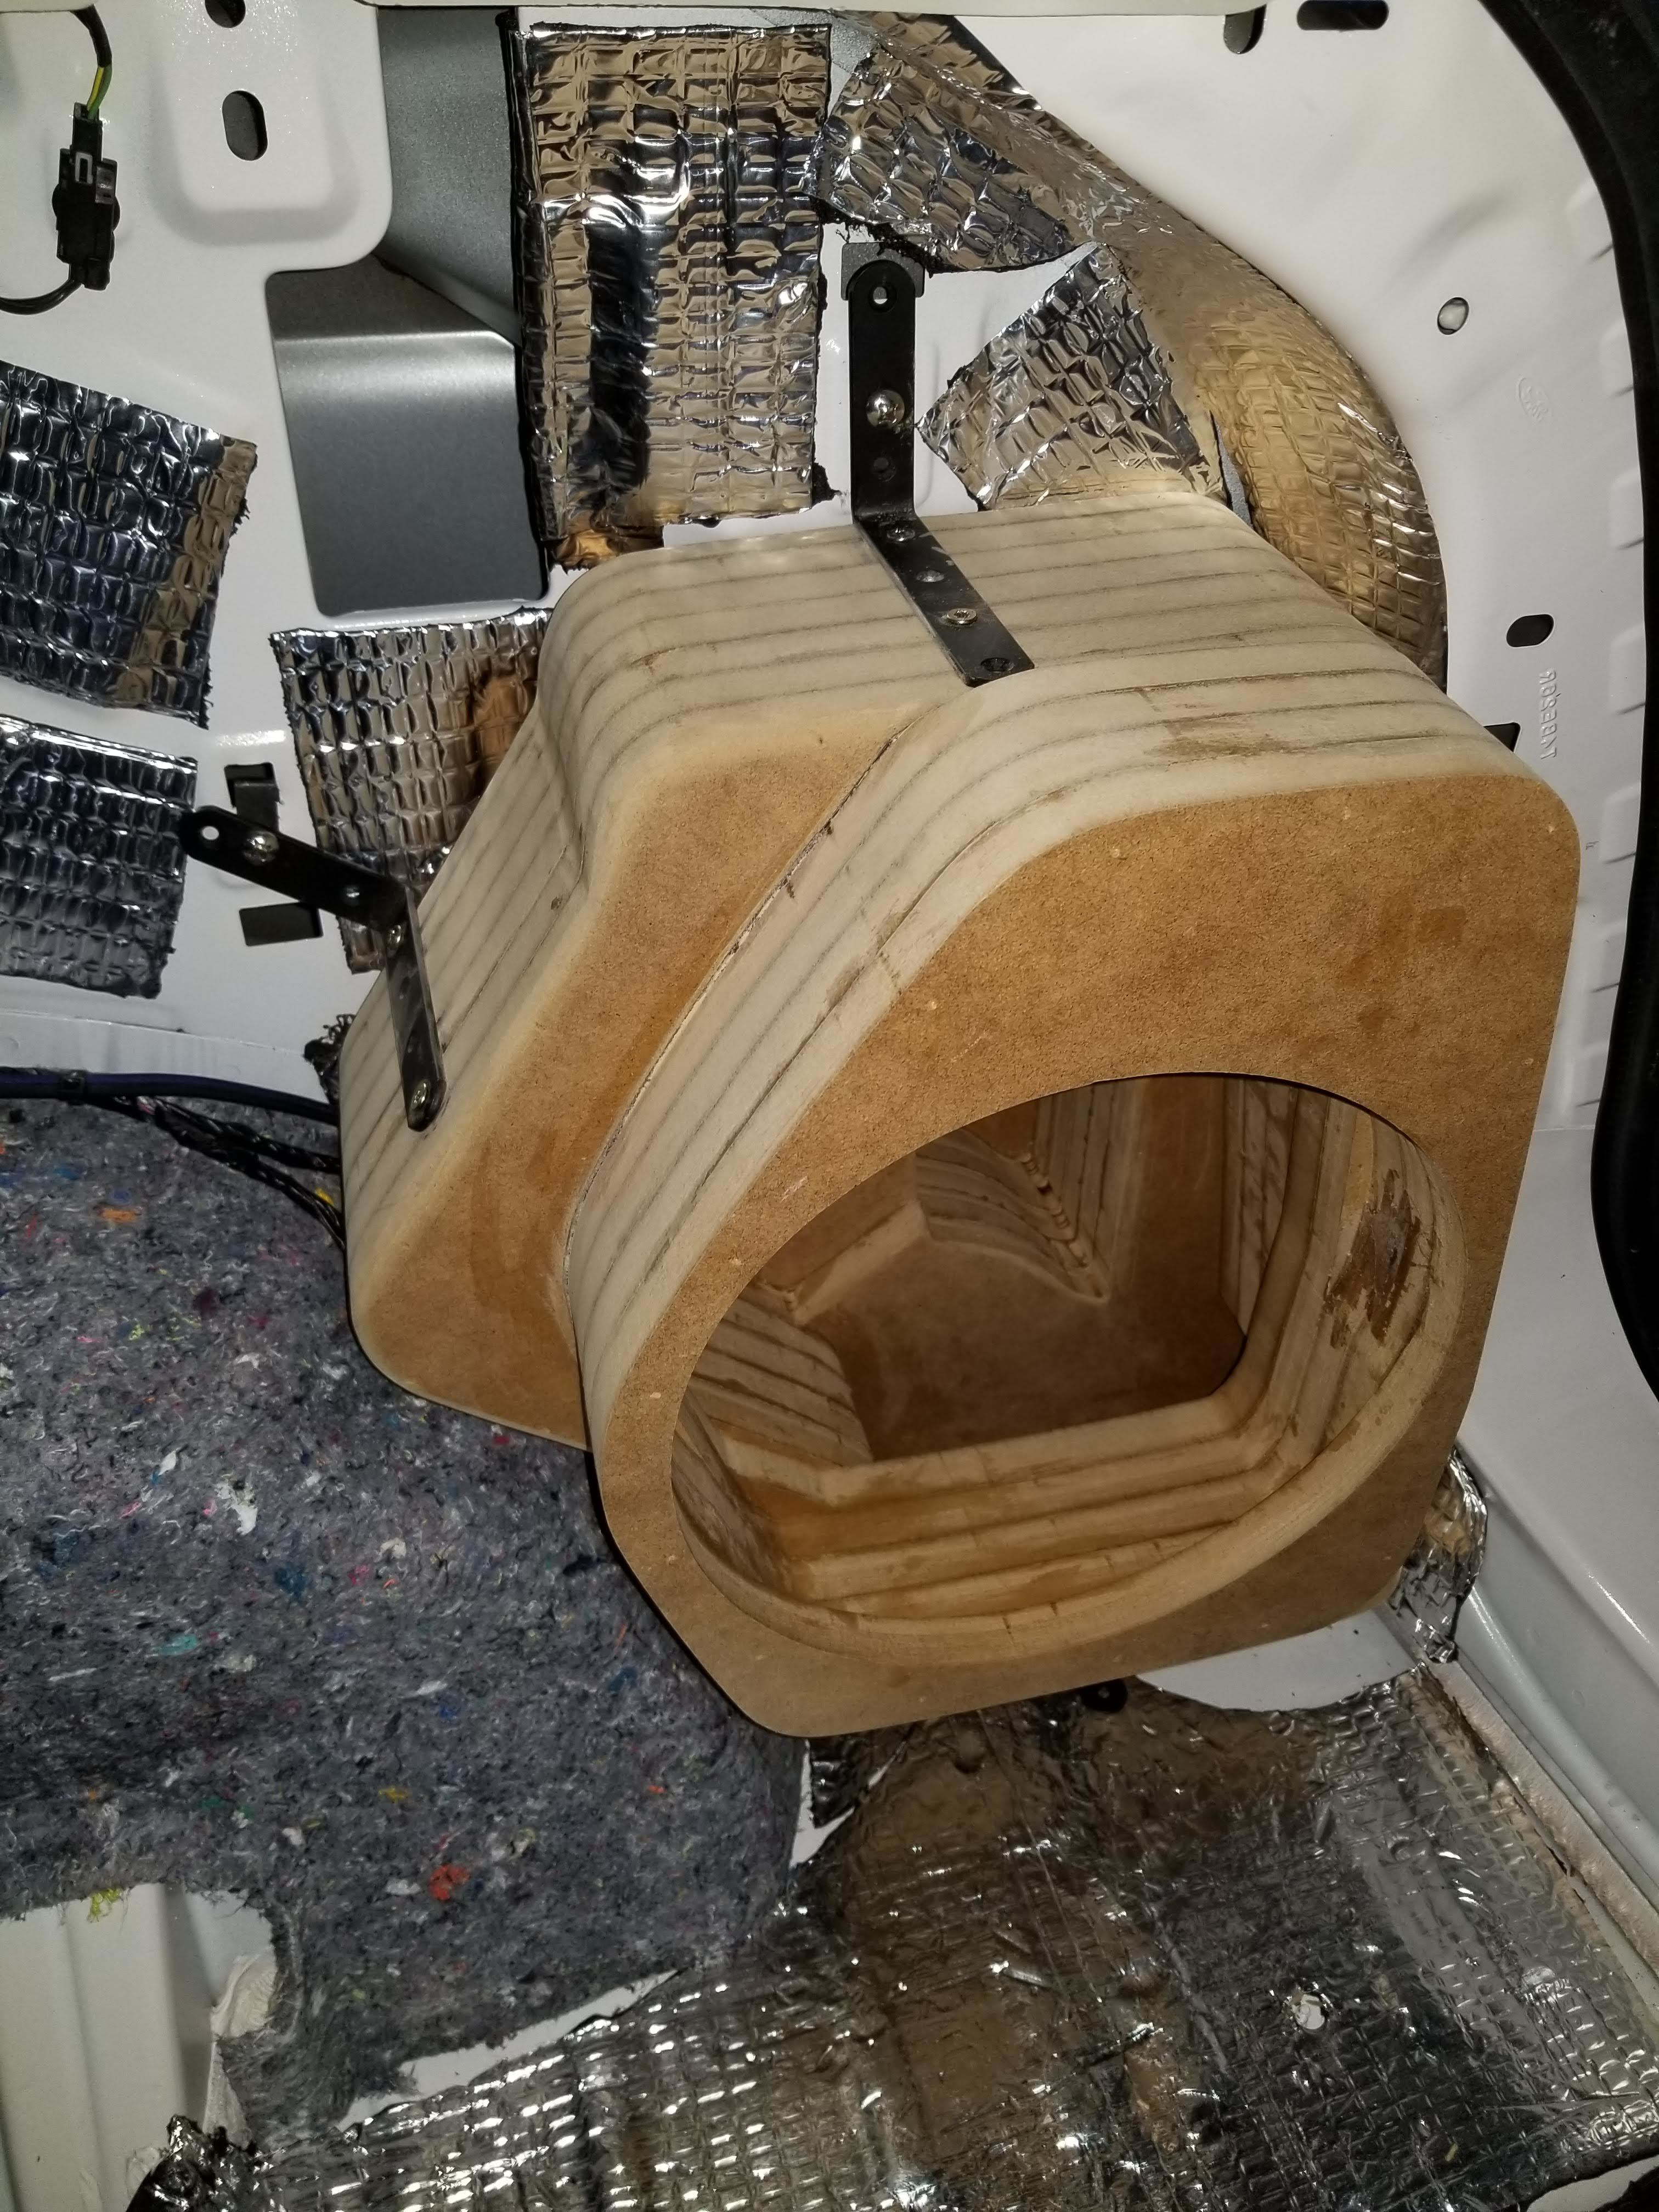
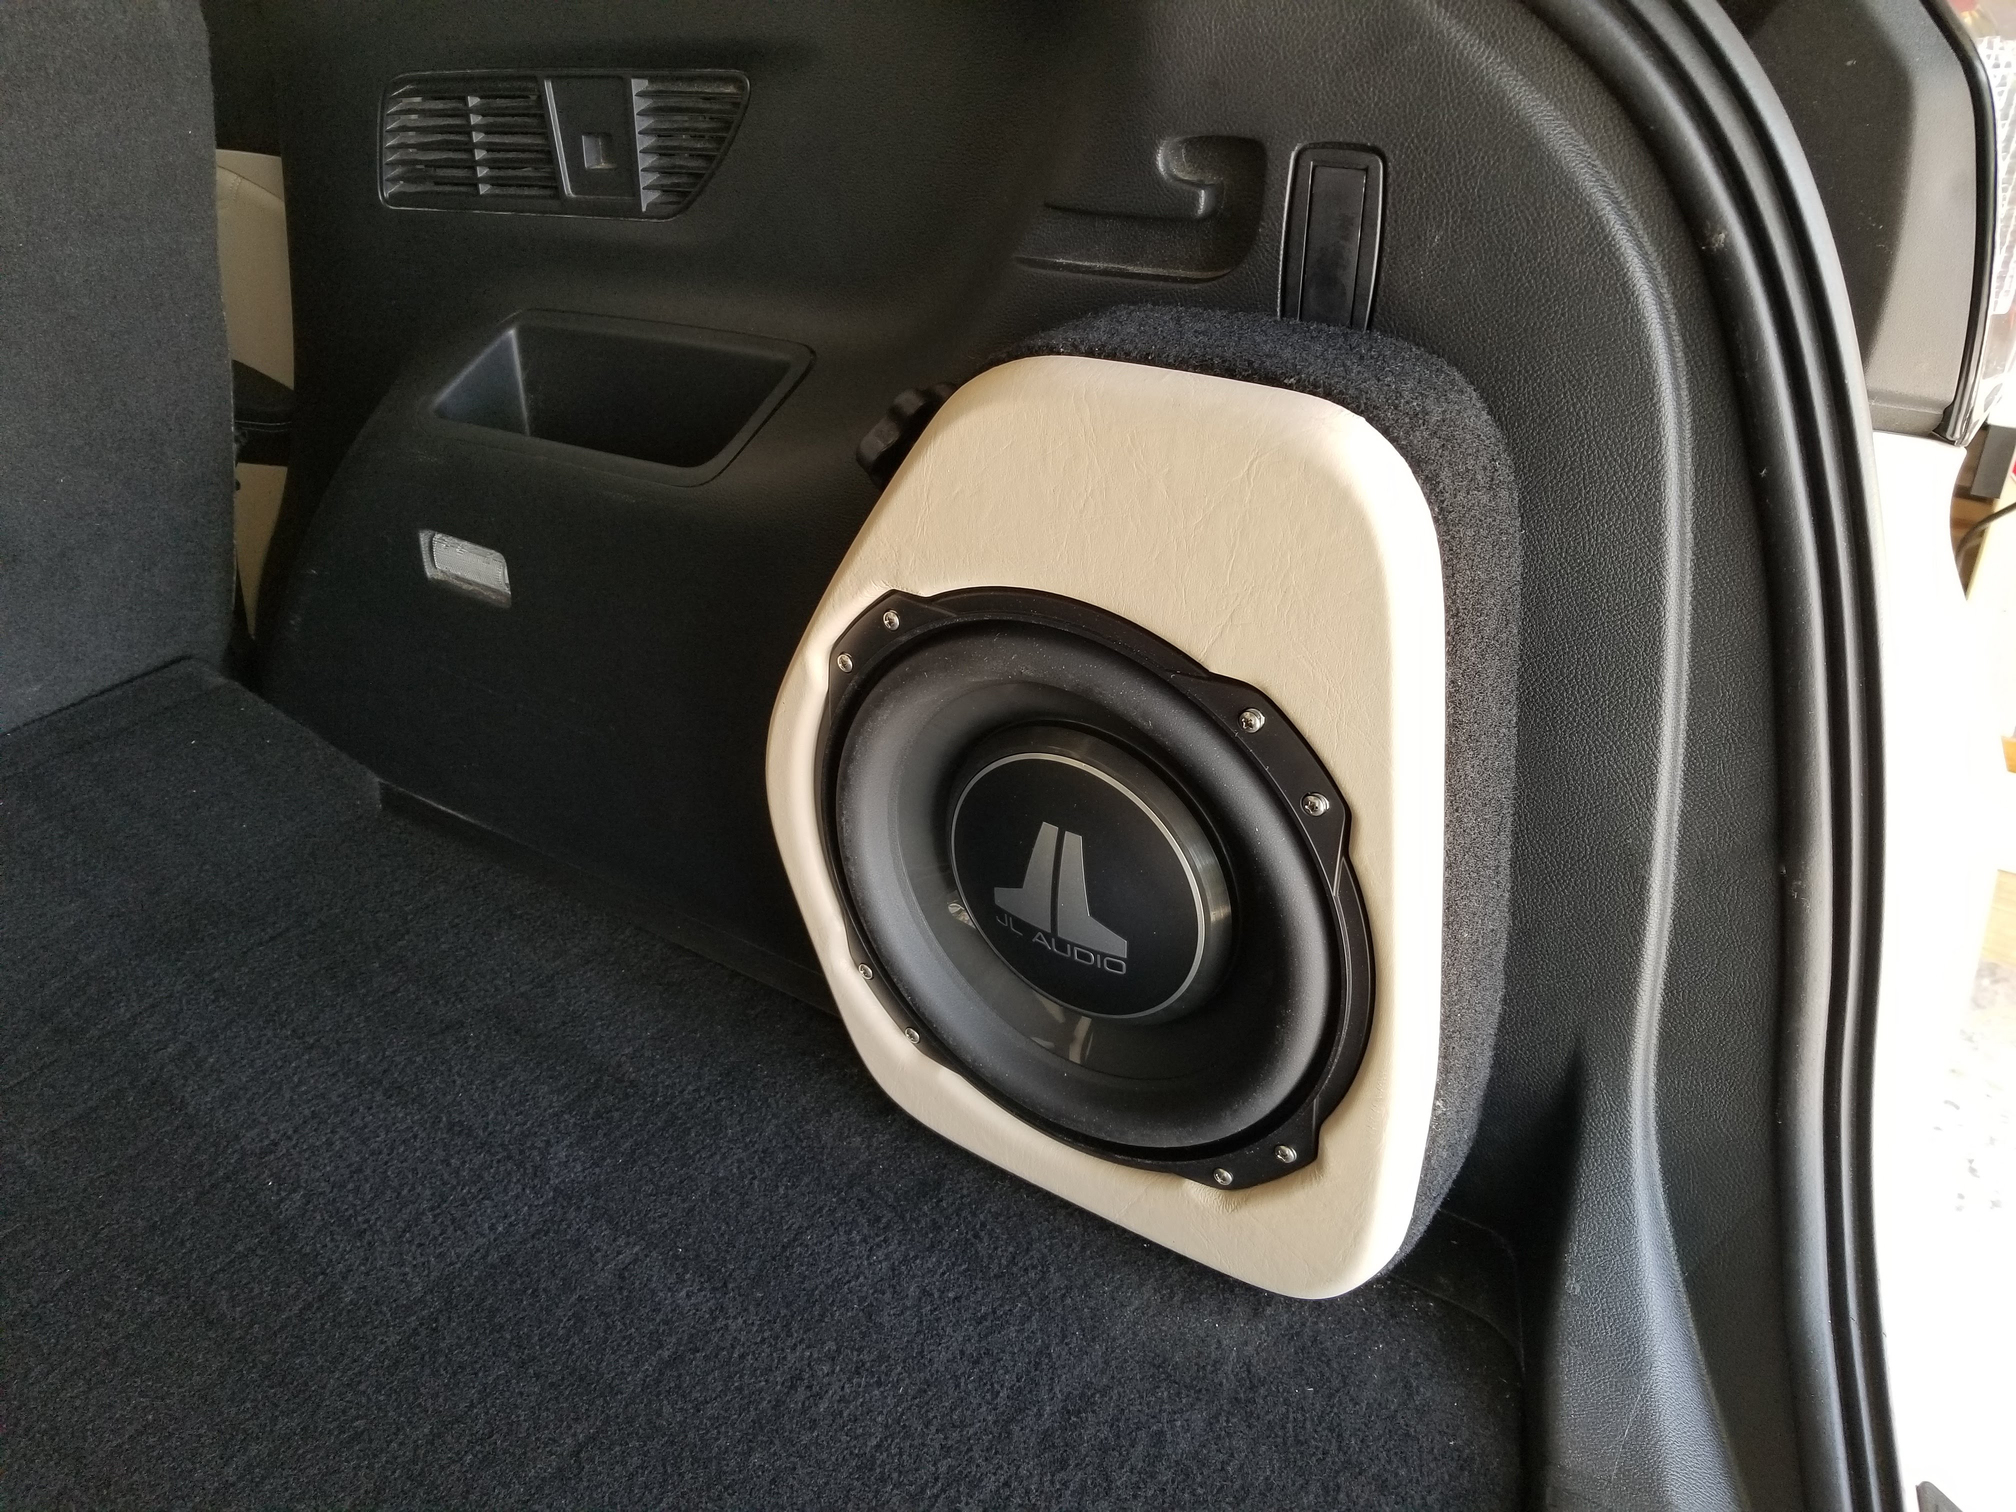
Another project! I’ve been spending more time in my car lately, so I figured it was time to upgrade the sound system. The Sony “premium” sound system the car came with left something to be desired. In addition to new speakers up front, I wanted some nice bass response with a good subwoofer, but I didn’t want to use up half of the storage compartment with an ugly box as I need to be able to haul wood and other materials when necessary. Ultimately, I chose the JL Audio 10TW3-D4 due to it’s small footprint and a sealed enclosure requirement of only 0.5 cubic feet (net).
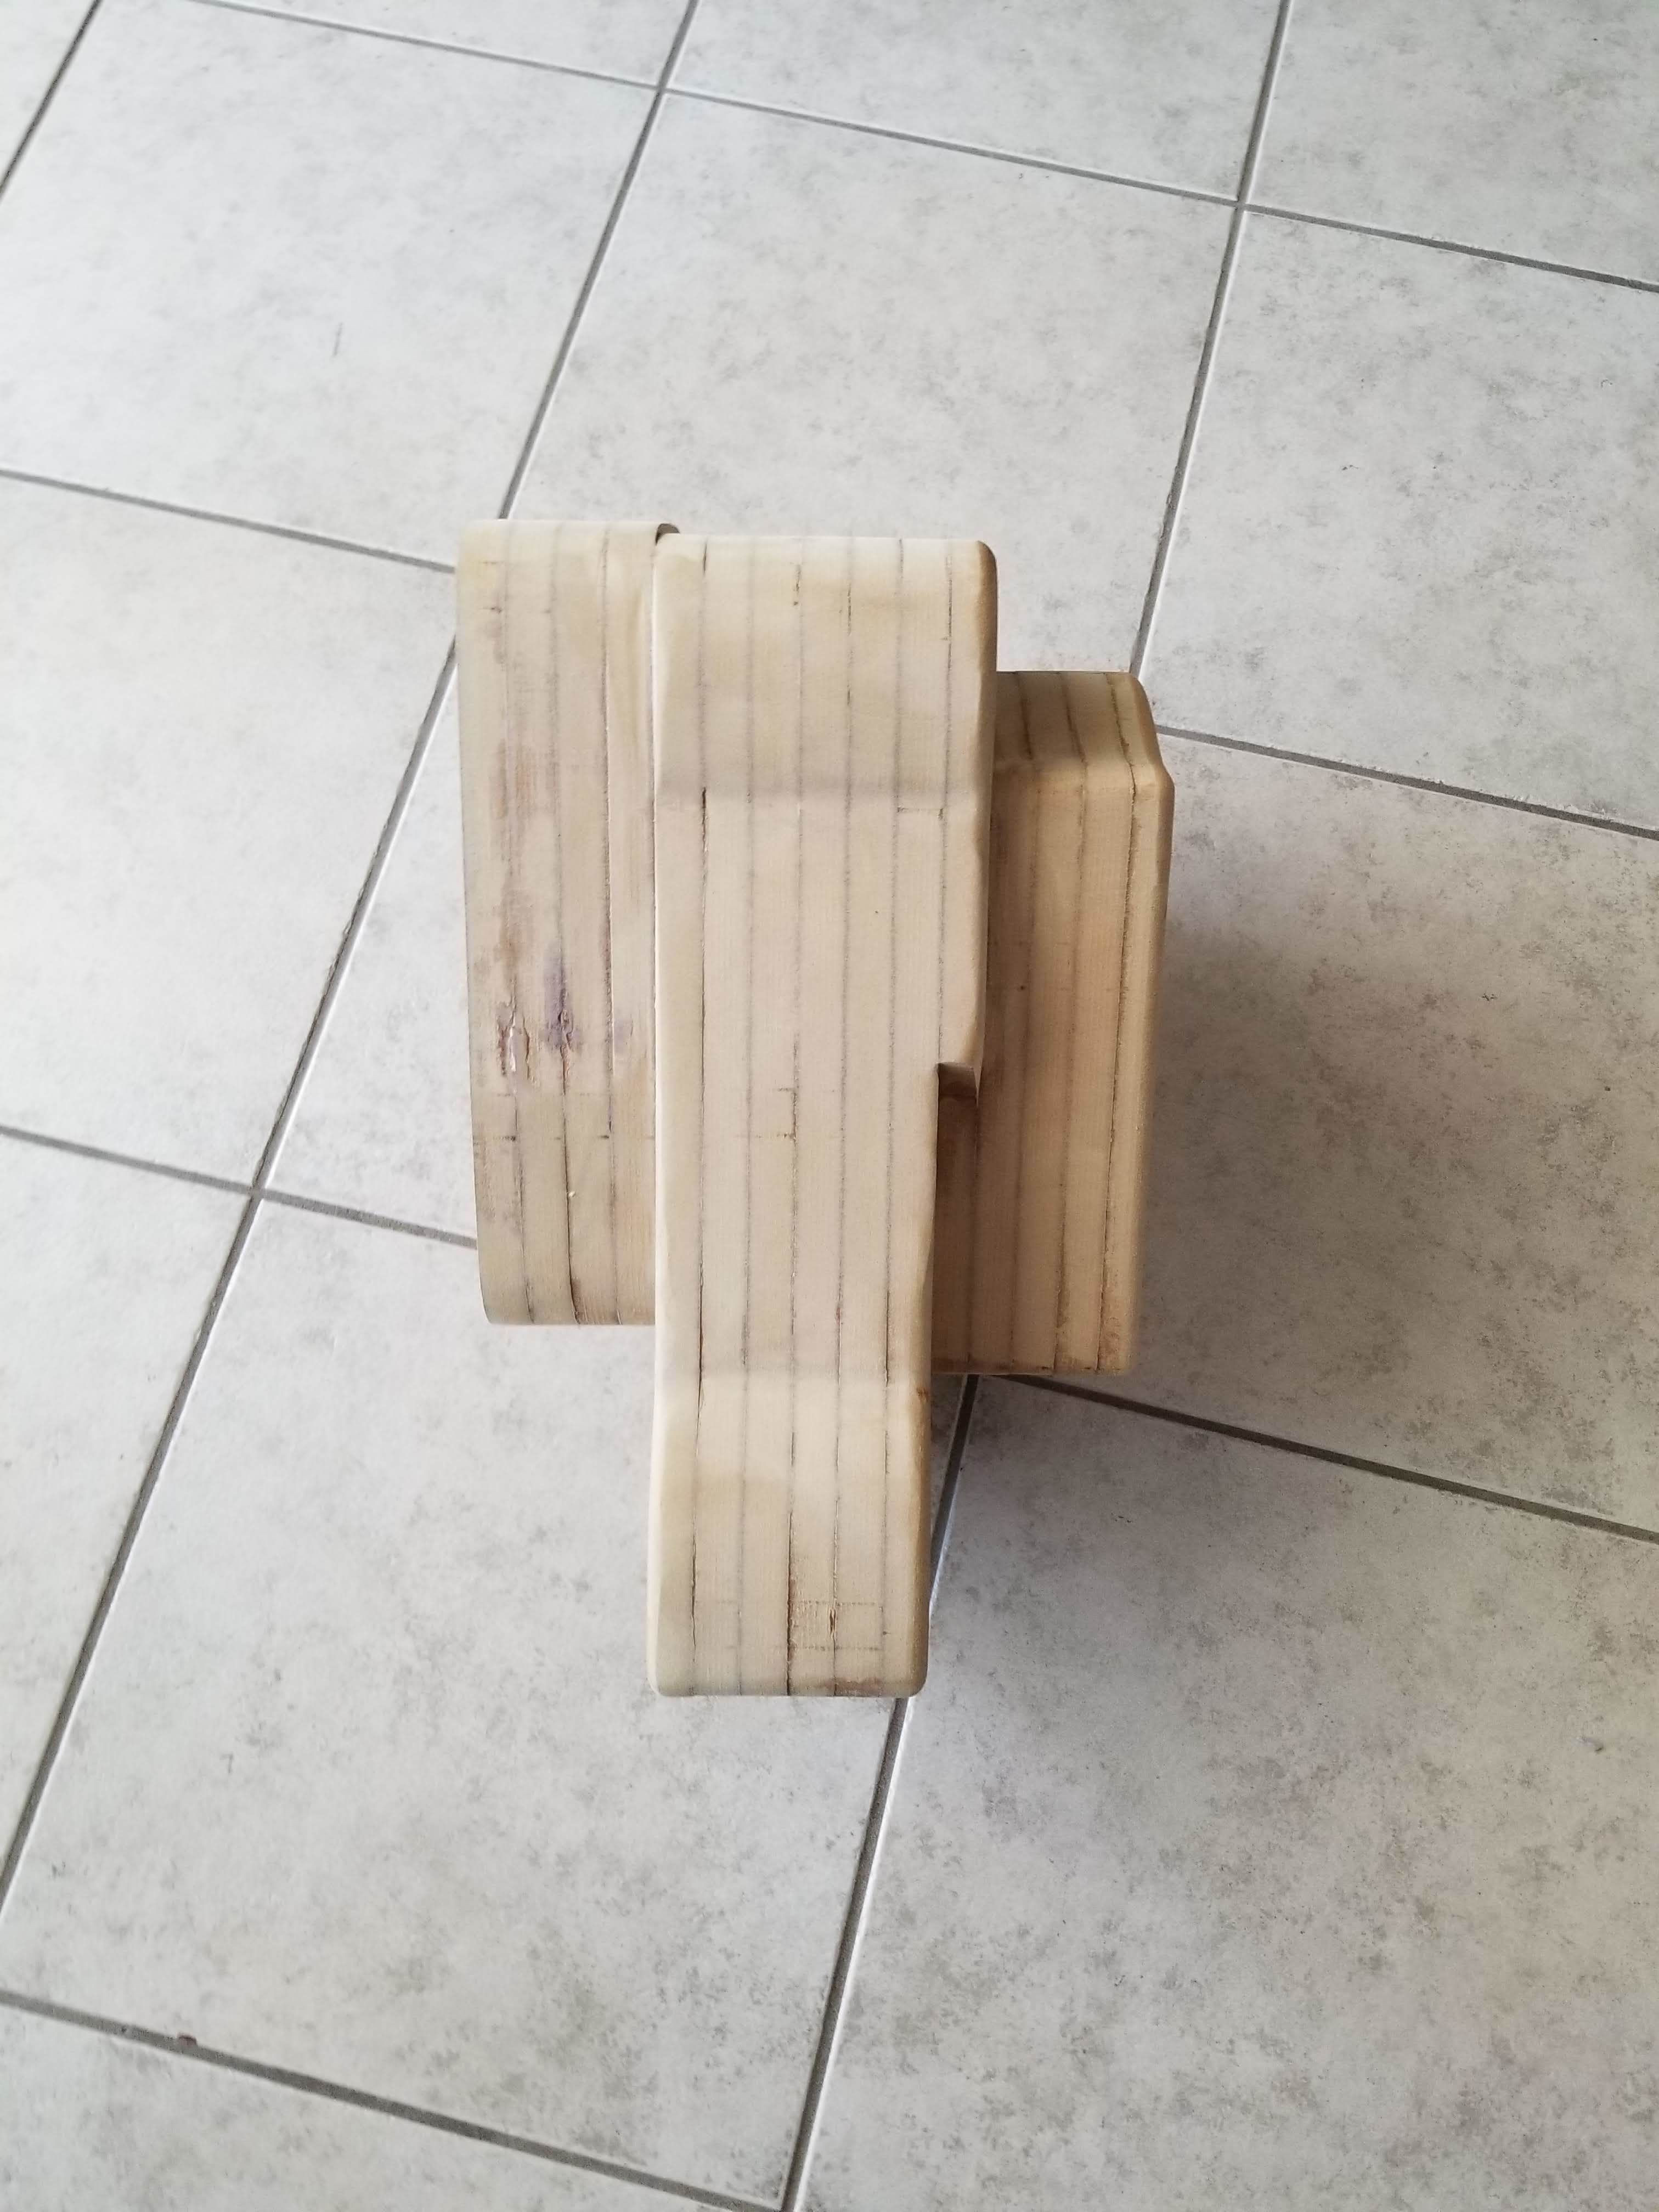
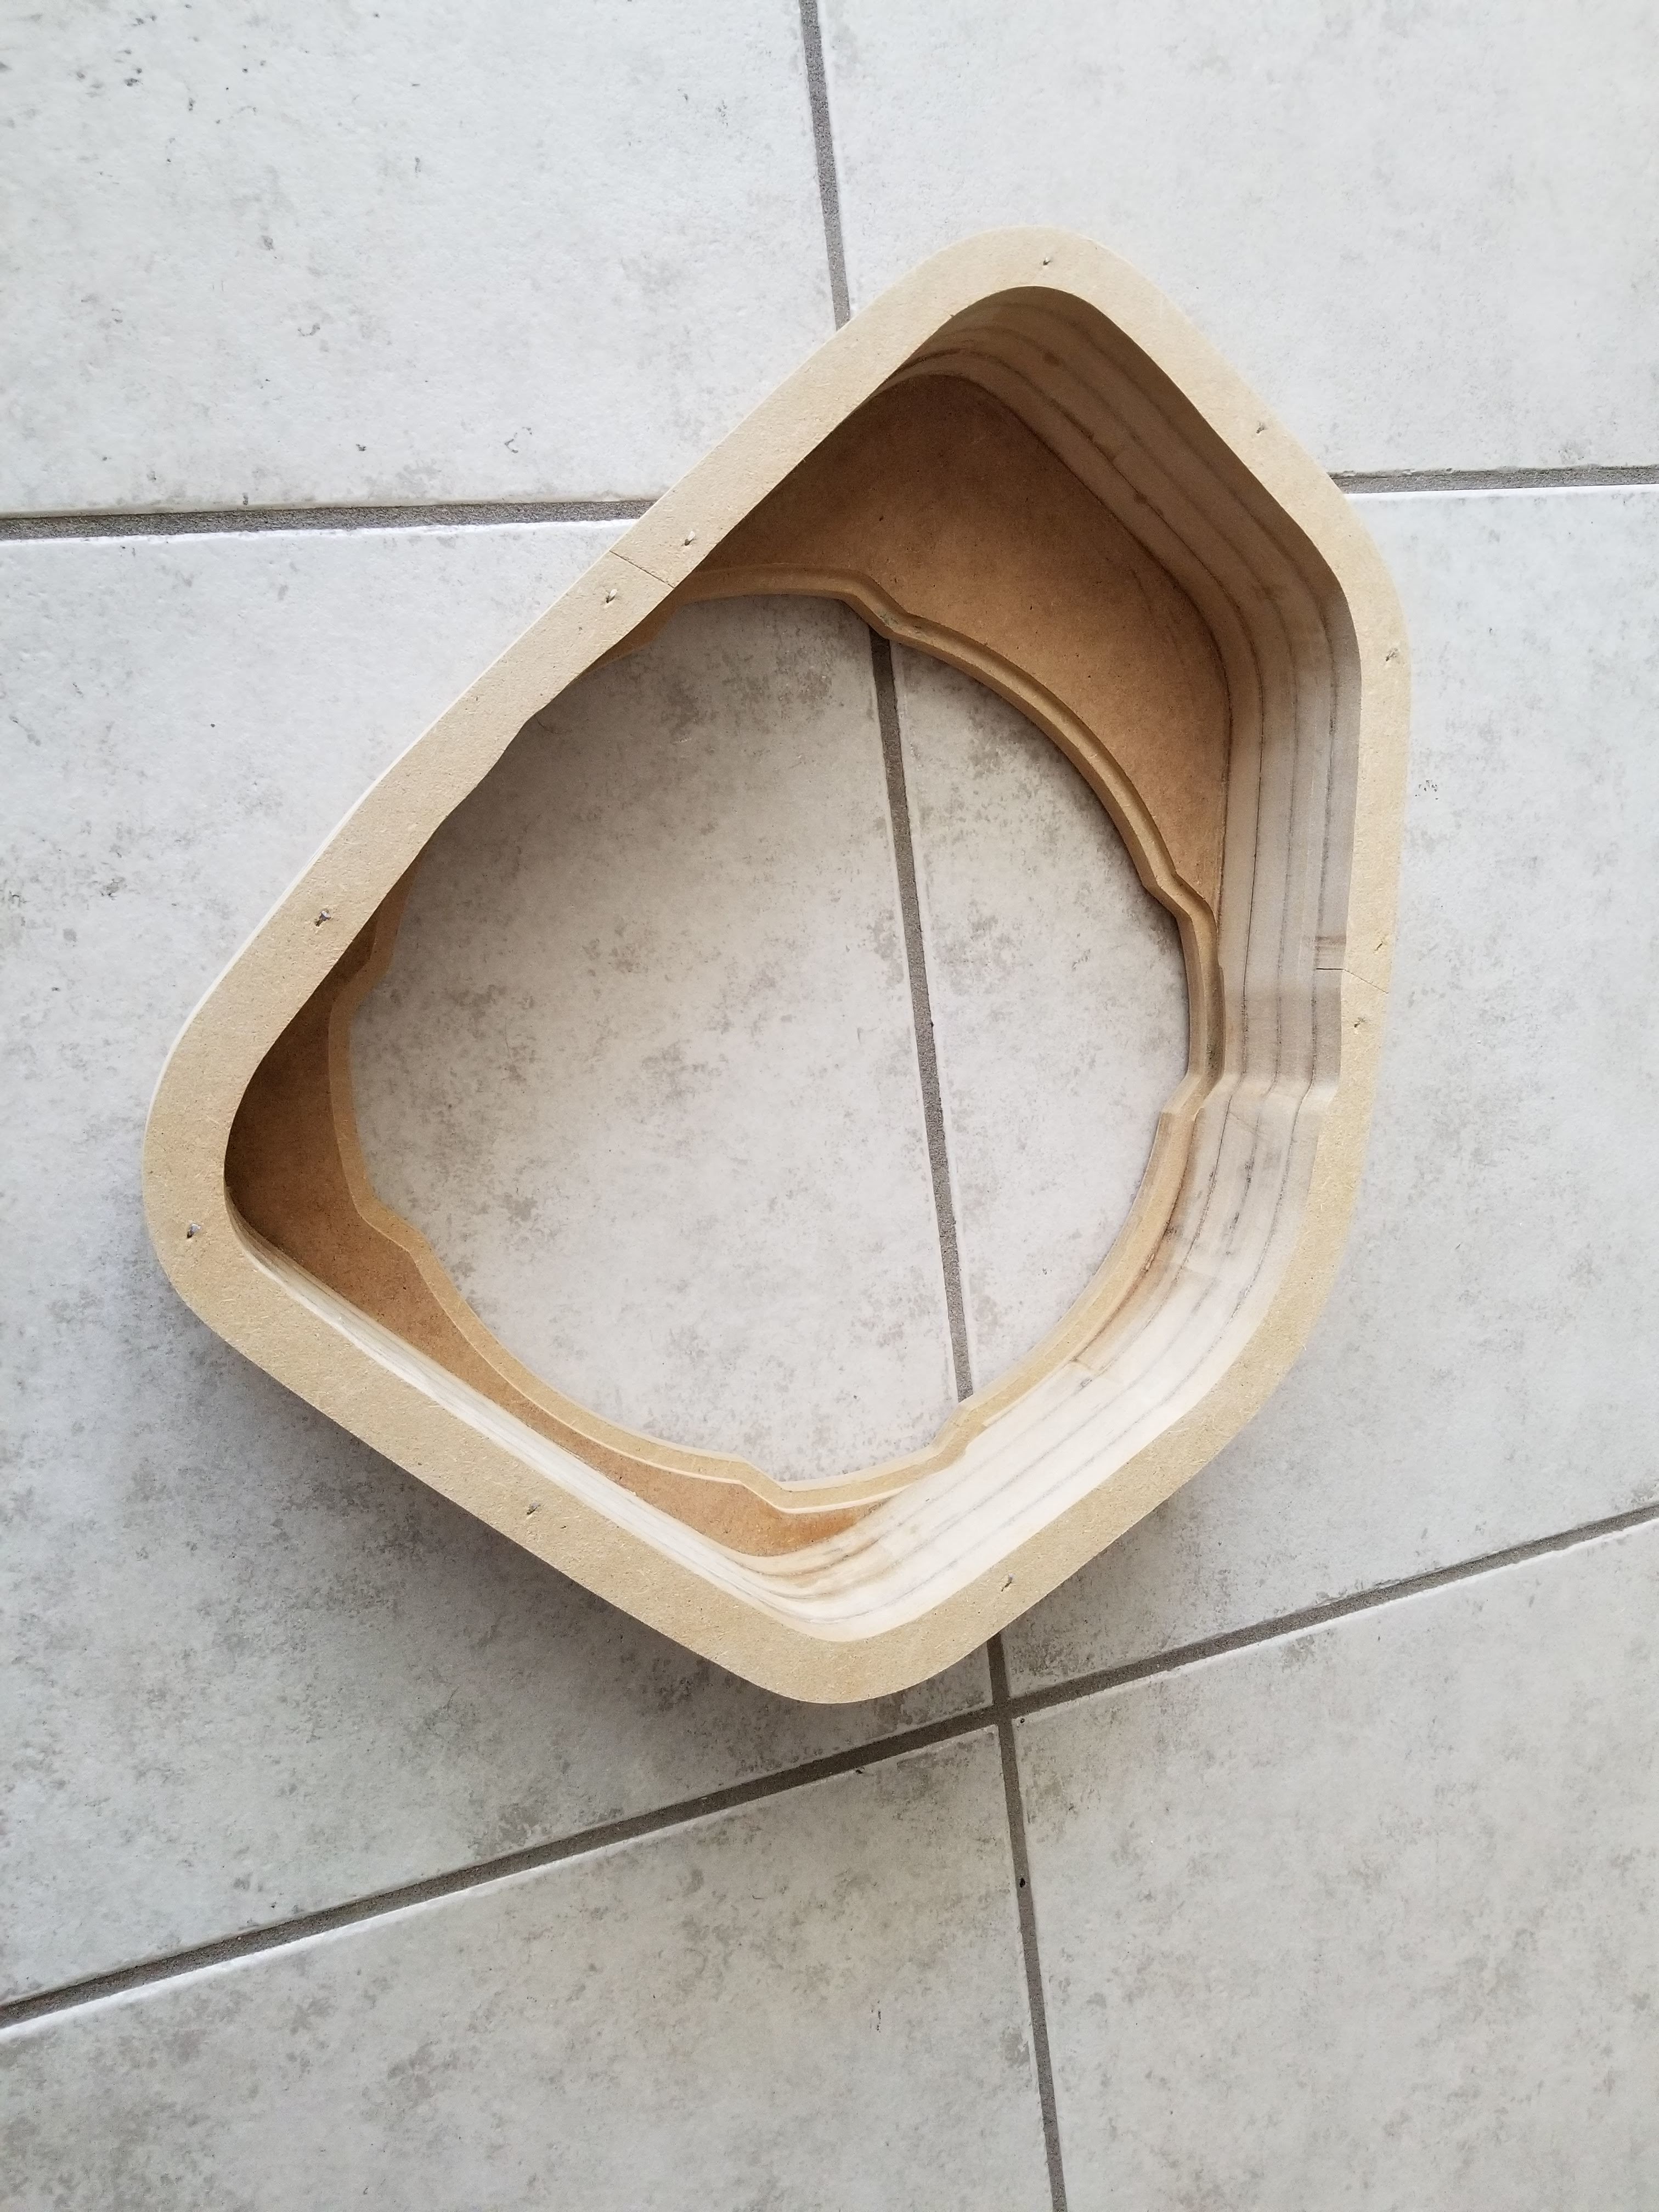
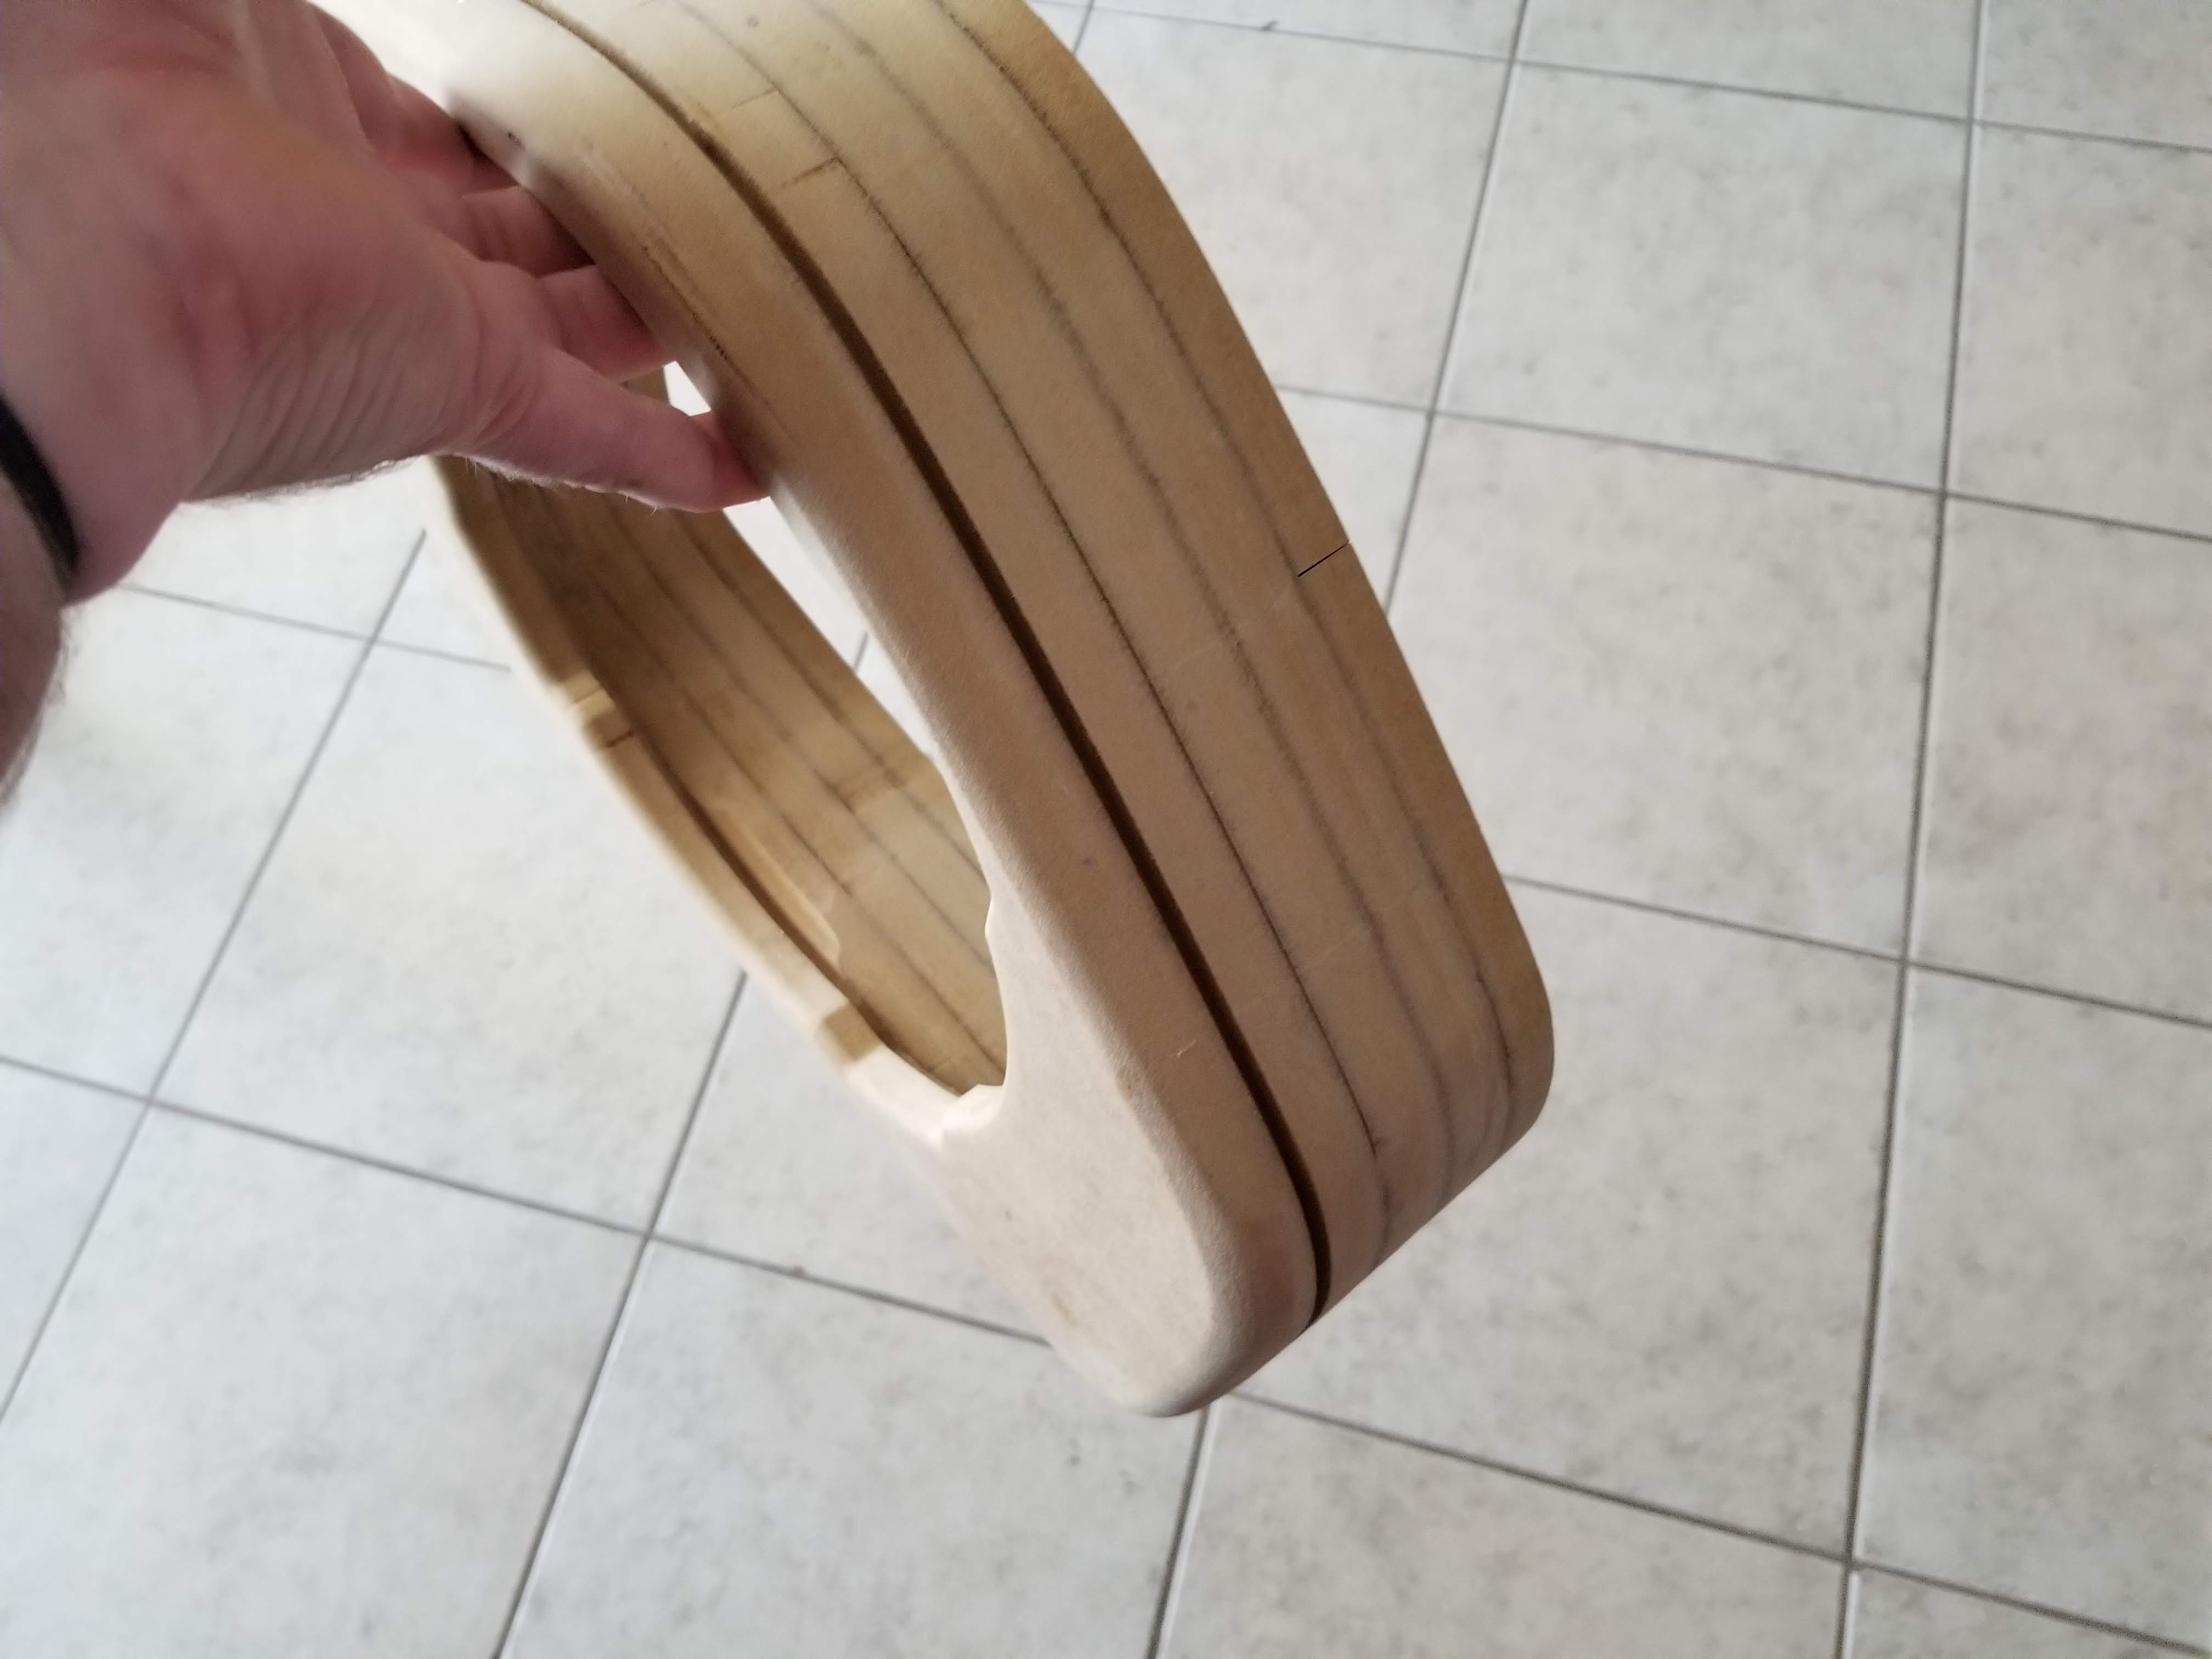
Enter the stacked subwoofer enclosure. Each layer was CNC cut and stacked to create a custom shape that fits into the original stock subwoofer location. Some additional sanding and routing was done to soften the edges and get the desired shape. Based on my calculations, the net internal volume (less driver displacement) comes out to 0.508 cubic feet, which is right on target.
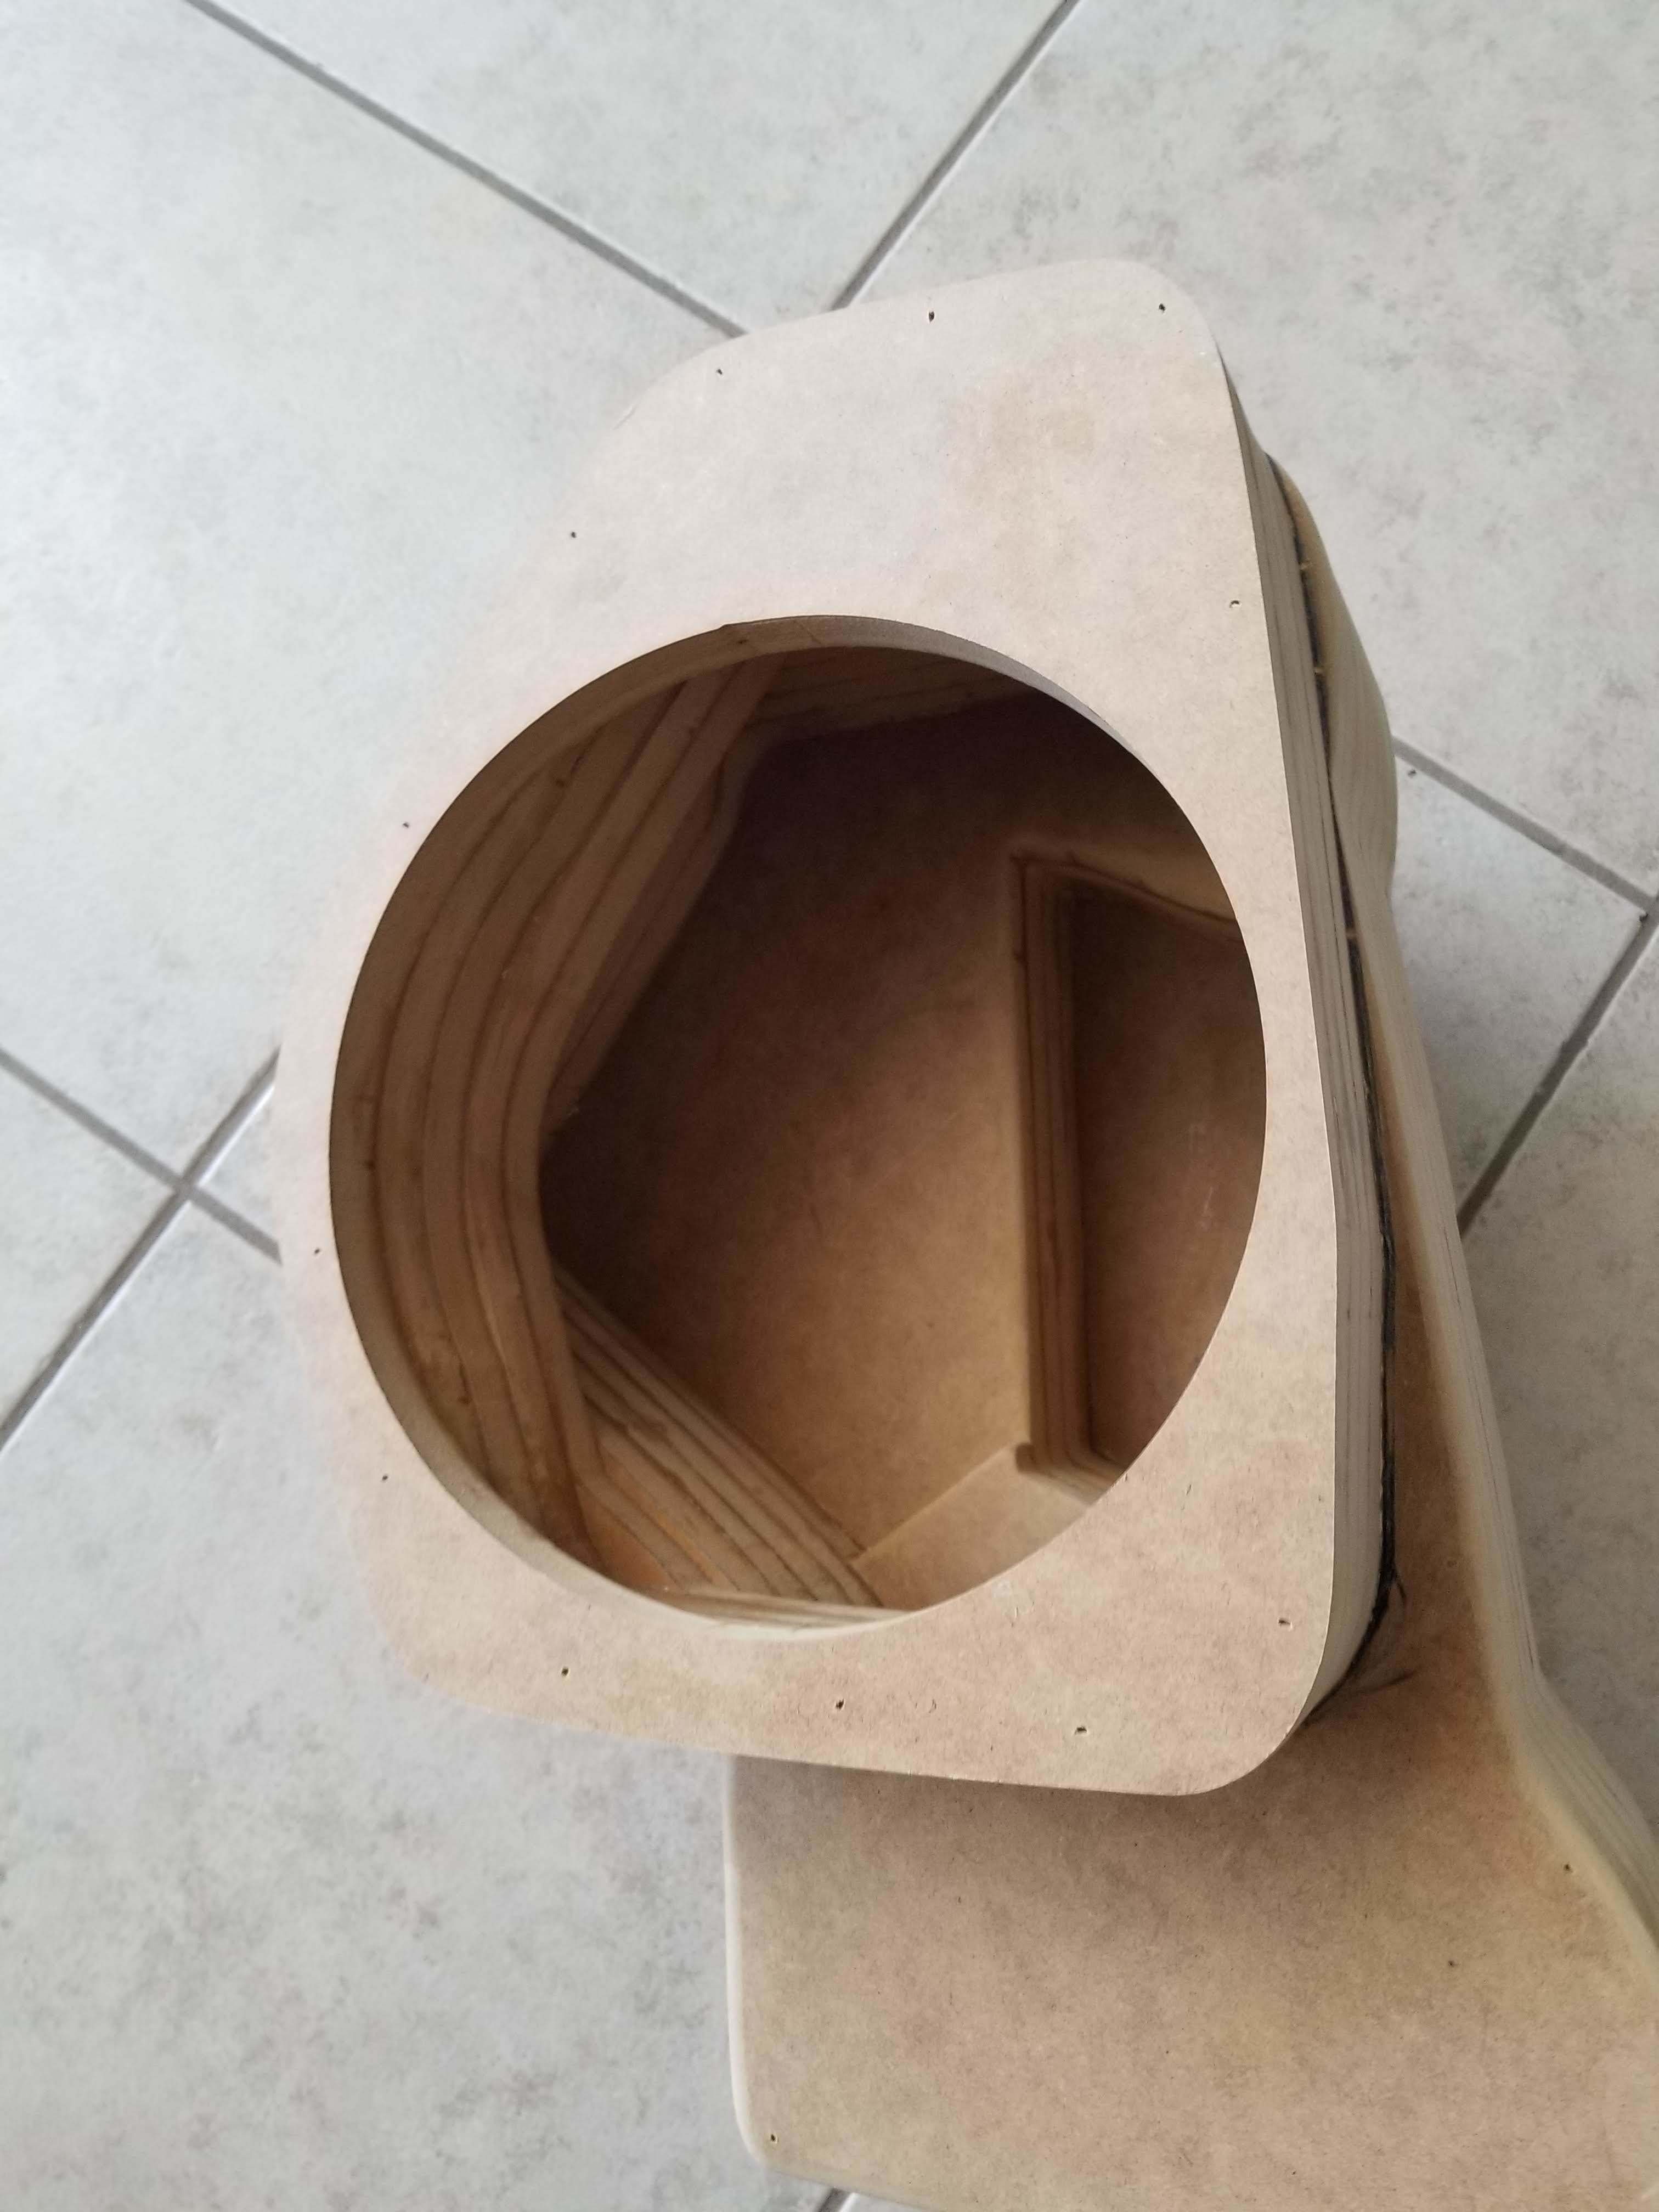
Here’s a test fit. While it doesn’t seem I took any pictures of the next steps, I sealed the inside of the box with spray paint. Also, I sealed the outside of the box that would be behind the moulding with a spray on truck bed liner for added protection.
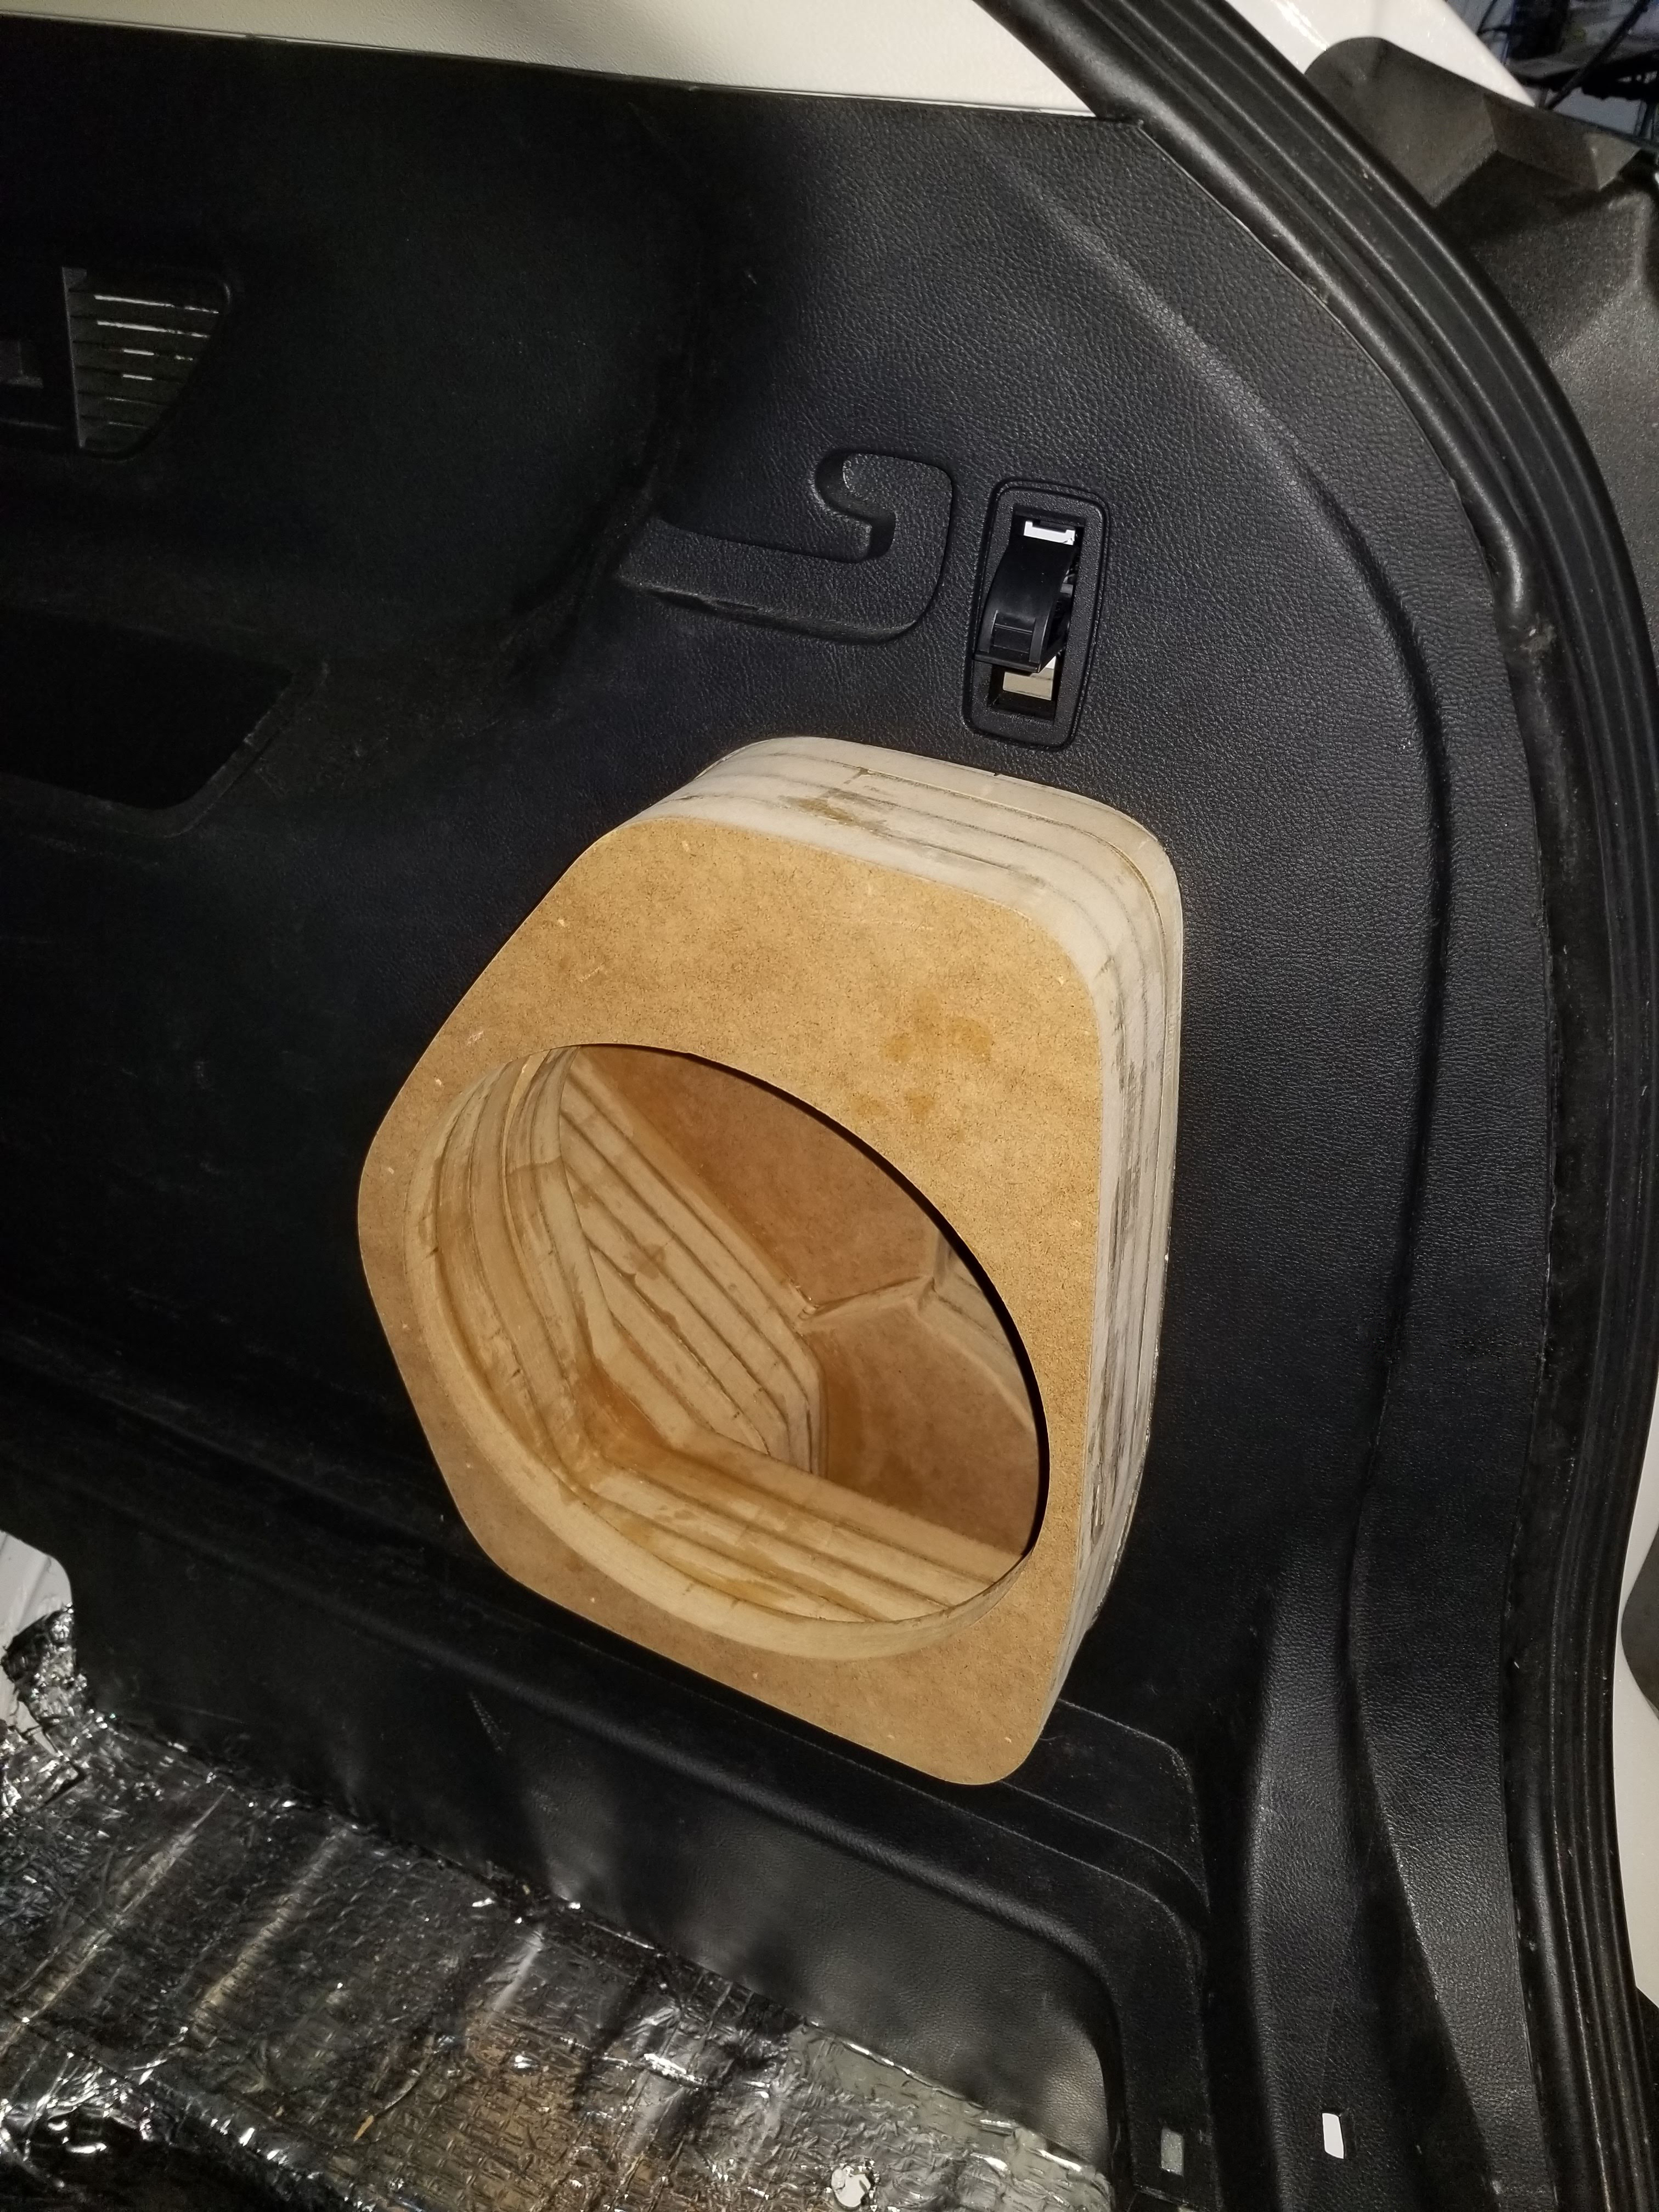
Then I created a beauty panel that would slide on as a cap over the protruding portion of the box. The back edge would later need to be sanded to fit the shape of the moulding. I also made some grooves around the top edge and around the back of the speaker hole so it would be wrapped with carpet and vinyl for a finished look.

And here it is! I have a special grille coming for the subwoofer that will slip on for protection, but it hasn’t arrived yet.

Thanks for looking! I hope you enjoyed this new project. And in case you’re wondering, it sounds great!
10 Likes
Nice.
I had a JL 12w3 in the trunk of a Dodge Stratus. The setup currently lives in the back of the BIL’s FJ. I sometimes wonder how hard it’d be to fit one under the rear seat of my RAM. One day I’ll probably give it a go.
I used the stretched fabric/fleece method of making a fiberglass enclosure for the sub in the stratus. I had it tucked away in one of the rear corners of the trunk.
1 Like
Very cool. I am terrible with fiberglass. If I thought I could have done a good enough job, I could have significantly reduced the protrusion into the compartment. But I’m happy with the results on this one.
The 12W3 is a great sub. I had two back in the early 2000s. Since then I’ve had mainly W6s — the 10s are my favorite, but in my home theater I went with 4 of the 12W6v3 subs for extra rumble. Space-wise this little guy made the most sense for this install and I’m not as interested in shaking other people’s windows these days.
1 Like
Awesome work, just makes me want the 25mm primo released even more so I can get started!
1 Like
I don’t need to rattle others’ windows either… but it’s cool when your eyes vibrate.
1 Like
I’ve got a couple more speaker projects to share. There were more tools than just the CNC involved, but it was still an integral part in creating speaker holes, internal bracing, and so on, so I figured I’d go ahead and post them.
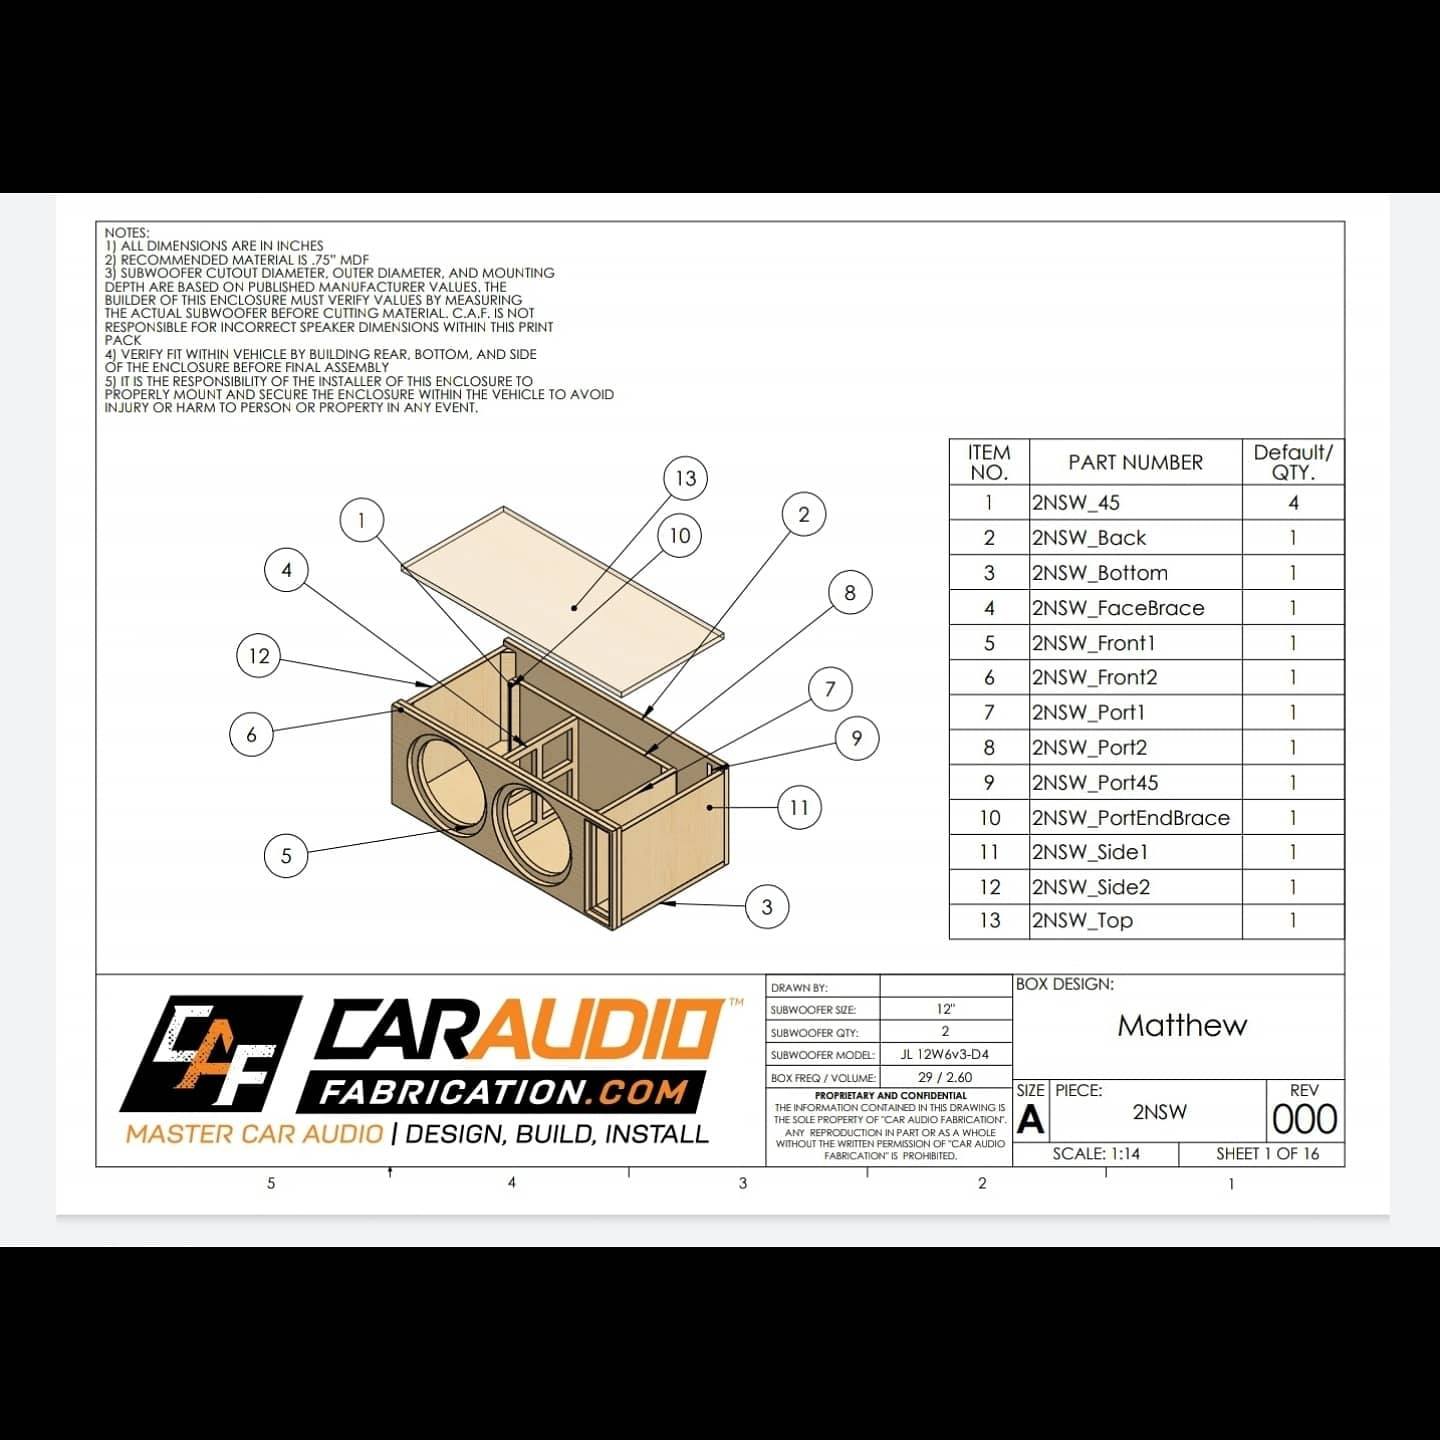
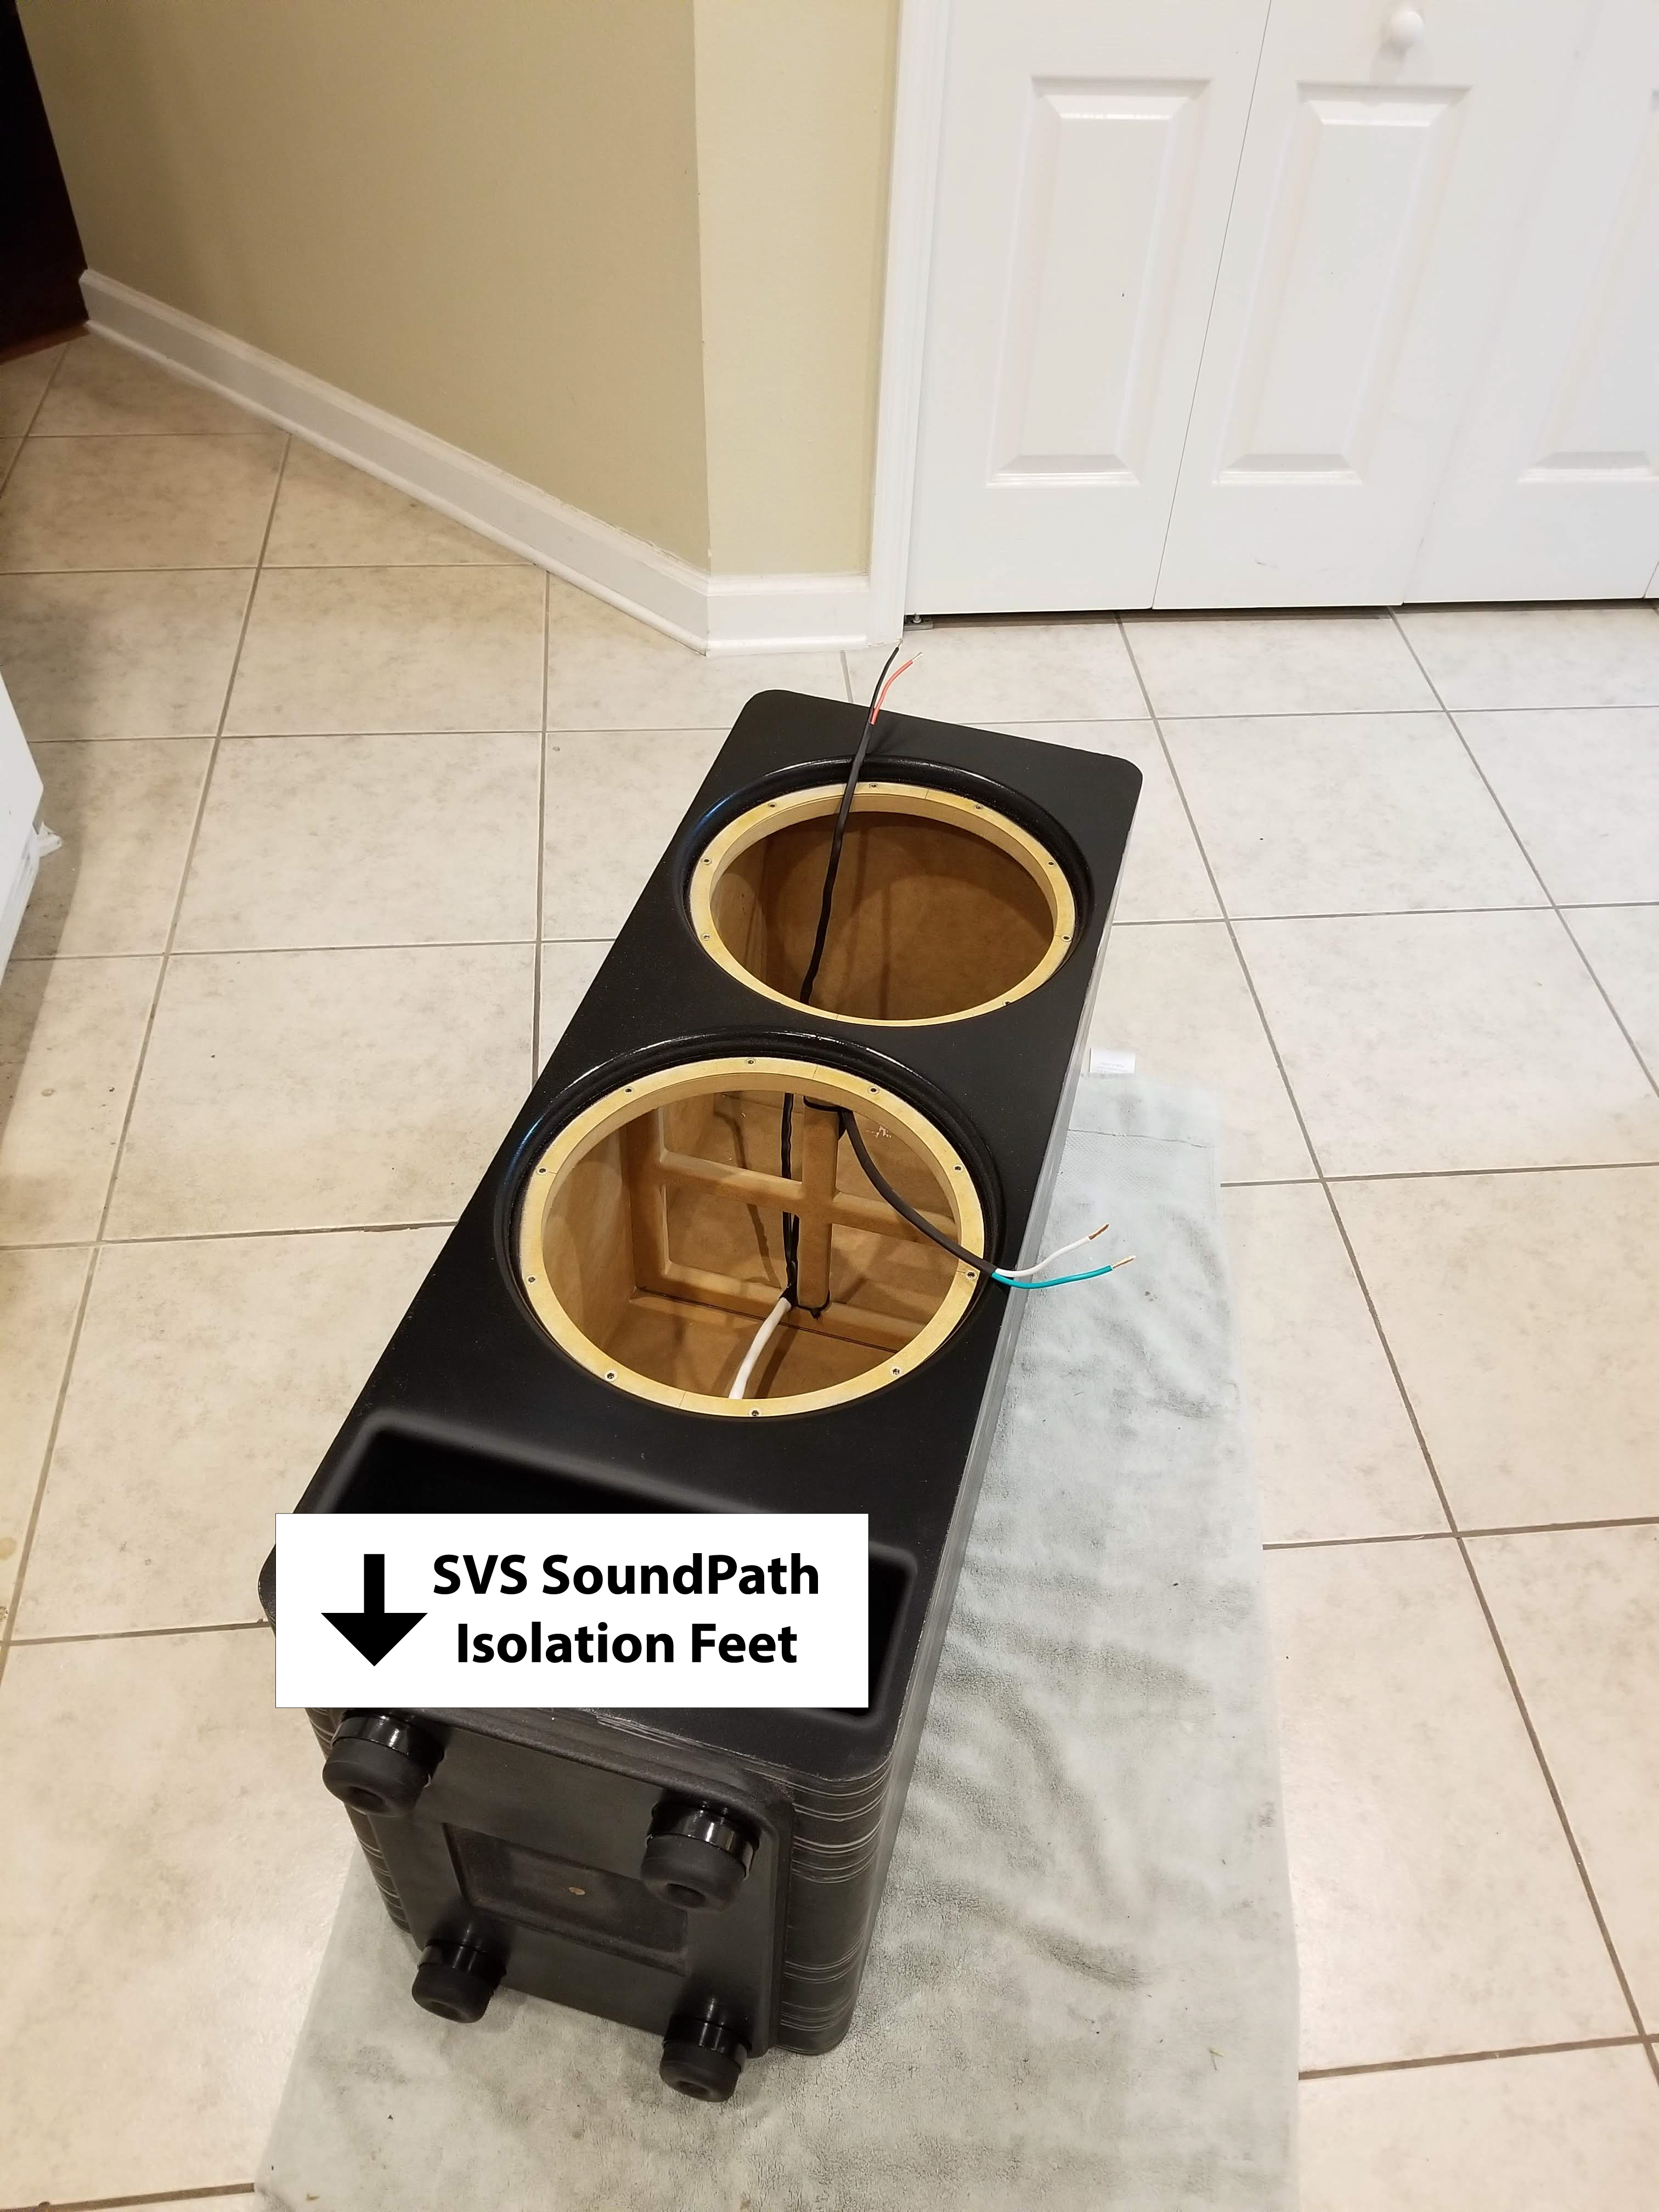
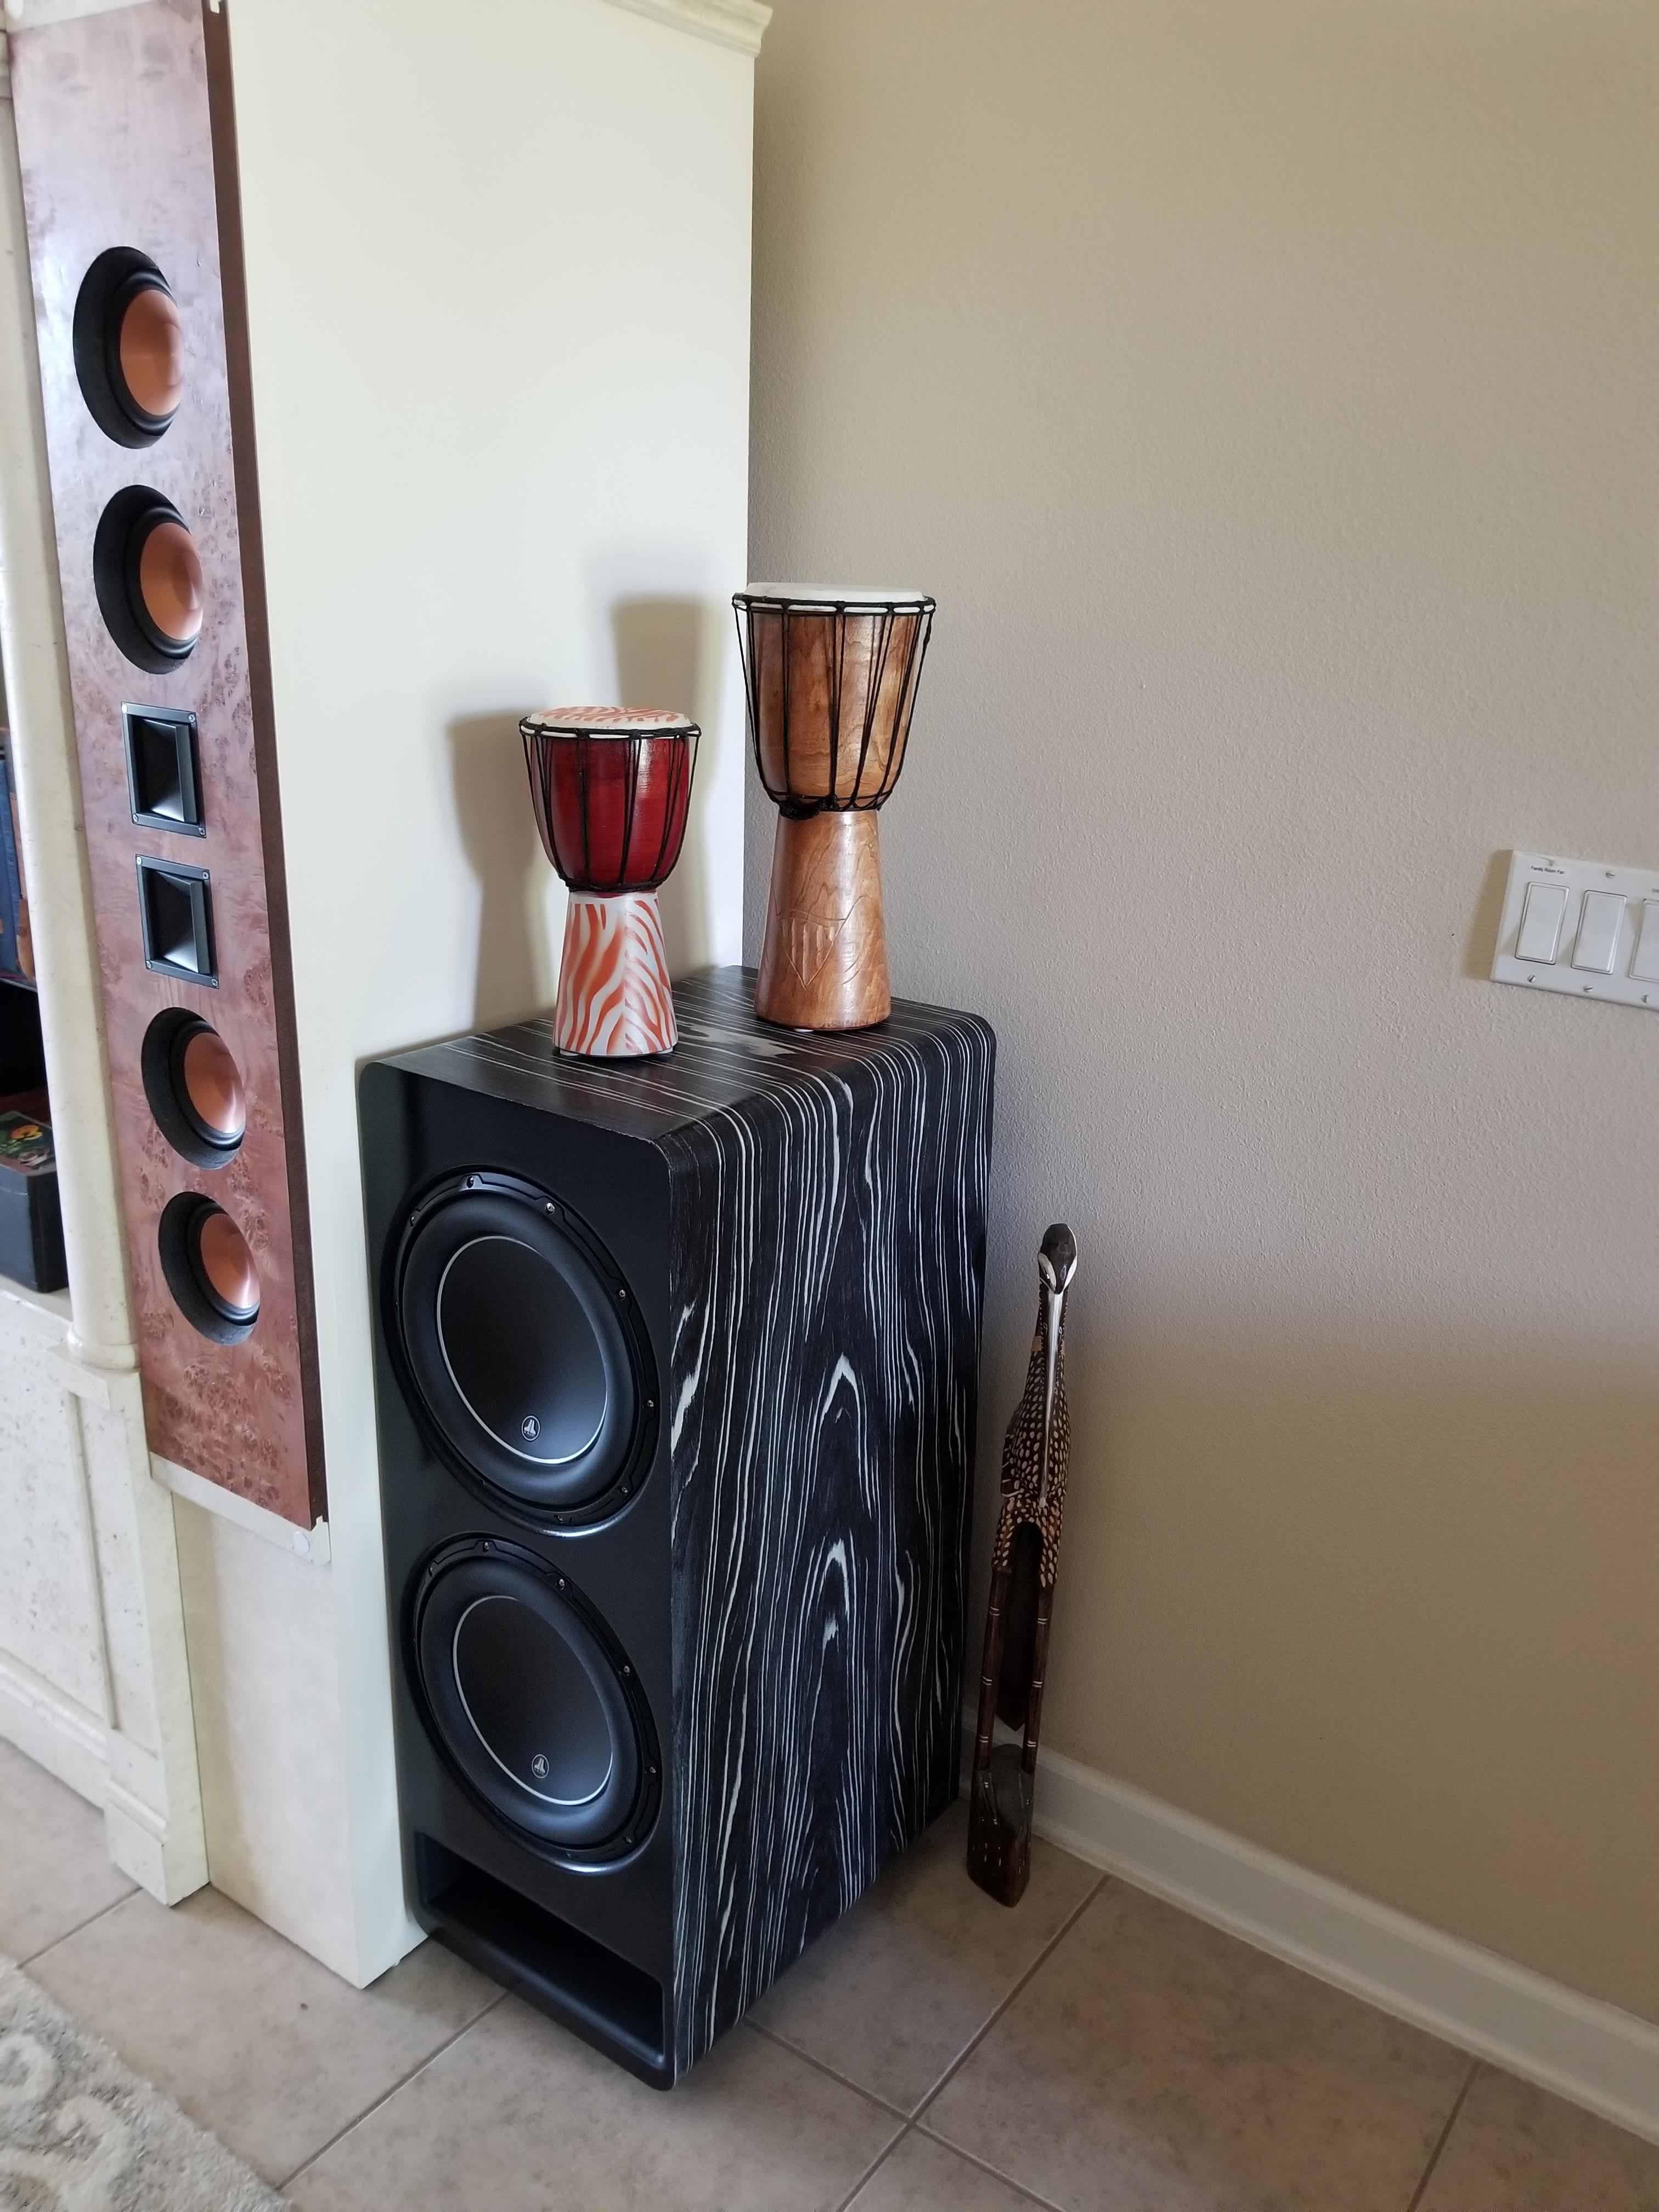
1. New subwoofer enclosures for my home theater
First up, new enclosures for my home theater subwoofers. I’ve built a lot of sealed boxes over the years, but I wanted to switch up to a ported design for some extra low-end extension in the home theater. Big thanks to Mark at CarAudioFabrication.com for designing these in CAD for me to proper specifications and tuning. I built two, but only one is pictured since at the time of the photo I was still waiting for USPS to deliver the other veneer. While I’d love to have a side-by-side photo, they’re way too heavy to move them around for just a photo shoot.

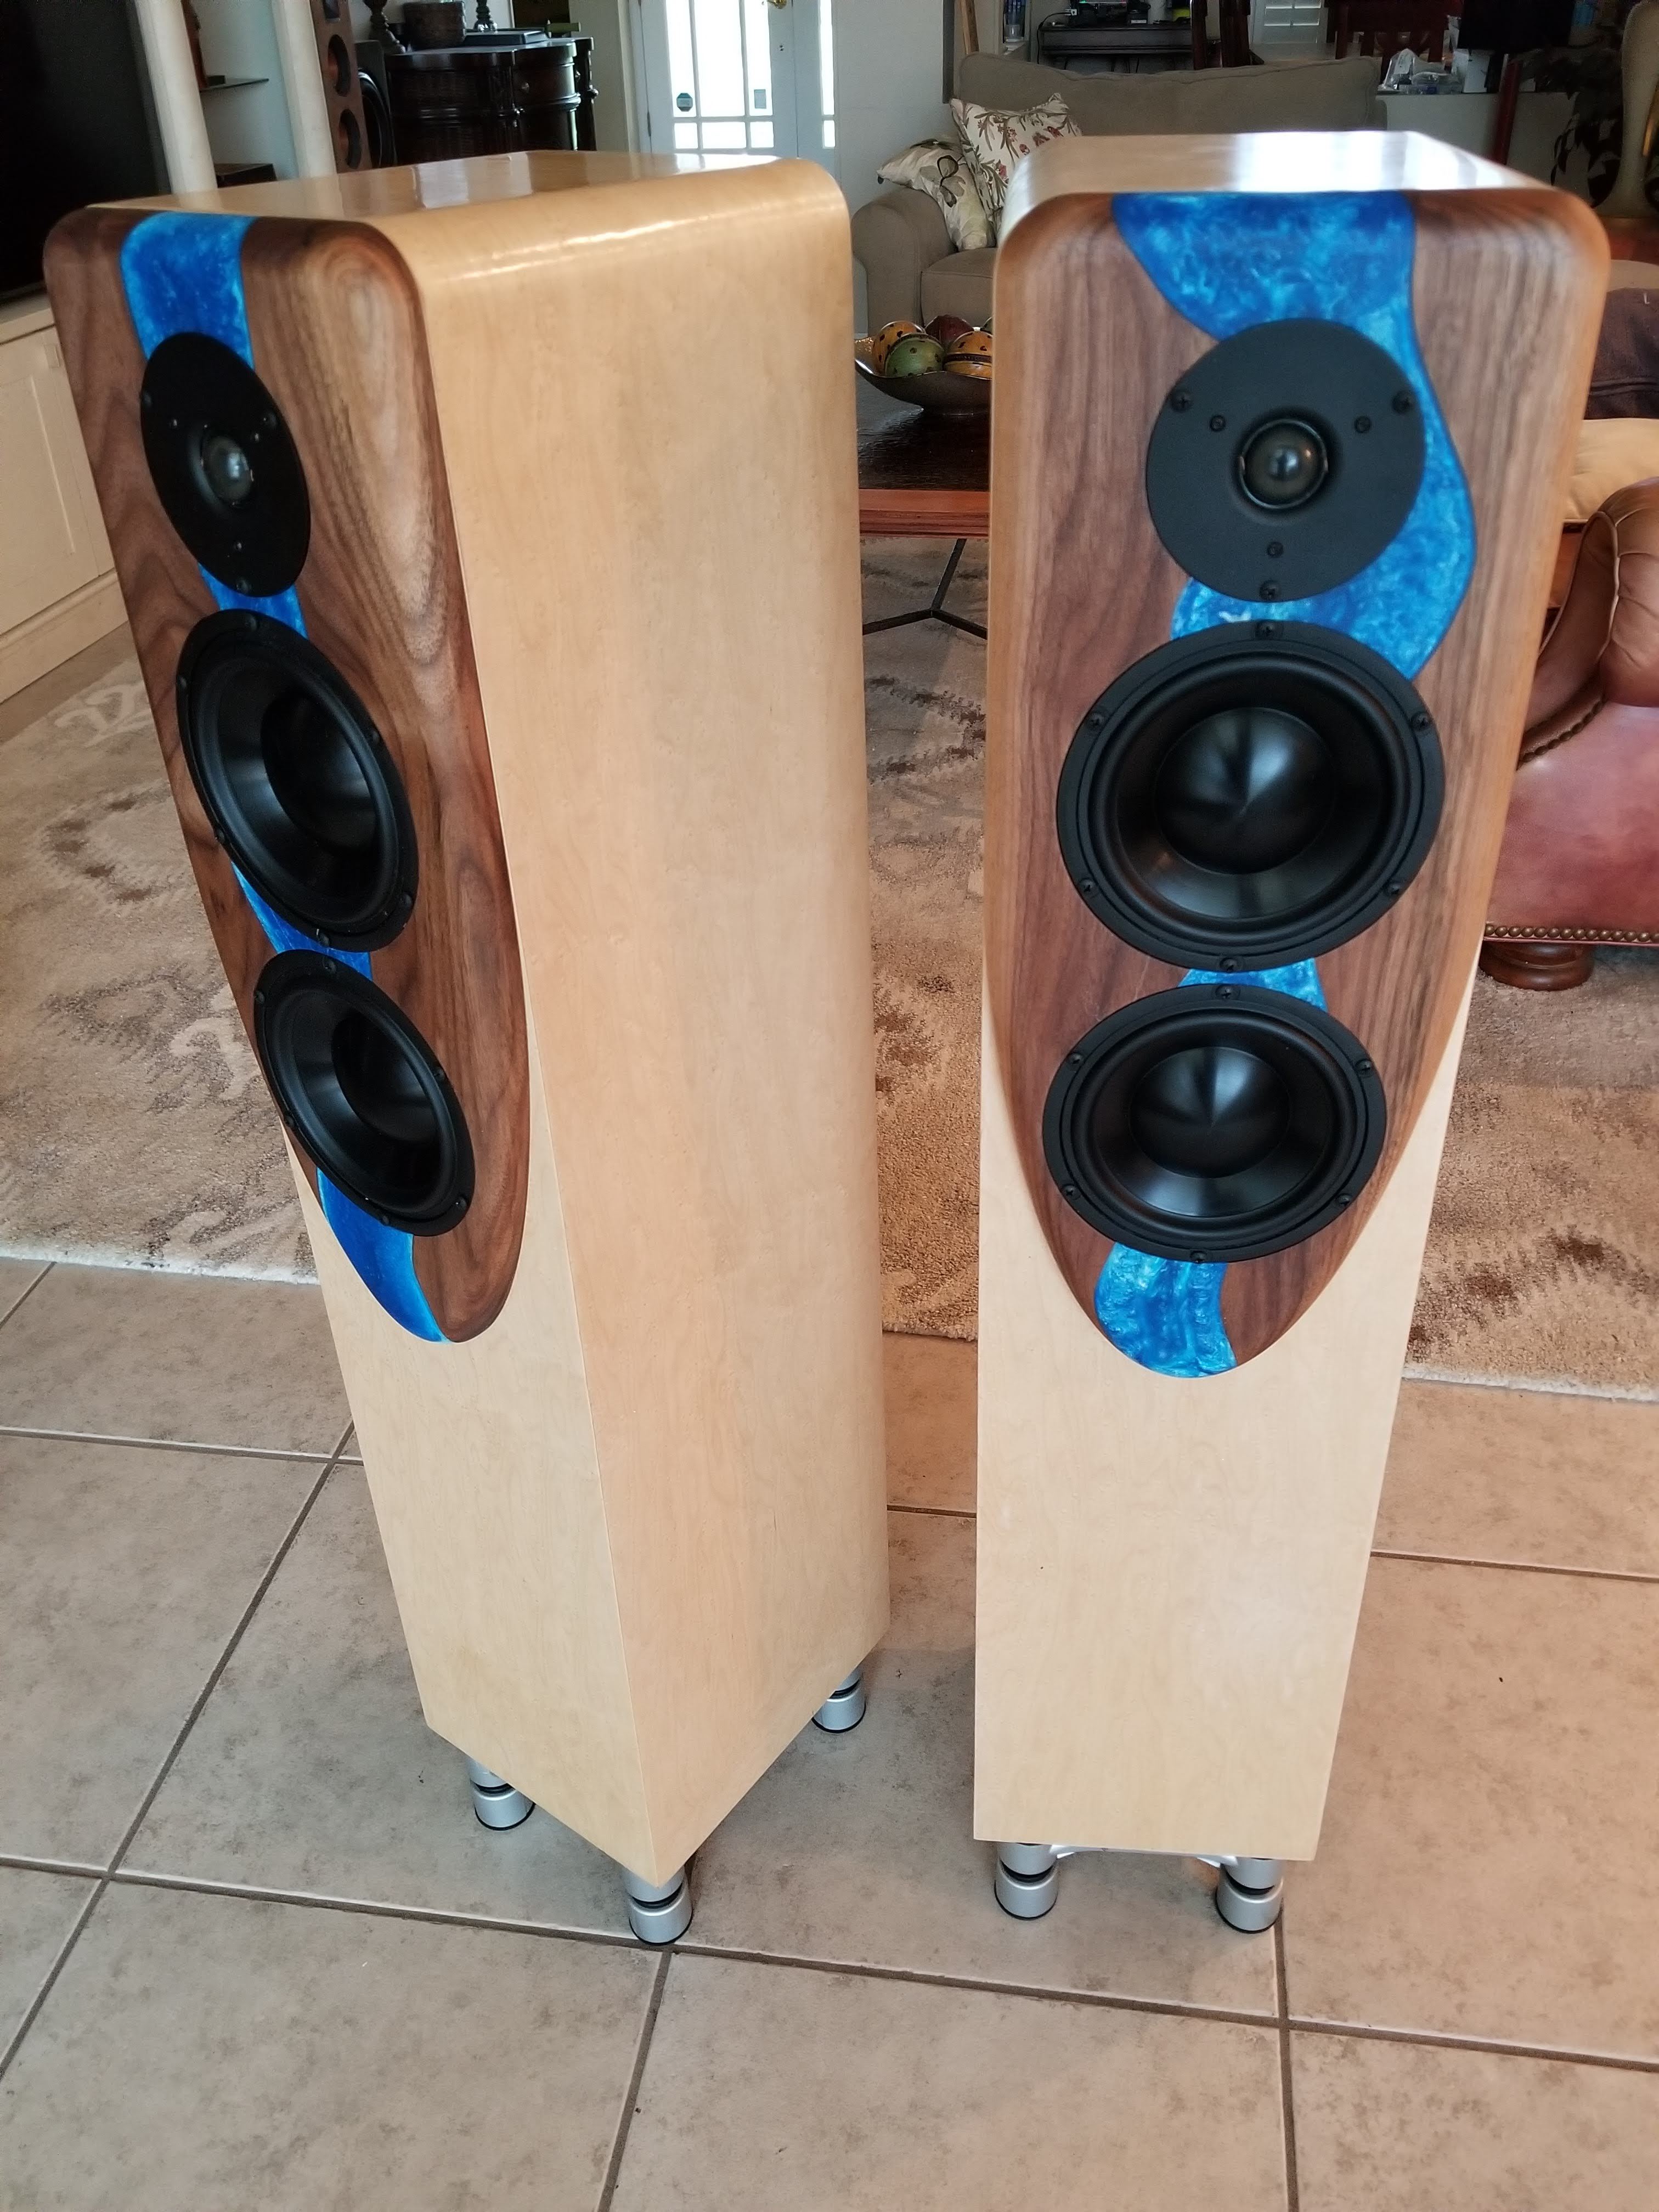
2. Solstice — mass loaded transmission line speakers, designed by Jeff Bagby
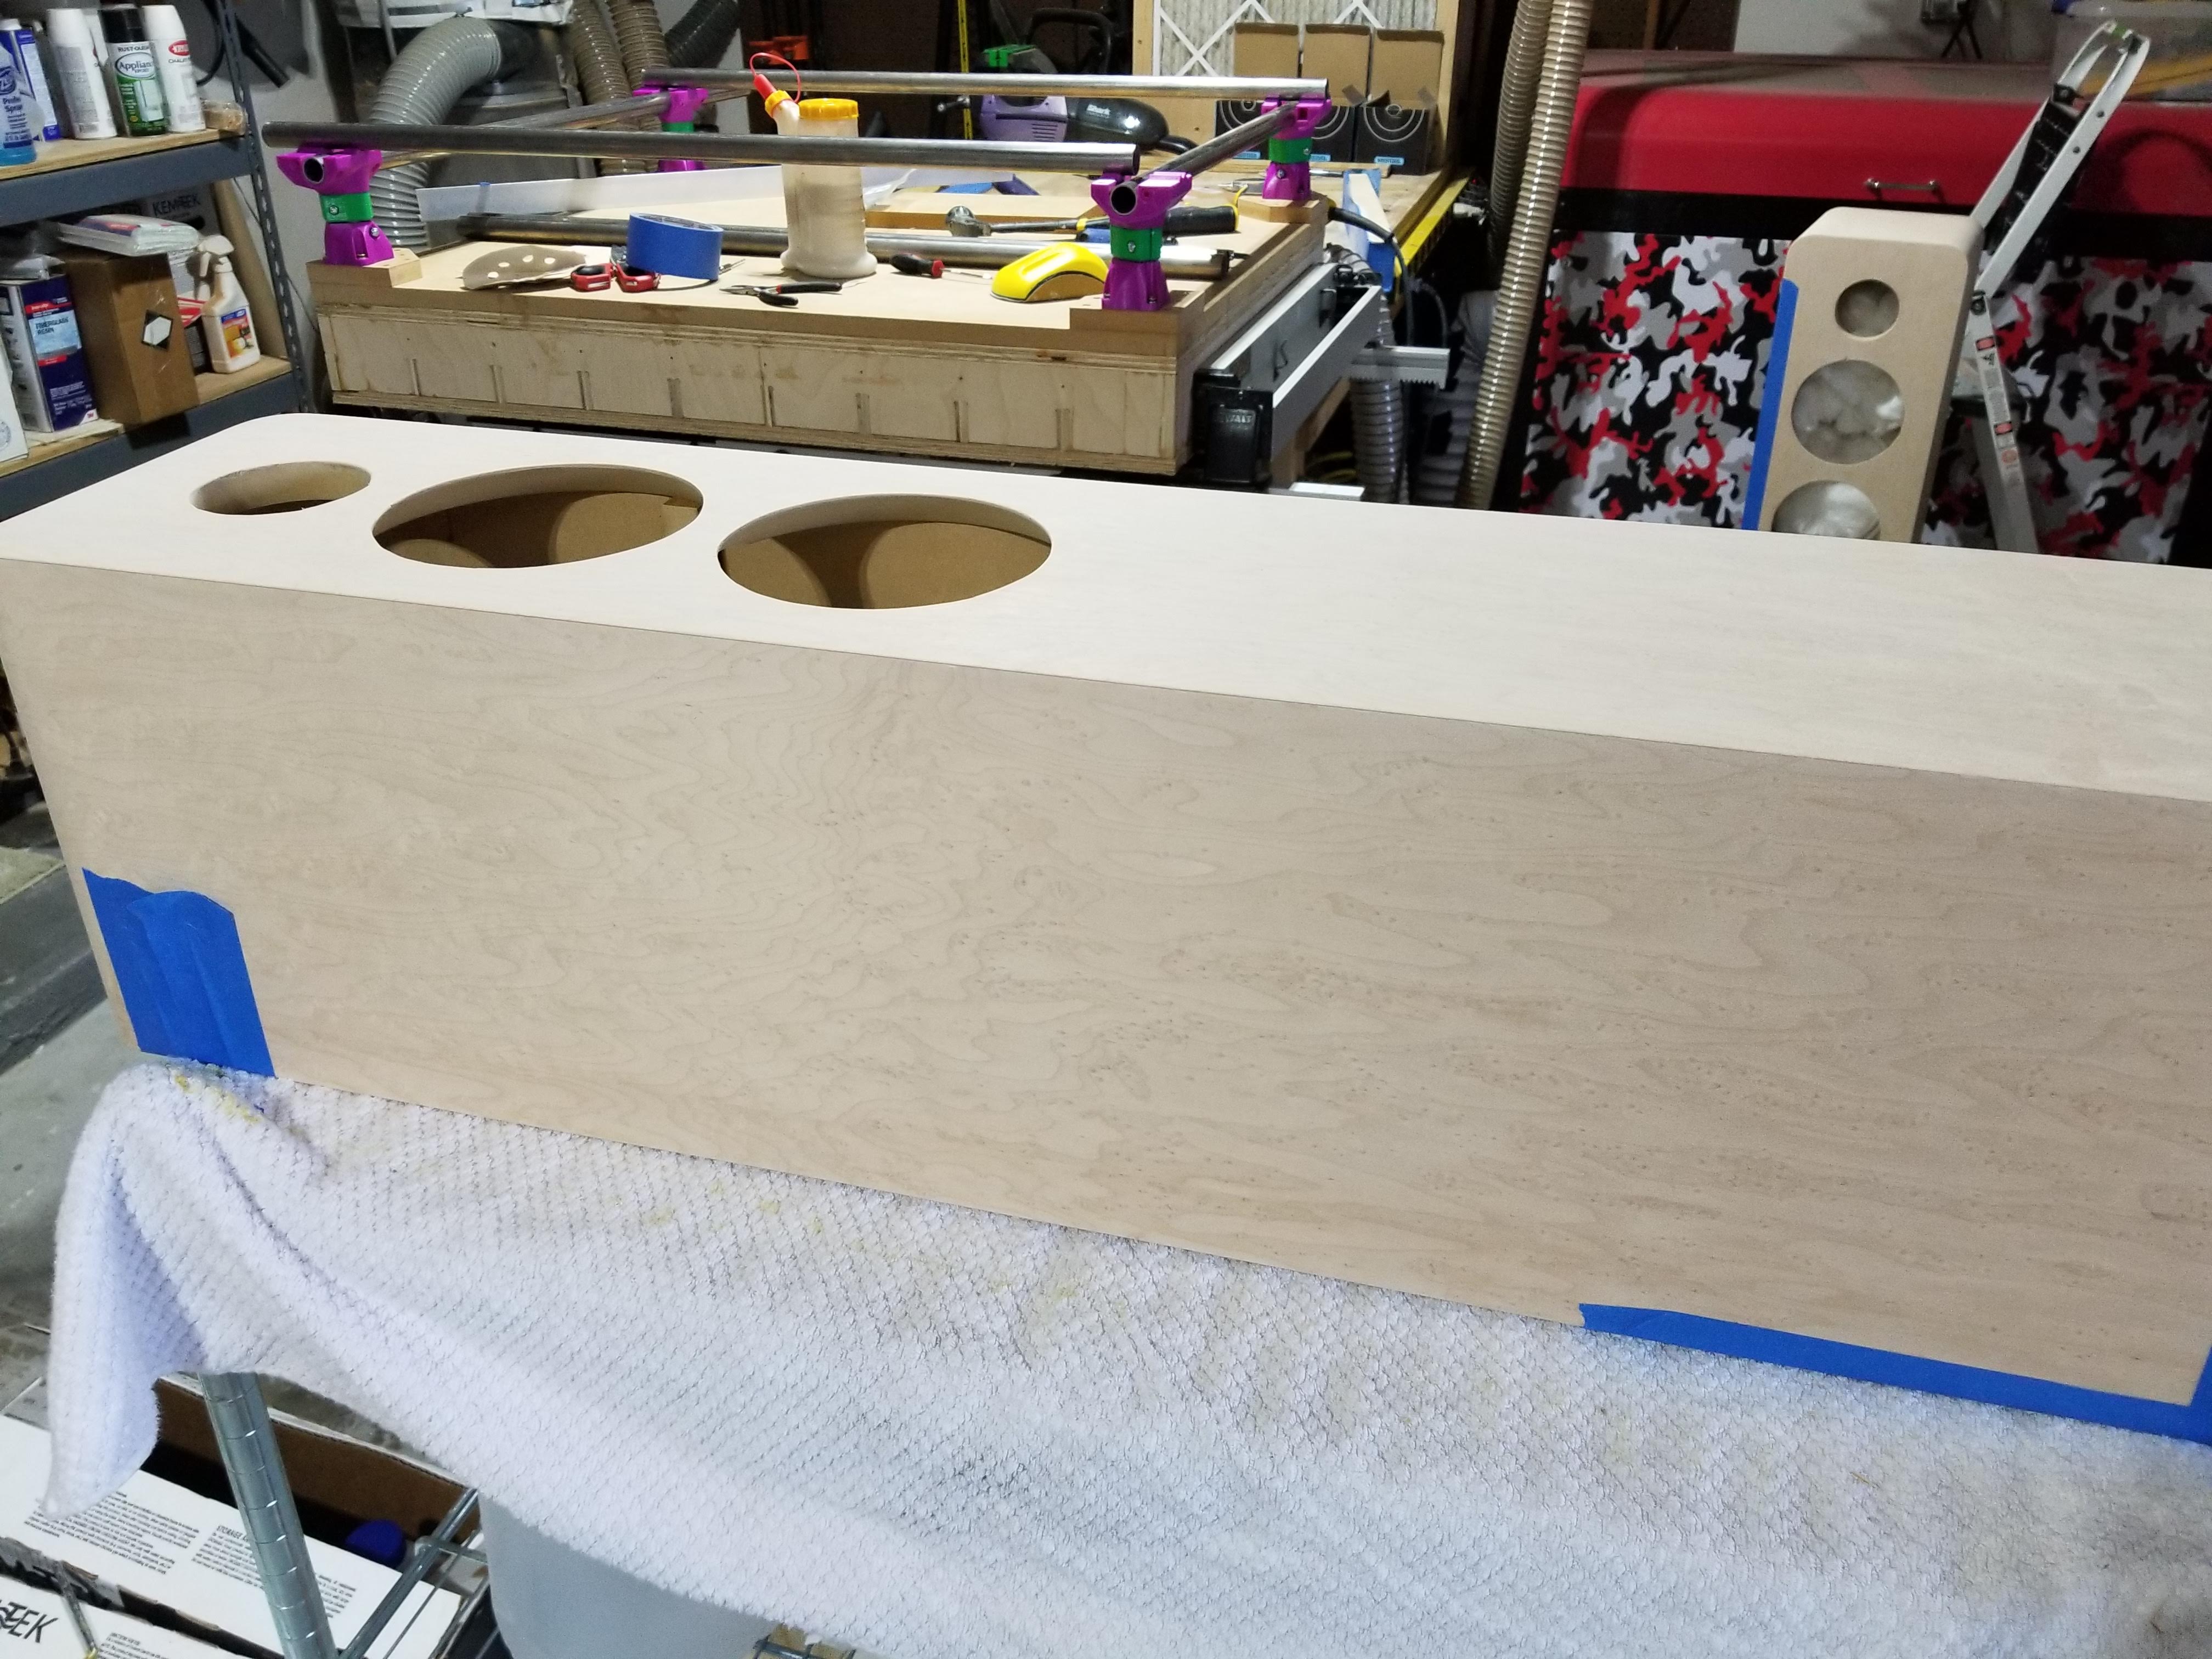
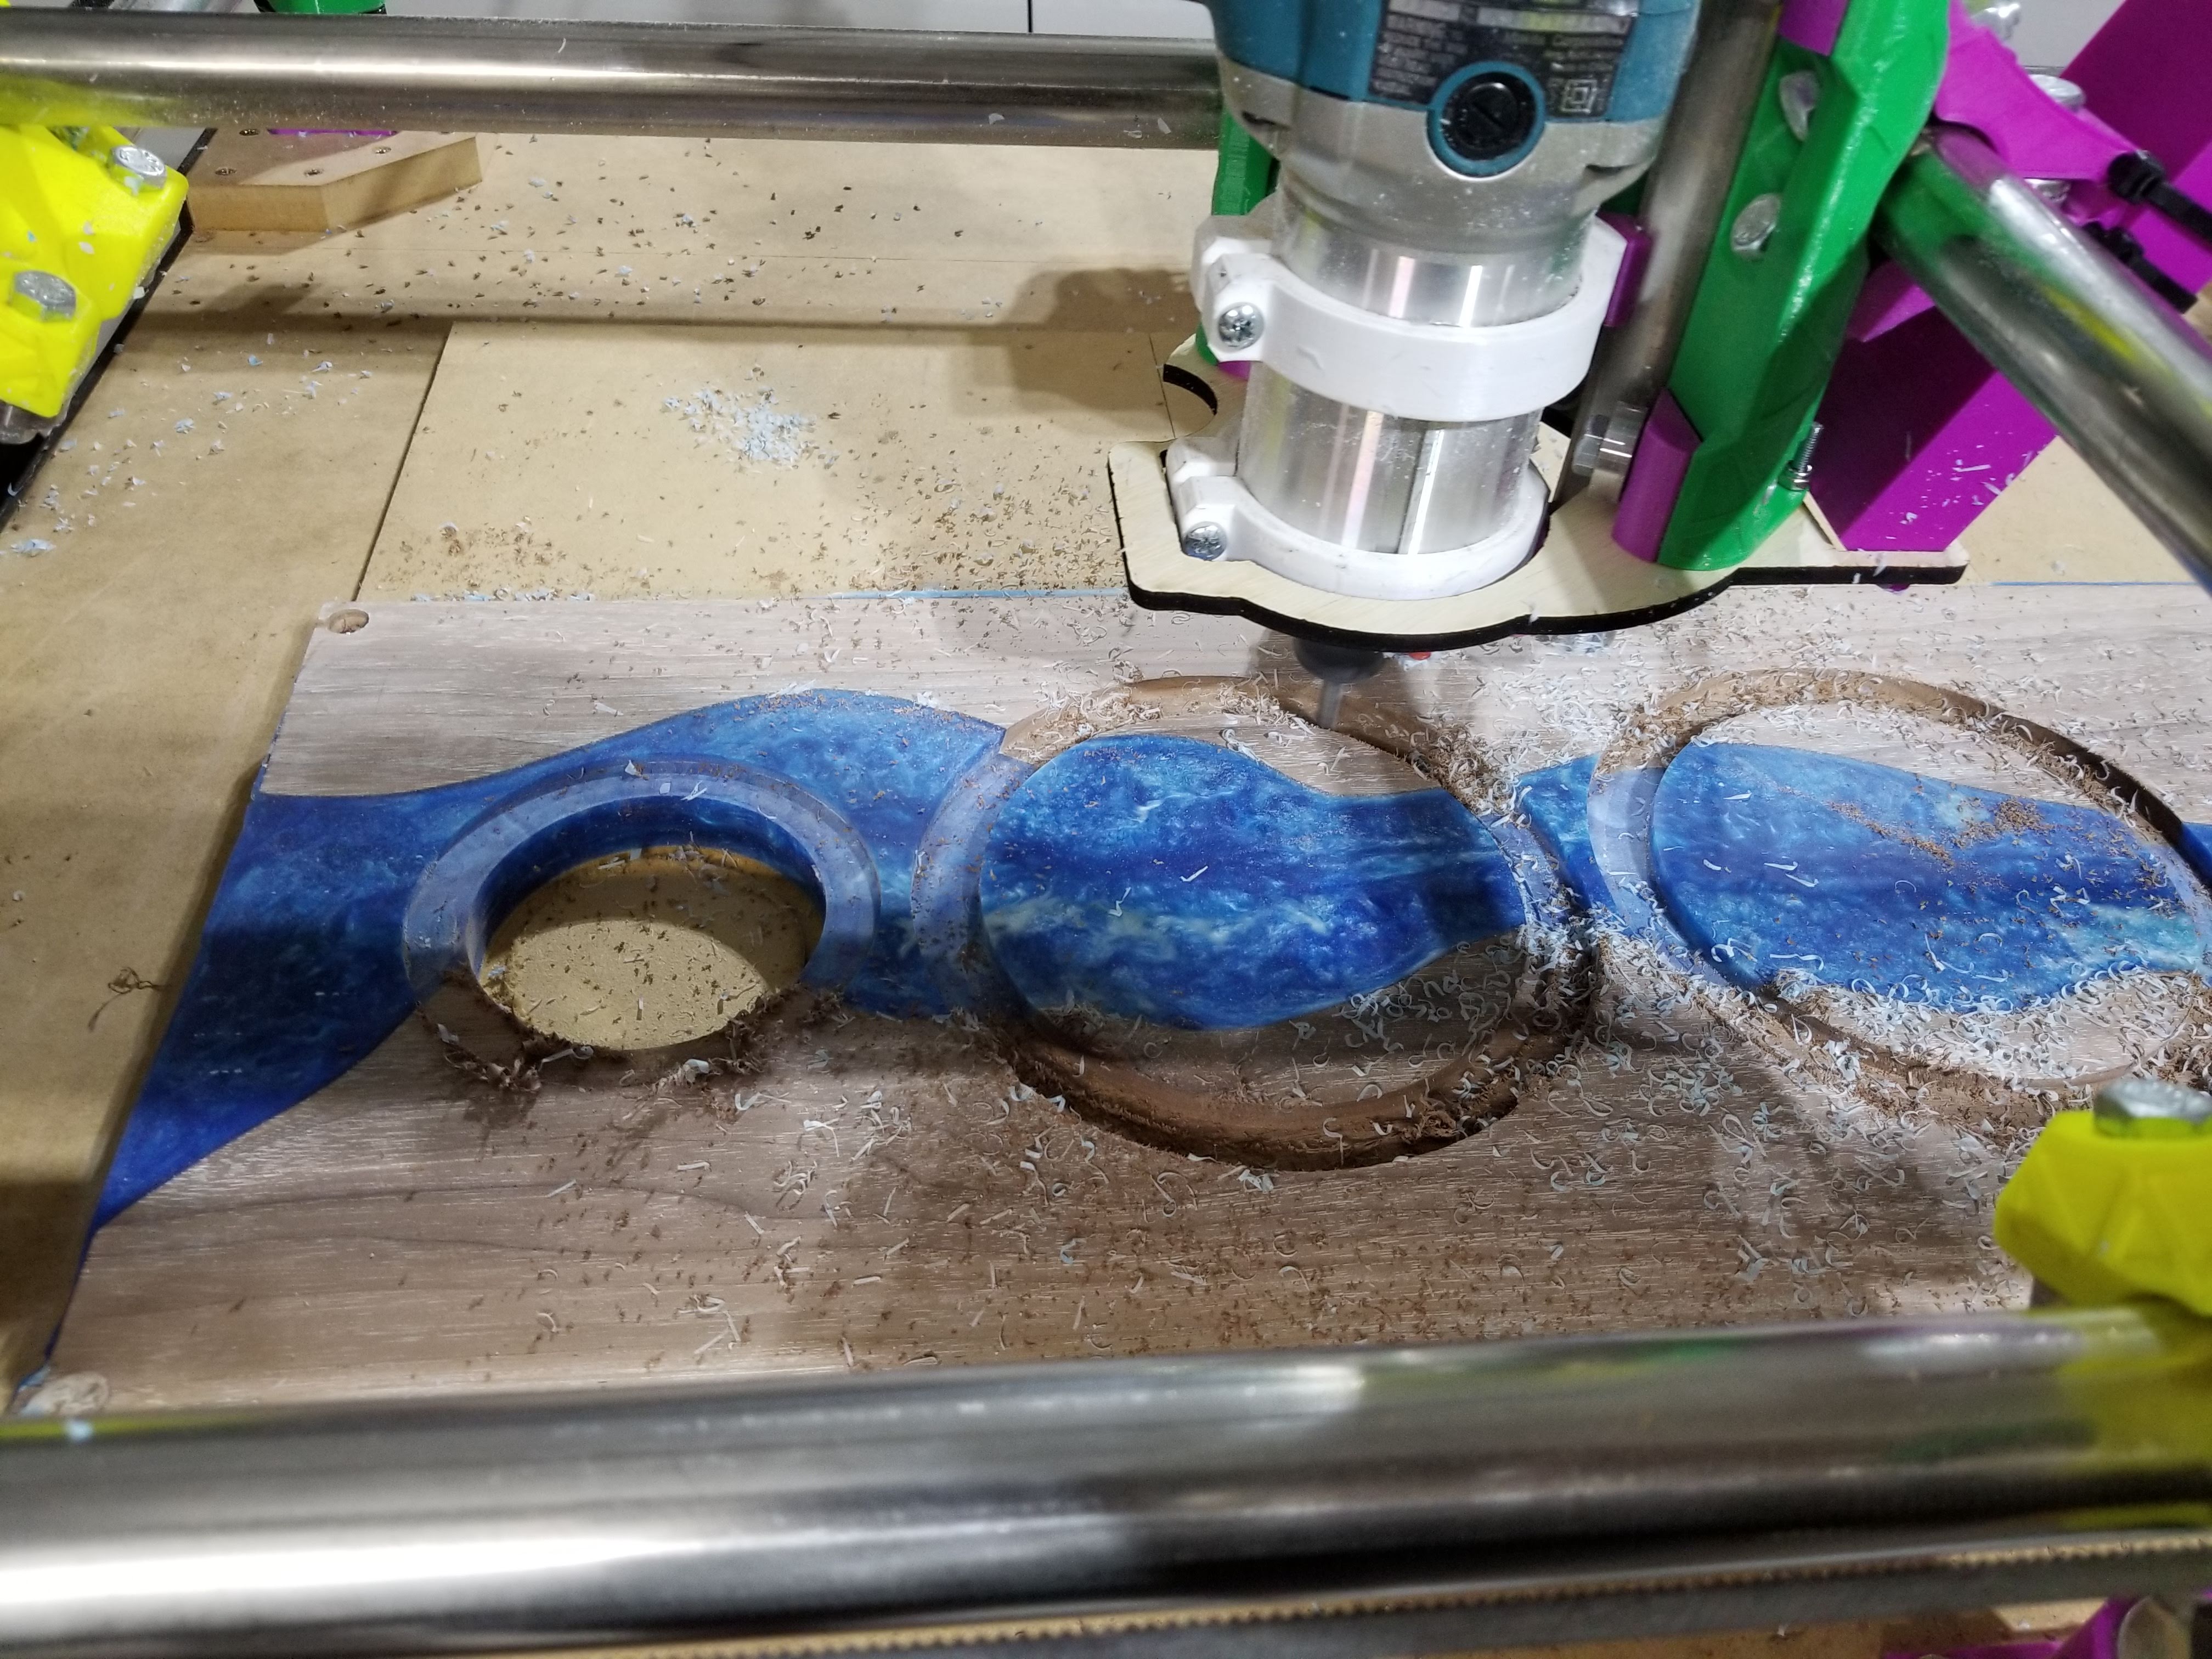
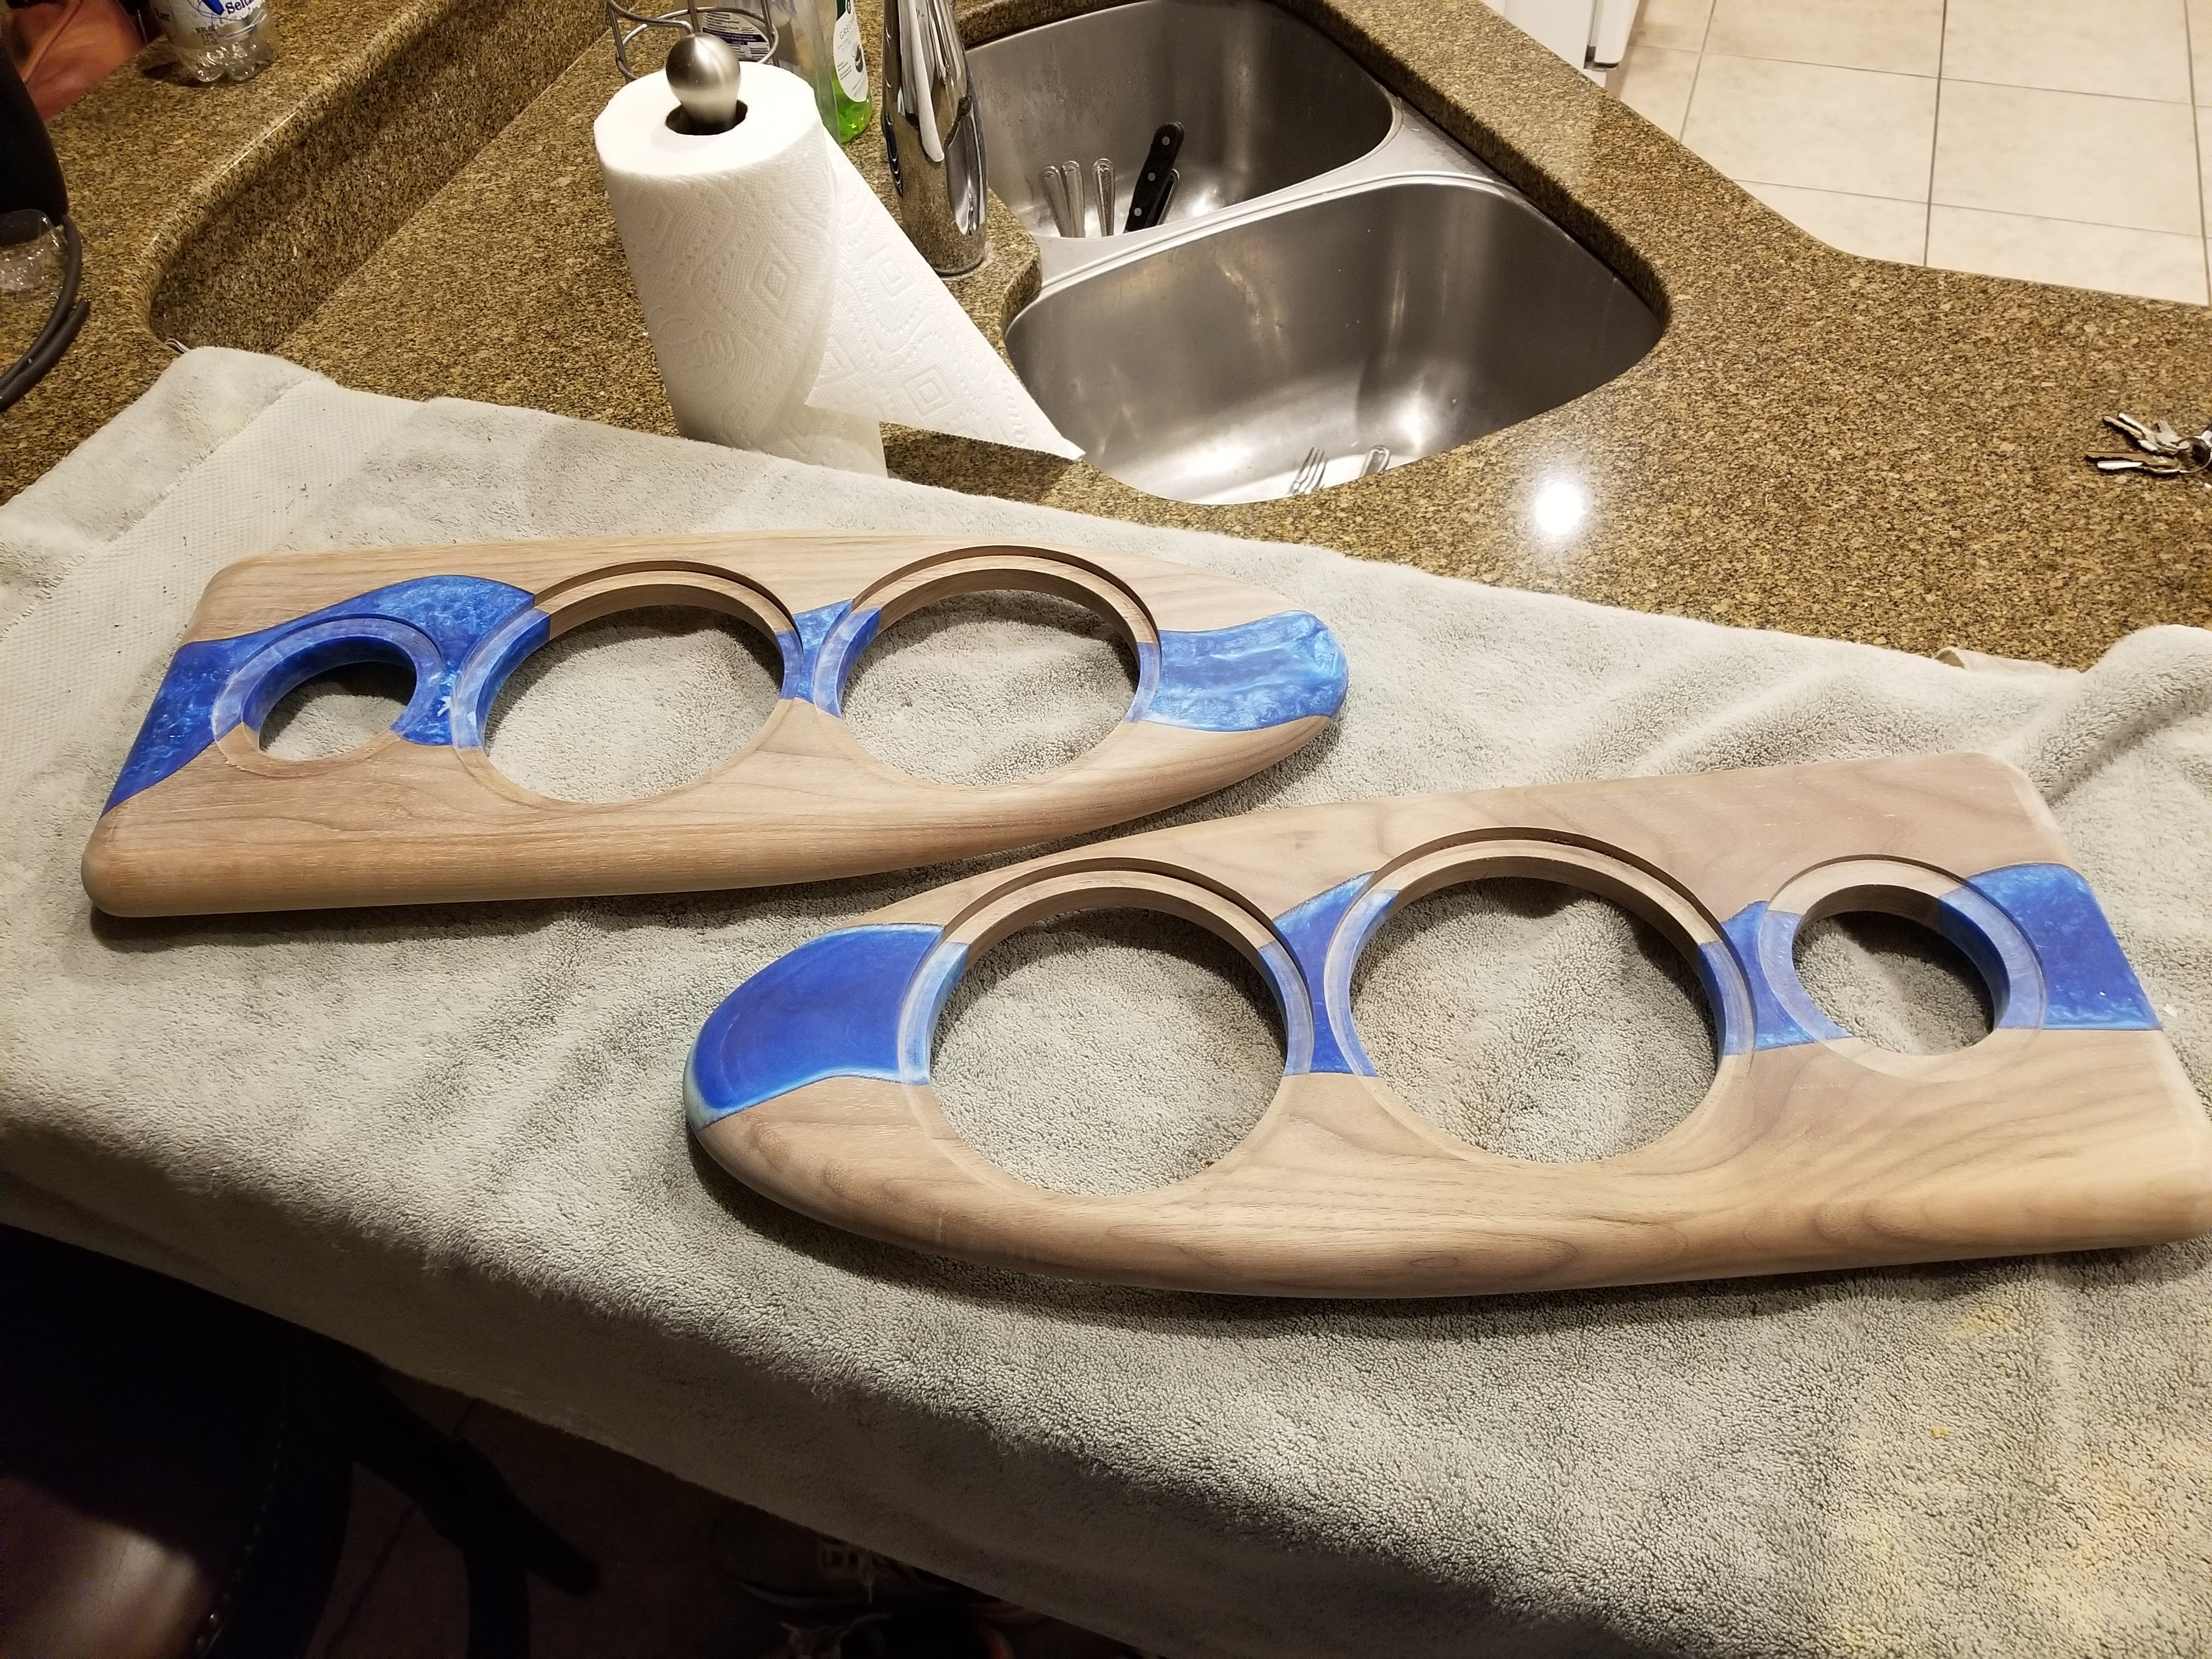
And second, a pair of Solstice mass loaded transmission line speaker kits from Parts-Express, with some of my own modifications. The main modifications were an extension of the outer height to accommodate for the 1.25" roundover on top, birds-eye maple veneer, and the custom walnut and epoxy river baffles.
Also seen in the background, the first stages of my new MPCNC Primo build which was used to create the front baffles for this job — an unintentional progress shot, but kind of cool.

These are going in front of my elliptical in the hopes of convincing me to work out more often…yet to be seen.
Thanks for looking!
12 Likes
Those look really nice.
What do you think of the solstice from a listening perspective? I’ve been thinking about getting new LR speakers for the HT setup. I don’t get to do a lot of pure listening anymore, but It’d be nice to have better speakers for movies.
I currently have been thinking of getting the ELAC Debut 2.0 F6.2 tower speakers. I’ve built speakers in the past and could easily do it again.
1 Like
I’ve only had them completed for a few days, but my initial impression is excellent. I have not heard the ELACs in person, so this review will be one-sided.
Processing/amplification
Emotiva UMC-200 (pre-amplifier)
Crown XLS 1002 (pro audio amplifier)
Music
Music is effortless and airy with great separation between instruments, vocals, and sounds you might otherwise have missed. I keep looking around thinking someone else is in the room. The sound is definitely on the warm side, which is to be expected with the Morel drivers. The tweeters are crisp and clear, but without any notes of harshness or sibilance.
Movies
I threw on Despicable Me due to the gratuitous use of sound effects and was blown away. The sound is incredible. HOWEVER, to be clear, at this time I am using them in an LR configuration only, with no center channel, so they are doing all the work. There is some nice low end extension due to the transmission line design, but I’m a big proponent of a well-tuned subwoofer and require some additional bass below 60Hz. I added a 12" subwoofer with dual passive radiators that, after some tuning on the DSP, fills in the low end perfectly to my taste while remaining completely transparent.
Personal thoughts
Despite all the praise I can give these (or any) LR speakers, if your intention is to use them in a home theater surround sound configuration, I would first make sure I have the absolute best center channel speaker I could stomach. Something like 70% of the audio in a surround sound setup comes out of the center channel and it will make the most notable difference in your soundstage. For the center channel in my main viewing area, I am currently running ScanSpeak Revelator drivers [midrange] [tweeter] in an MTM configuration and it is hands down the heart of my 7.4.2 Atmos home theater experience.
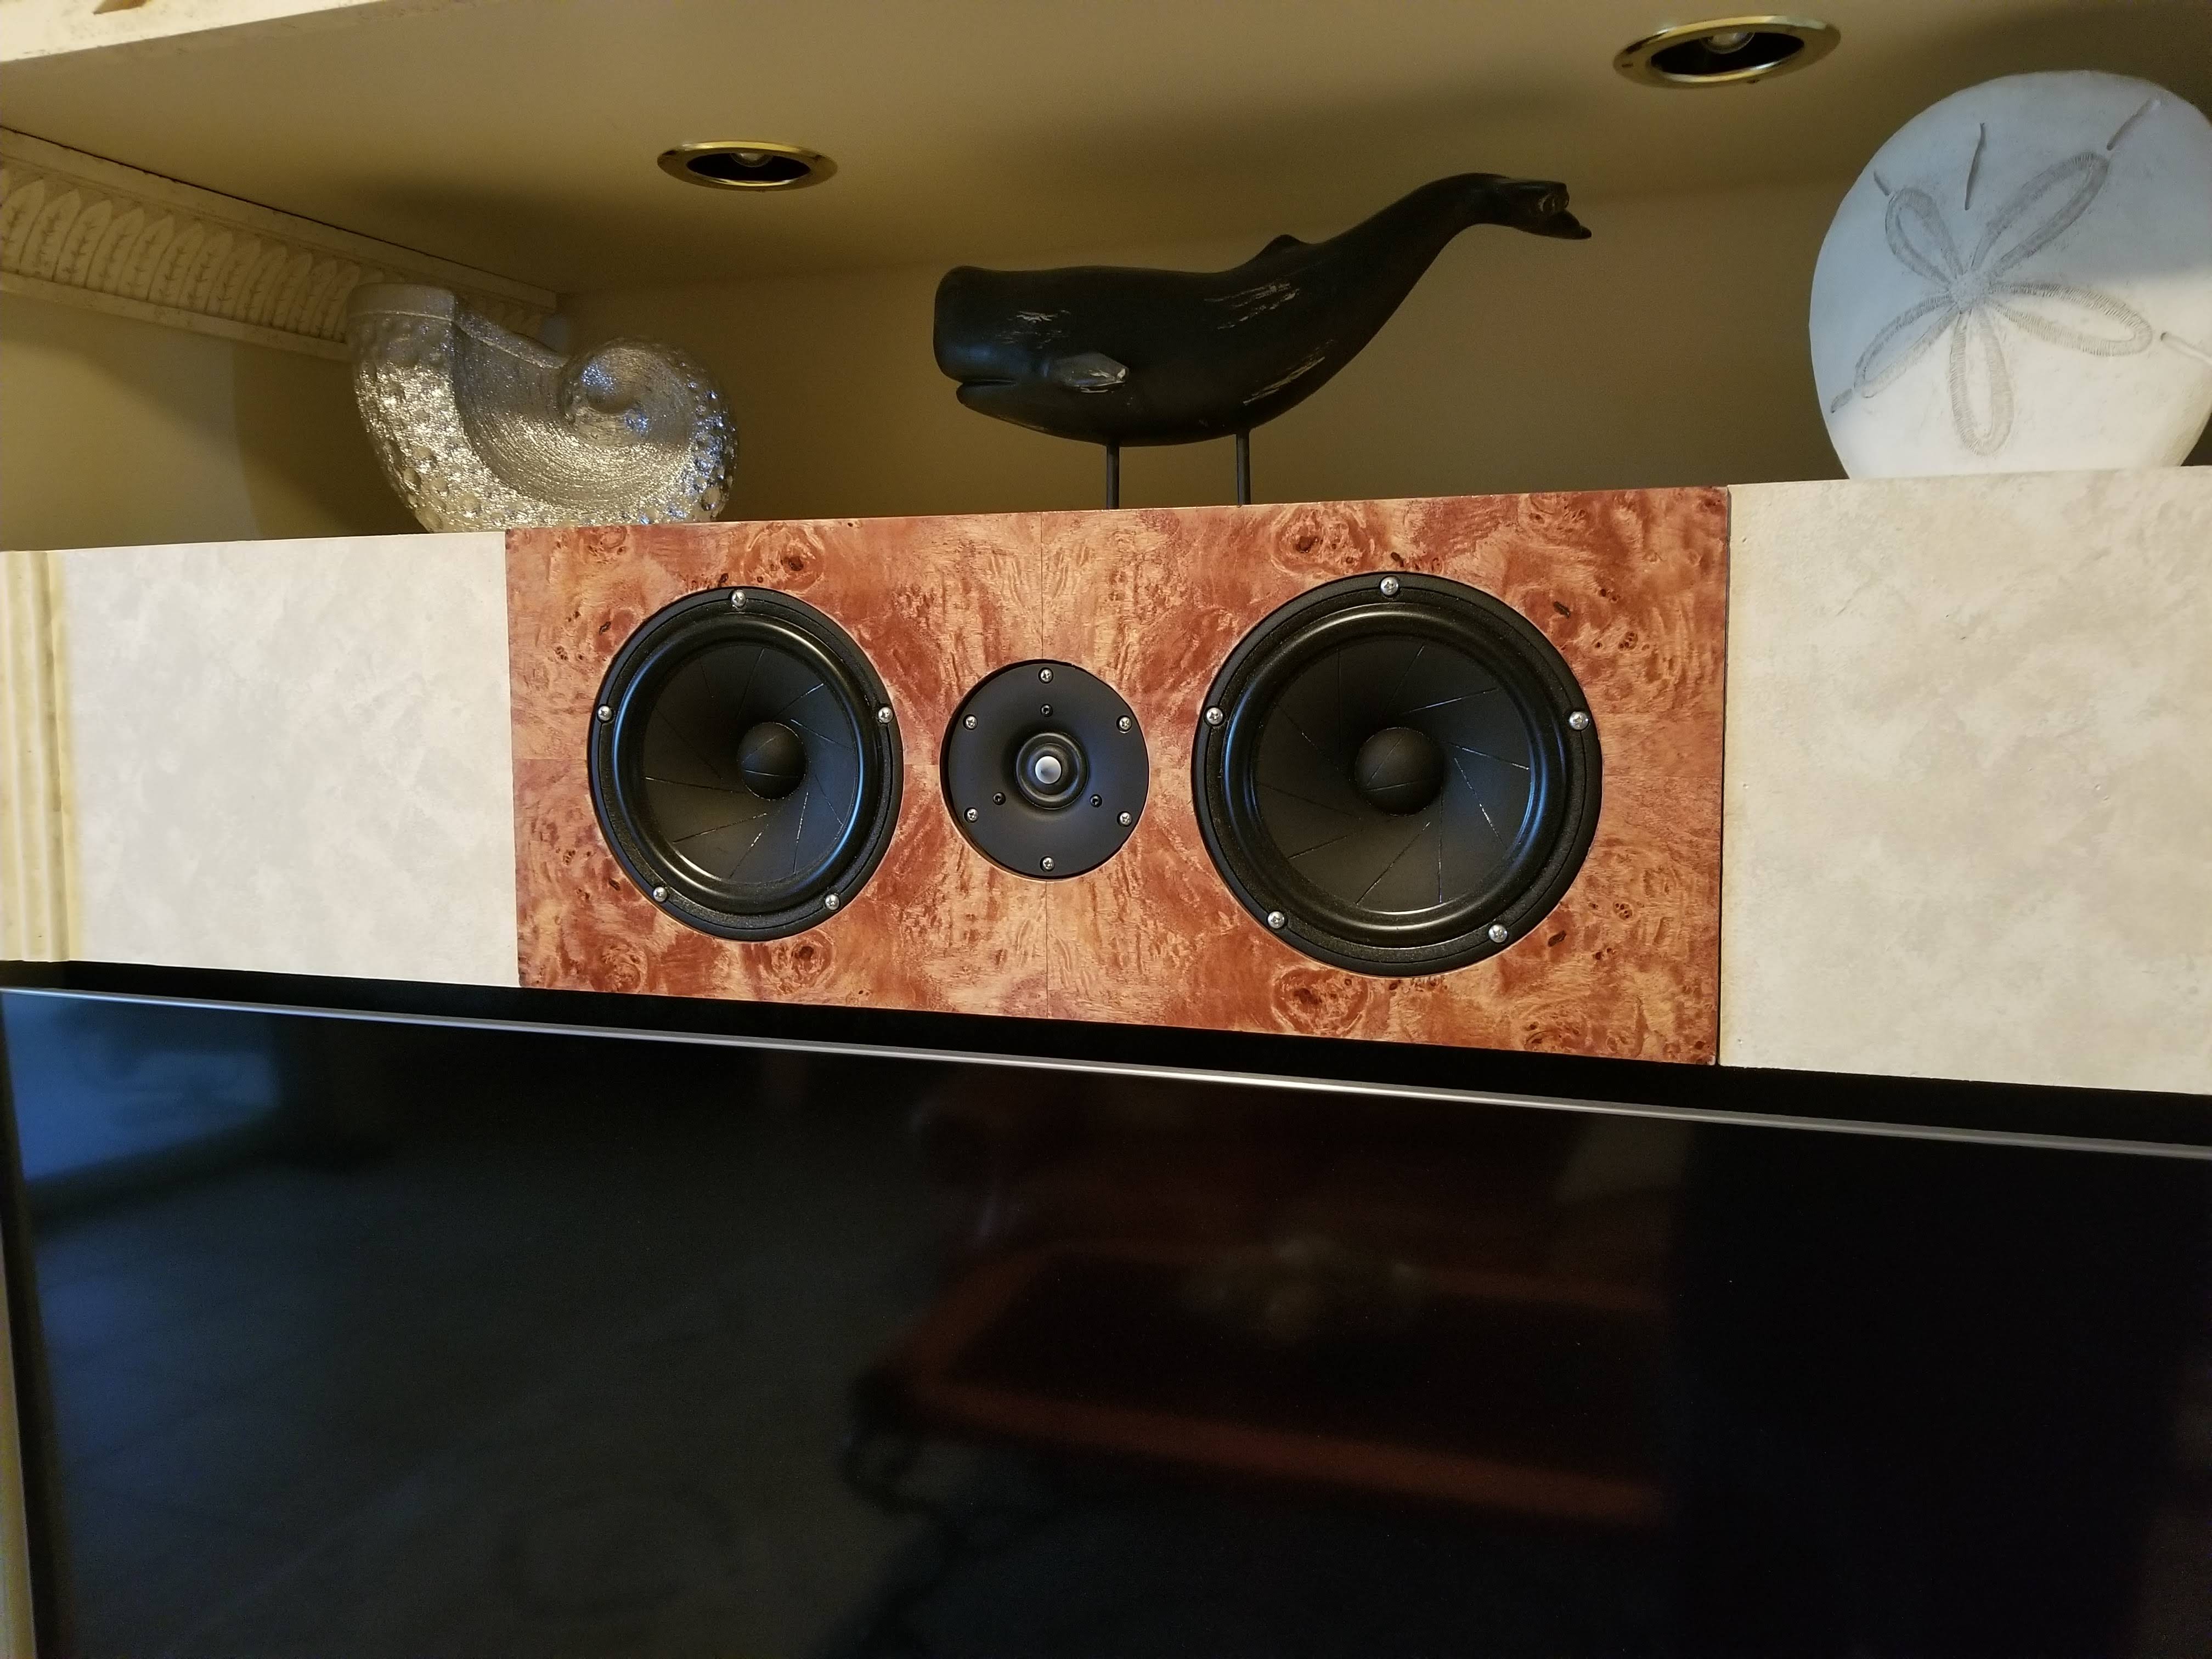
But if you already have a beast of a center channel, then by all means…
I started my way down the ELAC line last year by buying the ELAC 2.0 F6.2 center. It just barely fits on the shelf on my media cabinet. It’s why I’ll probably just continue picking up the rest of their speakers to flush out the HT. I’m a proponent of getting matched speakers where possible.
At one point I had a 5.1 setup where the front 3 speakers were all ones I designed and built. My living room in my apartment looked really odd when I had it setup for doing the free-air testing of the drivers. All the furniture was shoved into the dining room and I had the speakers suspended from the ceiling with the mic on a stand in front of them. I used blankets in the corners and to drape over hard surfaces to kill most of the bounce in the room.
I wish I could remember the name of the software I used back then to do the testing.
1 Like
My apologies, I made a post here before seeing the message about making new threads for each project.
You can read see it here if you are interested:
3 Likes
This stuff is great. You are on a Top Tier level, I hope that I can do some of this when I get my mpcnc running!!!
5 Likes