Hello again friends.
I have had a thought. The kind of thought that won’t just go away so now I get to share it. I’ll let all of you wrestle with it until it either dies or becomes something real.
I think we need a link in the milling basics to some sort of Milling Materials Documentation. Something that would show like a catalog of materials with pictures, info, pros and cons, where to buy, advice/tips for milling etc… because I still struggle with that kind of info. I remember as a total noob I wanted this info as well.
Where this idea keeps bouncing around is how to do it. A forum thread would be easy but unorganized. Something like a Documentation pages would be better but still difficult to organize all of the many materials. A Google doc might work but would anyone contribute to it. Or is there another website that already does all this that we could just link to. I don’t know.
I’m afraid I can’t contribute due to an absolute absence of knowledge, but I can confirm that I would greatly appreciate something like that.
While it’s true that you can pretty much find anything you wish on YouTube, that particular medium is a two edged sword, and having to sit through 20 minutes of irrelevant stuff to find that one helpful minute is not efficient, whereas simple written documentation and illustrations can be quickly skimmed or read in depth. Thank you to all who contribute!
That sounds like a good idea. I would really want it to focus on only very solid information and keep it in the docs. Good info is ABS turns into toxic gas if you burn it with a laser. Bad info would be something like, “I cut this at 20mm/s and it went well”. That’s good for the forums, but hard to maintain in the docs.
Maybe we should start with a google doc or a forum post and shoot for a small set of materials. Then convert it to a doc page?
What would the first set of materials be?
Solid wood (soft or hard, more distinction coild come later, but there are a lot of differences in wood)
Plywood
MDF
HDPE
Aluminum
High Density Foam?
I like the idea of it being mostly a reference, with a little info in story/readable format. A picture or 5 at the most.
Sounds great. We’ll definitely want to break out the different species of woods as tim and goes on. Hard maple mills a lot differently than purple heart.
I like that list. For solid wood I would specify Pine for sure since many people starting out are going to consider it because it is so common so we might as well address it and point out pros/cons.
100% agree. I am thinking about some sort of standard form easy to glance at info and at least one picture. (Because I am still not 100% sure I know the correct name for what I call particle board.)
I know some of these suggestions goes into the grey area away from 100% solid info so feel free to strike some of these down. I am still just brainstorming here.
Starting suggestion for Key data fields
Name
Picture
Suggested uses (free text field could be anything) ie: Indoor/Outdoor, furniture, structural, art, wall hangings, MDF great for spoil boards or inside panels of cabinets etc.
Pros: ie MDF is easy to mill, can be easily smoothed
Cons: ie MDF causes a lot of dust, swells with moisture/humidity
Machining Difficulty Level
Density/hardness
Suggested abstract DOC (NOT in detail as it varies per machine but in abstract like ) "Shallow vs deep DOC
Suggested abstract Speed & feed (slower vs faster speeds & feeds. NO numbers)
Where to buy
(perhaps) Cost marked as one to five dollar signs since ie: $, $$$, $$$$$
Tips for success: Use Trcodial milling for initial cuts then peel for pocketing, Upcut vs downcut bits for X affects, conventional vs climb for x reason, any user suggestions / advice.
Most of what I have focused on was milling specific but I suppose it would be a great idea to also include some laser specific info.
This sort of stuff might work, keeping it generic, not at all machine specific.
This sort of thing will not work here, https://docs.carbide3d.com/shapeoko-faq/shapeoko3-materials/, because our builds are very different so we could not include any of this info unless it was in some sort of percentage of a base test material. That is why I did the speed tests in MDF, I intended on using that as a “standard” to compare against. So 1/2" the speed or depth of MDF, 2x…ect.
At the same time, a chart like what we need might exist and can be linked.
I REALLY like the idea of comparing everything to MDF. That would be great place to start from.
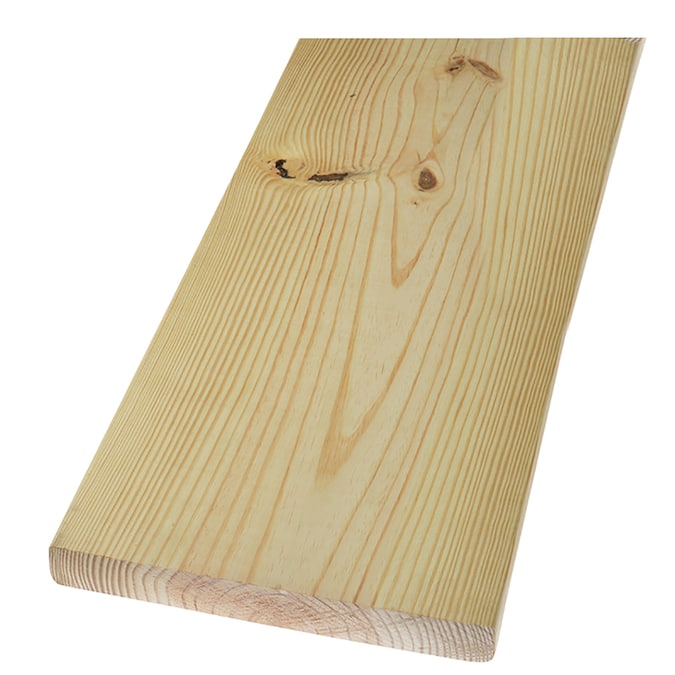
My initial Draft for Pine would be something like this. Note these are my opinions not some sort of facts
Name: Pine
Picture
Pros: Cheap, easy to source, soft easy to cut
Cons: warps, cracks, many knots, weak, occasionally messy (sap)
Suggested uses: (Not recommended for project use.) Practice/draft cuts, V carve signs
Machining Difficulty Level: Intermediate (compared to MDF)
Density/hardness: Mostly Soft non Dense with Dense knots
Suggested DOC: Medium (similar to MDF)
Suggested Speed & Feed: Medium (similar to MDF)
Where to buy: Big box or local hardware store, Lumber yards, construction scrap
Cost: $
Notes: Natural materials like solid pine is more difficult because it is inconsistent, random, warped, and/or contains knots. WARNING knots may be very dense and could cause damage or injury.
Now that I look at this though it is a little too wordy but still it provides information that I wish I had starting out. The same kind of info I would like to have before I drop $$ at the lumber yard when I am considering a new to me material.
Yeah most of my examples do sound more like a Milling basics kind of thing. I guess the only example I would disagree with is trochoidal milling and when to use it on some materials like aluminum. For example the first time I tried to cut aluminum I was using Trochoidal milling for every cut including pocketing. But the advice you gave me was to just use it for the first engrave then use peel in my pocket. Great advice! That is good to know when working with aluminum. And I think that kind of tip should be with the material page in a tips for success or notes.
Down cut bits may be suggested as a tip for success when engraving something coated in melamine (not sure on that spelling). But that note could either be in milling basics or on a material page.
Looks pretty good. Better than I expected. tables are a bit messy in the docs but there are ways to clean it up. I guess, lets see what others have to say.
Docs are really hard. Because you want to be as informative as possible. But more info can dilute the important stuff, and there is a cost in maintenance for every word in the docs. So it really needs to be short and sweet.
I am just going to pick on cost for a minute. 1) Finding out how much it costs isn’t too hard on other websites. 2) We aren’t going to edit the docs if wood prices skyrocket again, and wood is more expensive than PVC. 3) Something may cost a lot different in Australia than in Colorado, or in Germany vs. South Africa. 4) If you are spending your employer’s money, then cost may be completely different for you than if you are trying to use your birthday money to make a project.
It does not have to be perfect. Extra information is fine. Information that gets out of date is fine. But ideally it would be to the point, and eternal information. Instead of 12 fields, maybe more like 6? Or even less. Maybe something as short and sweet as this:
Pine
Natural materials like solid pine is more difficult because it is inconsistent, random, warped, and/or contains knots. The wood will expand with the seasons and is not water proof.
Knots may be very dense and could cause damage or injury.
I also encourage some more detail on this kind of thing. I think it would need to be fairly generic, like maybe soft, medium, and hard woods. Couple of plastics, foams, etc. What to look out for like knots, nails, safety, etc. That is the main reason I wrote the metals section, but then it got way out of control
At this point in the back of my head I am thinking about a way to qualify a machine. I have a force gauge and I am thinking of ways to measure deflection, If a group of us could gather some comparison data, it might be a way to categorize a machine rather than just say 12" bed, conduit rails, etc. Just a thought I am playing around with.
That’s a pretty clever idea. But if we do something like that then we may want to to come up with a test that can be done with our without a force gauge. Something like Ryan’s Quick and dirty flex test thread from last year. But I imagine any quality test would also need to measure chatter as well.
OH!! lightbulb moment! What if we had a set GCODE(s) that would cut MDF progressively aggressive. So we start out with instructions to load a 1/8 flat head bit and put the mdf into the center of the machine work area so we would get the most flex. Then the GCODE performs a set cuts that could test for round, accuracy as well as test the machine limits against a base material. As soon as the machine starts to show signs of stress then you know where to end the test and have an idea on how your machine scores.
If we could come up with a type of scoring or rating for each progressive test then we would have a rough idea how to rate the machine. Maybe call it something like an AUP (Accuracy Under Pressure) score. They would measure the cuts and apply some simple math to get a rough idea how their machine scores.
Its not a perfect idea but it would give us as close to a common baseline for comparing one machine against another.
Only problem with that idea is how do you measure stress while cutting? Ii thought about that too but by the time my cuts start to fail it is already too late. It’s so hard to determine what margin you have. I tried to do it with cutting metals but could not duplicate anything. I will try to find the other thread.
Force gauge is not so difficult, you can use a $10 luggage scale to pull with. Measuring deflection would need a dial indicator I think. I plan to play around with mine sometime when I get to it. I am not exactly sure what I am looking for, but I am thinking deflection at the router tool is most important since it is a combination of all the other flexing components. But of course after you measure flex at the tool you would want to measure something else to see where it is coming from.
Why do we need to compare one machine against another? I would think what is needed is a tuning procedure a person could use to best understand the performance envelope of their own machine.
I think we are talking about the same thing. The goal is not to compare machine to machine, but to understand the limitations better which will probably take a few data points. Theoretically, given the same speeds, feeds, tooling, and router every machine should be able to do the same thing. But we know that is not true and it becomes more apparent when pushing the limits. There is a lot of debate on rail stiffness but no one has tied that back to actual cut quality as far as I know. And I am not so sure rail stiffness is really the biggest variable. When cutting correctly, there is very little force into the rails but a lot of vibration. So in the end my thought is once the (advanced?) end user has everything set nominally and wants to cut a more difficult material, they should try and a few simple deflection tests to see if their machine is capable. Again, I have no idea if this will even work. But I plan to do some experiments just to determine when my machine needs “attention”.
That is how I worked the speed test. If you make a circle, measure the X and the Y dimensions with a caliper, choose your own tolerances and see how fast you can cut and keep those tolerances.
Some people think they “HAVE” to have 0.01mm, some think +/- 2mm is fine. Those will be very different speeds (chip loads).
That is interesting approach also. I just purchased a 4x2 sheet of 1/2 PVC sheet to run circles in. I found my tolerances were nowhere as close as I thought. I will measure the cuts and adjust because I just can’t get there with lines on paper.
 Knots may be very dense and could cause damage or injury.