Does your design hold true for the N40630 laser as well? It looks like from this NEJE video, they say stock is 20mm from housing to plate and then focus to 17mm:

Does your design hold true for the N40630 laser as well? It looks like from this NEJE video, they say stock is 20mm from housing to plate and then focus to 17mm:
Robert,
Effective air-assist does indeed do all those things – it suppresses flames, helps with clearing debris from the kerf, and keeps smoke/soot from attenuating the beam while also protecting the lens. It clearly helps during most cutting operations but is often not needed/desired during engraving operations. But the key IMO is that it needs to be both effective and controllable… strong when cutting, minimal when engraving, and directed properly into the kerf regardless of the direction of travel. So, I modeled this air-assist setup similar to any number of CO2 lasers machines on the market… thinking that they would know best how to do this stuff 
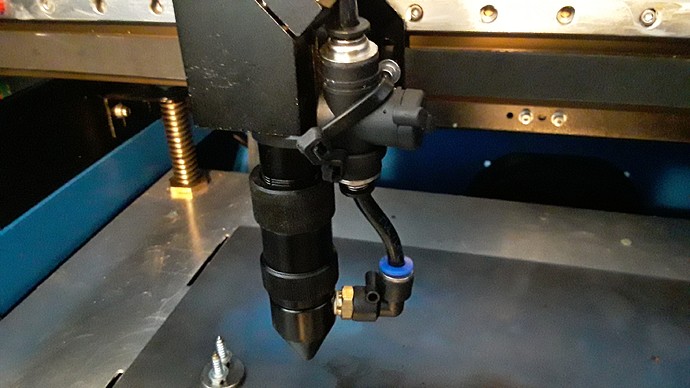
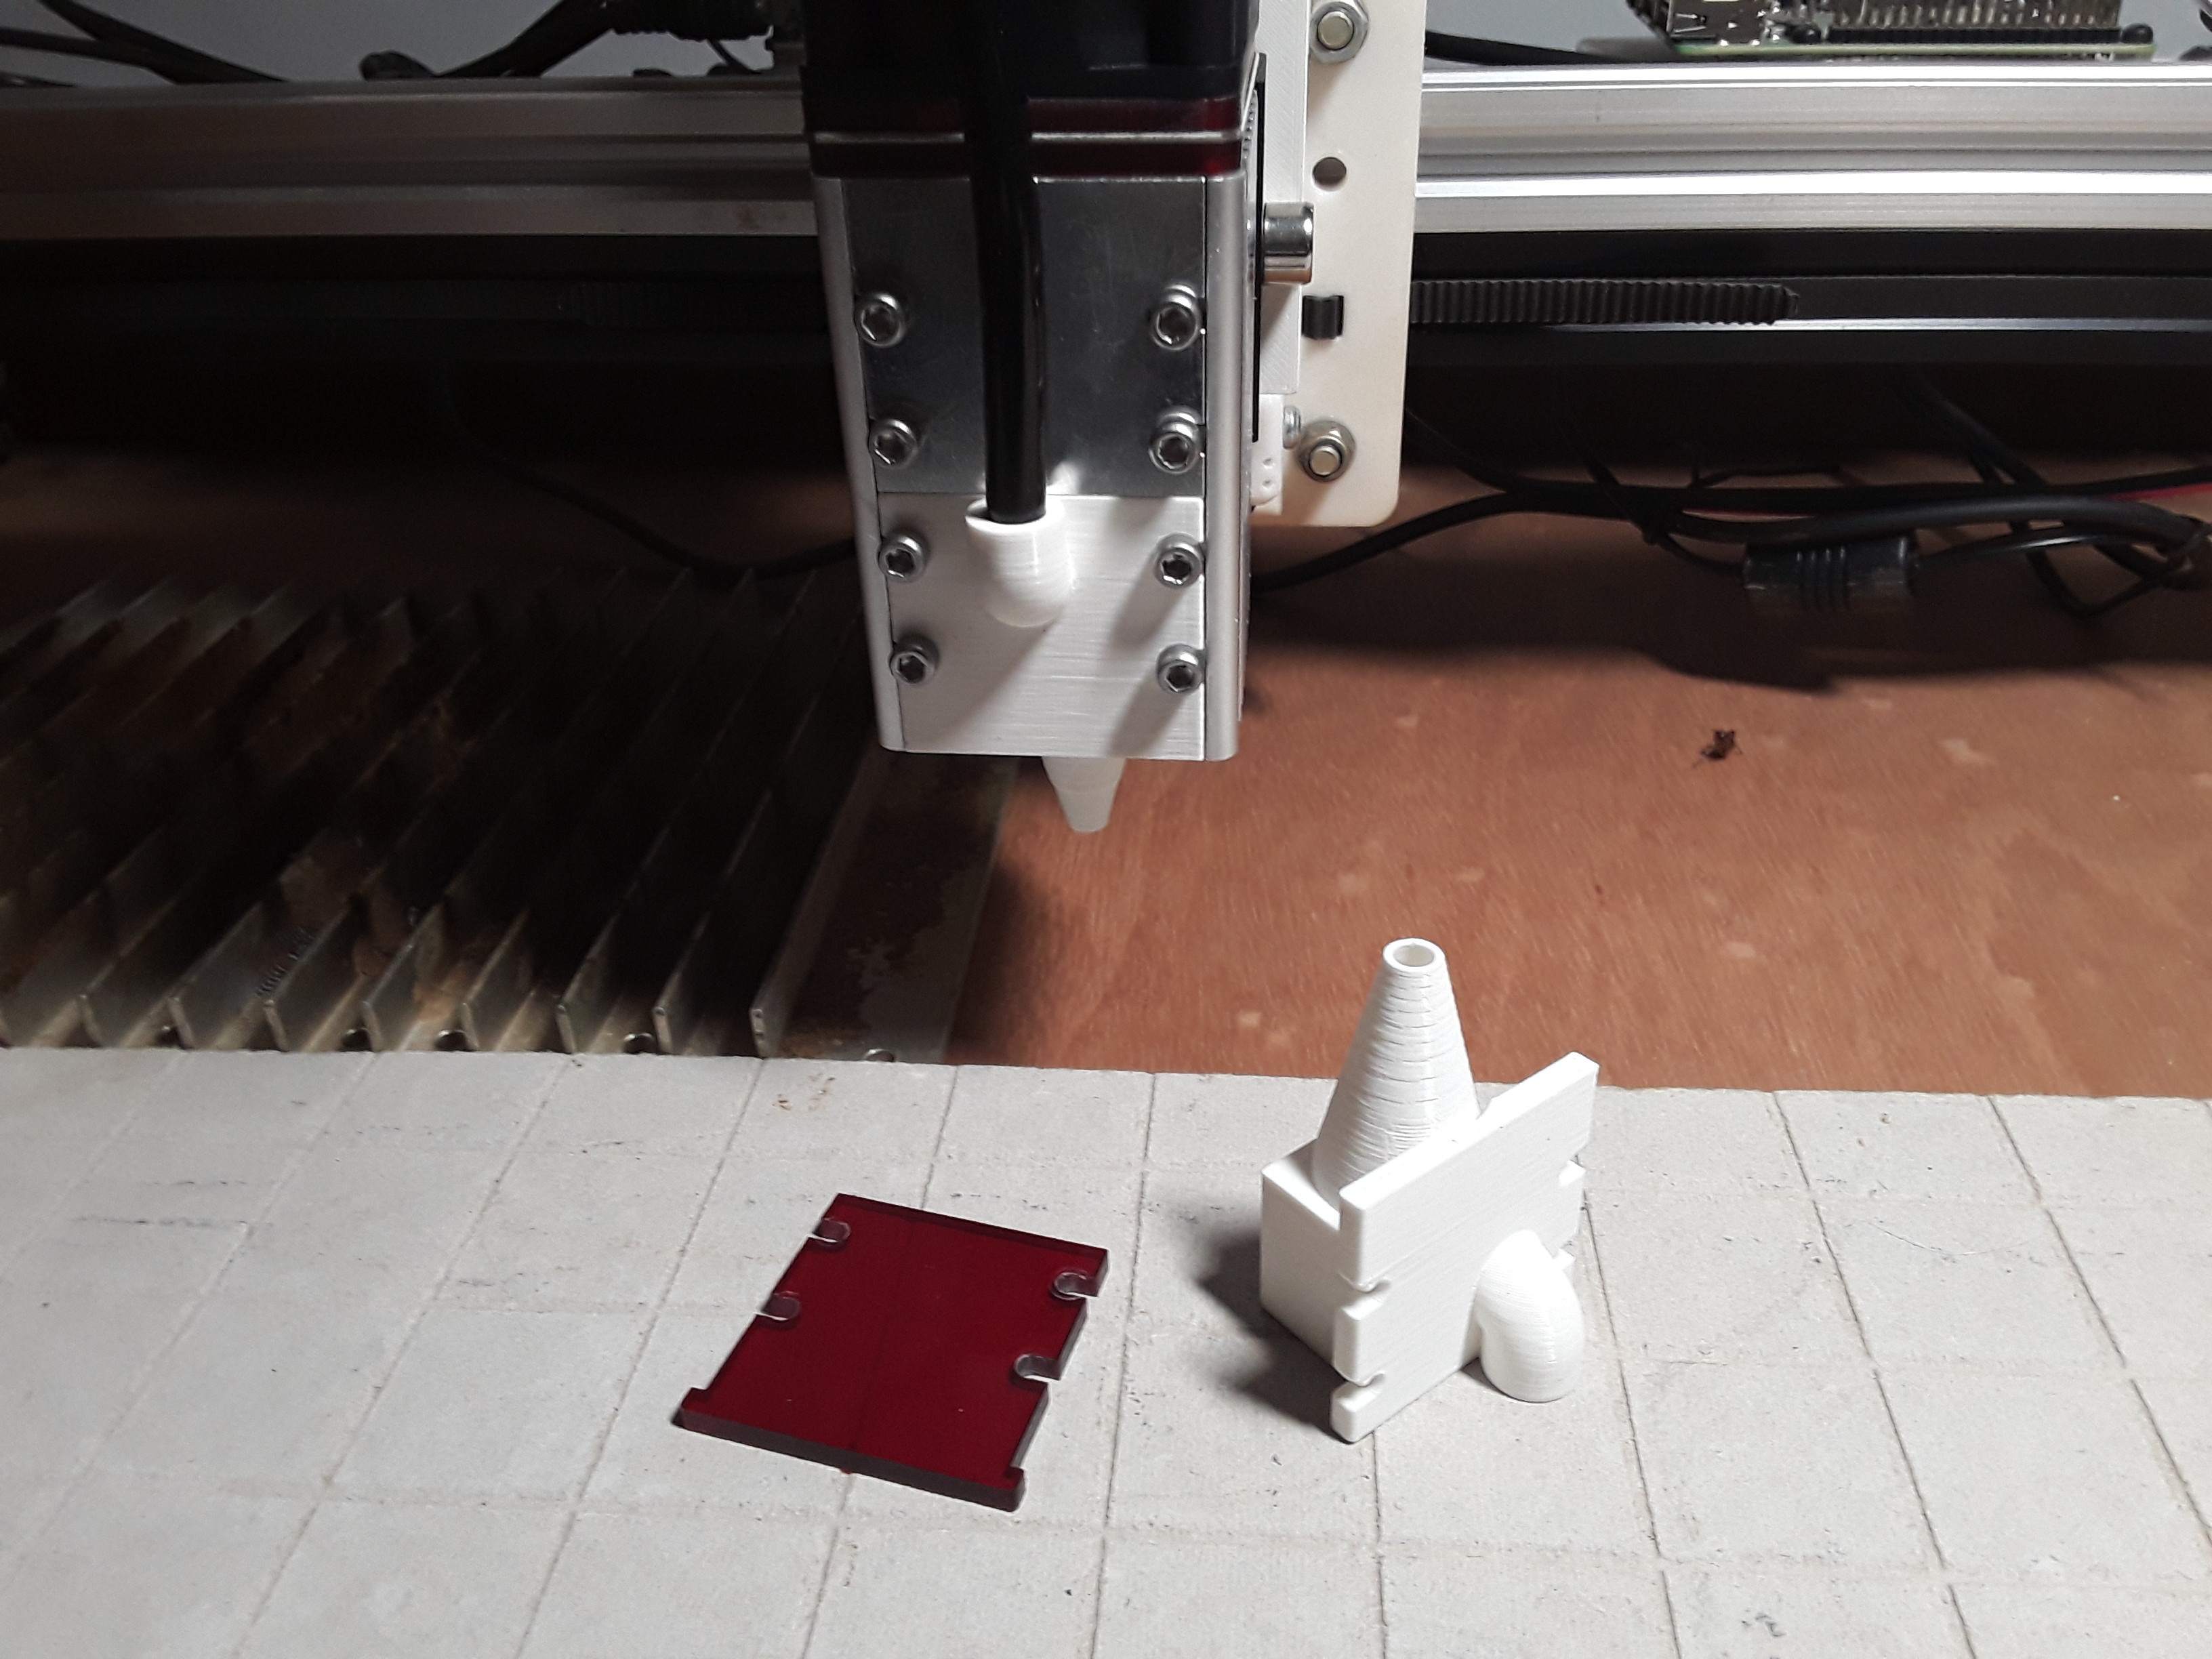
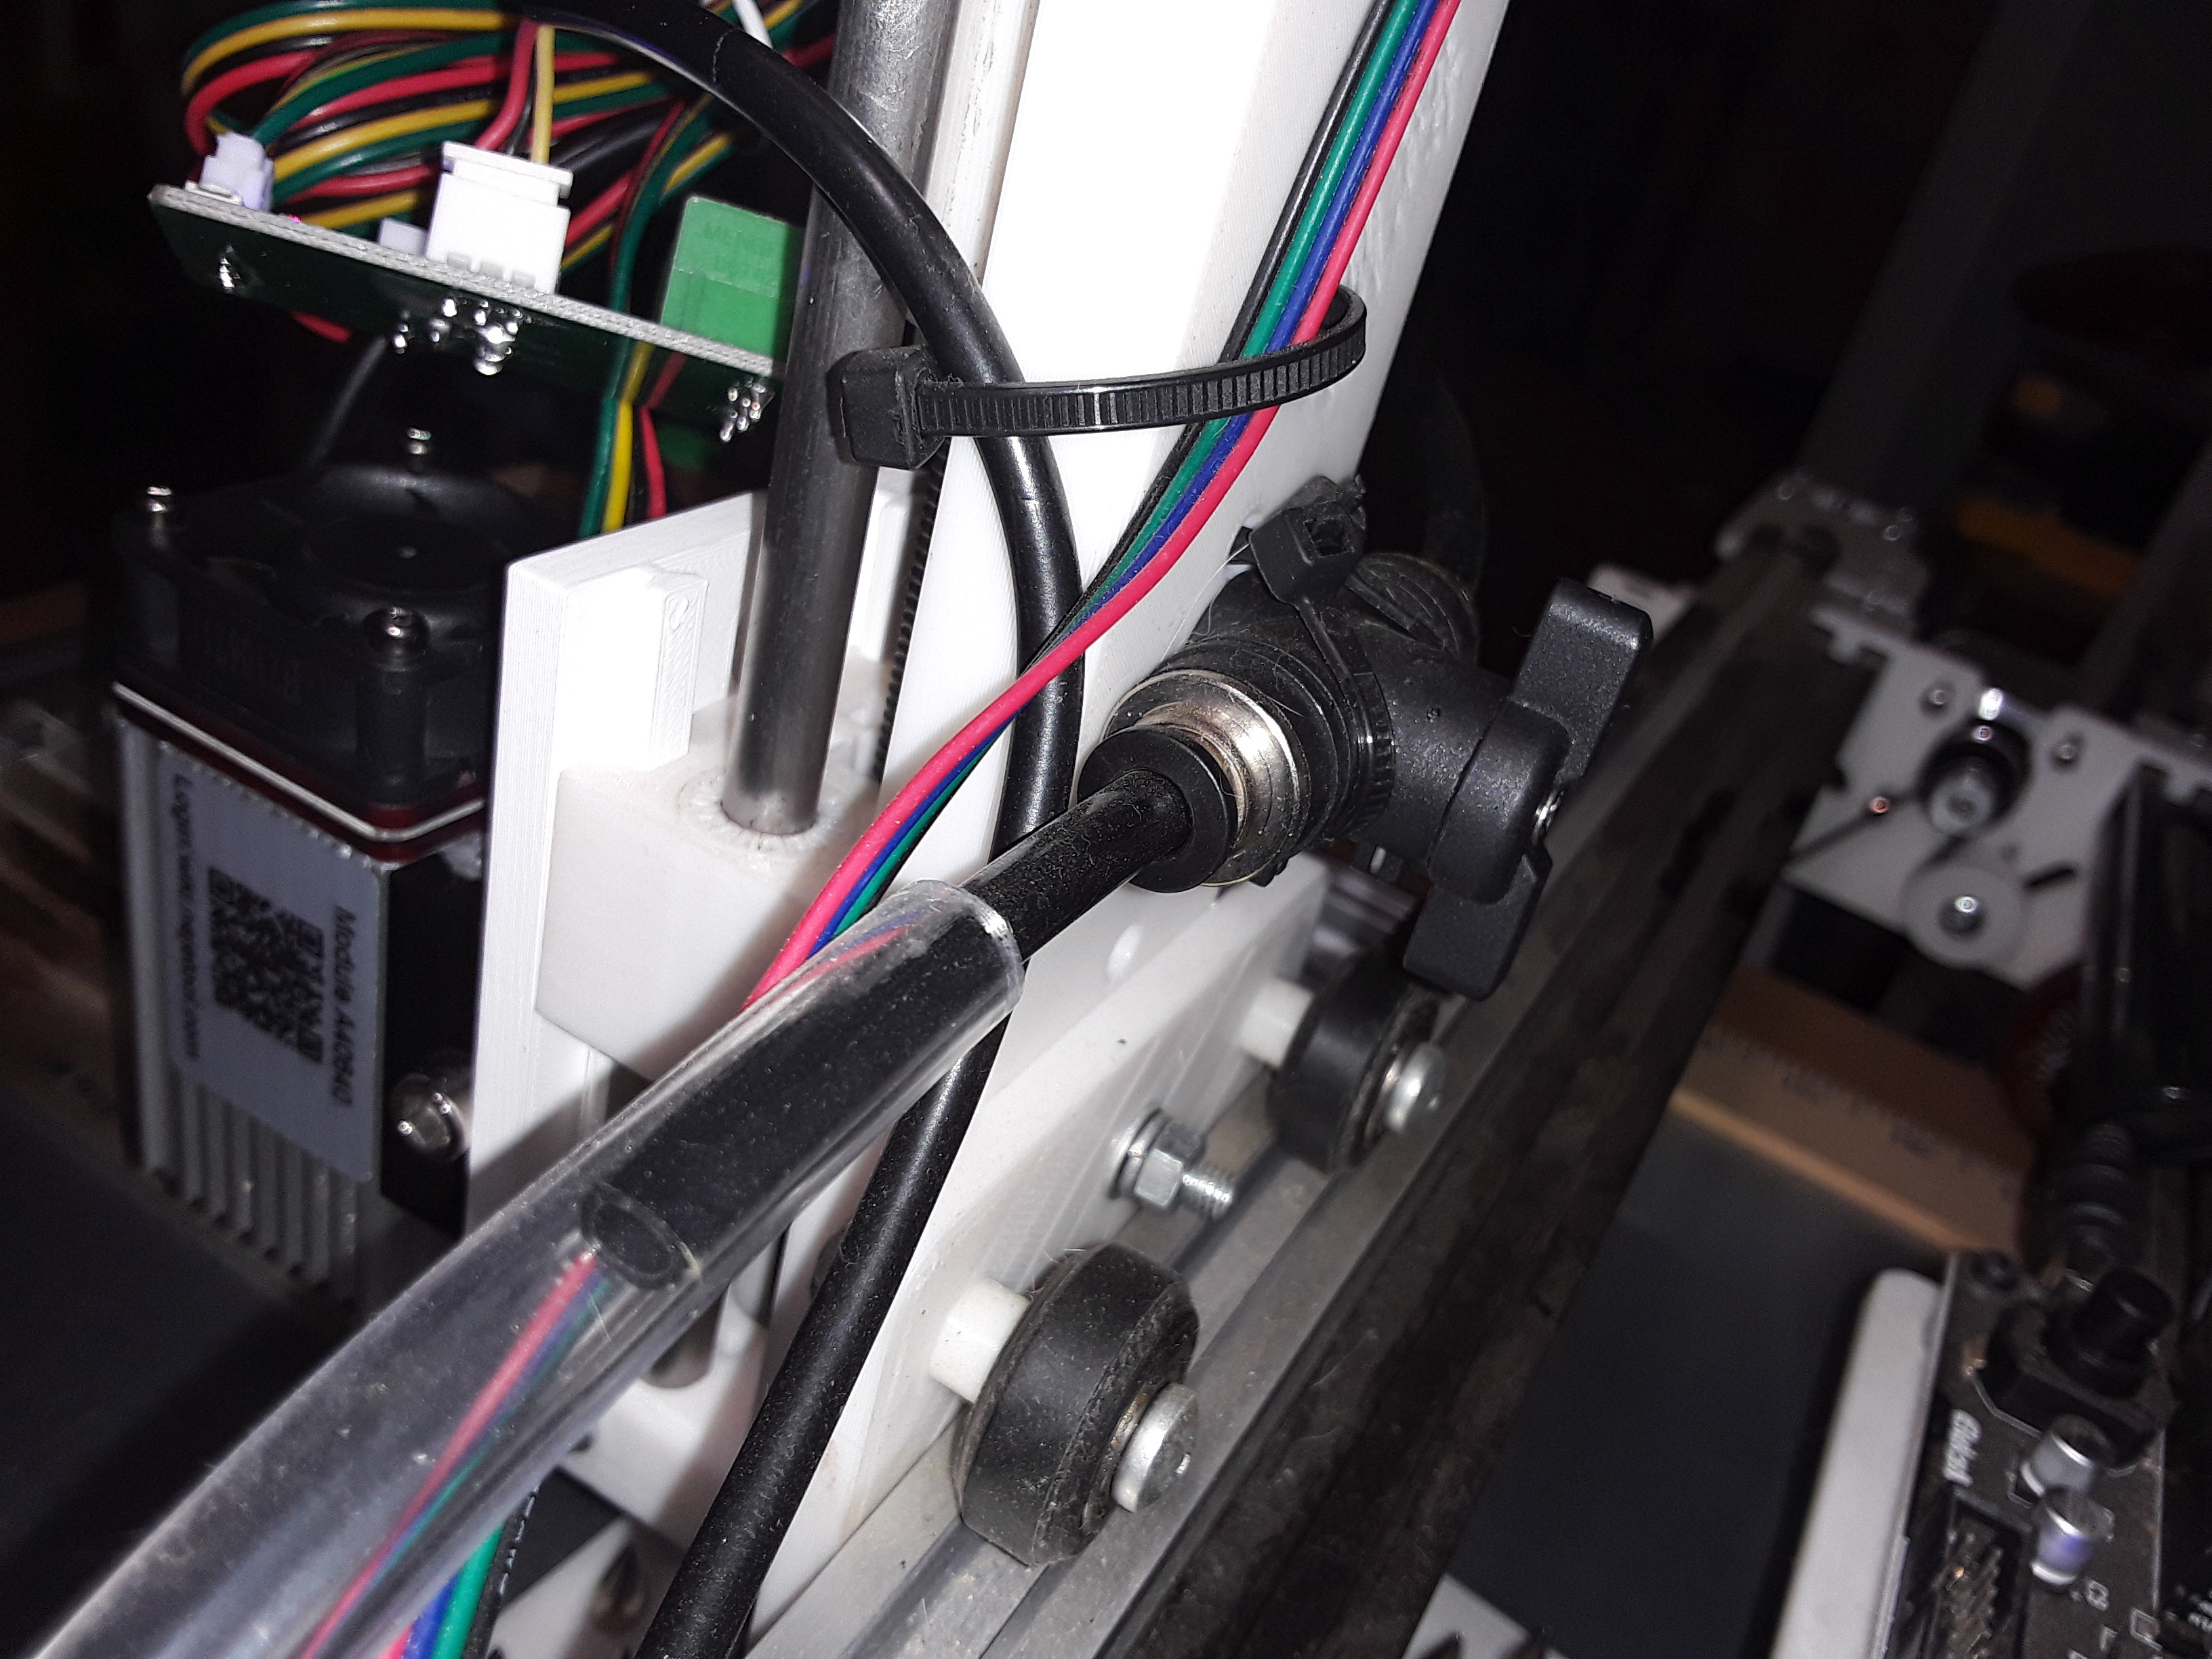
My setup consists of a nozzle, a ball-valve (zip-tied to back of X-carriage), and a modest compressor…
Obviously, I’m set up to manually control the air-assist with the ball-valve but you can always segment your laser job into separate cutting and engraving files… or take your chances adjusting it “on the fly” (Grbl allows easy job pause and resume…). Also, depending on the material and its thickness, I run “wide-open” air-assist when cutting thicker material and “just barely” air-assist to engrave… barely enough to keep positive pressure in the nozzle so smoke can’t enter and coat the lens.
I don’t remember if this video is one that deals with air-assist but ol’ Russ at SarbarMultimedia has many [very!] in-depth videos that deal with all things laser… use the “search” function to find videos that have anything to do with air-assist.
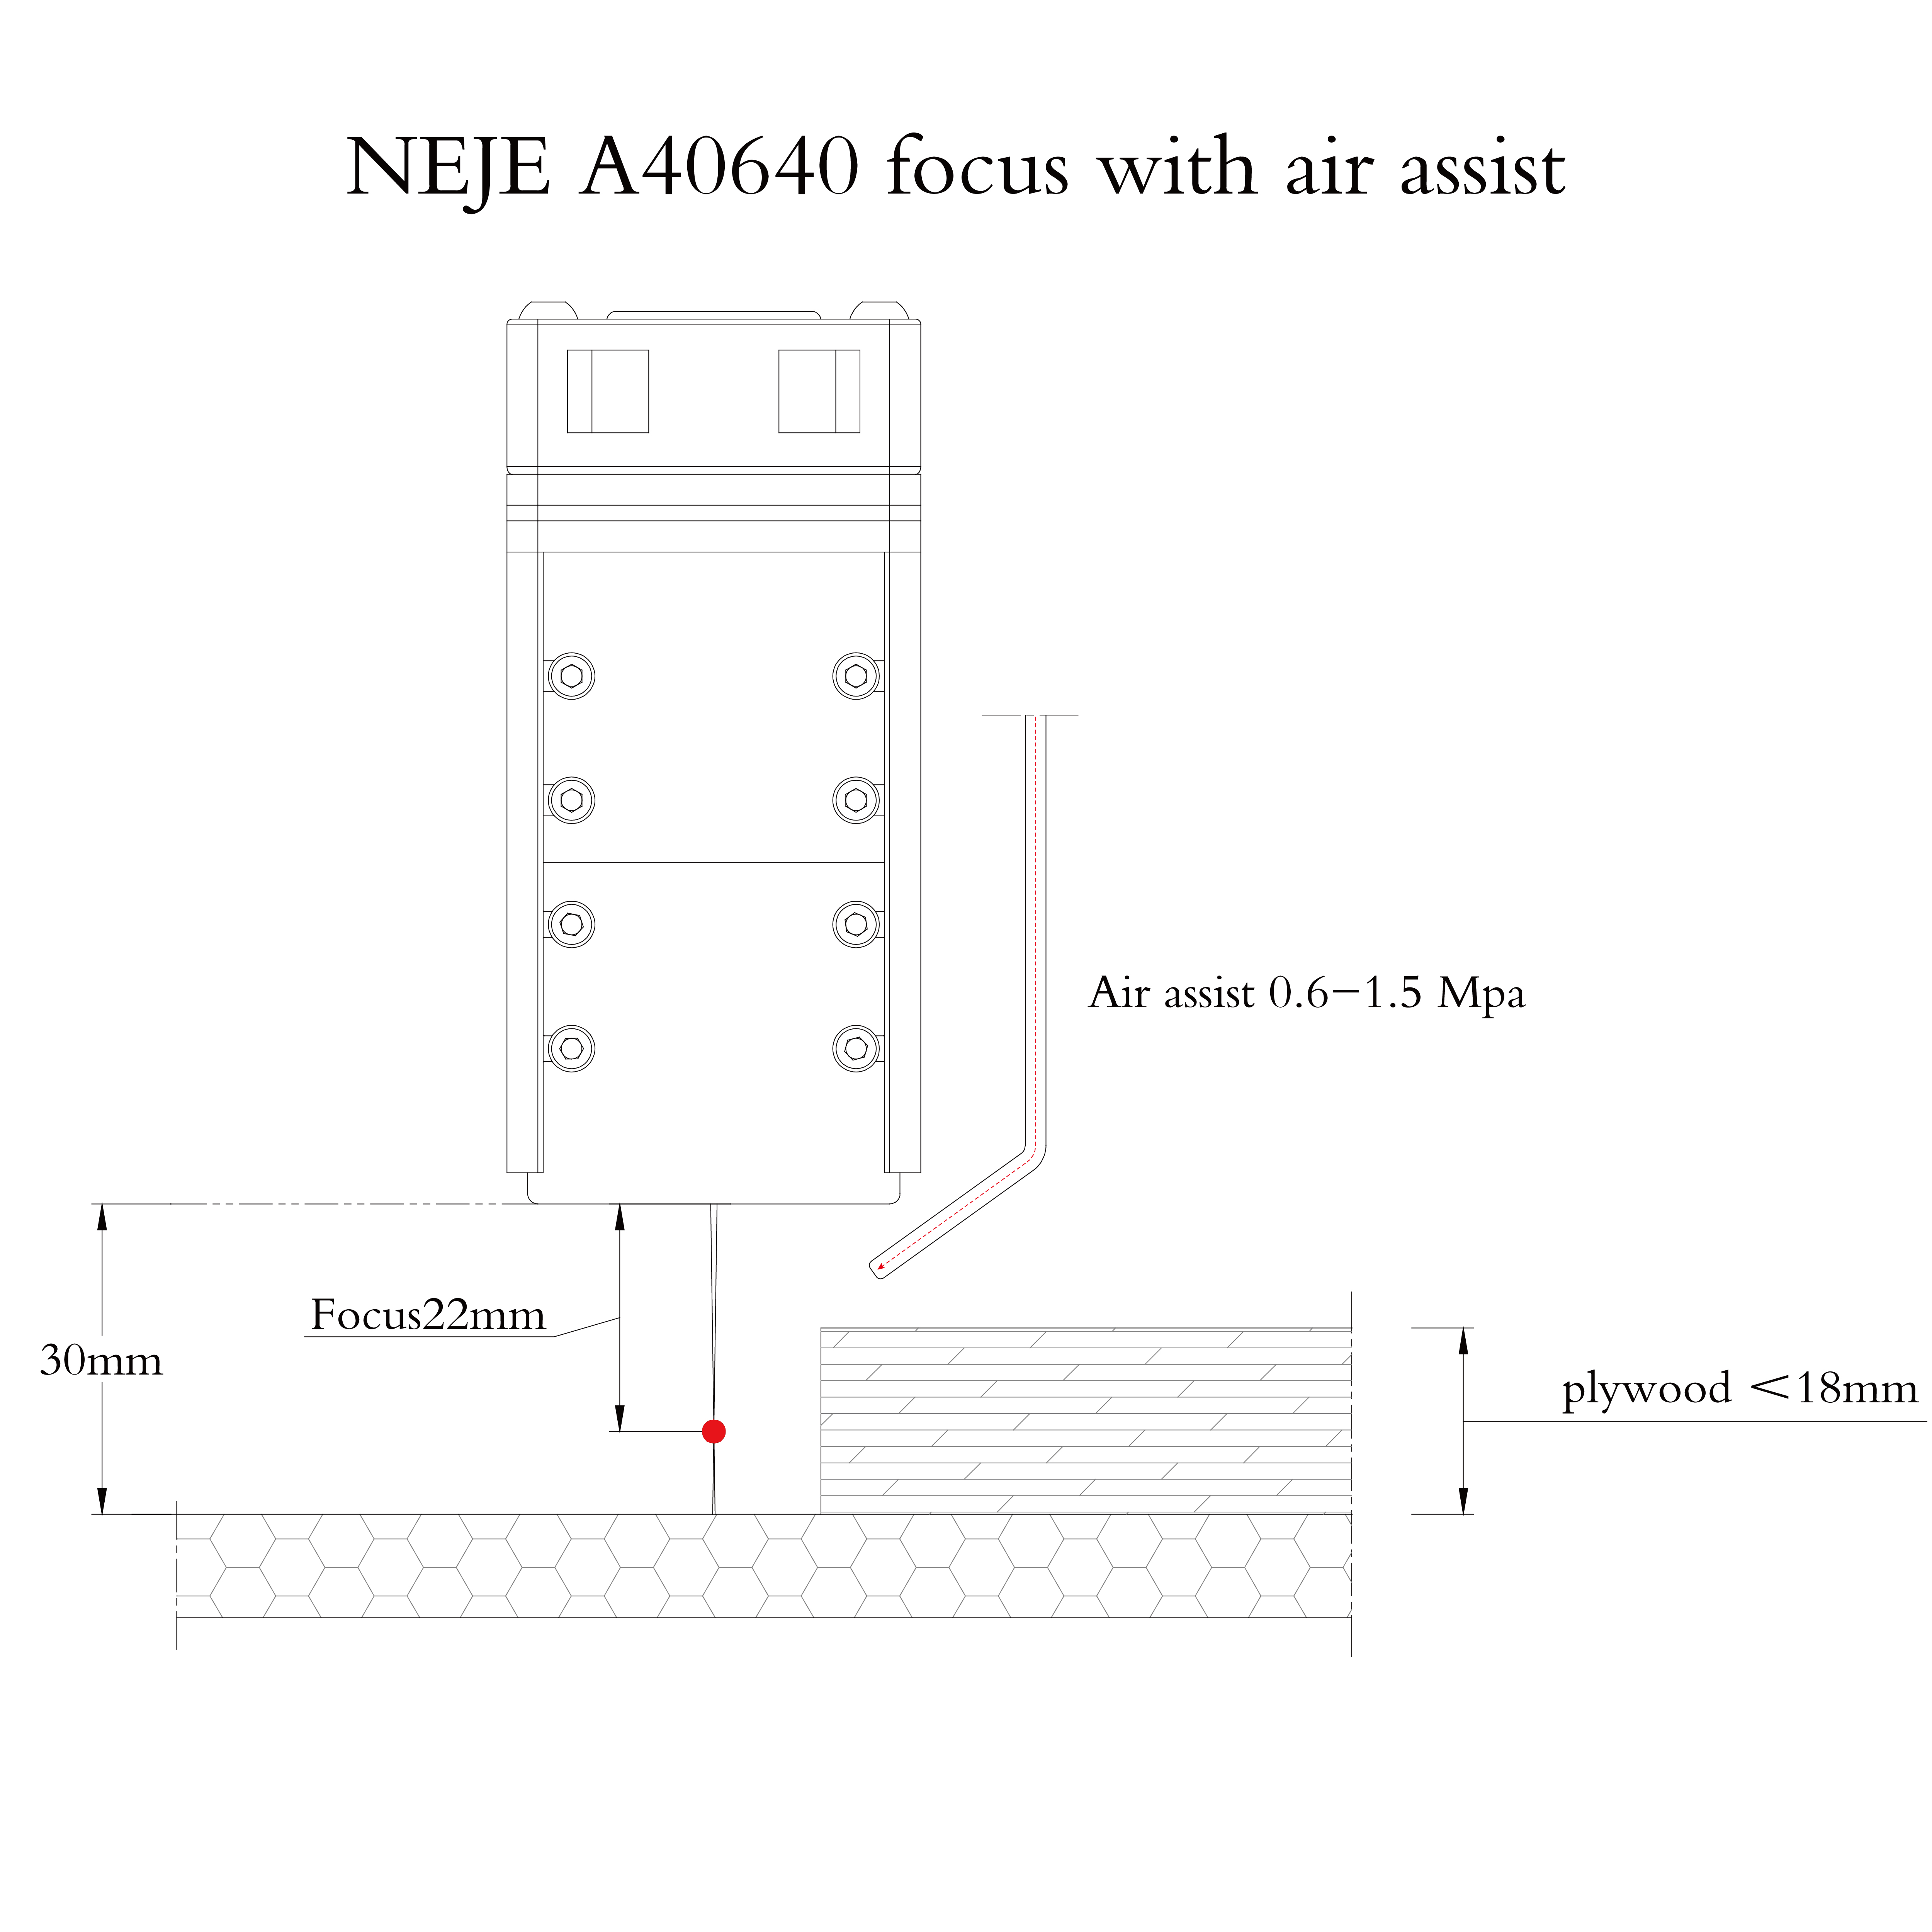
When I first tested my A40460 laser I measured about ~22mm from the bottom of the housing to the focus point, similar to this drawing from the Neje website…
Yours isn’t about 22mm as shown? After confirming mine was set about “right”, I used that to set the dimensions of my nozzle.
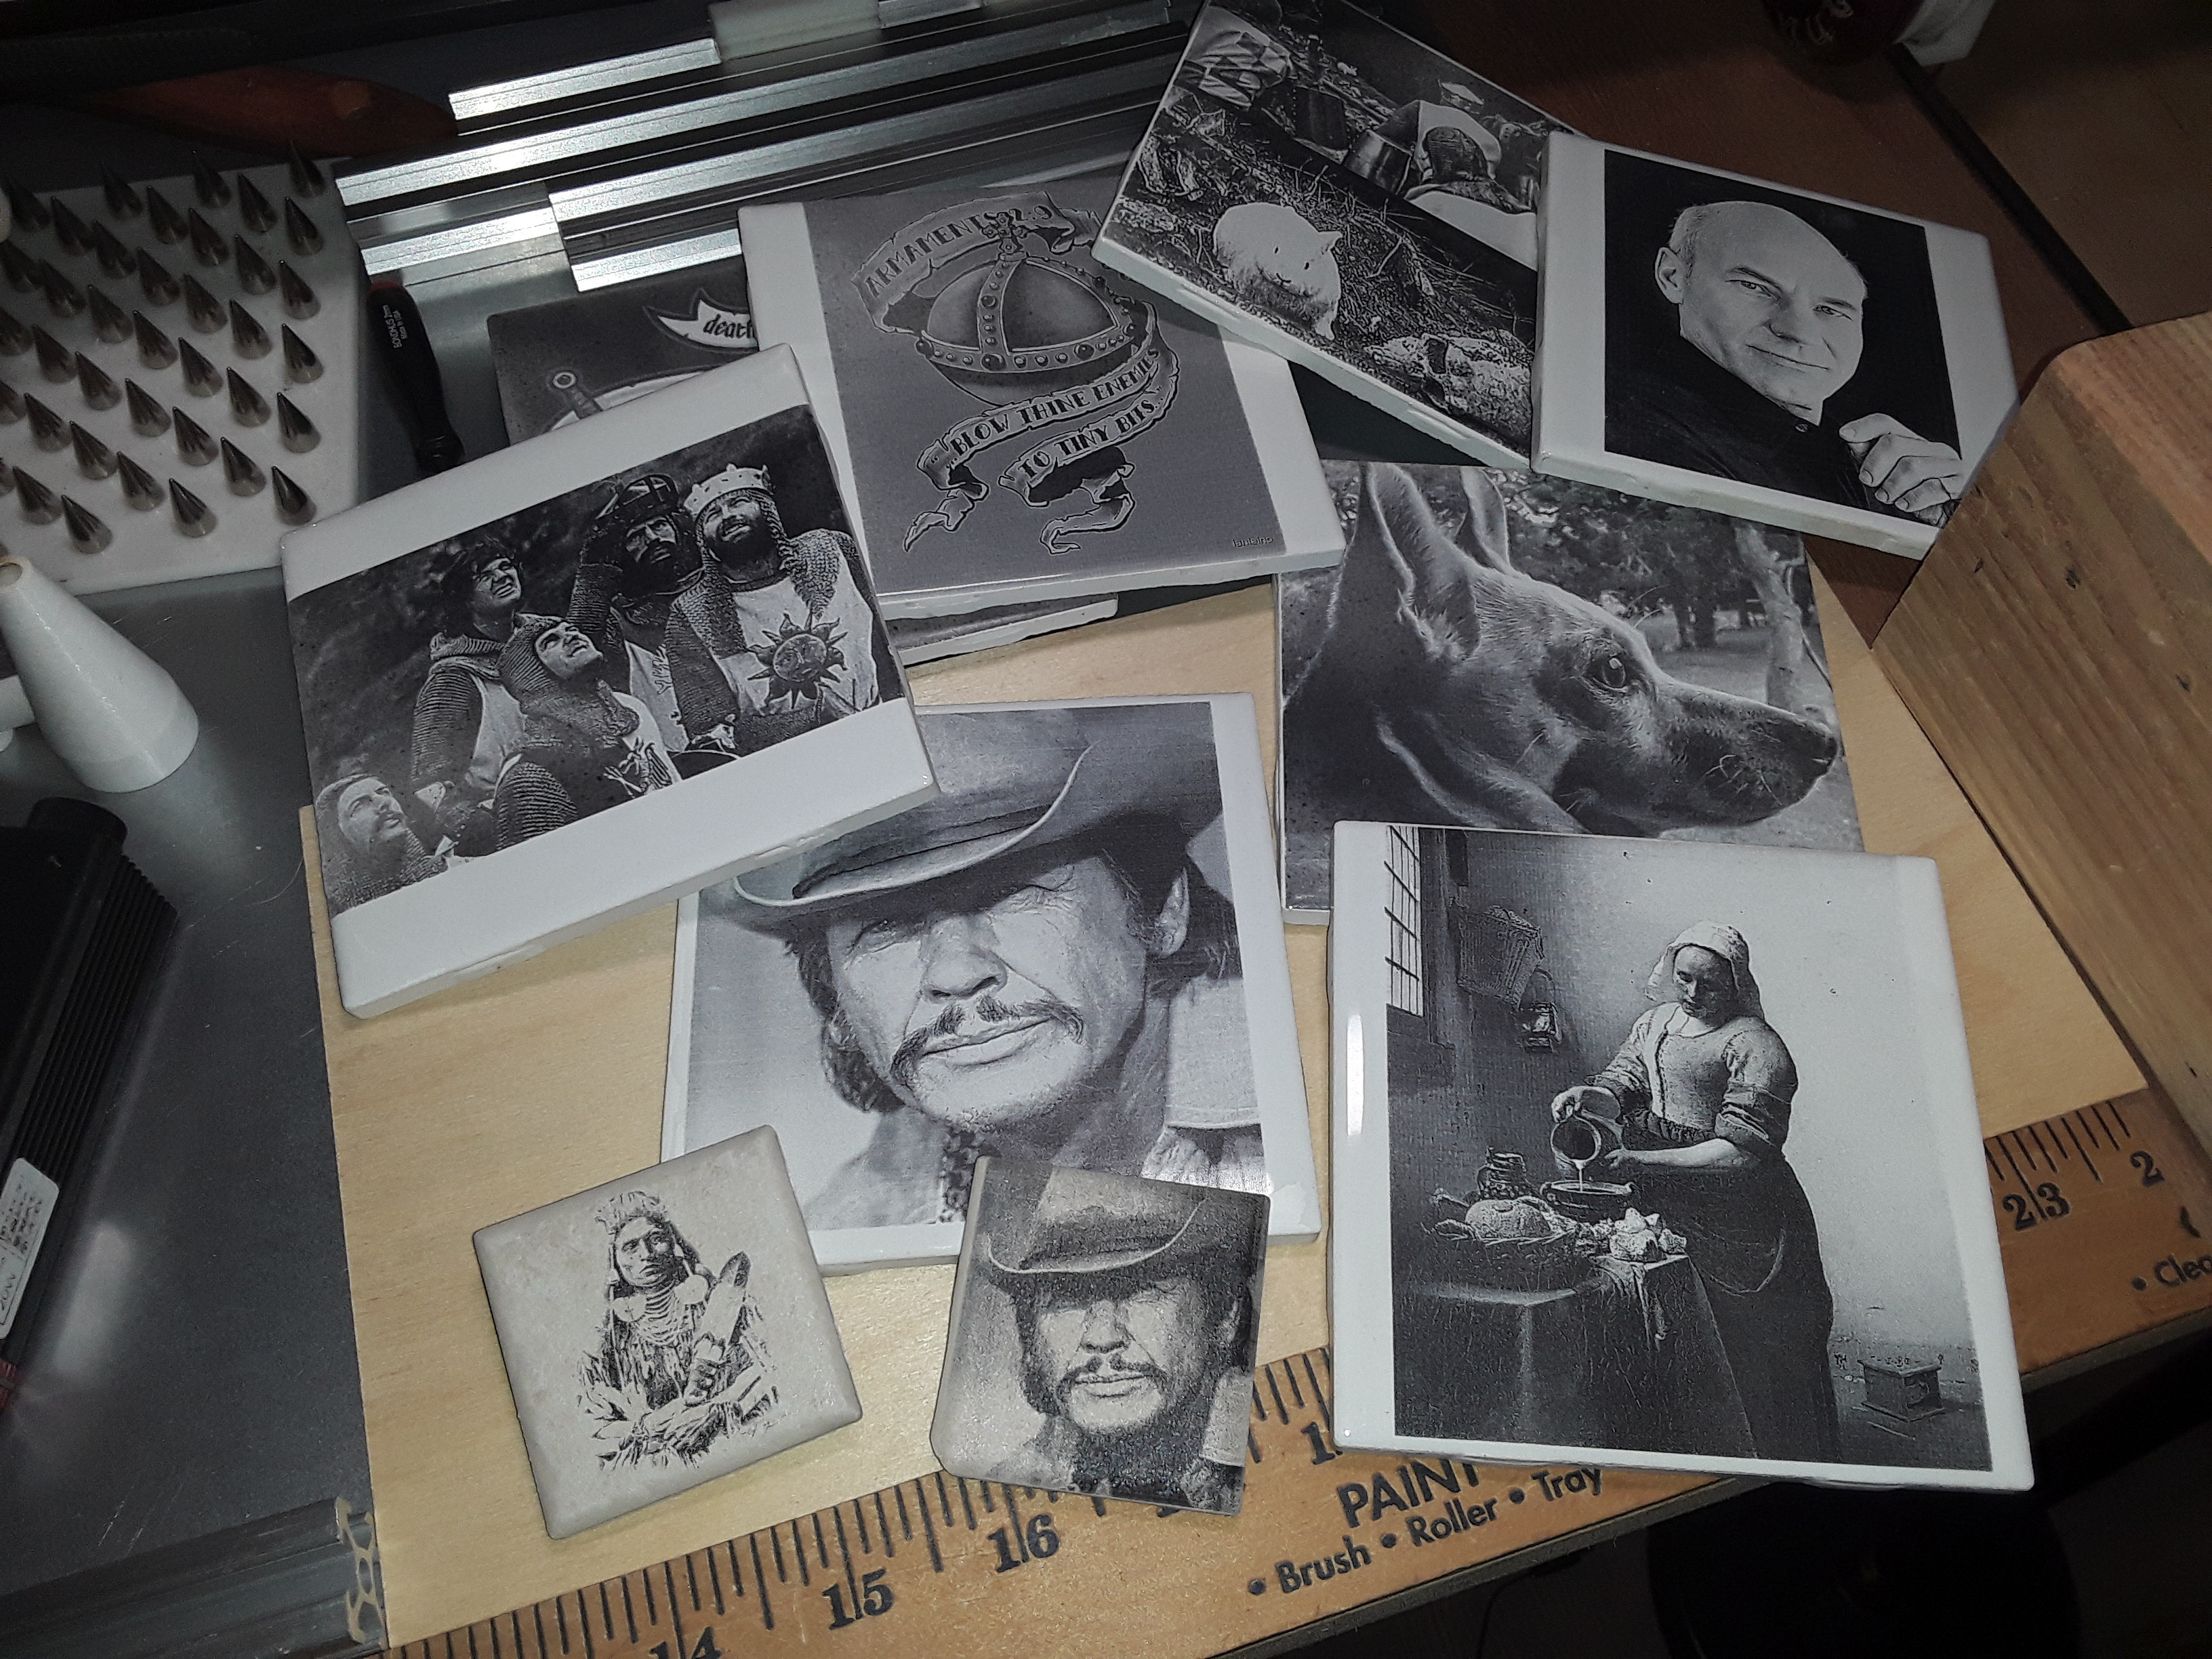
I’m sorry you’ve not done tiles yet. I found those to be one of the most satisfying “products” I’ve ever produced with a laser…
Interestingly, these were done with a lowly Banggood/Eleksmaker 2.5W diode laser… and no air-assist was required. I hope you’ll try again. It’s not a difficult process at all and the results can be stunning. I’ll gladly help as I can… 
– David
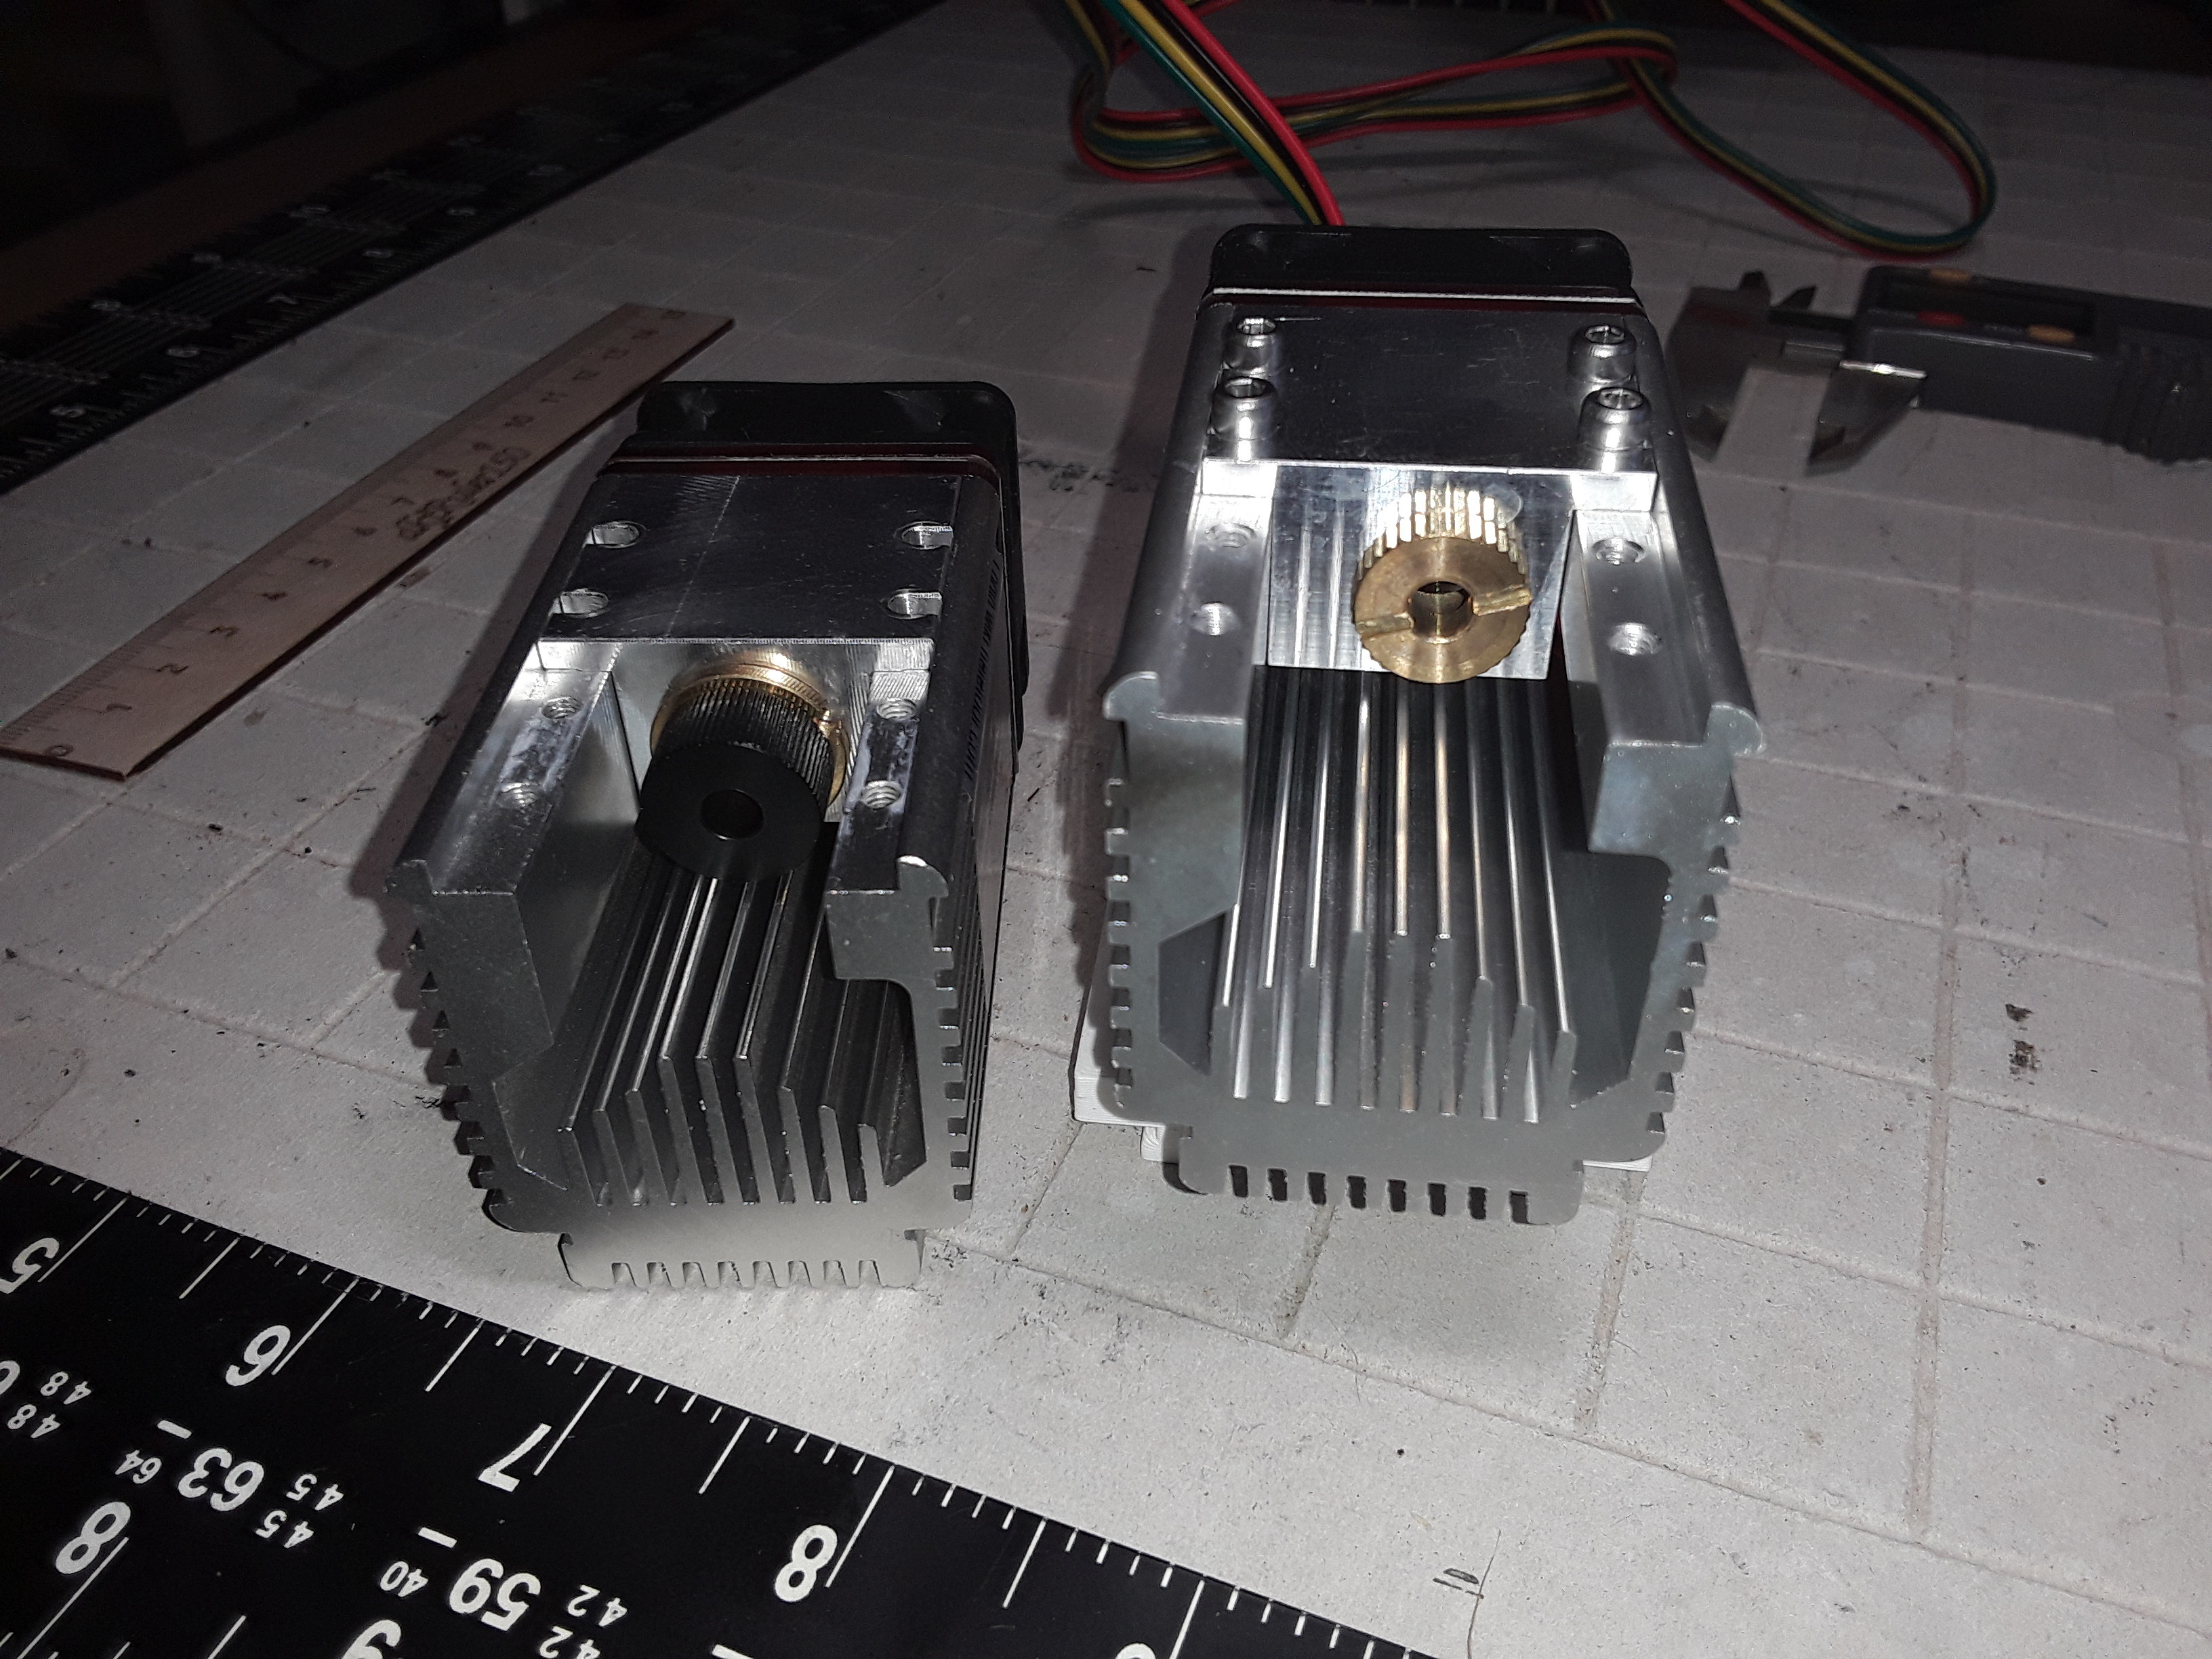
I show my “new style” Neje 30W laser module in my post above… but it may pre-date the 406x0 numbering scheme they have now. So, I’m not sure about the N40630 module… or the difference between A40630 and N40630.
If it’s an adjustable focus module, you can probably adjust it out a few millimeters. The major difference in the two modules I have is that the 40W lens assembly is off-center from the centerline of the module and the 30W was centered.
If your 30W module looks like the one on the left, my 30W “thing” might work fine. It could be a bit “tight-fitting”, depending on your printer, but you might be able to shave/scrape/sand it to fit. The print is easily done in less than an hour…
– David
The difference between the A40630 and N40630 is the max cutting depth (8mm vs 18mm).
Both the 30W and 40W modules are listed as “Dot (Focusable)”.
I have the N40630, similar to the one you show on the left - and your air assist printed and fits great!
Good to know. I’ll install a ball valve in my air assist.
Yours isn’t about 22mm as shown?
I’m not sure why 38mm popped into my head. My focus point is at 18mm from the metal housing (not the plastic shield). I’ve run several different focus tests, and they agreed on about 18mm. Given how small the kerf is on the laser, it was difficult to tell the exact focus point, but 18mm was the mid-point between the two points I could clearly see were out of focus. I ran several tests of different types since my focus appear to be different than the 22mm to the shield in their drawing, and they agree.
[Tiles] I hope you’ll try again.
Actually, I’ve not tried at all. I authored an tile engraving, put in the max feeds that Ryan had for the Rambo board for a laser, and choked on job time. I don’t feel comfortable being away from the laser, and I haven’t had the large chunks of time to be in the shop to babysit the machine for an larger engrave. But doing some tiles is definitely on my stack of things to do this Winter.
And thanks for the YouTube channel reference. I’ve had more difficulty finding good laser content on YouTube compared to the material on CNC work.
I must have seen your post before you edited it and IIRC it mentioned how to determine where your module is focused… 
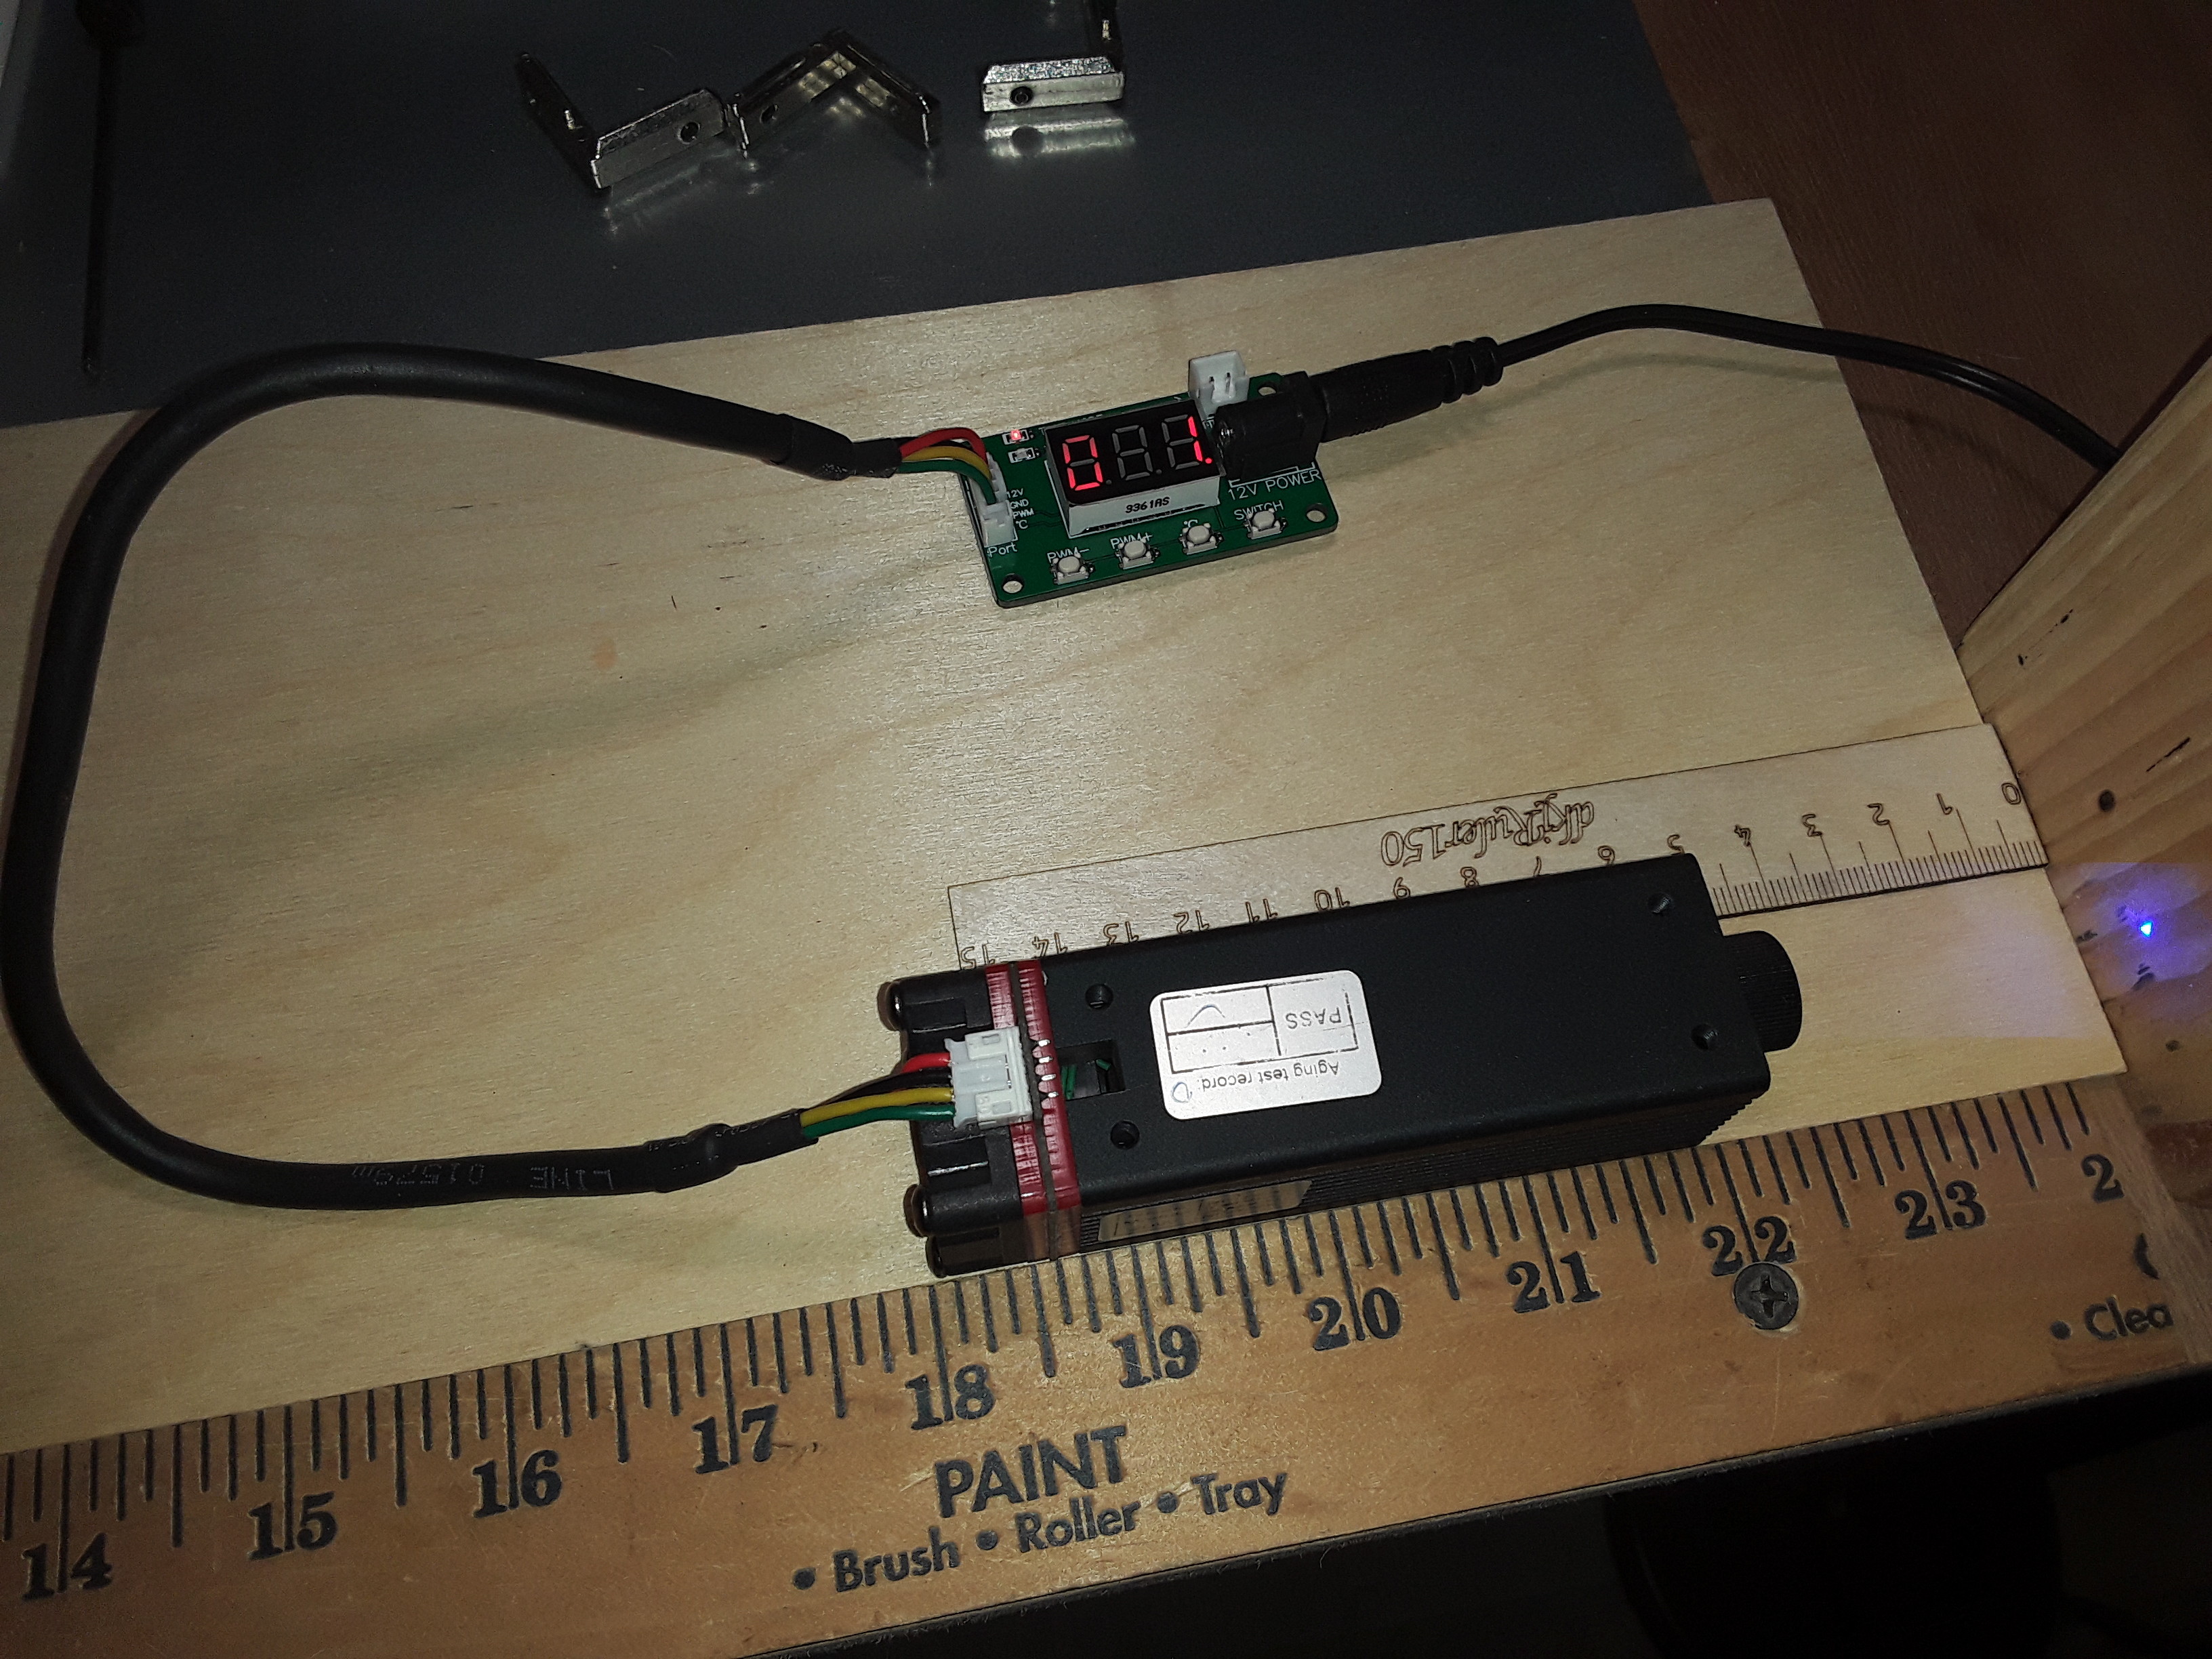
Anyway, hopefully your Neje kit included a little PWM module… I’ve gotten several of them with my several orders from Neje
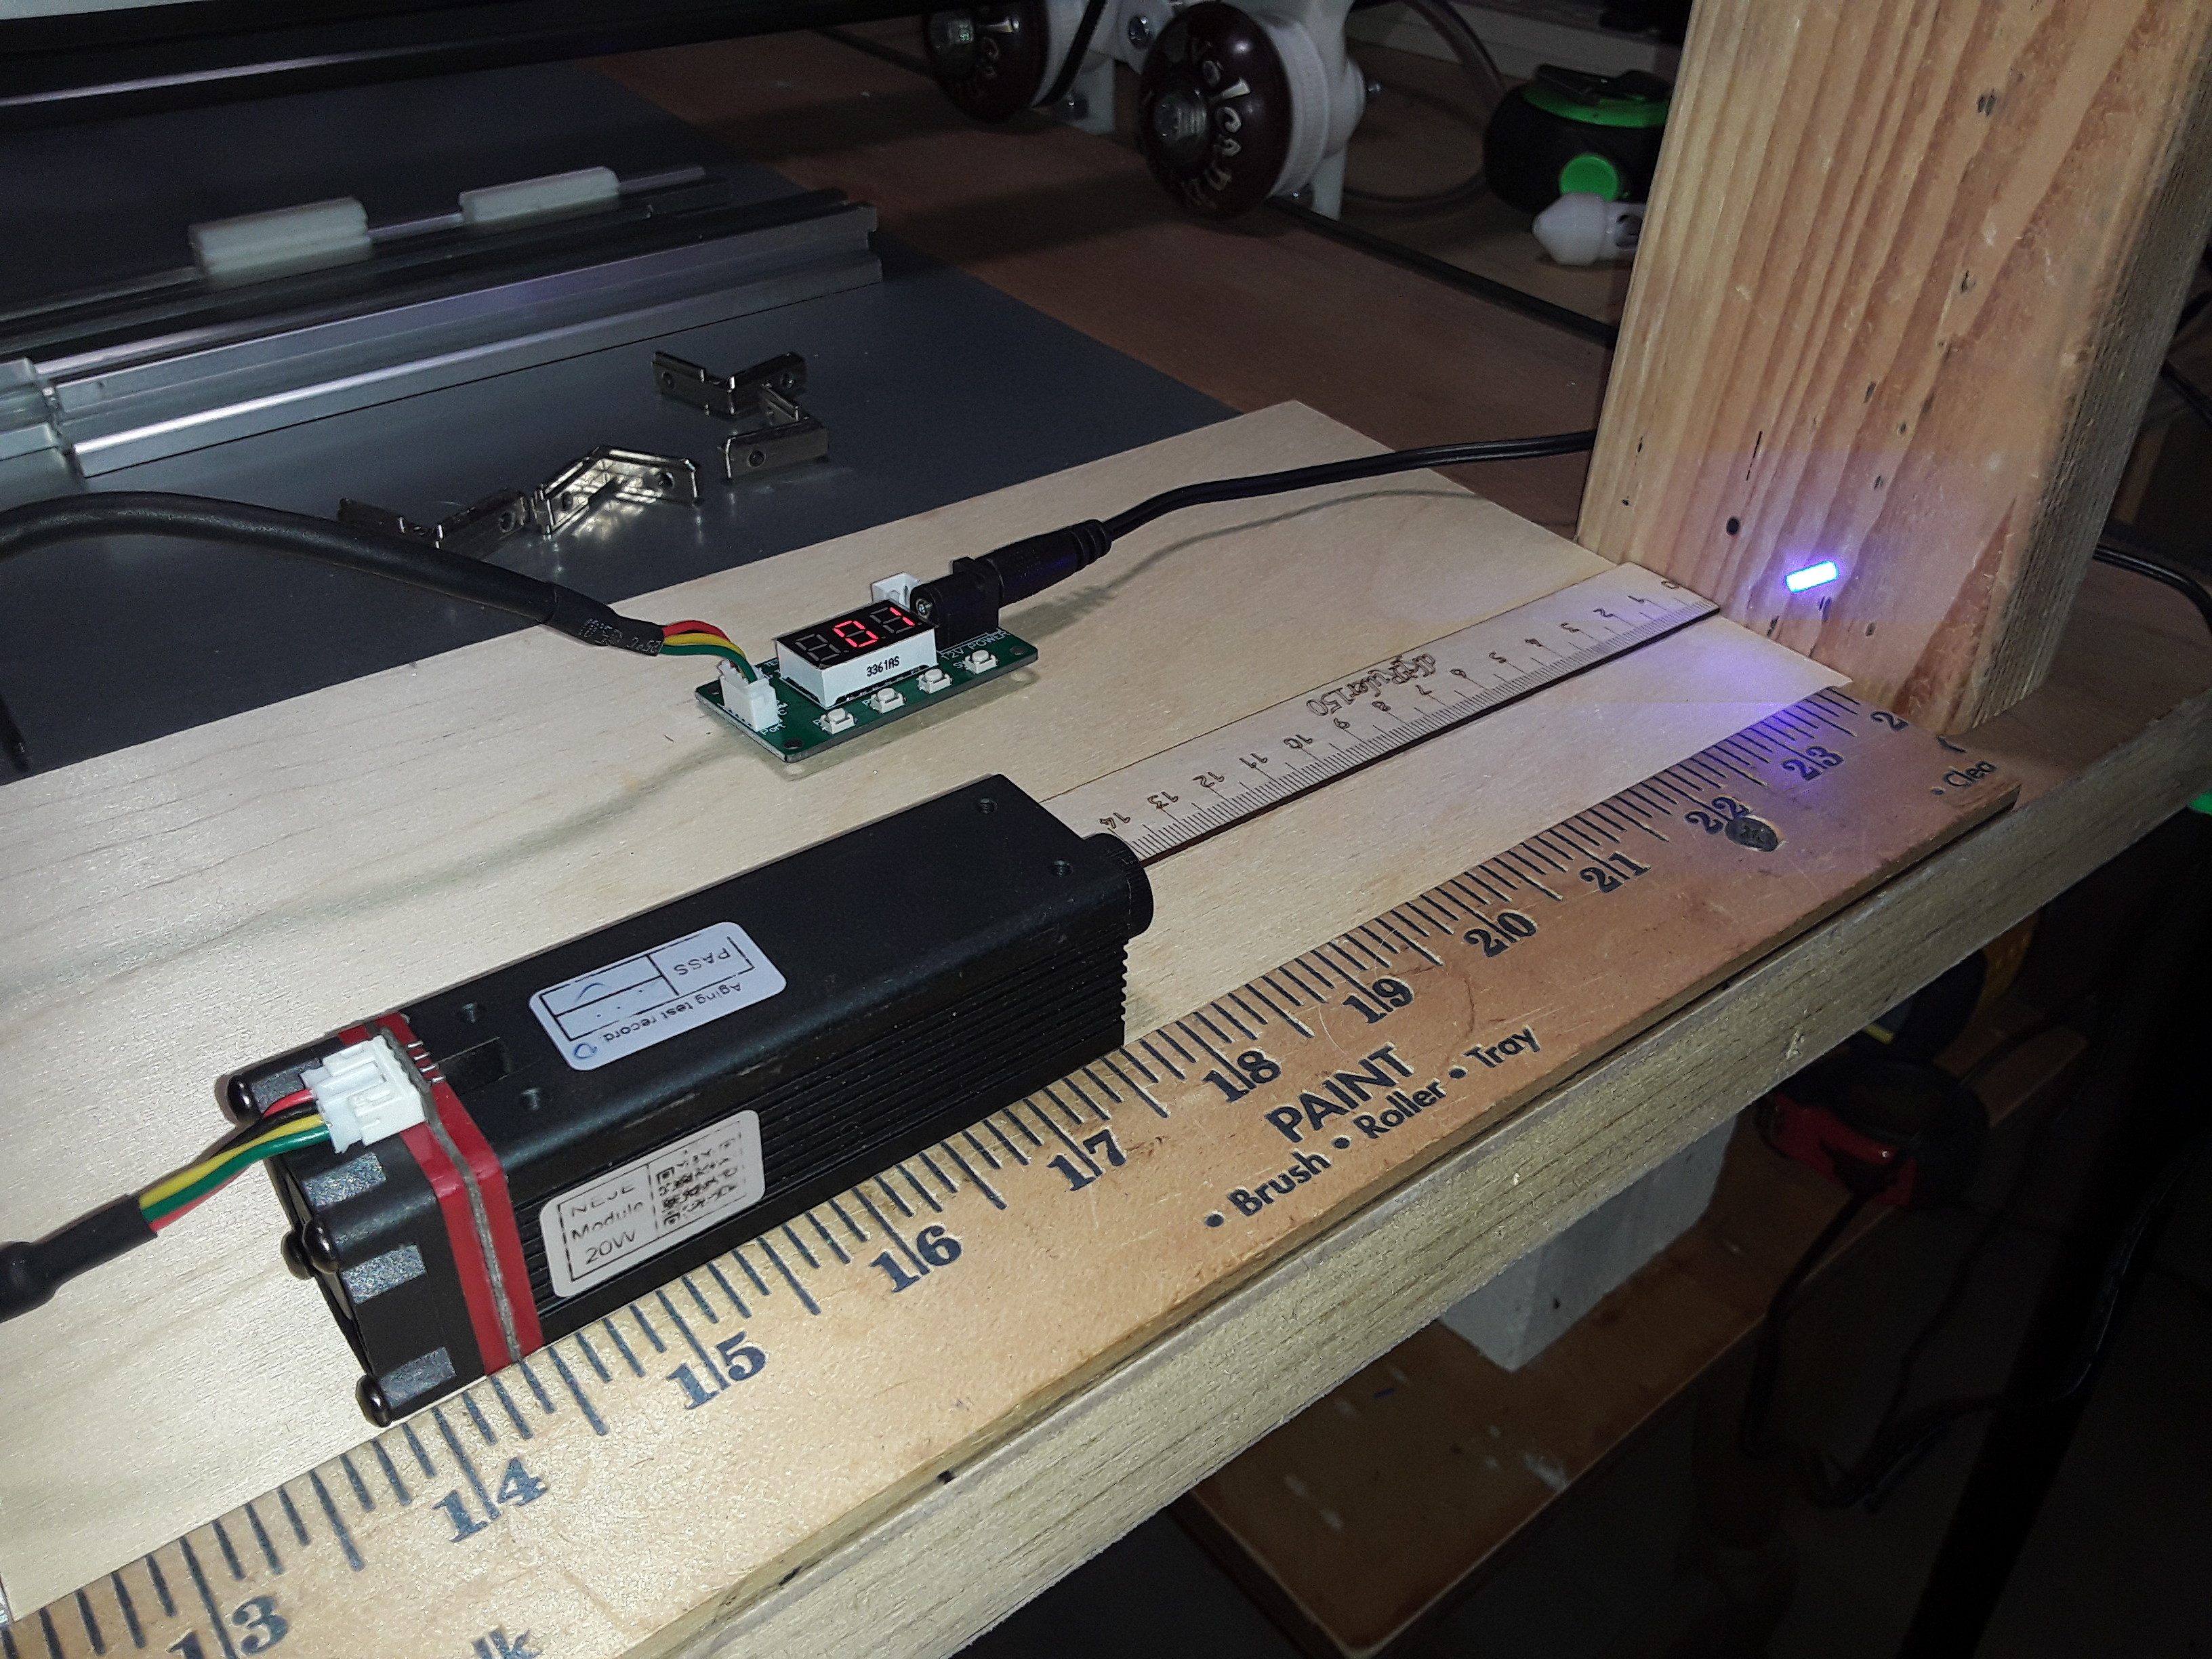
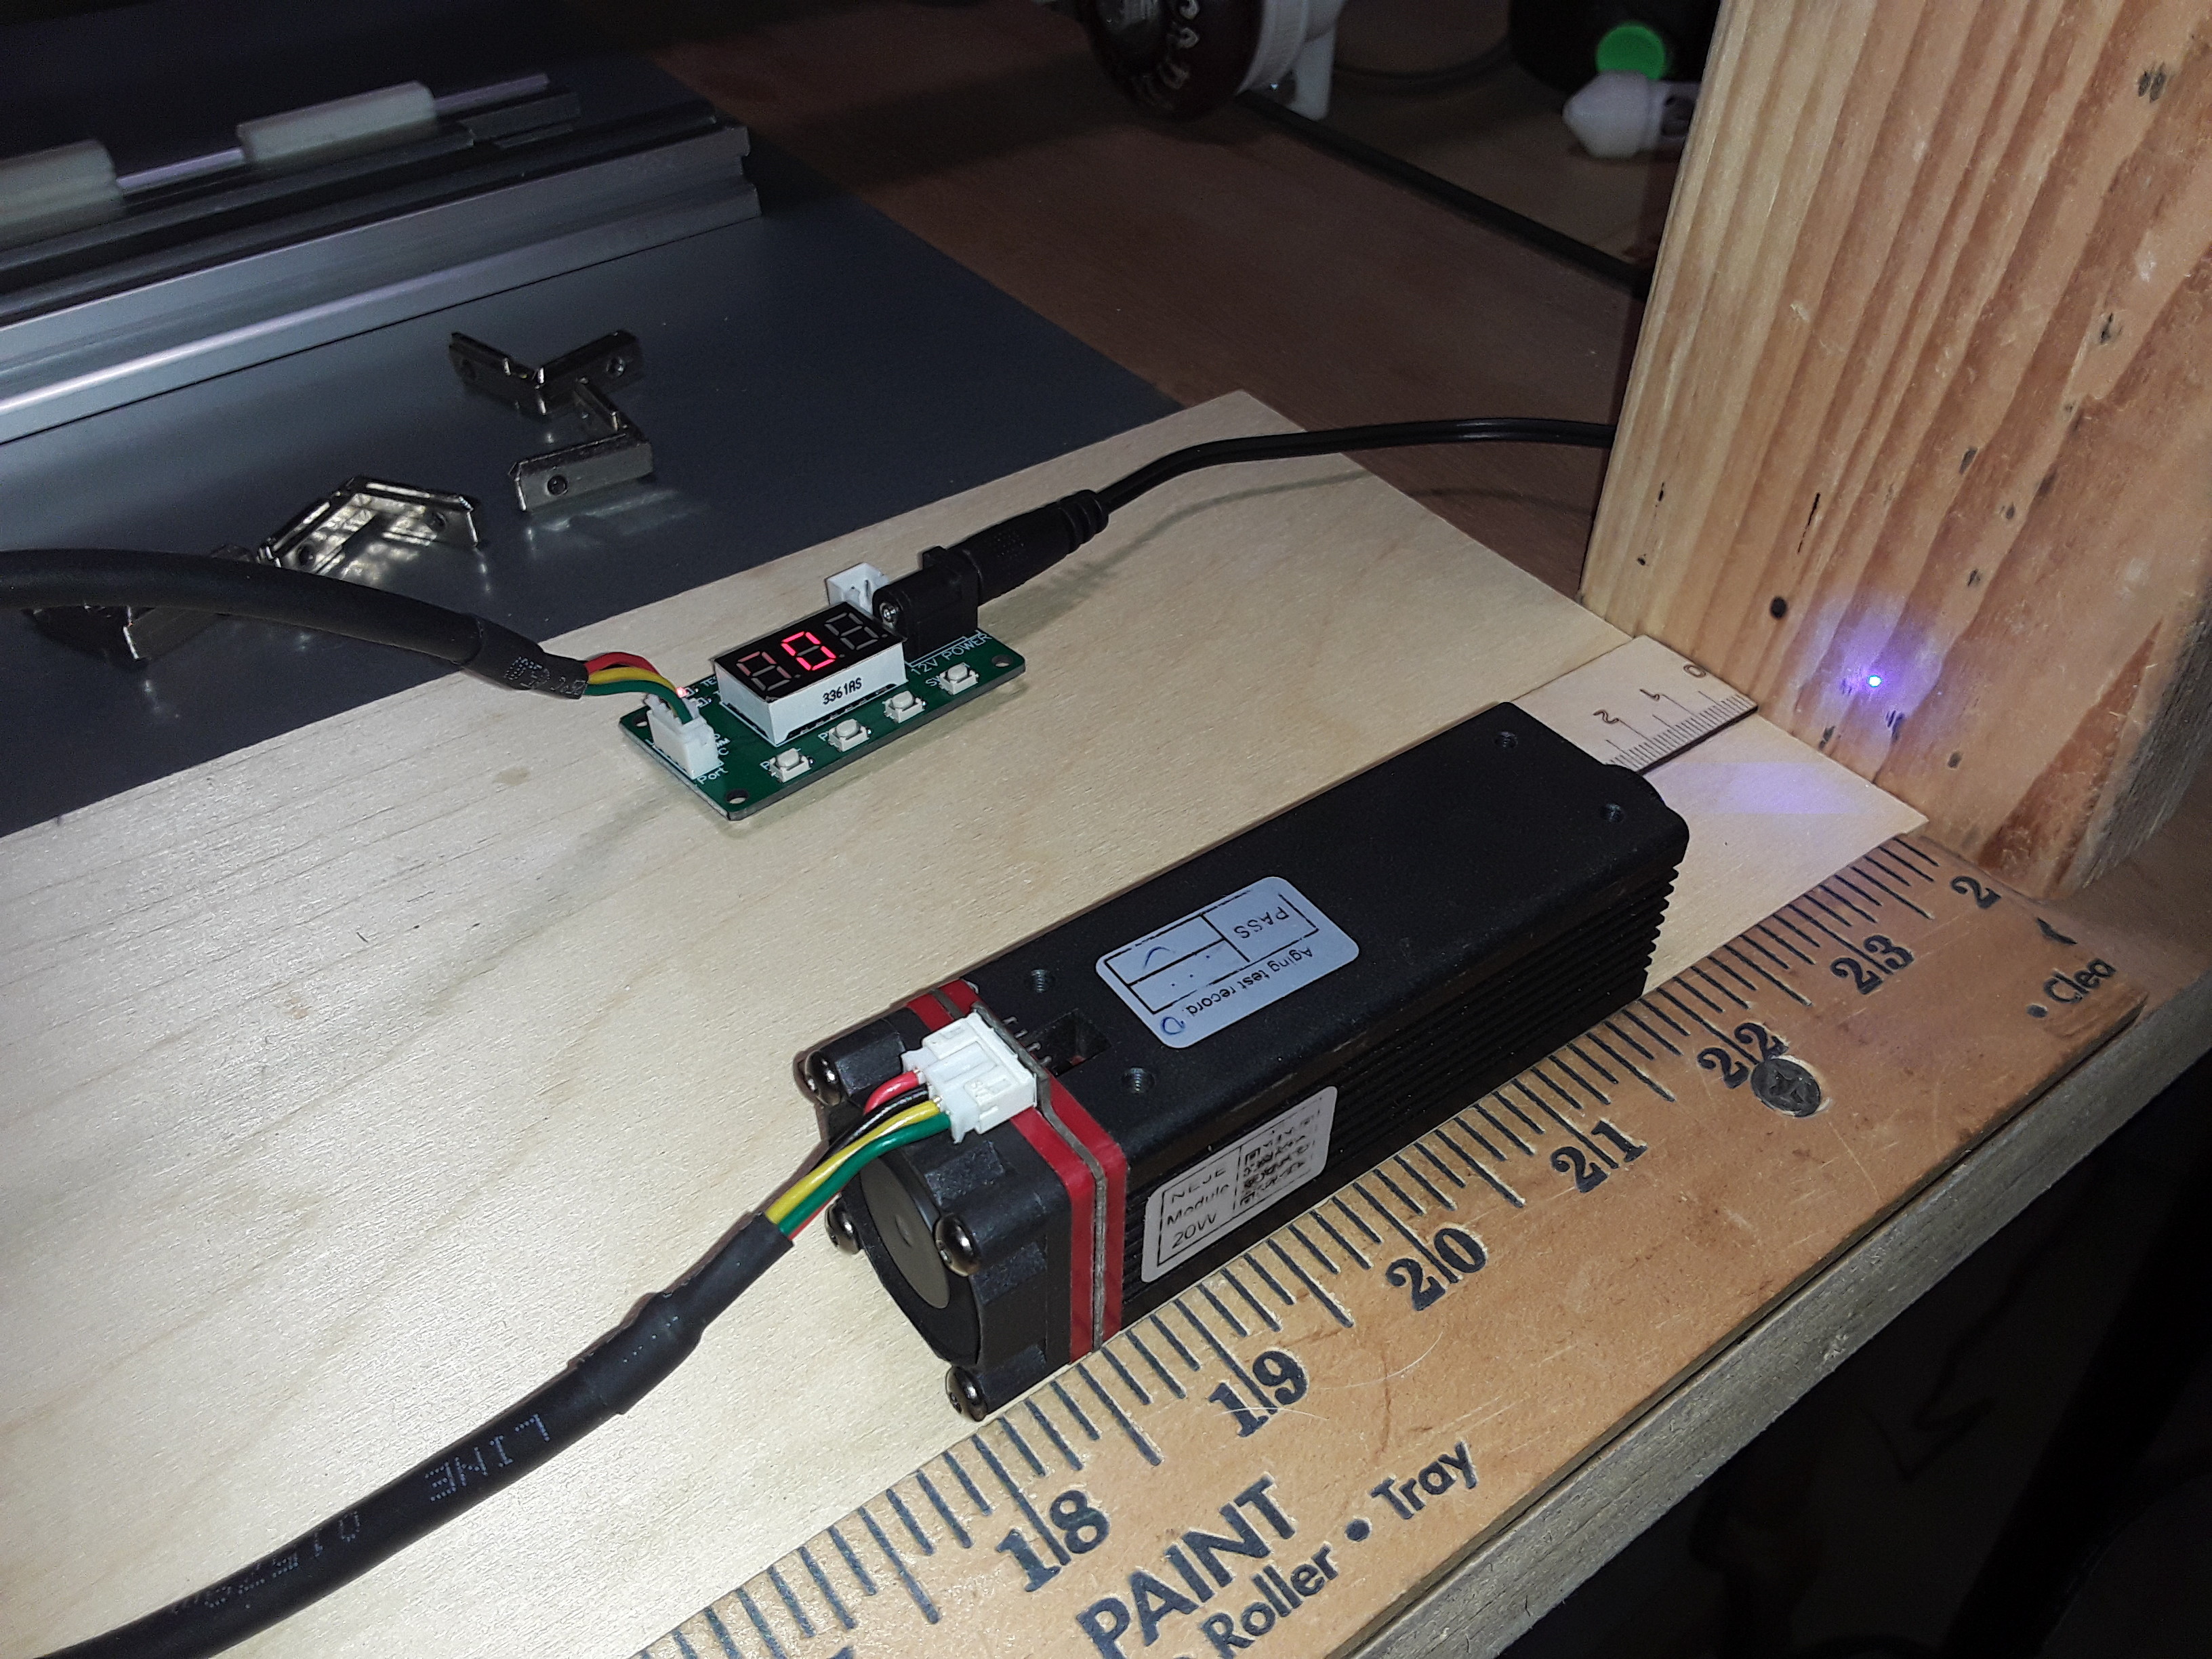
I lay the laser module down flat on the worksurface, connected to the PWM module (it reads 001, photo timing drops one digit), and +12V power… that’s all that’s needed. I use a wooden block and ruler and slide the laser module back and forth to quickly find focus…
too far…
too close…
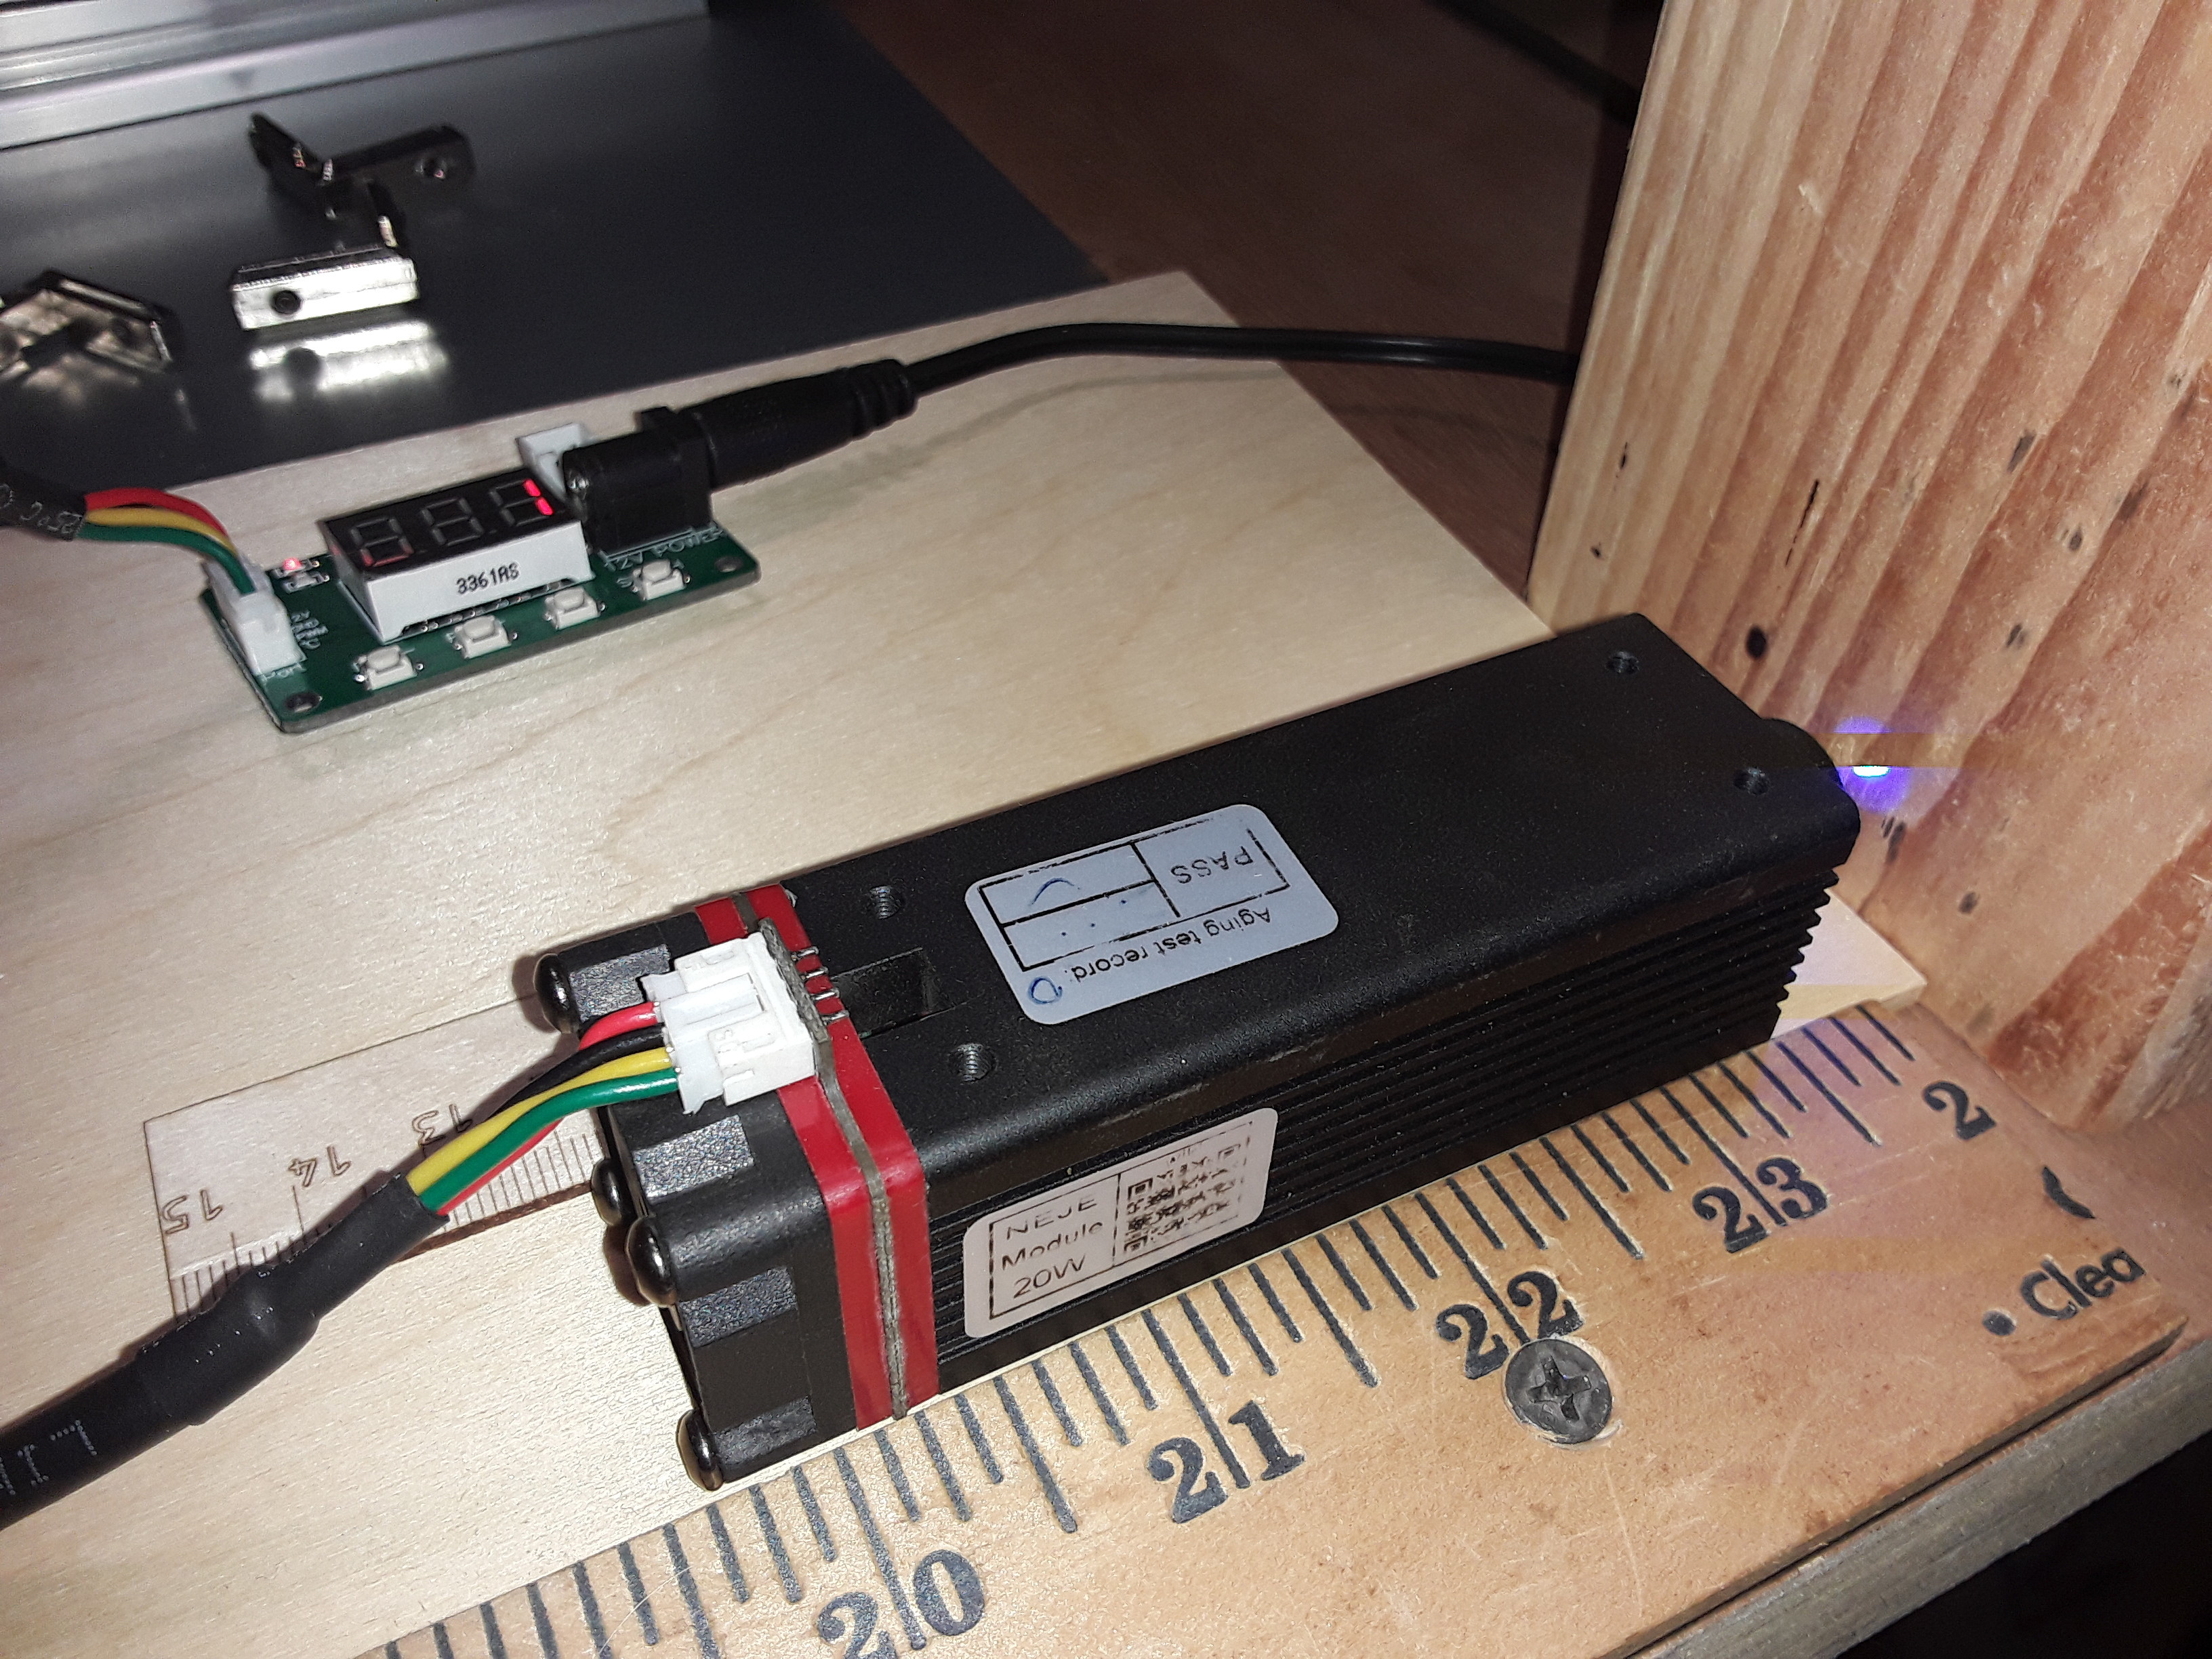
just about right!
Get your measurement from bottom of housing to the wooden block or make any focus adjustments… and then go make a gauge block (or step-gauge) to enable setting the proper height when mounted on your machine!
– David
Oops sorry David, yes I should stop playing around with editing my posts ![]()
I didn’t get the PWM module with my order, but your explanation makes sense and I can just order one if need be. Watching some youtube videos as well shows a lot of people using Lightburn to do a low-power fire test and then use a USB microscope to dial in the focus. Or focusing via firing on piece of wood set on an angle and picking the best looking spot/measuring the distance.
Thanks for answering my lasering questions (and everyone else asking in this thread)!
To me this method seems the same as just raising and lowering the laser in its mount to see where the best focus spot is and then measuring the result. The problem is that I cannot tell any difference between 15mm and 25mm using this method. I’m not sure if the issue is me, or the issue is related to the dual-beam A40640. The method that I have the most confidence in is the angled wood as kcny suggests. I still cannot tell a difference near the focus point, but I can match out-of-focus areas of the line and pick the midpoint. I also used LightBurns’s focus test. My best guess between the two was 18mm from the metal housing.
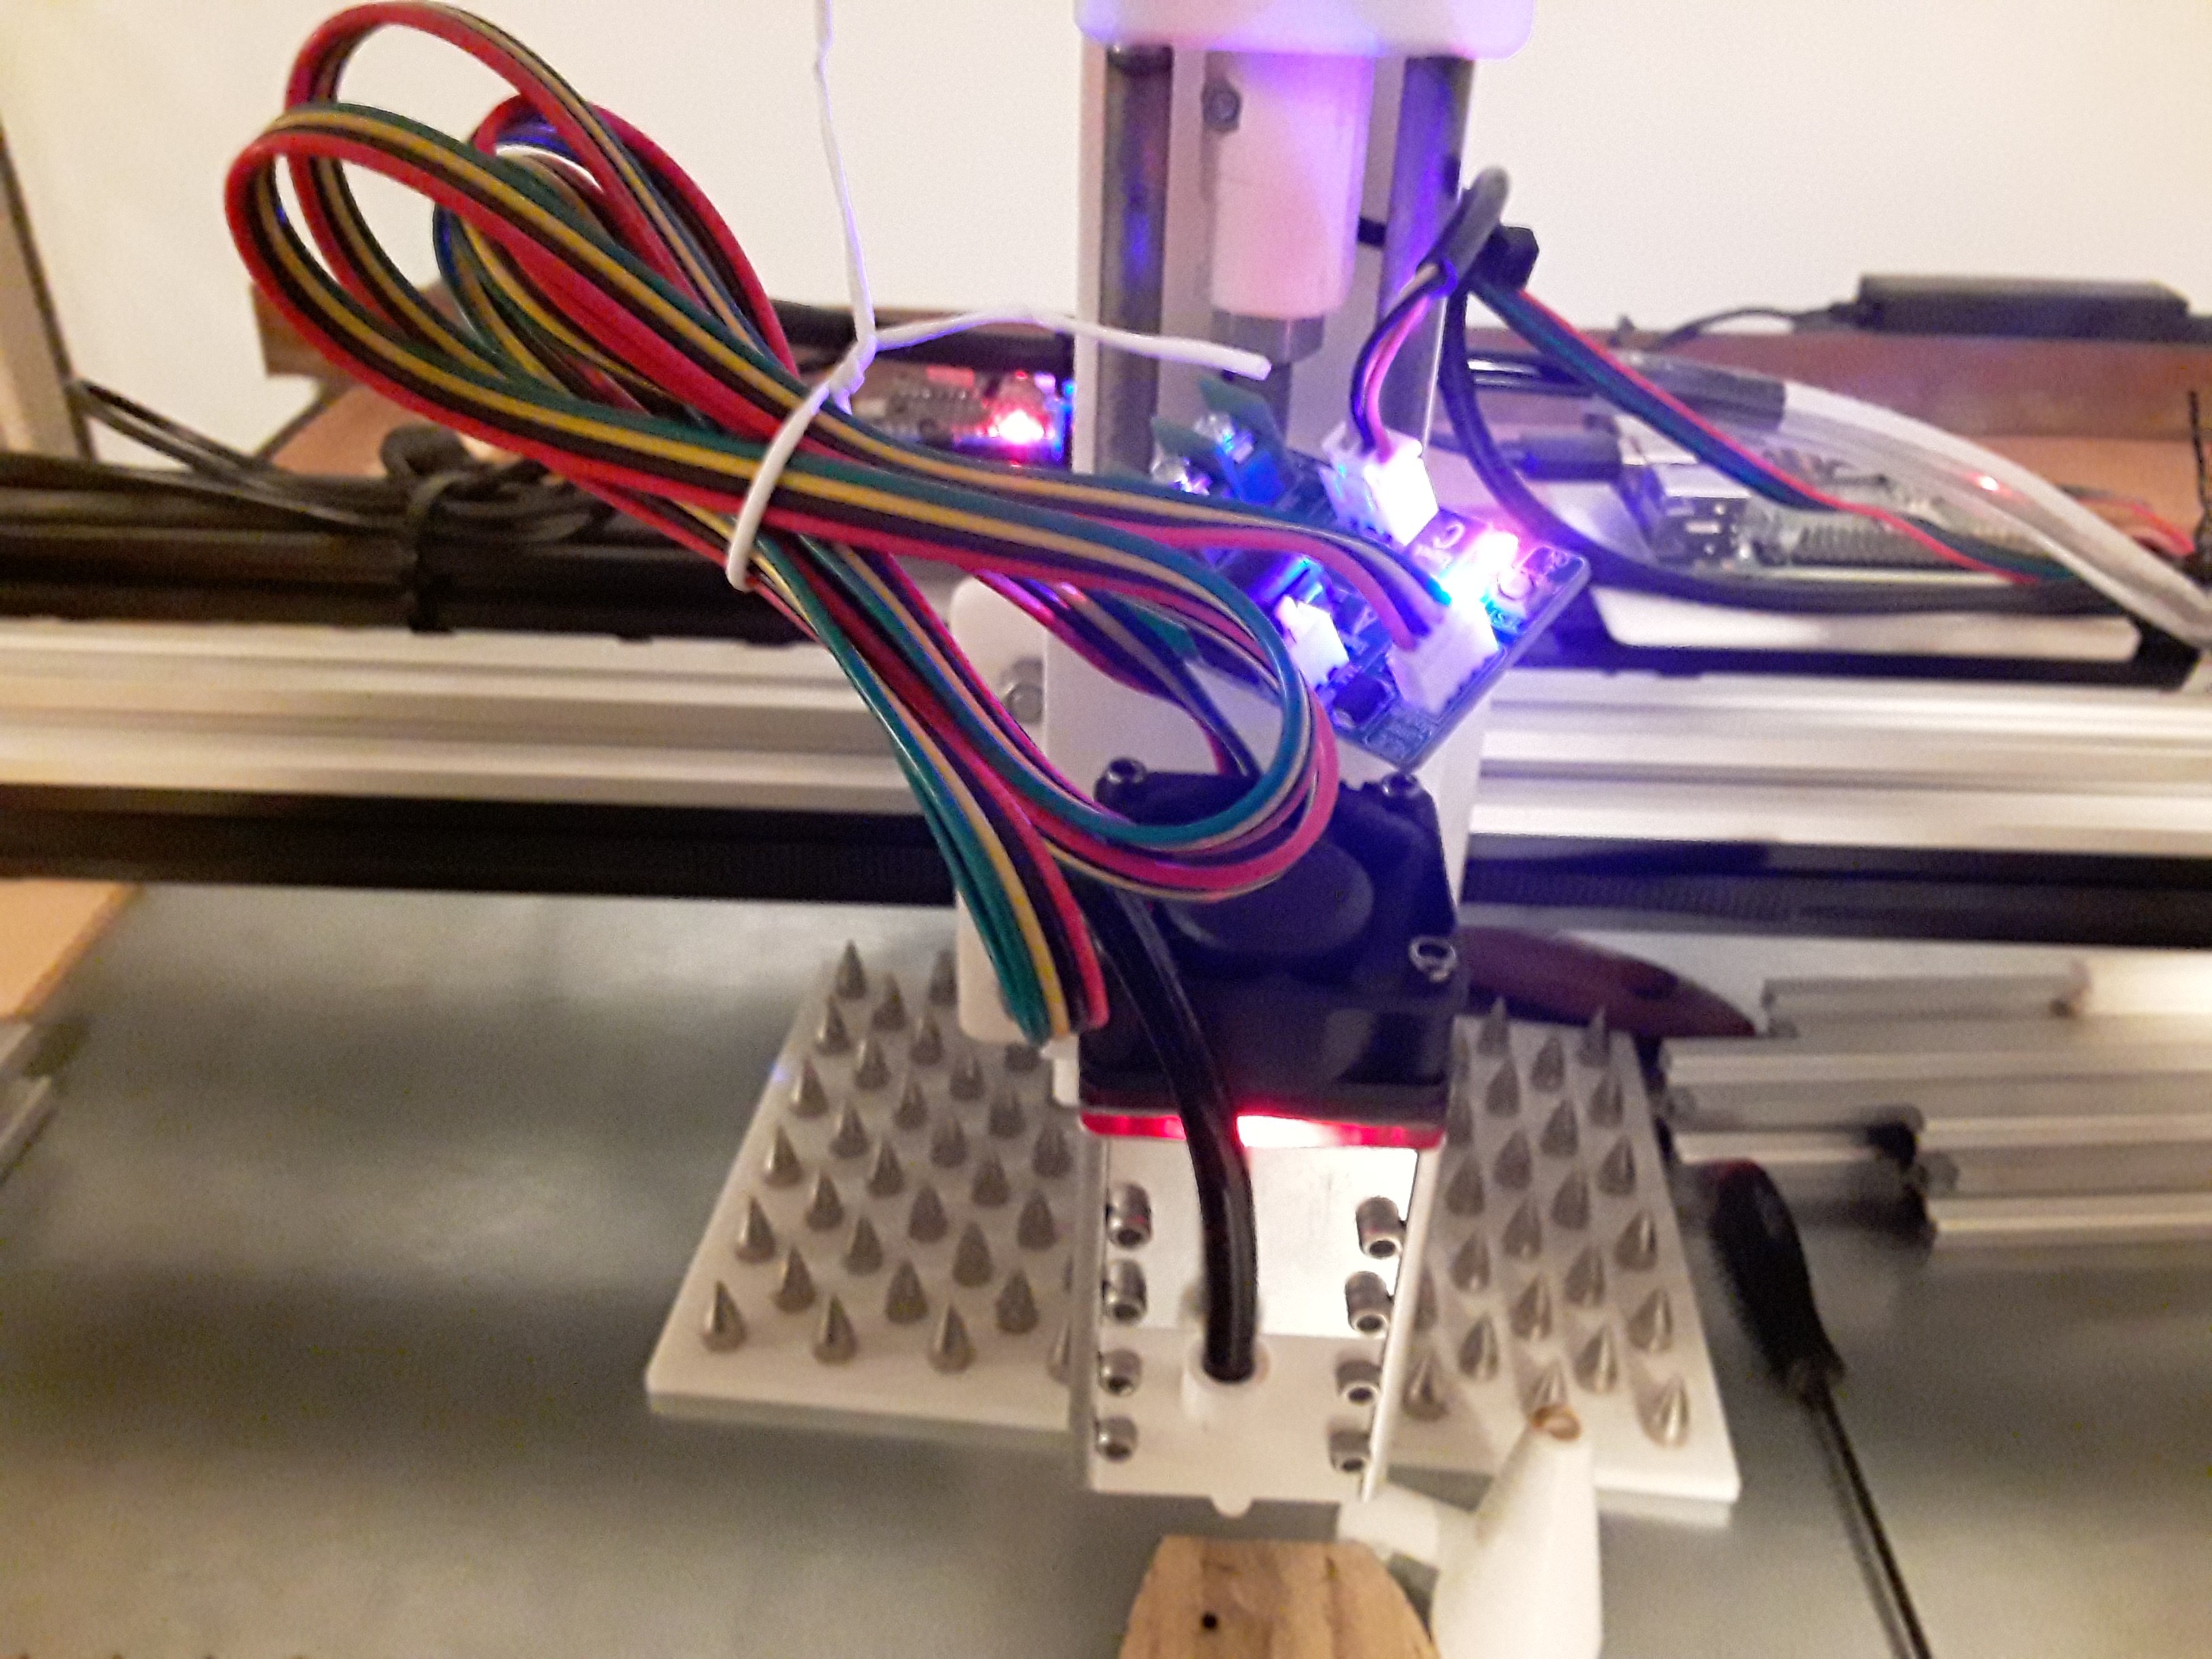
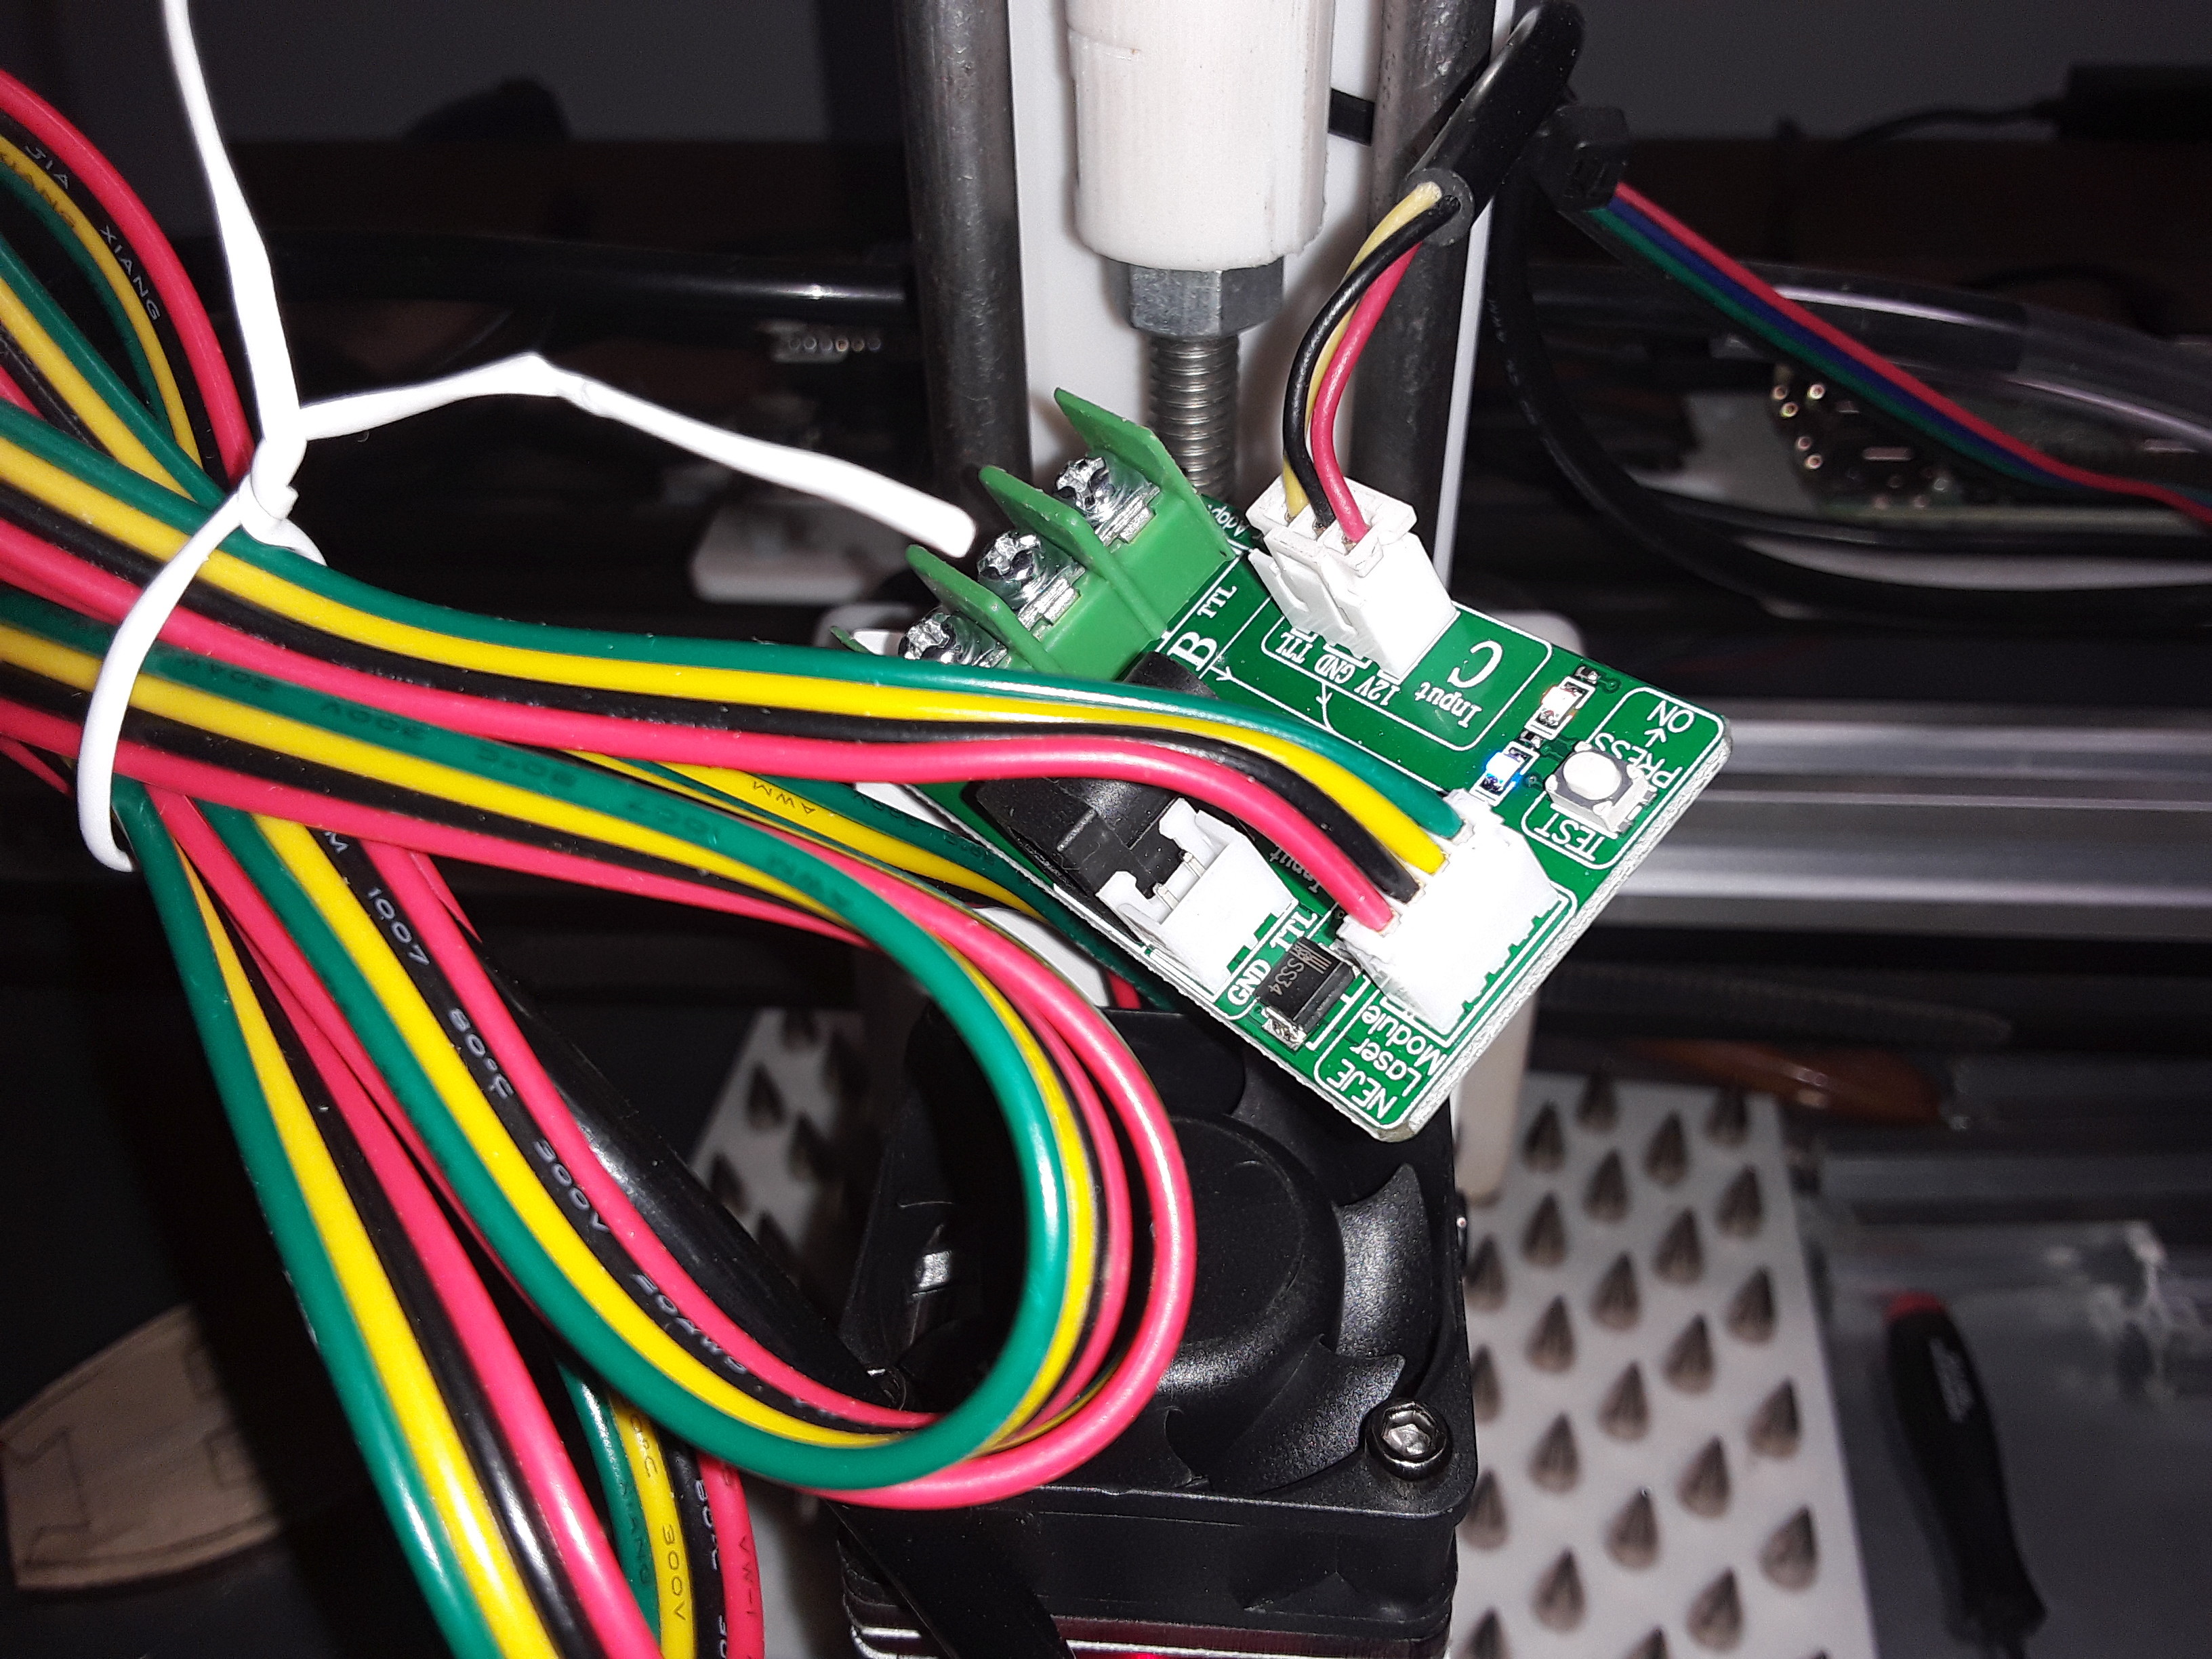
There is a different little board I’ve gotten with some Neje laser modules… that doesn’t have the PWM generator or digital readout. But it does provide a variety of ways to connect power and PWM (TTL) to your laser module. Most of the time I just leave it out of the system and connect directly to the laser module… but it can be handy (I’m actually just testing this laser on my machine prior to installing it on my daughter’s machine…) for testing and, more subtly but important however you do it, it provides a convenient way to insure a common ground when using different power bricks to provide power to your controller (which provides the PWM signal) and the laser power.
It provides a two-wire TTL connector, a three-wire +12V/GND/TTL connector, and even screw terminals to allow easier(?) connection to different controllers. It also provides a “TEST” button but, unfortunately, it fires the laser at full-power and is IMO of limited utility. Or, you can just go ahead and mount your module on your gantry and connected to you controller and simply focus it in place, controlling the power with Lightburn/CNCjs/etc.
By hook or crook, get PWM connected so that you can adjust to a very low power dot and you can use any focus method you want, on or off the machine.
– David
Yes, this is the board I got! It is called the IAB board (Interface Adapter Board).
I’m using the SKR Pro board on my Lowrider, so I intend on connecting like this guide shows: SKR Pro + Marlin 2.0.7.2 + NEJE/3 Wire Laser (Summary)
Robert,
When I have a fully-implemented Z-axis, I often use Ryan’s focus script to find the BEST focus when my laser is already in place and operating on a machine. You start with the Z-axis height too close to the material to possibly focus and then run the script. It burns 10 lines, each 2mm higher than the one previous, leaving the Z-axis 20mm above where you started. If the best focus point is found within the 20mm you traversed you should see a “gradient”… thicker lines surrounding thinner lines. Then you count from the top down to the finest/thinnest line and lower your Z-axis by the linecount you counted times 2mm; i.e. 6 lines X 2mm = 12mm below where you finished. I personally believe that this is the best way focus a machine that is fully-functional and has a true Z axis.
The method I showed above can be done as soon as you unbox your laser module… especially if the PWM board is included. No engraving machine is needed. Just lay it all out on the table, hook the laser module to the PWM board and plug in the power brick, Then use the buttons on the PWM board to turn on “TEST” mode and it comes on at the lowest power setting (001) … you should see a dot. Sliding the module by hand, against a guide or some sort (a wooden ruler is great!), you slide back and forth to quickly find the general area of minimum dot. Fine tune by making smaller back and forth movements and you’ll quickly zero in on the best/smallest dot… just like tuning the note with a trombone slide or cello string.
Sure the same thing can be done when mounted on your machine. I just find it easier to look down on it all from above rather than bending down and looking sideways to try to read my measurements or make an adjustment.
There’s many different ways to do this, of course. I just like what Neje has done to supply everything needed to do a quick and dirty test of the laser… right out of the box.
– David
Do you (or, anyone else) have any idea how small the kerf actually is? (I’m assuming it’s the 40640?) I’m asking because one of the possible requirements that I would have would require cutting out 3mm x 3.5mm windows that are separated by 0.55mm in both x and y directions. Material is thin, 0.020" laserboard. Can the 40640 do it?
(Customer is currently using a CO2 laser system at the local makerspace, but, we are interested in more control of the process. )
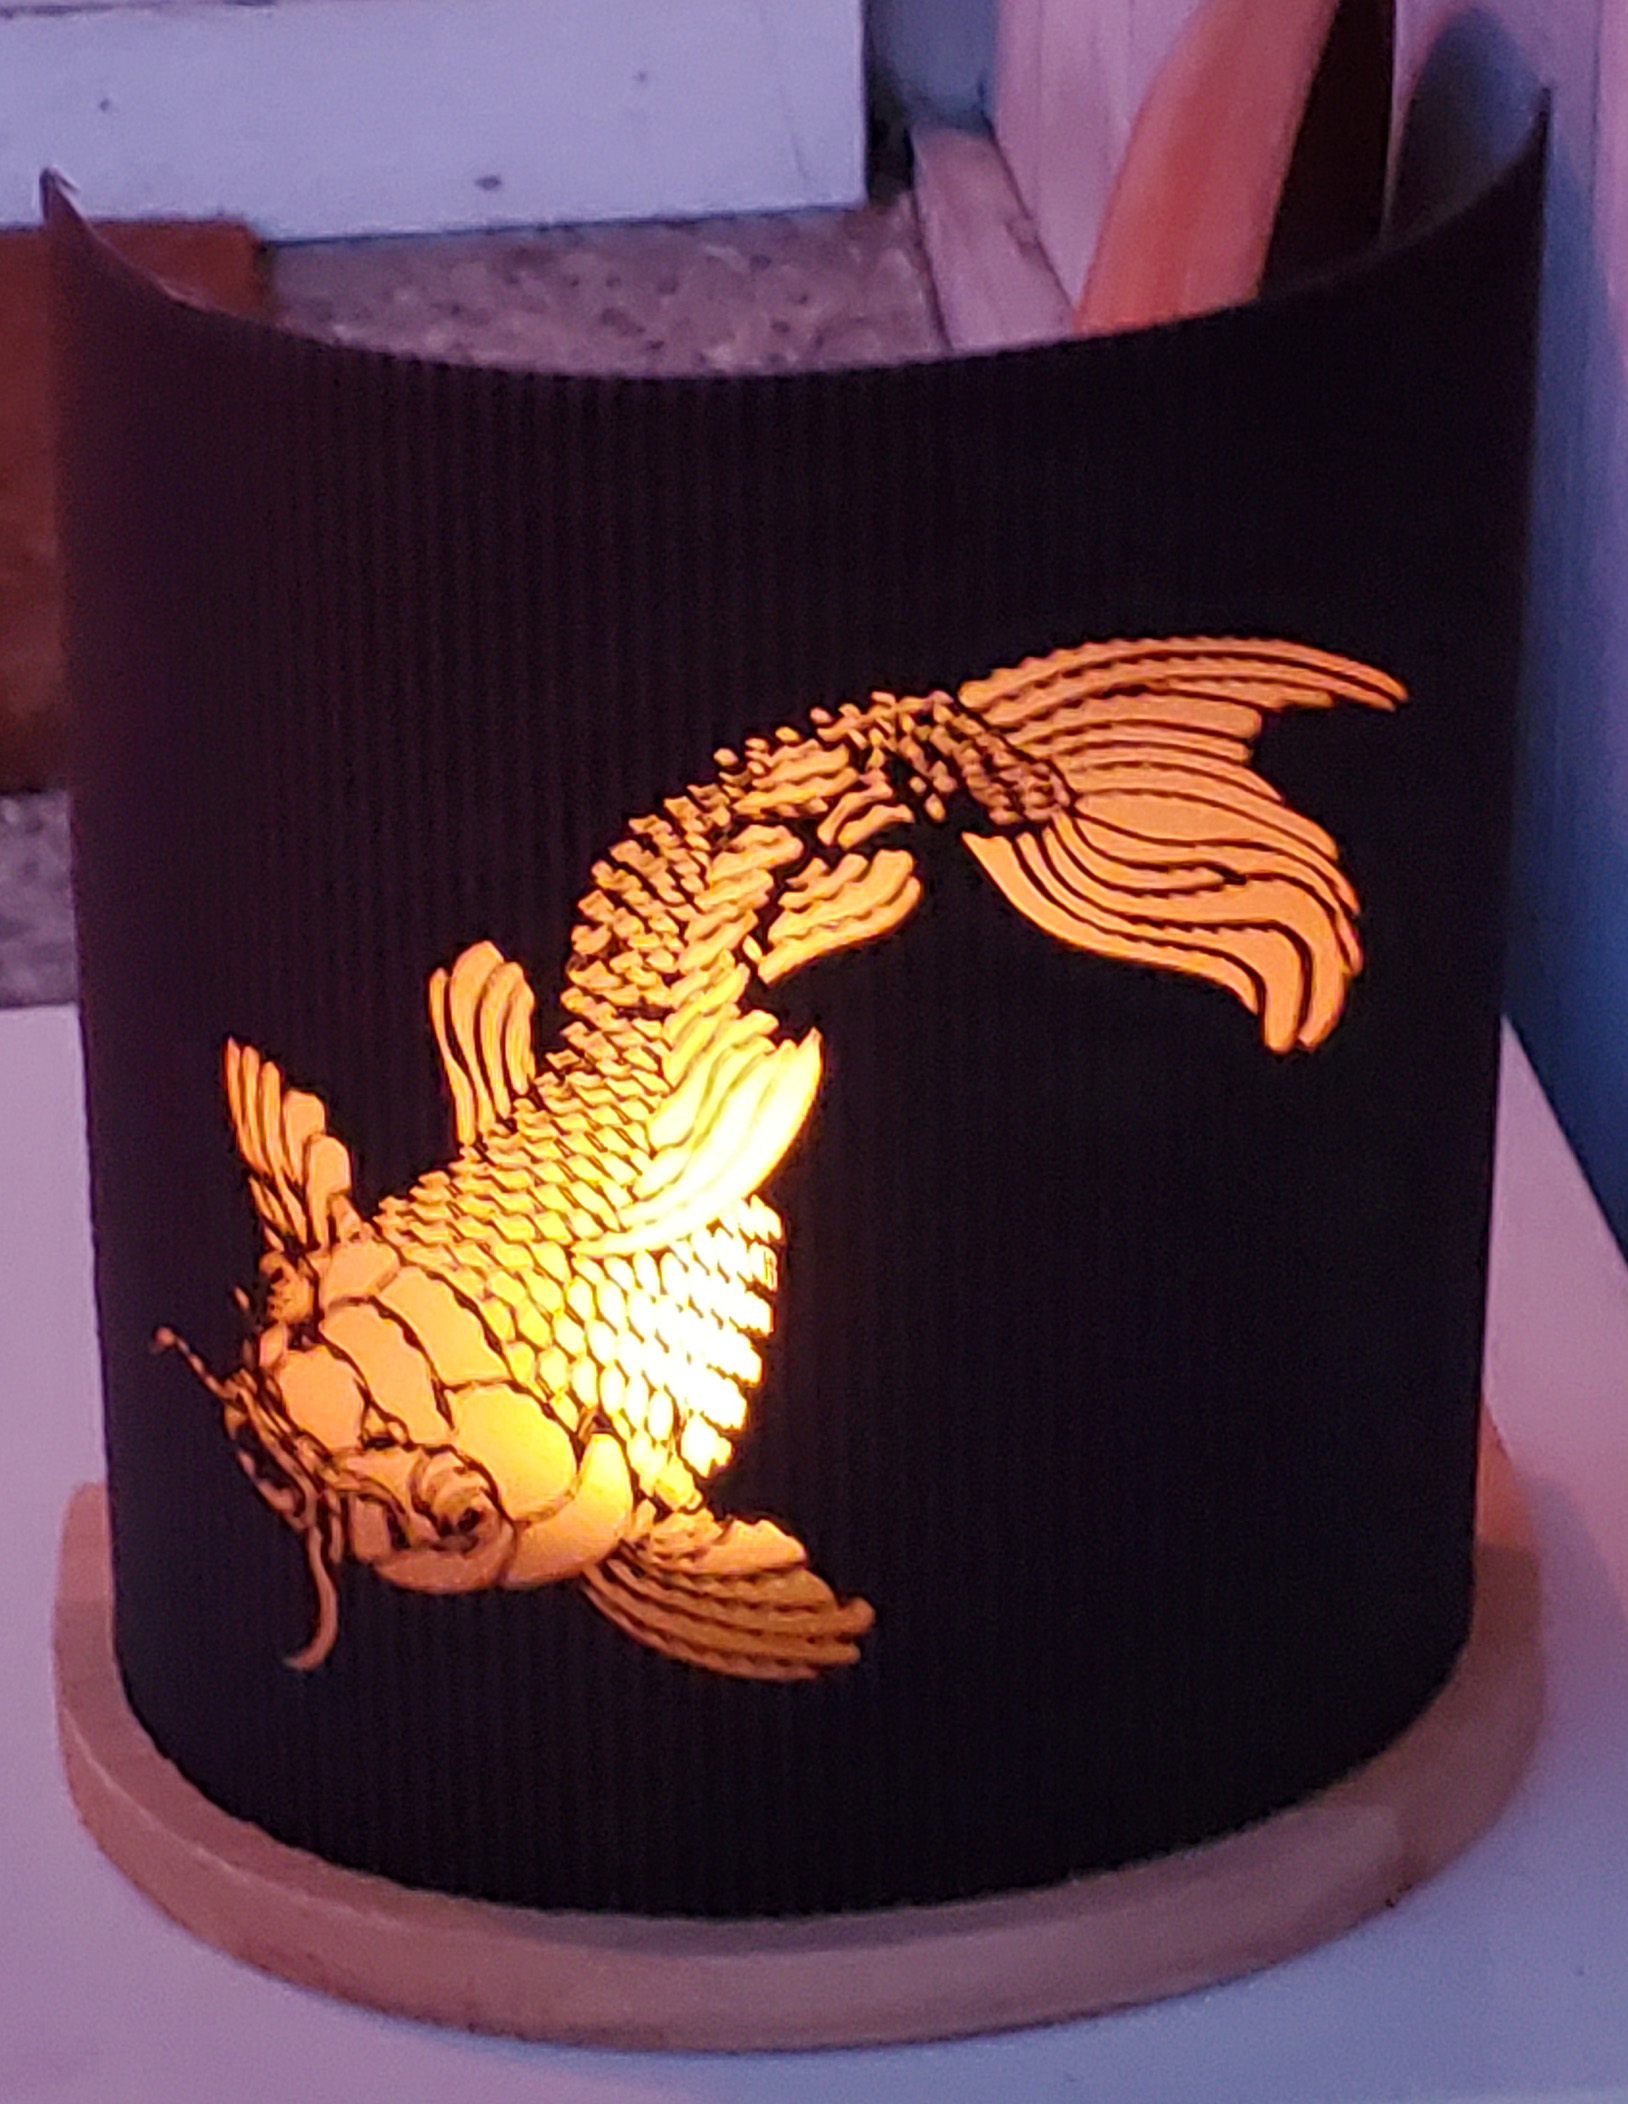
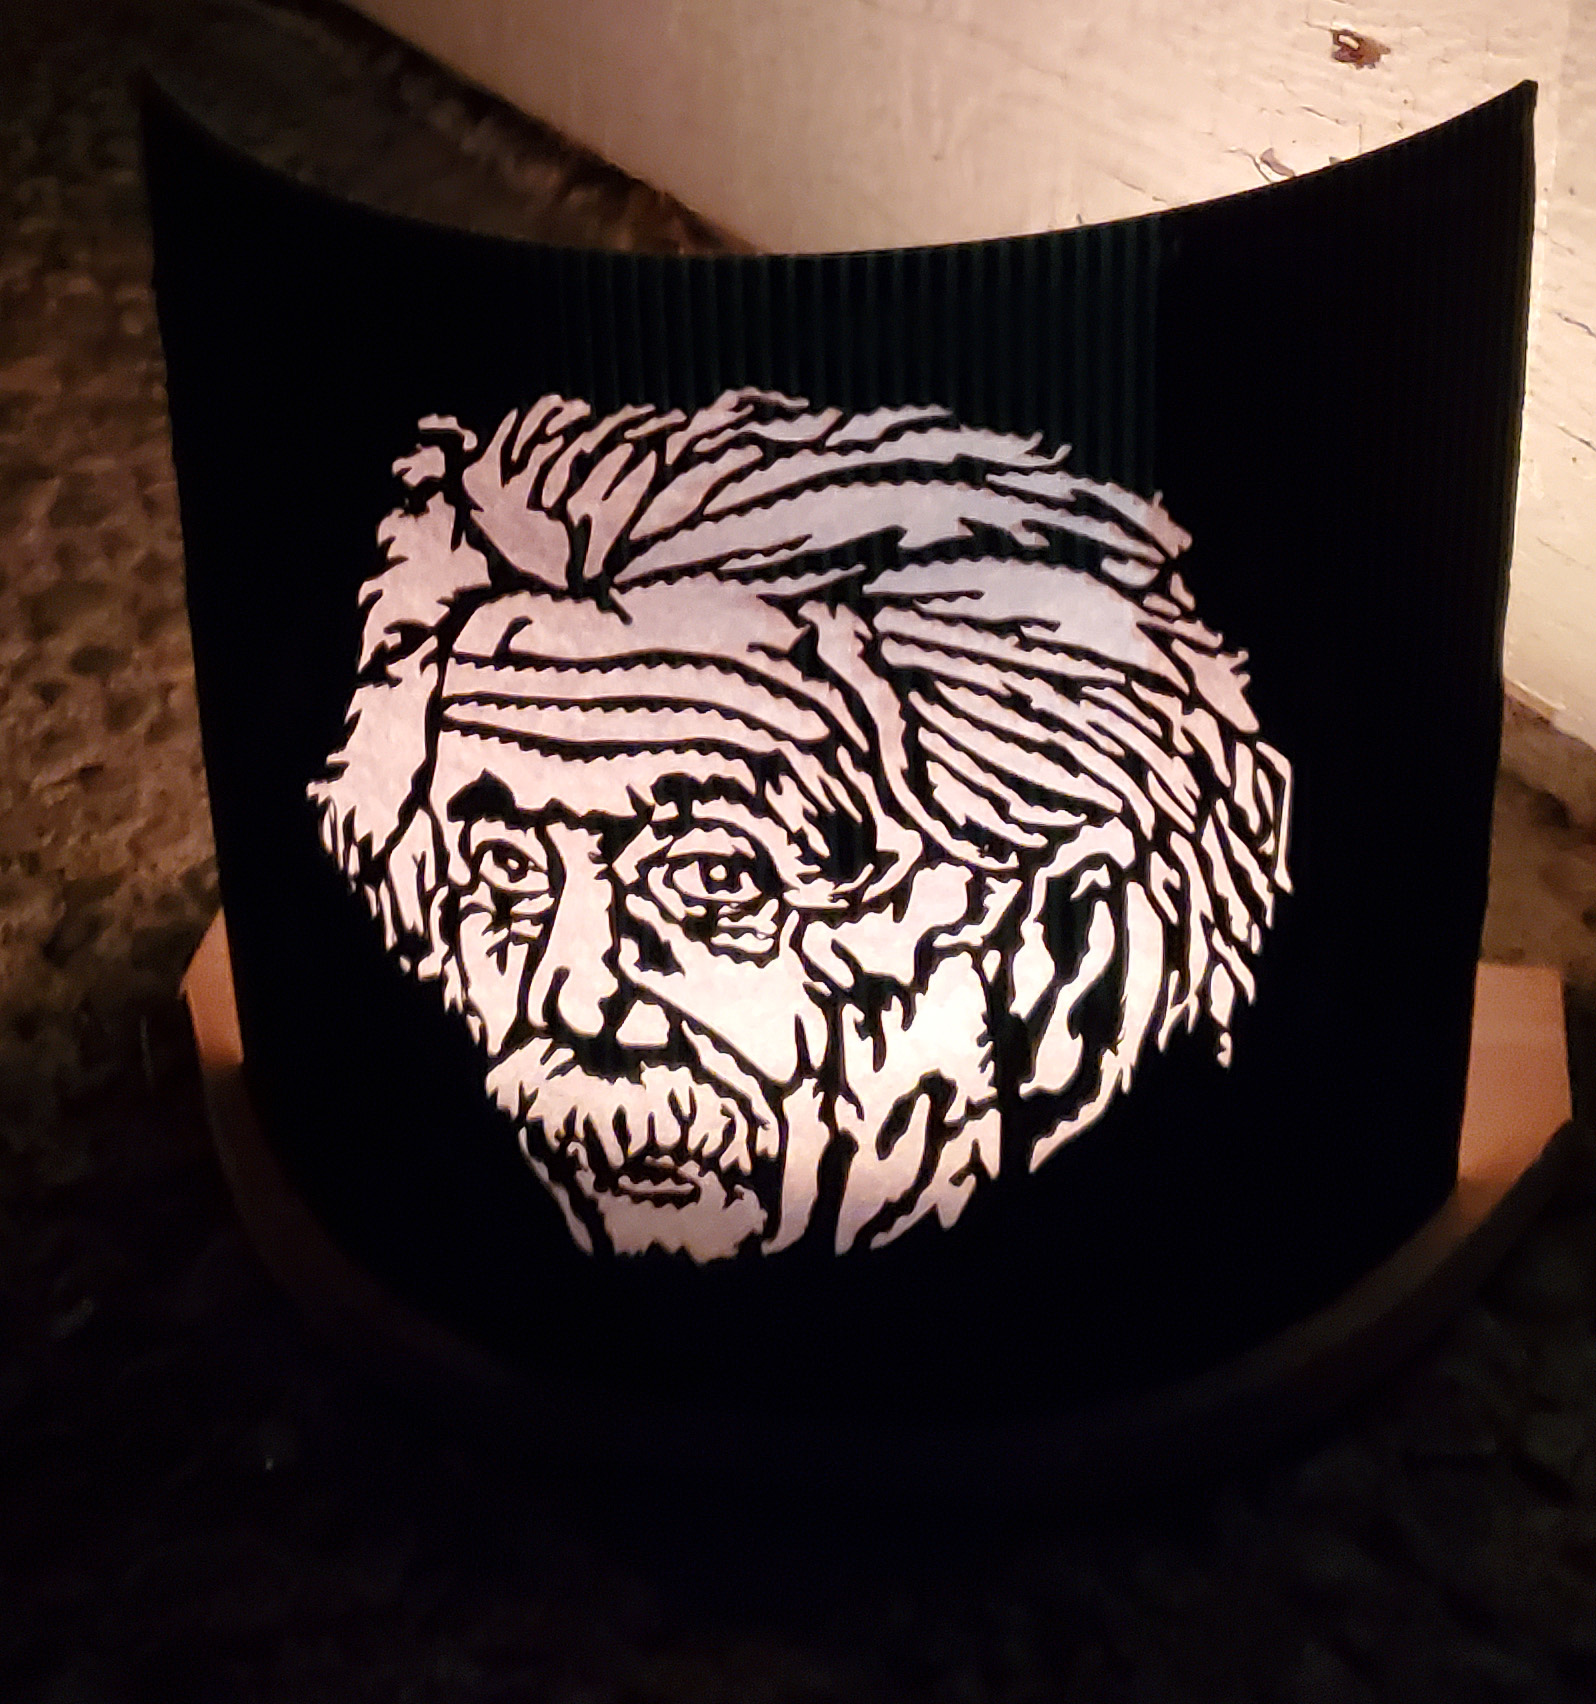
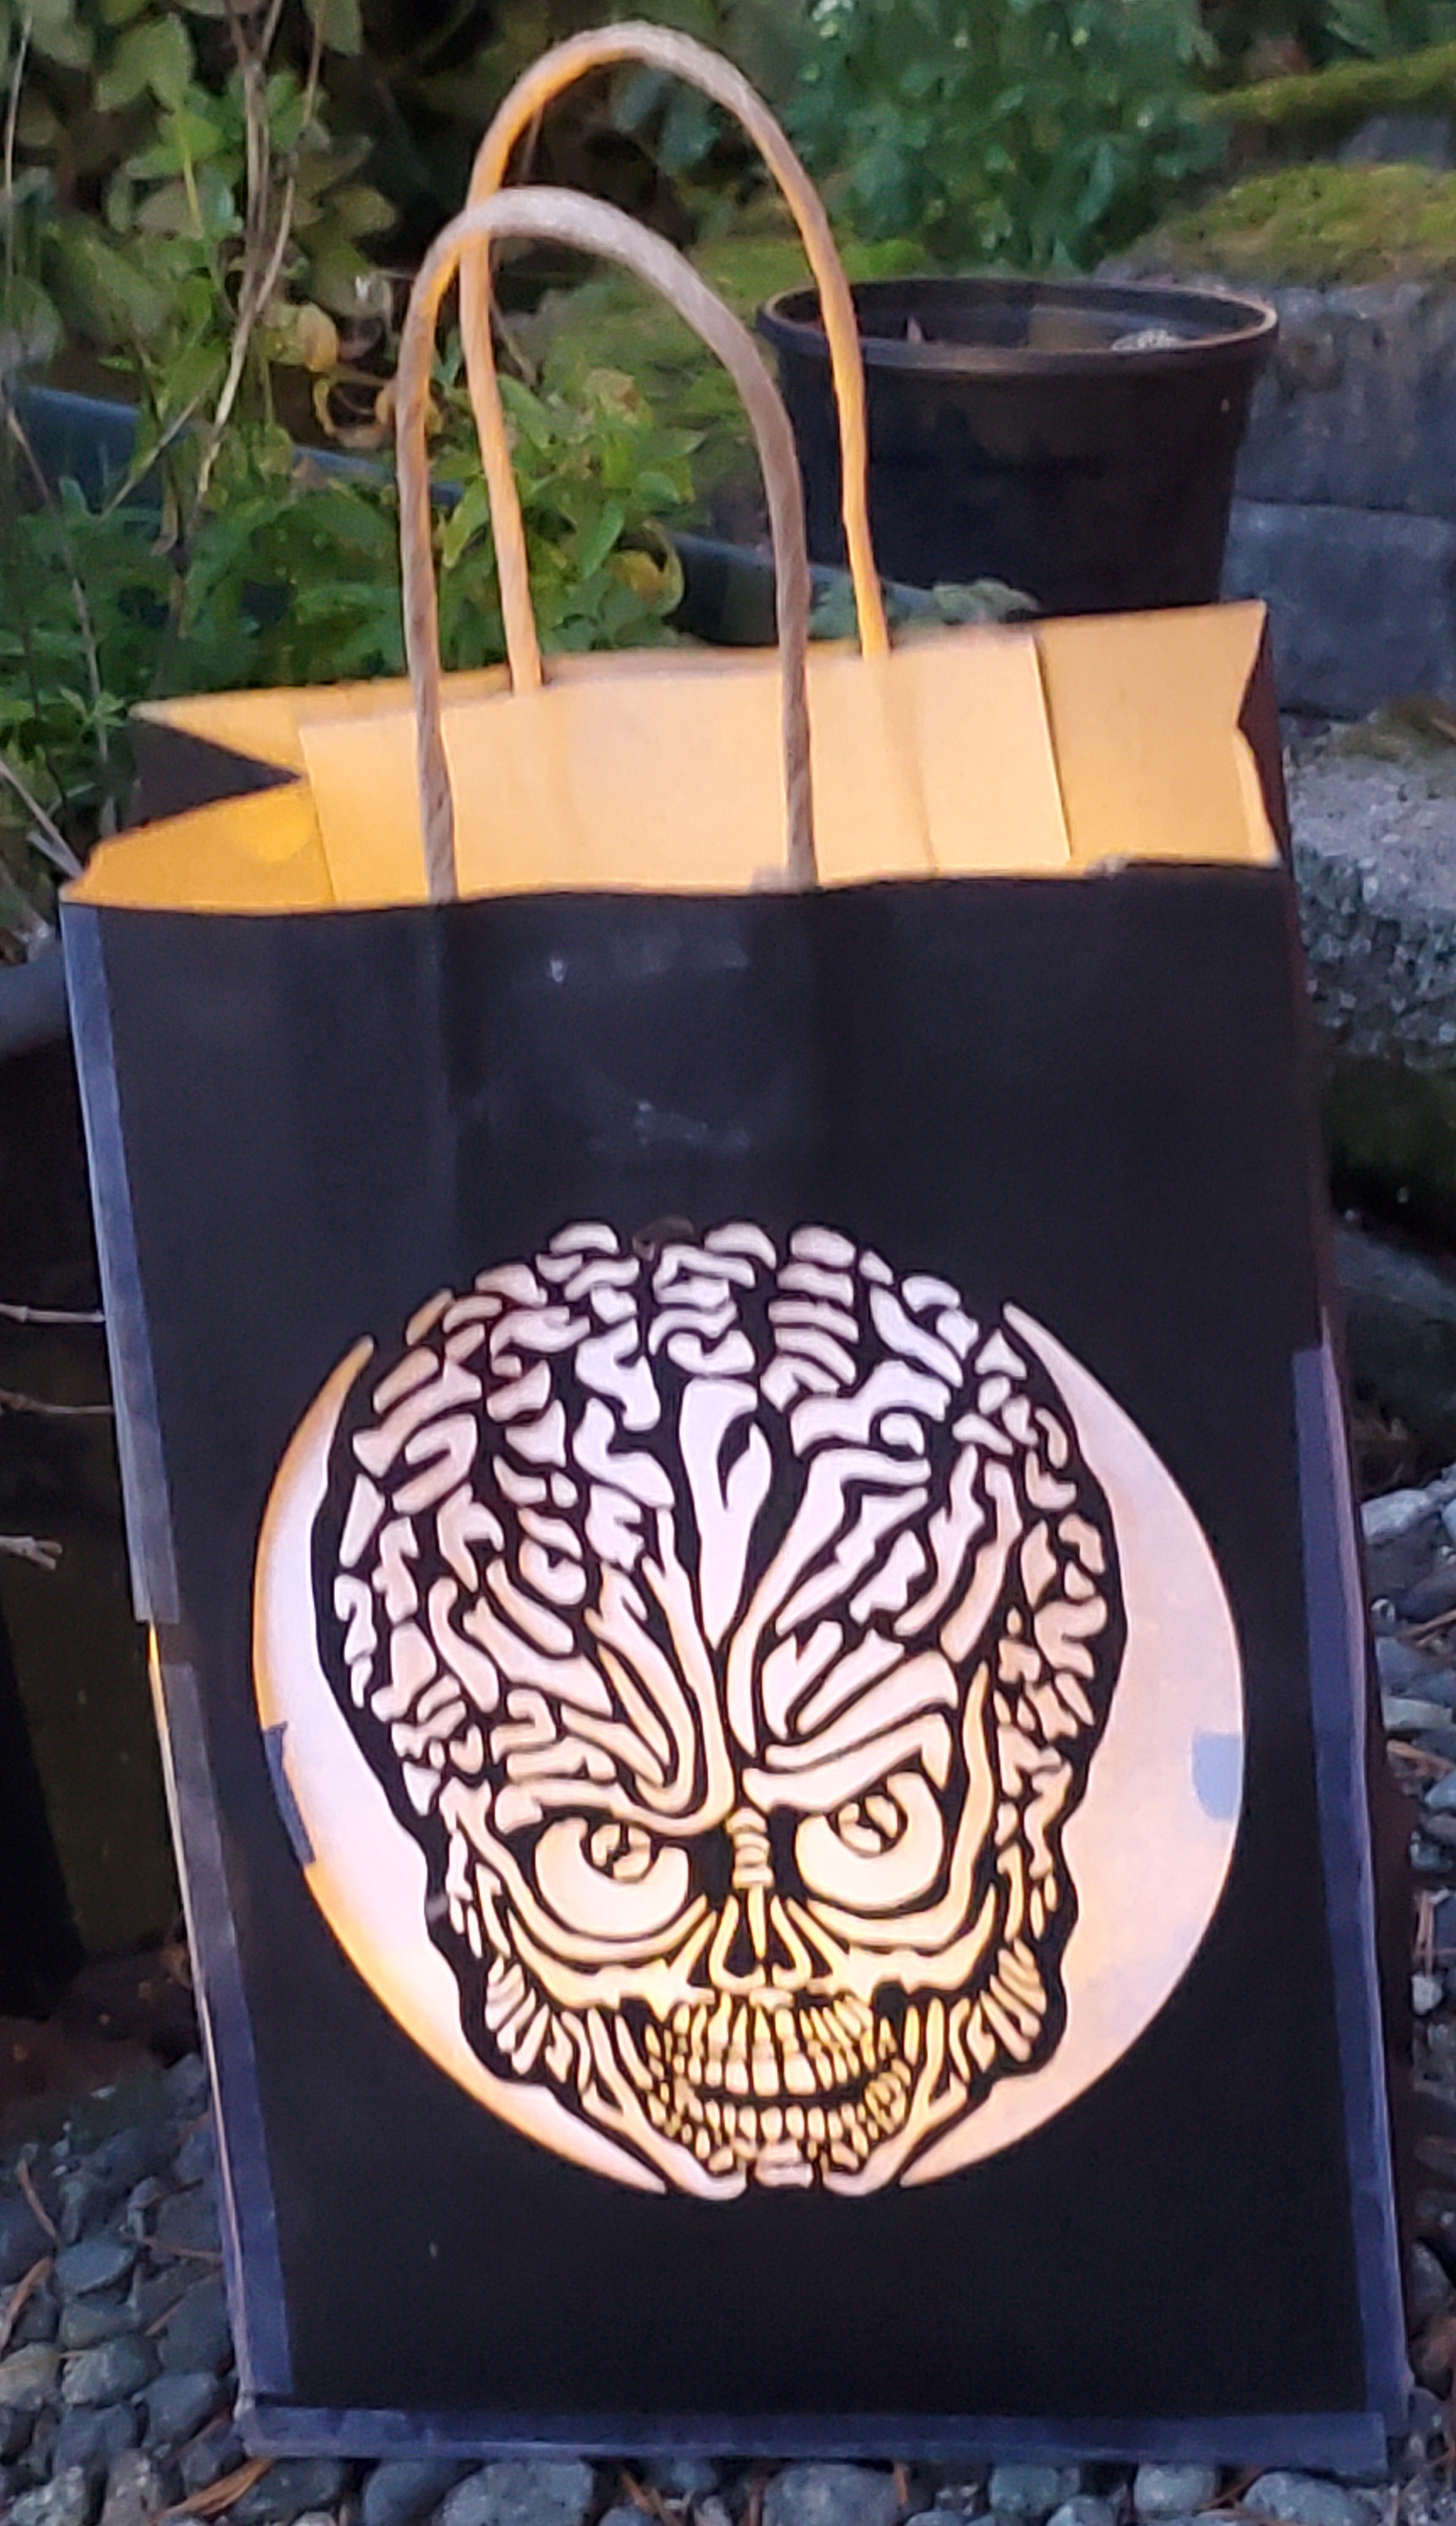
The kerf on my laser (a A40640) is 0.2mm, though it varies a small amount depending on the material. Here are three luminaries I cut for Halloween to give you and idea of the kind of detail it can do:
The carved areas are all about 6" tall. I just measured, and the thinnest areas on the koi were .45mm thick, and the thinnest lines (around the teeth) of the Attach on Mars face were about 0.65mm. But with that said, it’s not a slam dunk. If there is any tension in the material, it can curl up and get in the path of the laser and ruin the cut. And as mentioned above, when I turned off my air assist, the bag caught fire.
So I think you are pushing it if you have a lot of windows with only 0.55mm of separation, but it is theoretically possible. It will depend on the nature of your material and how you present it to the laser.
Thicker materials will tend to have a larger kerf. Lasers are slightly cone shaped.
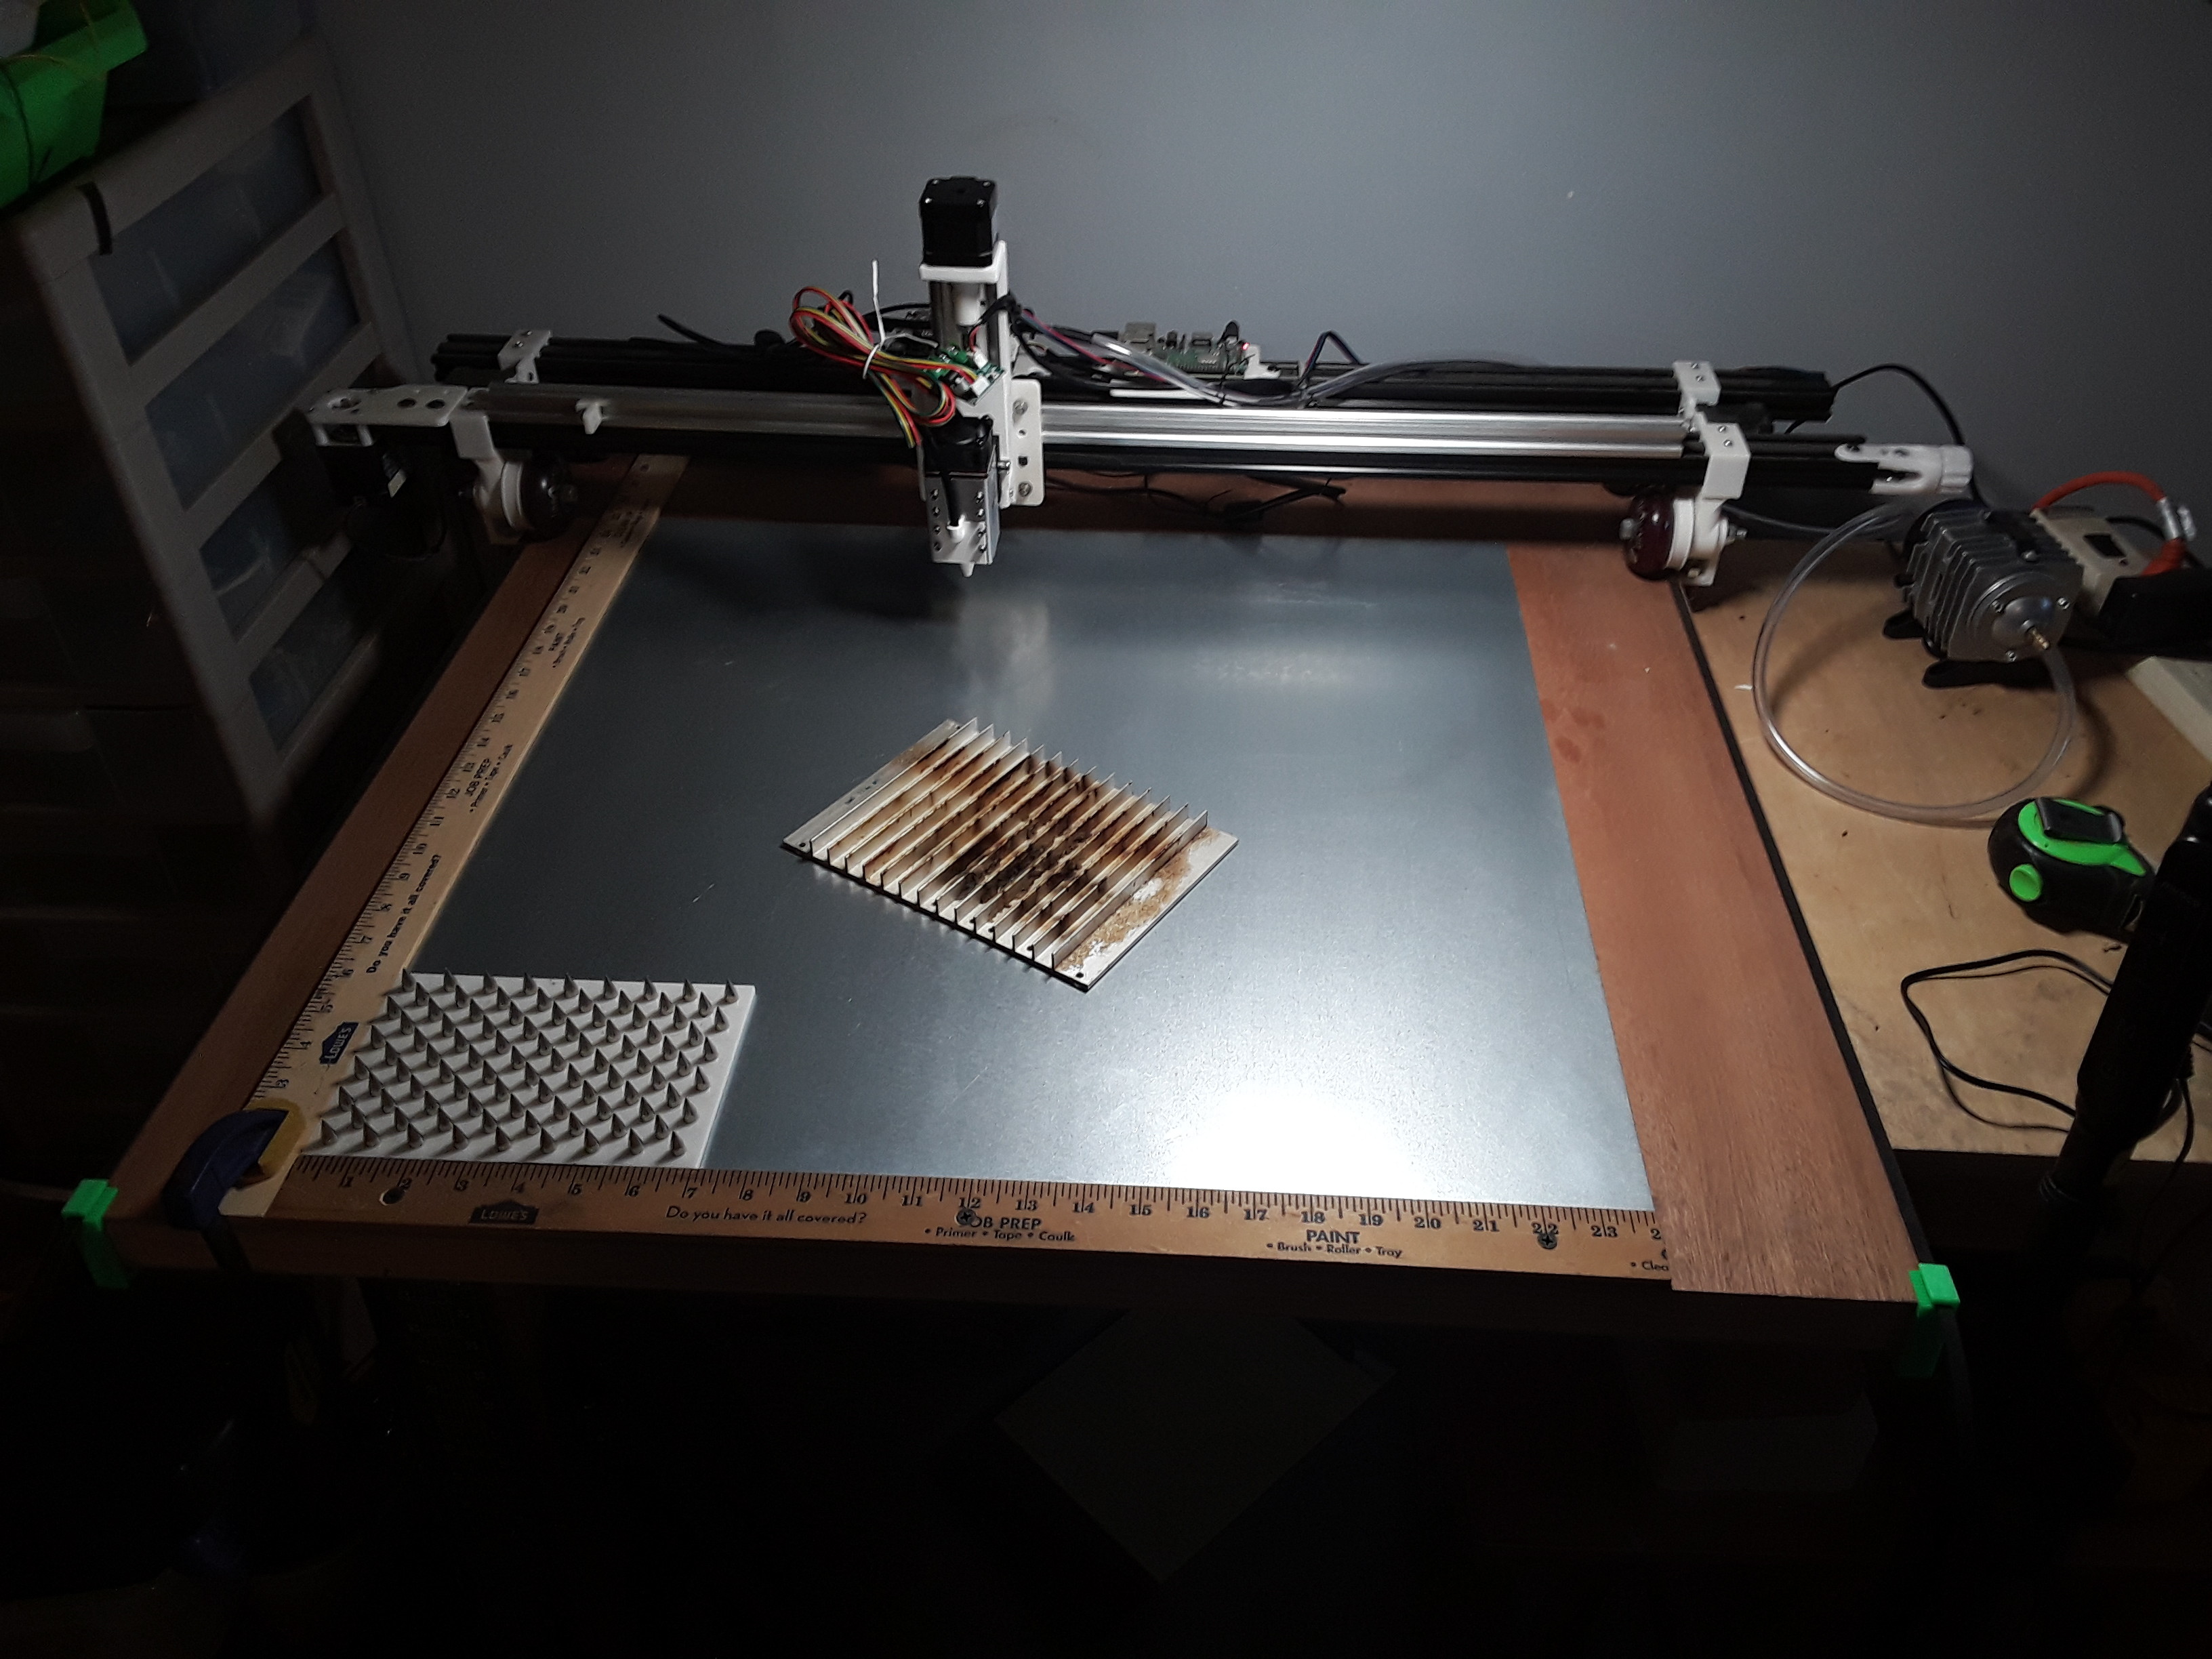
What is that plate with all the spikes composed of? Looks like a good bed to set a burning project on.
Based on seeing some in various K40 articles, I’m guessing it is made from something like these.
Cool. thanks
LOL! During my laser “travels”, I had always been keeping an eye out for a good “bed of nails” design… when I came across a video (no clue where I saw it now) where a guy had found a “goth” apparel shop online (Ebay?) where they sold all this spiky stuff, popular with “those” folks. Anyway, a bag of 100 metal studs and screws was inexpensive enough I bought a bag. Printed a plate with counter-sunk hole pattern and assembled it (very tedious!) into a bed of “nails”. Unfortunately, when I packed for the move back to East Texas I lost track of it and only found it a couple of days ago… I had never had a chance to use it!
Anyway, playing with this big diode laser, destined for my daughter’s laser engraver, I’ve been trying to get my miniFoamRipper machine set back up for actual use again. Bought a 24" x 24" steel sheet from Lowes and I’m hoping now to start doing productive stuff again… it’s been a welcome diversion 
– David
Yep!