Hi,
So I’m looking at the tensioners and trying to figure out which goes where.
A better naming convention would help as I didn’t realise there were front and rear tensioners, since the front ones are called"Front Y…" and the rear ones are “Y tension…”.
Maybe something like “Y Tension Front Left Base” or “Y Tension Rear Right Block” would work better.
Anyway, I finally got it figured and just want to check that this is correct ?
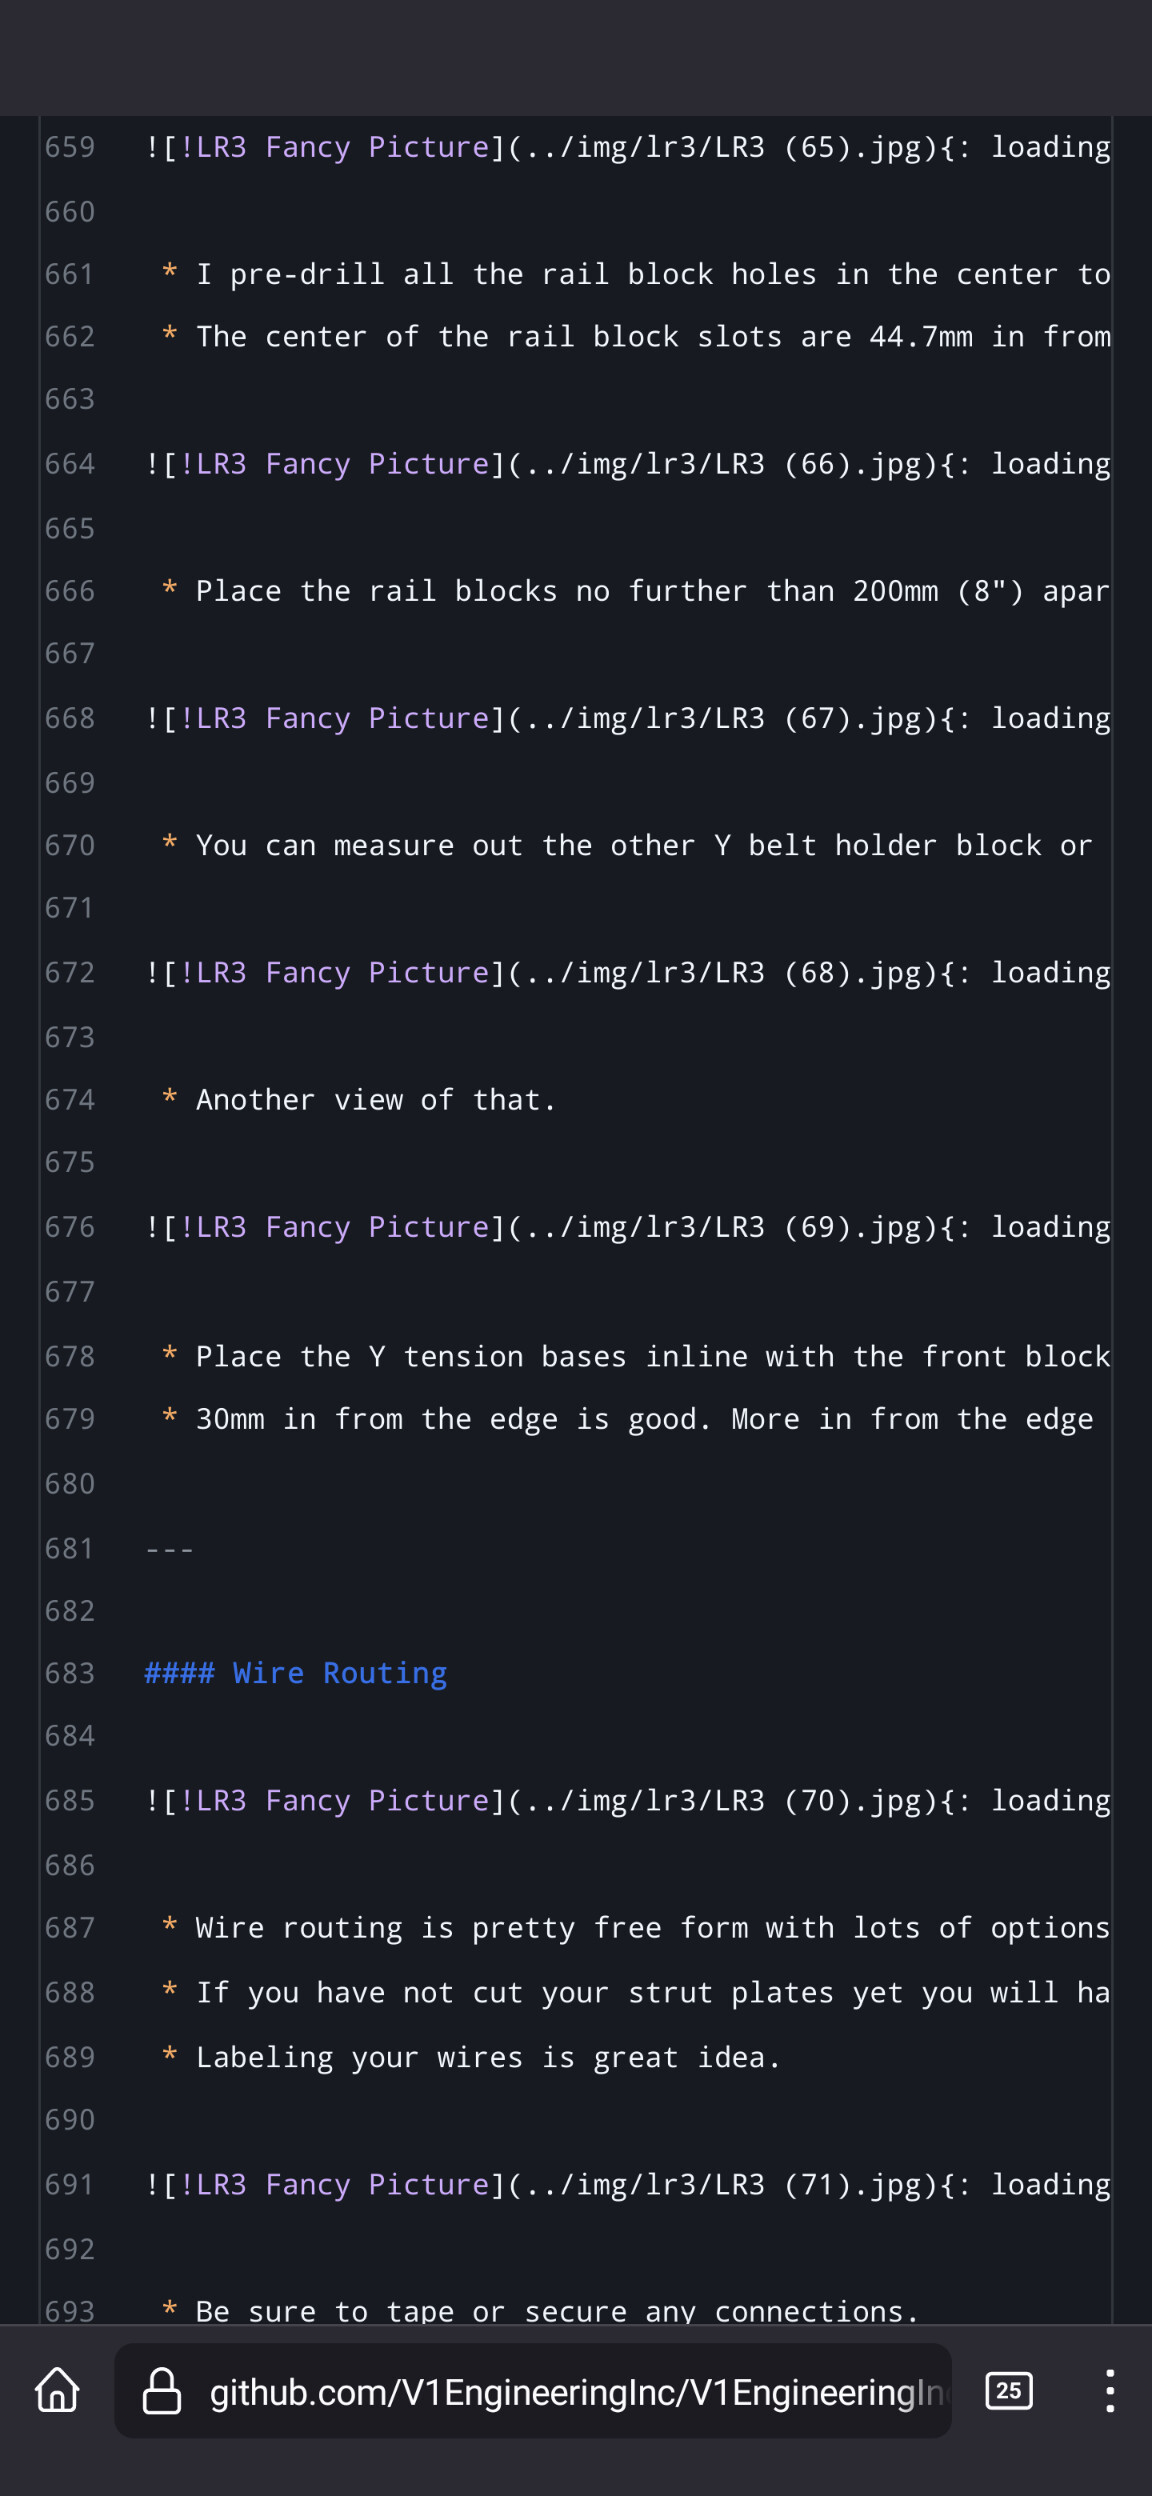
The documentation also needs some tweaks, the front right block and base are in the y rails section but the last photo shows the left rear block and base.
Then there’s a section on the wiring and then the Y belt section finishes off the belts and tensioners, which seems to be in the wrong order to me. I assume that I go through Github if I want to update the docs ?
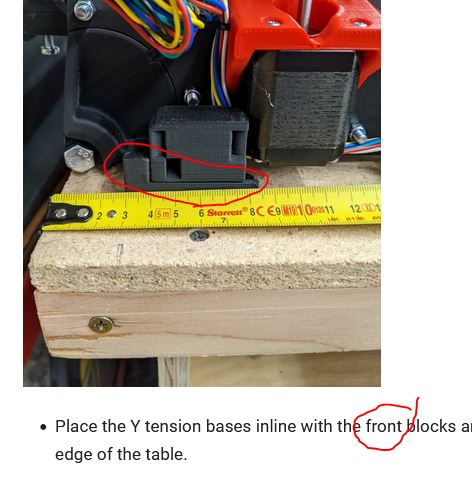
The second picture you show looks correct to me. I am trying to convey they are along the same line as the front blocks, not saying they are front blocks. Any way you can suggest to say that better?
It is easier to run all the wires before you string up the Y belts, in my opinion. I wrote them as I was building that one just to be certain things were in the order I actually built it. In what way would you suggest?
Yes.
My answers are reading really snarky to me but I promise they are not meant that way. I am genuinely looking for suggestions. I wrote them so just saying they are wrong is tough for me without suggestions on the way they read to you…and I am horrible at this stuff.
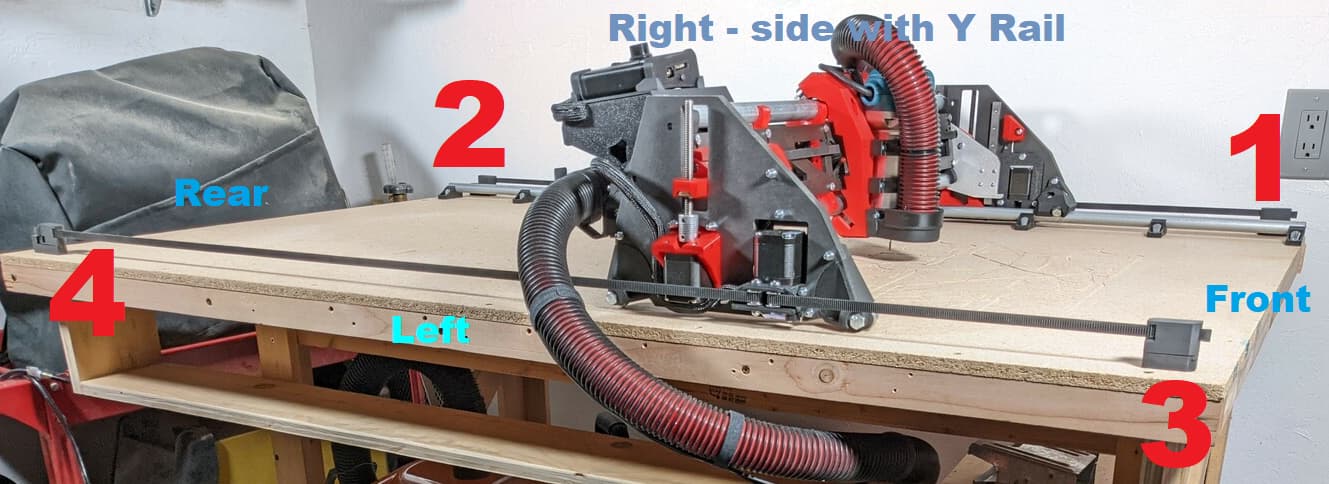
Reaching out because this took me a while to grasp. My initial intuitive guess (as a person who is assembling LR3) of front/rear/left/right was wrong. However, if I try to think about LR3’s orientation as a person doing the CAD design, the front/rear/left/right sides make perfect sense.
Would like to understand, and also help/contribute clarifying if others are struggling during assembly.
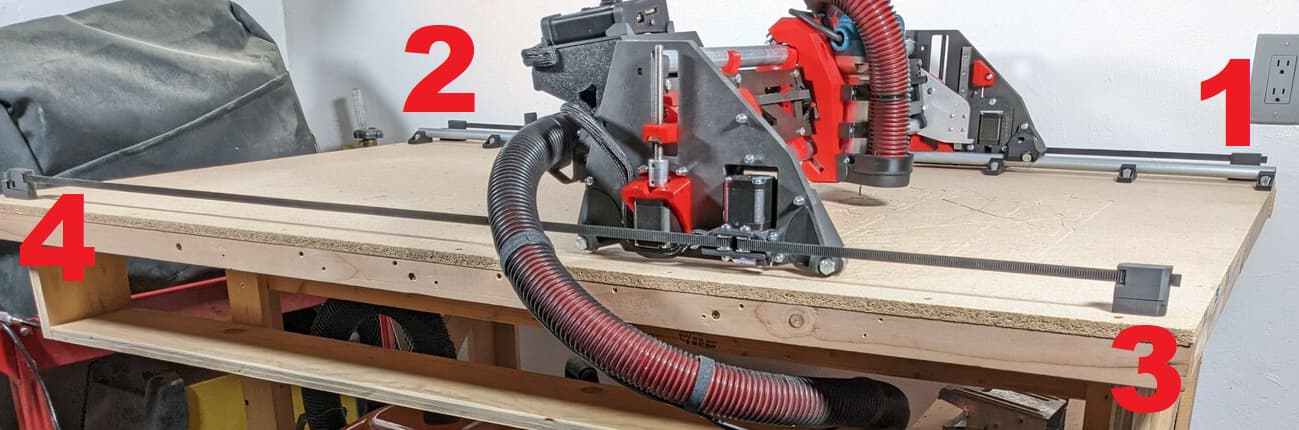
“Front” is the 1 + 3 side of the machine, “rear” is the 2 + 4 side.
“Right” is the 3 + 4 side of the machine, and “left” is the 1 + 2 side.
FL is 1
RL is 2
FR is 3
RR is 4
I understand the confusion, I guess, because the control panel is set up to be placed to the side of the machine, and not the “front” which is actually how it was designed.
I could be wrong about right/left… All I did was set up the dovetailed blocks as front and set them so that the belt was towards the outside, and the tension blocks were to the rear, with the belts towards the outside again.
Cheers happy holidays to all !
In this image the rear tension blocks I have printed were not alter nor used with support.
But did some reason my belt will not go through sadly ; will there be any techniques or better ways of getting over this issue that I’m having?
Please let me know if you have received this message thanks !
If you cut the bekt at a 45° angle sometimes it’s easier to thread in. I’d look while it’s printing to see if it’s sagging or something. Mine are tight, but usable.
I’ve tried this & looked @ all 6 seperate prints is there any alternative? This is the only thing holding back my setup @ the moment & it really stinks


 sadly ; will there be any techniques or better ways of getting over this issue that I’m having?