Printing that mount now. Turned the Vref up to 0.300-ish with the motors energized. It’s about 20% into the print and the motors are just a little warm.
Triple-double printer.
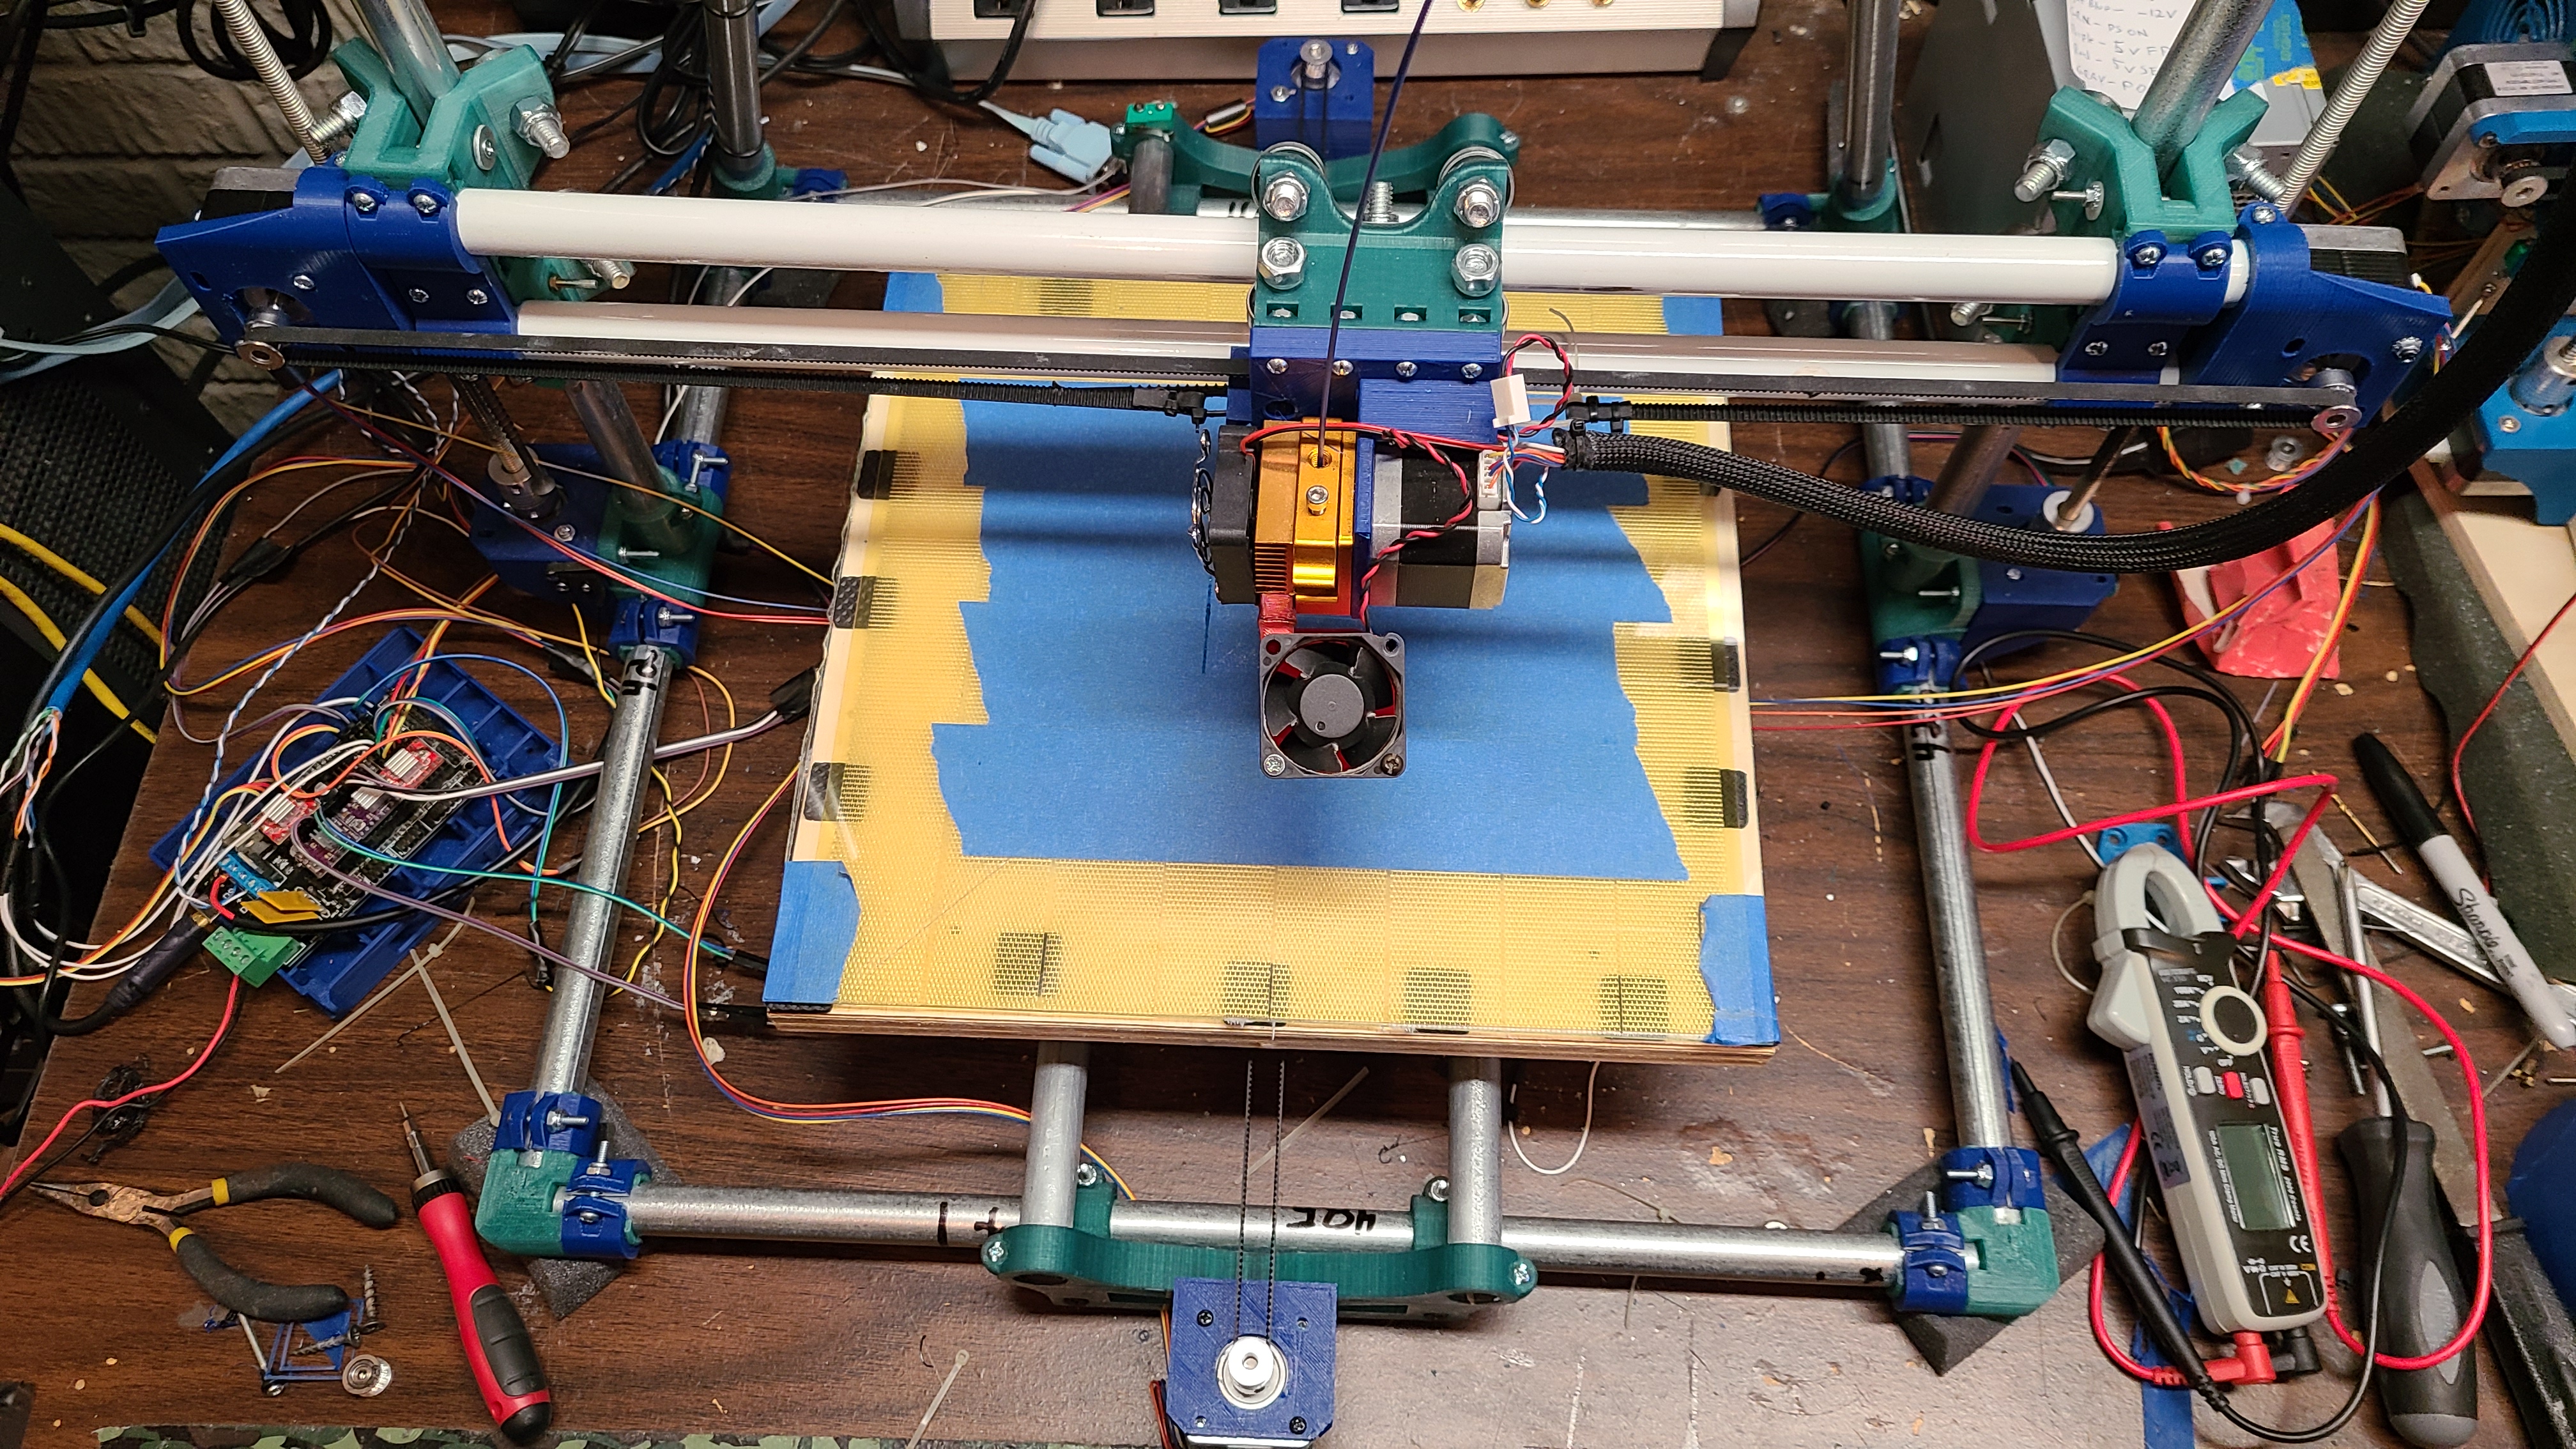
Currently printing mirrored XZ-motor mount for the MP3DP. I figured I’d go with a known part to judge speed and accuracy.
Settings are: 160mm/sec print speed(all types), 100mm/sec move speed, 1000mm/sec acceleration. 20% infill with a .4mm nozzle at .3mm layer height.
1 Like
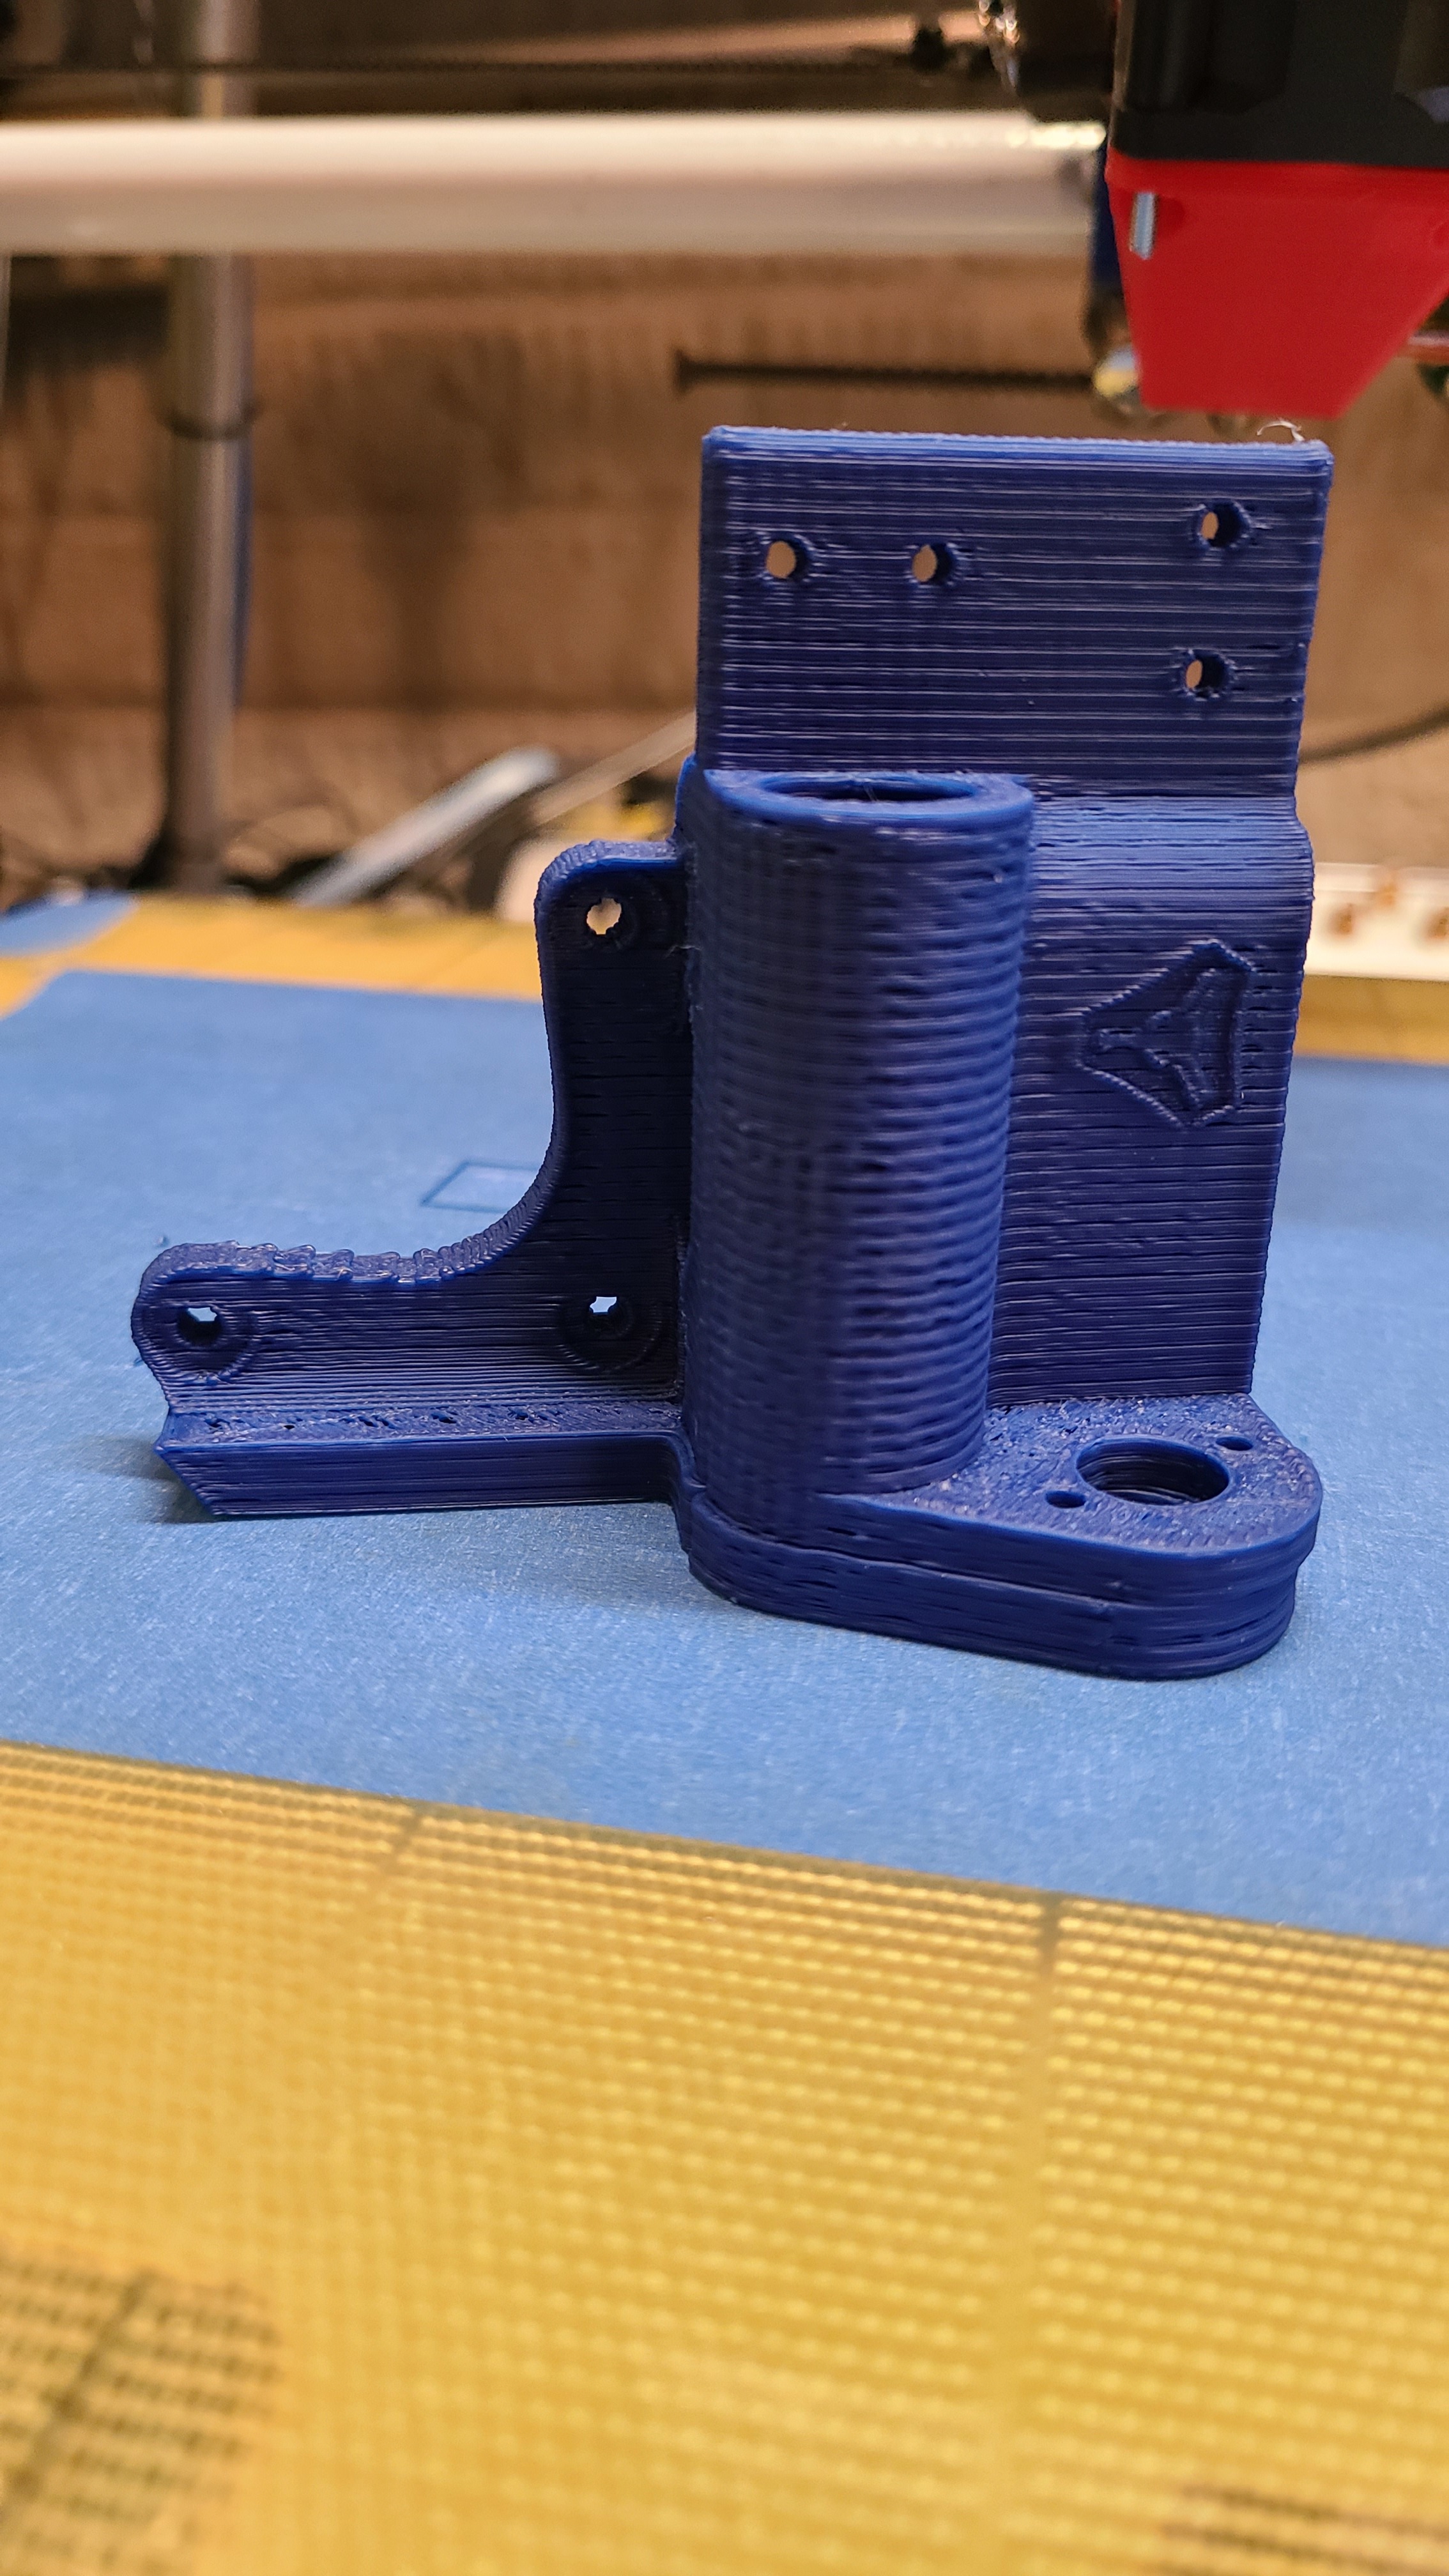
It ain’t pretty, but its within <.5mm in all dimensions according to my hyper-accurate Harbor Freight caliper. This is based on the one currently on my MP3DP. Well, the motor mounting holes line up anyway. And it did skip once.
And the layers didn’t bond very well. But it only took an hour and a half to print.
Suggestions? Higher extruder temp? Higher flow rate?
This rig is pretty rickiddy anyway. Lots of slop in lots of places at normal speeds. I’ll print some nice mirror pieces on the MP3DP for itself and do a proper tear-down and rebuild with dual motors. I finally ordered some 84oz/in motors to see where those get me too.
More heat, less speed, maybe some more flow. And figure out what’s wrong with your Z screws. If you are getting swelling in the corners look at linear advance, too.
160mm/s is insanely fast for most printers. Cut it in half (same accelerations) and see what that looks like. If you still have adhesion issue look at extrusion multipliers and nozzle temp.
1 Like
Ahh yes, those Z screws  . The problems are they’re 5/16 threaded rod from the local corner hardware store. So they’re not straight, they aren’t lined up correctly with the motors because they are in 5x8mm couplers, and I’m using metric layer heights so my wall ringing actually matches the thread pitch. It actually produces serviceable prints when I’m not on this quest for speed. They will be replaced with proper 8mm 4starters when I get serious about this machine. Or not, who knows

That makes sense. The prints look like they came off a RepRap Mendel (or other printer w/ threaded rod Z). You can go with single-start t8 rods too for a printer Z, gives you higher resolution. But 2 or 4 start is probably just fine too.
Okay, so, in my super controlled, highly scientific process of changing 3 or 4 variables at a time and hoping for better results, I got some.
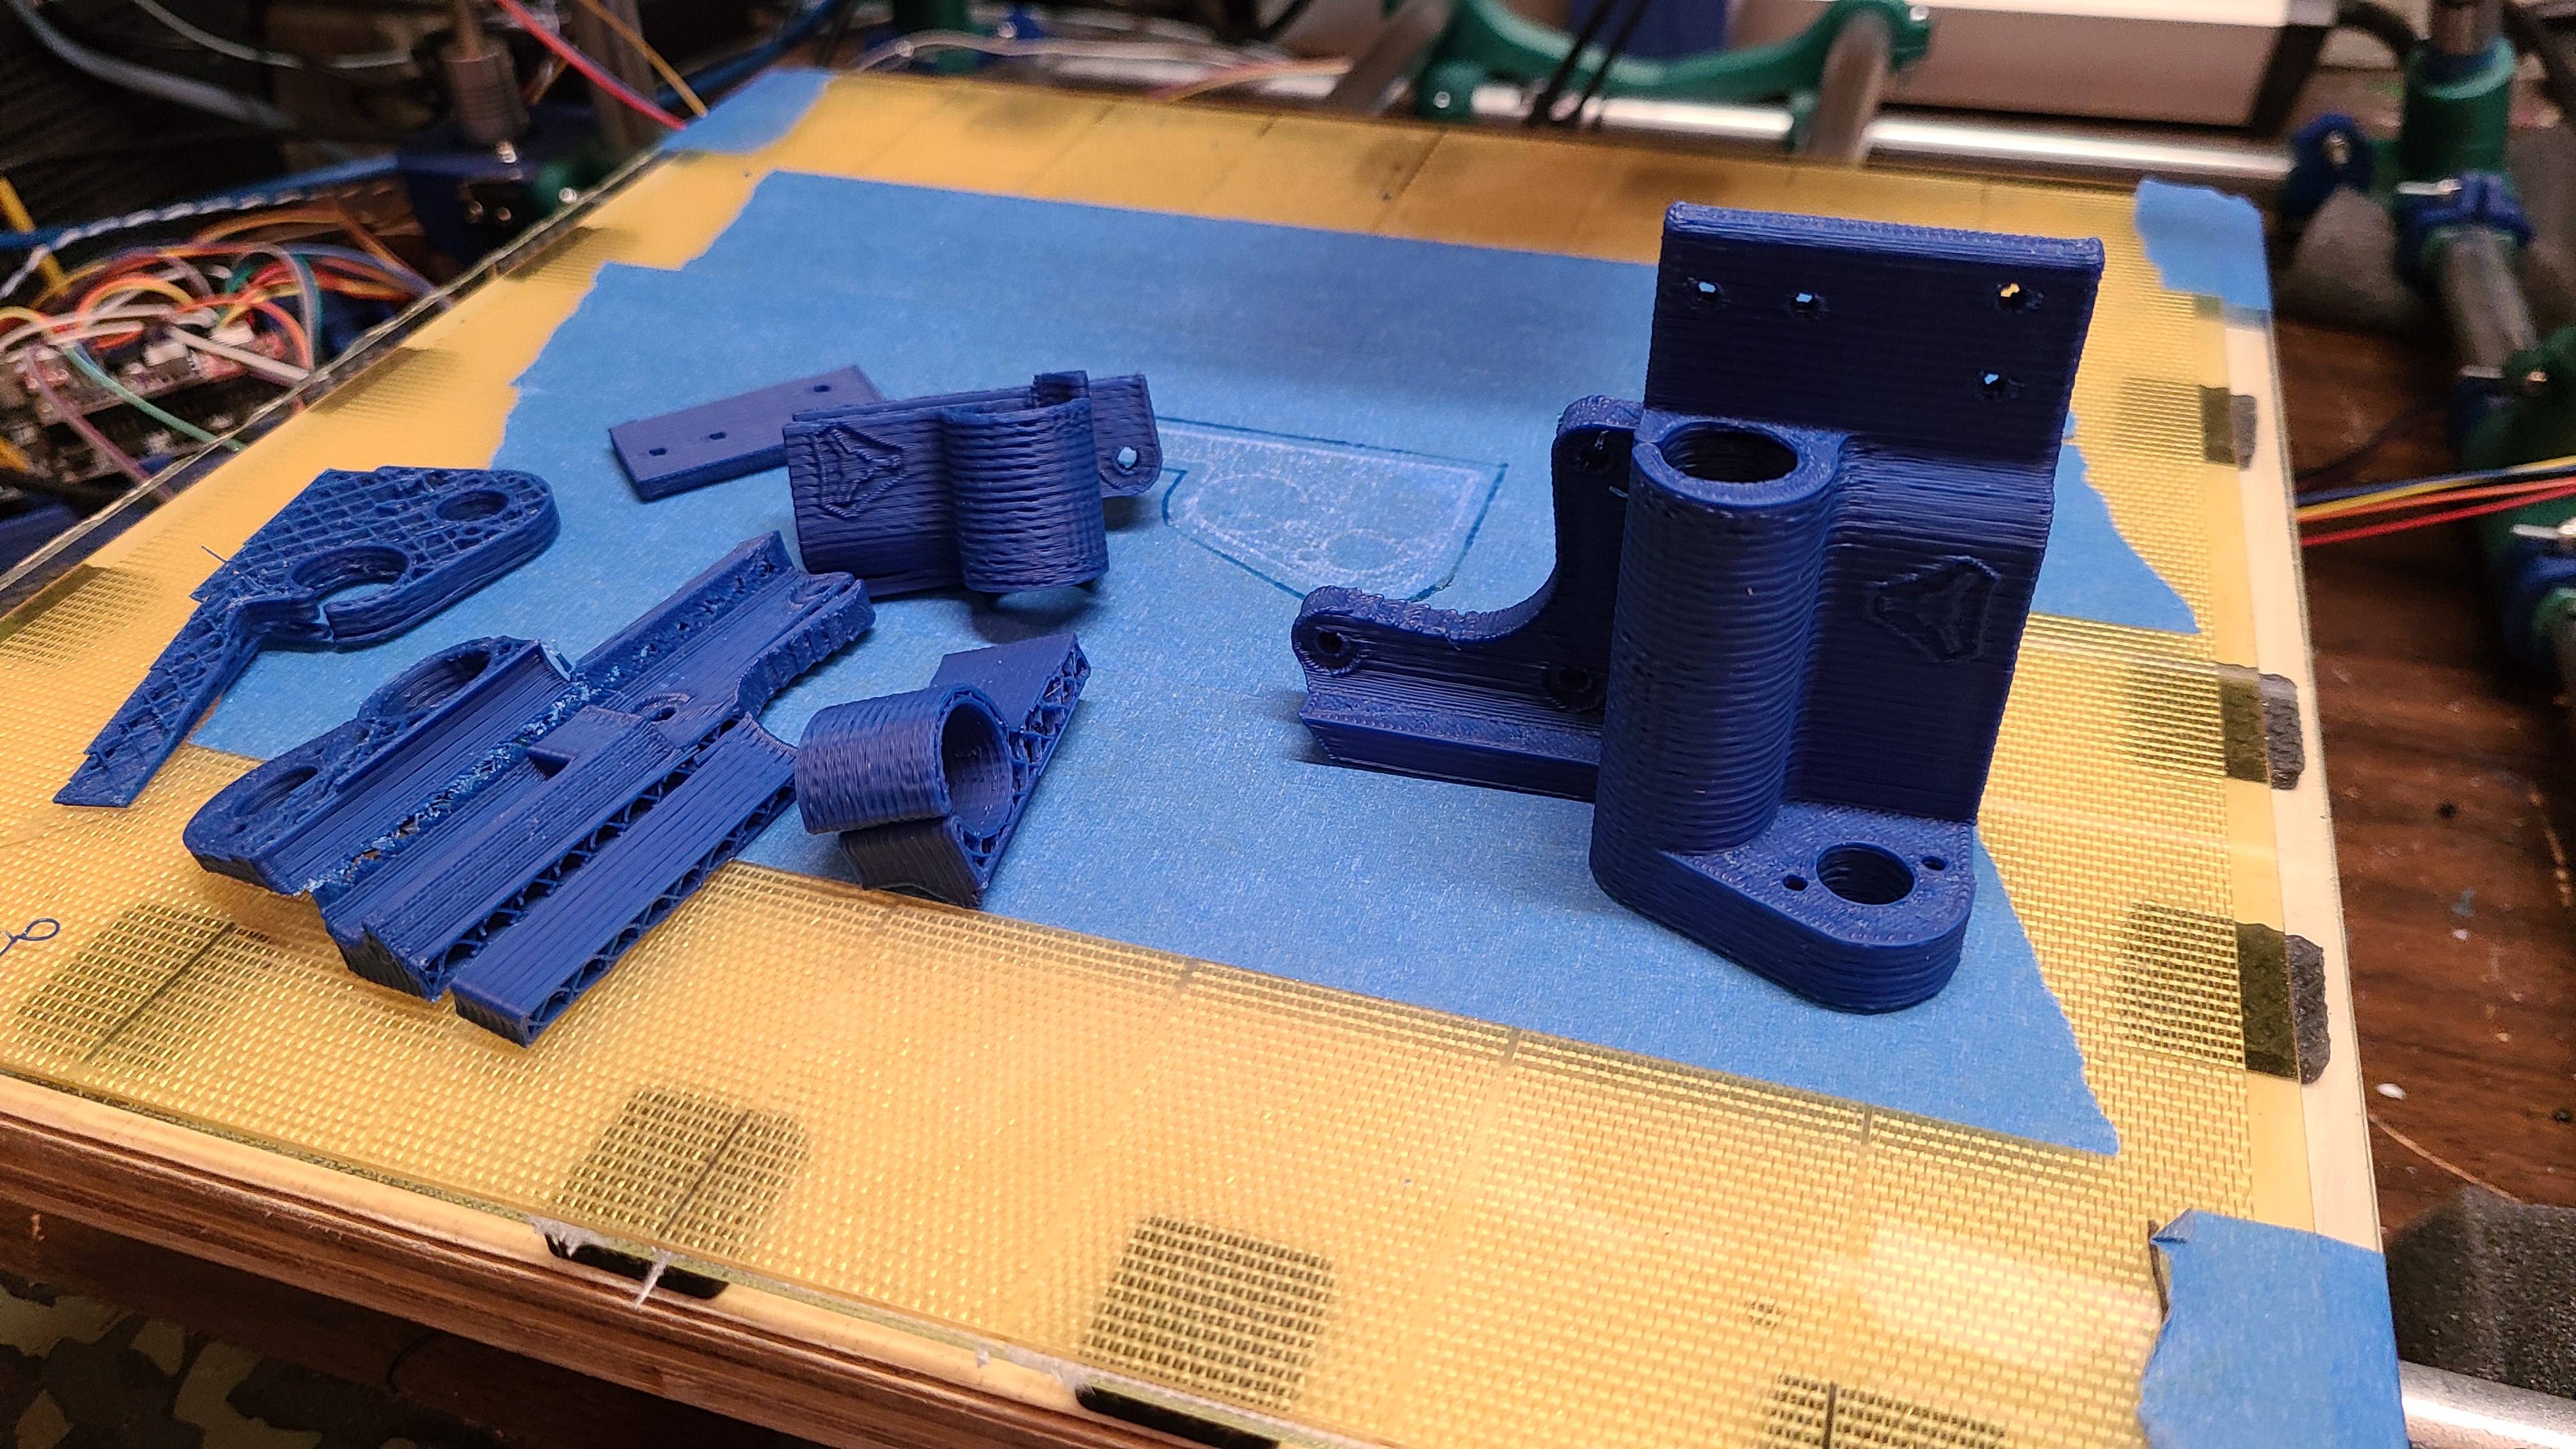
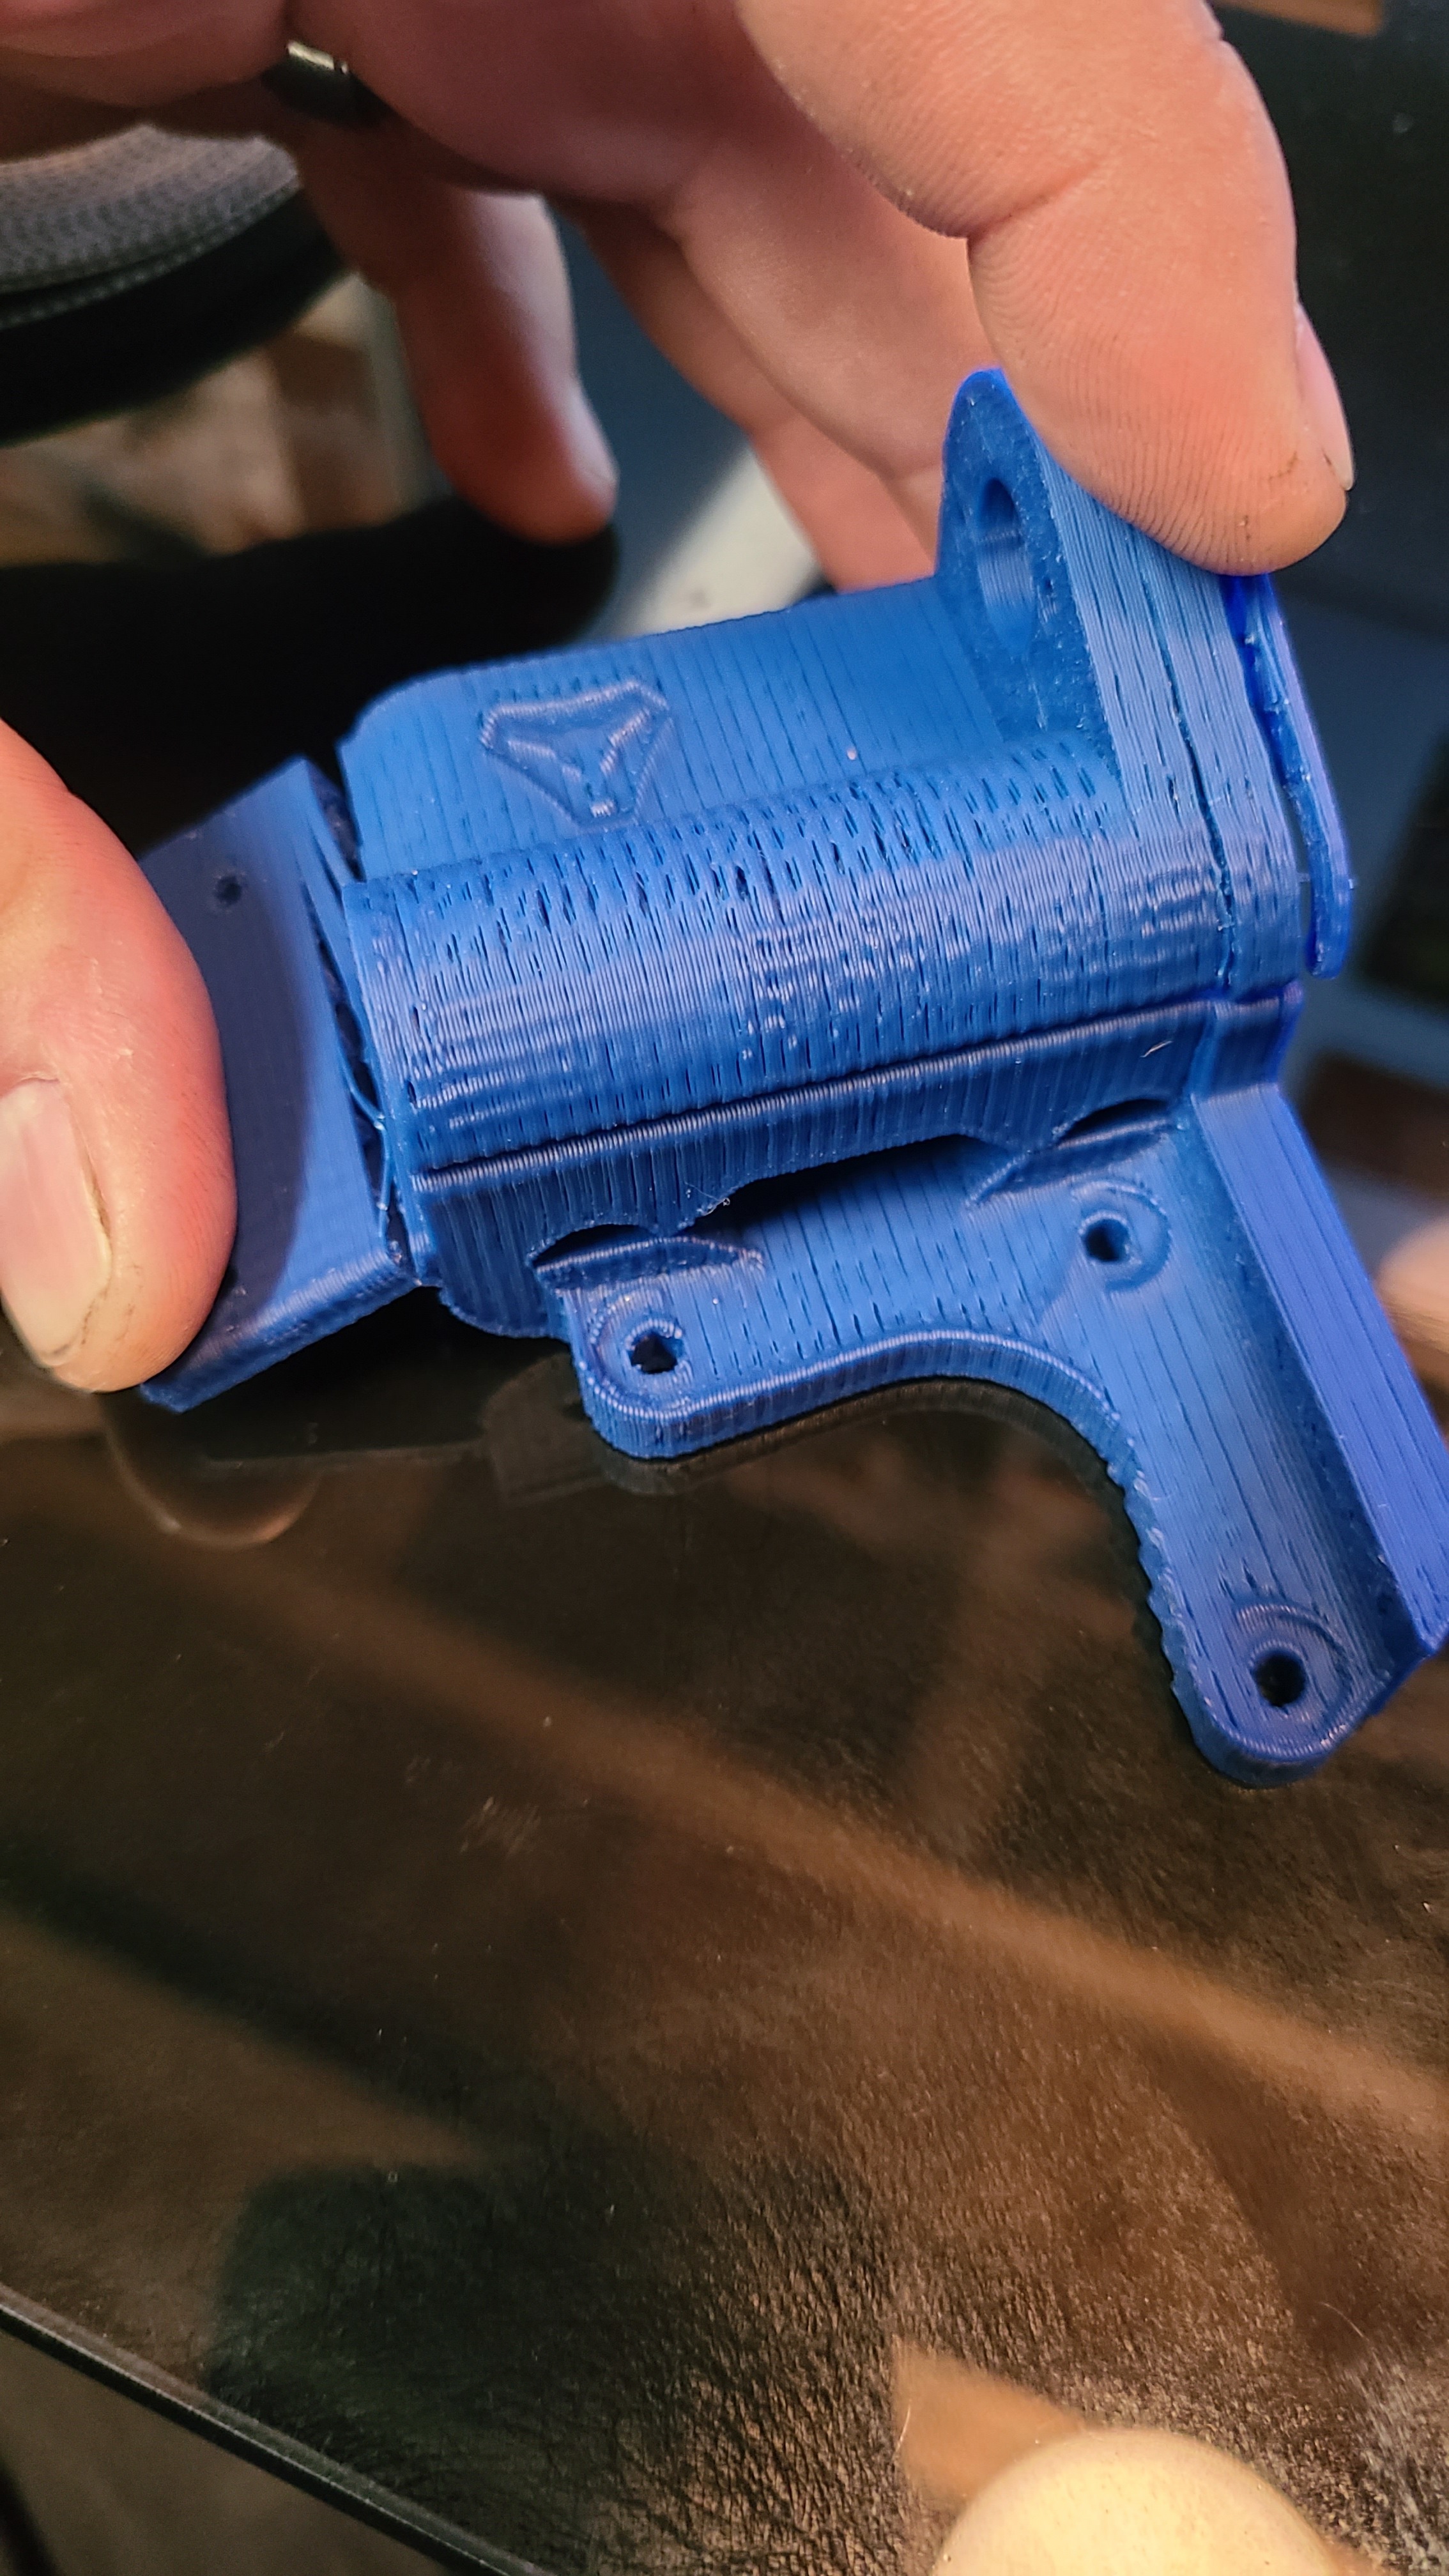
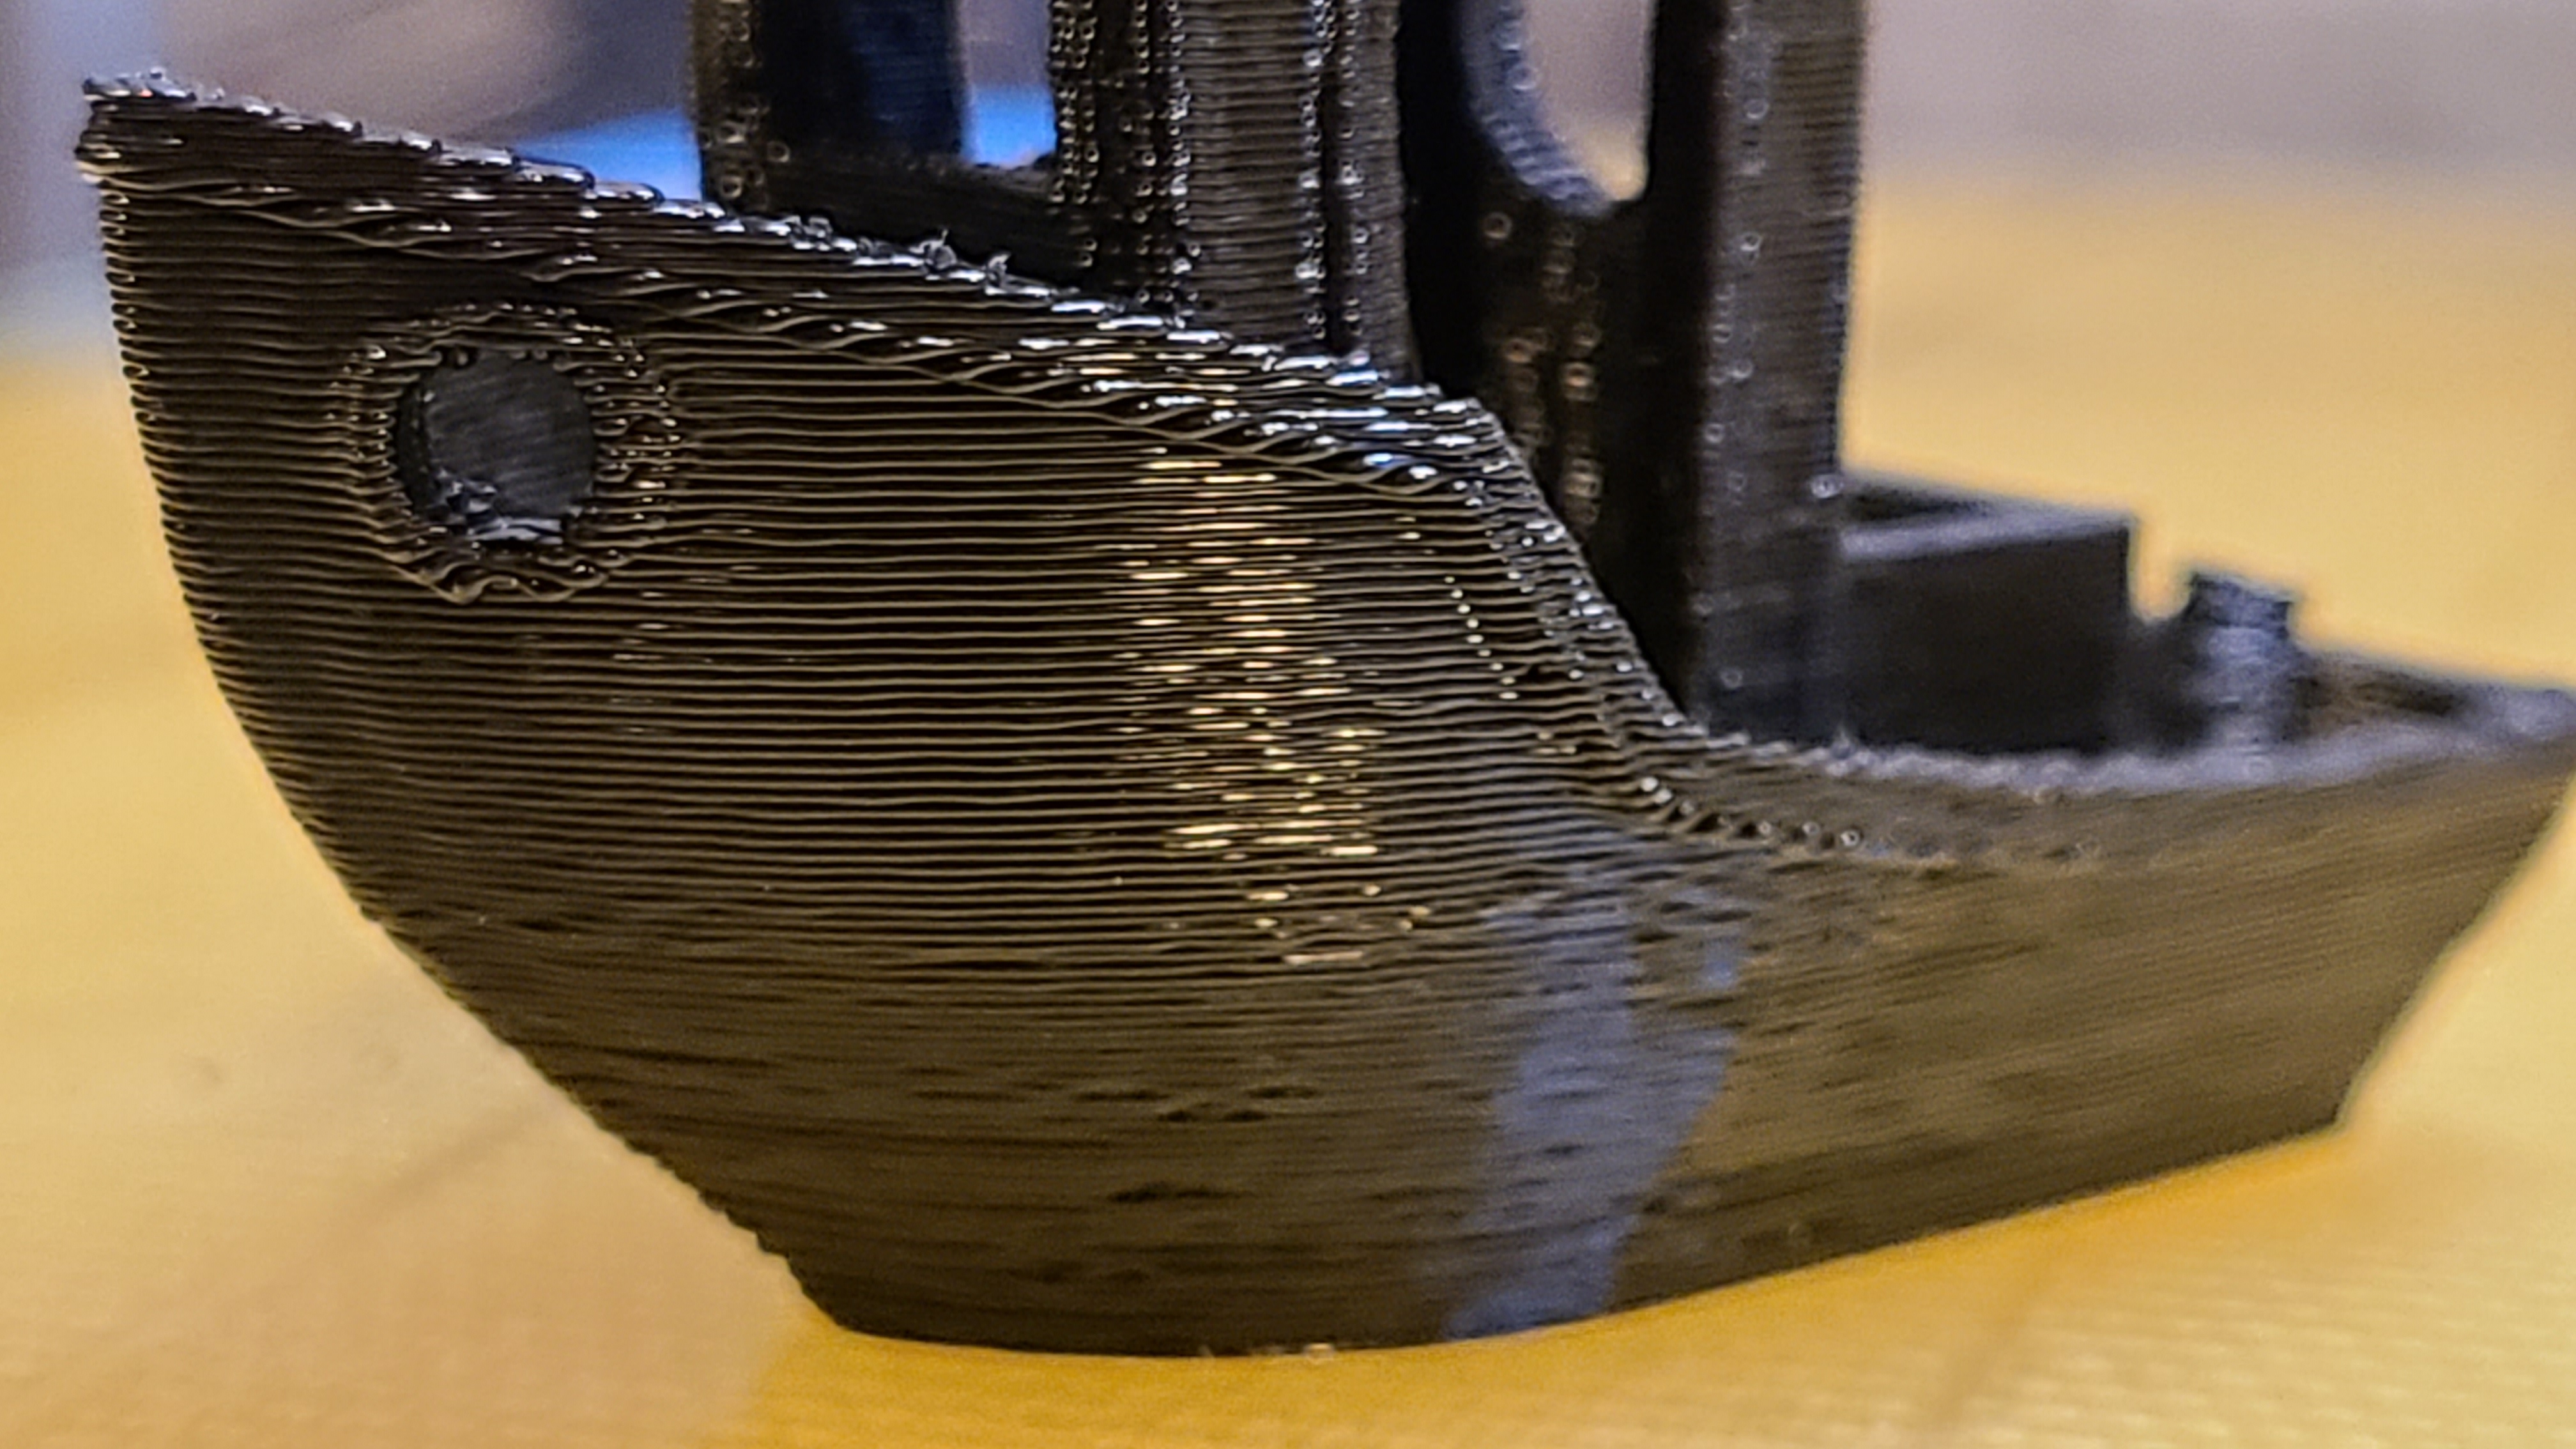
So I went with 220C (up from 210C) heat, lowered print speed to 120mm/sec, and took the extrusion up to 120%, which seems like it was a little too much. Linear bearing diameter is about 14.73mm, linear rail diameter about 7.8mm, so over-extruding now me thinks. Oh yeah, and I turned the cooling fan down to 50% from 100%. Layer bonding is waaaay better. The other one broke apart easier than a stale rice cake. I don’t get any crackling out of the new one when I stress it. Print time was still around 1.5 hours. And no skips!
If your top layers are solid (or holes are undersized) then you don’t need more extrusion multiplier, maybe cut the print speed for perimeters a bit if the infill looks serviceable otherwise back that if too. What extrusion width are you using with the .3mm layer height?
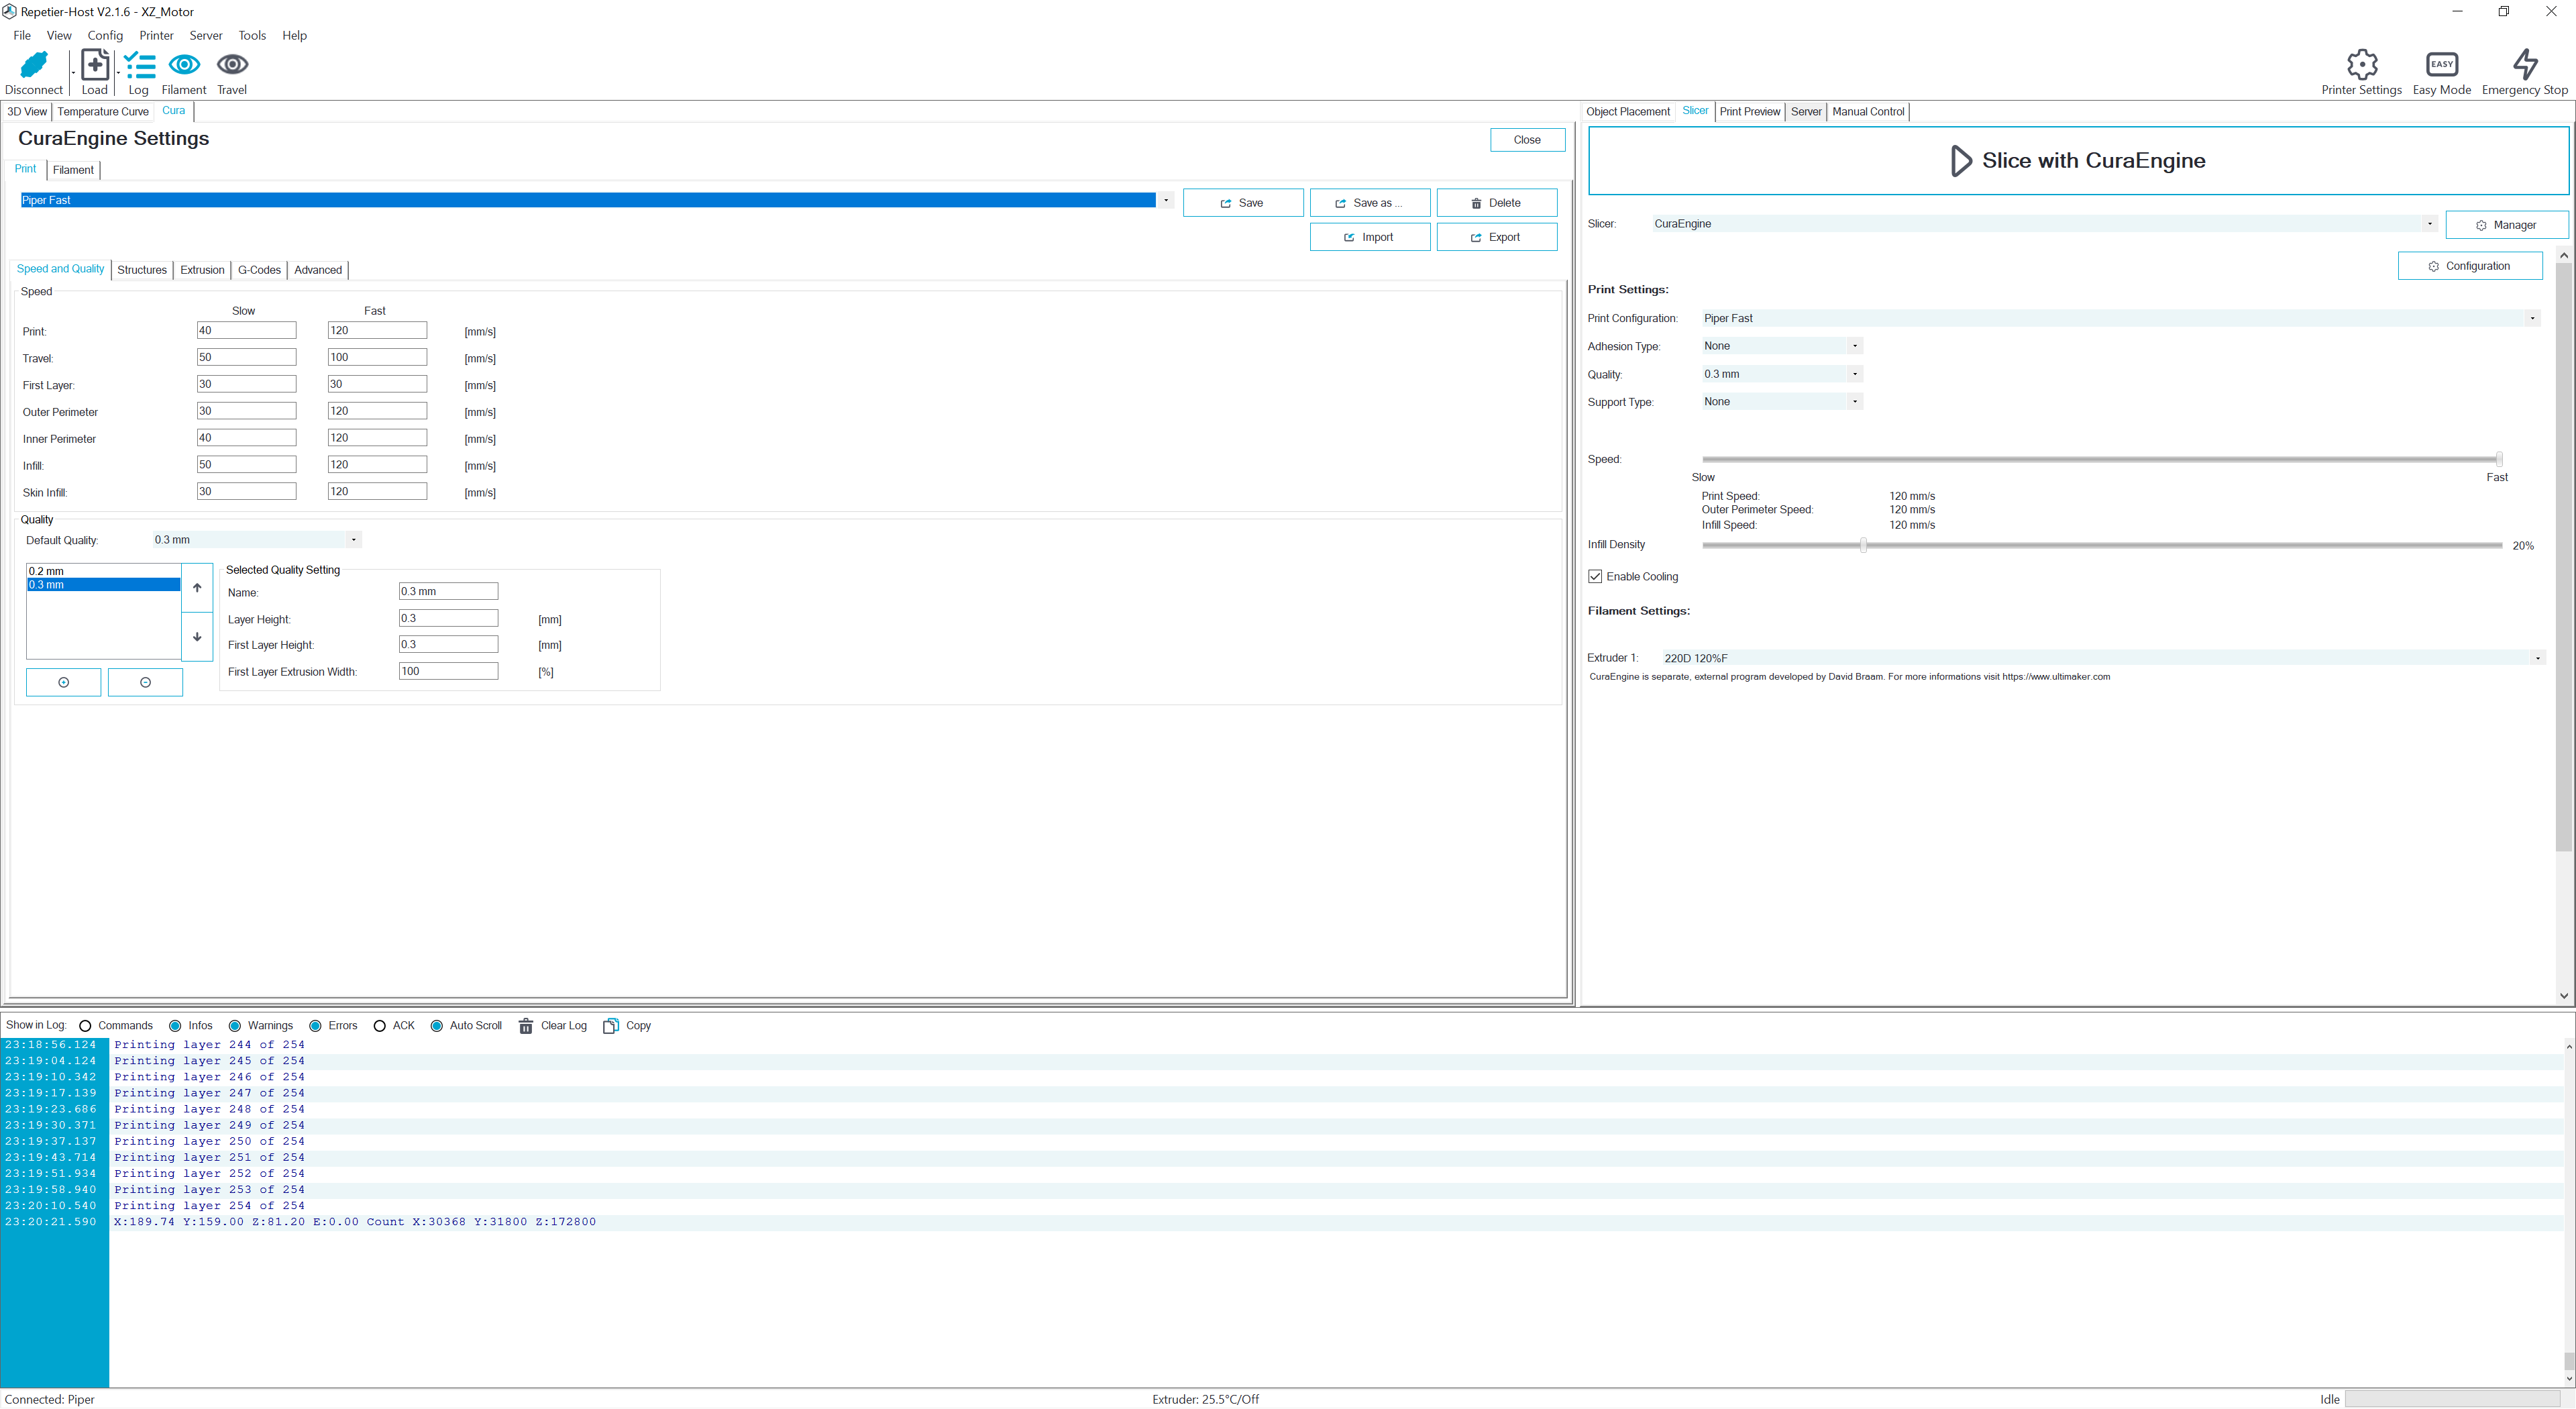
I think CuraEngine is a less-than-full-featured version of Cura. on Cura3.4.1 under the ‘Shell’ tab there is a ‘Wall Thickness’ option:
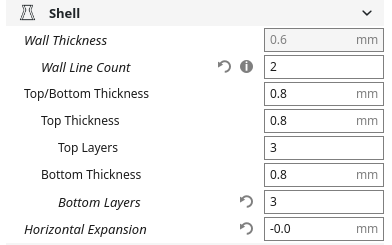
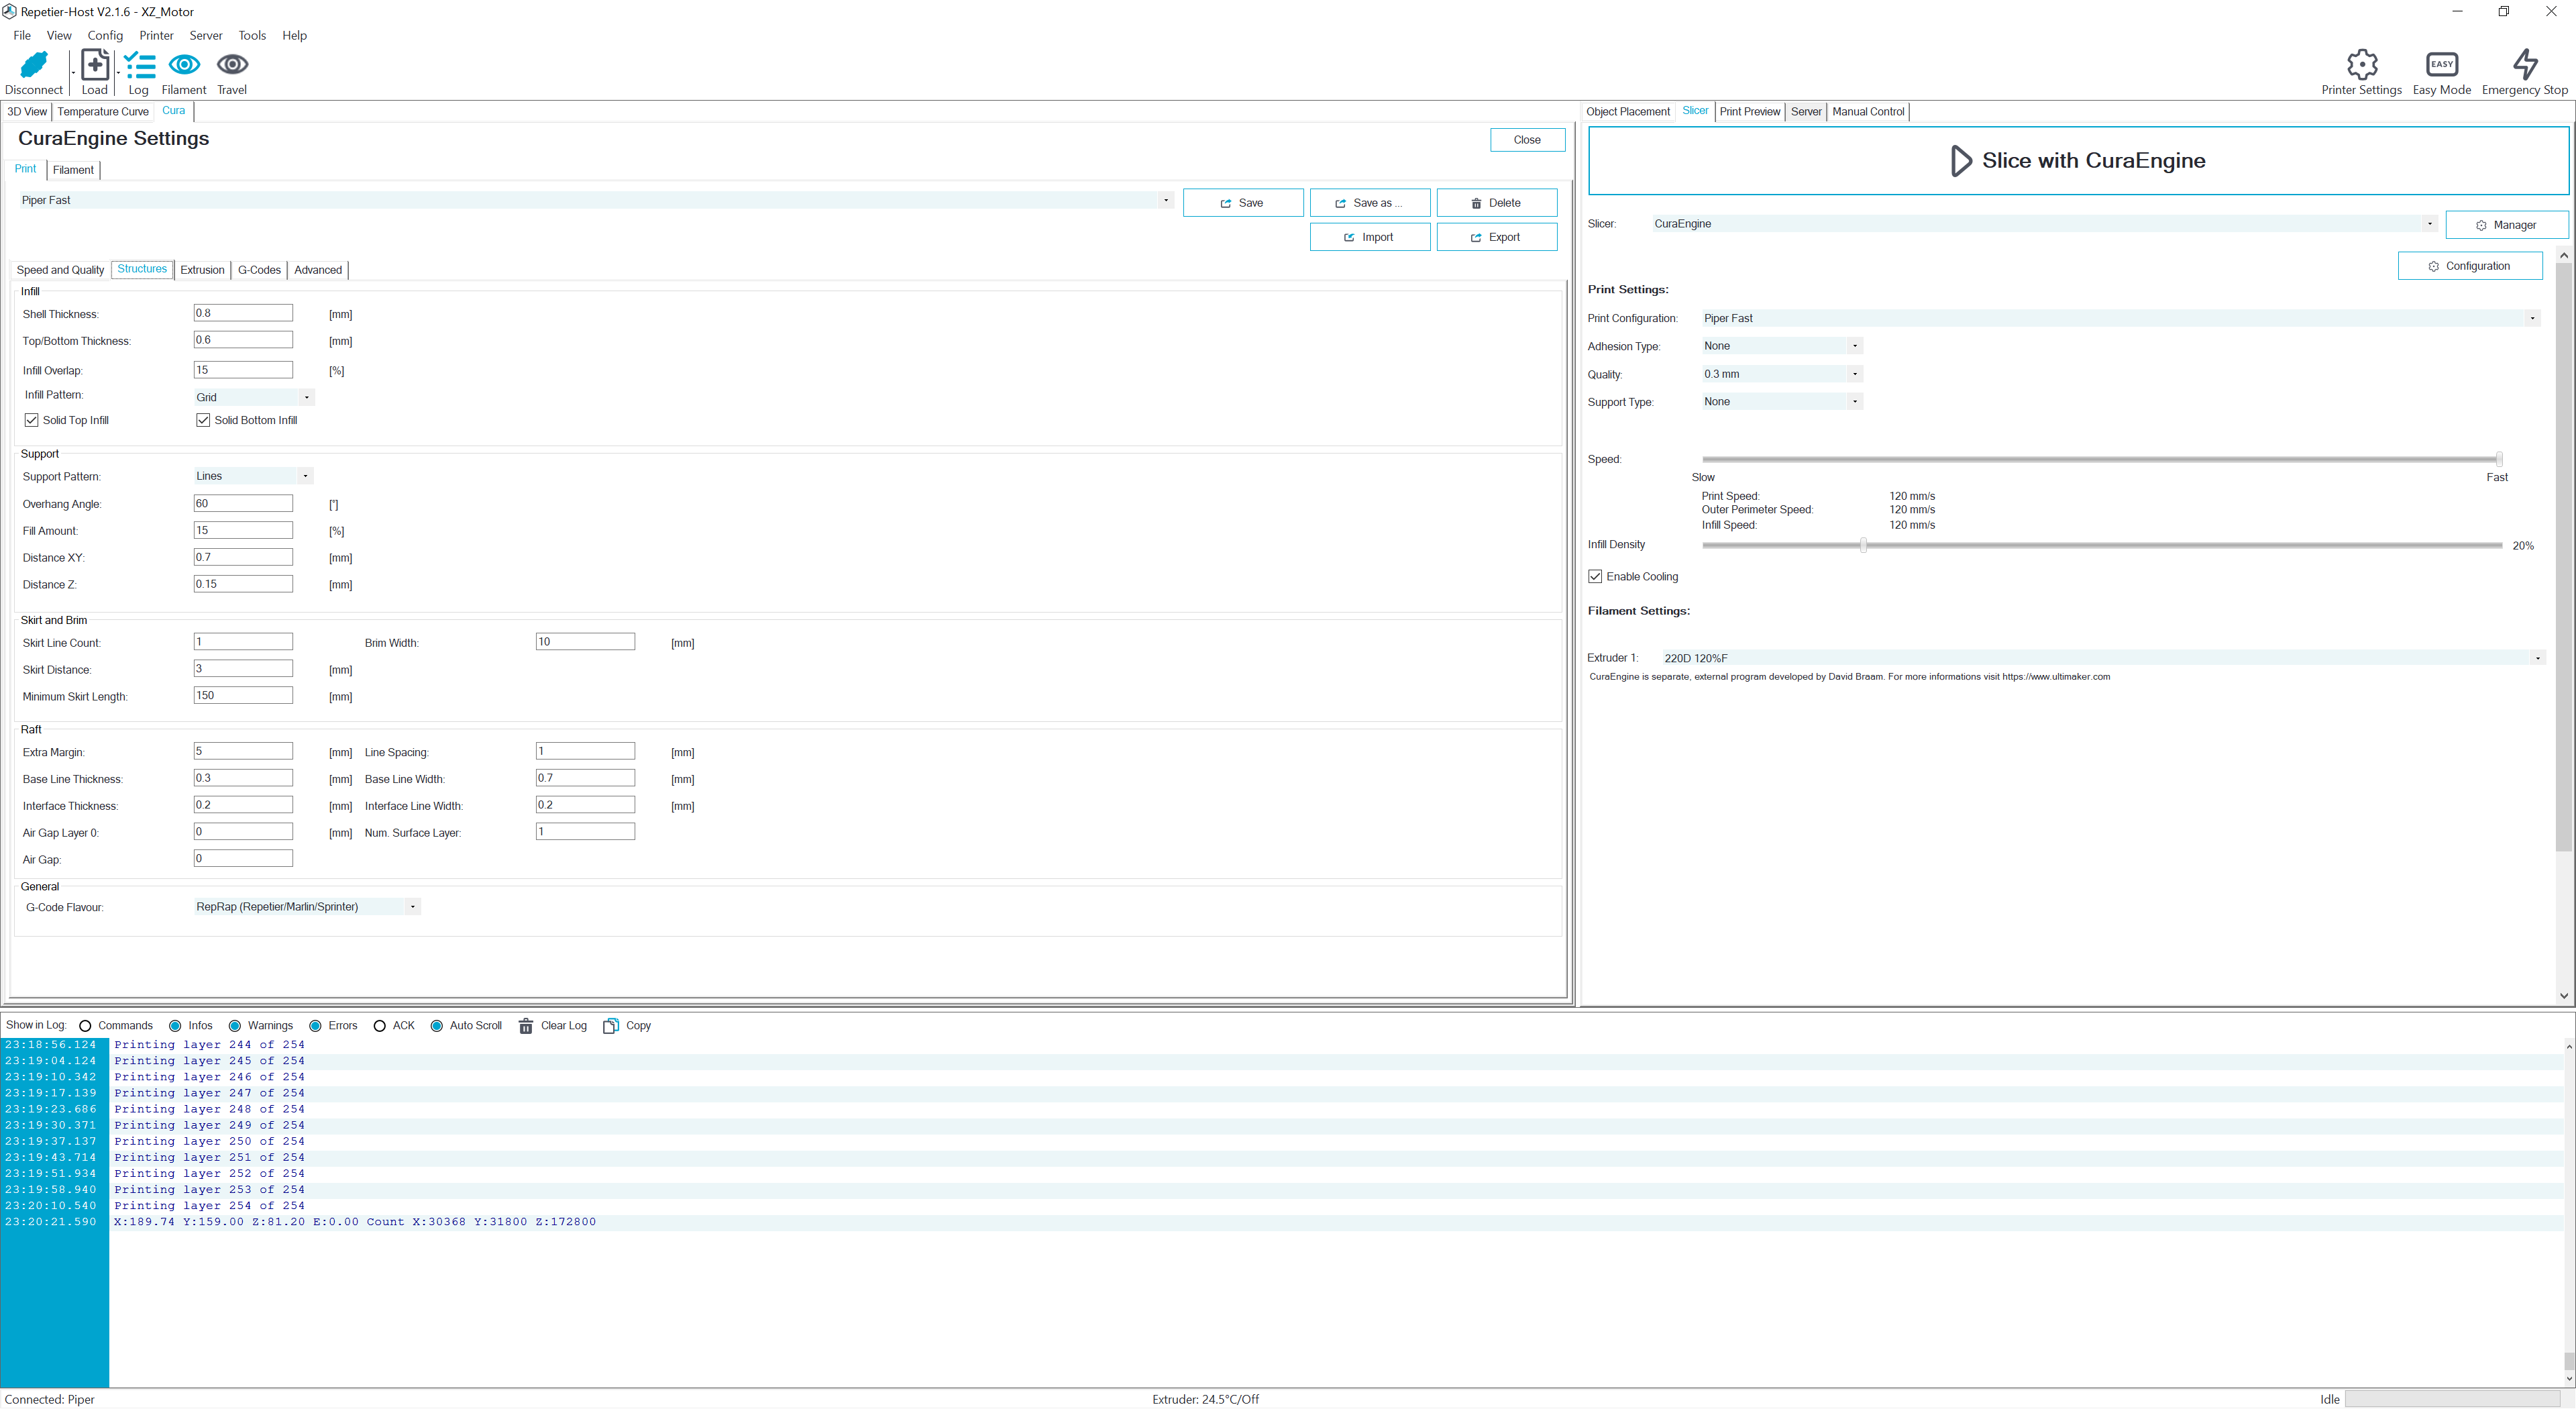
OK, that must correspond to the “Shell thickness” in the Infill section on the Structures tab. I’ll try lowering that. Maybe by half.
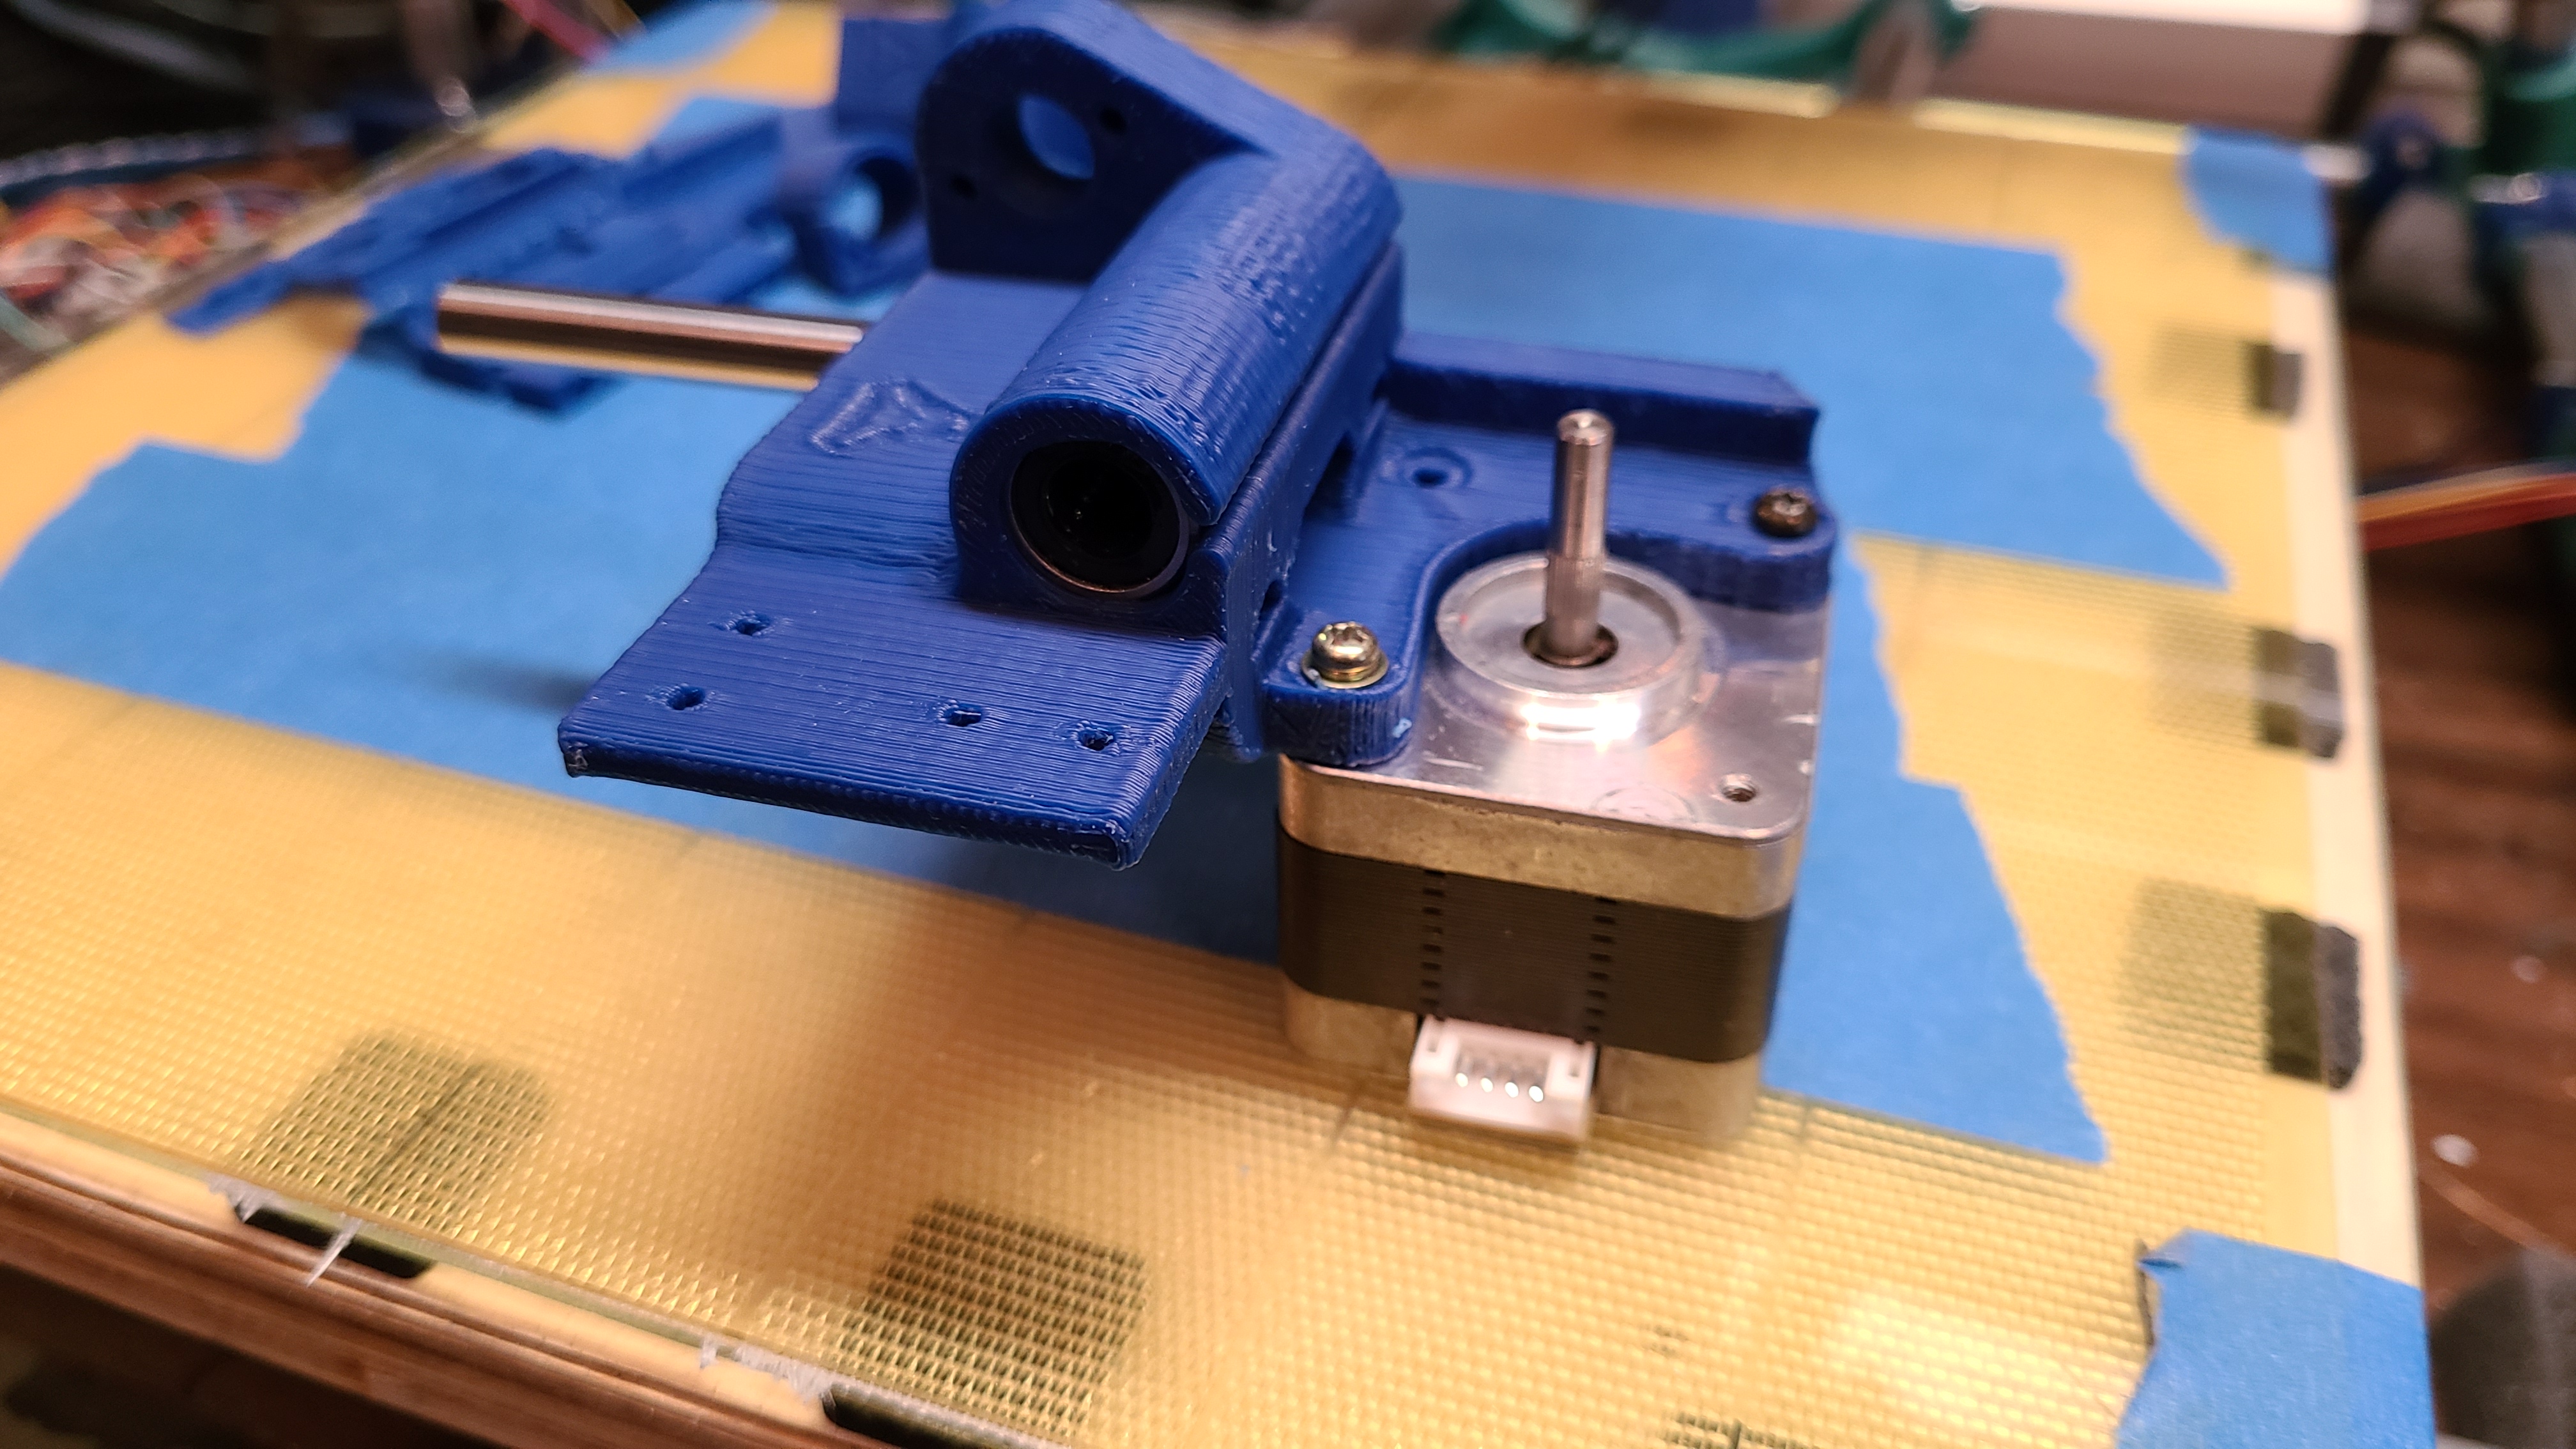
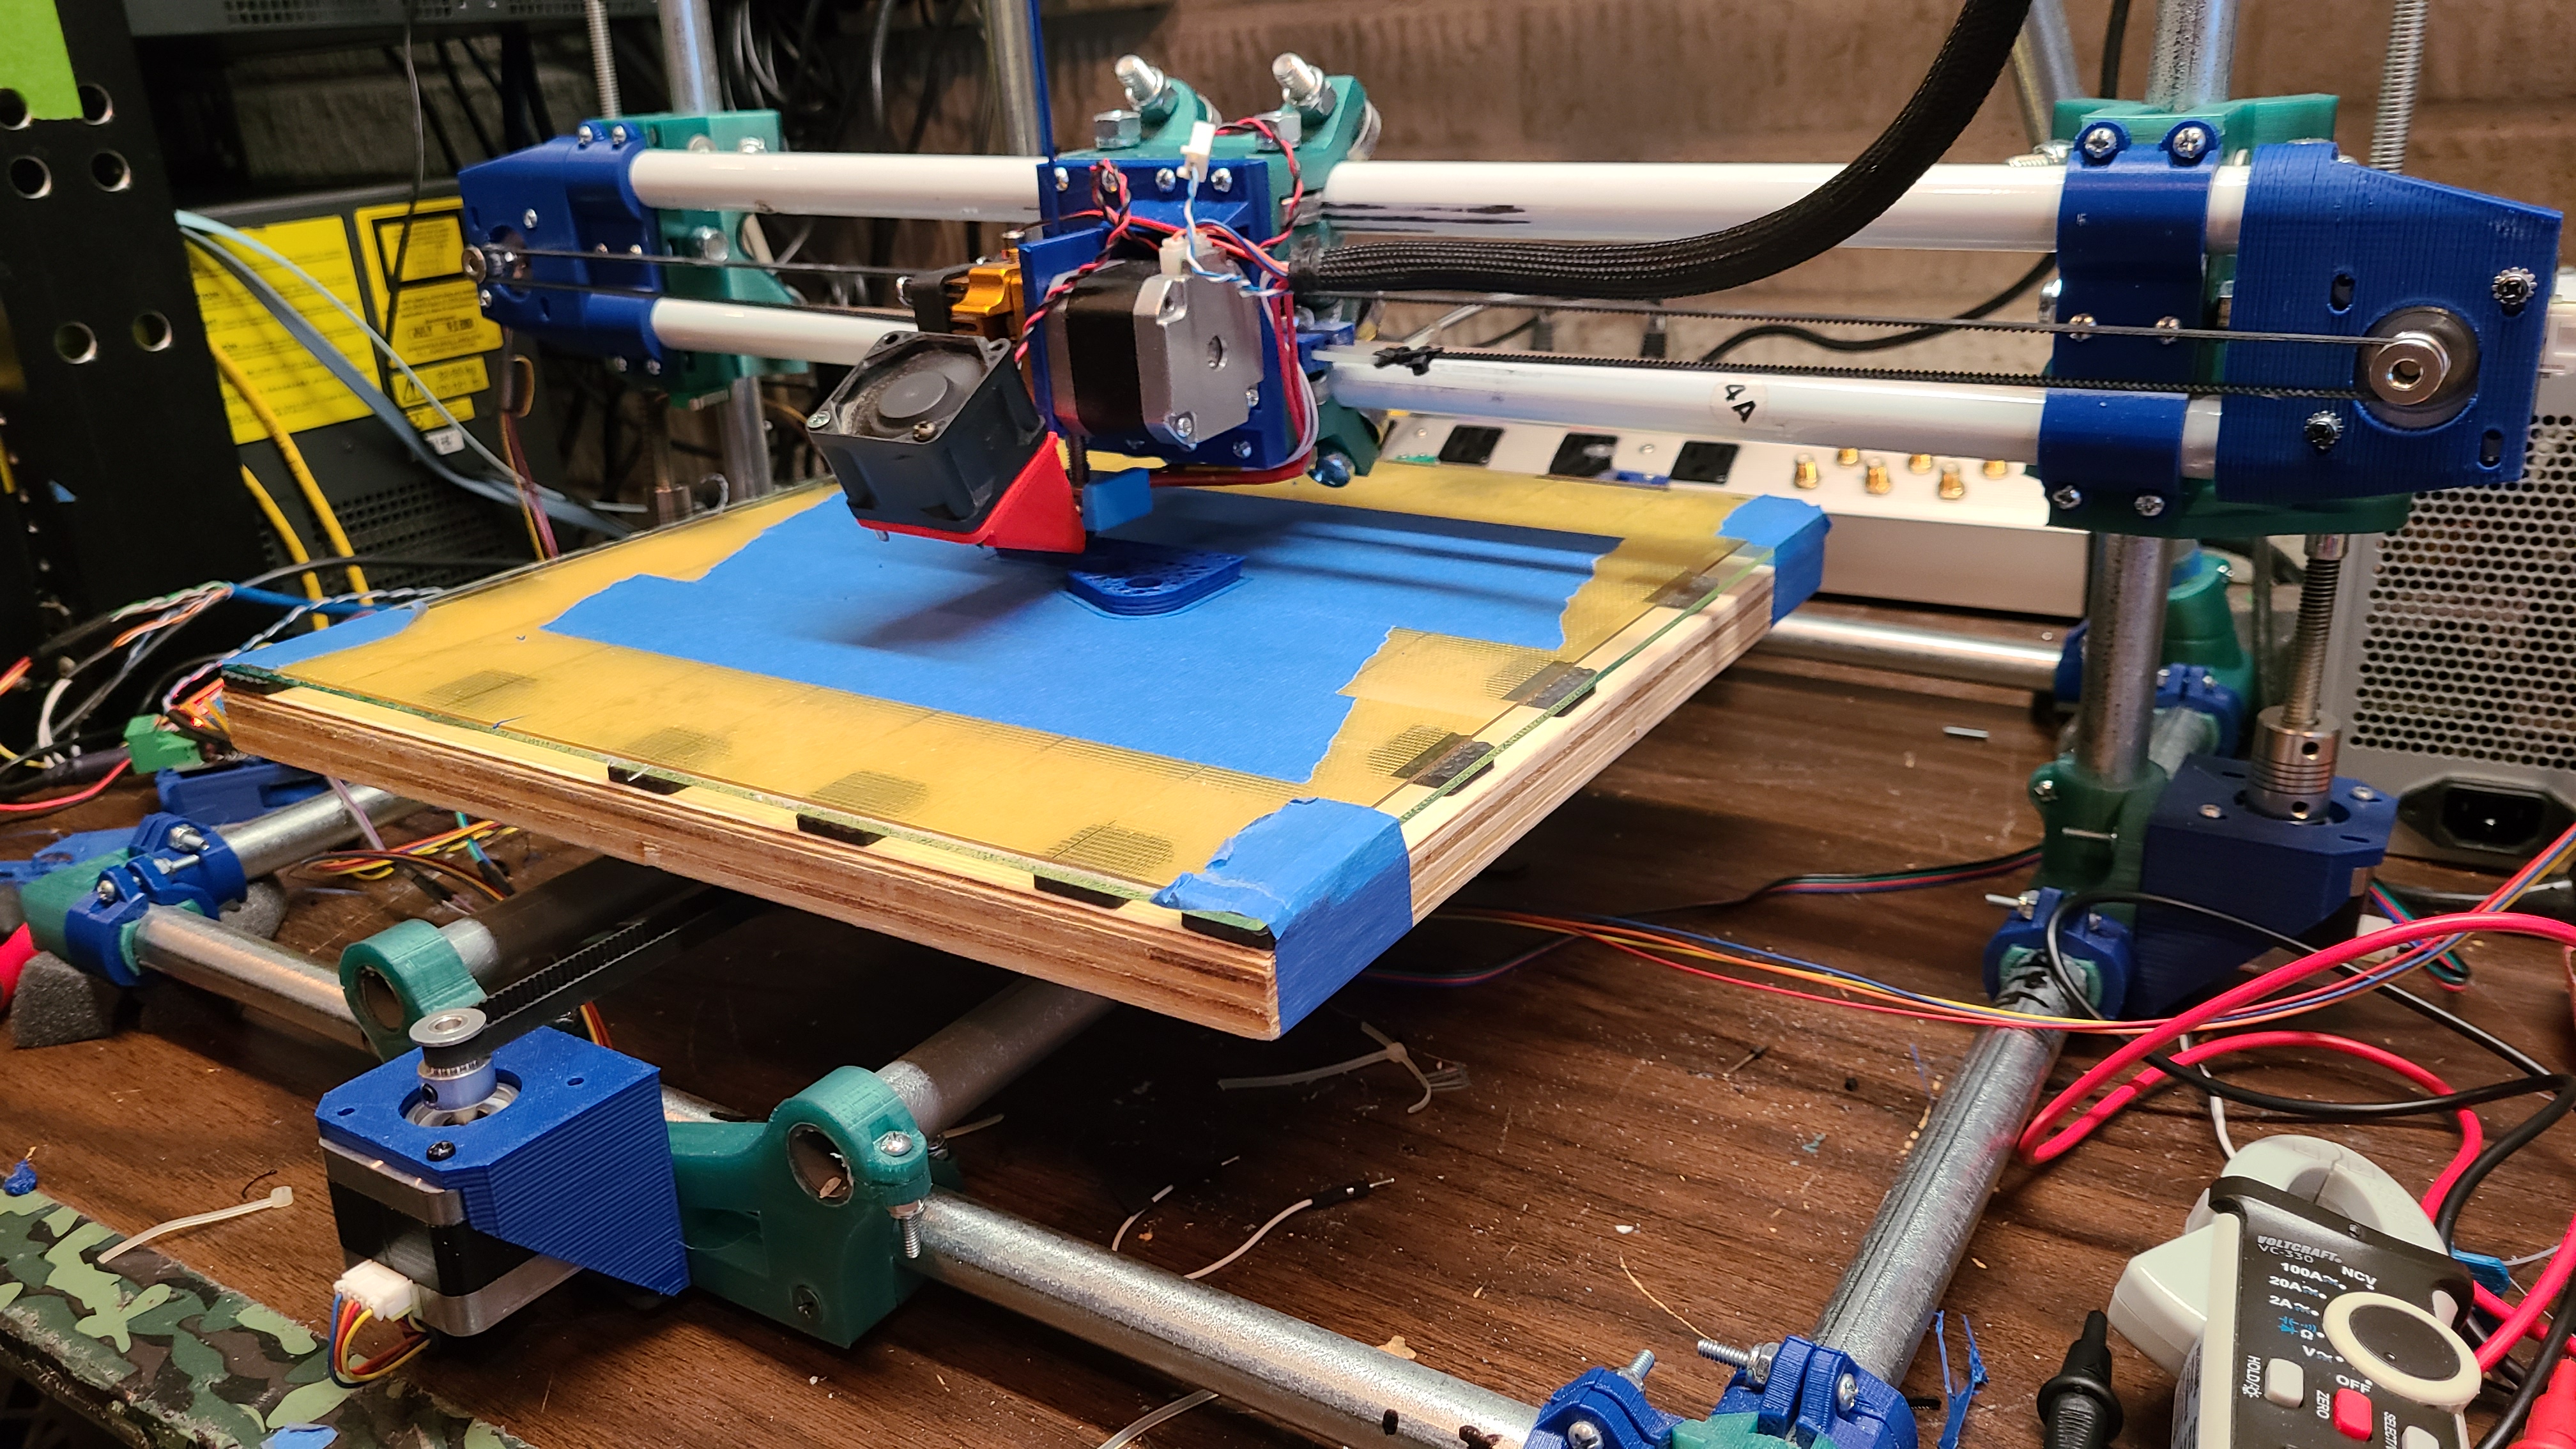
Everything fit with a little persuasion. The bearings were tough. Motor fit fine and the rods fit once I cleaned the end of the opening a little.
I think shell thickness might be total wall thickness, not the width of an individual extrusion. so check your gcode before printing.
I would really recommend moving to the full version of Cura (vs. CuraEngine). There are a lot more features and ways to adjust your settings.
Ahh, got it. I’ll check out the full version.
So I found a setting in Cura called “Horizontal Expansion” The pop-up tip says it will compensate for holes being to small or to large.
That is a bit of a bandaid to fix models that have loose/tight features. I wouldn’t rely on it to give you properly sized parts generally. Get your other parameters tuned first and use that feature if necessary to do the final touch up.
I tried messing with Cura, but that’s a whole other few hours of learning. First stuff I tried ran my nozzle into the bed, then I couldn’t seem to get my speeds right. Too many settings for me right now. I’m comfortable with my Repetier Host/Server and Cura-lite slicer. That was a big step for me a while back coming from Slic3r and Octoprint. Maybe I’ll come back to it some other time. Thank you for pointing me in the right direction though.
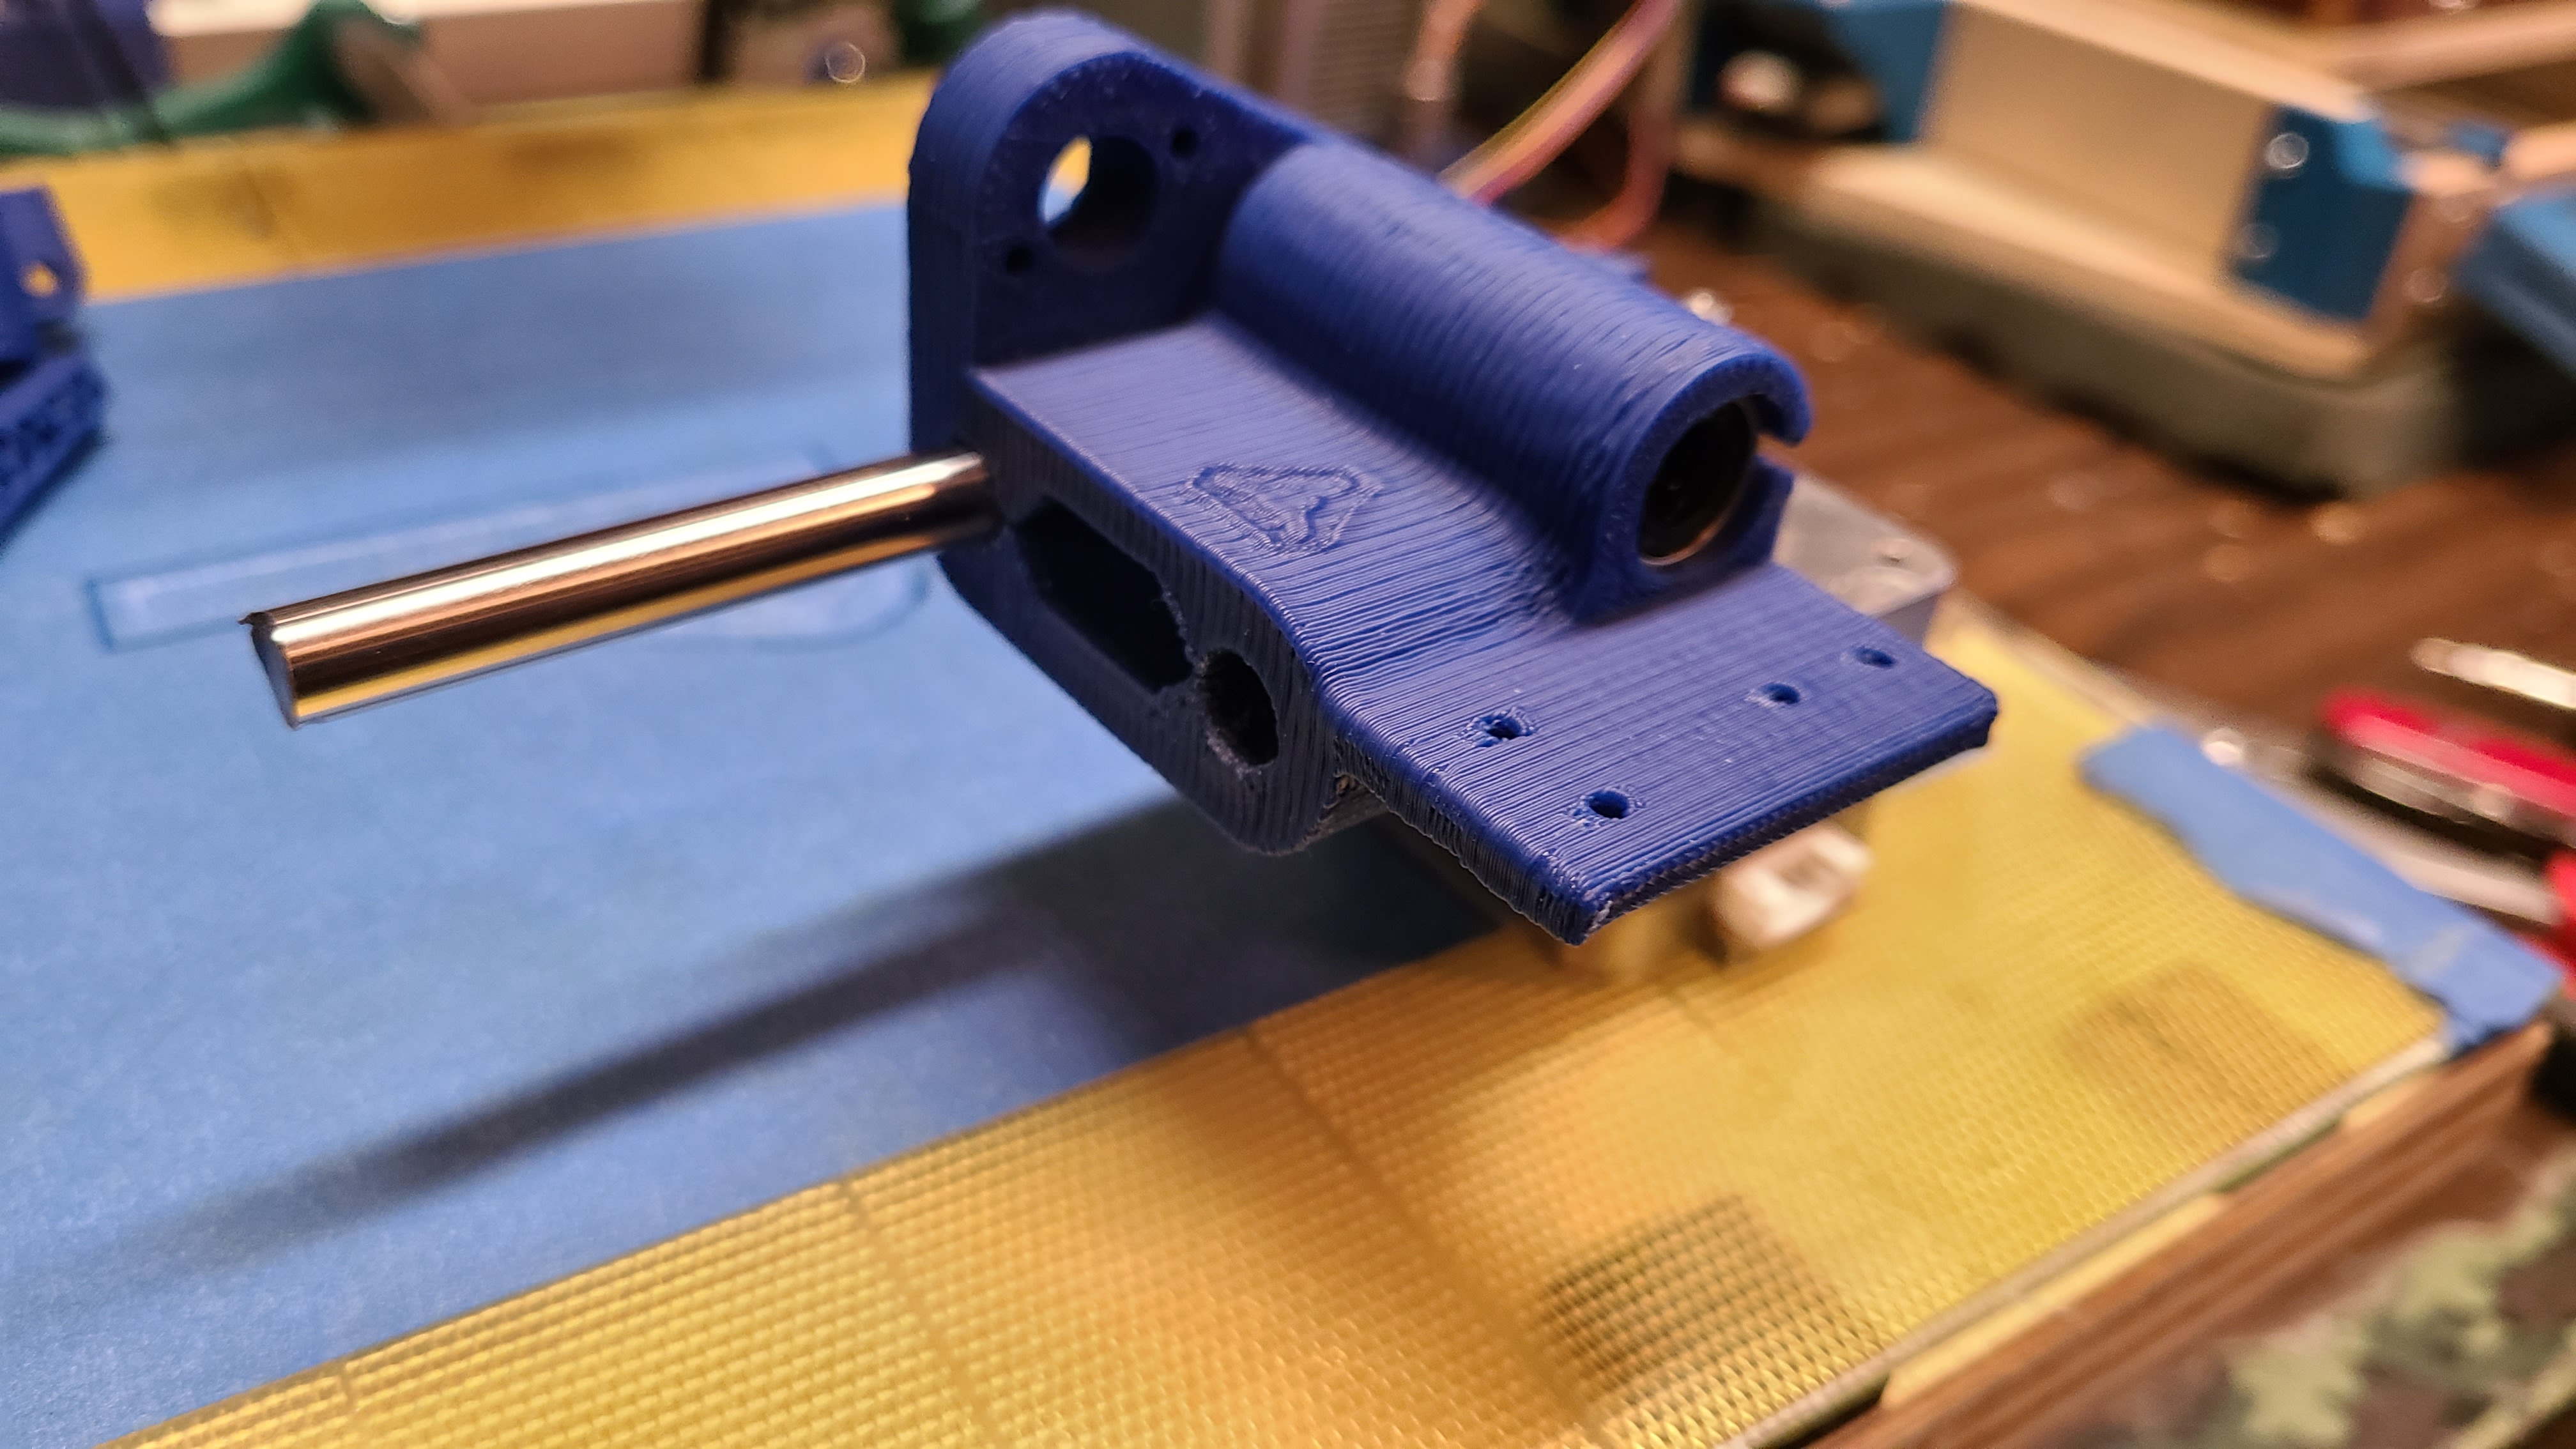
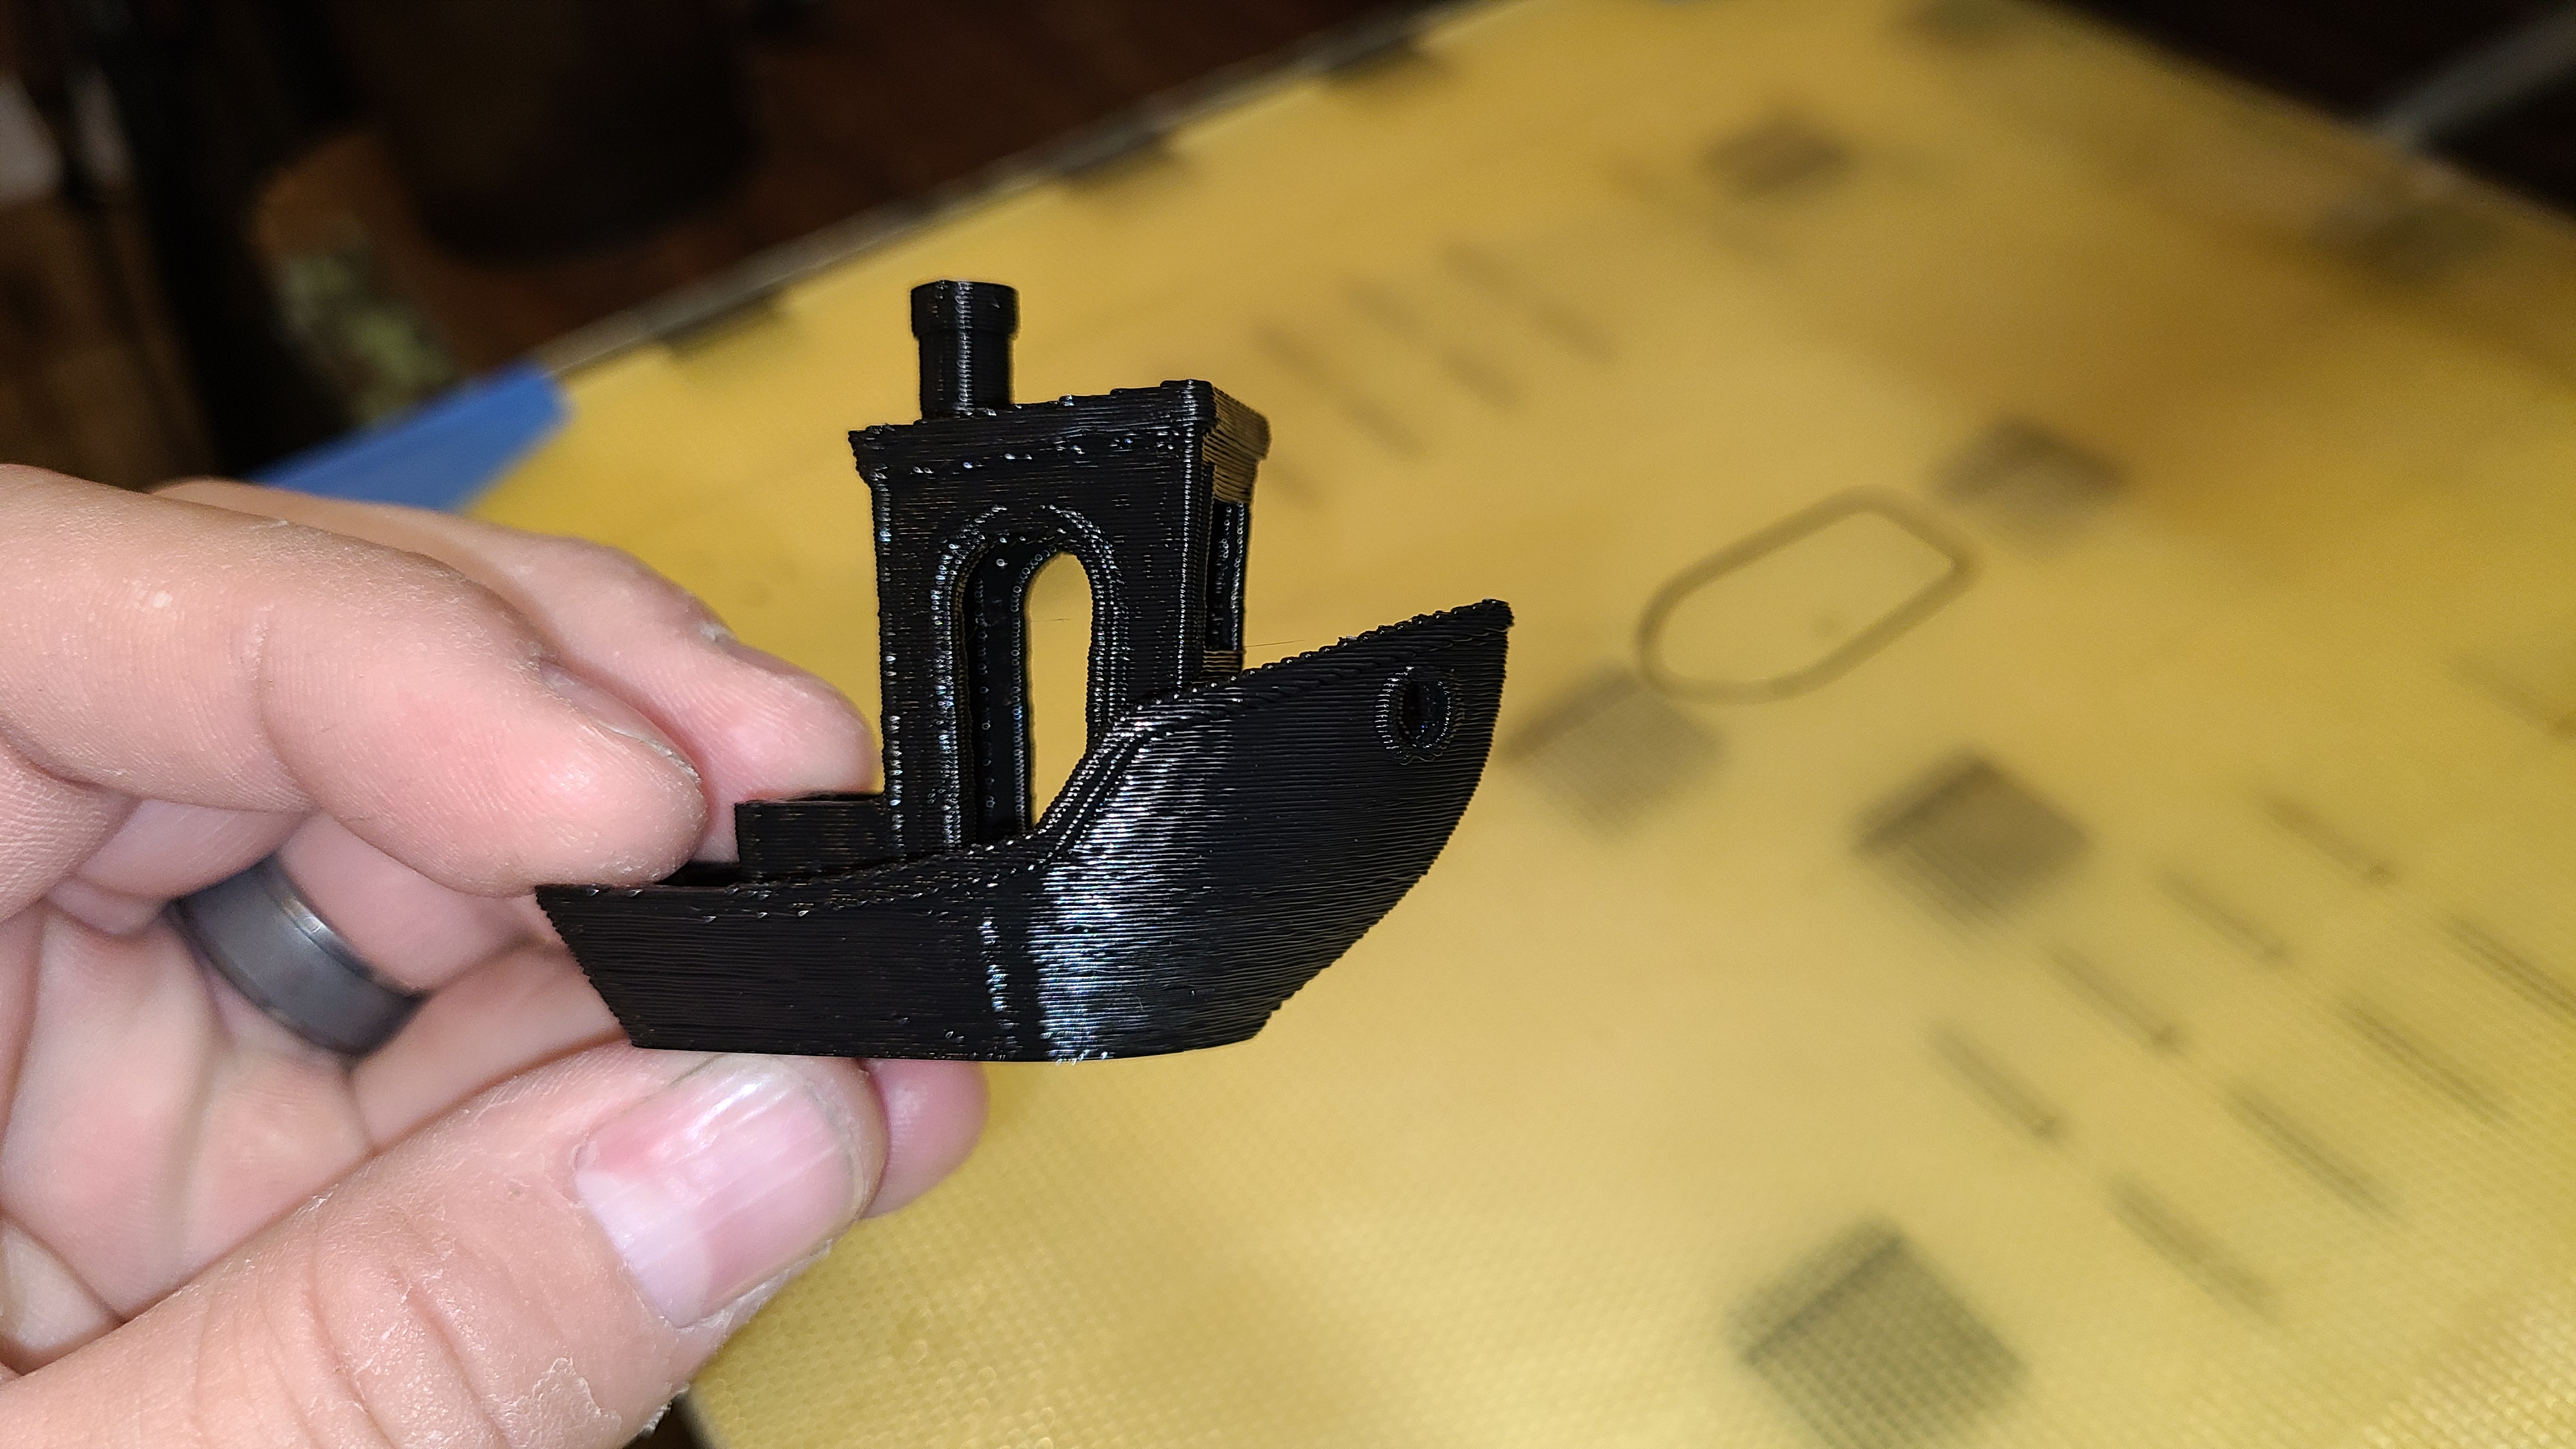
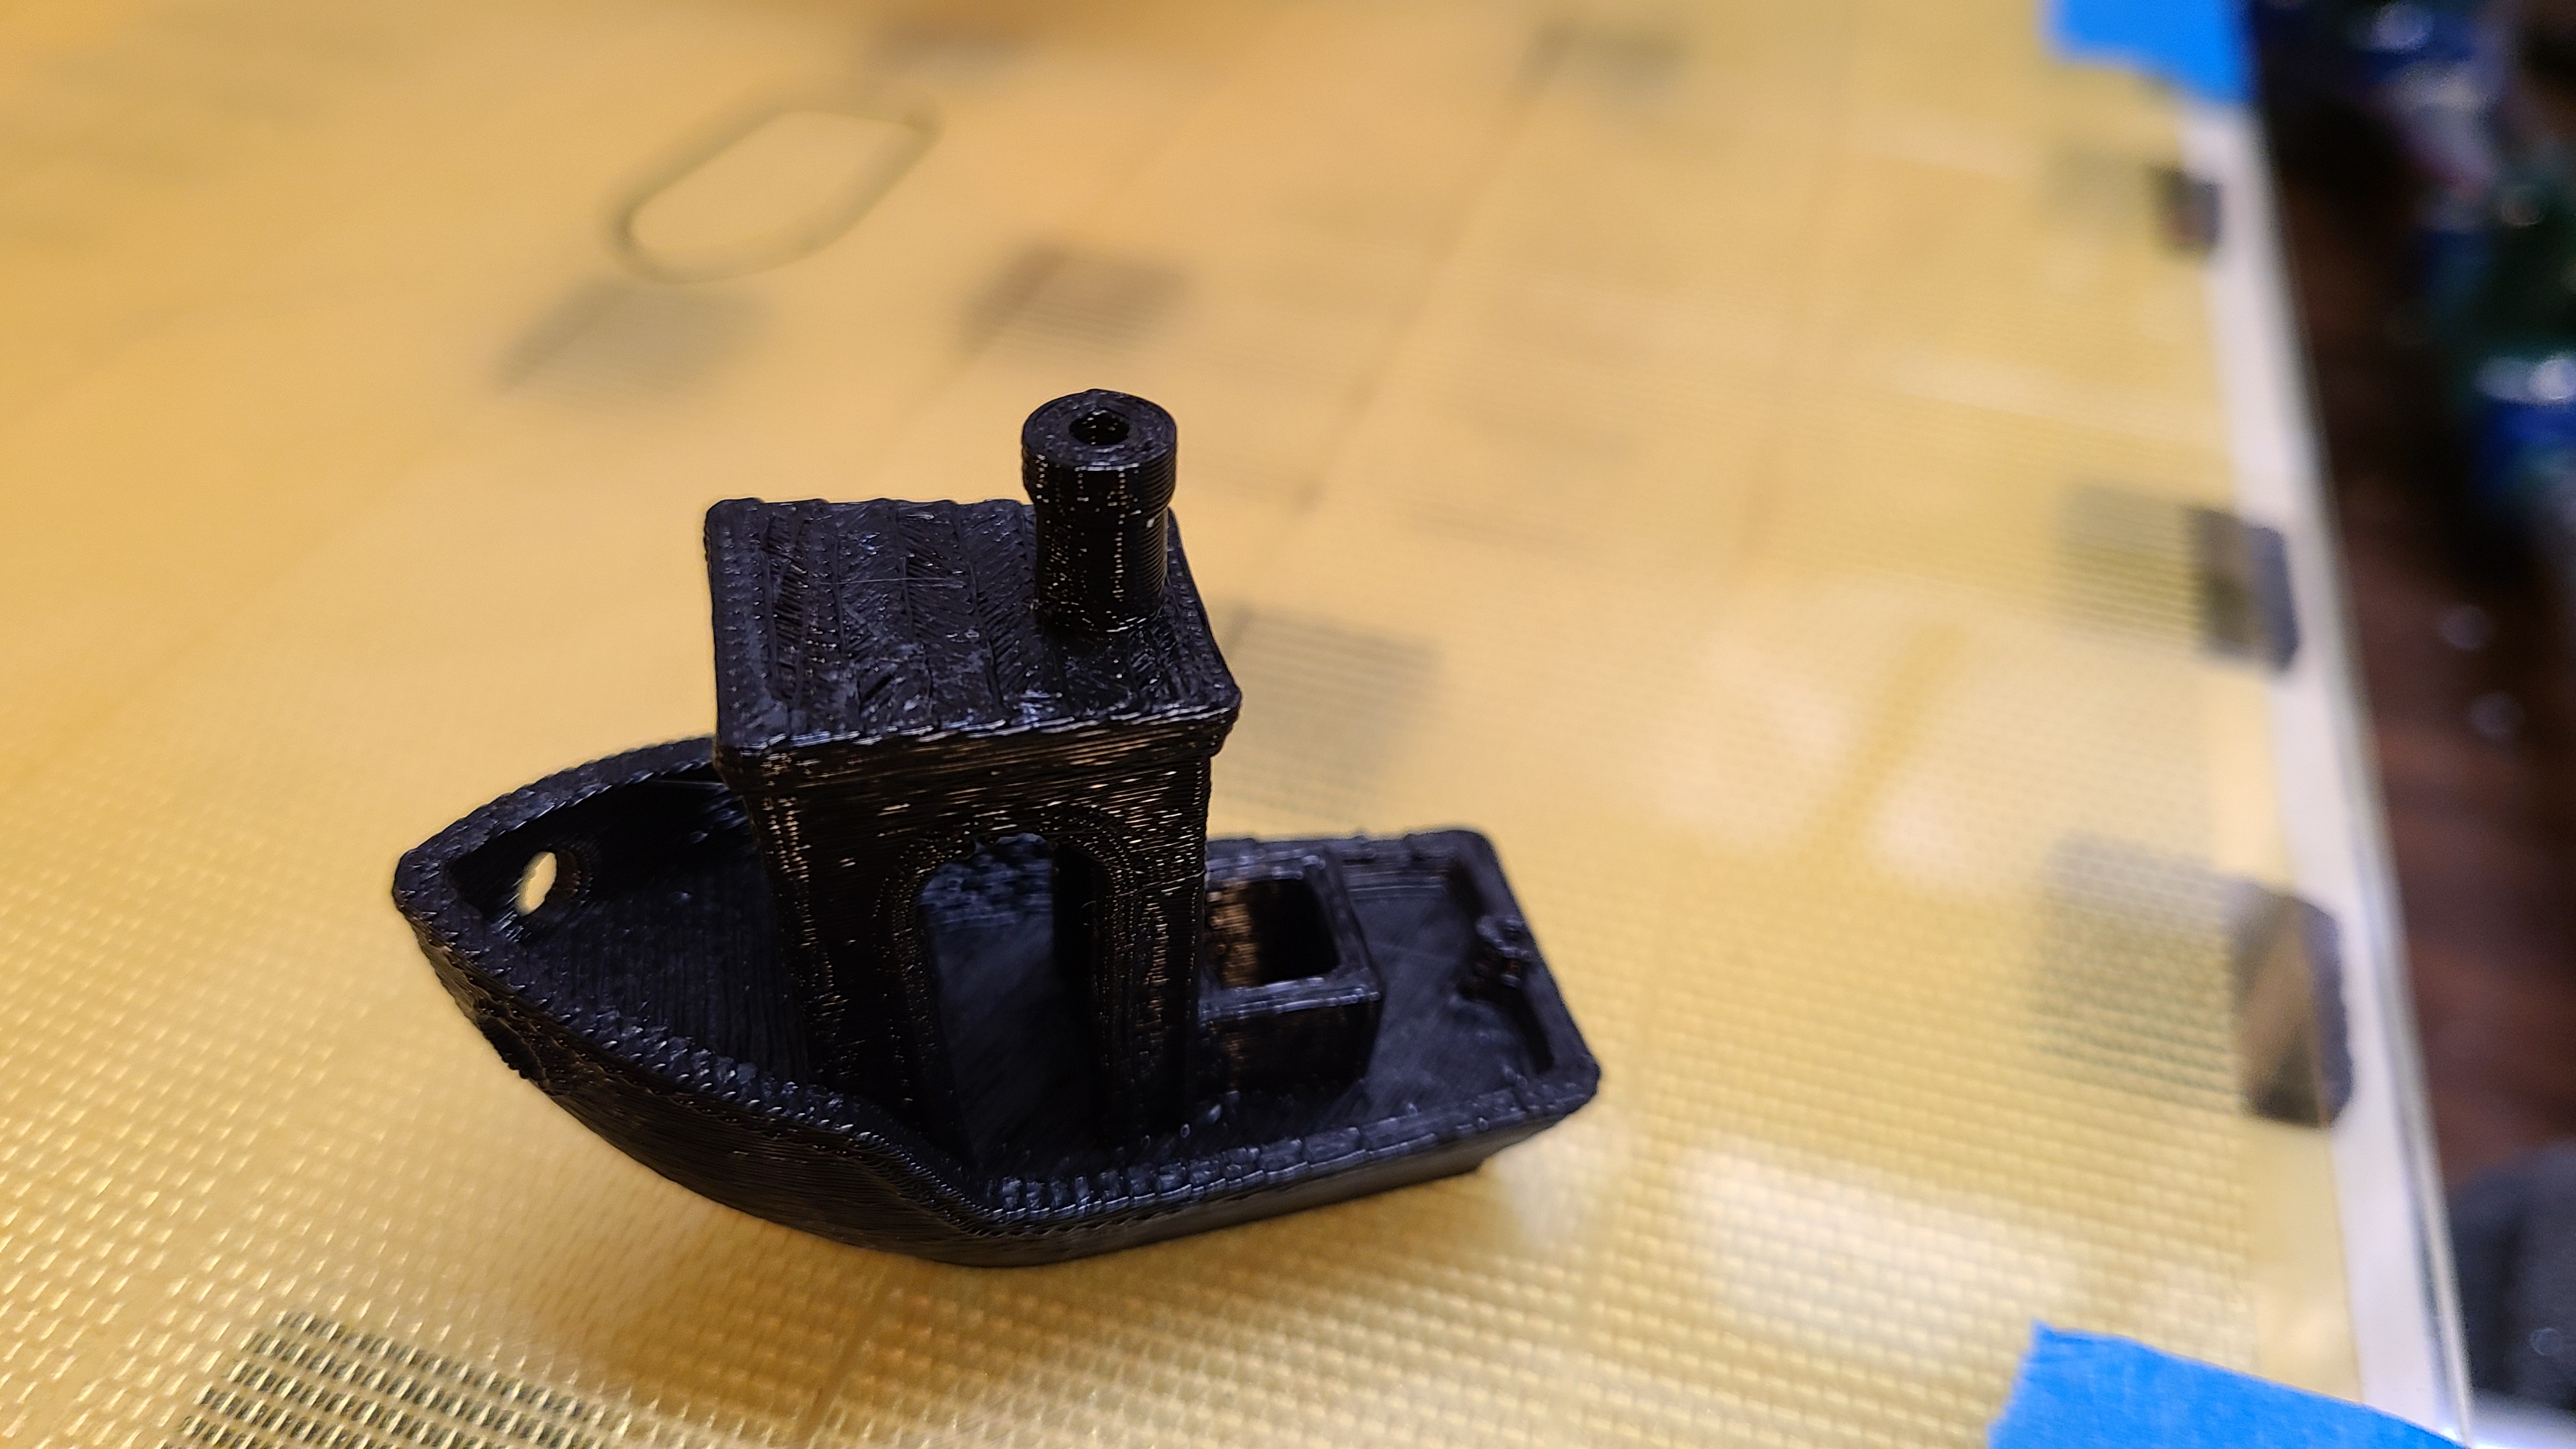
I did print another XZ mount last night but I forget what setting I changed. Came out a little better, just had to clean the “elephant foot” off of the bearing hole and the rods fit well without any help.
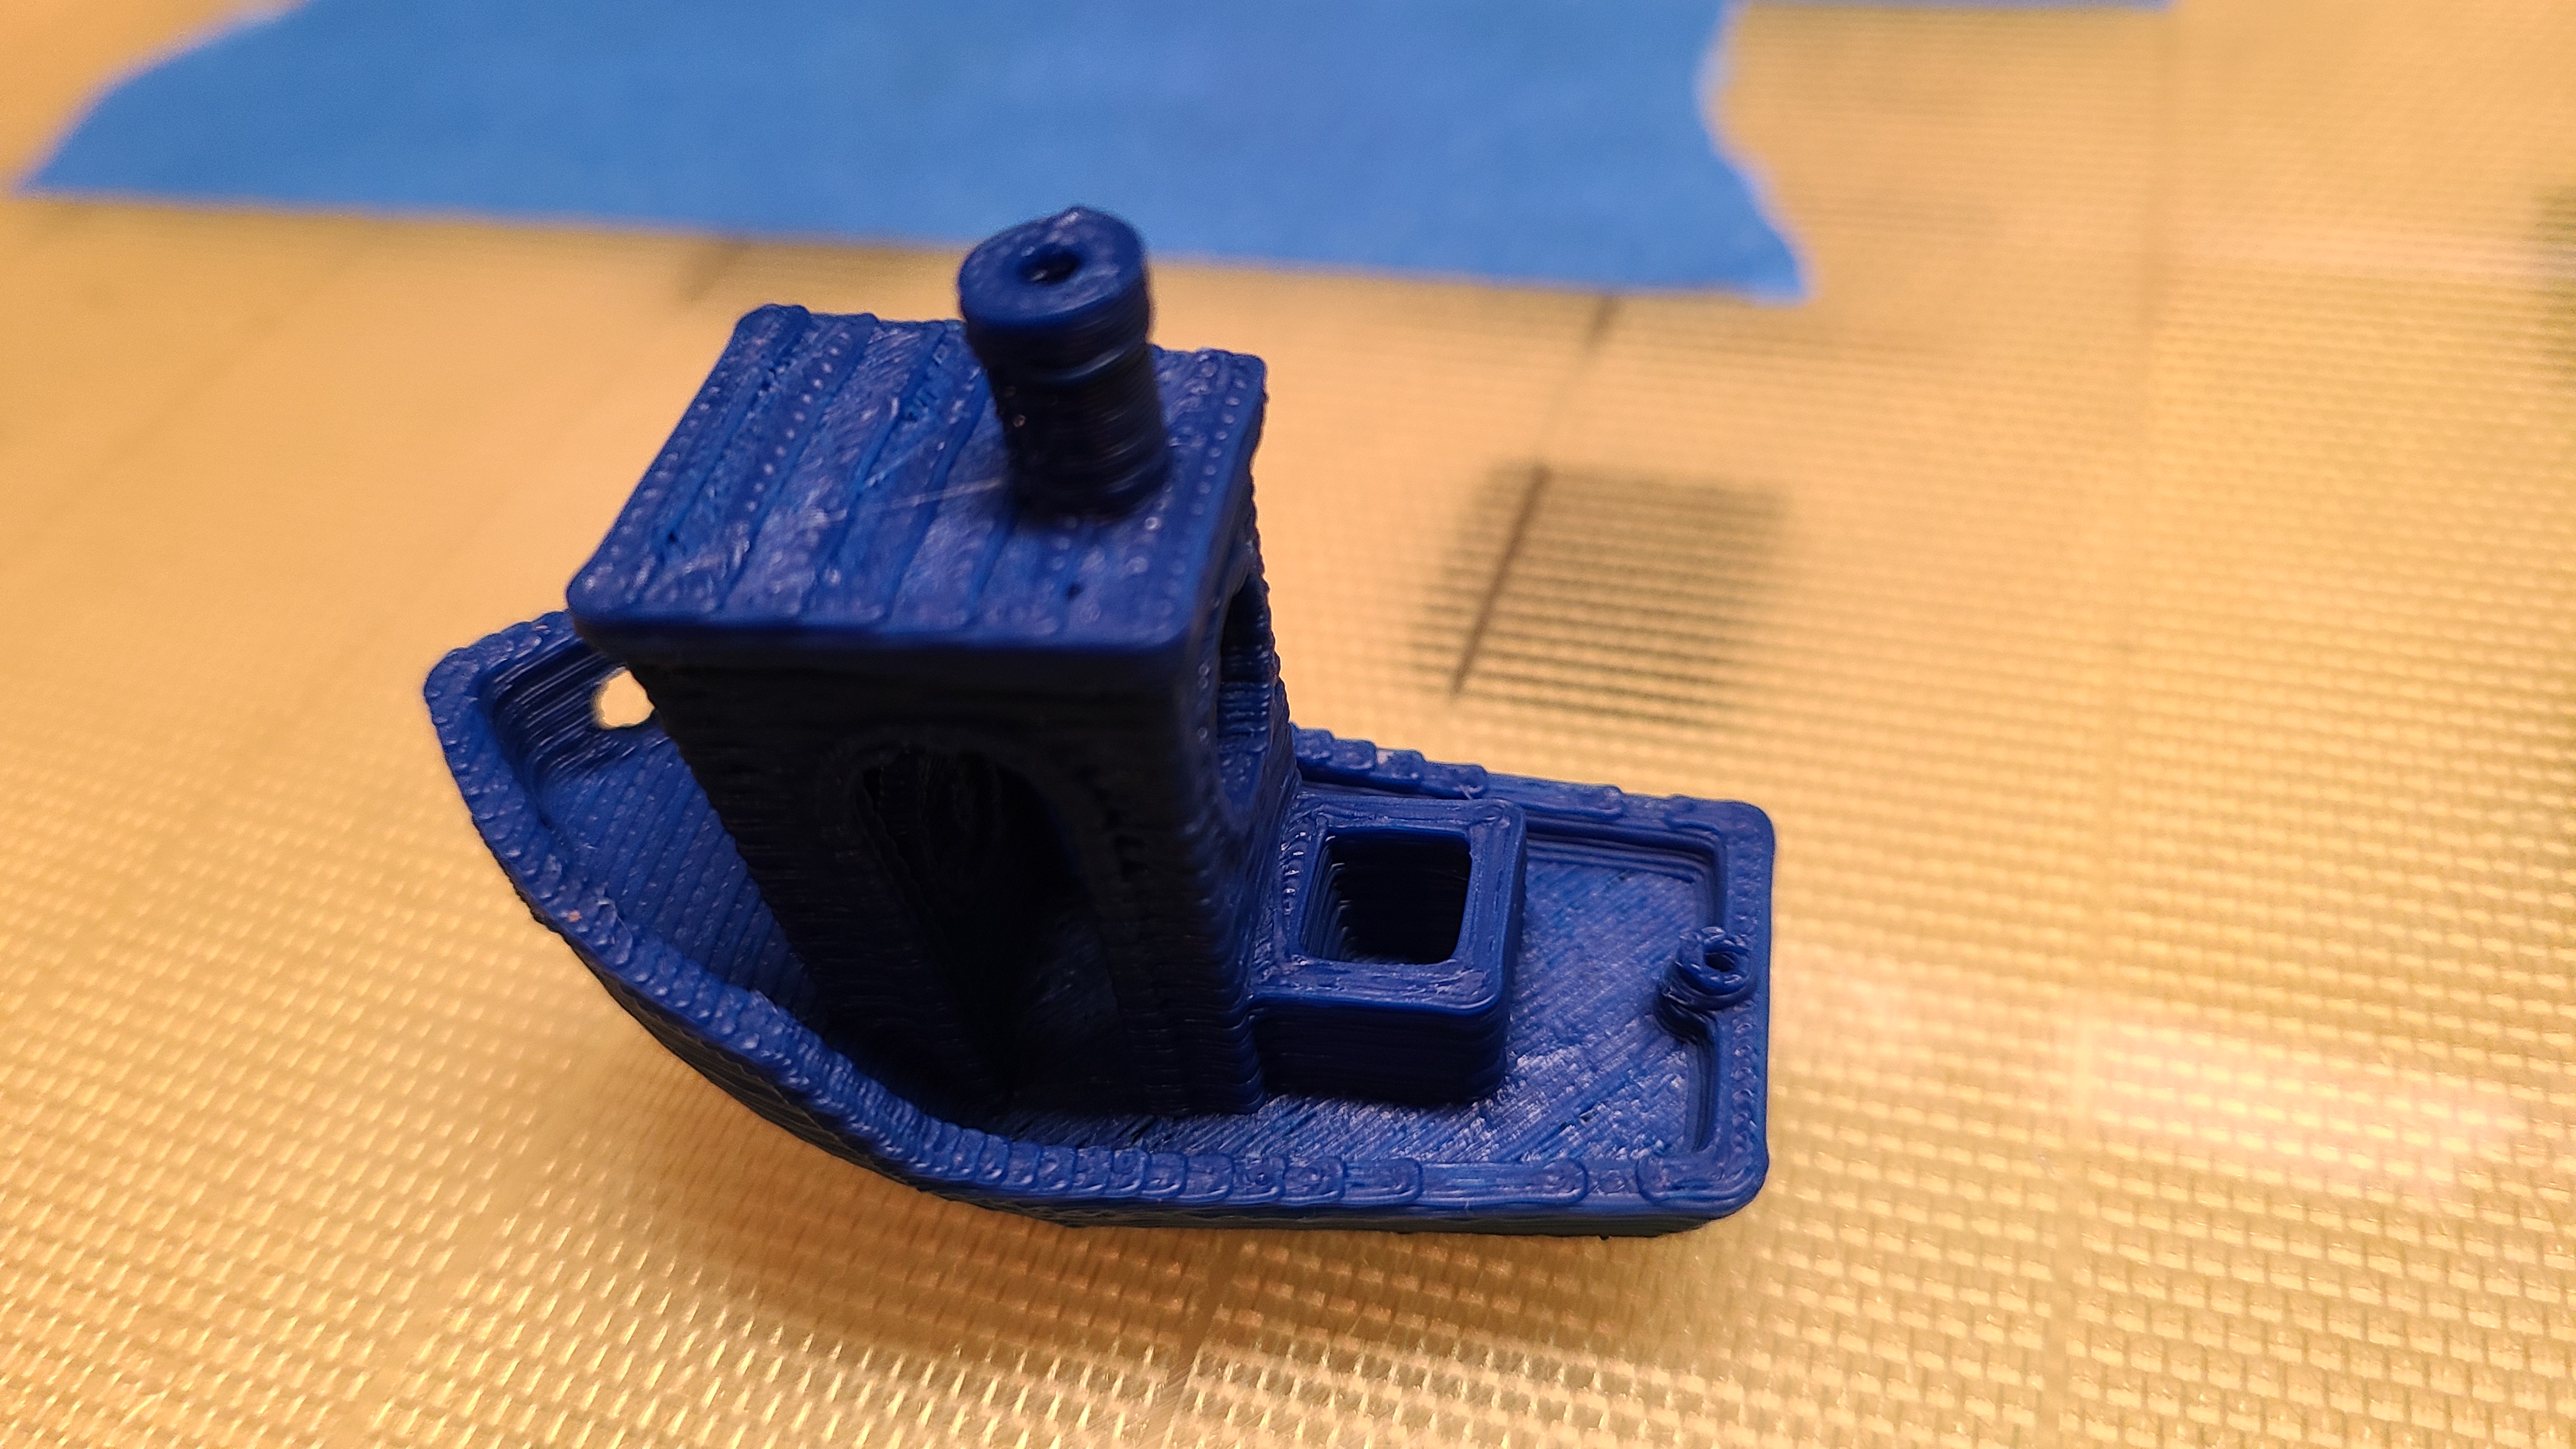
Also printed a benchy at 120mm/sec. I don’t think I’m going to continue this until I get new Z screws.
1 Like
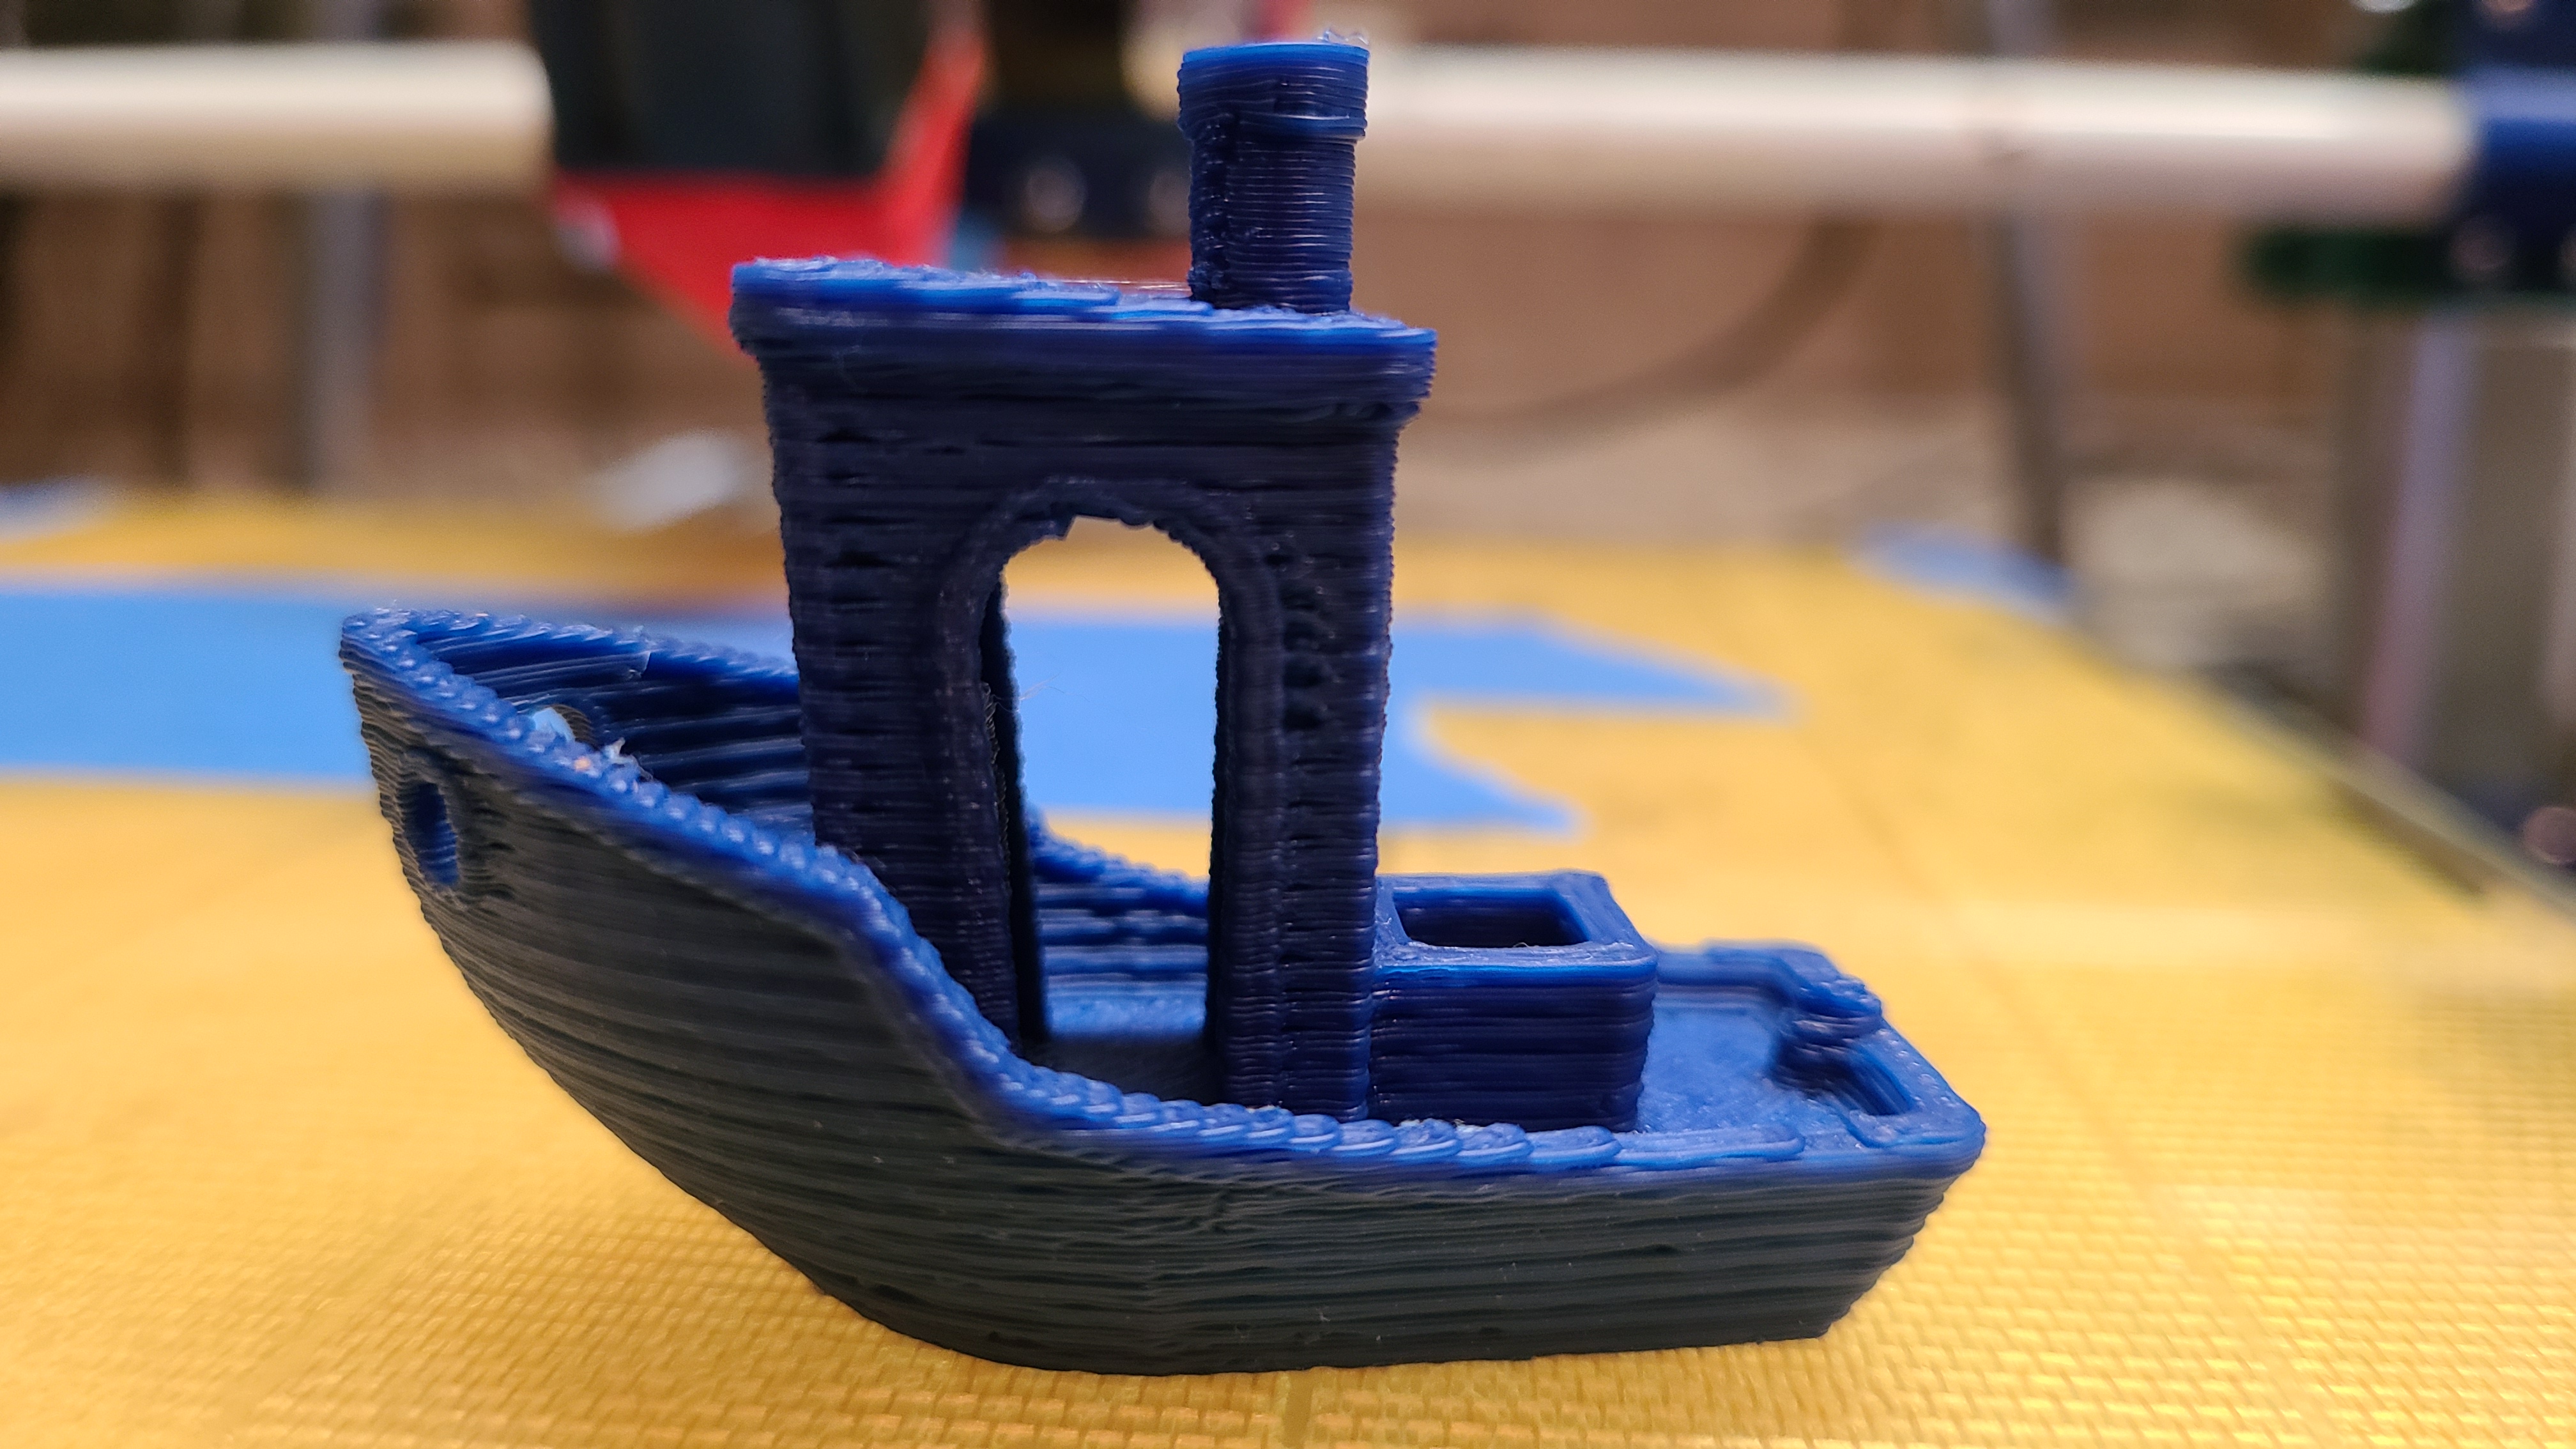
New screws arrived! Finally… Received and installed yesterday. Ended up getting 1-start with 2mm lead. Difference is night and day. Here’s whats coming off the printer at 100mm/sec. This took about 45min to print with .3mm layer and 20% infill.
!
Tried running at 120mm/sec but my aft Y stepper was making some weird noises and started skipping. Kinda like pushing a dry squeegee over dry glass, like a chatter-squeak. Lowered to 100mm/sec and still got a little chatter, but no skipping. I think I might have to re-print my Y trucks because I think the plastic is contacting the rails and causing the chatter. Now I have made other upgrades to this rig while waiting for the new screws. SKR 1.4, and TMC2209s for the X and Y axes. I also realized with the help of @ttraband that my hot end was running about 30 degrees cooler then it was reporting. So I’m sure all of these have small improvements on the quality of the fast prints.
1 Like