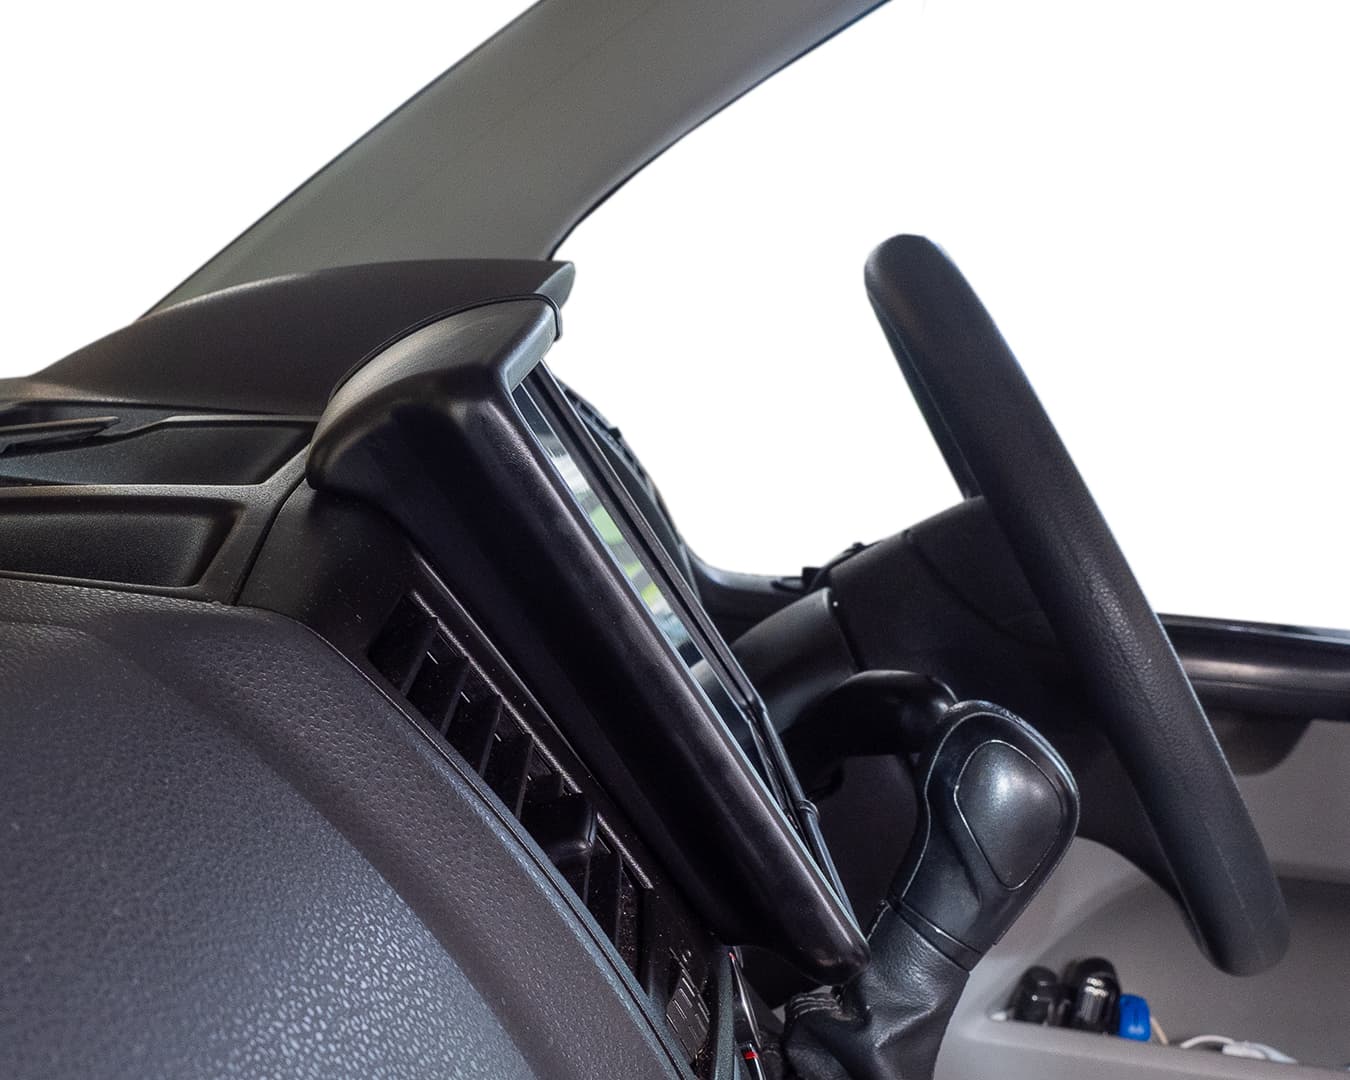
I printed a new binnacle/hood for the head unit in my van last week - a little sanding and a little filler and it looks like a bought one - printed in an enclosure not heated (although 50°c was recommended) and a 20mm high skirt. Didn’t fume at all as far as I could tell. I don’t like ASA to look at, but it’s really nice to post process as @forcerouge pics show! Here’s my finished product (sorry for the hijack)

4 Likes
Print temps - 260 nozzle and 100 bed with enclosure as a minimum
2 Likes
Those are your photos of your print? Beautiful.
2 Likes
Yes but the link is on my other computer, I’ll post it next monday
But it is a link for a chinese wesite, not sure you can get it wherever you live. ![]()
In my case it worked fine without one, but you absolutey need to print a large brim/skirt around the first layer to get good adhesion, here it was 12mm wide.
I generally like to refer to this really nice material property table made by Simplify3D:
This table is actually the whole reason I tried ASA in the first place: I was searching for a material capable of widstanding high temperatures while still being able to print without an enclosure.
But later some friends said they had issues without enclosures so I don’t know. In my case it worked, beginner’s luck I guess ![]()
Wow that’s totally awesome, great job it looks just like it came from the factory. Gives me even more hope this thing might actually work!
You can hijack the thread anytime with stuff like that, no problem ![]()
In my case it was 220 nozzle and 80 bed without enclosure. It worked somehow ![]()
5 Likes
Hi guys,
Been in lockdown ever since the last post here, I think the whole Shanghai covid nightmare started just a few hours after I posted that last post 
Who knows when we’ll finally be able to get out, but at least this gave me some time to work on the BOx. 
No crazy mods unfortunately this time, I focused on making the 0.4mm print head better and more reliable.
Had a very, very tricky problem that took me a while to figure out: the nozzle would jam up and underextrude at seemingly random points during prints.
Tried all the classics first, retightening everything while printhead was hot, making sure the nozzle was perfectly clean with no debris, tweake retraction, linear advance, even changed the liquid coolant for good measure cause the symptoms looked a lot like heat creep, which has been a problem of the past ever since I used watercooling so I was puzzled.
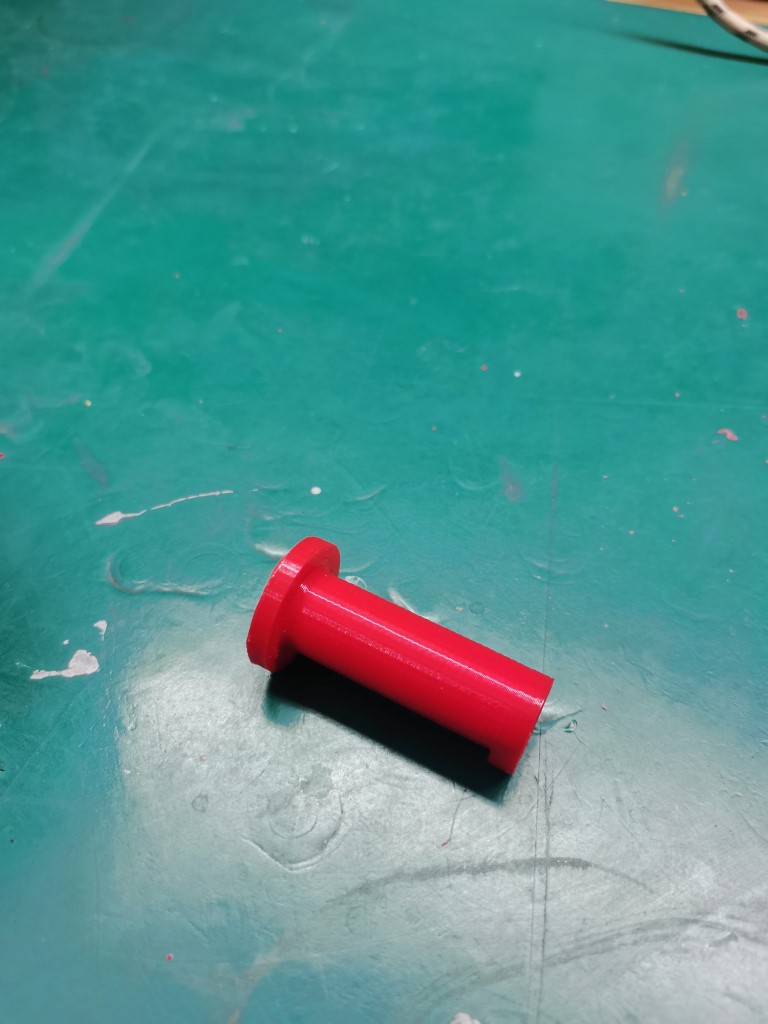
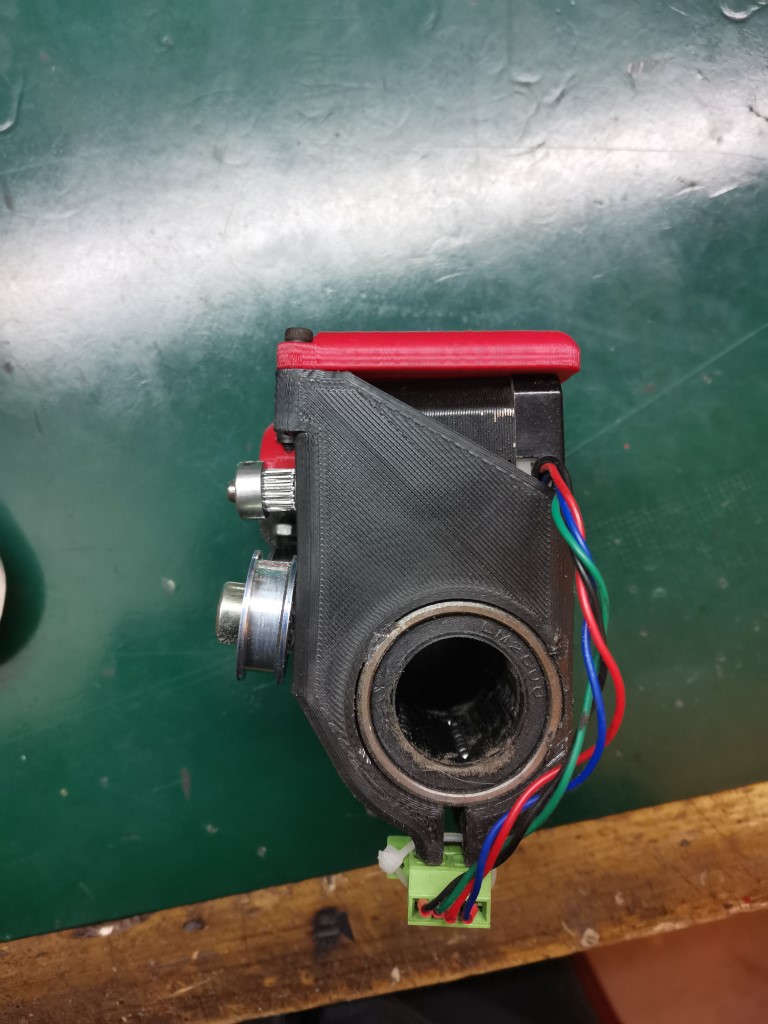
Turned out to be this thing:
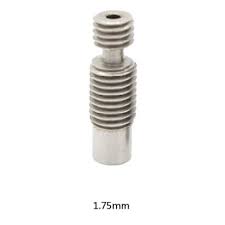
Apparently I slightly bent it during assembly, and it tuns out the filament was jamming in the bend on some very rare occasions.
Switched to a new one, printed already 2kilos of filament and never had any issue with it again.
So if you ever think you bent this thing at some point during assembly of an E3d hotend, don’t bother and just replace it immediately.
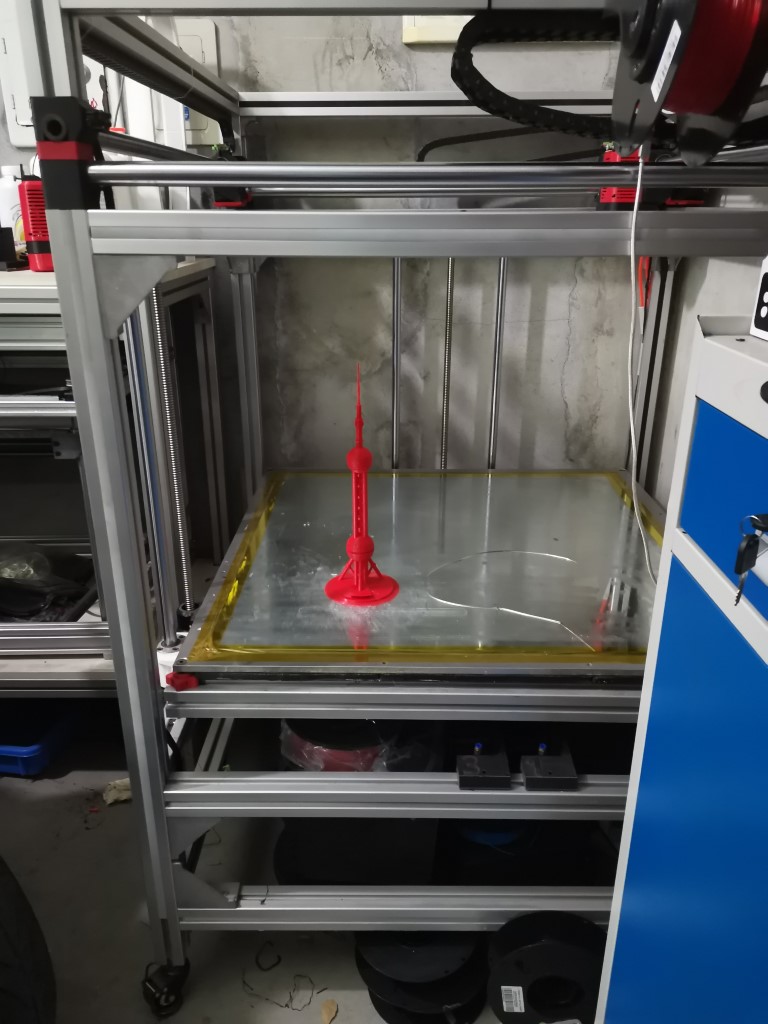
Anyway, I tried printing some bigger stuff with the 0.4mm nozzle at 0.2mm layer height. Been wanting to print Shanghai’s famous Pudong Skyline for a while and finally found what I thought were good models of it. I scaled the models so that the tallest one would be 500mm tall. The printer can’t go much higher, I think the max height right now is 560mm.
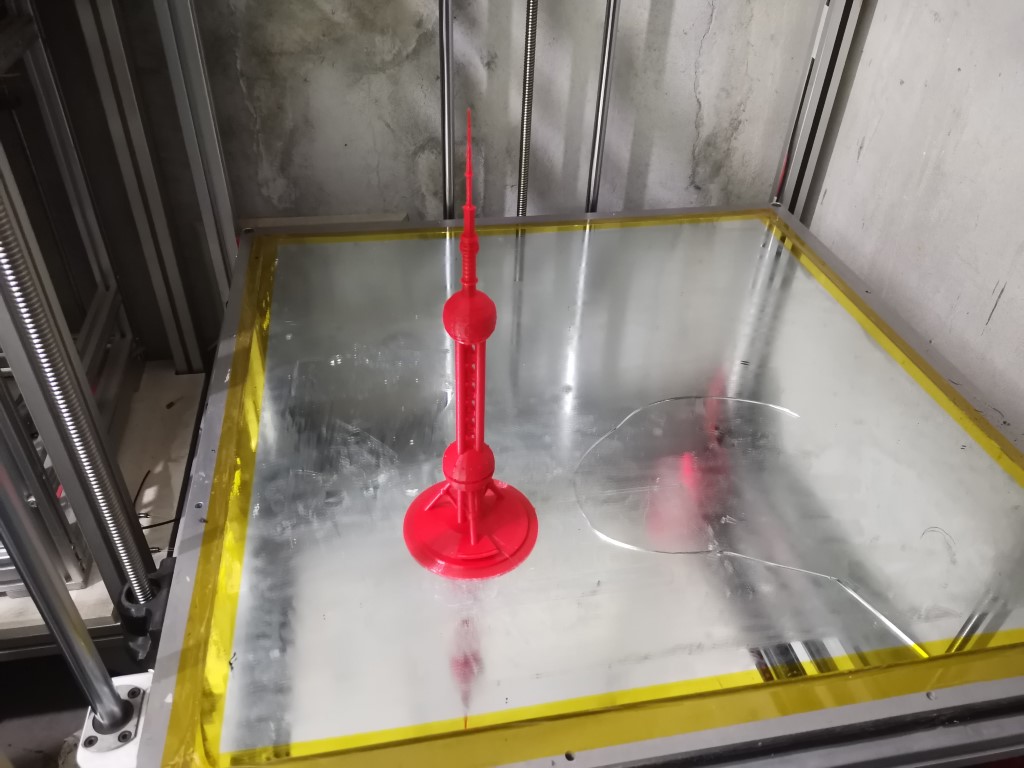
First the Pearl Tower:
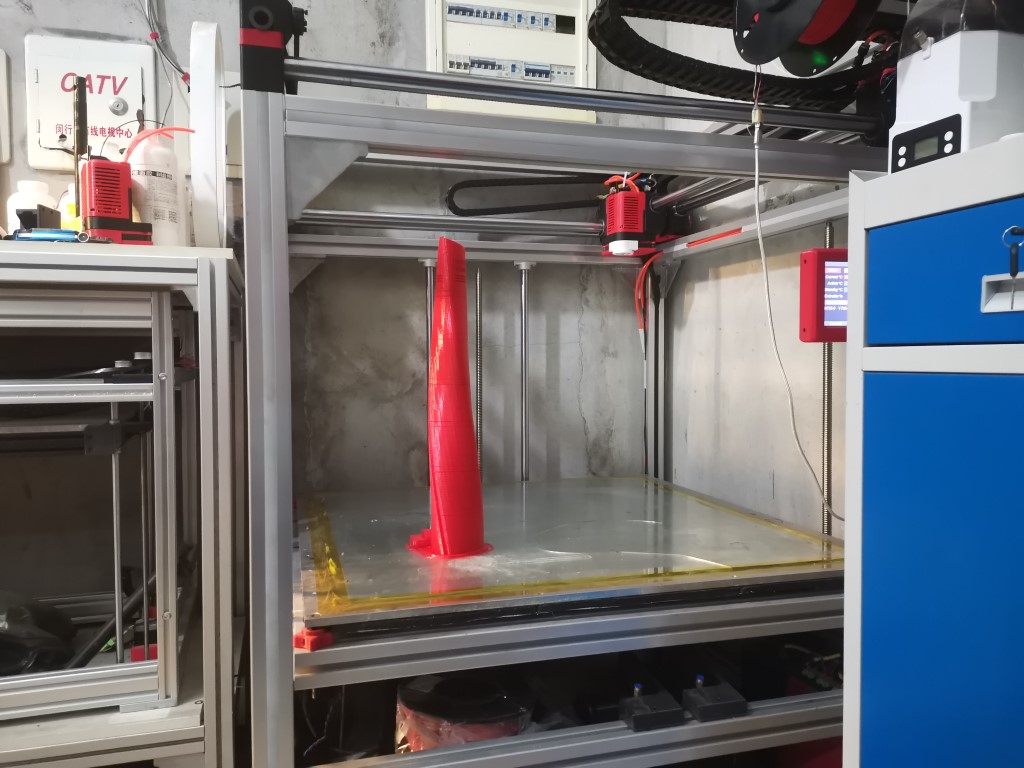
And then the Shanghai Tower:
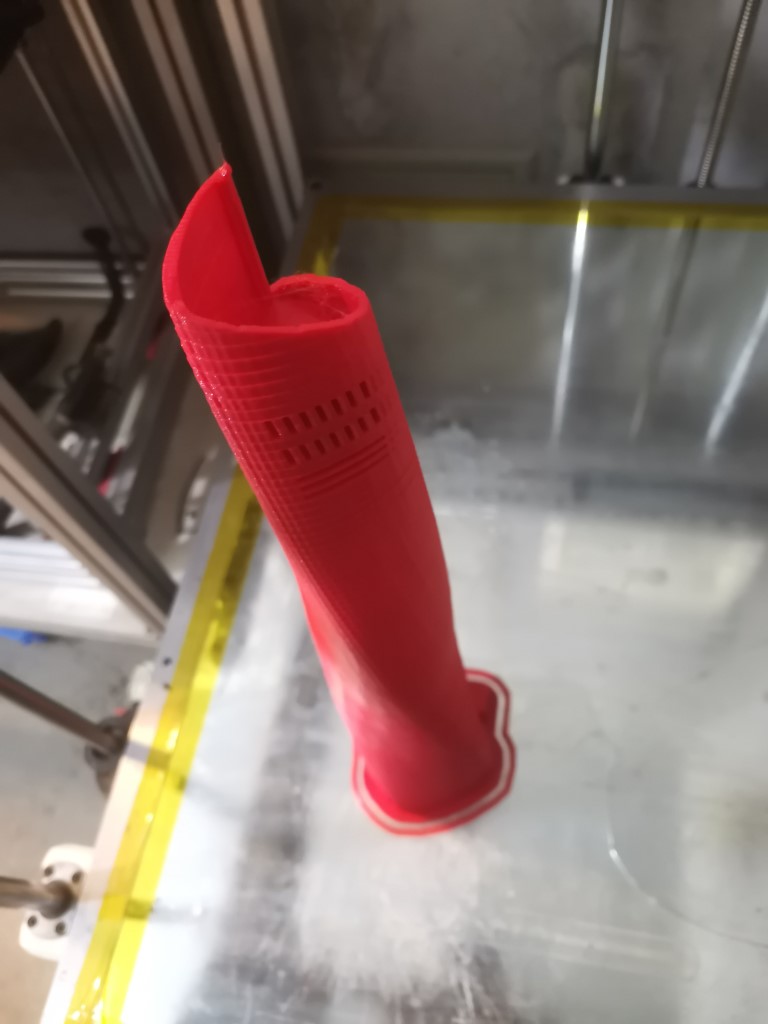
The Pearl tower took about 10 or 12 hours in total, I don’t remember. The Shanghai Tower took less than 20 hours even though I made the mistake to go with a very high infill (20% infill, totally unnecessary). Took almost an entire spool, which is impressive because it means an entire spool can probably go though this tiny 0.4mm nozzle in a single day…
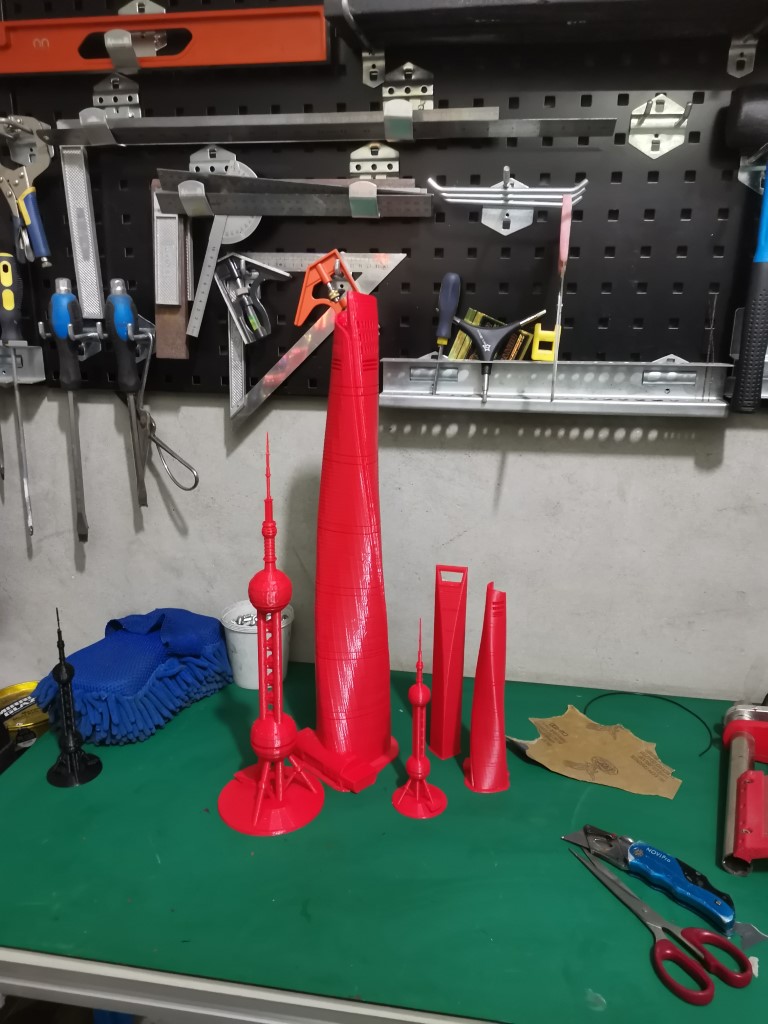
The final result is really great, pretty much perfect. Unfortunately the 3D models were not as good as I initially thought and all the defects you see actually come from the 3D file. The little ones have been printed with my delta printer and show the exact same defects at the exact same spots. But it’s just less visible cuz they’re small.
So, basically, what that means is that I now have a giant printer that can also prints stuff with a print quality that’s on par with my delta printer or even the ultimaker I have at work. I couldn’t be happier, I wouldn’t think this would work so well actually.
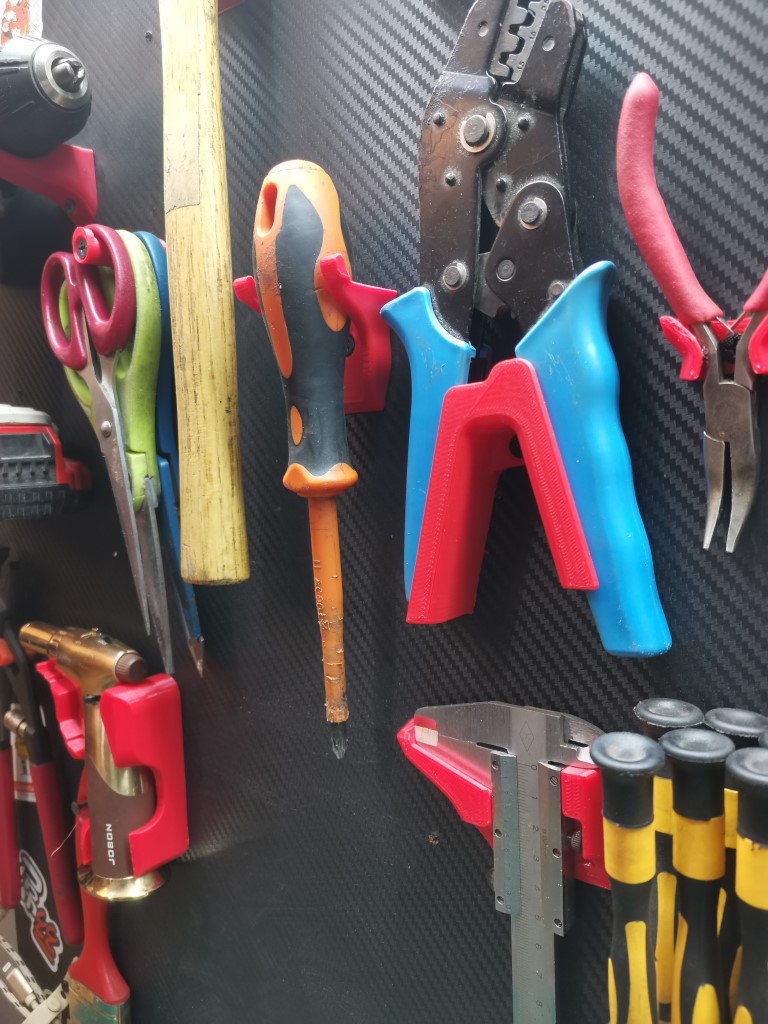
Layers are very regular and my new cooling shroud works very well. This is a small hook I printed to hang some tools that shows the layers are consistent:
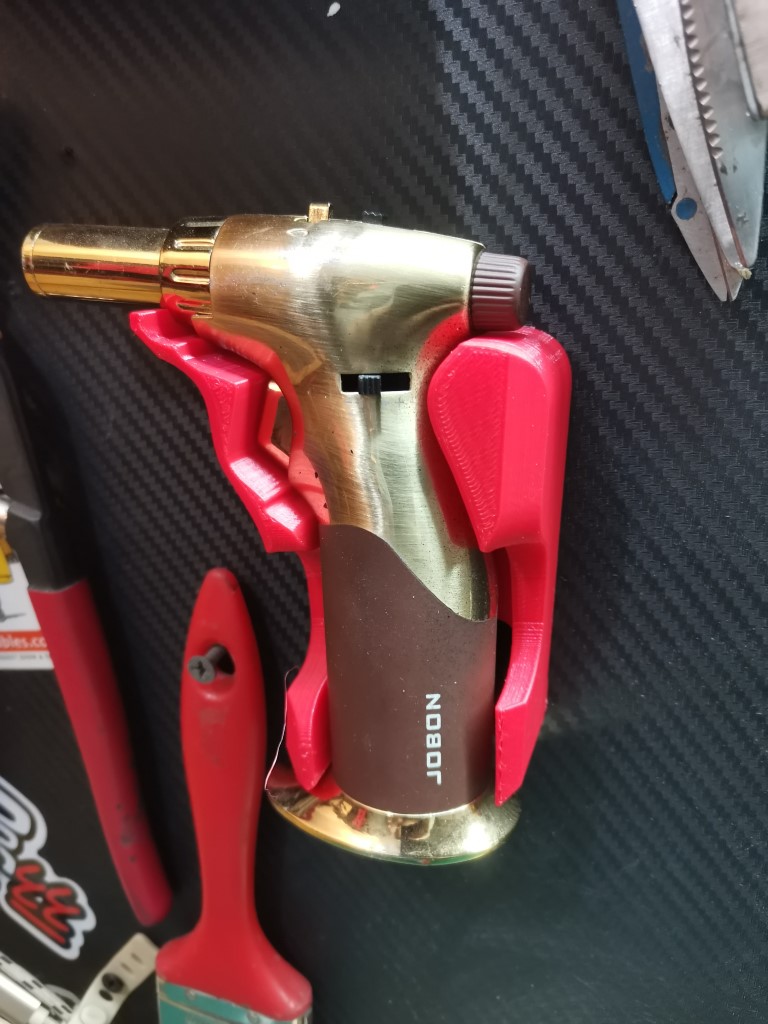
I needed to make a few prints to further test reliability so I reprinted all my wall tool hanger stuff + made a few new ones. No problem on any of those prints!
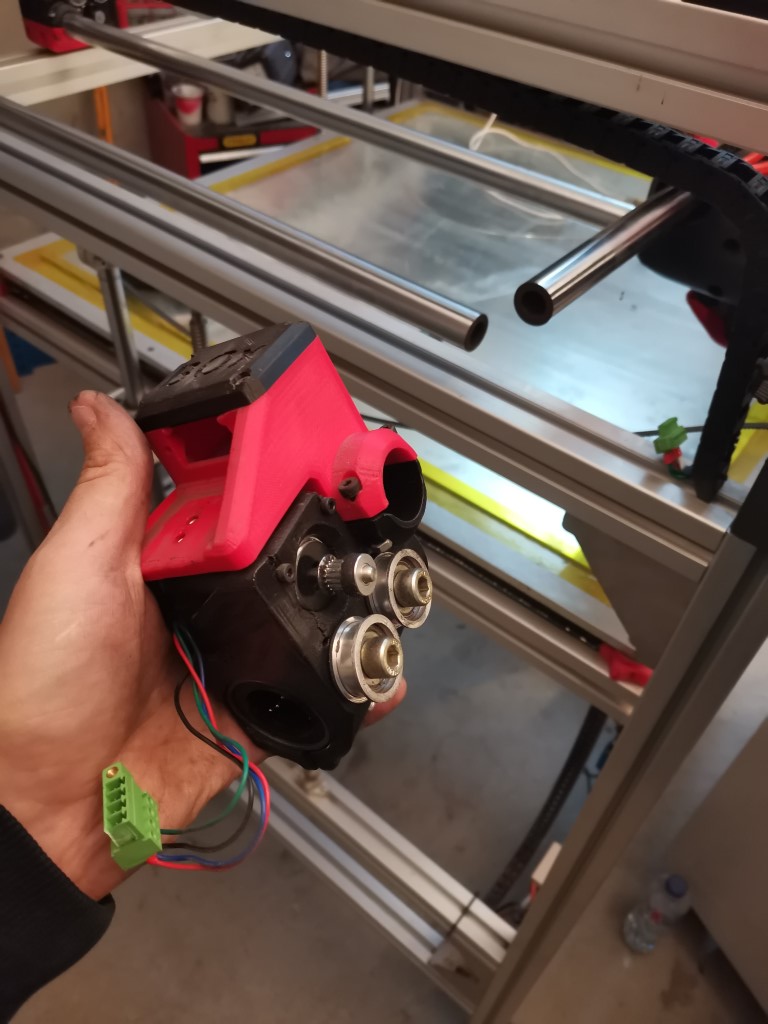
This great success has motivated me to further experiment with different print heads. With this system it is relatively easy to switch from a print head to another, so I would like to build a new one with at least two extruders, to be able to print different materials and different colors.
If anyone has experience with multiple extruders and would like to share some useful tips like a really good hardware they know performs well, I’d appreciate any help. You guys helped suggesting me the bondtech extruder and it was was an absolutely great suggestion that made my machine 10 times better!
10 Likes
Had A LOT of time these days, thanks to this crazy lockdown ![]()
The good thing is I’ve spent a fair amount of it working on the Printer. Doing all the little stuff that takes forever and that you always say you’ll do “sometime”.
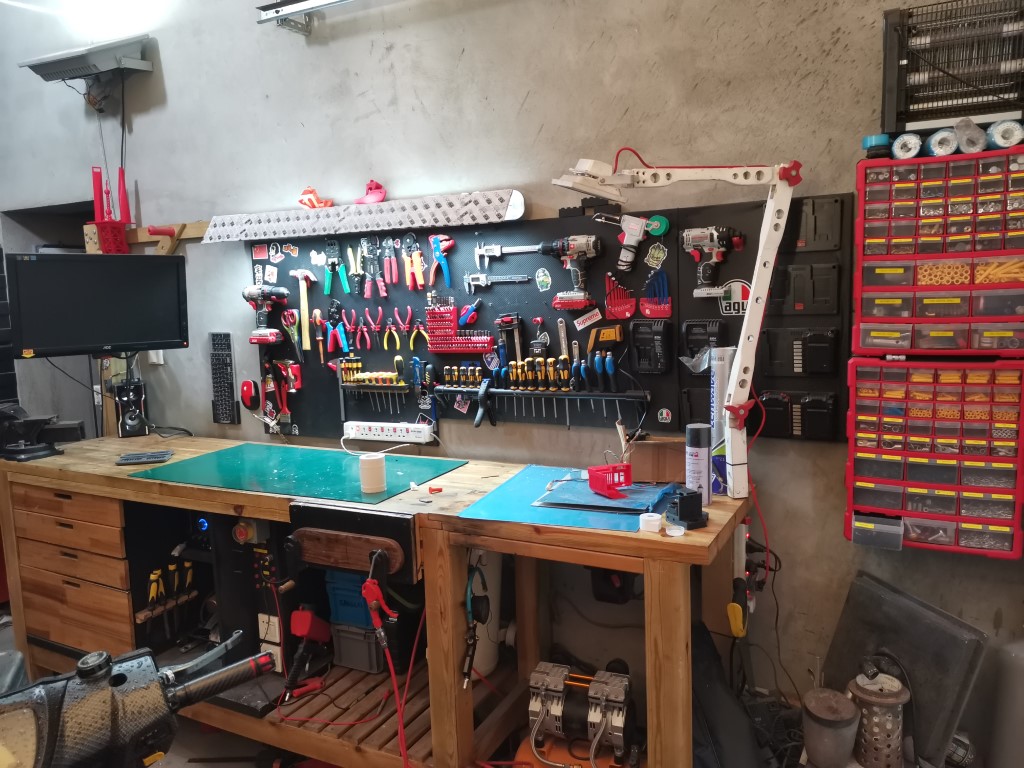
First thing I did was to relocate the front screen to the left of the machine because it is not convenient to have it on the right side with the big toolbox right next to it.
Also I moved the horizontal aluminum profile under the screen, instead of on top of it. It doesn’t look very nice either but it allows for vieving the first layer much more easily.
It was also a good opportunity to re-route the wiring. I managed to make it completely invisible this time so at least this looks much better now!
Also printed some corners to straighten the top profiles.
Last but not least, I got rid a of all the cable ties and properly securing all the cable chains with some small printed brackets.
Then I finally solved the number one issue that still bothered me on large prints: squareness.
I decided to go for the cheating options, which was to use the orthogonal compensation in the firmware. Meaning that instead of getting the machine square, you just tell the machine to compensate for it while printing.
So first I had to print these little things:
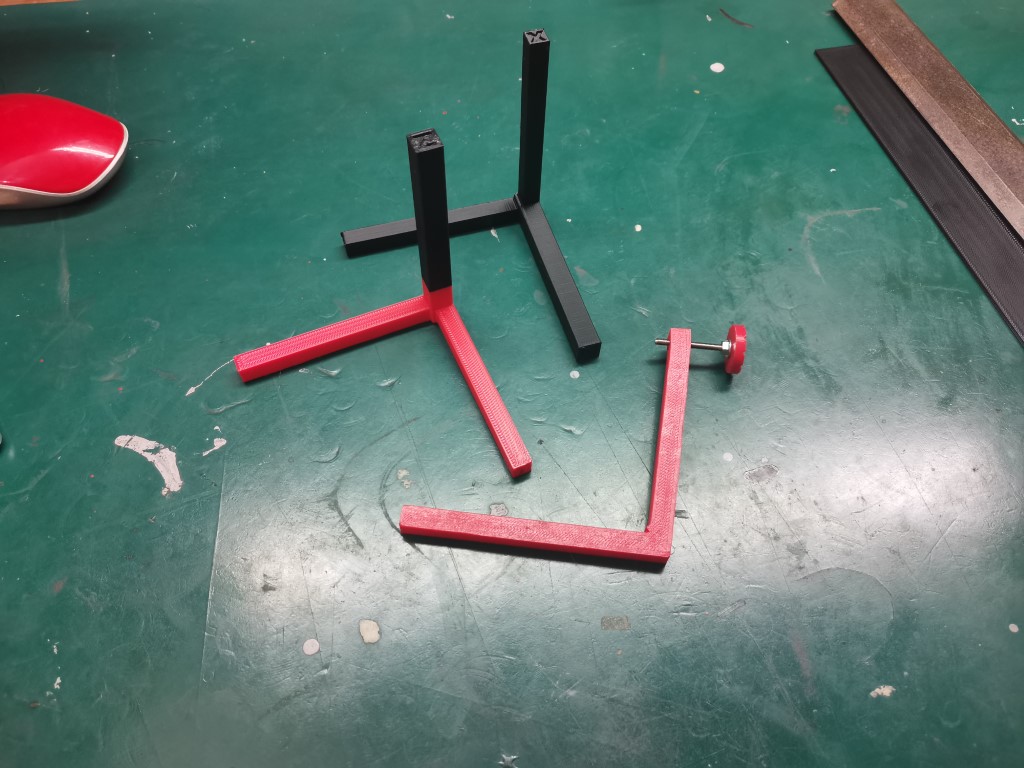
Then I followed the instruction on the Reprap firmware pages, and now I can print stuff that is perfectly square, tadaaaa:
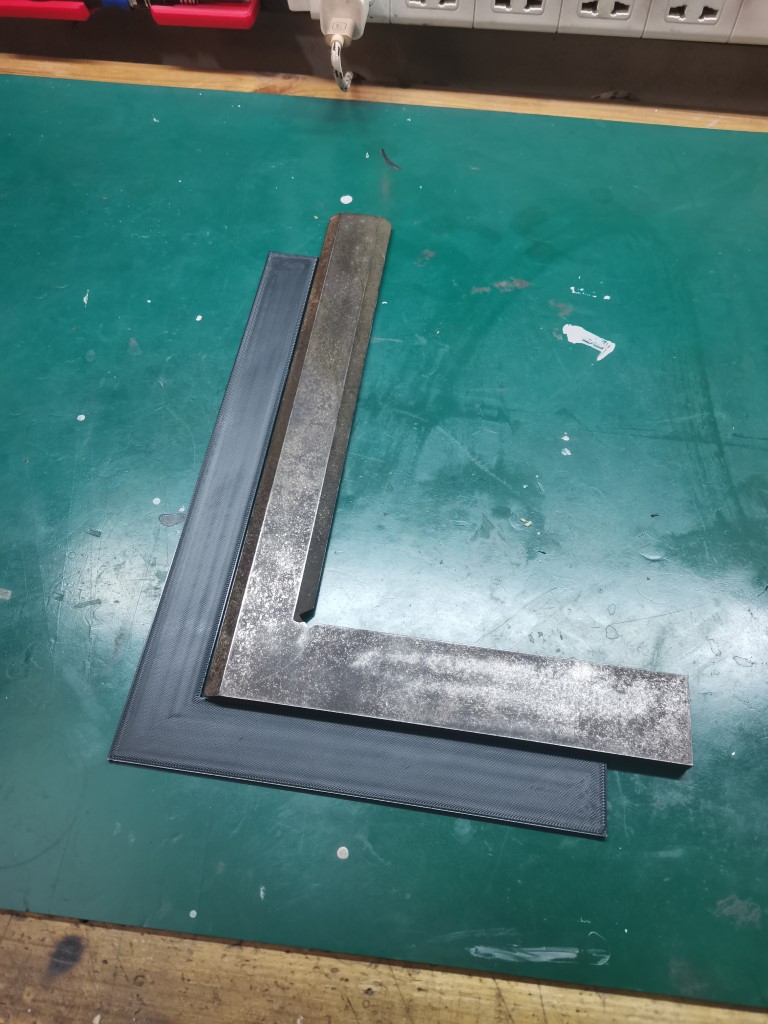
My biggest fear here was that this wouldn’t last if I were to ever move the gantry by hand, but this square has been printed after shaking the print head manually in all directions, yet it’s still perfect.
This was the last real issue with this machine, now it’s gone, yay!
Last thing I’ve done is to switch the Z axis back to 16 microstepping. It was set at 4 microstep before because I needed a lot of power to move the bed with only two motors. Now that I have 3 motors it is possible to raise the bed at full speed even with the reduced torque 16 microstep produce.
So now it is MUCH MORE quiet!
Took me about a week to make all these little things, but totally worth the effort!
Now for the first time the printer is actually a really finished project. Sure I’ll add some mods, but this right now is exactly what I was aiming for while designing it in the first place! Couldn’t be happier.
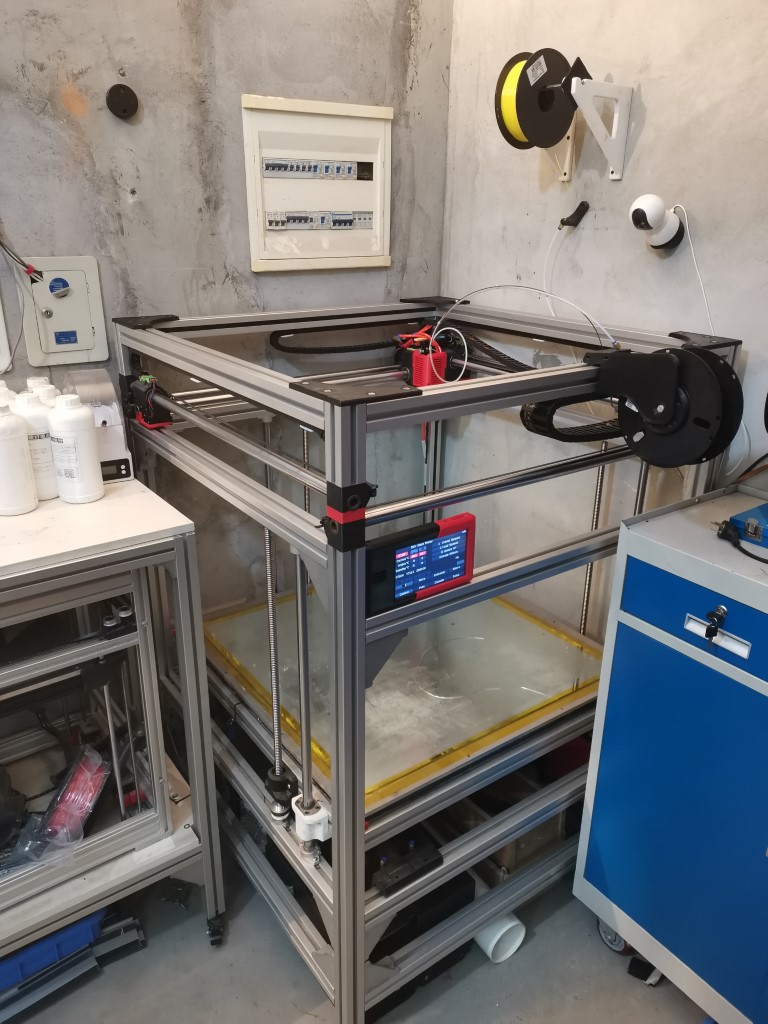
So I guess this is a good time to do a little tour of the machine while it is printing. I tried to show most of the details but I’m clearly no Spielberg so I’m sorry if the video kinda sucks:

12 Likes
Still going strong, the BOx printed a lot of parts these past weeks!
I 've been working on a battery suitcase, because I had a few cells collecting dust and I’ve received this cool little suitcase with the purchase of some other stuff, so I thought it would be nice to puth these to good use. I’ll later use that as a backup power supply with a photovoltaic system I’m yet to build.
So Basically I designed some kind of modular system, where it is possible to very easily maintain the battery by removing entire string modules.
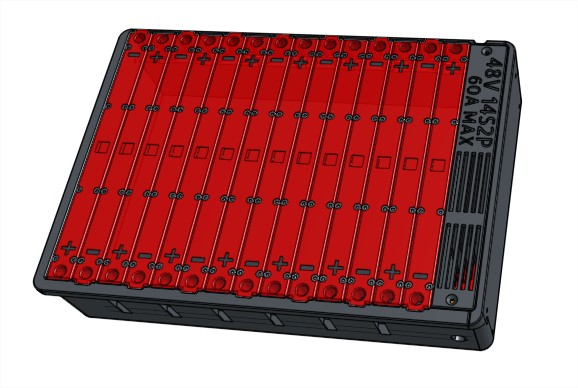
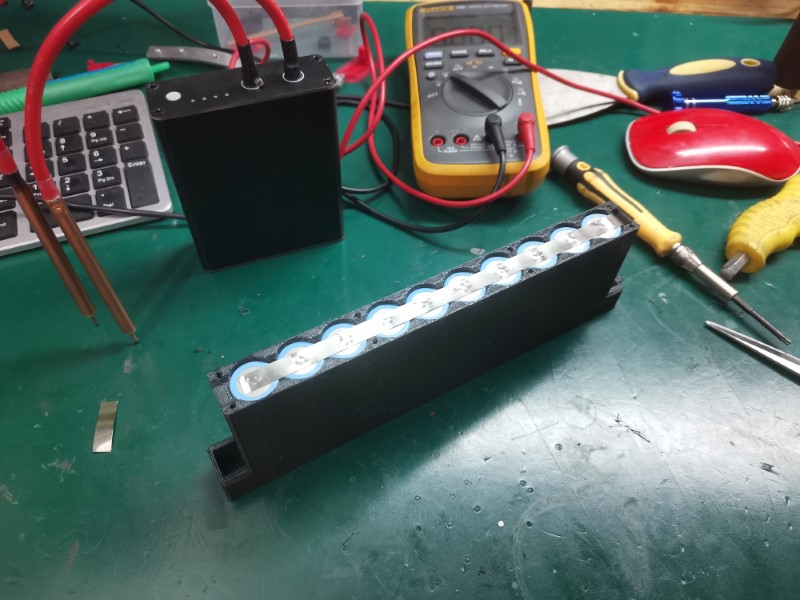
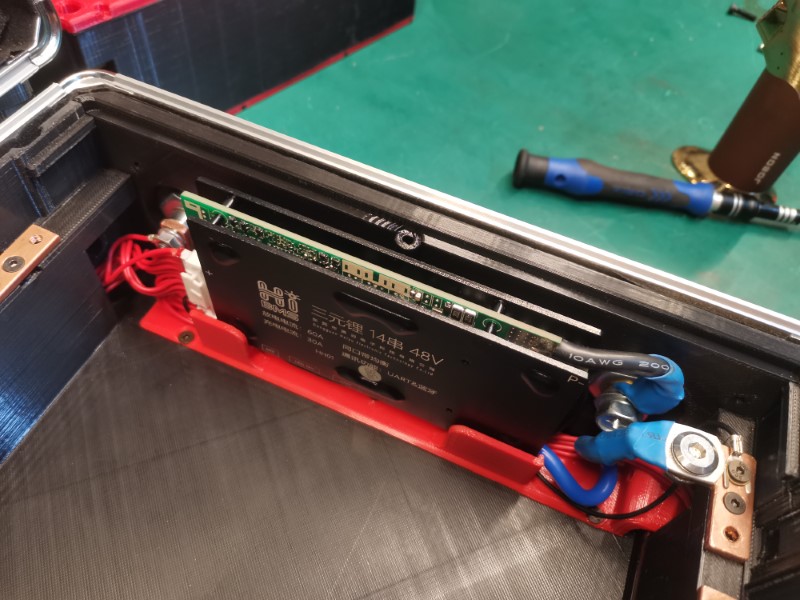
Each module has 10 cells put in parallel, so each module is 3.7V and 25ah. The battery puts 14 of those in series for a total of a bit more than 48V and 25Ah. It also features a bluetooth “smart” Battery monitoring system, so I can connect with my phone and see the state of charge, how each module performs, the temperatures and whatnot.
This is what’s inside of each module:
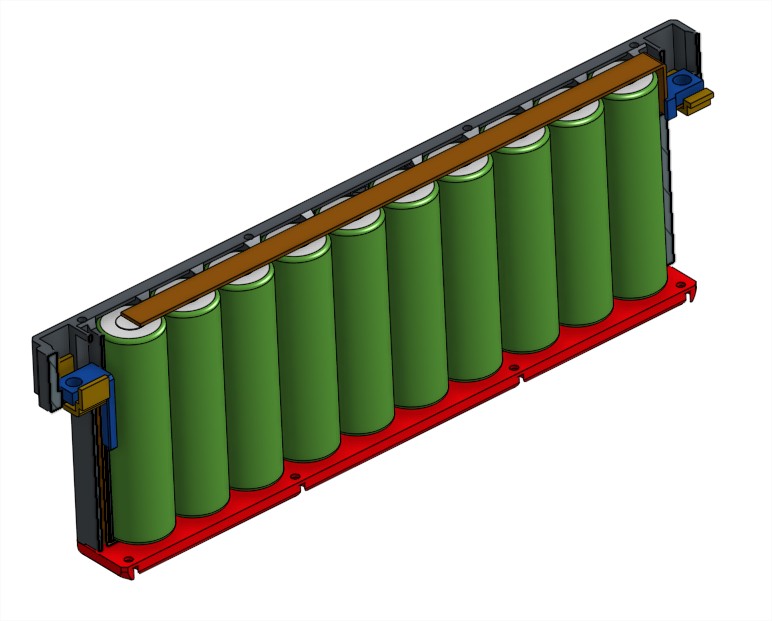
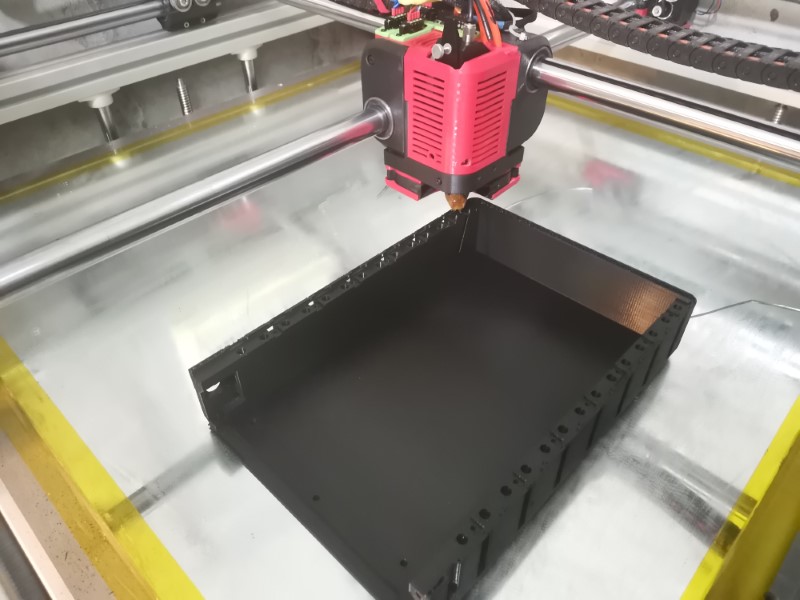
So I had to print a ton of stuff, and for that I have no better machine than the BOx. This time I went for the 0.4mm nozzle, because I needed a relatively high precision. So everything has been printed on this giant machine at 0.2mm layer height and 0.4mm nozzle. The largest part, which was the outside shell on which all the modules attach, took 30 hours to print. Each module was about 6 hours. That’s actually quite fast considering the sizes.
anyway, some pics of the build and the prints:
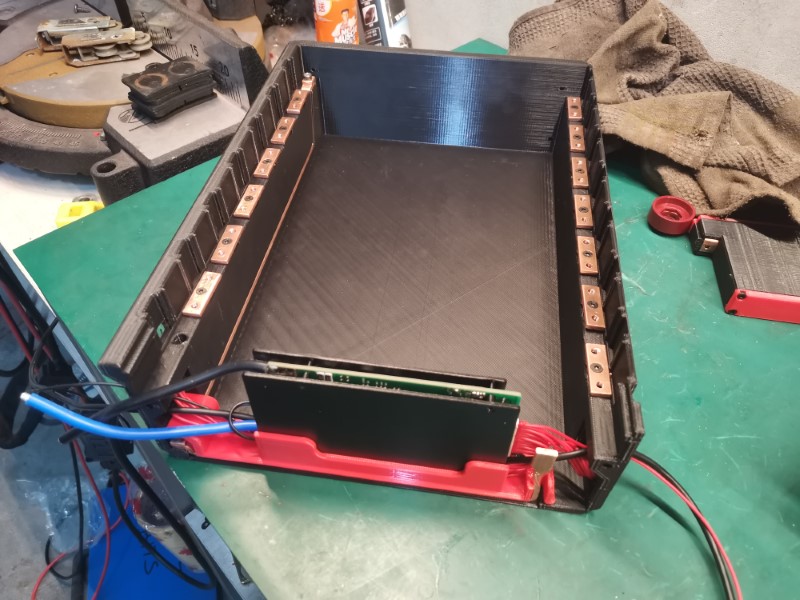
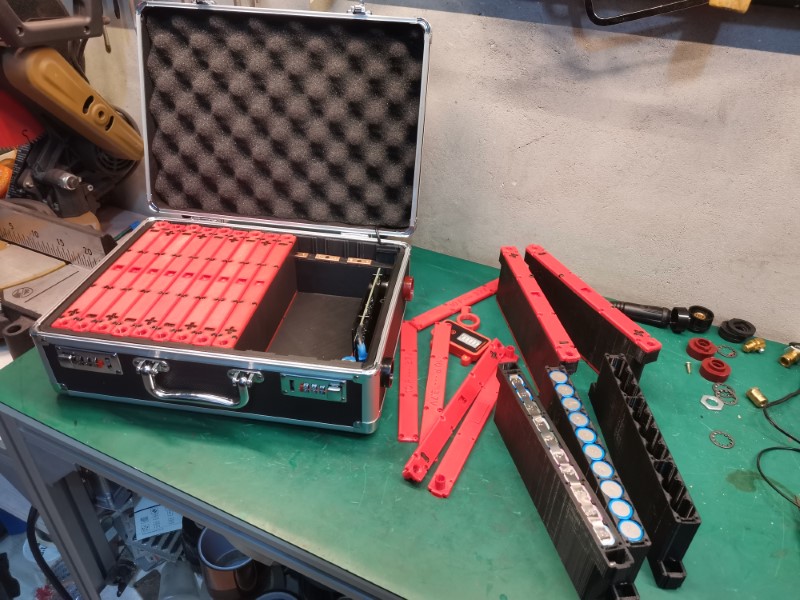
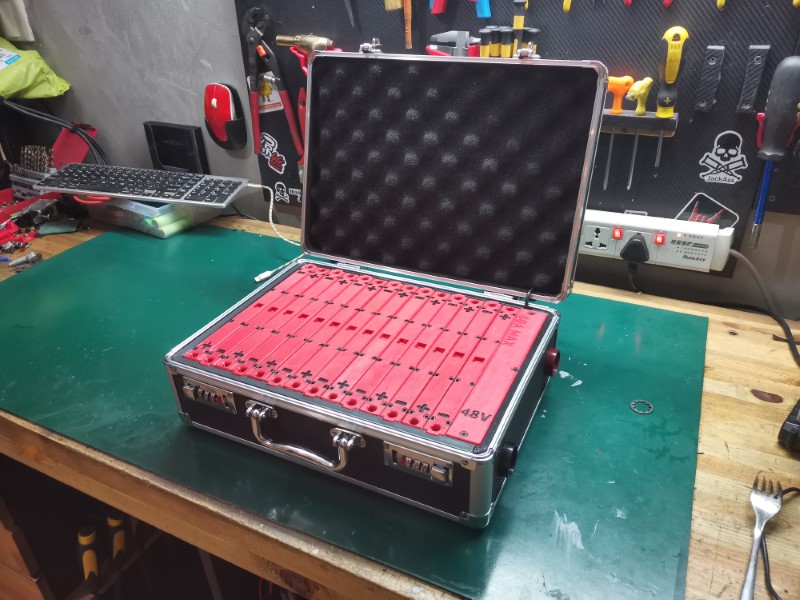
It was an interesting build with lots of stuff to print, the BOx performed beautifully! I think it printed for about 200 hours in just over two weeks, which was no easy task because the past weeks have been insanely hot, the printer’s stepper motors temperatures were far behond what can be considered as normal. Some parts melted a bit on the rollers since it’s just PLA, but it didn’t affect the printer which still works just fine.
I thought it would be interesting to share an actual example of a useful project made with the printer, hope you guys liked it!
10 Likes
Are you not worried about heat? That is alot of power in that box. Very nicely done
2 Likes
Talk about a TSA nightmare…
“This? Just my backup power bank…”
“Fine, can I just gate check it?”
“Why is this shipper’s address at the port?”
1 Like
Not really worried, because generally if your battery heats too much it means that you have exceeded its specifications in the first place.
The reason why battery heats is that you pump too much current from it for too long, but this battery isn’t intended to be used on very heavy loads so it should not see crazy currents.
Also, there is the Battery Monitoring System which will monitor both current and temperature. It is fully configurable so can set triggers and alarms in case there is overcurrent or over temperature, then the BMS will either alert me or cut the current inputs/outputs immediately.
For the first runs, I intend to use the thermal camera just to make sure everything is all right, but I don’t think there will be much problem. If it turns out to heat too much I’ll just dial down the BMS.
I have other batteries on my motorcycles which deliver 300-600 Amps on a daily basis and they don’t heat at all, it’s mostly a matter of dimensioning the load vs the cells capabilities. 
3 Likes
Wow if i have battery questions I now know who to ask!
3 Likes
Hi guys, it’s been a while!
No major update on the printer, it is still working great. I just did a bit of annual maintenance and replaced the 4 rollers.
They deformed during the hot days of summer, while I was printing a lot of stuff in my very hot garage. In the end, one of the roller was so bad that the belt just fell off. But it still kept on printing just fine for a month, until I replaced the rollers.
They were in pretty sad shape:
You can see the motor deformed the plastic quite a lot
Anyway, I just dropped new ones and it was fine, took about one hour per roller, it wasn’t very difficult, pretty smooth process.
Also took the time to properly re-align and level everything:
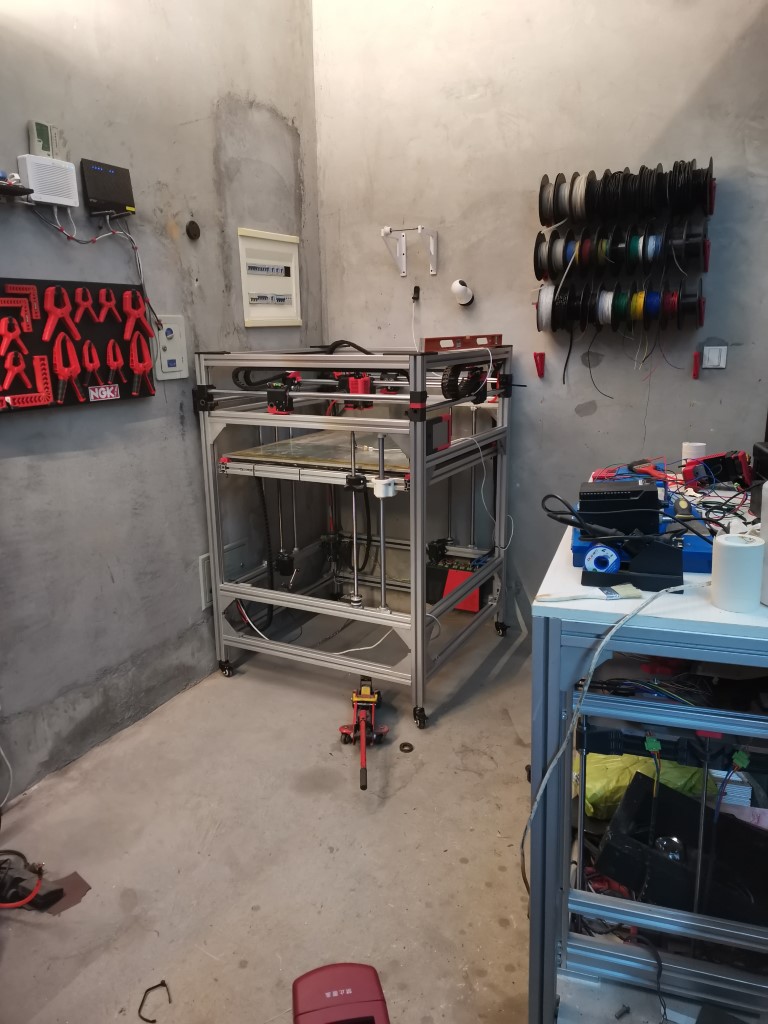
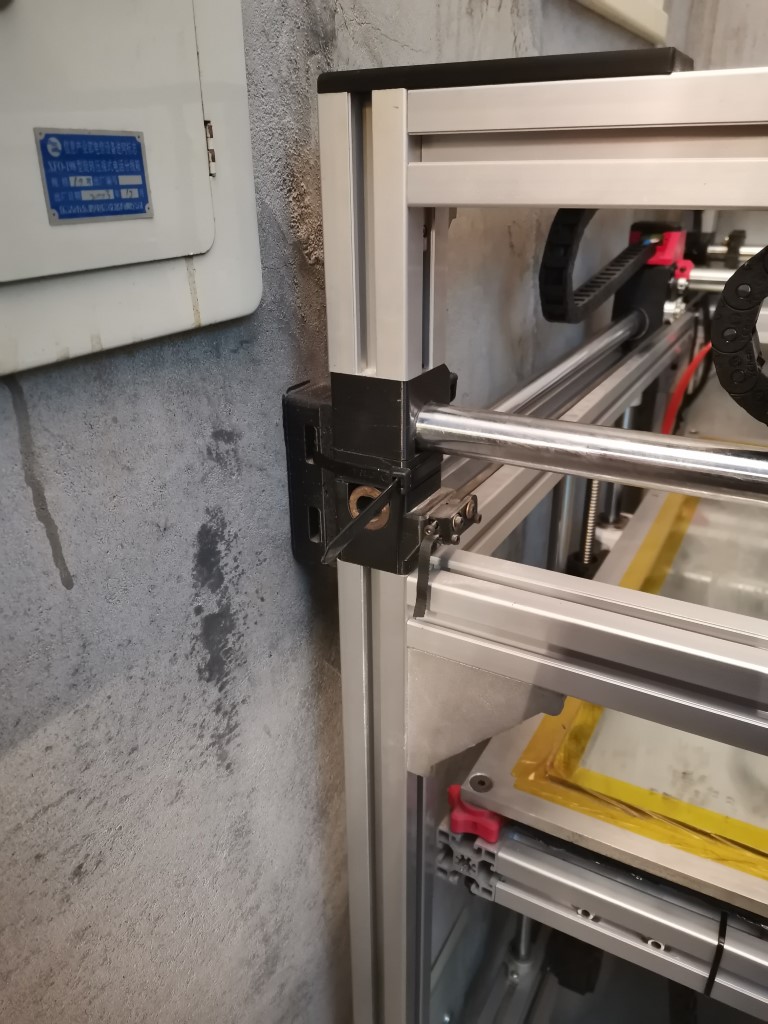
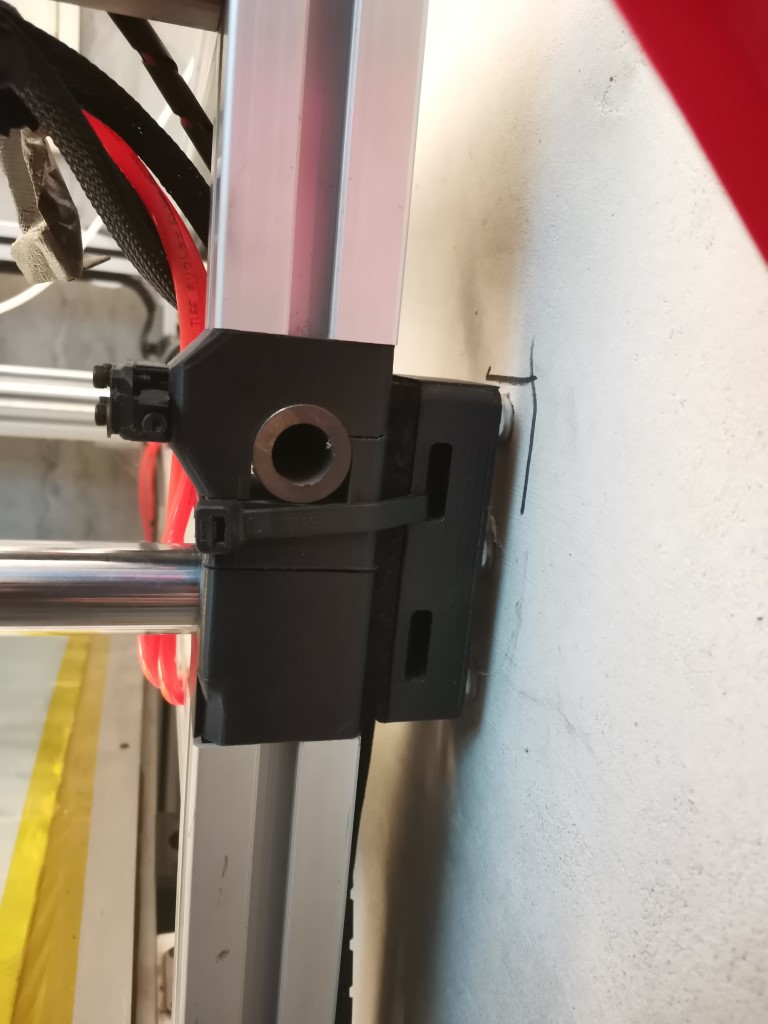
Last but not least, I re-attached the printer to the walls. This is something I’ve done for a few years already but I’m not sure I mentionned it here before. This simple trick was one of the most effective stuff I’ve done to reduce the printer’s noise, lowering vibrations while increasing the accelerations and speeds. For this I printed some PLA blocks, added some rubber padding, then screwed these on the walls firmly. I then simply use a big ziptie to secure the printer on these anchors, so it’s easy to remove and put back. Works very, very well, this was probably one of the best ideas to improve the printer’s performance overall.
Printer’s back to work and everything’s fine.
By the way, for those who wondered how the linear bearings and tubes would age: they are still in pristine condition. Not even a scratch, they look brand new and still running silky smooth.
Only the seals on the bearings start to degrade, so I’ll probably will have to replace the bearings at some point in a few years because of the dust, but the tubes are basically indestructible.
Now I’m starting to think about a new addition to this printer: a multiple filament system. Kind of like the MMU system of prusa. Right now I try to educate myself on this topic, especially the electronics side of it, before I try and design something. I don’t care all that much about multiple colors (though it can still be pretty cool), but I’d like to be able to do multiple materials on a single piece, especially some stuff like PLA/TPu or ASA/TPU, I’d have a few use for that on my bikes.
Hopefully I should be able to get some progress going over the next months.
15 Likes
You’re back…you just couldn’t let us go. Glad to see you back!
8 Likes
Hello everyone,
A few days ago I realized that, because I mostly print with big nozzles and because the printer is huge, most people assume that is it not capable of printing nice stuff.
So I decided to make something that can demonstrate what the printer is really capable of.
At the same time, I was trying to come with an idea of a gift for my little nephew. I came across this little remote controlled tractor, which I found pretty cool:
https://www.printables.com/model/318896-openrc-tractor-mk3-tea20
So anyway, I printed the parts with my trusty BOx, assembled them, painted and voila:
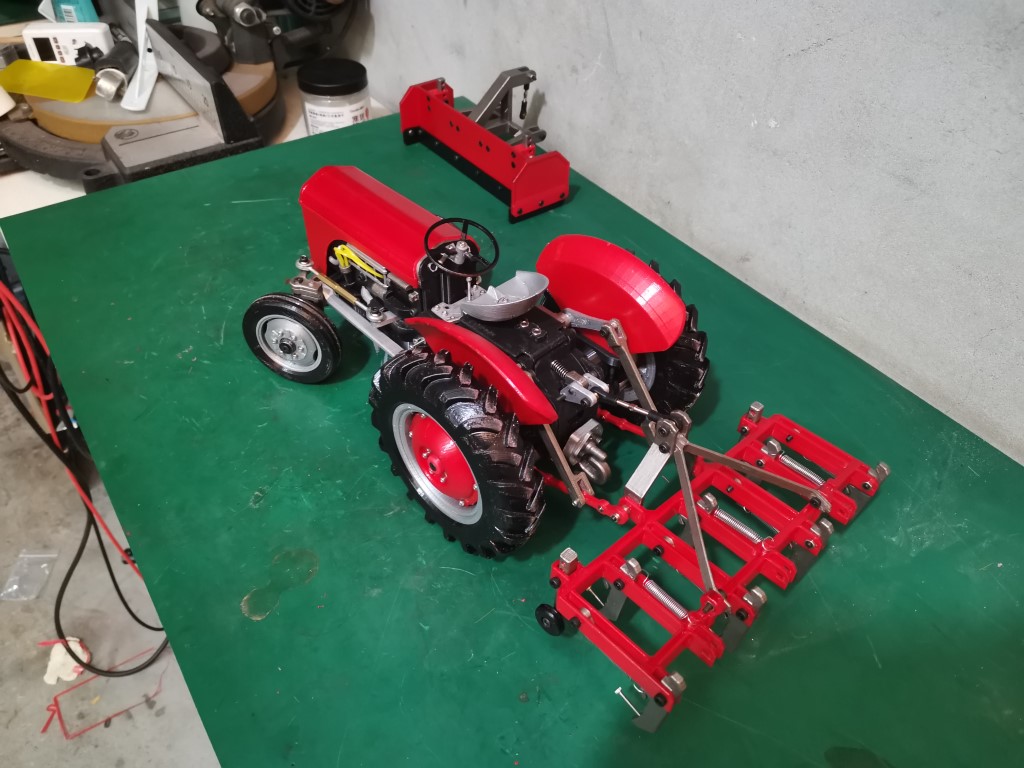
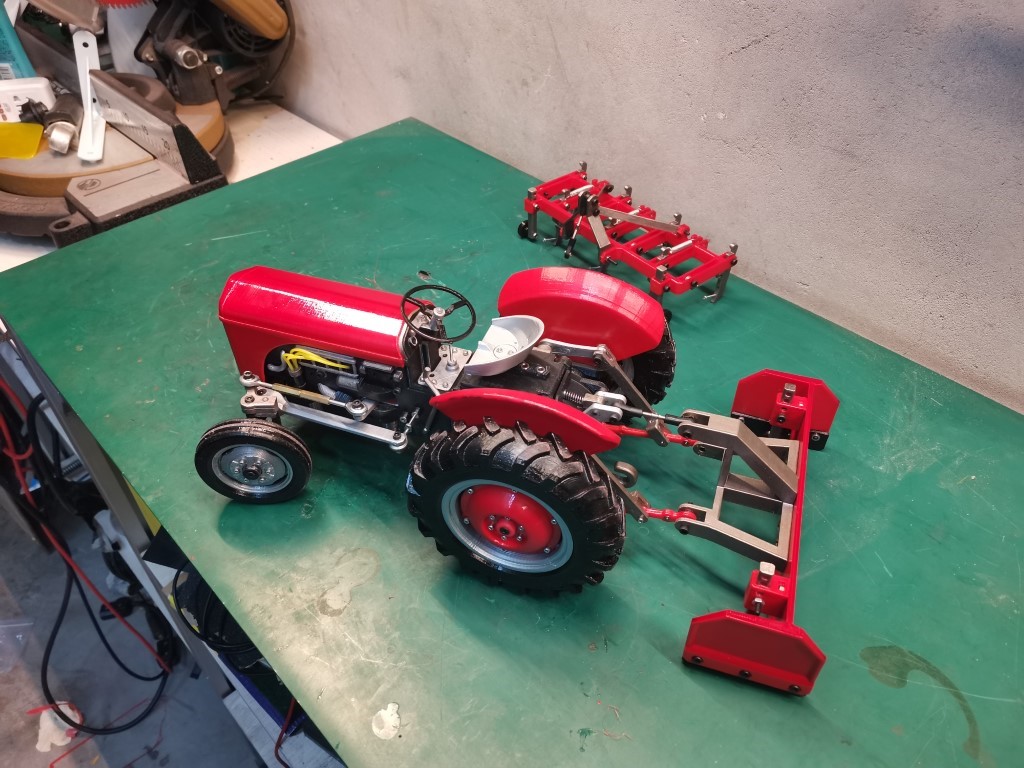
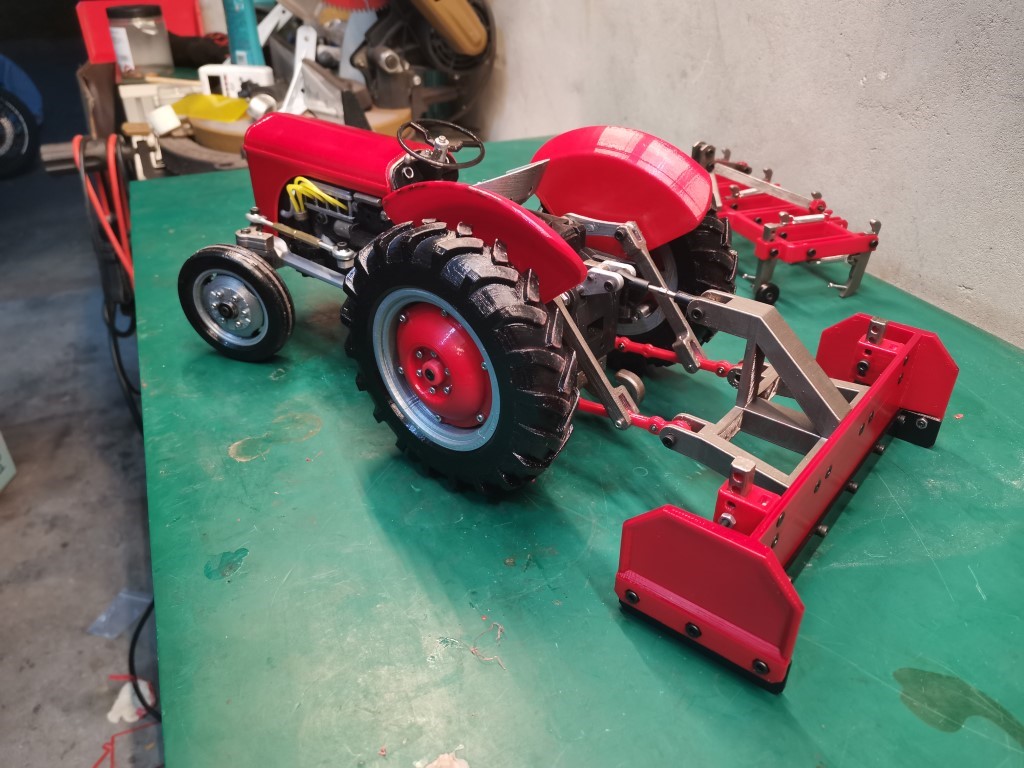
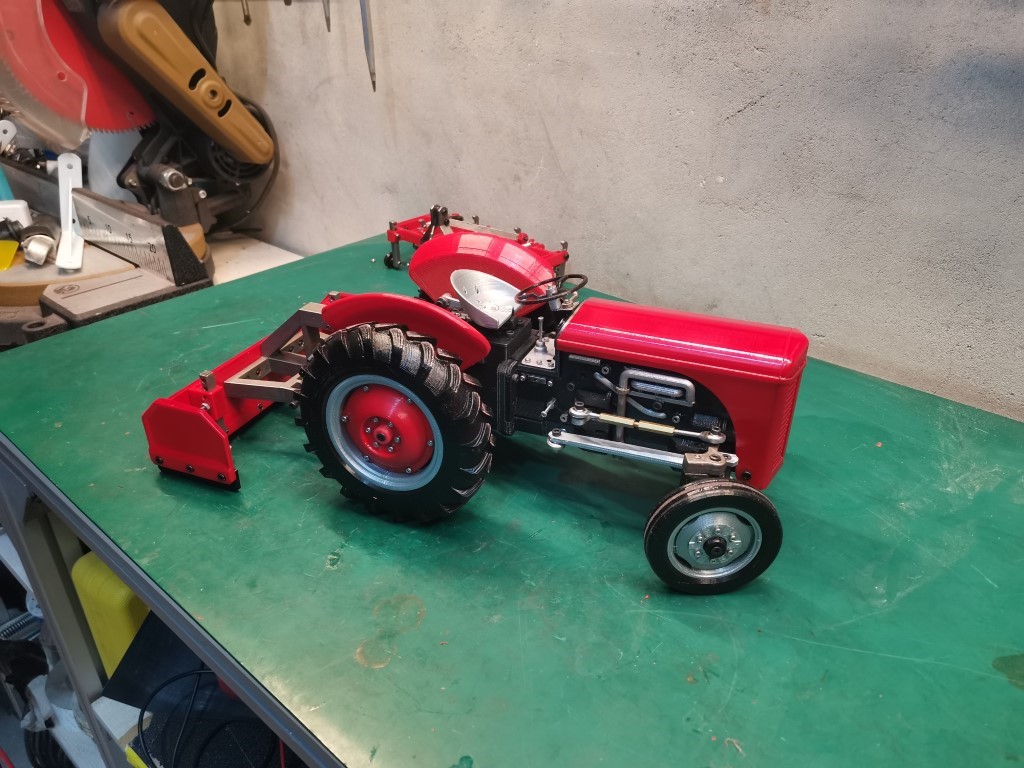
Took me a week from start to finish, the BOx helped tremendously because I was able to print almost all the parts in one go, thanks to the giant build platform.
It’s been printed in PLA with a 0.4mm nozzle and 0.2mm height, the quality is on par with my Ultimakers at work. It is quite impressive IRL, it looks like some very high end model.
Anyway, the BOx is still going strong!
24 Likes
Incredible!
1 Like
Every time a new posts from Dui shows in the feed, I’m convinced that he’s got amazing stuff to show. And you never disappoint!
9 Likes
What nozzle and what layer size? I do notsee layers like large nozzles usually produce.
The nozzle is 0.4mm in diameter and 0.2mm per layer, just the normal stuff you’d find in most printers.
I use the big nozzle only when printing big stuff.
Now I’m trying PETG for the first time and I’m having a hell of a time to get it tuned properly.
First I had a lot of trouble with the infill, but it seems like printing it very slowly works.
But now I have difficulties printing overhangs and bridging. PLA seems way more forgiving than PETG.
It is a lot more difficult to print than I thought, the first layer needs to be absolutely perfect otherwise it doesn’t seem to be able to recover.
I surely need more practice, but any advice is welcome from the PETG experts.
1 Like
I remember having the same issue with petg. I never did get it to print on my first printer. I hope to try again when I finish building the new printer.
1 Like
“printing very slowly works” Prusa Slicer standard settings drop the fan speed by about 50% compared to PLA, if the fan speed remains the same, I would have thought that meant speeding up to slow down the cooling - interesting.