Just checked and unfortunately just purchasing such machine would cost 10 times more than buying the plate and silicon pads… ![]()
So unless I find one in the trash somewhere, I guess I’ll stick with the aluminum plate XD
1 Like
Regarding the USB for driving steppers.
I know that some of these phones are charging at 2+ amps. Assuming your steppers are staying at that amperage or below, I don’t see why the USB cables shouldn’t work.
I think USB-C is rated even higher as it’s being used to power laptops now.
Quick google-fu comes back with the following:
"
By default, USB - C cables only support up to 3 amps for 60 watts maximum power delivery. Premium 100-watt certified cables have thicker wires and internal electronics that enable safe, reliable, and fast charging at up to 20v @ 5 amps .
"
and USB-3.0 cables look to actually be good up to 3 Amps.
2 Likes
This doesn’t really help, because it is using the USB-C in it’s original spec, so there will be some talking back and forth to coordinate voltages and current, but it does show what USB-C is capable of in terms of power delivery. It isn’t just current, it can also deliver higher voltage, which really helps quick charge phones and laptops:

It looks like there are a few other USB-C videos that I haven’t watched yet.
Here is the video I was talking about:

I have been messing with my wires for the hotend on two machines recently, so I might be extra sensitive to the pain of doing that. But I can see that keeping my fat-finger, through hole soldering/connections on a board, an then trusting the USB-C to do the movement is a really good solution.
I would like to be able to get everything across, but I’m not certain how many pins of USB-C I can use:
- Ground
- Thermistor (I assume I can reference the normal ground)
- 12V (for heater, extruder fan, part fan)
- Ground - Heater (These are low side drive, so the ground is the part that gets toggled).
- Ground - Extruder fan (This could just be tied to ground, bit I have gotten used to my printers being quiet when I’m not running them).
- Ground - Part fan
- BLTouch servo pin
- BLTouch 5V
- BLTouch signal pin
So 9 pins to include the BLTouch. I do think we’d need to watch out for cables that are trying to be “smart” and have parts hanging on the pins. Alternatively, if you could run a little software and some mosfets on the breakout boards, you could do all of this with a Gnd, 5V, 12V, Data+, Data-. It would have to be tiny and light though. I’m not good enough at electronics design to do that, but if someone like BIQU or Ultimachine made one, I would buy 3. I would really like to have the bltouch on there though. Leds would be nice, but the BLTouch is a necessary component on my printers.
2 Likes
Oh man do I like this idea!
2 Likes
The USB-C has 24 pins, so I’m confident we can pass all that good stuff through it and even more
It is also to be noted that the 60W rating is probably for continuous power. On our machines few things are working on continuous power mode, for very long: the heating element will go full power to reach the set temperature, then it will throttle down with PWM and use only the amount of energy necessary to keep it at that temp, which is much lower than the initial demand. So I’m not too concerned about the 60W limit. For instance, my motorbike’s motor rating is 3000Watts, but I feed it 16 000Watts everyday and it is still doing just fine after 3 years of this daily treatment.
I hope it will be the same with the USB 2.0 cables I chose for the motors, USB2.0 is supposedly only good for 500mA but my guess would be that it can take much more. Just afraid of the impedance disturbing the steppers or the drivers but we’ll see. Ethernet cables worked fine so…
Yeah I do fear that too. Hope there is no weird electronics in there, I’d just like it to be a bunch of wires.
1 Like
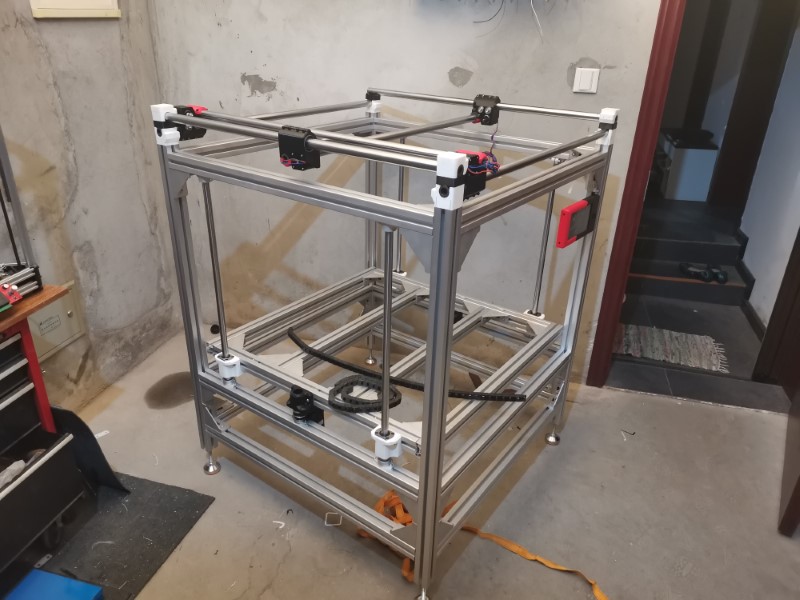
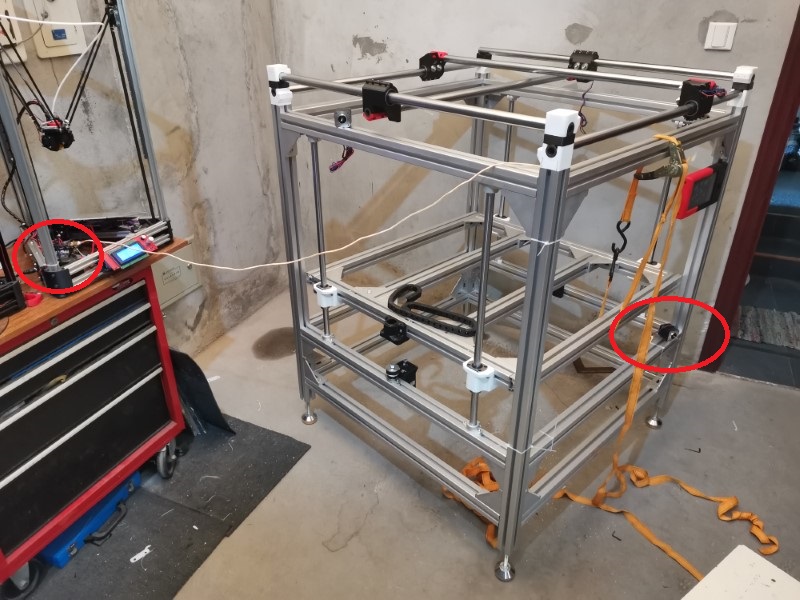
Ok most of the parts are now printed so it’s ready for a test fit.
The Z motor bracket and the ball screw support part: Still waiting for my ball screws to arrive. I hope the steppers will have enough power to deal with the table without needing more reduction or bigger motors, I think it should be fine, ust hope it’ll be able to move fast.
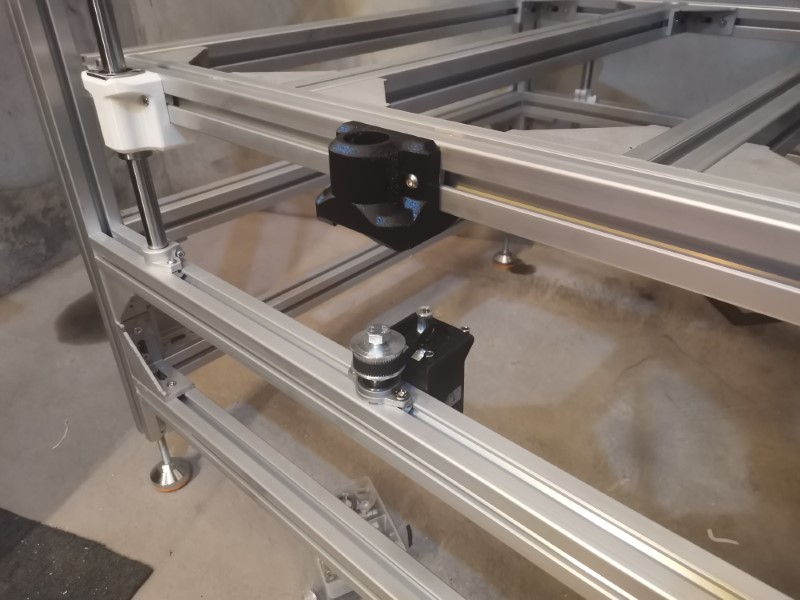
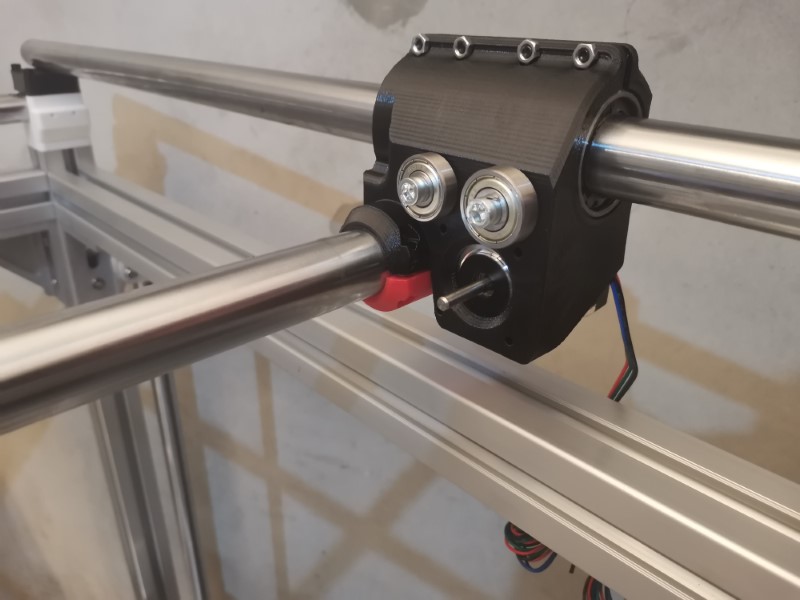
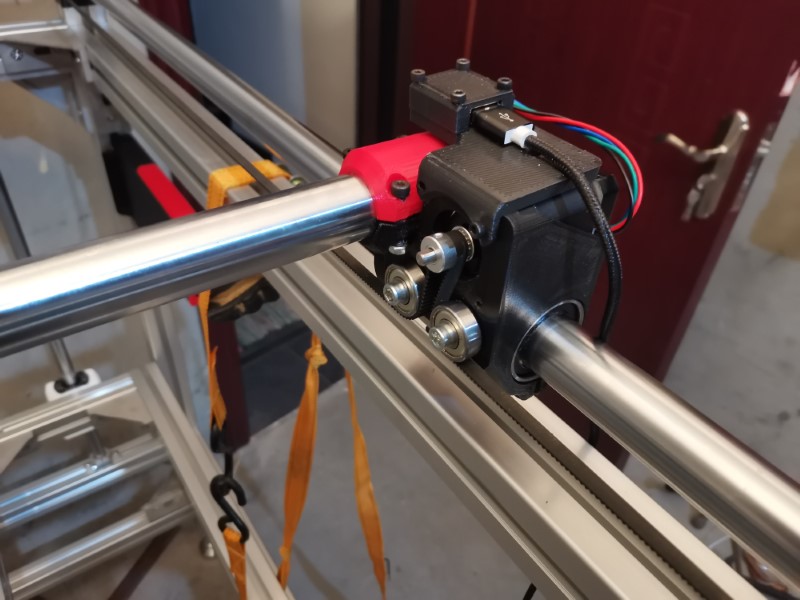
The roller bearings with their stepper motors and tube clamps: I’ve flipped their orientation so the whole thing takes up less vertical space. My assumption would be that it might help a bit with stiffness, but I also think it does look nice. Also, the belts will remain in the inside of the machine, I don’t want anything to be out of the cube of the frame, everything needs to be within its limit.
The screen enclosure was too big for my printer so I had to cut it in half. I found a way to make it look like a design feature, very happy with that!
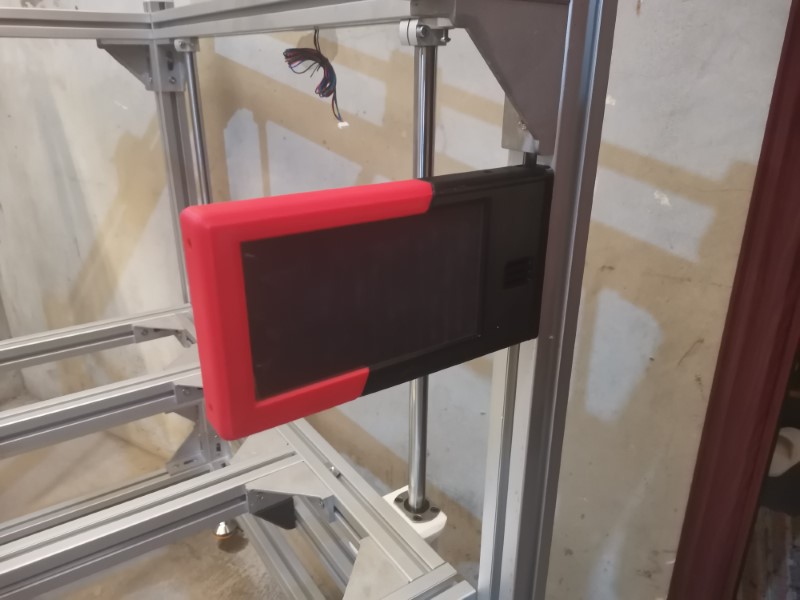

Still a few parts to be printed, I’ll redo all the corners in black later since white is getting filthy real quick plus doesn’t look great.
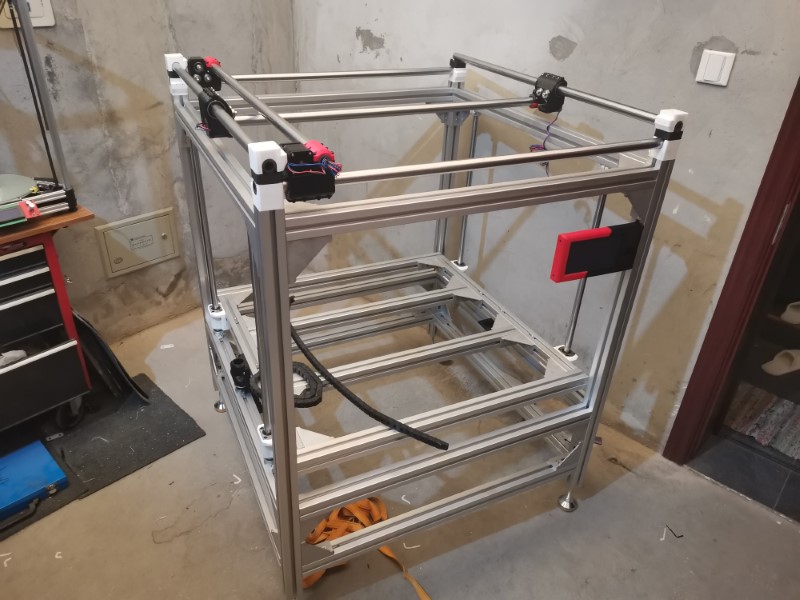
Now waiting for my cables to arrive, also in the process of designing an enclosure for the electronics, some little things to cleanly attach the cables, and some little enclosures to hide the little USB PCBs attached on the motors.
I will also need to get this thing square, it is currently about 4mm out of square. Won’t be easy, that’s my biggest fear, I really suck so much at getting things parallele, square and acurate. 
So far the axis move perfectly smoothly even with all things tightened, so that’s a good sign it isn’t too far off.
10 Likes
Hello Everyone,
Good news, the USB 2.0 cable trick seems to work fine for connecting our stepper motors.
I received all my goodies this weekend, two cables per axis, one color per axis and various connectors:
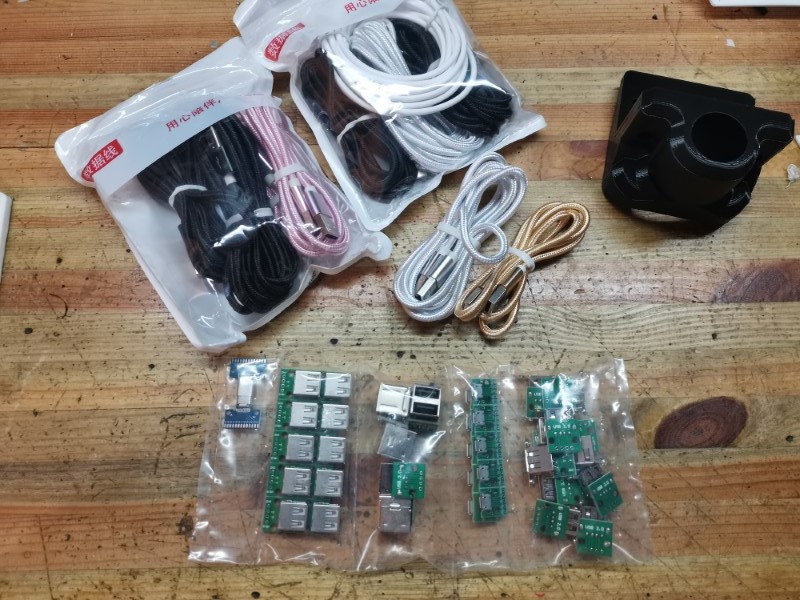
This was litterally the easiest wiring job I’ve ever done. The most time consuming task was to twist the copper wire to make it pass through the little holes… Took me less than 5 minutes to have a working setup.
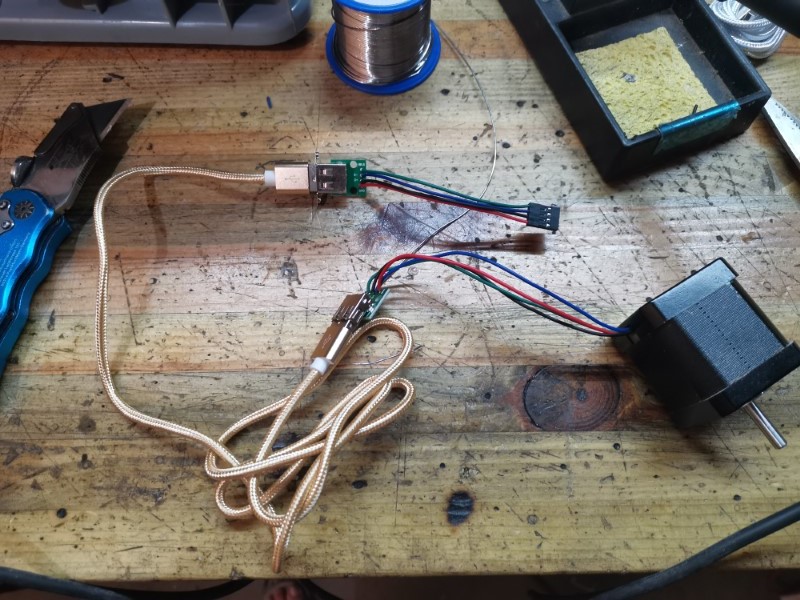
I tested it using my delta printer, simply disconnected the extruder and connected the stepper instead using the longest USB cable I had ordered (3 meters long).
Worked perfectly, seemed to have normal torque, didn’t see any difference from using a regular cable!
Changed my corners to black since the white ones weren’t looking good, plus they got dirty real quick and weren’t really well printed anyways.
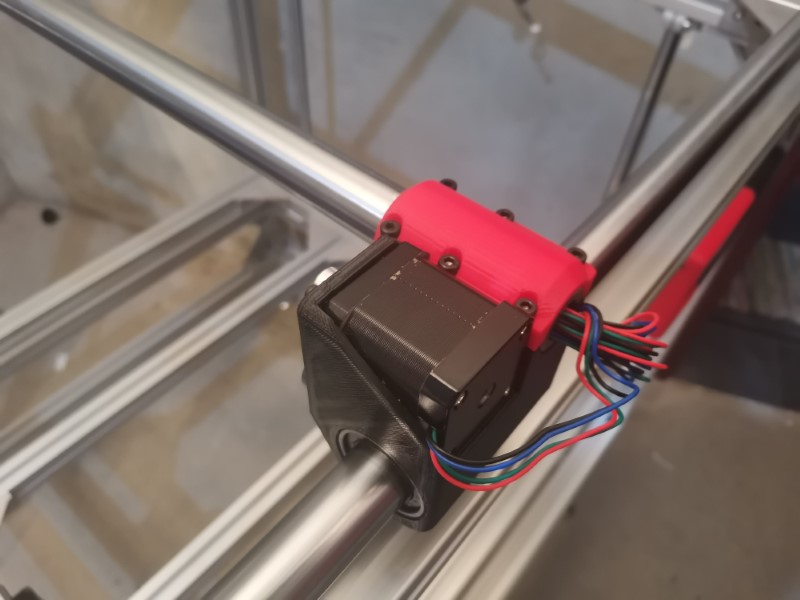
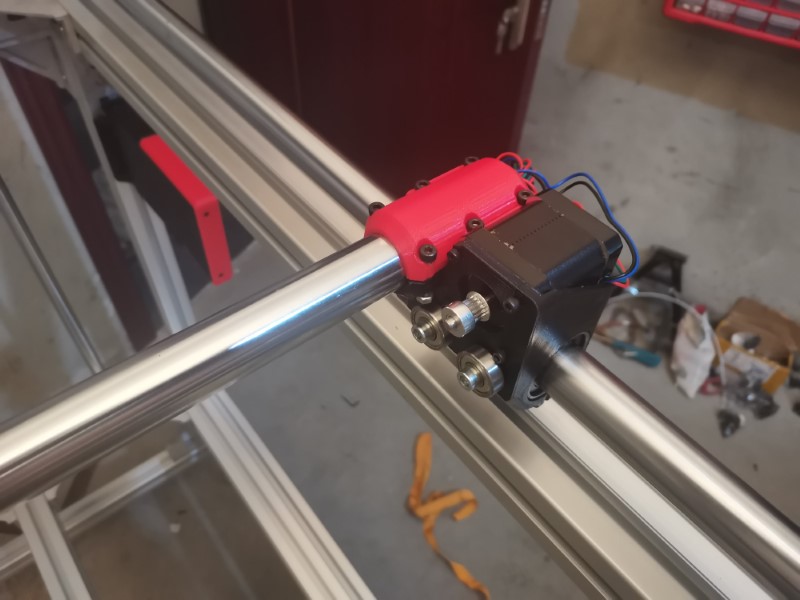
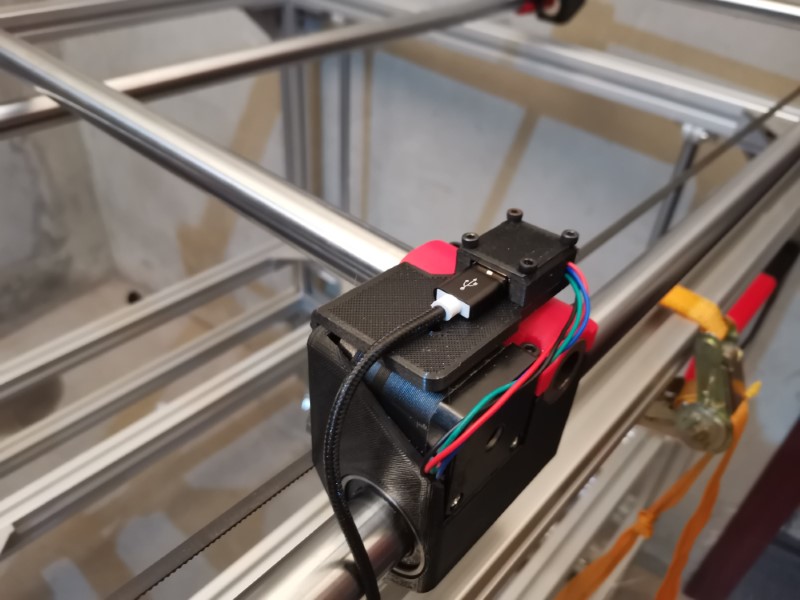
Designed and printed those little things to attach the drag chains and have a clean connector for the motor’s USB wire.
Unfortunately that’s all I was able to achieve. I had to get drunk AF for social purposes so this did affect a lot my productivity for the rest of the weekend.
13 Likes
Everyone is going to want those plugs!!! We need a direct connection, 4 pin stepper to usb.
Pretty slick, awesome idea and I am sure that is going to pop up everywhere now.
4 Likes
Yeah I was actually wondering if I should make a design, ask a supplier to make these and sell a few bundles to whoever would be interested. Just need a bit more testing to see the reliability first, but I’m pretty confident so far. Would love to make a bit of extra income, I’ve been livin on a tight budget these past few years so maybe that could help…
3 Likes
Man, that’s pretty. 
1 Like
A wise man once told me, “If you don’t do it, someone else will.”
3 Likes
I know a guy that might want a big bag in the US…
6 Likes
And right in front of our eyes, a supply chain is born… 

Now, where’s the USB-Stepper adapter listing in the store, and where can I get on the waiting list?
1 Like
Soldering directly is probably the strongest. But adding 0.1" 90 degree pins would mean you could plug it right into the motor.
It really looks great though.
Are those kind of usb cables common? All the extras I have are A to B and I have a ton of micro and mini cables now that everything is usb c.
1 Like
I am not seeing any 24 pin breakout boards. I am seeing lots with 12. I would like to find one like this, but with the female port at a right angle. I think that would make it easier to wire everything up. Maybe it would depend on the printer though:
Amazon wouldn’t be my first choice. There are a few more options on aliexpress (for much cheaper). But it is useful to still check there.
The 12 24 thing is probably due to duplication because of no up or down?
2 Likes
I have to look into this more to be sure I let this slip away on me
The one I bought is a 24 pin one. It looks like a 12 pins at first glance, but the board is double sided, one face has 12 pins and the other face the 12 other ones ![]()
It doesn’t have through holes though, but the soldering pads are not too tiny so it shouldn’t be too hard to solder.
The cable is fairly common, but maybe less common than the traditional printer USB cables with one bigger end. But they could be used too, just need a different plug on the board side!
Best of all, those cables are really, really cheap and can be sourced anywhere.
Can’t wait to make the first real tests to see how it performs!
2 Likes
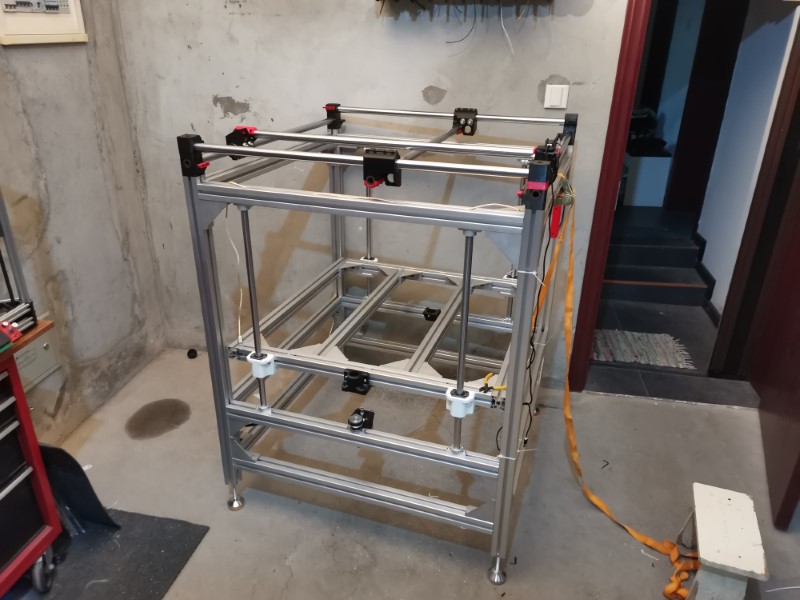
Some nice progress these past days!
Almost all the hardware is done, only the carriage remains to be printed as well as a few little stuff.
I added the top frame. It’s not a structural thing so it’s not there for rigidity, i’ts mainly here to support the drag chains and provide an easy way to enclose the whole printer if I feel the need to do so later. I can also put some kind of plank over it an use it a a giant, expensive and uncomfortably high table.
Anyway, here is how it looks now:
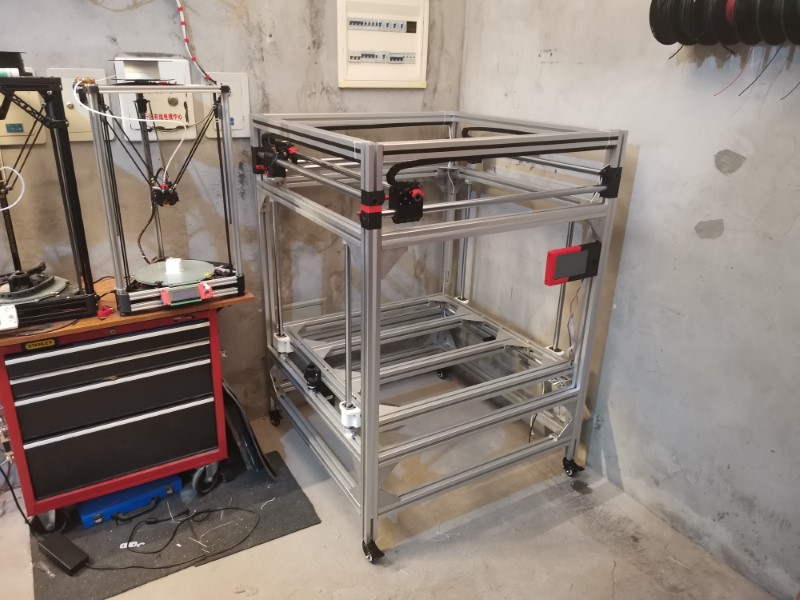
By the way, on the above picture, all the motors are wired. You almost can’t see any wiring, it looks super clean.
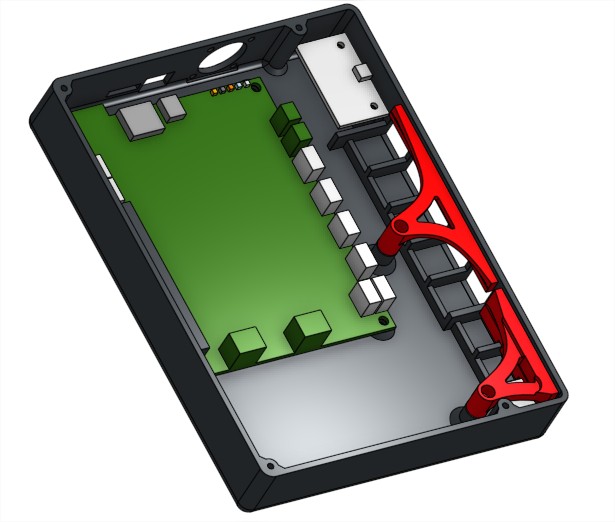
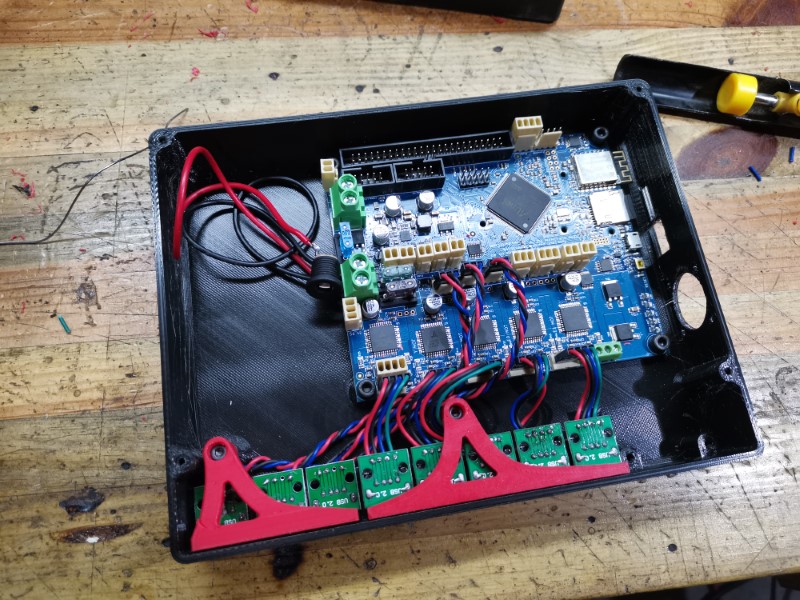
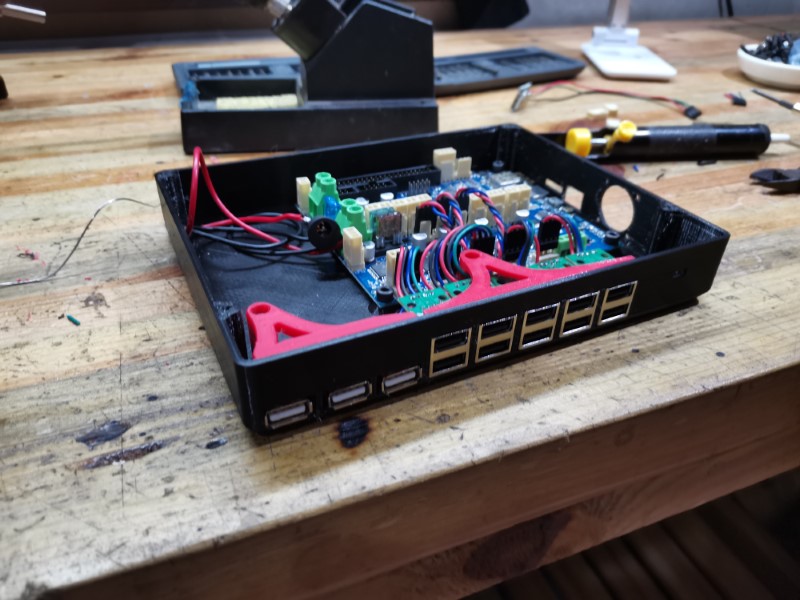
Also worked on my electronics. So I built this enclosure for the Duet2:
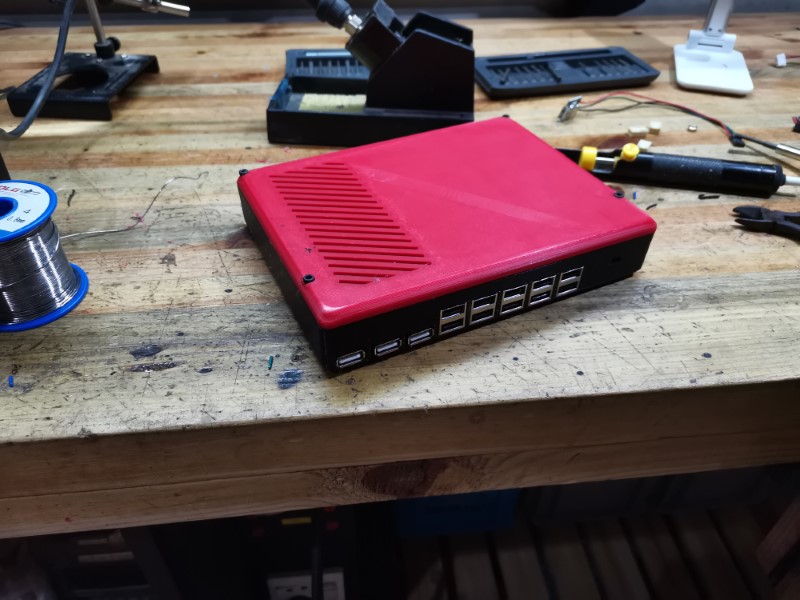
It’s really small and compact, it features a 25mm fan (but I might change that for a bigger one if it turns out to be too noisy), and a dust filter, so that hopefully the inside stays free of metallic particles and other nasty stuff.

The USB plugs made wiring this thing a walk in the park. The double ones are for each axis (they are paralelled), and the small ones for the endsstops. There is also a tiny one on the right that you barely can see, this will be the USB-C for the whole hotend assembly.
They fit pretty well in there, but I added those little red parts so they re well secured. The lid then presses on these, which presses on the plugs, which maintains everything in place.
I still need to find a good spot to put this box in the frame.
Also I’m still waiting for my ball screws to arrive, my supplier is taking forever to make them…
9 Likes
Magnet, ball bearing, baking soda… how frivolous!
2 Likes