After I built it, I tested it by spreading about 300g of dust on the floor and vacuuming it up. That dust was from the keyboard case I milled from MDF.
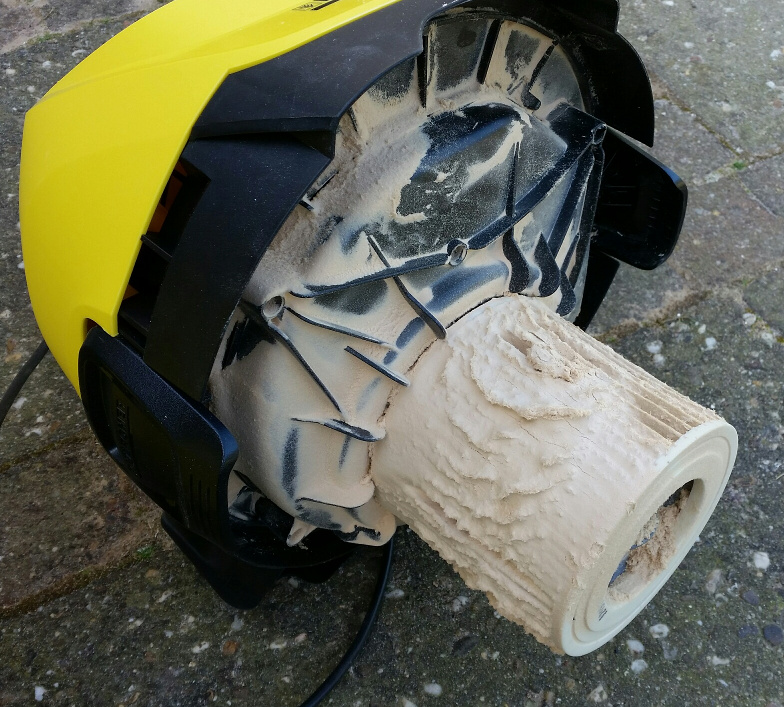
I was unpleasantly surprised to see that the filter in my vacuum was just as clogged up as before. Pretty much all dust went into the vacuum, and was not separated out by the cyclone.
It’s really not a good design for a cyclone separator. That ramp at the top kills most of the cyclonic action. It probably does alright for heavier stuff like table saw chips, but the fine stuff like you found out won’t get seperated. On my dust deputy the inlet shoot into the top of the cyclone which doesn’t have a ramp, so the heavy particles are allowed to spin freely at the top. This causes them to go faster and faster until they’re going about the same speed as the air, which forces them to the outside edge of the container, where they slow down a bit due to friction. Gravity takes over and pulls them down the cyclone into the bucket. Cyclones rely on high speed smooth air flow, which the size of this cyclone and layer ridges kinda kill.
I printed this one https://www.thingiverse.com/thing:2018105 and it works perfectly with an amazon basics vacuum (variable speed to prevent heat buildup and noise), just a little fine dust in the bag after surfacing my whole build area (800x1200)
I was looking around for buying a real dust deputy but they are kind of expensive here, over $80. @turbinbjorn had issues with his bucket imploding, but I don’t think mine was even close to buckling. I also read that a dust deputy needs to be sealed really well to the bucket for it to work optimally. I think I’ll try to seal everything really well before I give in and spend those $80…
The walls of the bucket do flex inward. But when they flex, I think that the seal between the mdf lid and the bucket has small gaps. I caulked them together, but it did not stick well to the plastic bucket. I’ll have to get a better bucket/lid combination.
Barry is right. The point of the cyclone is that the dust gets thrown against the sides until friction slows it down and it falls out of the airflow. The airflow speed needs to stay fast to be effective against the smallest dust particles.
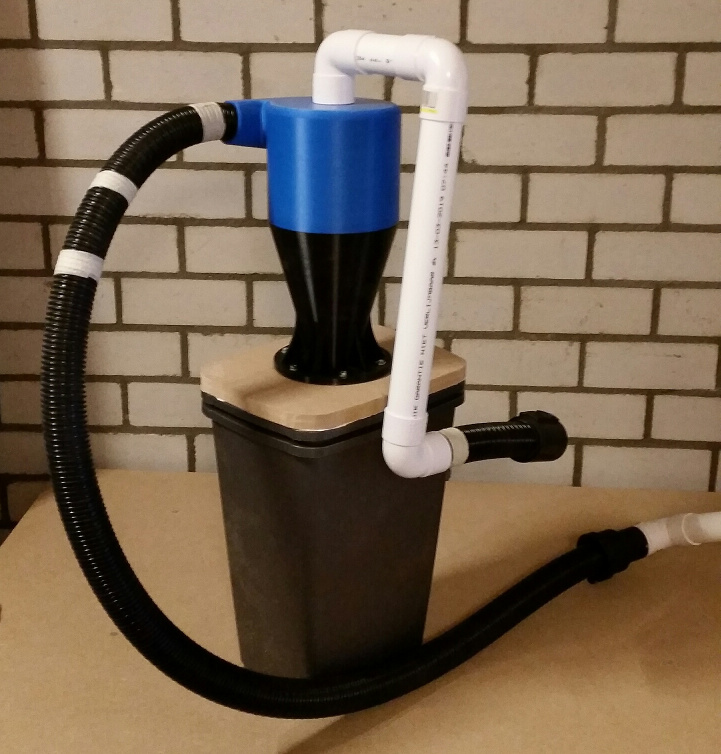
The three 90* bends on the PVC are not doing your airflow any favors either. I’d try just attaching the vacuum hose to the top of the cyclone in as straight a connection, or as gentle a curve as you can maintain, and see if you get better results.
And, just be sure we’ve covered the very basics, the tools are attached to the longer black hose in your photograph, and the vacuum source to the white plastic pipe, right?
I just had another look at the design in a slicer. The top part has a kind of a downward spiral, but that spiral effectively only works for half a rotation. And the diameter is quite large, so I’d expect air speed to be relatively low in that section. If the dust particles are not pressed against the wall, or they don’t move fast enough, I think they’ll just get sucked up into the vertical pipe instead of dropping down into the bucket.
The whole thing took 2.5 days to print, so it’s not that easy to just try a slightly different design…
Some cyclones use a “neutral vane” to avoid turbulence where the airflow comes in and keep the speed up.
My suggestion for retrying the vacuum connection shouldn’t require any reprinted parts as long as your hose fits in the top of the cyclone. I hope some tuning gets you to a place where the time you’ve already invested in printing pays off.
My $0.02… It is a chip separator, not a dust separator. The dust is still going to get through. This looks like it is still letting a lot of chips through though. There is a lot of “art” that we explain with science behind dust collection. Getting enough air flow, and enough pressure, and speed (which are somewhat independent properties) is needed for the design.
I don’t have a funnel/cyclone, I have a Thein baffle, which I talked about here:
Since you have a CNC, maybe it would be easier to test theories out on something like this instead? Hopefully it works OK if it’s a lot smaller.
I have that same HF dust collector and I turned mine into a 2-stage with a Dust Deputy (first with a homemade thein separator, which worked great) and it really works well. It is WELL WORTH the time and effort to make it into a 2-stage. That being said, the little Home Depot versions of cyclone separators that snap onto buckets would work really well for the CNC also. I have one of those hooked up to my chop saw at the moment.
I’m sorry that the cyclone didn’t work out for you! I whish I could tell you exactly why my works, and what is faulty with yours - but as jeff says, undertsanding the sience behind it is impossible for me.
What I have experienced though - is the following:
My cyclone setup does indeed gather most of the dust - both fine dust, saw dust and chips. I’m suprised by how fine the dust in the bucket actuall is. It glues itself to the sides and the underside of the lid.
When there was air leaking different places in my setup, the vacuum bag got much more dust and debris. Making a proper lid and enforcing the inner sides of the bucket made the operation behave in a good way, and the vacuum bag is now nearly empty, even after lots of use. I think the air leakage might cause the cyclone effect to weaken a lot.
One thing I wonder about your bucket: might it be too small? Or can the rectangular size impact the cyclone’s swirl?
I’ve used a 30 ltrs brewing bucket. I think it’s size is perfect. Small enough to fit in my tiny chicken coop room in the shed, but big enough to accomodate the cyclone swirling. Here’s from the norwegian shop: https://www.europris.no/p-gjaeringskar-30-l-125377-125377.html
I actually found out that a hardware shop nearby is selling a very similar bucket to the one you use, with a matching lid. I was planning to buy one tomorrow, and now I definitely will.
I expected the bucket size and shape to be irrelevant, because once the dust goes into it, it should just fall down and stay there. No idea whether that is true or not.
It seems to me that the “outward” force inside the bucket is quite strong. The fine dust is plastered along the sides and under the lid. It seems like the force of the swirls is very strong and pushes everything outward and downward. Can it be possible that this swirling effect have to happen both inside the cyclone, and in the bucket? As already mentioned - understanding the mystical forces of a shop vac is not easy!
Idea from way out in left-field. Any chance the printed cyclone is too porous, therefore leaking/losing air speed? I 3D printed some whistles for my daughter’s volleyball team which worked terribly until I coated one with thinned down white glue. While the whistle looked okay, there was enough of a gap between lines of filament that air wasn’t going where it needed to for the whistle to work. Sealing it up made a world of difference.
One way to check if there’s any air coming through the walls is to use the “dry wood test”. If you wet one side with water and dishwasher soap and try to blow it through with your mouth. You should be able to see bubbles on the other side.