My MPCNC finally found its place

Hello, I realise i haven’t share my build yet.
I had a lonely week-end without wife and daugthers so i had time to build a torsion table and a first attempt for an enclosure(i think its’ ~10cm to tall), still need add front door.
Table can be folded because i have to be able to park my car for holidays.

I now need to find time to clean my workshop :slight_smile:


13 Likes

That looks like a nice space. It like the height. And the cable management. Thanks for sharing.

What sorcery is this? How is this table basically levitating?

That was exactly my first thought as well o_O But then I found it: there is a small but probably sufficient angled strip of wood below the table. It’s barely visible if not zoomed in. In the last picture it hides behind the vacuum connector to the cyclone :slight_smile:

What I know is that torsion tables are extremely rigid and flat and warp resistant, good idea to use this as a base, may you have a lot of fun with it.

1 Like

Ah, I see it now. :+1:

Still home alone and i made some progress tonight on enclosure practicality.

Speaking of levitating :wink: watch this out :

It’s the magic of french cleat !

With the primo screwed to the table:


When table is folded, the enclosure can easily be pull off the french cleat rails.

9 Likes

Well seen ! it’s quite solide with one leg, I tried to put 3/4 of my weight on a side and the table didn’t move.
I would not try to sit on it thus, that test doesn’t worth the risk.

Cool build, it even folds out of the way, super nice!
My only concern left is vibrations that somehow make the stud move and collapse the table mid-operation, but that is probably overcautious :smiley:

The table with the Primo is quite heavy, the foot beam absolutly cannot move, to remove it i have to raise the table 1.5 cm.

Even if the leg is already very robust to collision, I will see how to secure a bit it more for the case where table would be accidentaly raised.

1 Like

I fixed the youtube video that couldn’t be read.

Some progress on my enclosure, i’ve sticked orange film on each face of plexyglass.
It not worth a real laser safety glass and off course i wear good goggles but that panel filters a part of bad light.

In action:

I used that film:
https://www.amazon.fr/gp/product/B074RBSKSK/ref=ppx_yo_dt_b_asin_title_o05_s00?ie=UTF8&psc=1

Some Easter bunny i “designed” myself in LightBurn:

I messed up some(fume traces) at making tests with my air assist, taking age to change from compressor to air pump.

I had to clean the lens as i wasn’t able to cut through 3mm at 100% after 3 months not using it, laser got it’s full power back after the cleaning.

4 Likes

What did you use to clean it?

1 Like

A coton swab moistened with Isopropanol to clean and an other one to dry the lens after.
I removed a bit of cotton to make it a bit thinner to pass everywhere on the lens.

4 Likes

An Easter bunny army for our table !

I use to be on my own when i do that kind of stuff but this time good moment with my wife decorating it with acrylic pens.

Kept 4 naturals for my 3 years old daughter as she will want to paint some for sure.

I wishe i can have more time to create different shapes(ears postion, faces…) but will be good enough for this year.

Big rabbits design comes from 3axis website, i just adapted slots and tabs to fit 3mm plywood instead of ~4.5mm

8 Likes

I’ve installed a cheap 2K webcam on top of my enclosure. Lightburn calibration was quite simple.
I now have a cam preview of my bed so some free spaces on used plywood sheets can be reused for small elements i would like to cut.
I just need to position small shapes where it can visually fit, it’s about less than 1mm precision, very usefull !


4 Likes

One more step to a decent setup!

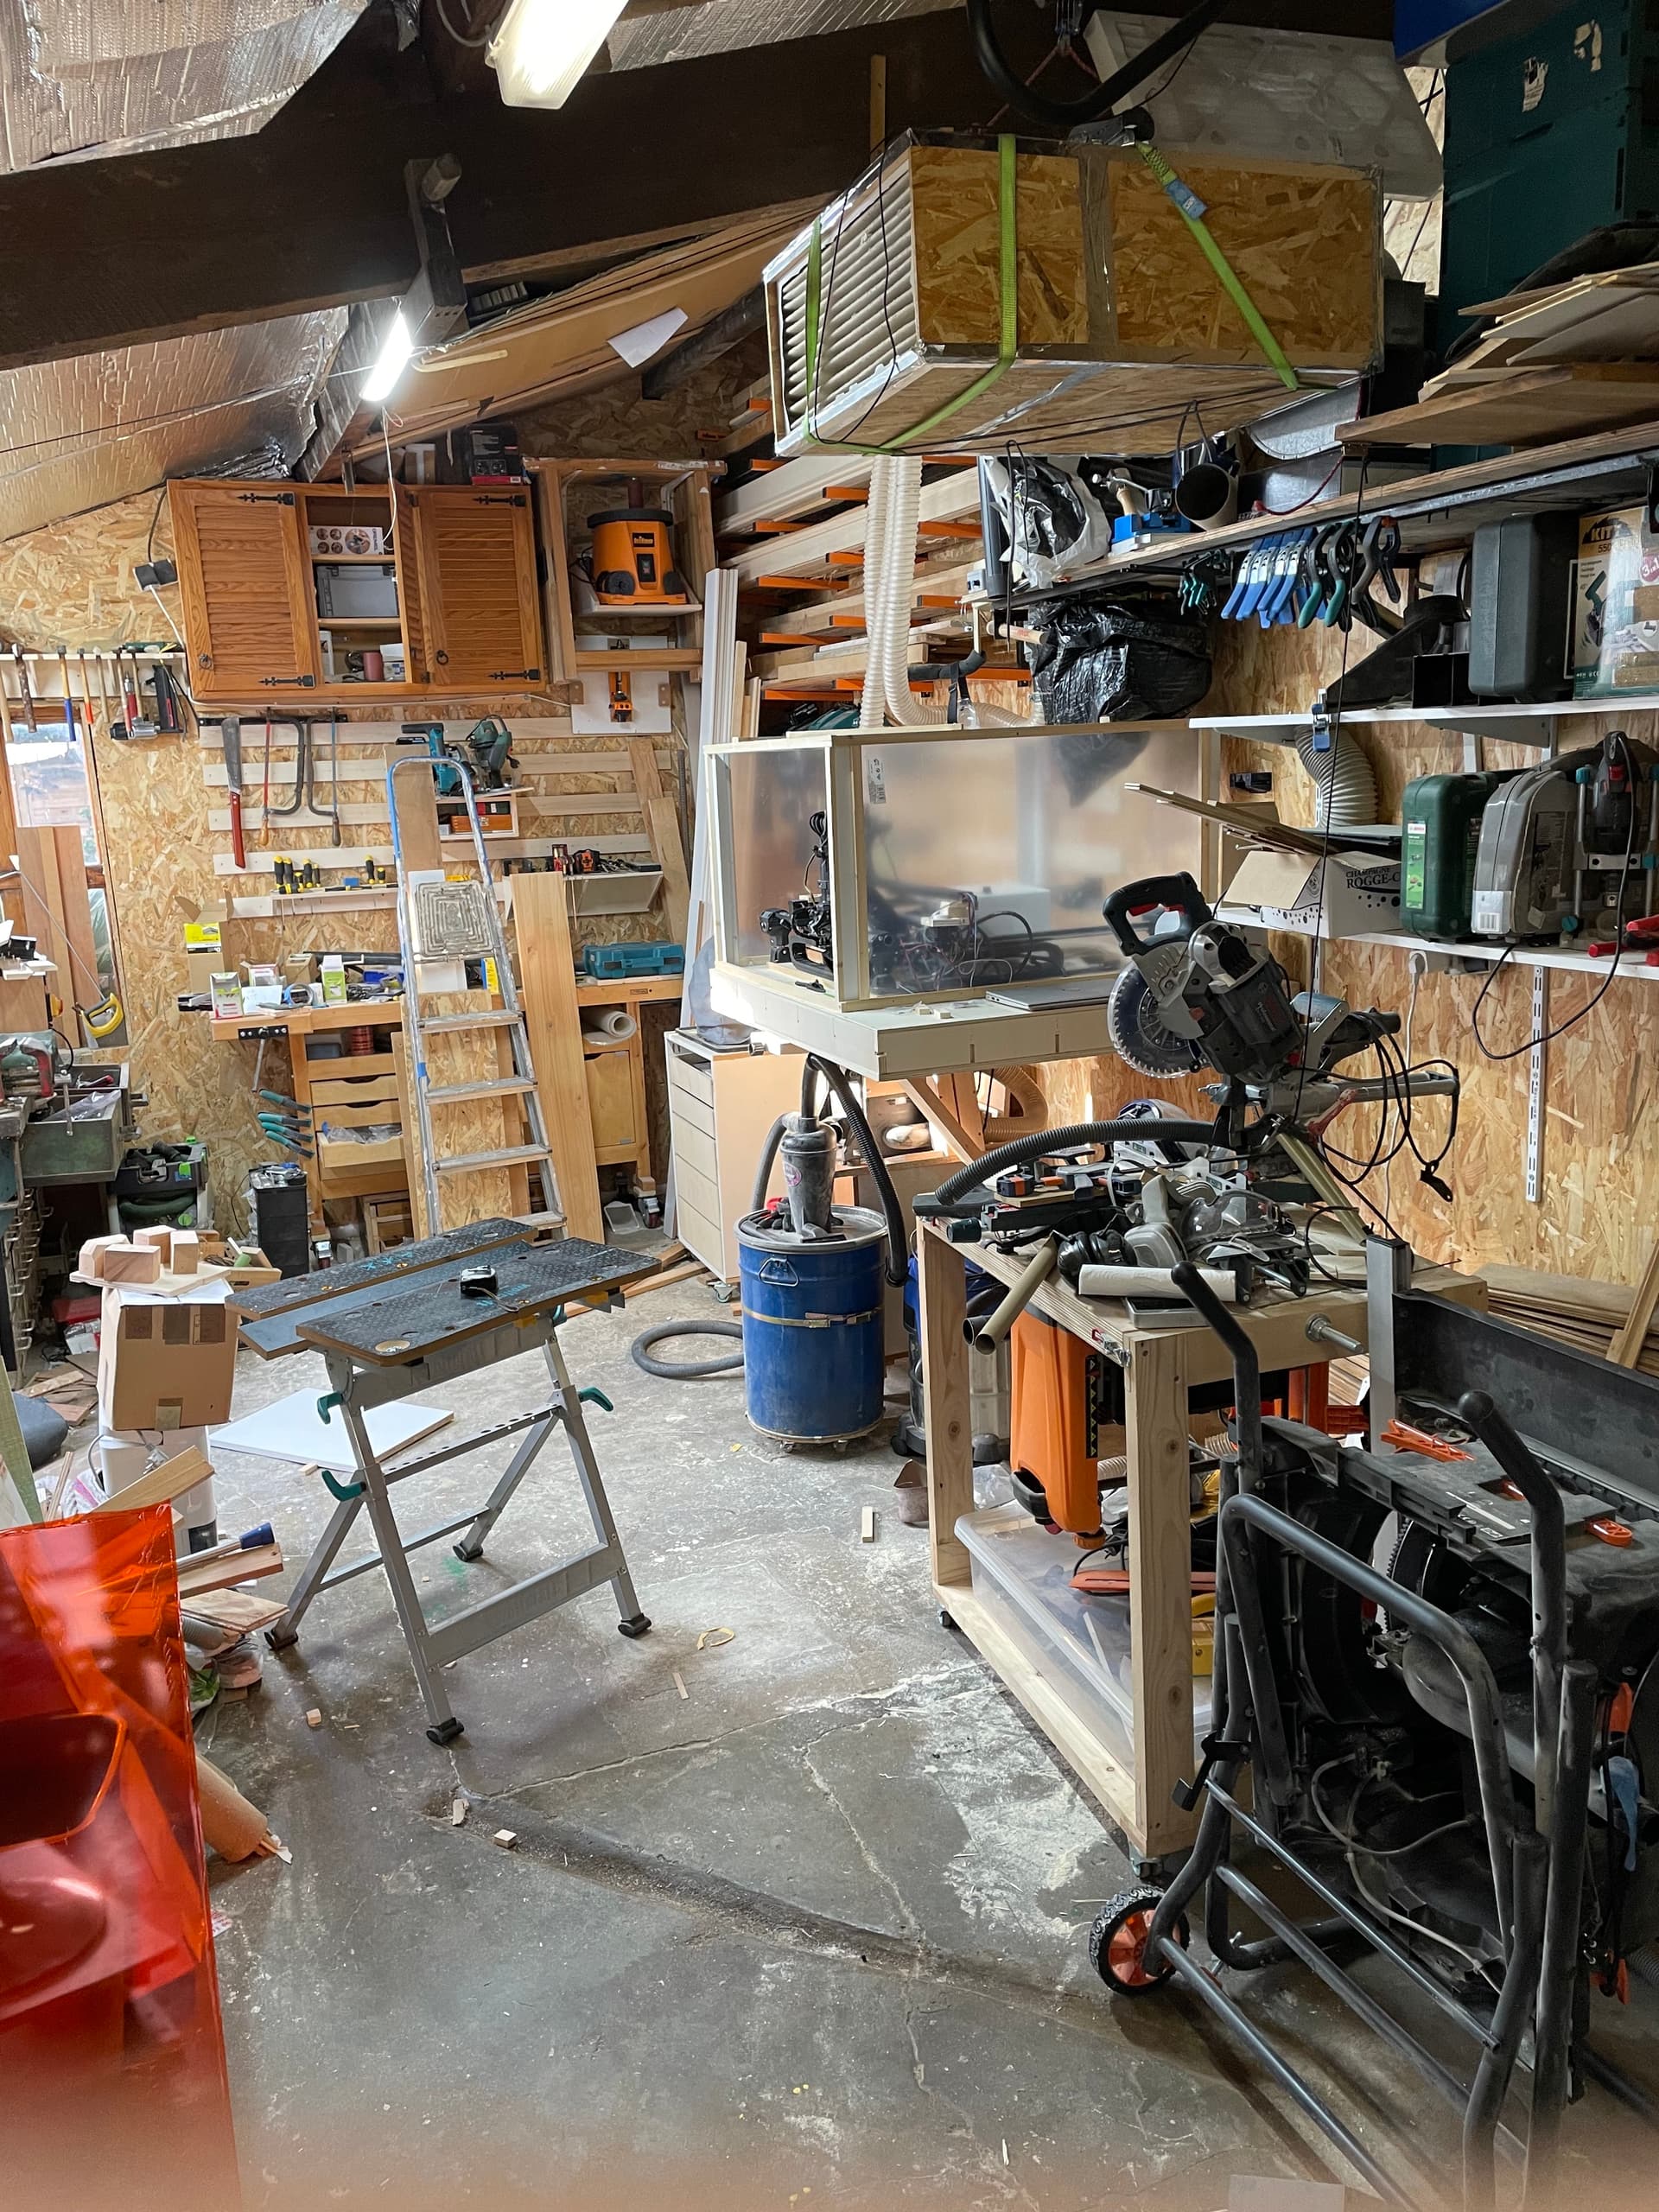
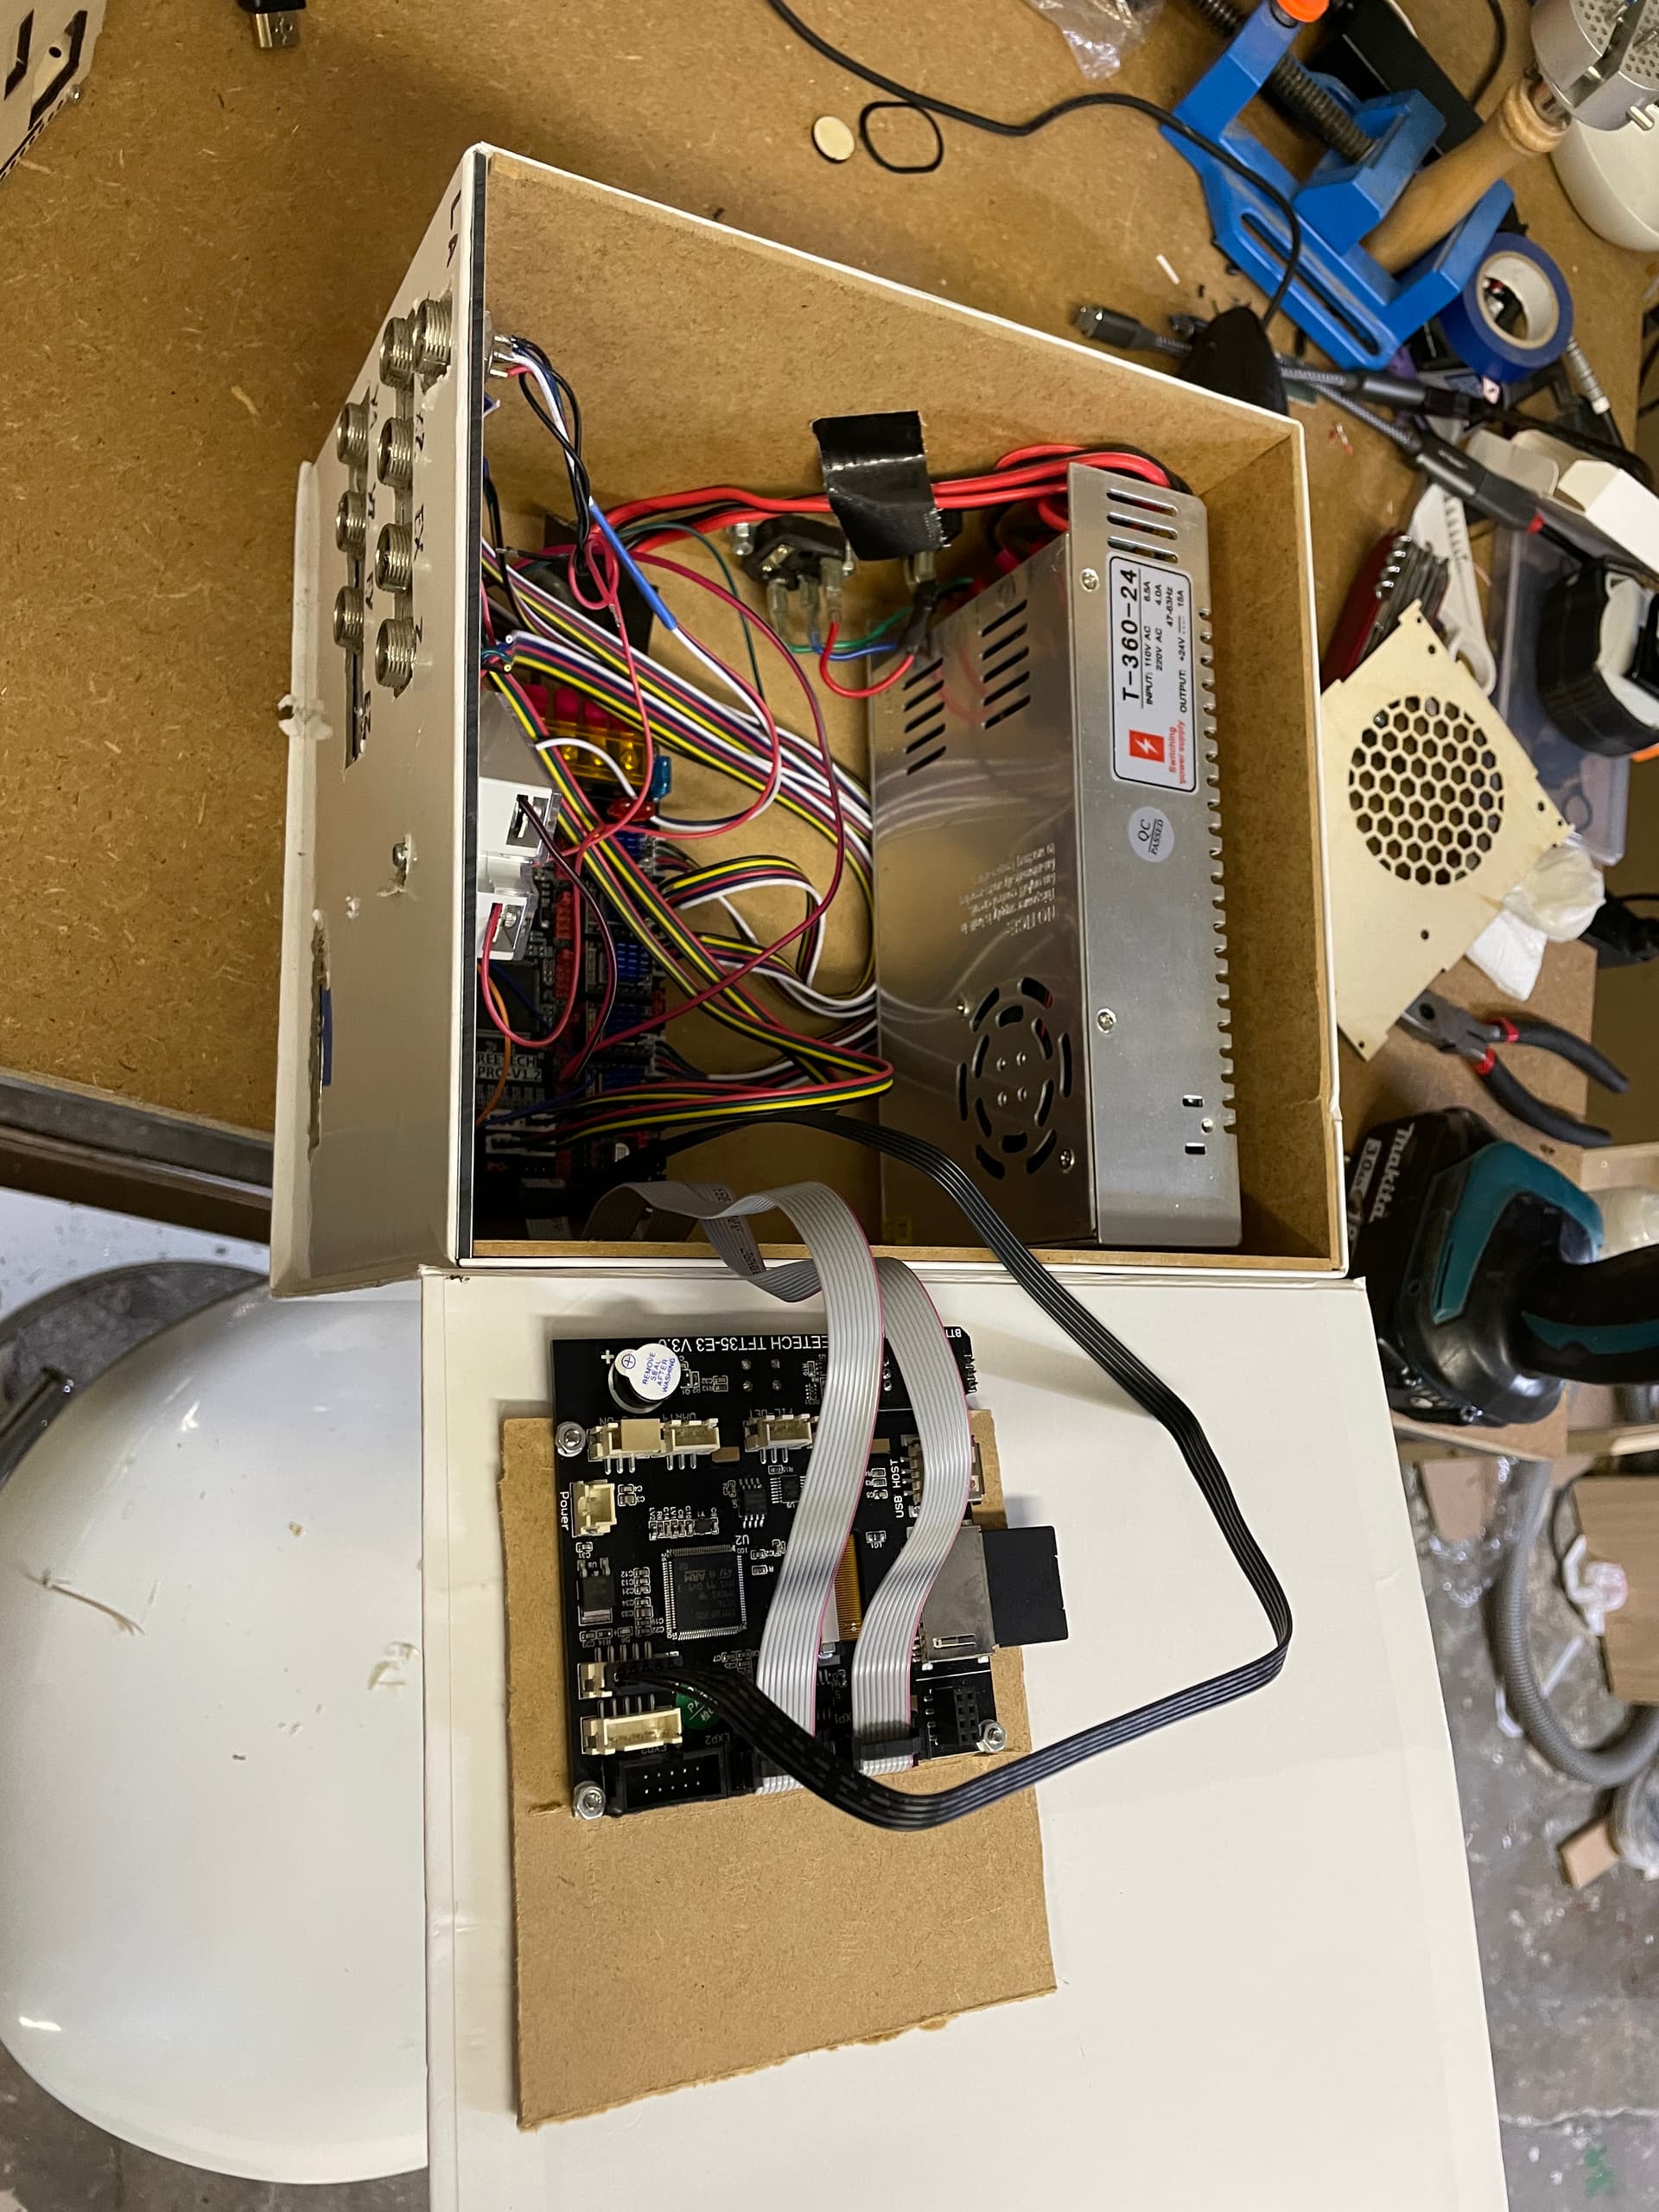
When i finished my built of the primo, I had made myself a control box in a cardboard box reinforced with MDF.
I made it in a hurry in about 2 hours and it did the job but it was cumbersome and not safe enough IMO.

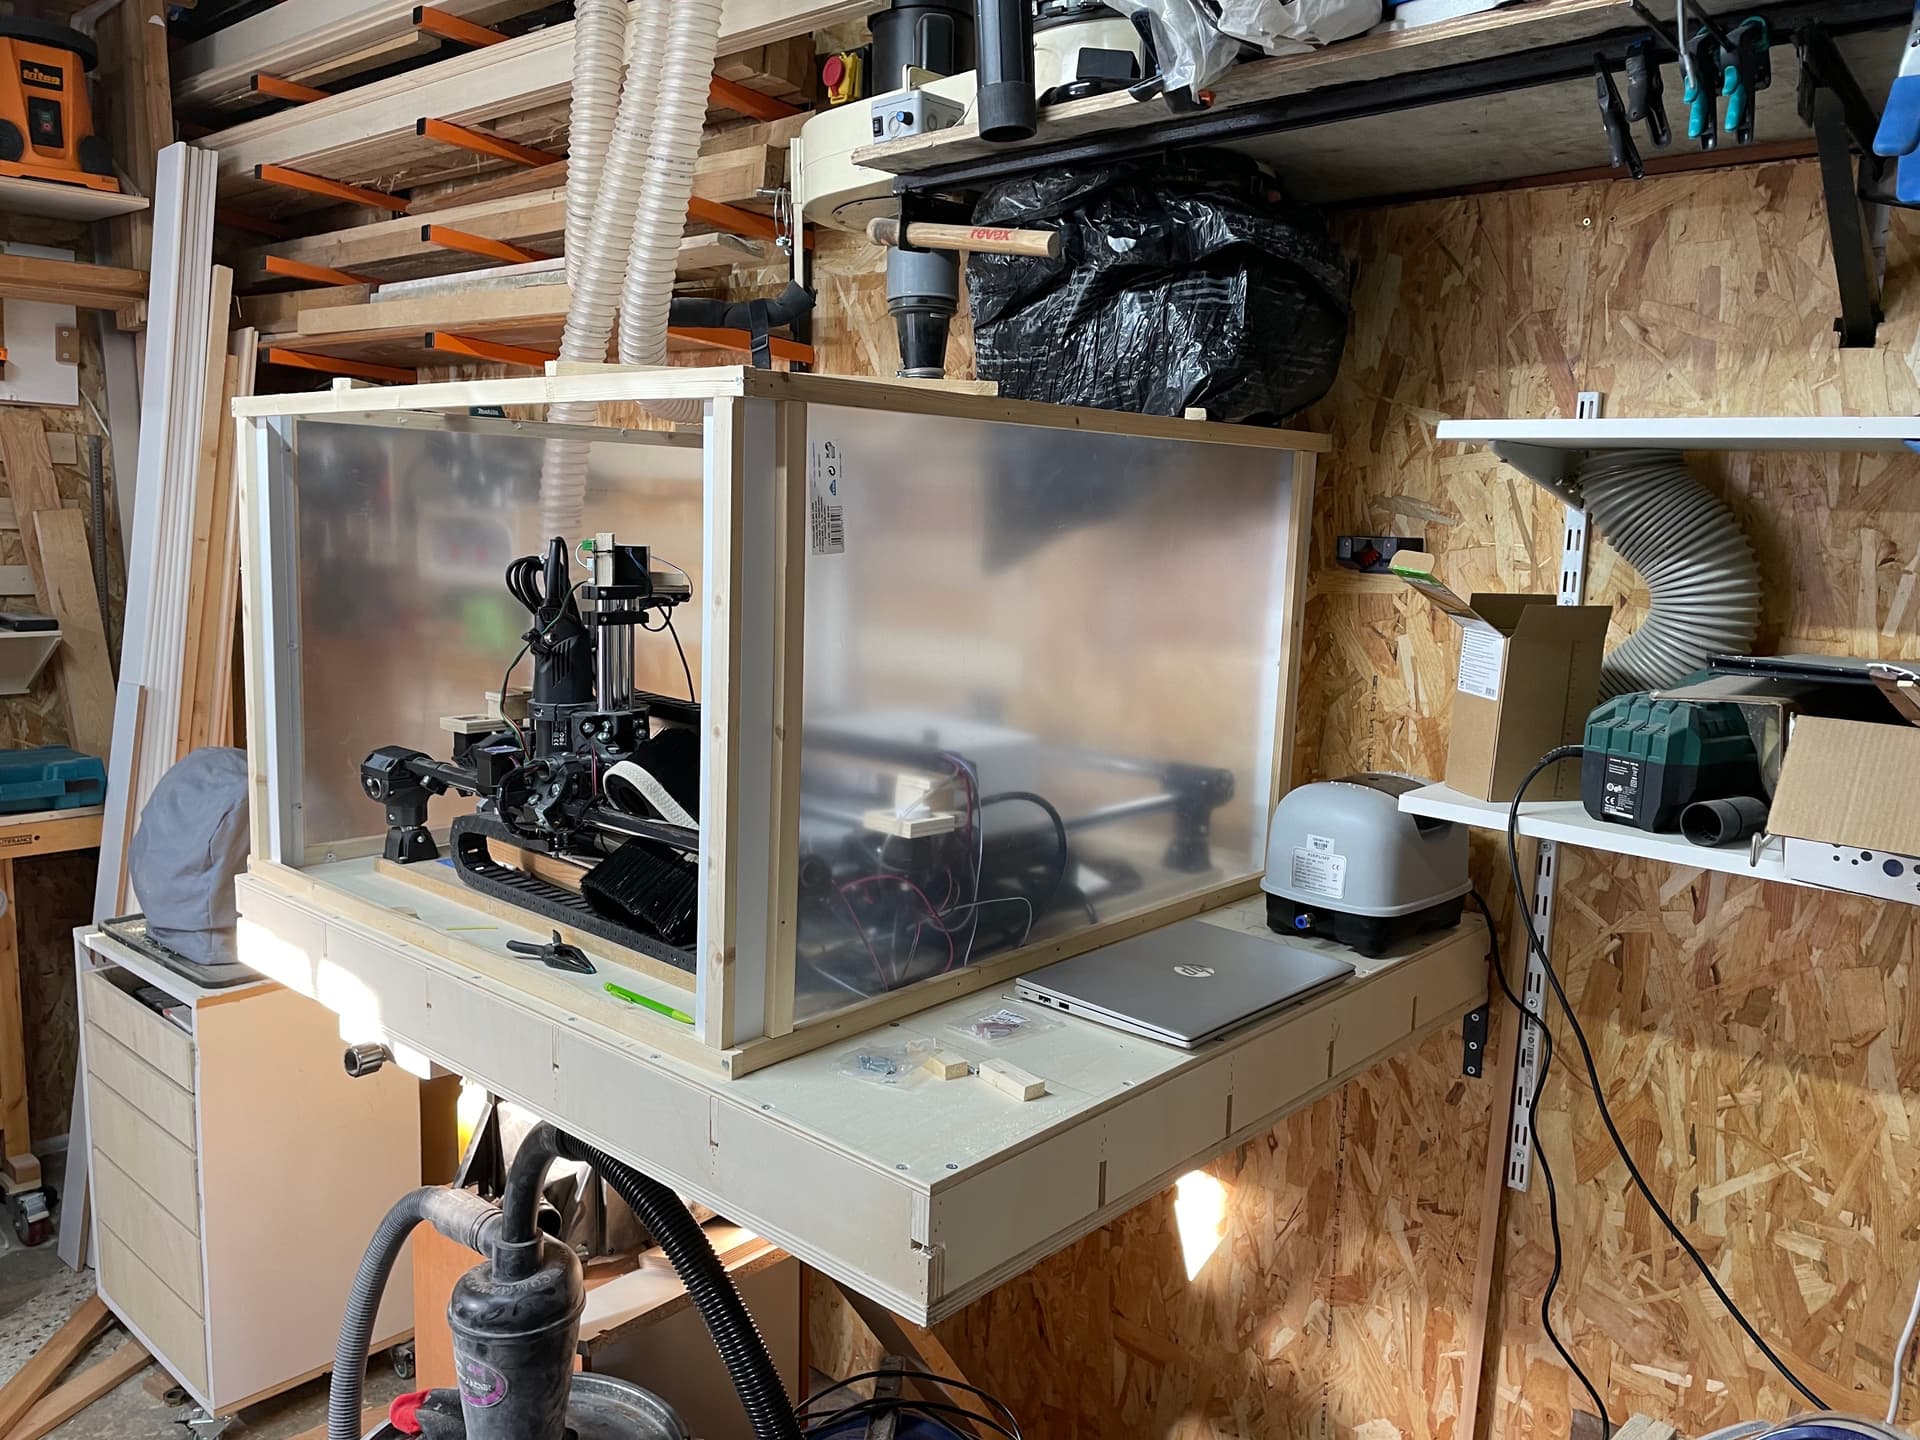
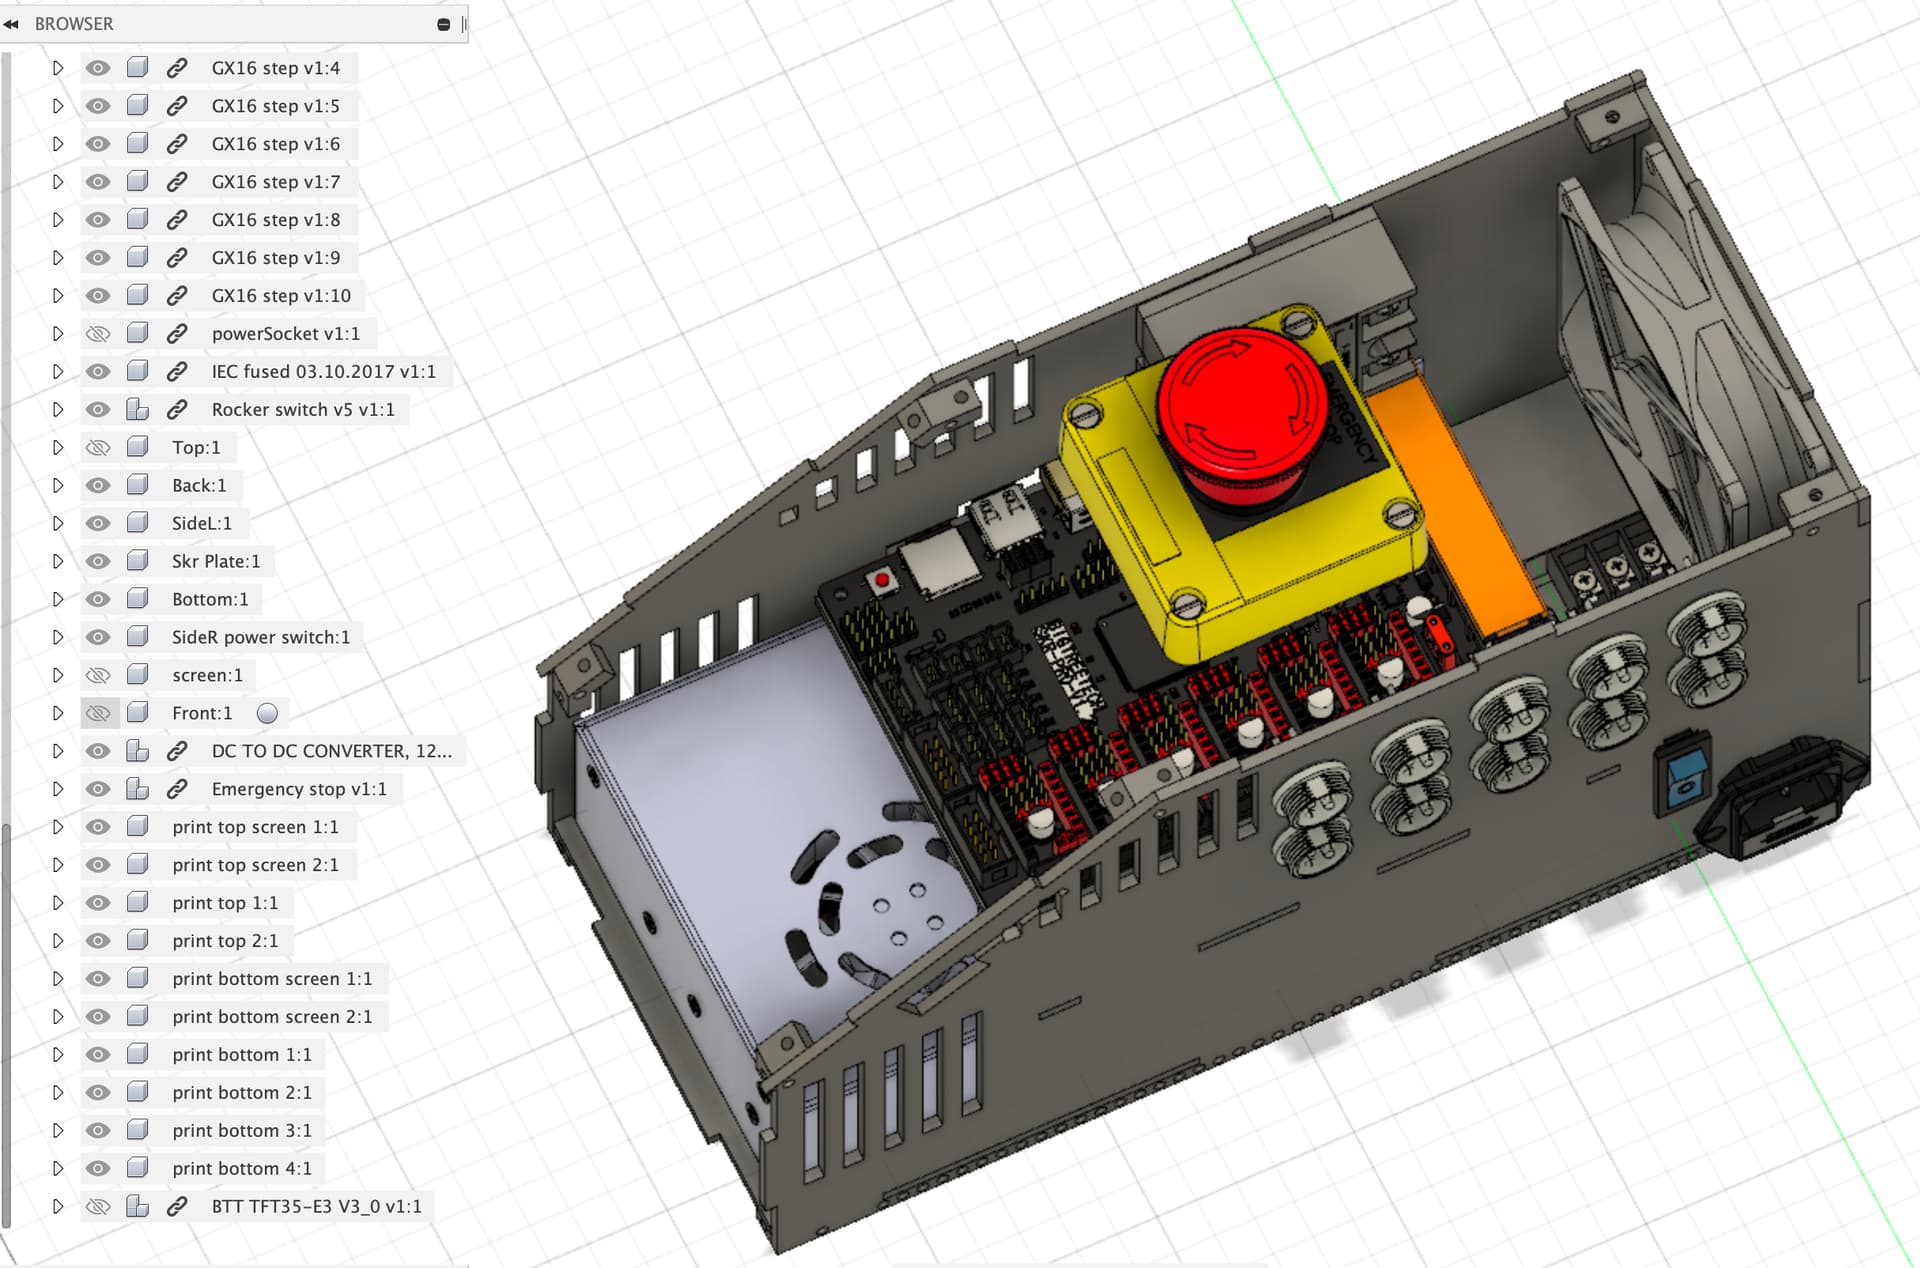
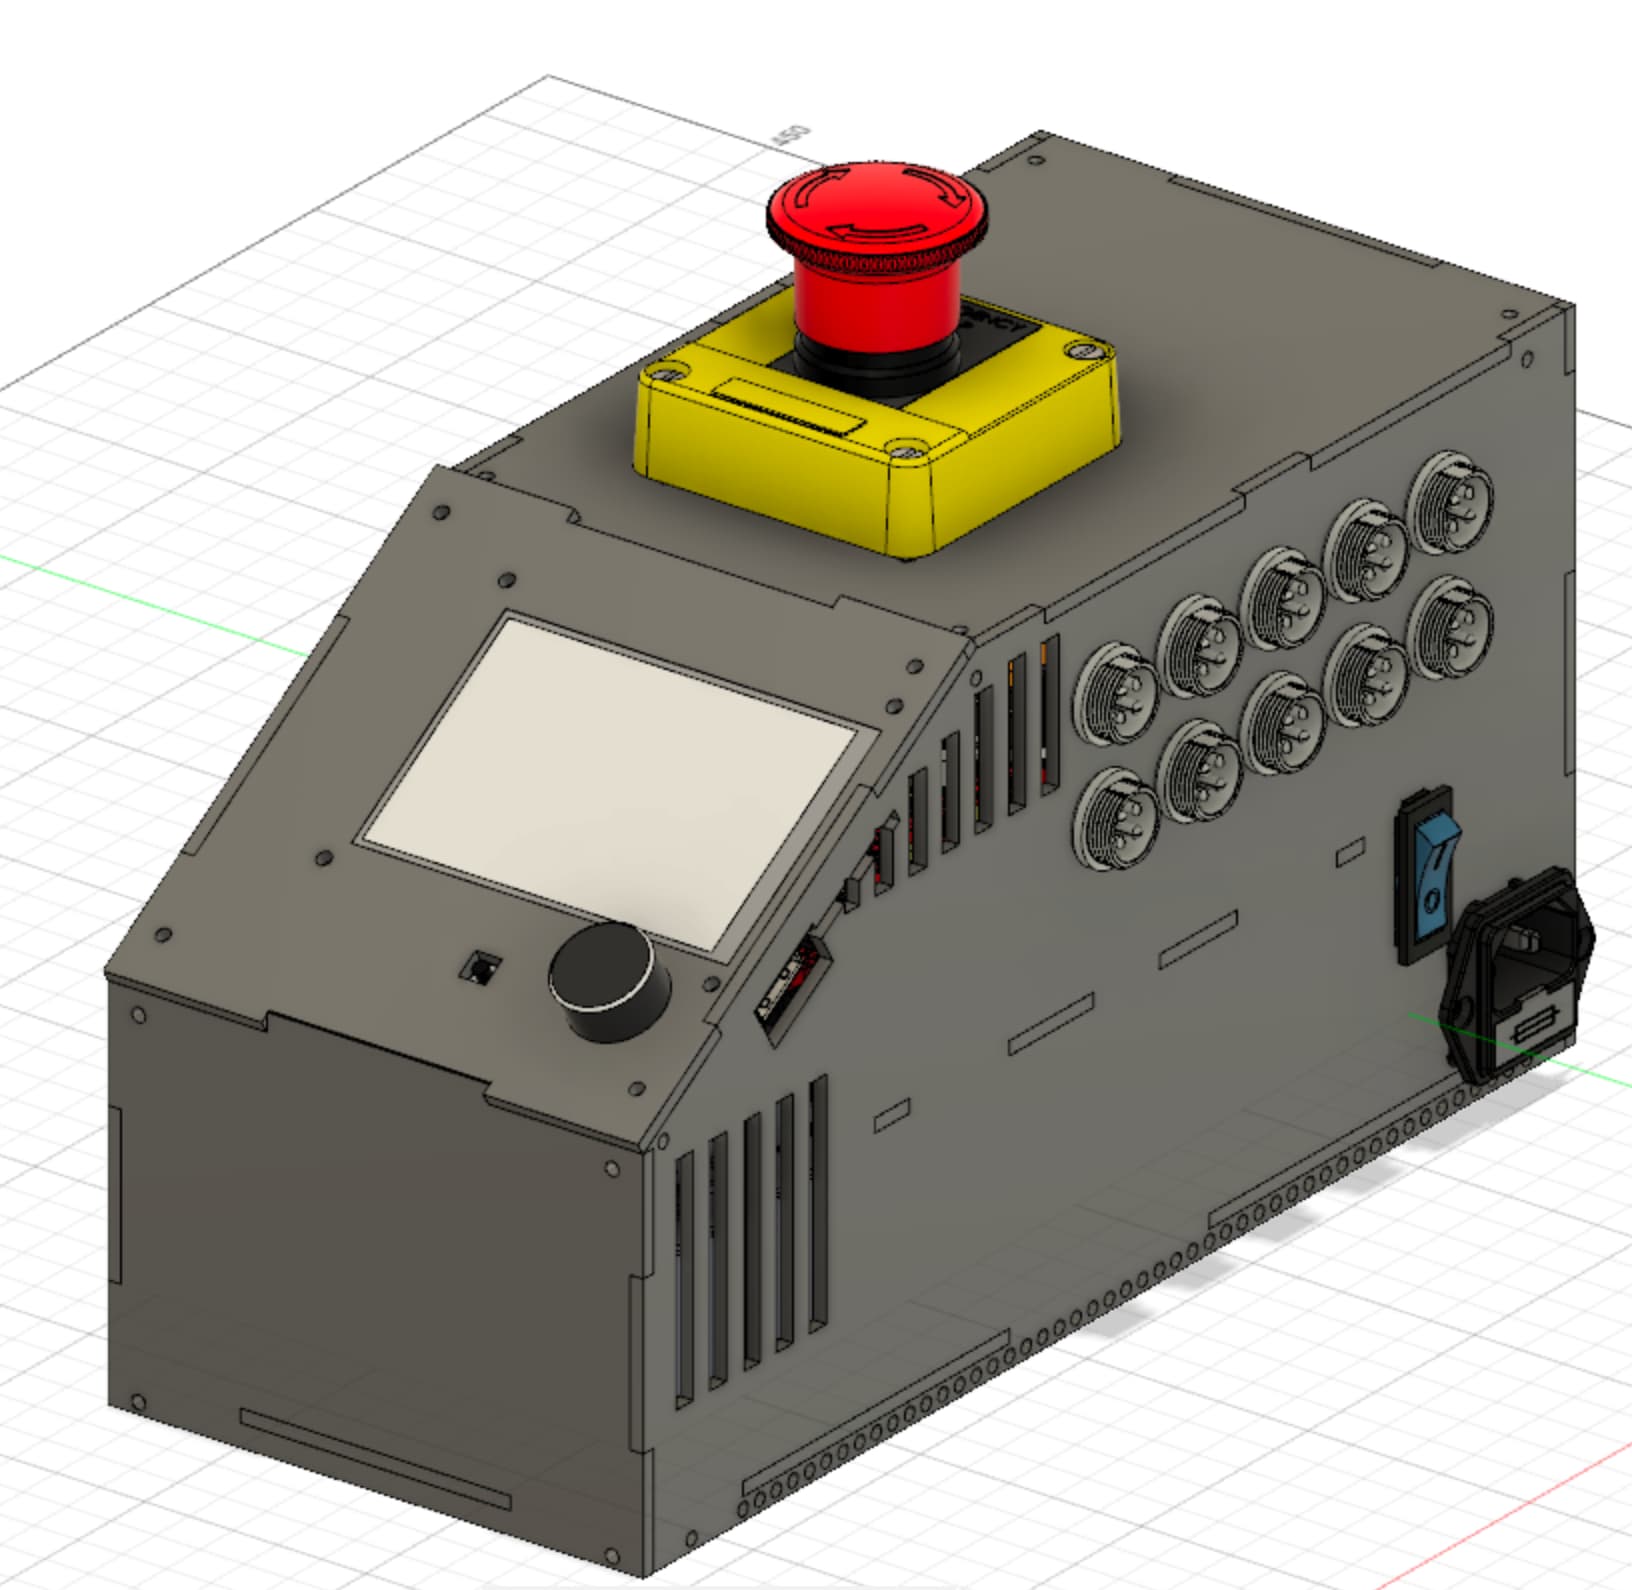
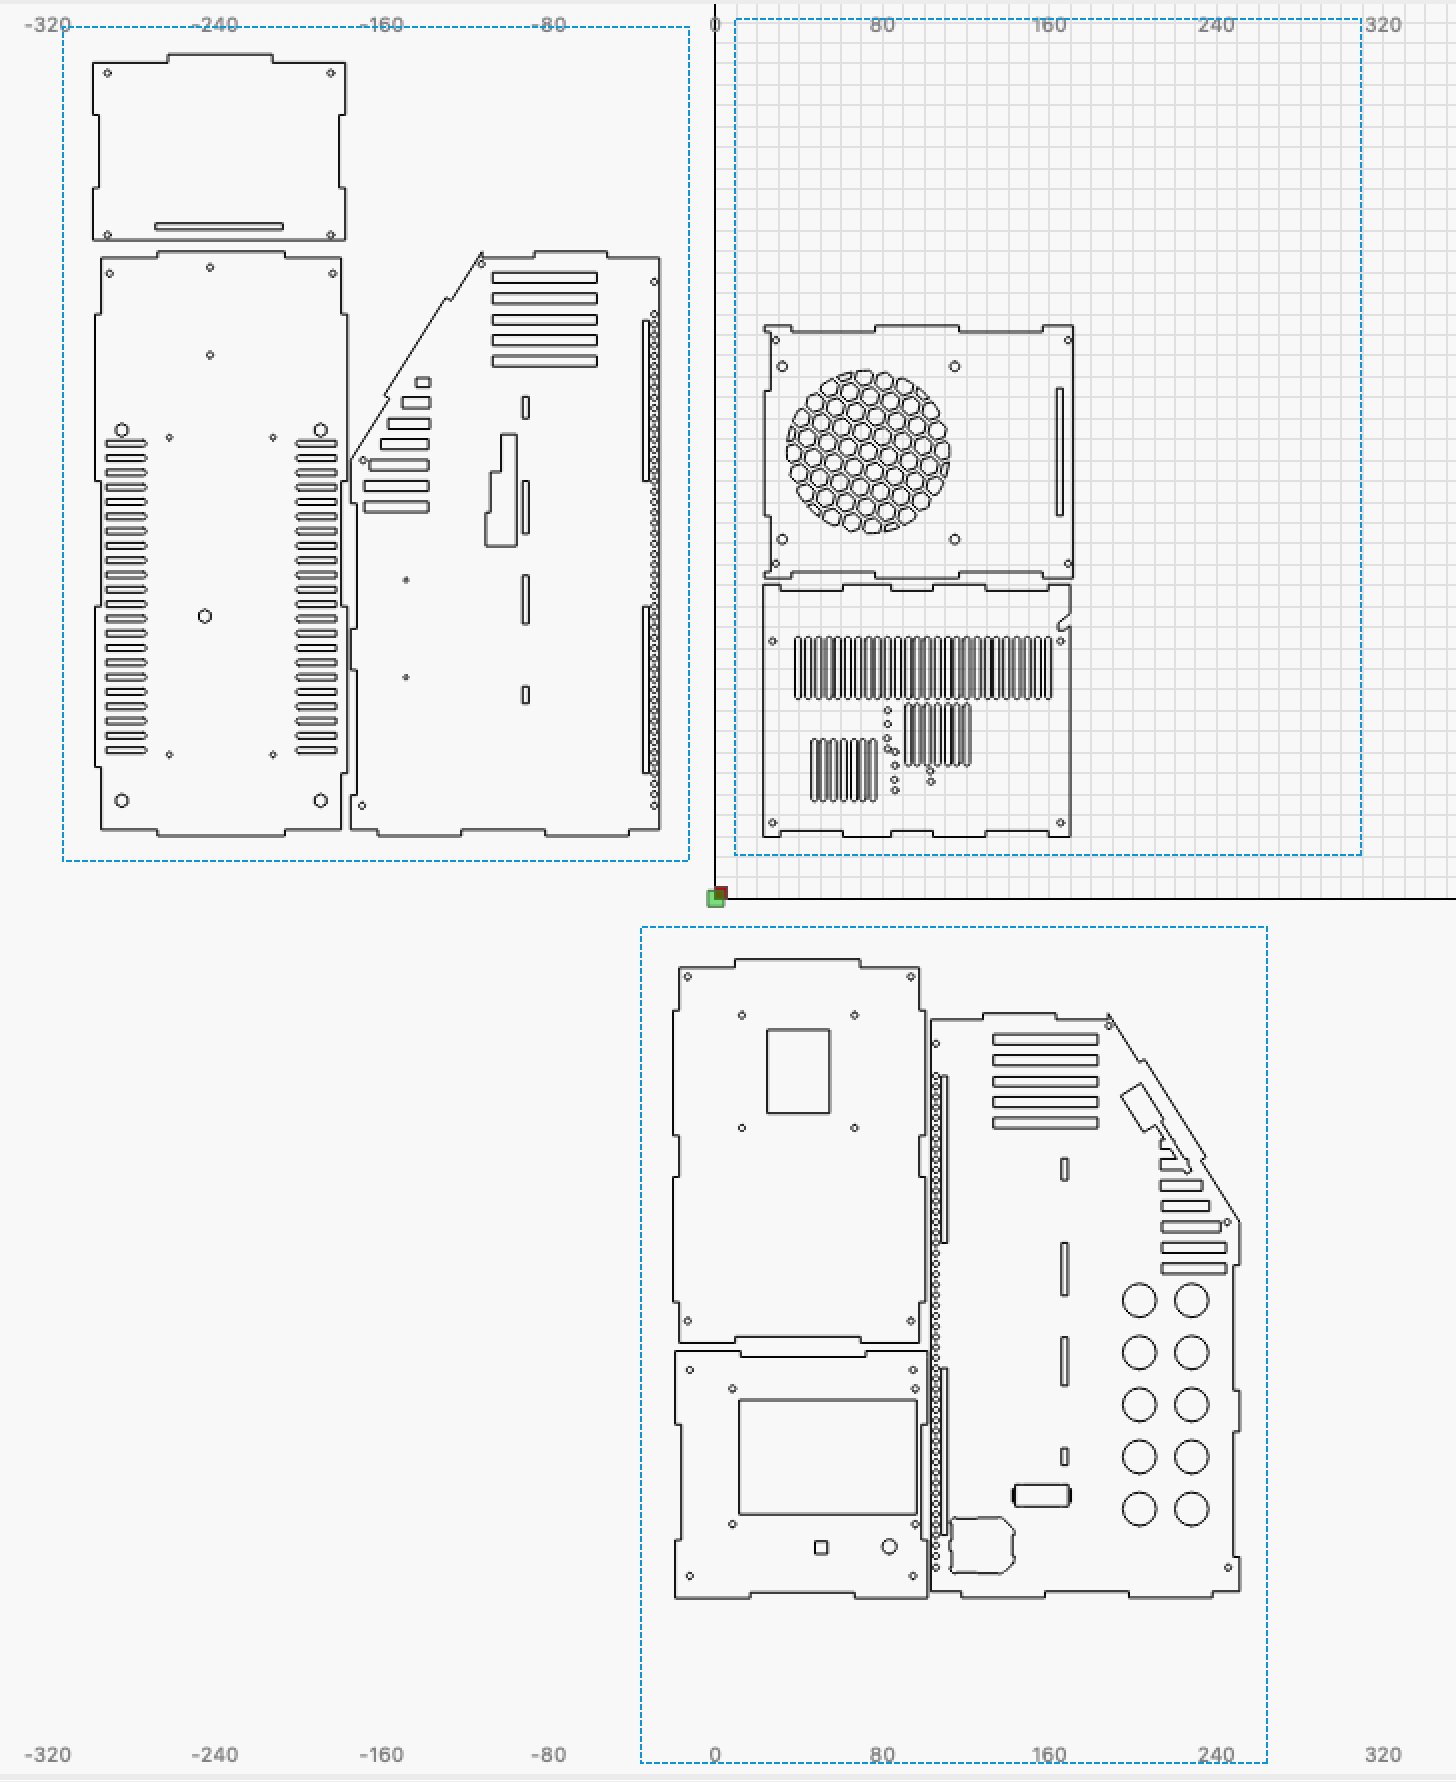
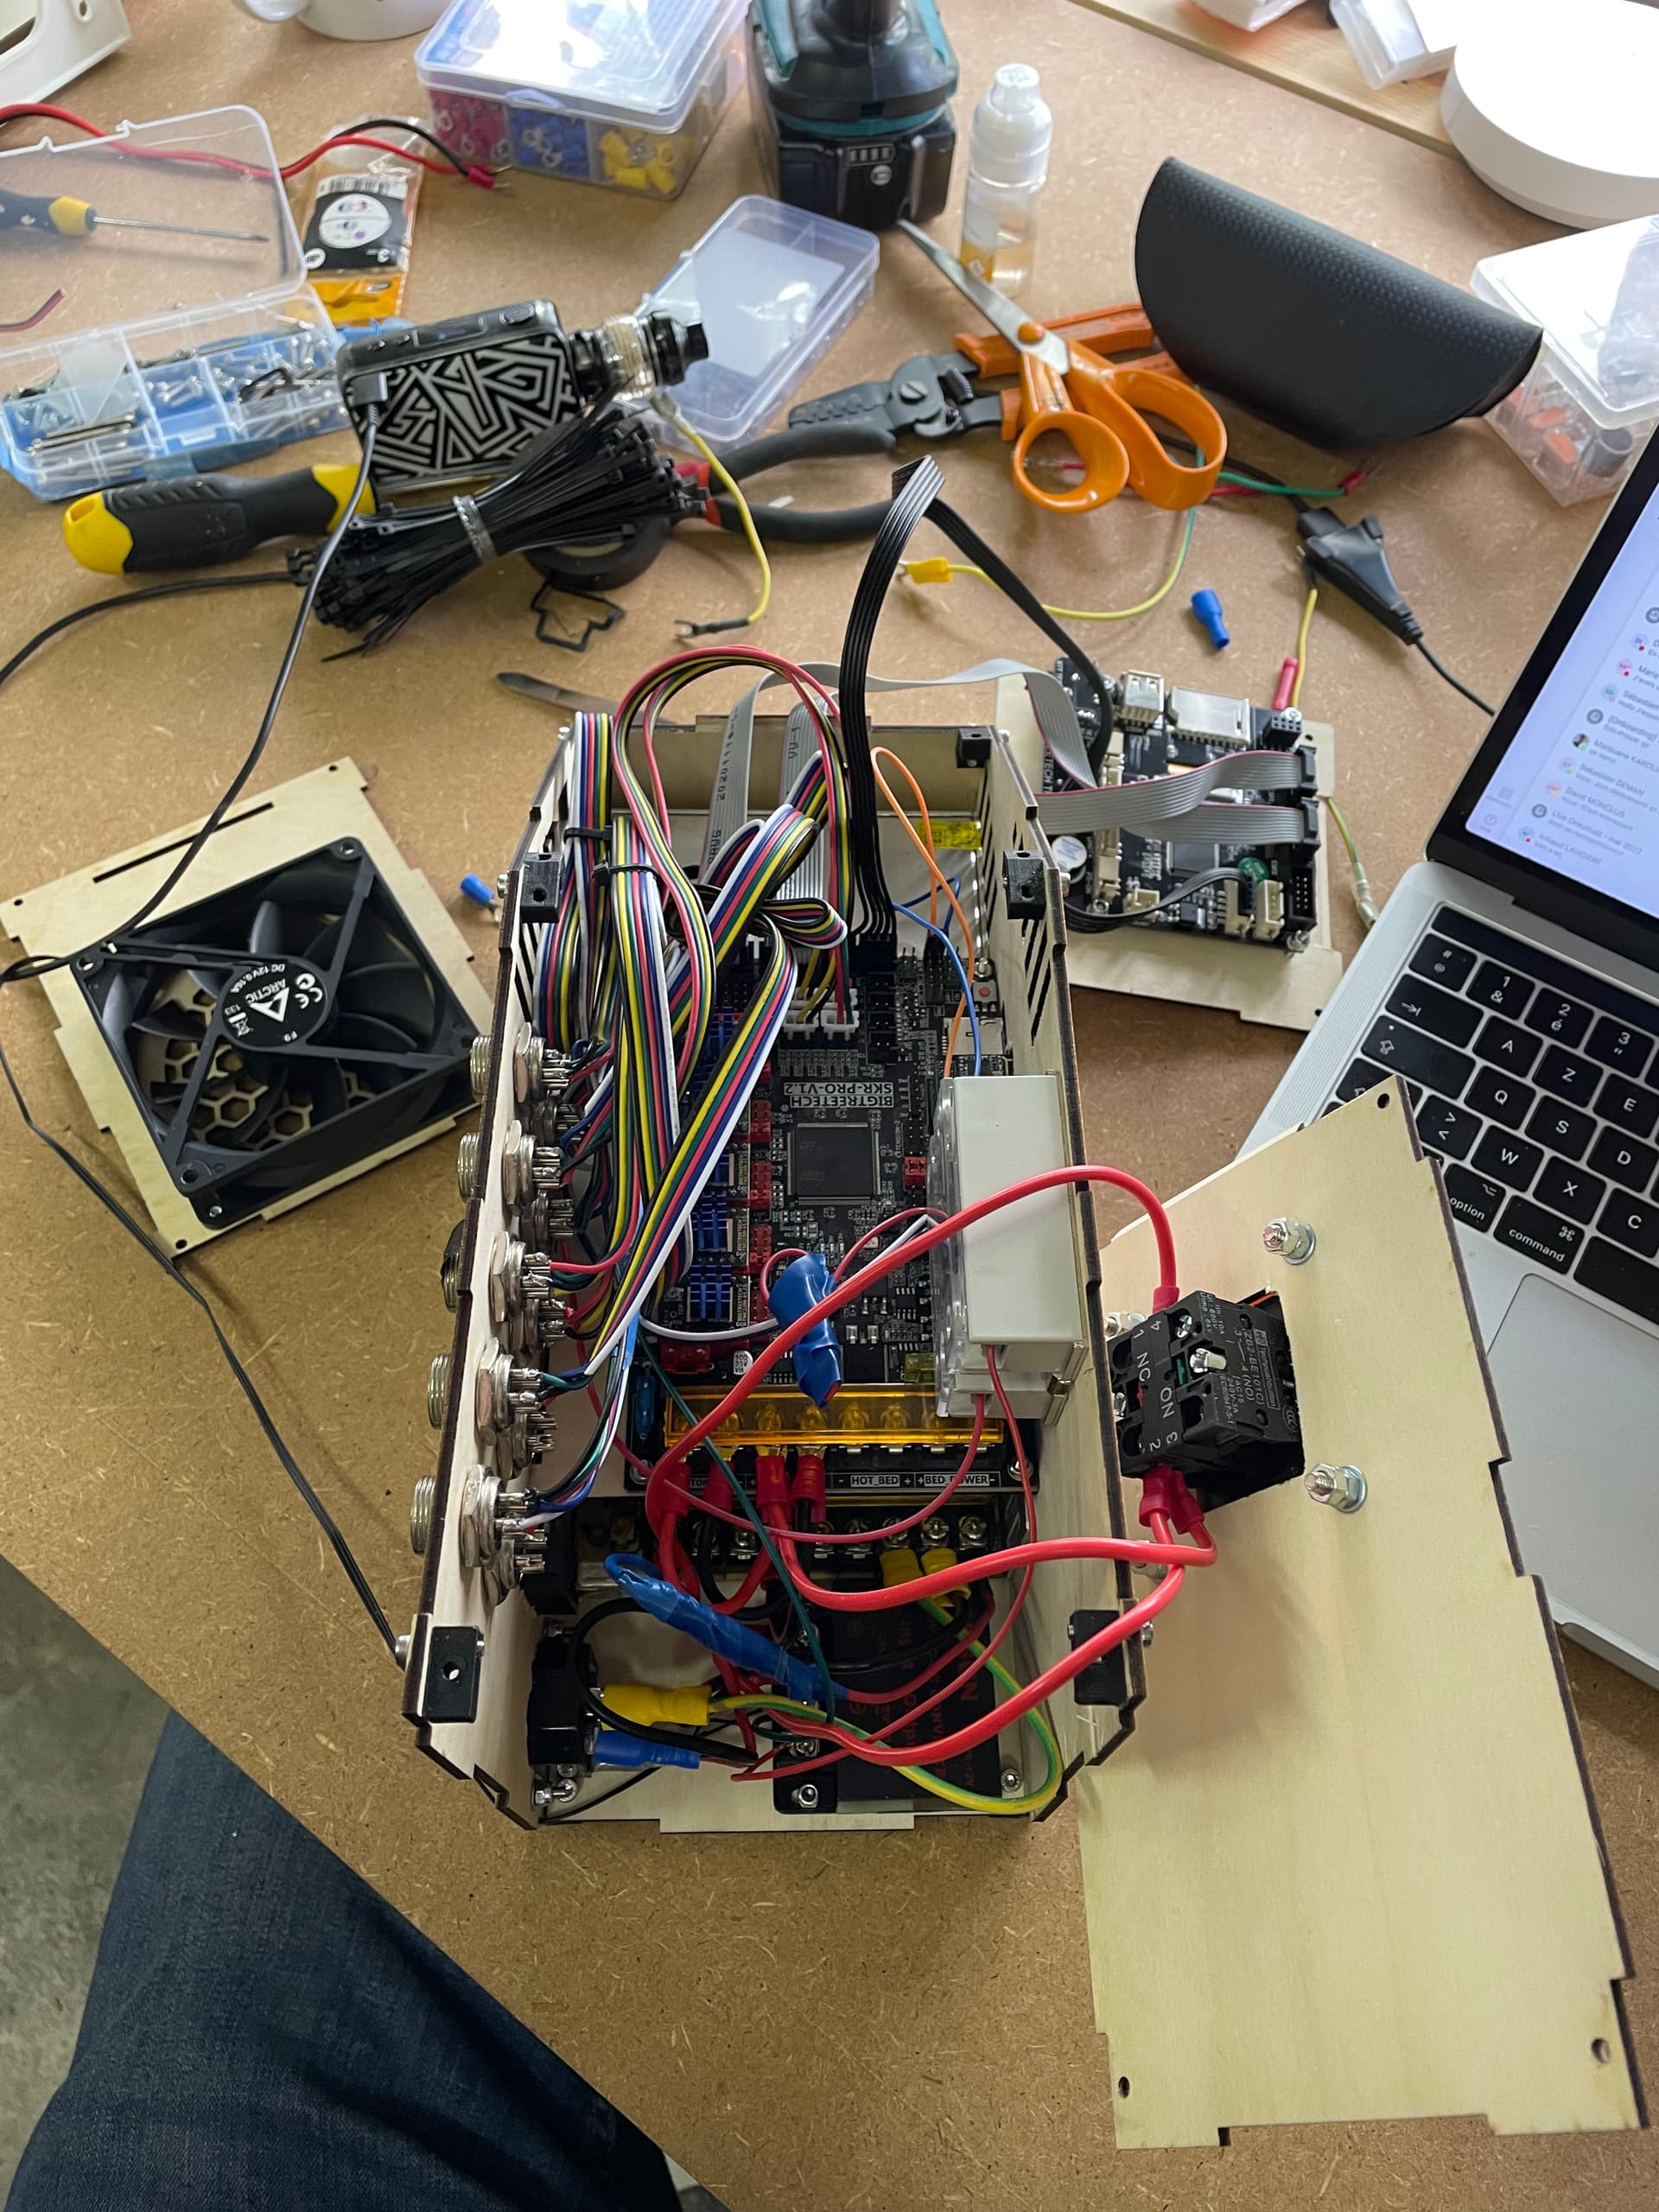
I didn’t want to stay on a temporary solution that lasts forever so I designed from scratch/sketch, a control box under Fusion360 with all the improvements I wanted (eStop, unique 24V power supply, 24V to 12V/10A converter for 12V Neje …) and I laid this flat in DXF for LightBurn.

All electronic components, plugs and switch were found on GrabCad, corresponding on what i’ll use.

I didn’t wanted to 3D print a box as it take ages and Mesh alteration was a burden to adapted it to my needs.
Just a few “false nut” pieces were made in 3D printing to hold it all together with M3 screws(can be seen on 1st Fusion picture)

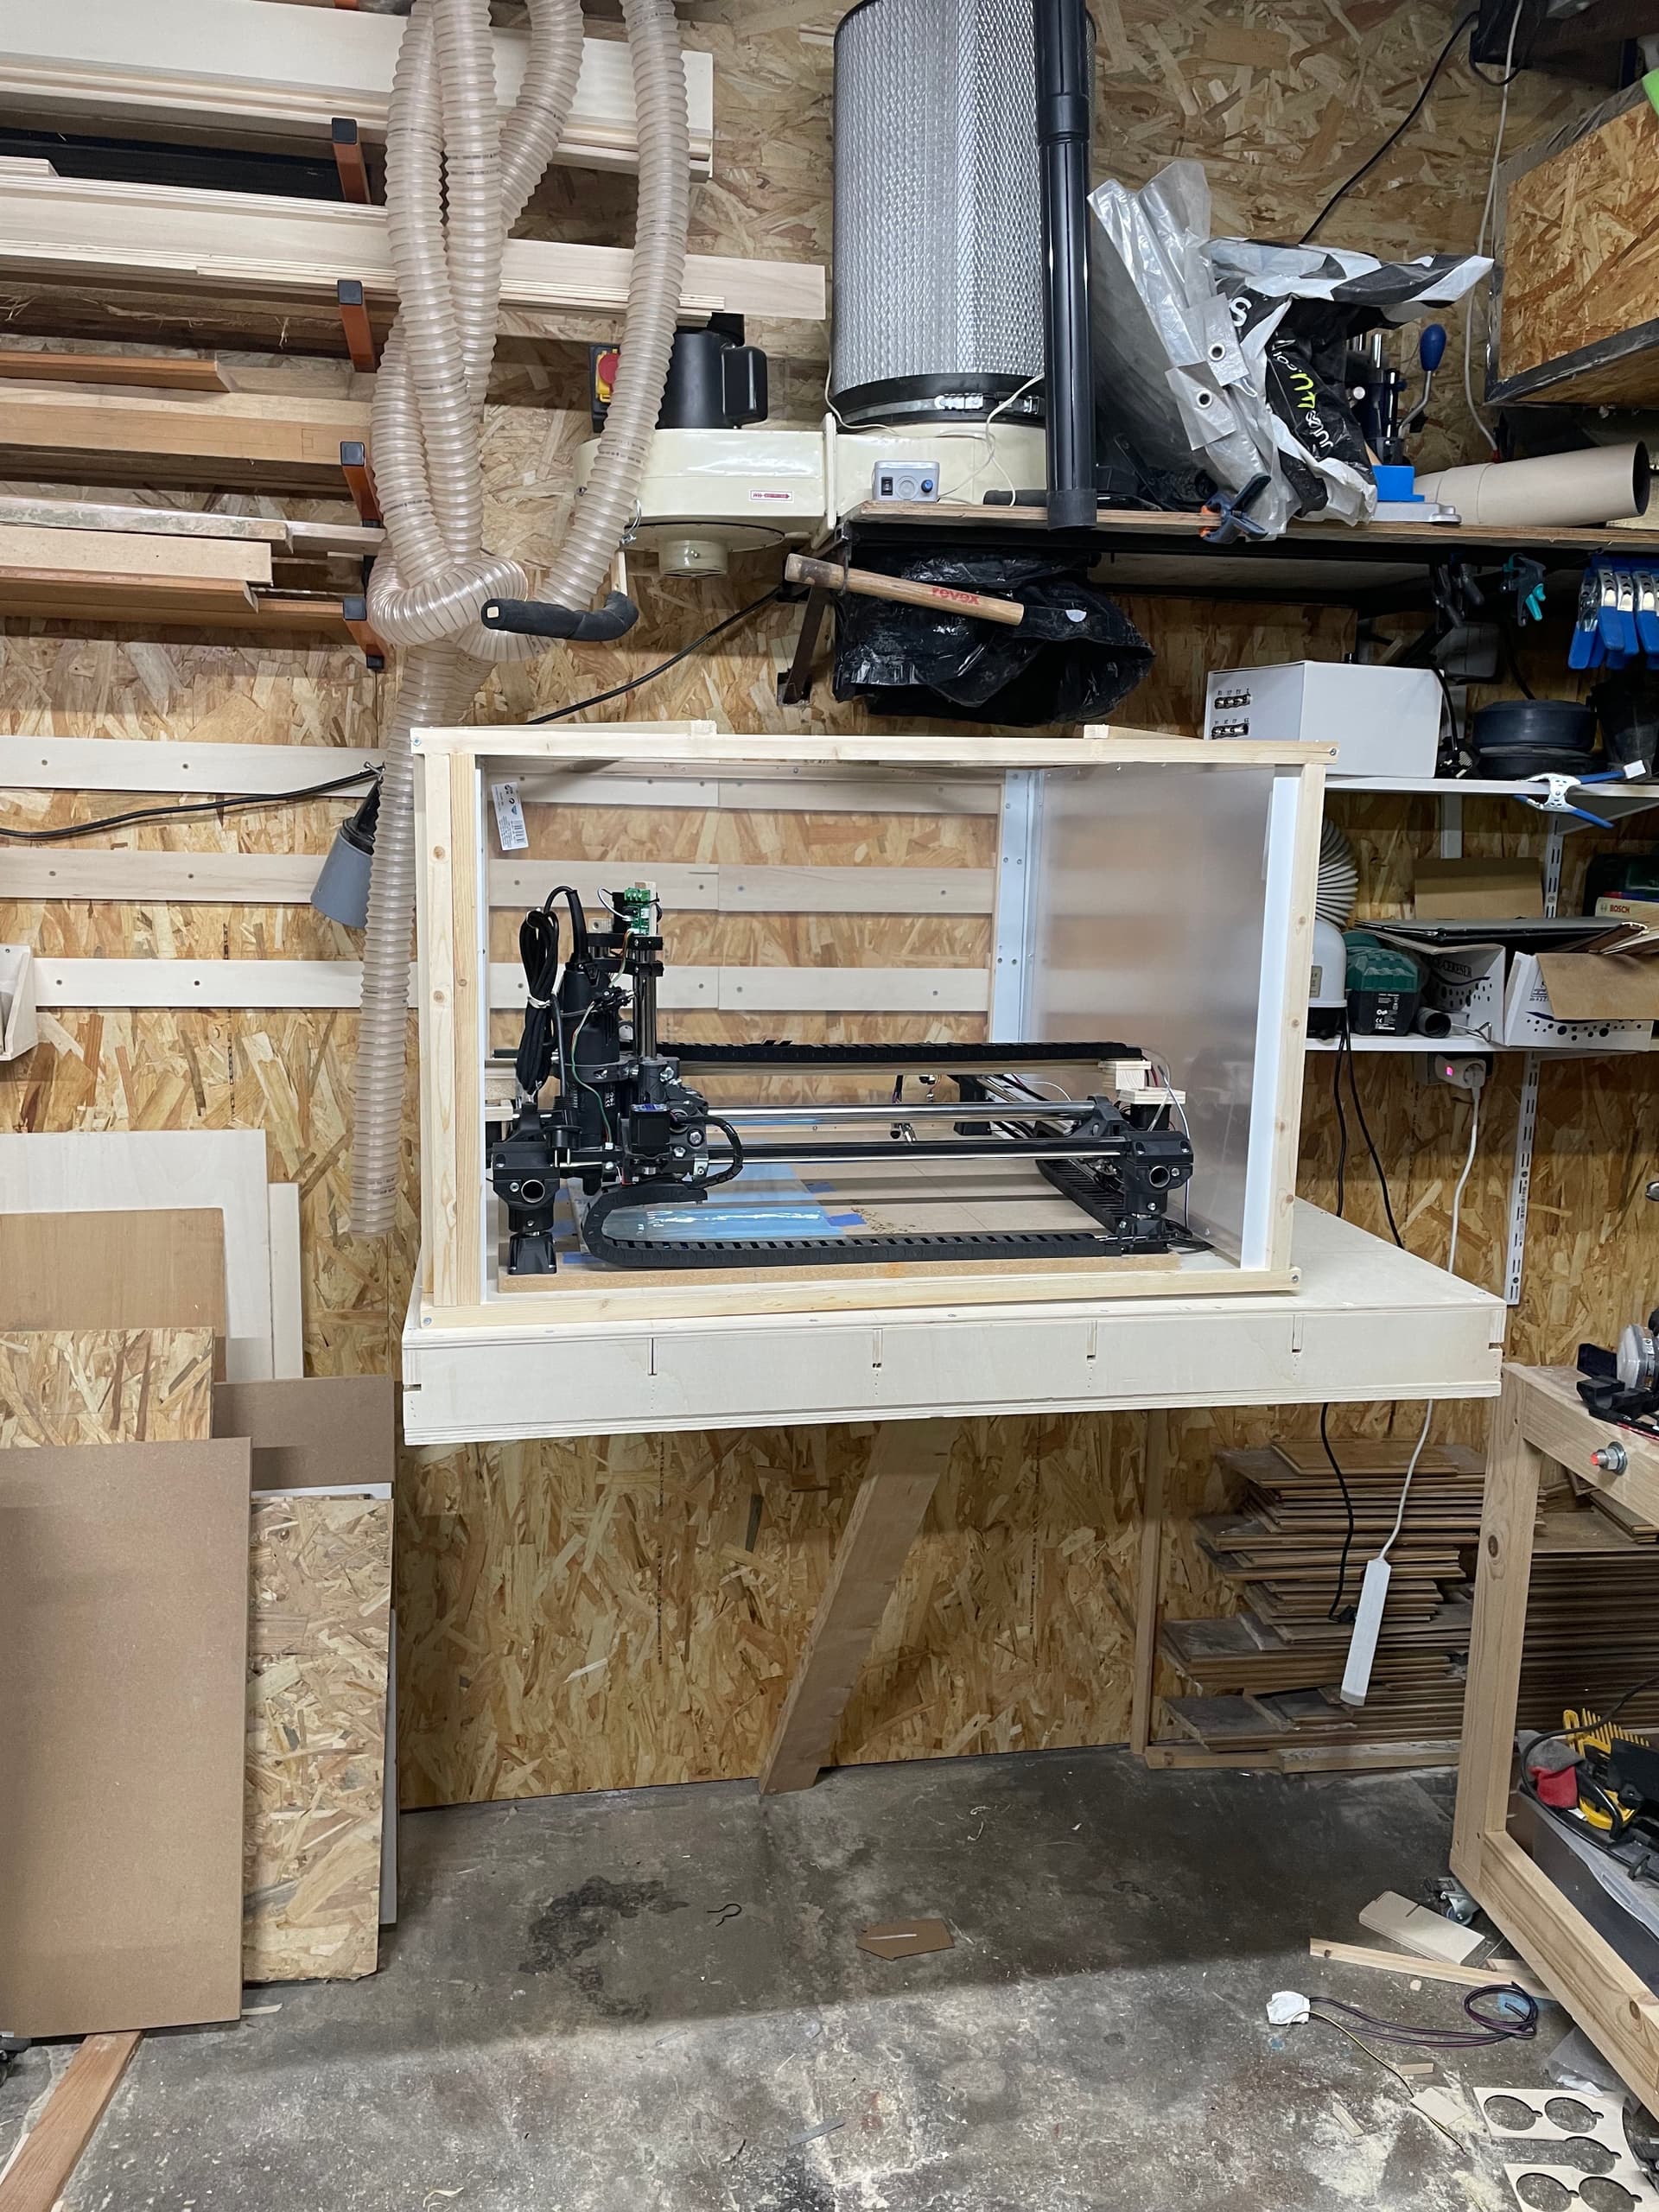
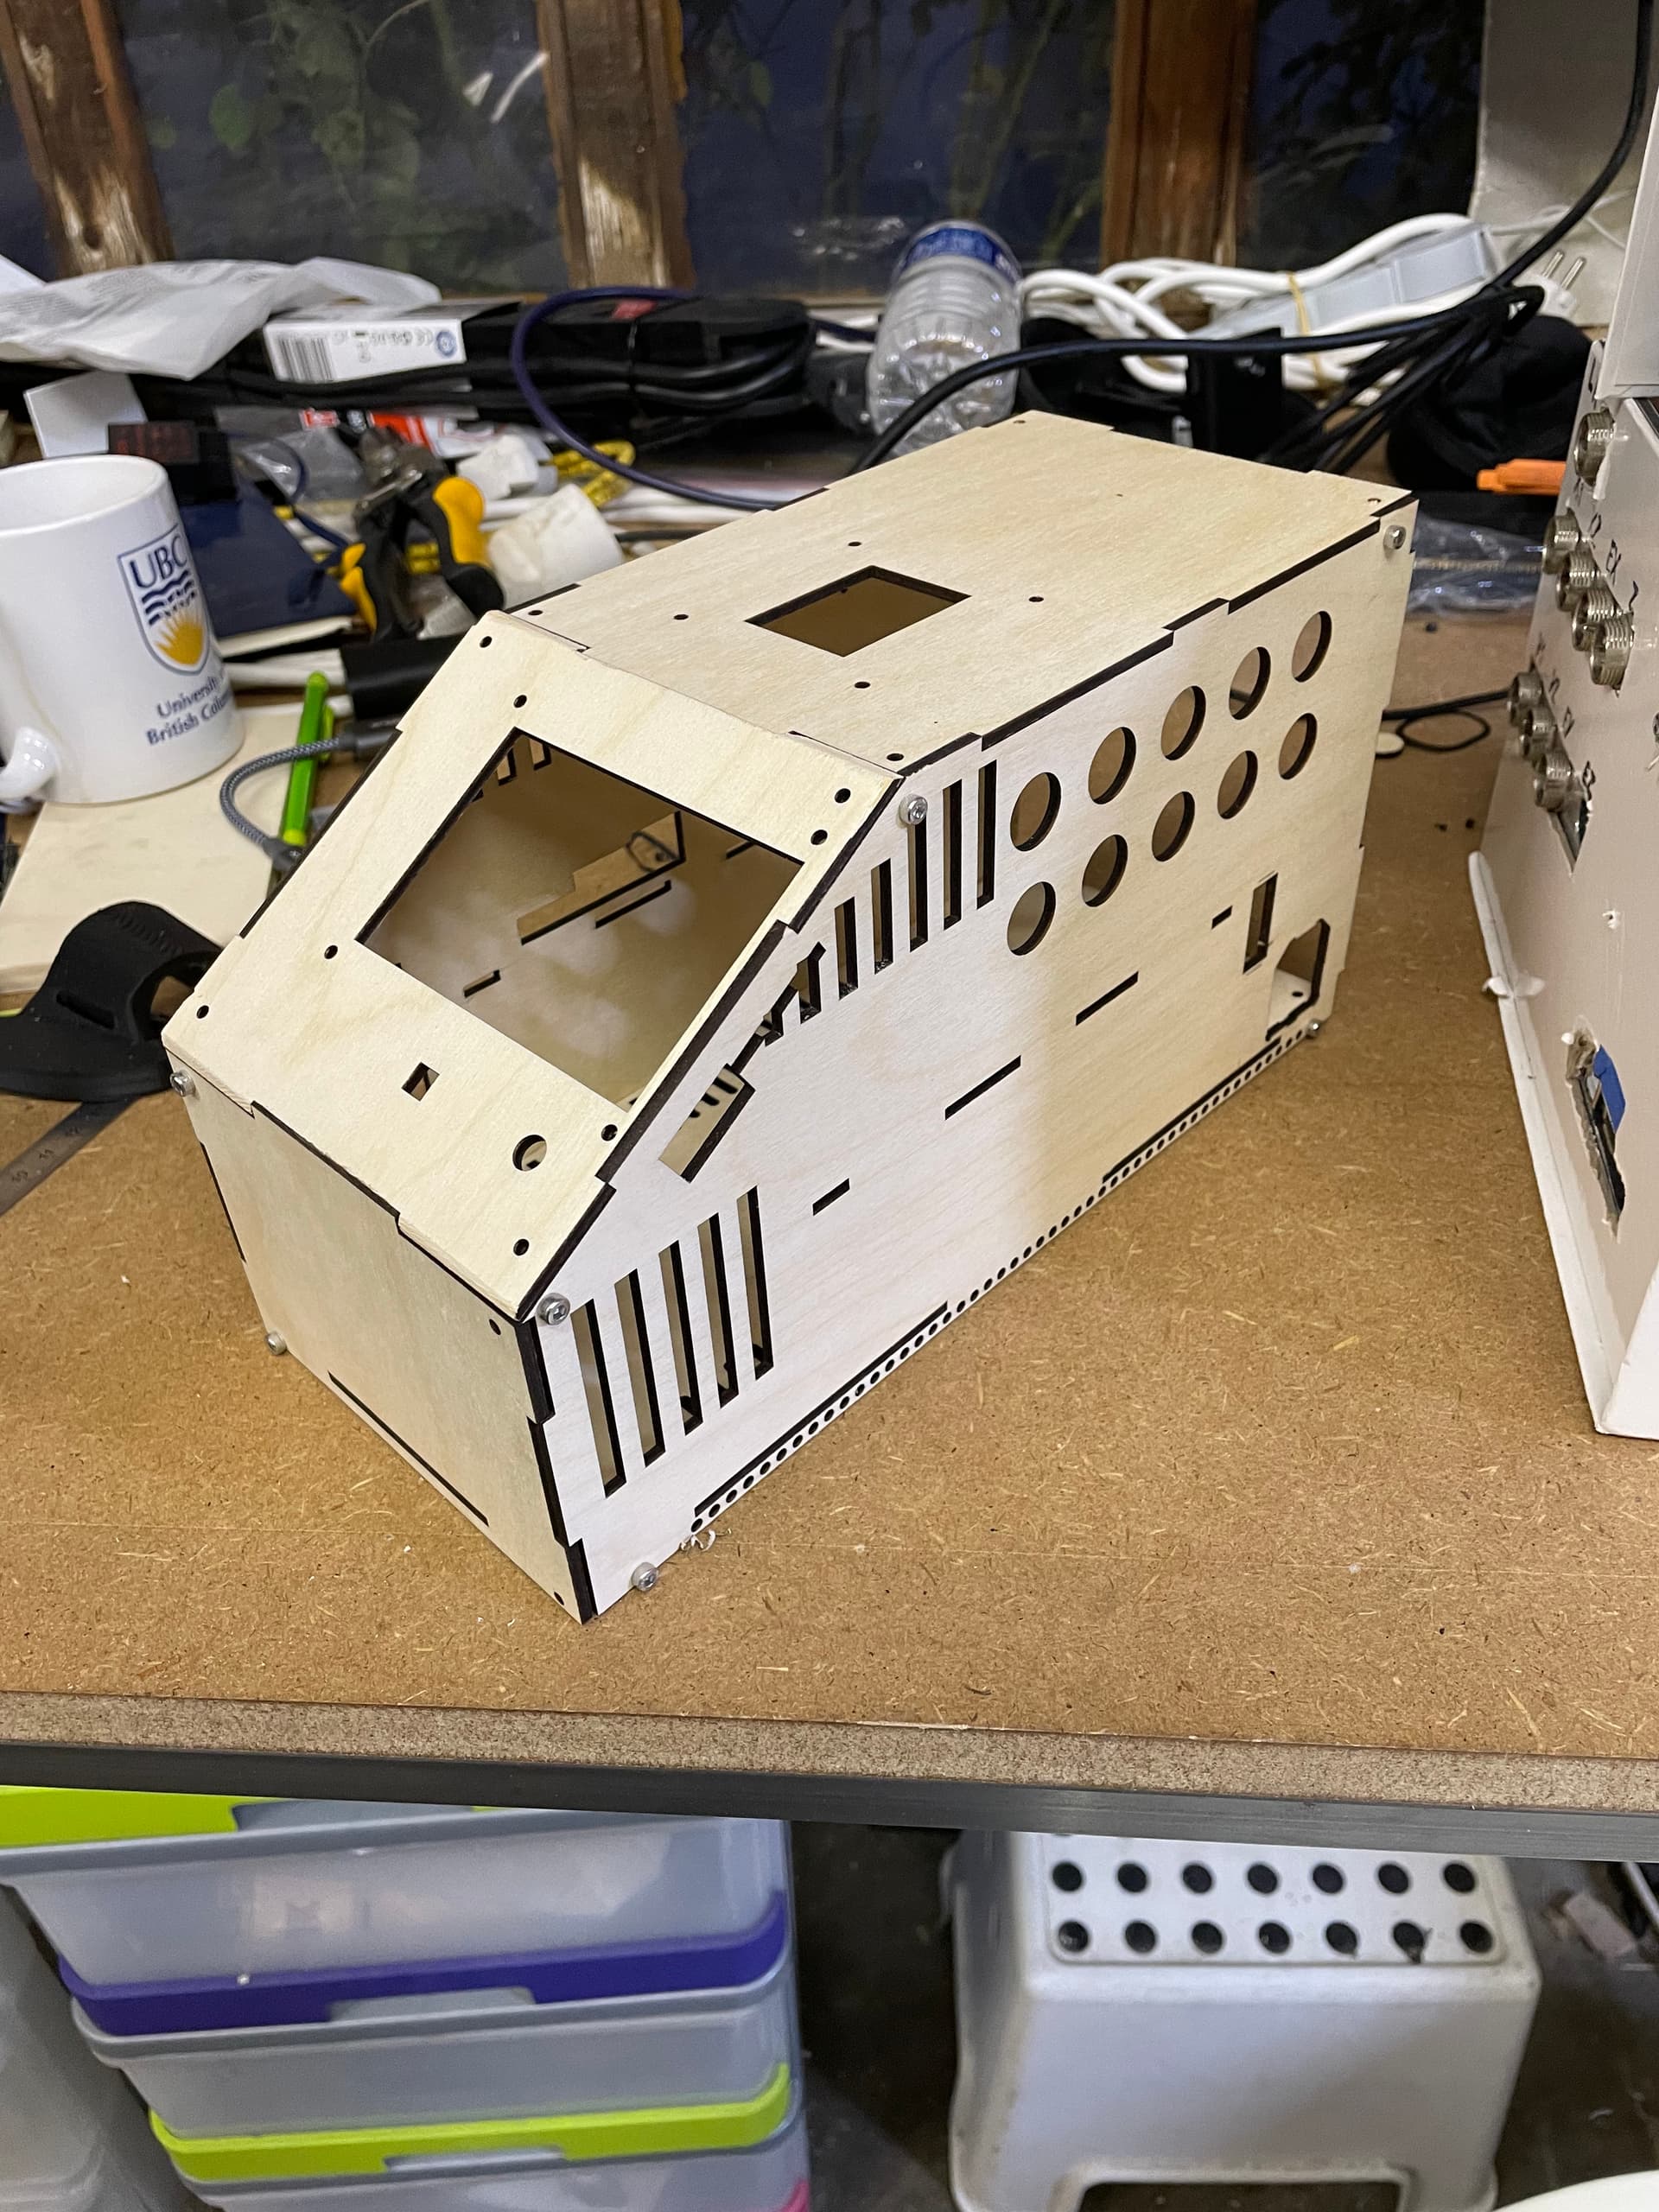
I laser burned the whole thing out of 3mm plywood, a bit less of 3 hours to cut everything( i used a conservative slow 100mm/min speed at 100% to ensure every cut would pop out) and dry assembly was perfect, no laser Kerf issue !

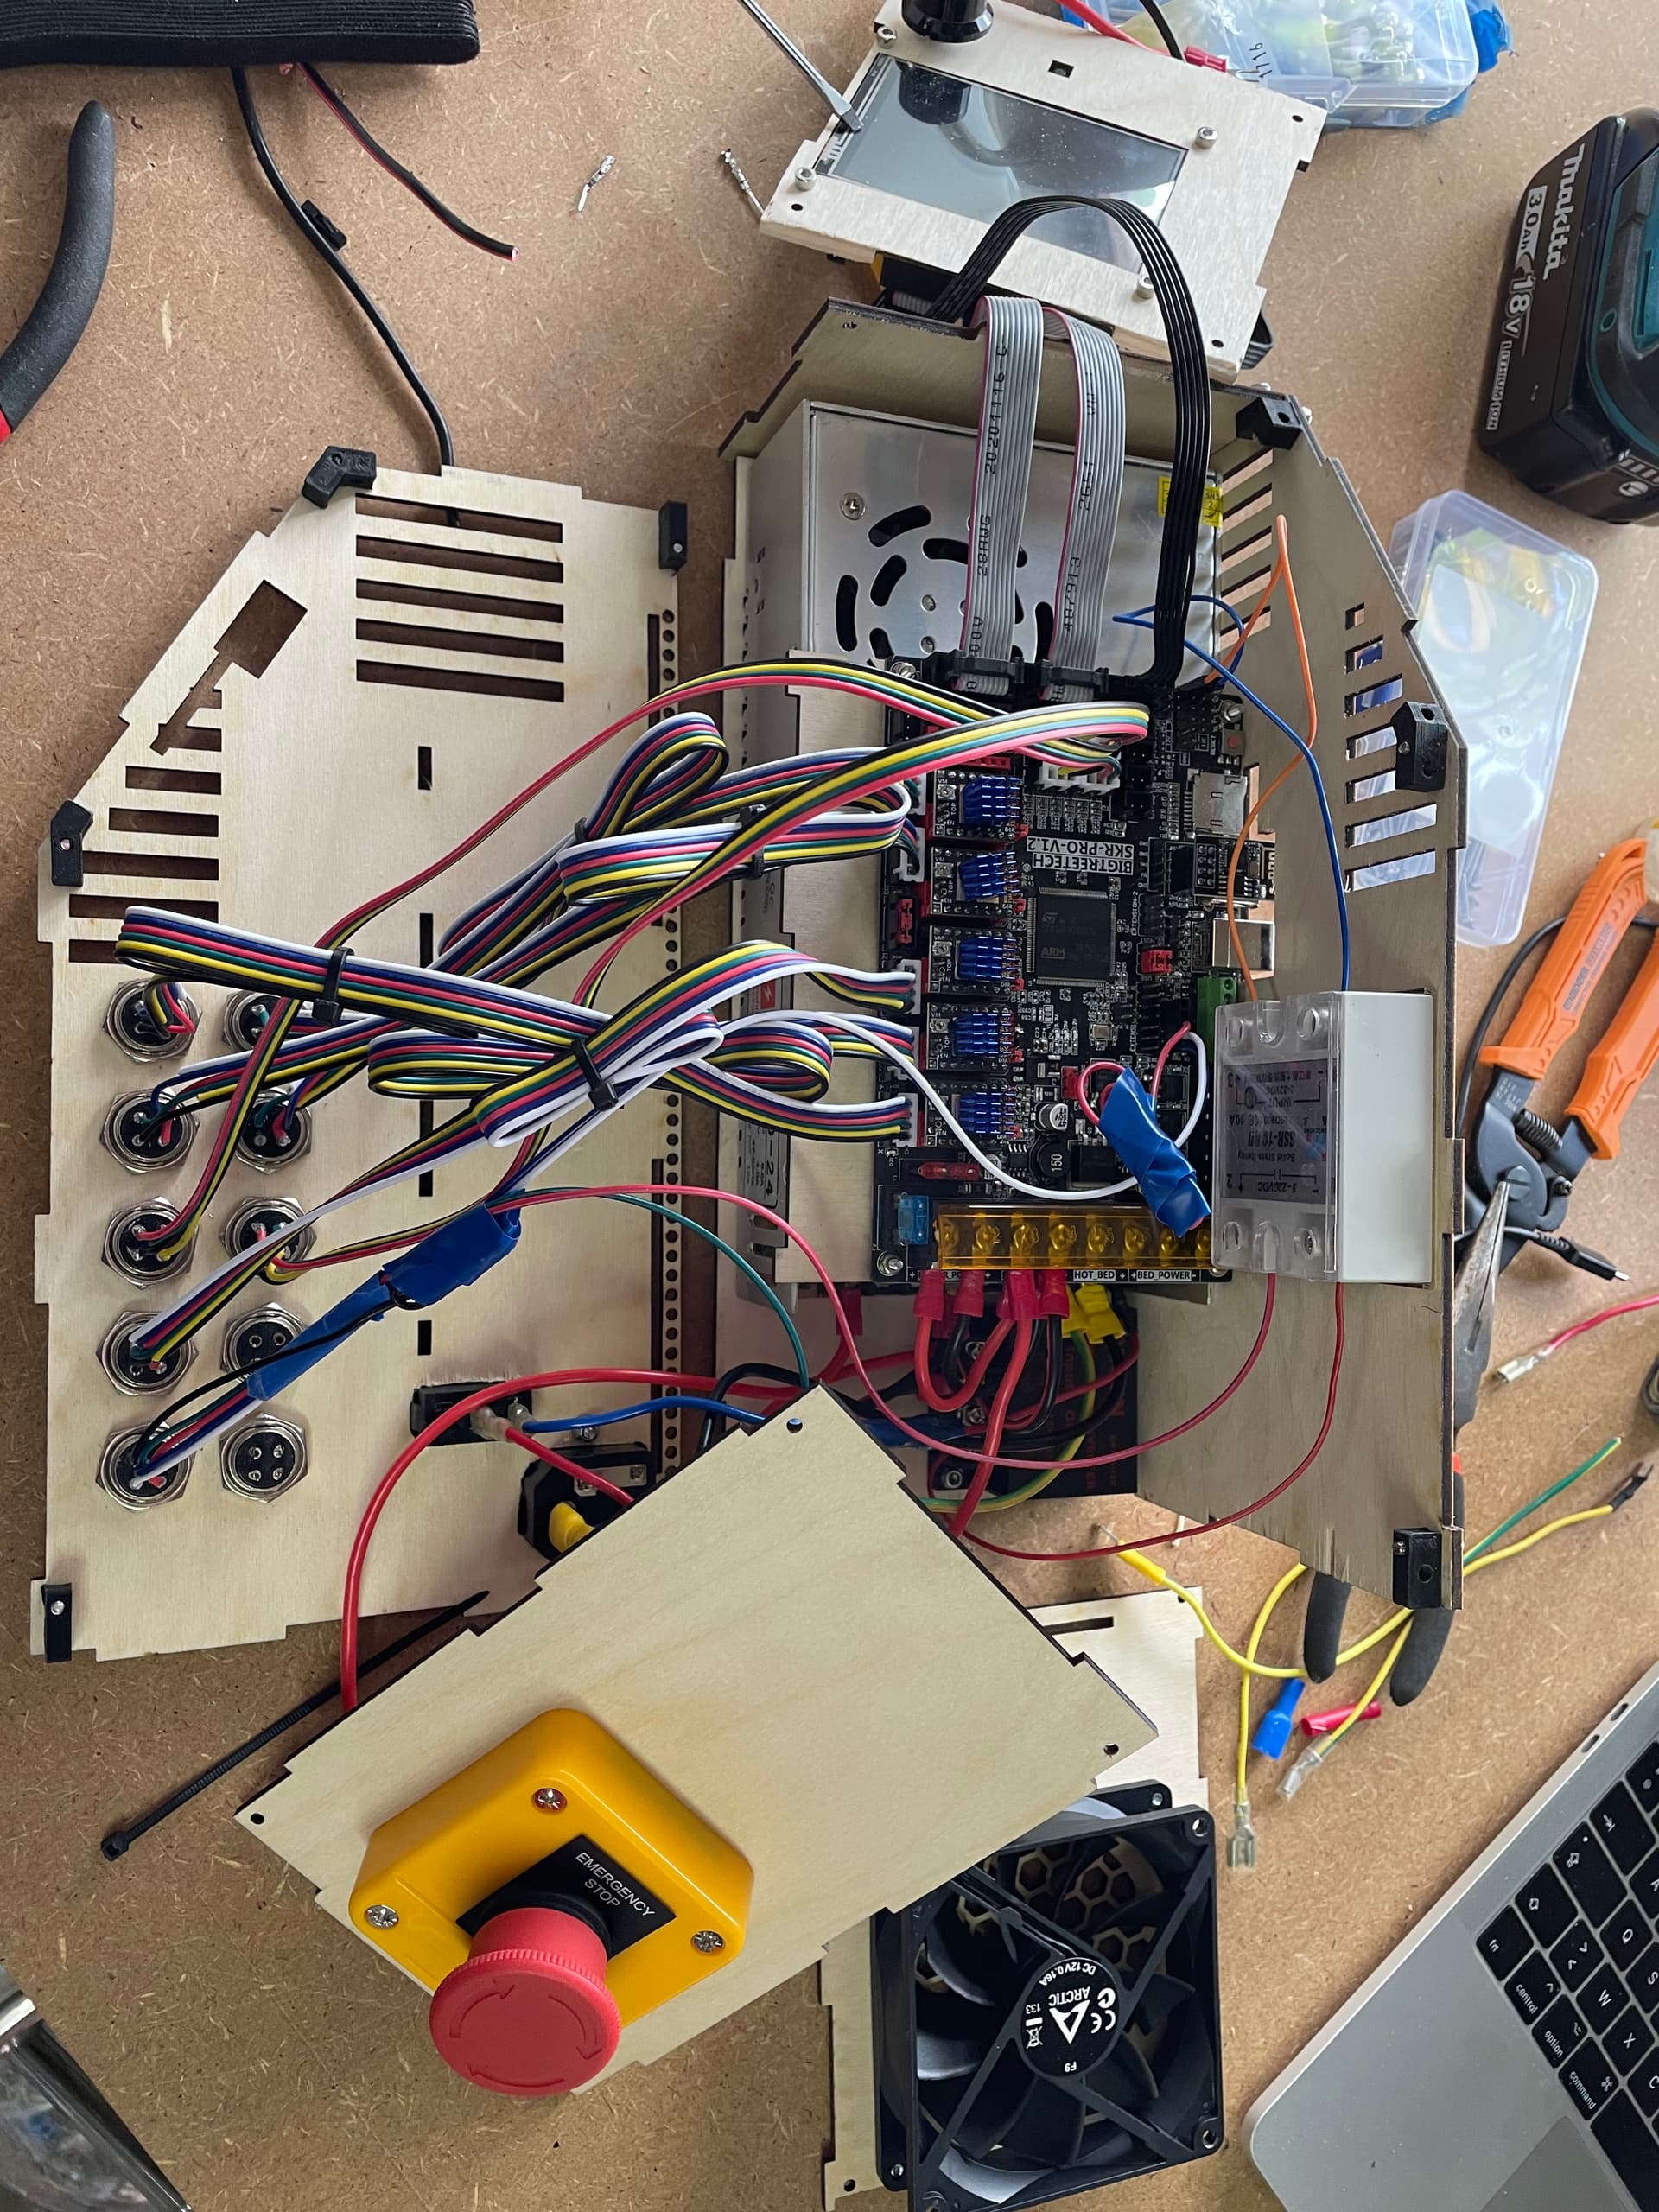
And the filling of the box with all the components was perfect too !

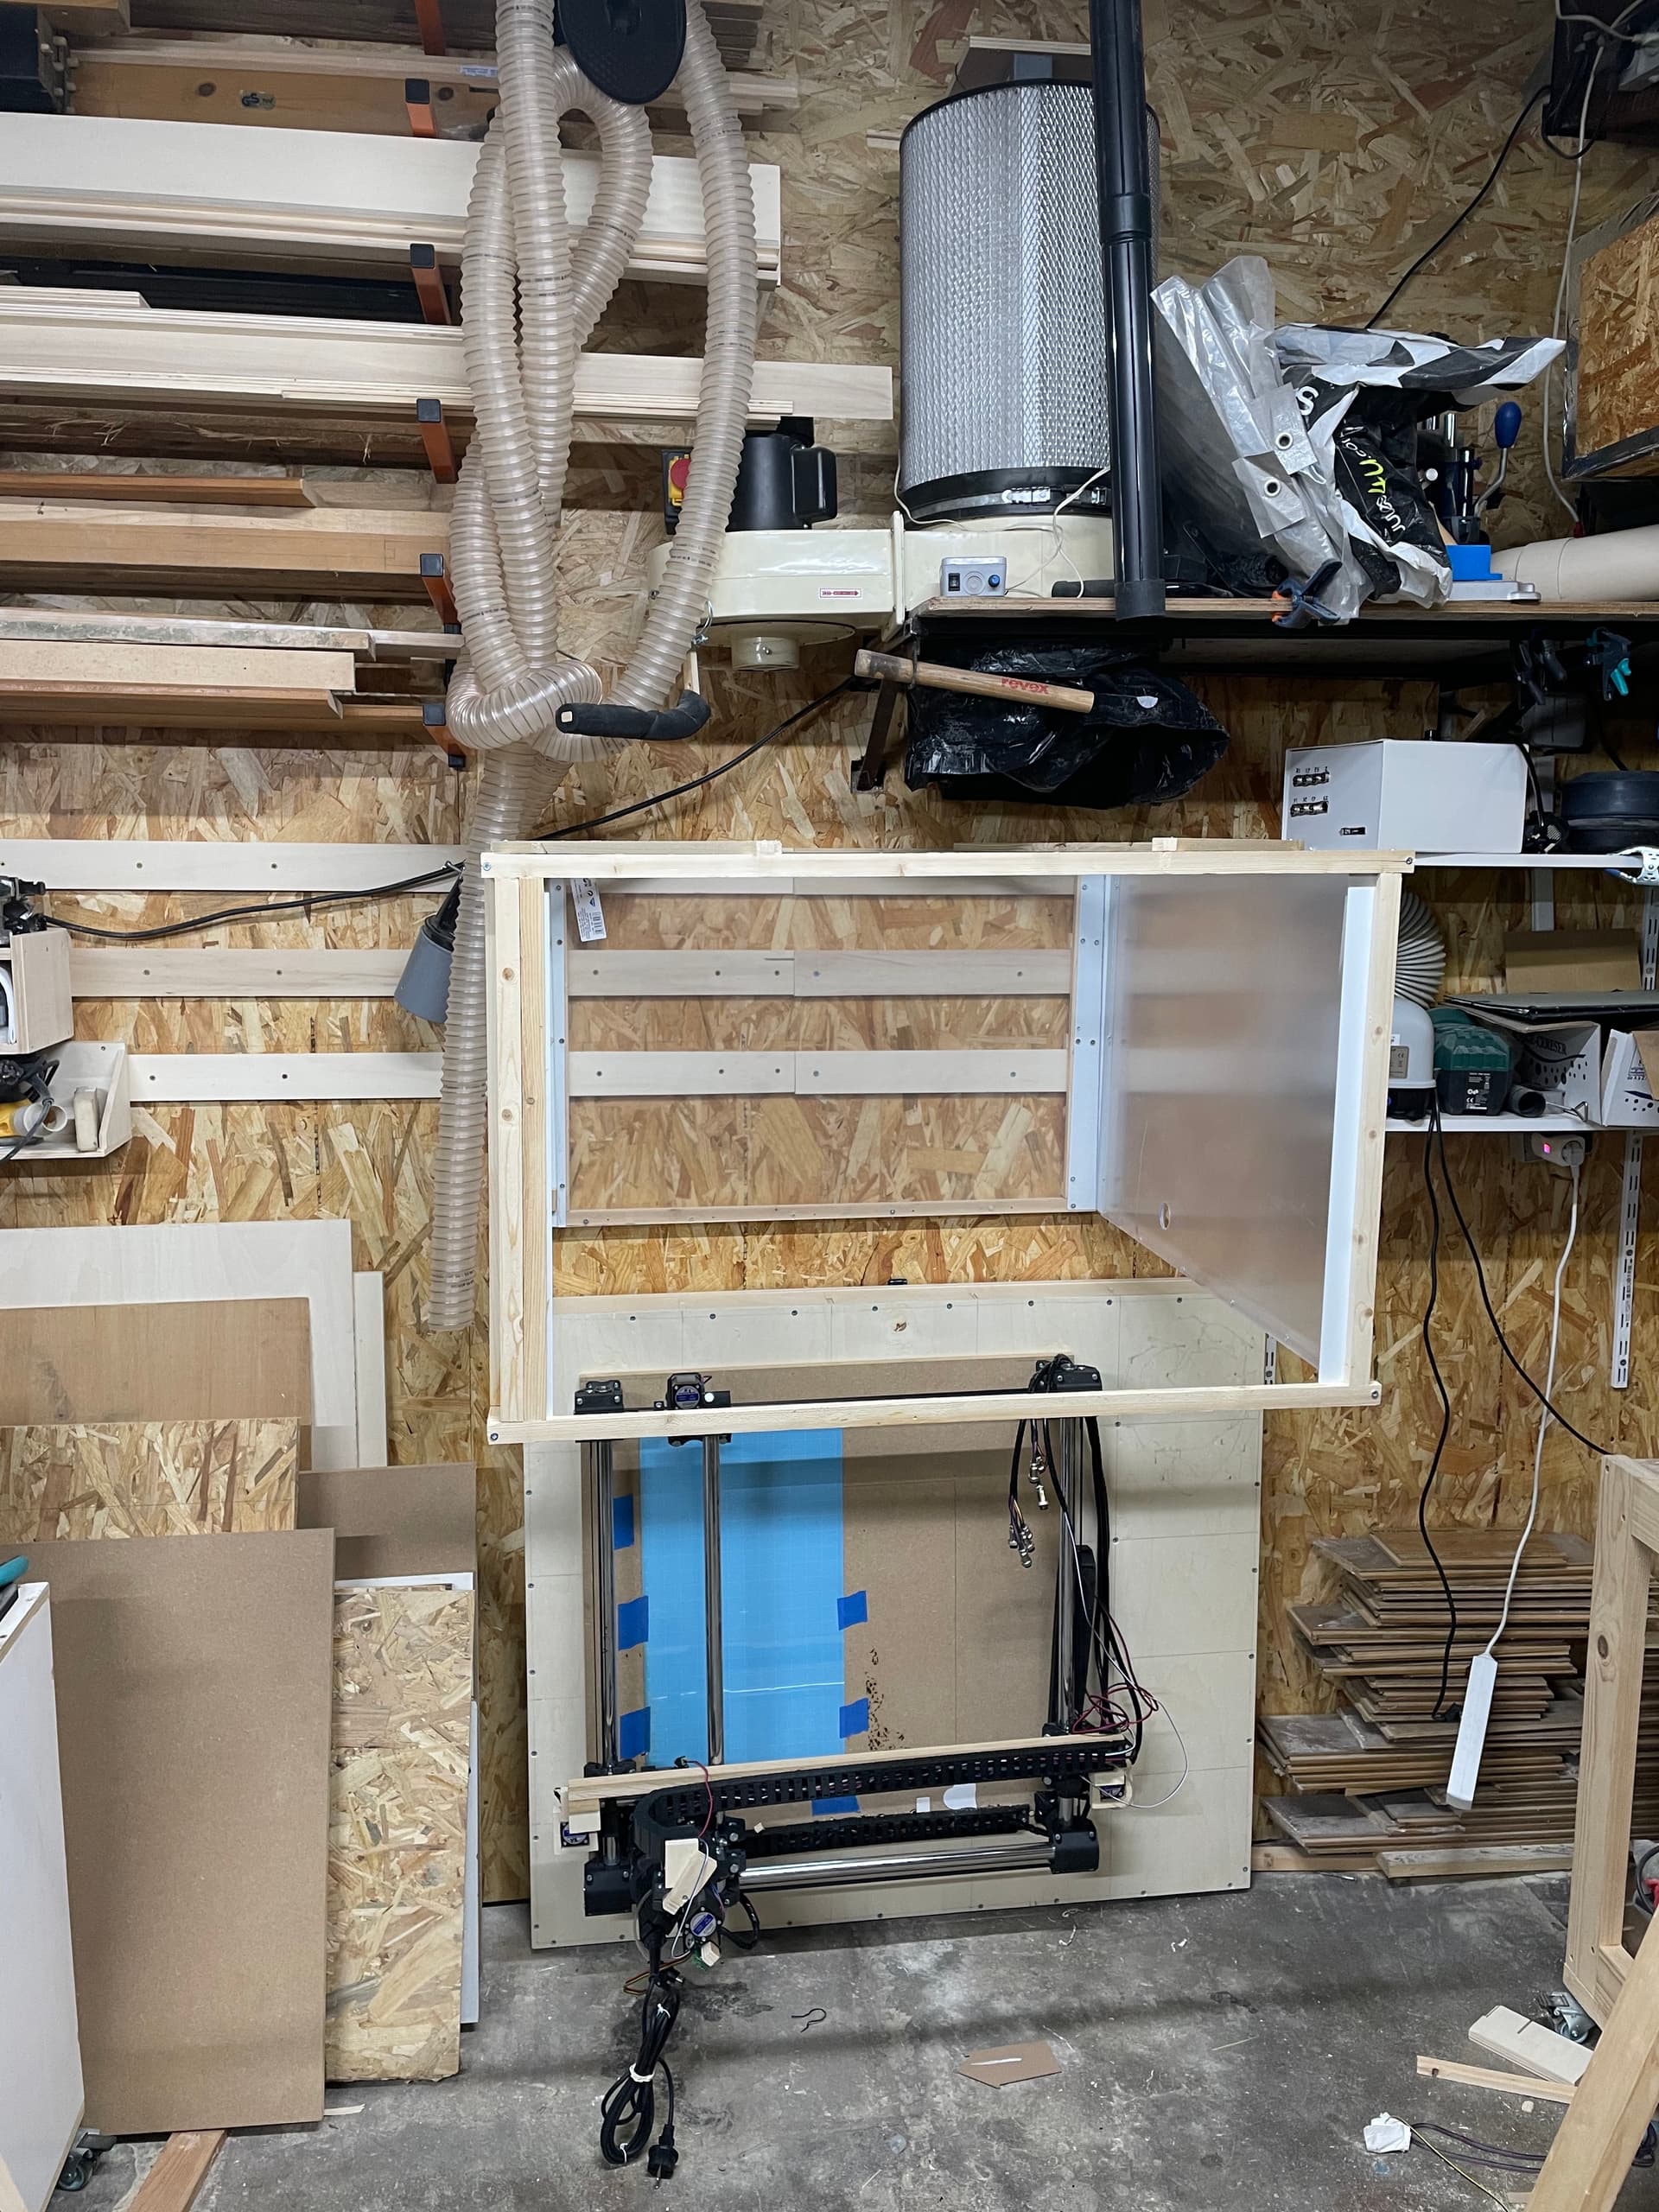
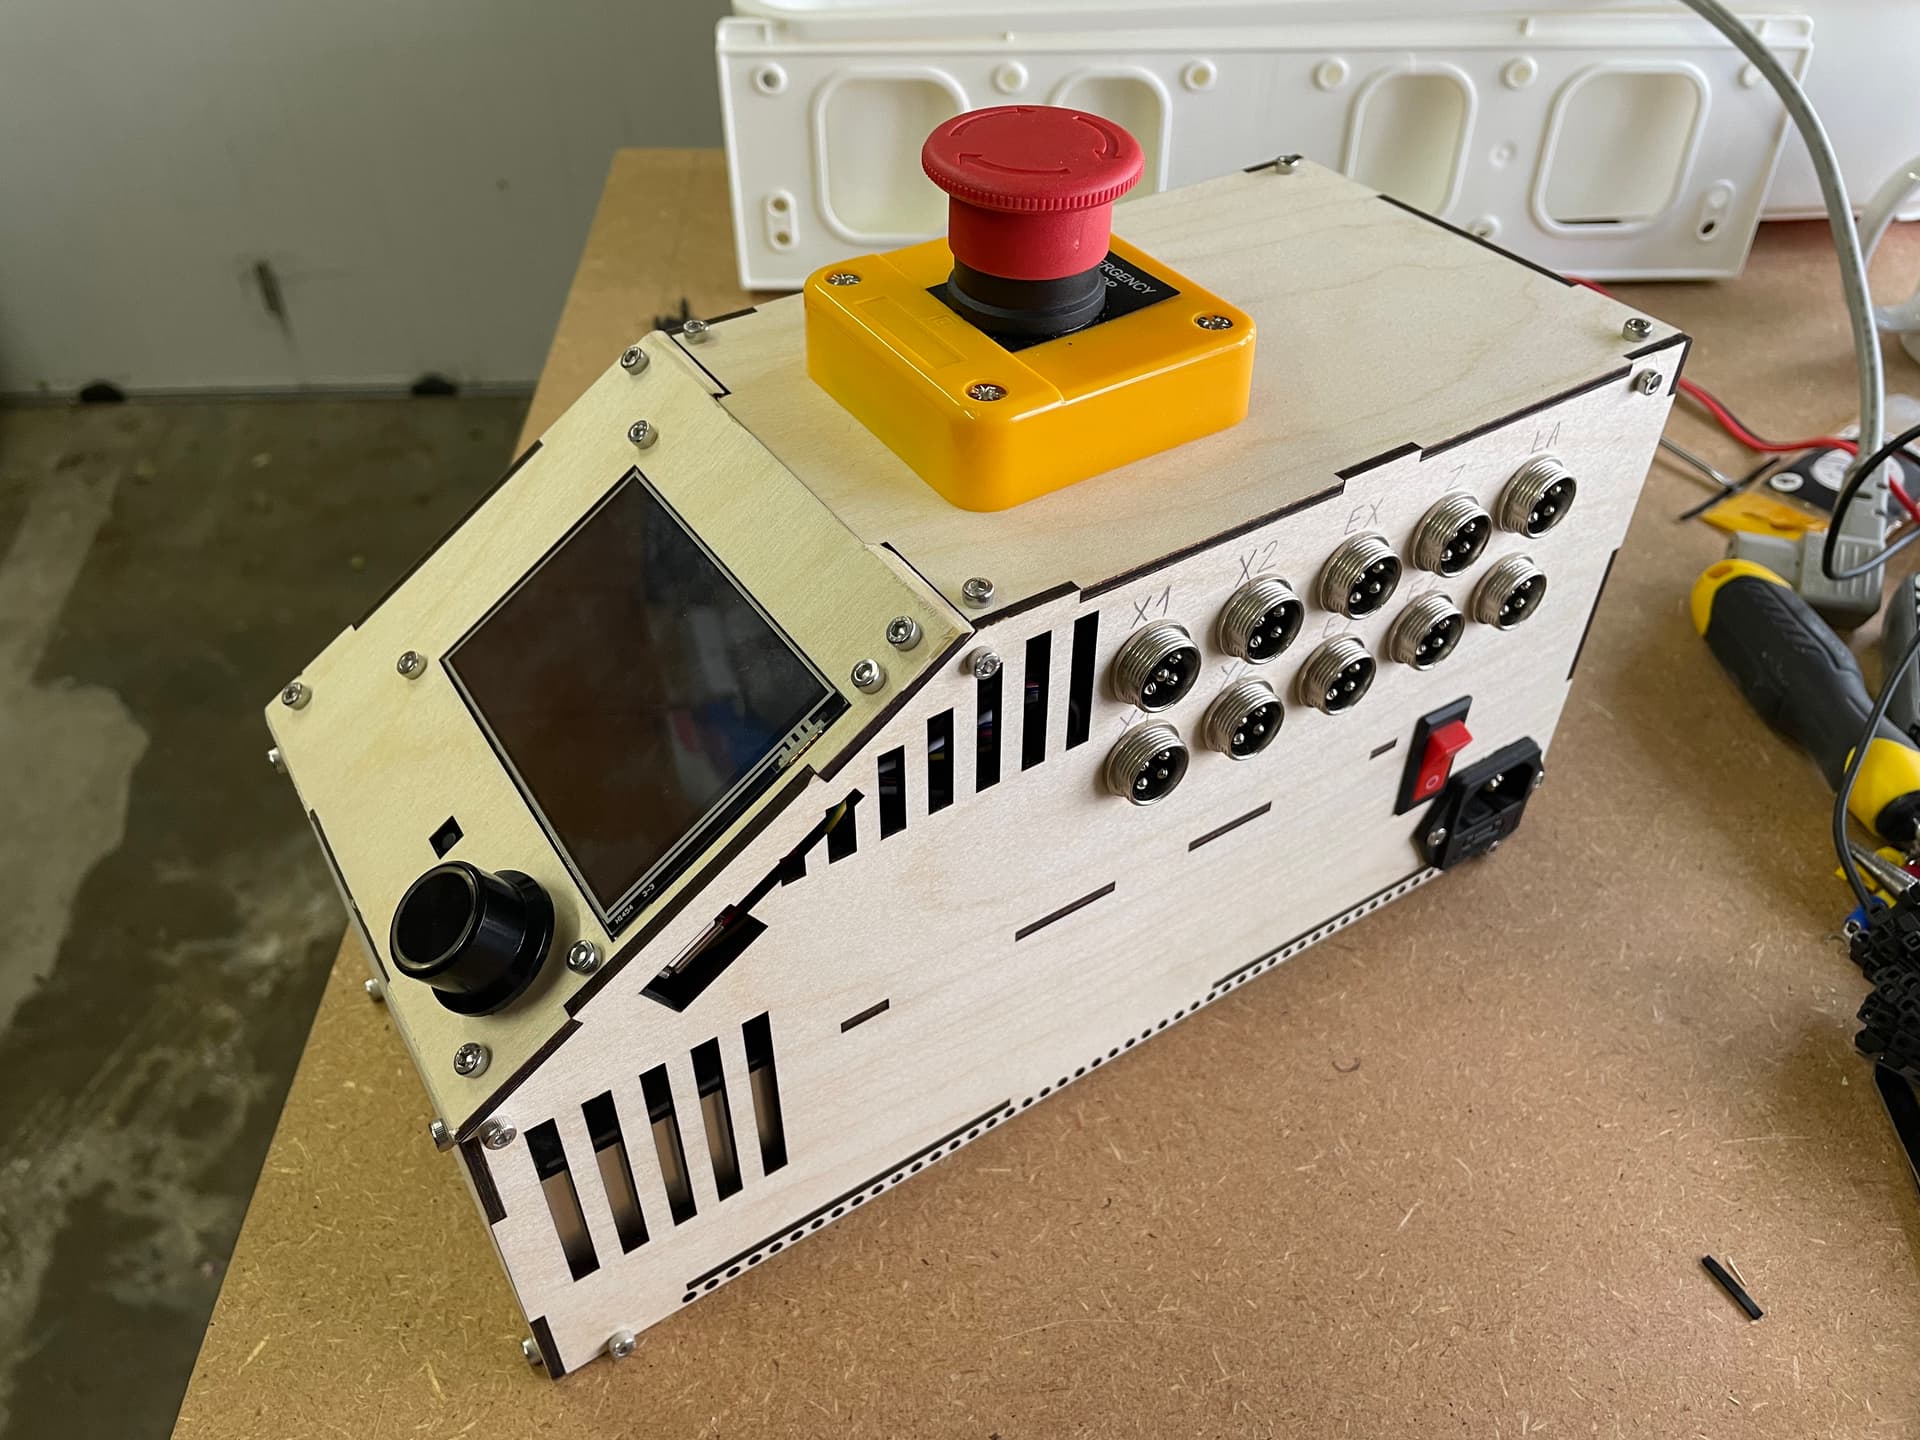
I had to postprocess by triming/sanding the top and bottom sides of the screen panel to get correct angles as laser only do perpendicular cuts.

There is still some imperfections like aviation plugs labels i forgot to engrave or too large usb/sdcard slots but i will deal with it.
Only my motor wiring that are too long and messy, not great for drivers ventilation so I plan to shorten them and crimp them again in JST one day or another…

About the eStop i didn’t plugged it directly on the 220V power supply but in interruption of 24V lines because when I shut off the power supply some built in capacitors make the SKR board, motors and lasers still powered on for ~2 to 3 seconds, anoying in case of emergency…
I use the red switch for turning off power supply.

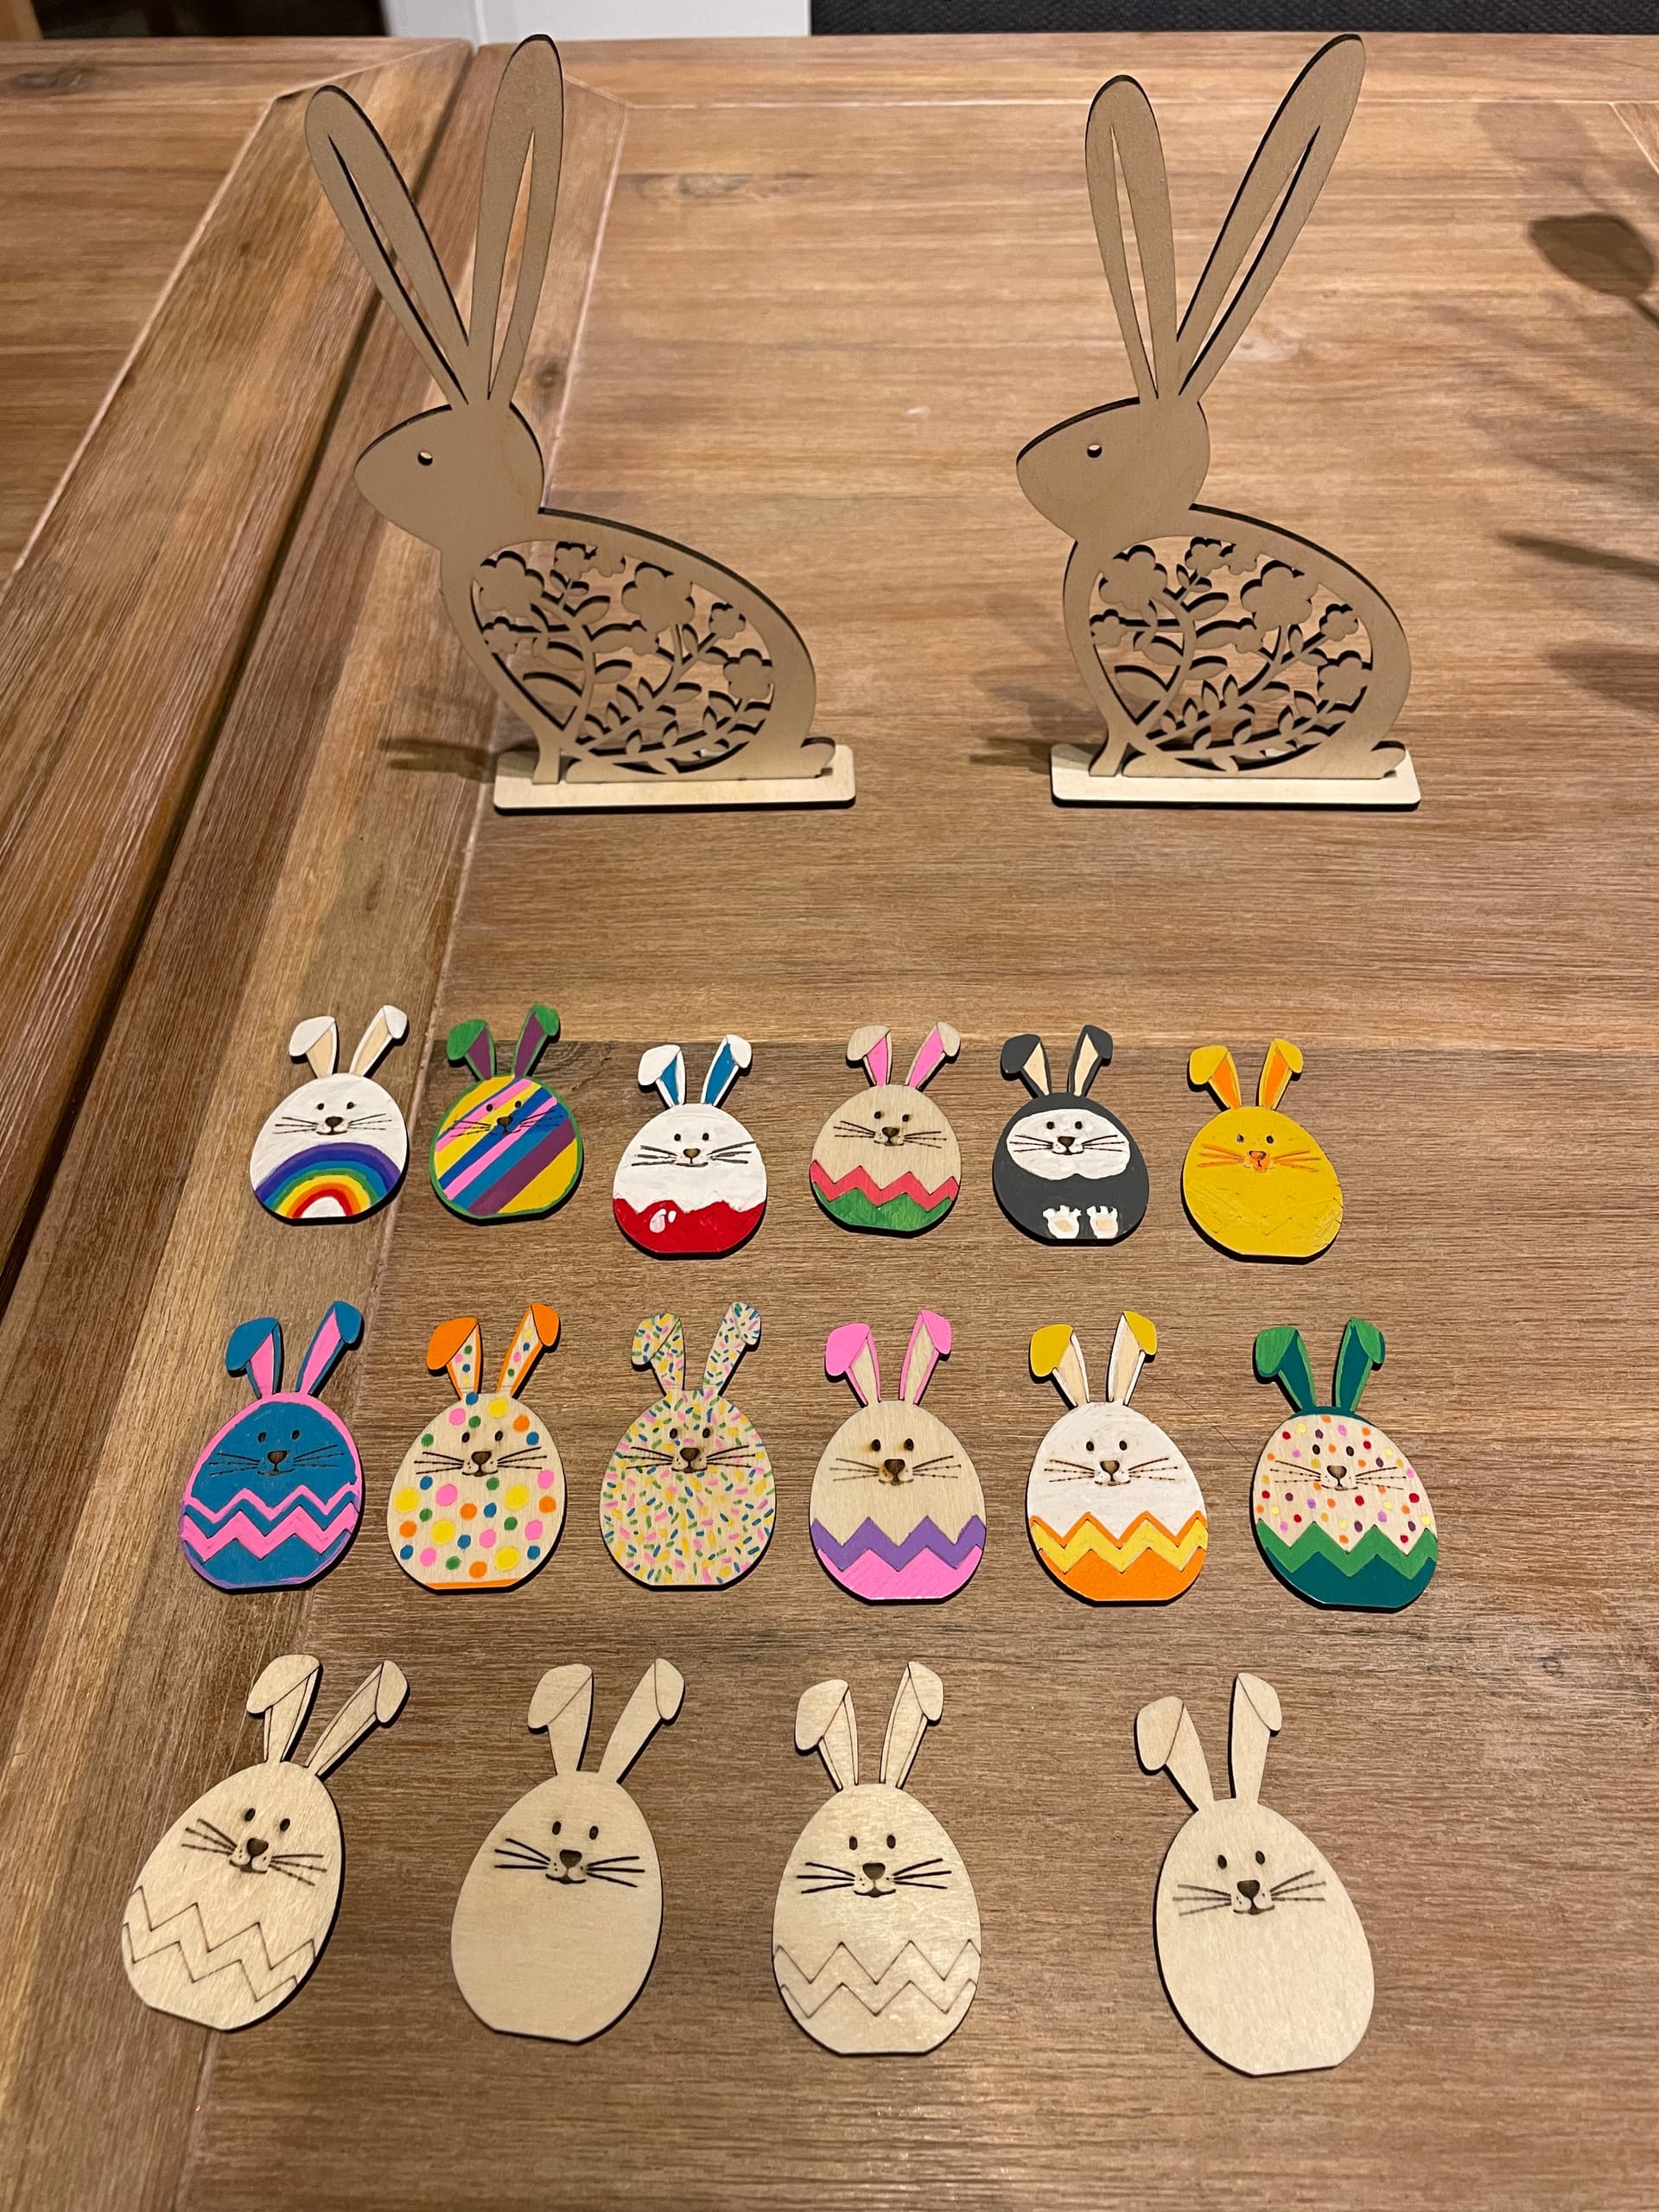
It’s the first “serious” project i design and build on and for my (still just) Laser Primo - rabbit orders from my wife it’s nice but it’s fine 5 minutes :wink: - and i’m quite glad of the result so I wanted to share it with you in my MPCNC log.

A long post ! I hope not TLDR, more pics than text thus :slight_smile:

13 Likes

That looks awesome. And more than that, it looks like it would be super fun to design and build. :+1:

1 Like

I love that feature in lightburn. Very cool

Quite a moment i didn’t posted anything, my daughters then us have been sick every week for a month and a half, my skr pro 1.2 board burned down because of 2 heatsinks that came off the drivers, my fault i knew and previously wrote that those too long cables were a big mess :confused: 
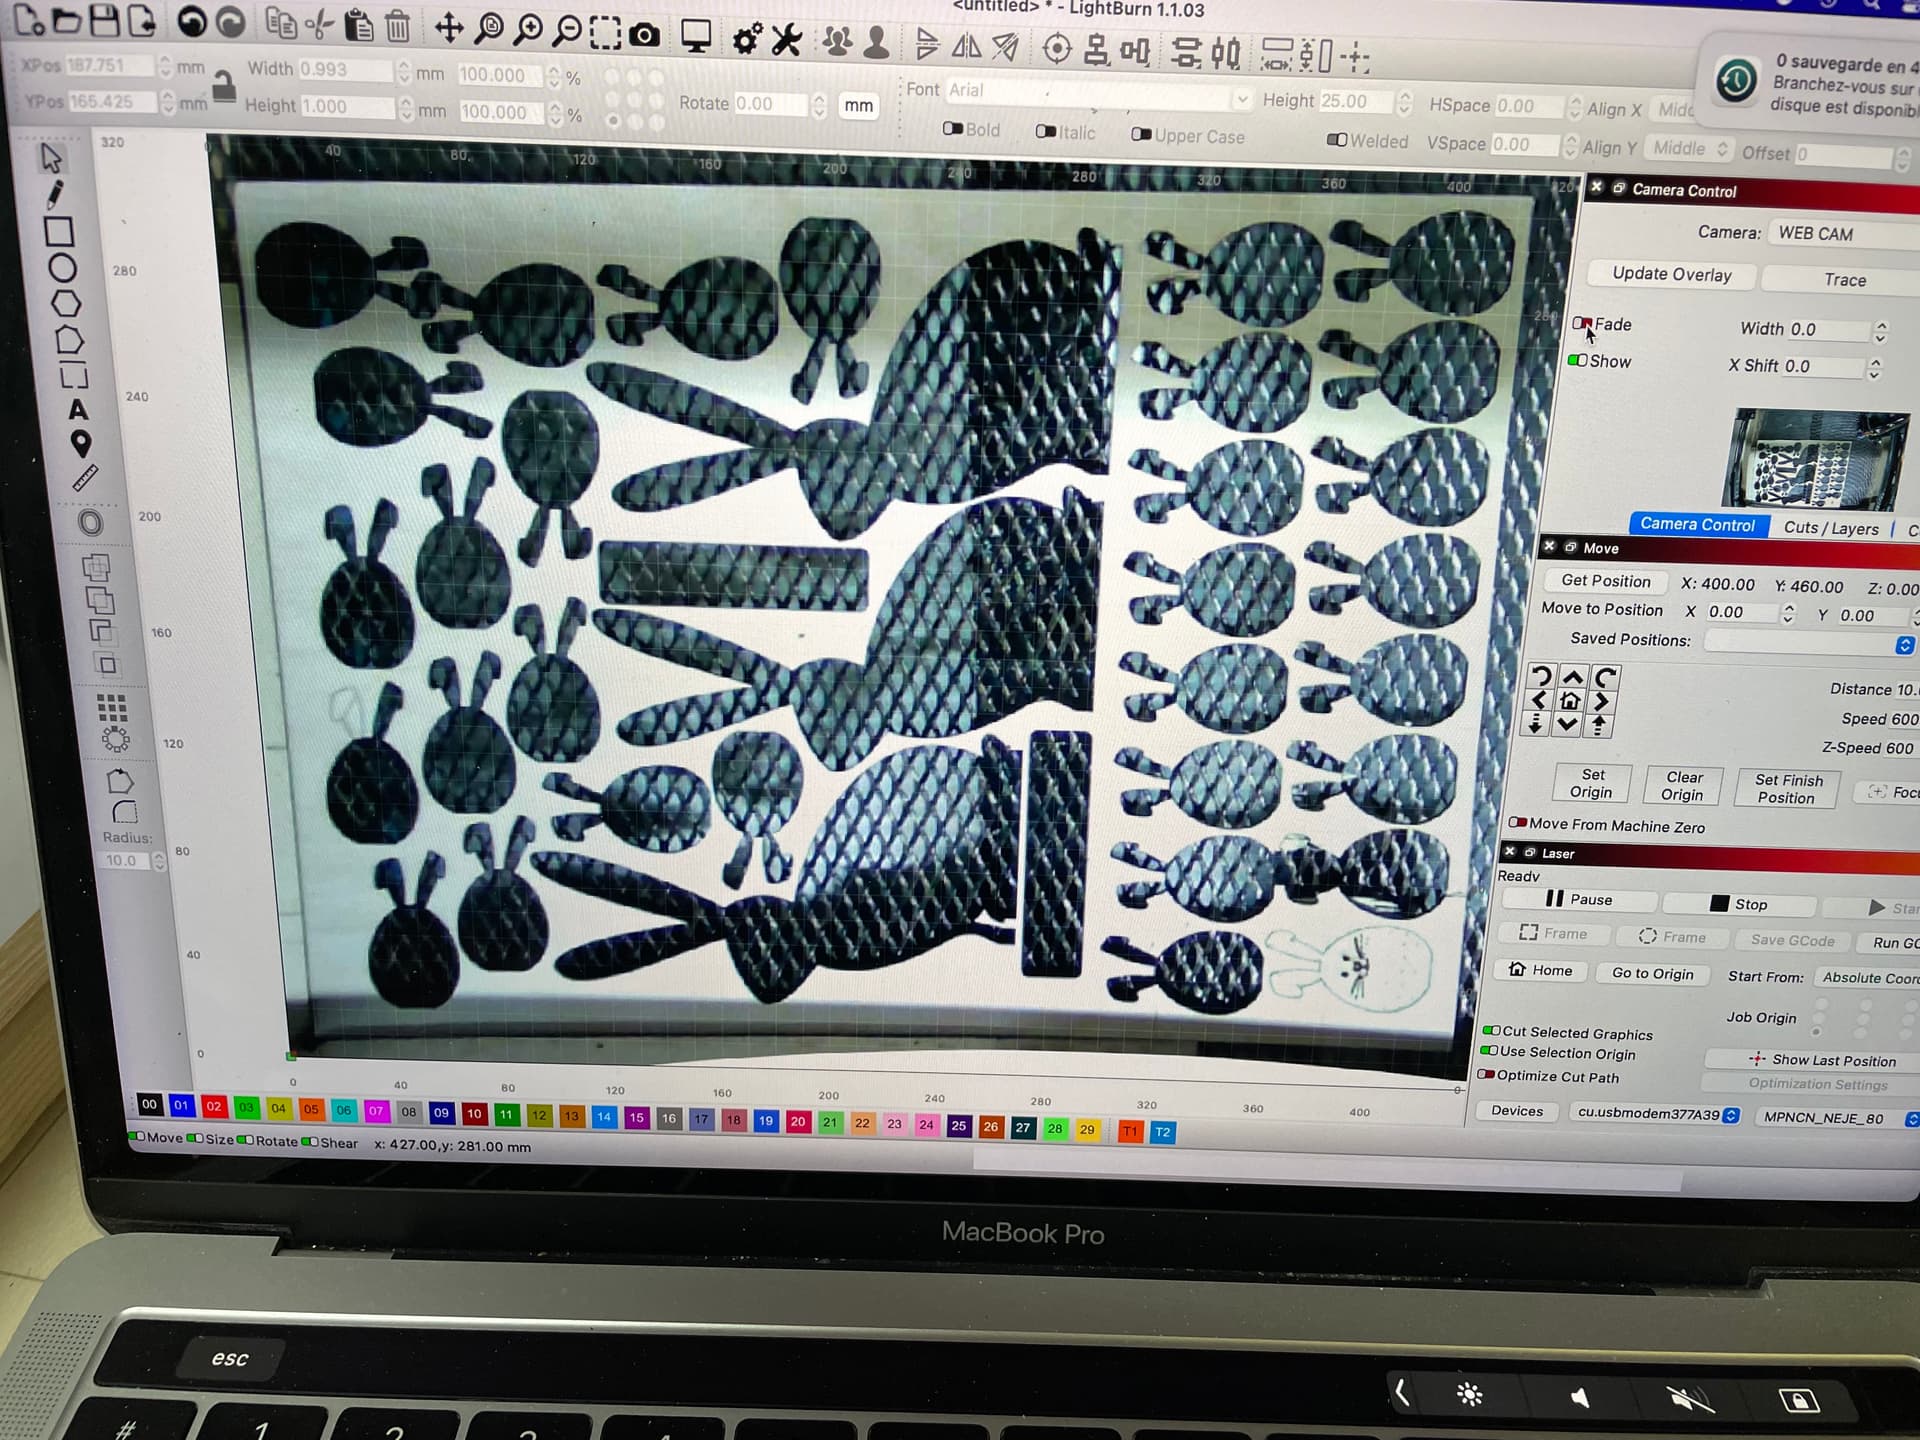
Hopefully it happened right after I finished cutting a batch of Christmas presents
Covid just before the new year :frowning: But 2022 has passed long live 2023 !

I bought a second-hand skr pro 1.1 but never used for 30 euros, I will be able to repair it soon, just hope that the drivers have not been damaged either…

I also just bought the sculpfun S30 pro Max, 20W optical laser power(12mm in one pass ! ) and the air assist pump is included and directly actionnable under lightburn with M8 M7.
Still quite expensive but the machine is on special offer at 719€ instead of 1300€(very overpriced) right now so I jumped on it. I will receive it next week…
That machine can be extended to 935x905mm cutting area with an affordable kit, but not plans on it for the moment.

I will keep my Primo and i will try to spend more time on fine tension tuning, use it on a drag knife setup, and maybe also finally use a router on it…

Running Grbl on the new machine should also help me to continue my tests on grblHAL on the skr pro as i will always have the sculpfun ready to burn on demand and most of all more quickly with less lack of power/glue fails.

Recently noticed heatsinks fell off my drivers too, dumb luck discovery while installing V1E ESP01s. Not sure if heatsink fell off due to cold weather and/or pressure from the long wire length in the beautiful but cramped compact enclosure. Currently looking for better heatsink adhesive? Also contemplating cutting out an opening in enclosure top so clear acrylic can slide in. Goal being to enable quick visual inspection of excess dust and/or anything else needing to be tweaked.

1 Like