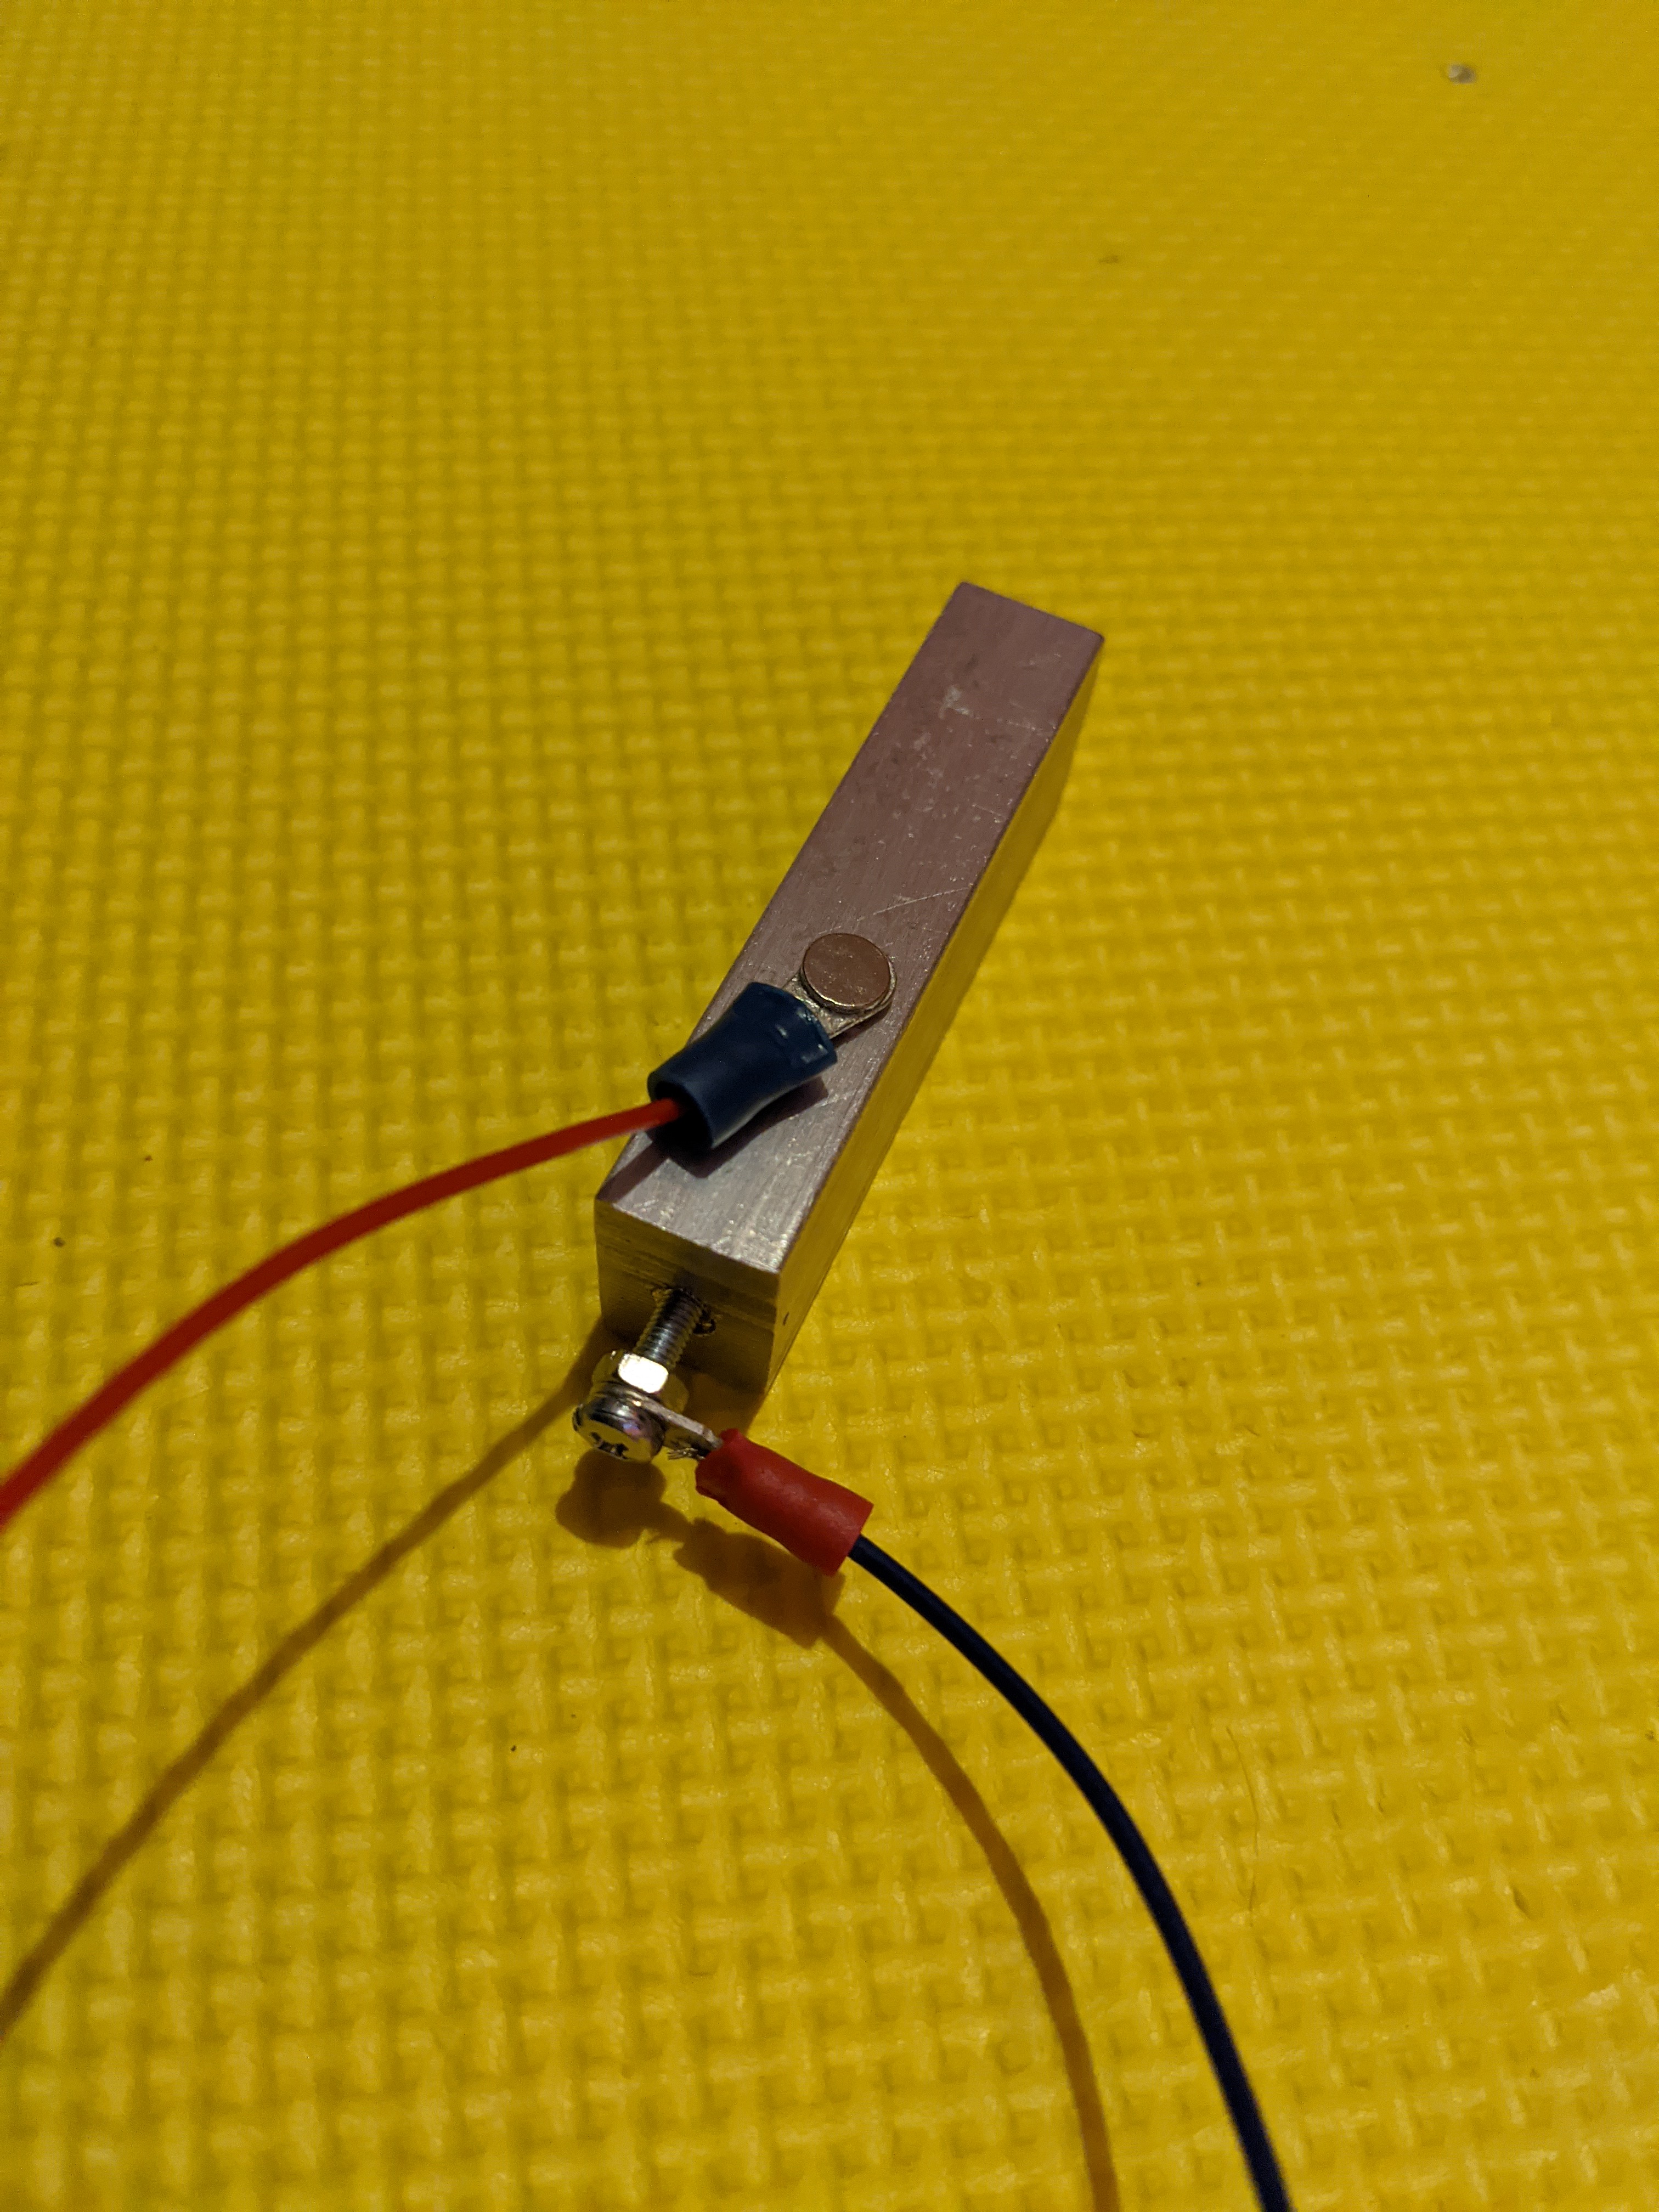
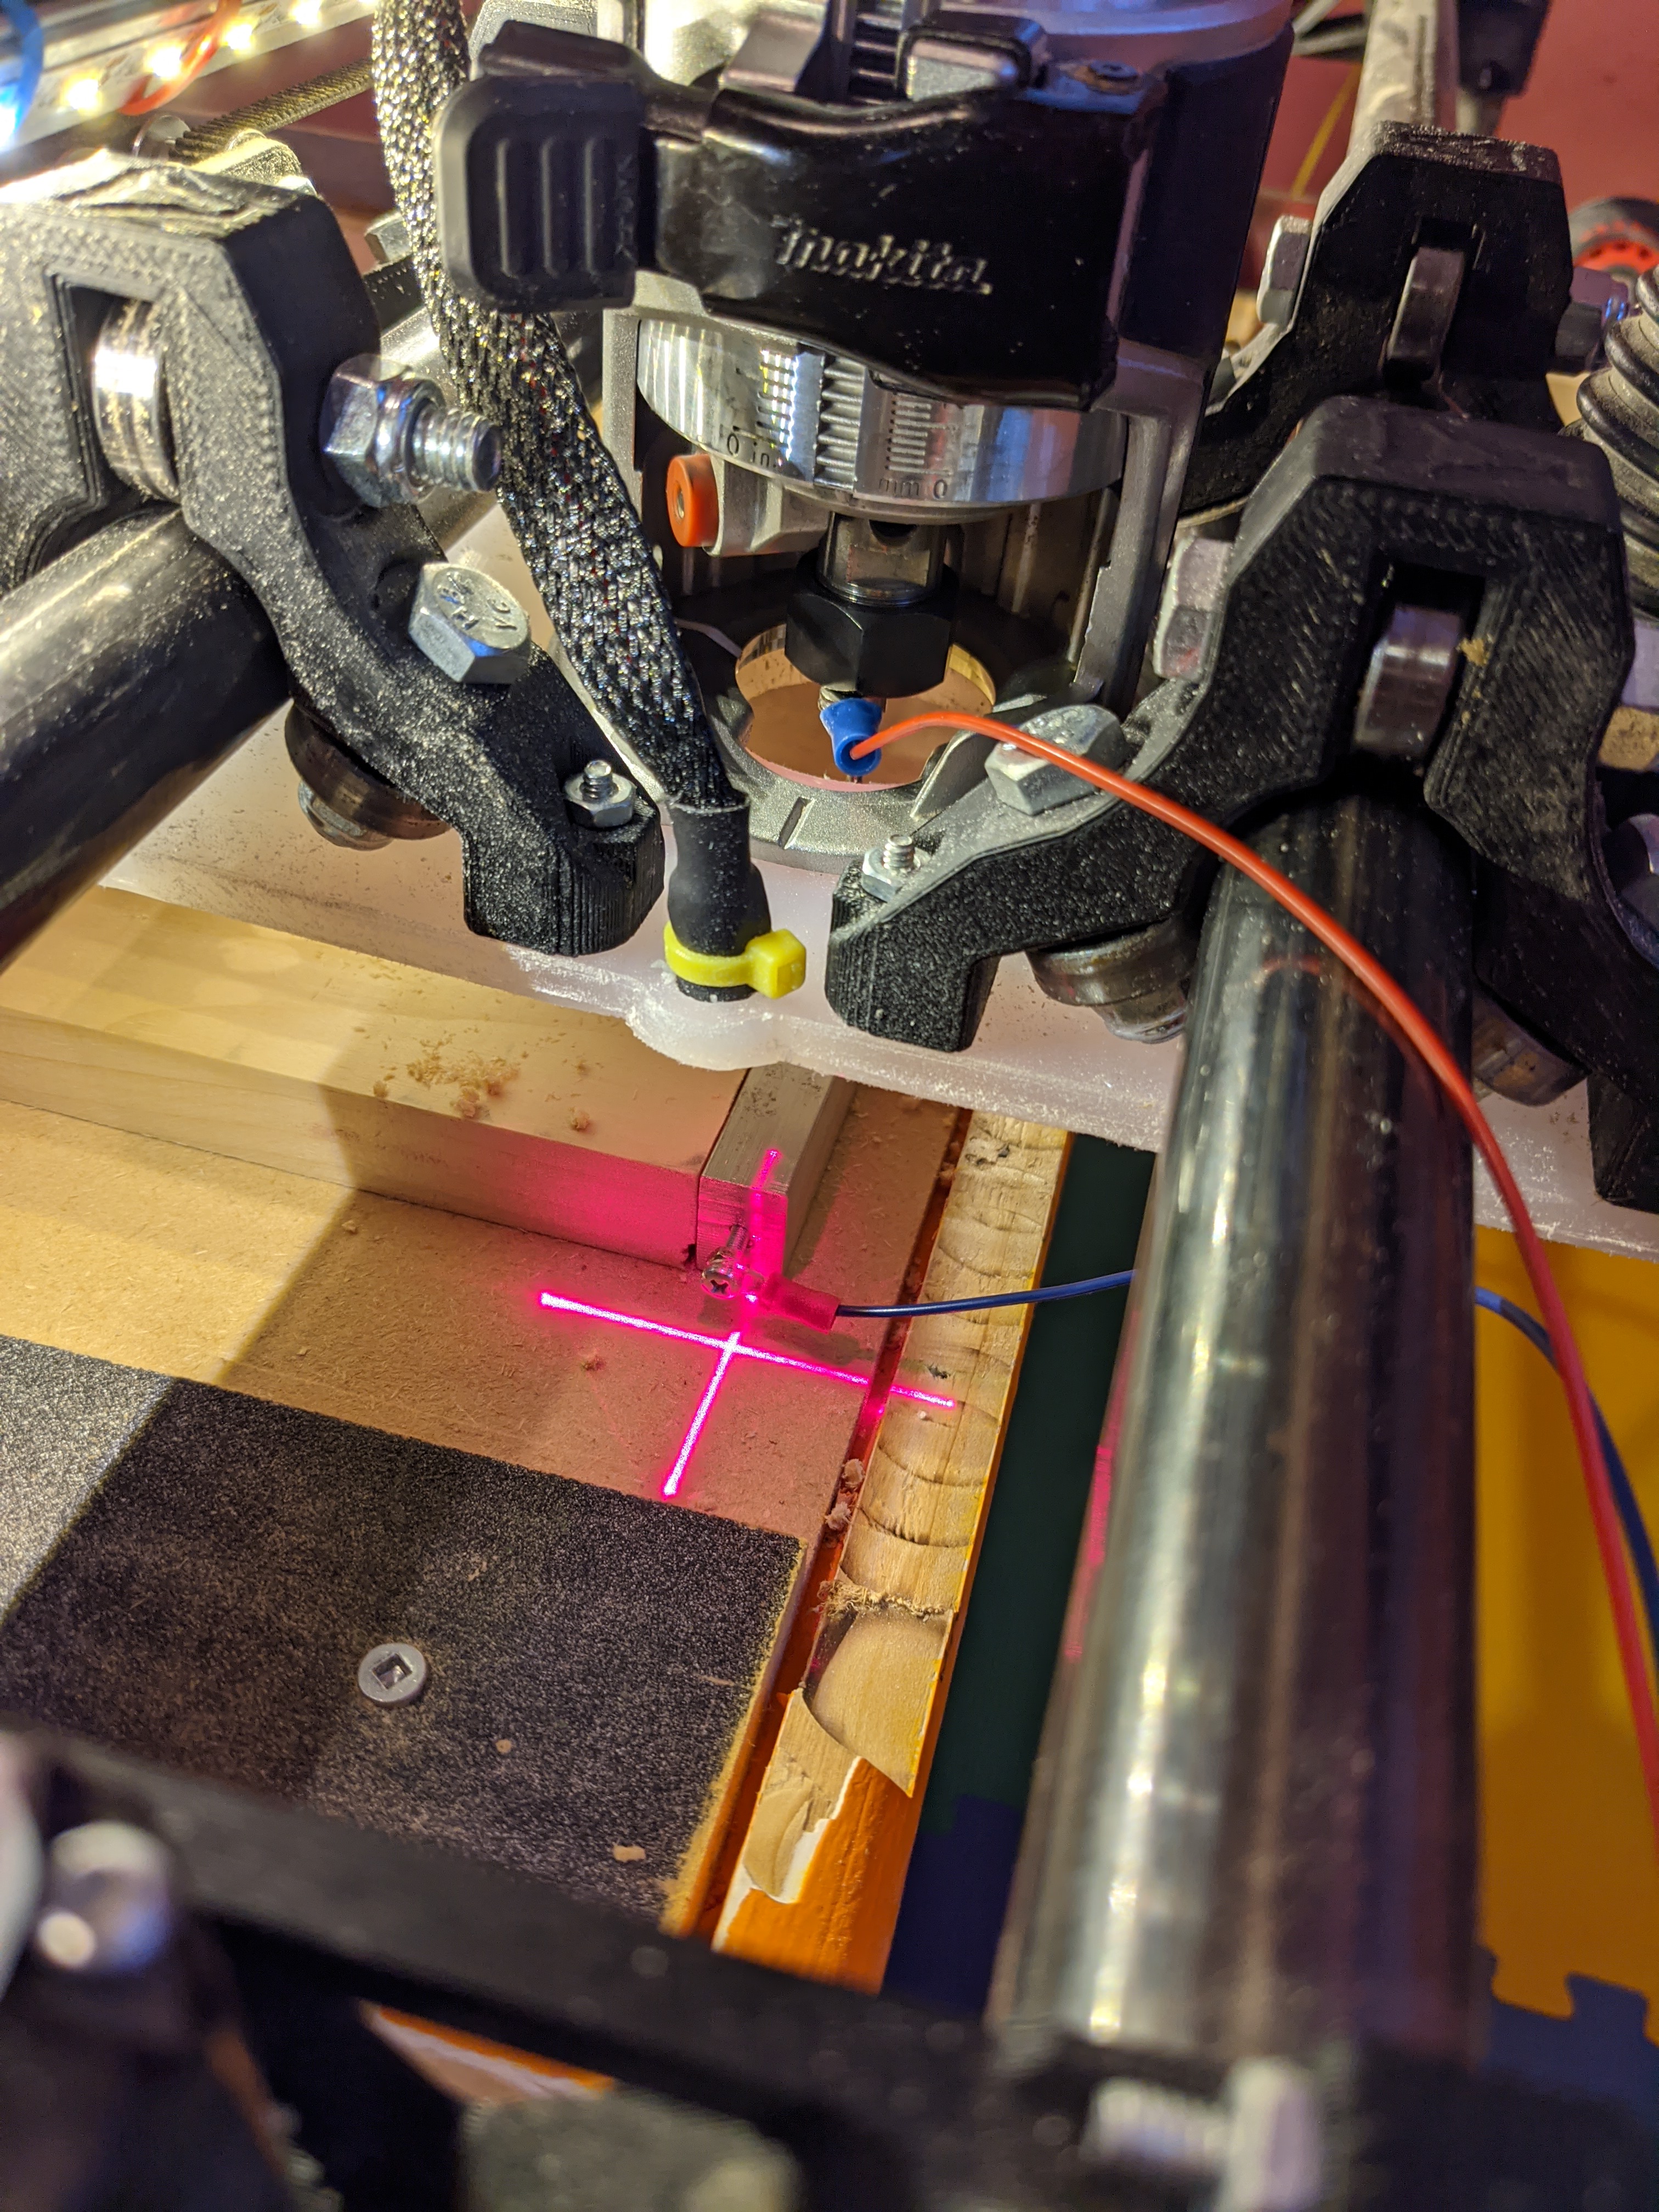
3/4" tall aluminum bar cut to 2.5" to match the end of the wood, screw and nut combo to hold the wire on one end, magnets on the other end, the circle in the middle used for the crazy glue, tiny round magnets either side. Have to do up a firmware routine to touch the sides to get zero for x and y.
Something like:
Home Z first, Z up, Y to -20, Z down, home Y up, Z up, Y to 5, x to 50, Z down, home X left, Z up. Offset by known width and height of the bar and the bit radius.
Just found out who’s going to give me a helping hand to wire, install and understand V1’s tiny touch plate… I was not going to go for this but I see all the guru’s use it, so I thought it might be handy using it.
Marlin is a bit inflexible when it comes to homing, it assumes the end stops are all separate with fixed function, I will have to see how much trouble it is #define it all away and do my own entirely. Marlin’s exhaustive #defs make me want to either run or search and destroy.
The other option would be to connect all the end stops so one connection triggers them all, for my initial idea, I would have to change the Y direction and Y homing plug to max. Not sure which is more obnoxious. I am not sure I can even reuse any of the existing bump functions. Probably best to go total custom and ignore everything existing with the word homing.
There was a thread where G38.2 was expanded to X and Y and there was even some custom code to trace an edge to determine square, but I believe that was very much a prototype. I can’t remember where it was, or who worked on it.
Going with the mod route first, to see if that can be done.
configuration.h:
A few changes, set Y homing dir to be positive and to use YMax end stop and create a define.
SanityCheck.h:
Disable the errors for the Y end stop, added in X for good measure. EDIT: not needed anymore.
endstops.cpp:
This is probably where I will be able to get somewhere, still working on it.
EDIT —snip old code—
So far X works and Z works, Y still an issue.
EDIT 2:
Well that was just the reversed Y Axis direction, lol
  // Now, we must signal, after validation, if an endstop limit is pressed or not
  if (stepper.axis_is_moving(X_AXIS)) {
    if (stepper.motor_direction(X_AXIS_HEAD)) { // -direction
      #if HAS_X_MIN || (X_SPI_SENSORLESS && X_HOME_DIR < 0)
        if (ENABLED(USE_ZMIN_PLUG_FOR_ALL_HOMING))
          PROCESS_ENDSTOP_Z(MIN);
        else
          PROCESS_ENDSTOP_X(MIN);
      #endif
    }
    else { // +direction
      #if HAS_X_MAX || (X_SPI_SENSORLESS && X_HOME_DIR > 0)
        if (ENABLED(USE_ZMIN_PLUG_FOR_ALL_HOMING))
            PROCESS_ENDSTOP_Z(MIN); // always min, not a bug
          else
            PROCESS_ENDSTOP_X(MAX);
      #endif
    }
  }

  if (stepper.axis_is_moving(Y_AXIS)) {
    if (stepper.motor_direction(Y_AXIS_HEAD)) { // -direction
      #if HAS_Y_MIN || (Y_SPI_SENSORLESS && Y_HOME_DIR < 0)
          if (ENABLED(USE_ZMIN_PLUG_FOR_ALL_HOMING))
            PROCESS_ENDSTOP_Z(MIN);
          else
            PROCESS_ENDSTOP_Y(MIN);
      #endif
    }
    else { // +direction
      #if HAS_Y_MAX || (Y_SPI_SENSORLESS && Y_HOME_DIR > 0)
        if (ENABLED(USE_ZMIN_PLUG_FOR_ALL_HOMING))
            PROCESS_ENDSTOP_Z(MIN);  //always min, it's not a bug
          else
            PROCESS_ENDSTOP_Y(MAX);
      #endif
    }
G28.cpp:
So g28 x works g28 z and g28 y, just have to turn off the raising of the bit before x and y.
EDIT 3:
#define UNKNOWN_Z_NO_RAISE in configuration.h will work.
EDIT 4:
So, just need to do a custom macro that uses g28 and some moves.
EDIT 5:
Positive homing still not working, bah. -1 works for all 3.
EDIT 6:
Positive working, removed edits to SanityCheck, updated code above. All it does is define Y homing to be positive, and use ZMin for the trigger. G28 won’t work by itself, the bit has to be positioned first.
configuration_adv.h:
A note on homing Y, it will assume it reached the large end of the values for Y, so you have to set it to be zero again using G92 Y0. Also, use a starting Z depth so that you get enough coverage of the flutes so one of them is the widest.