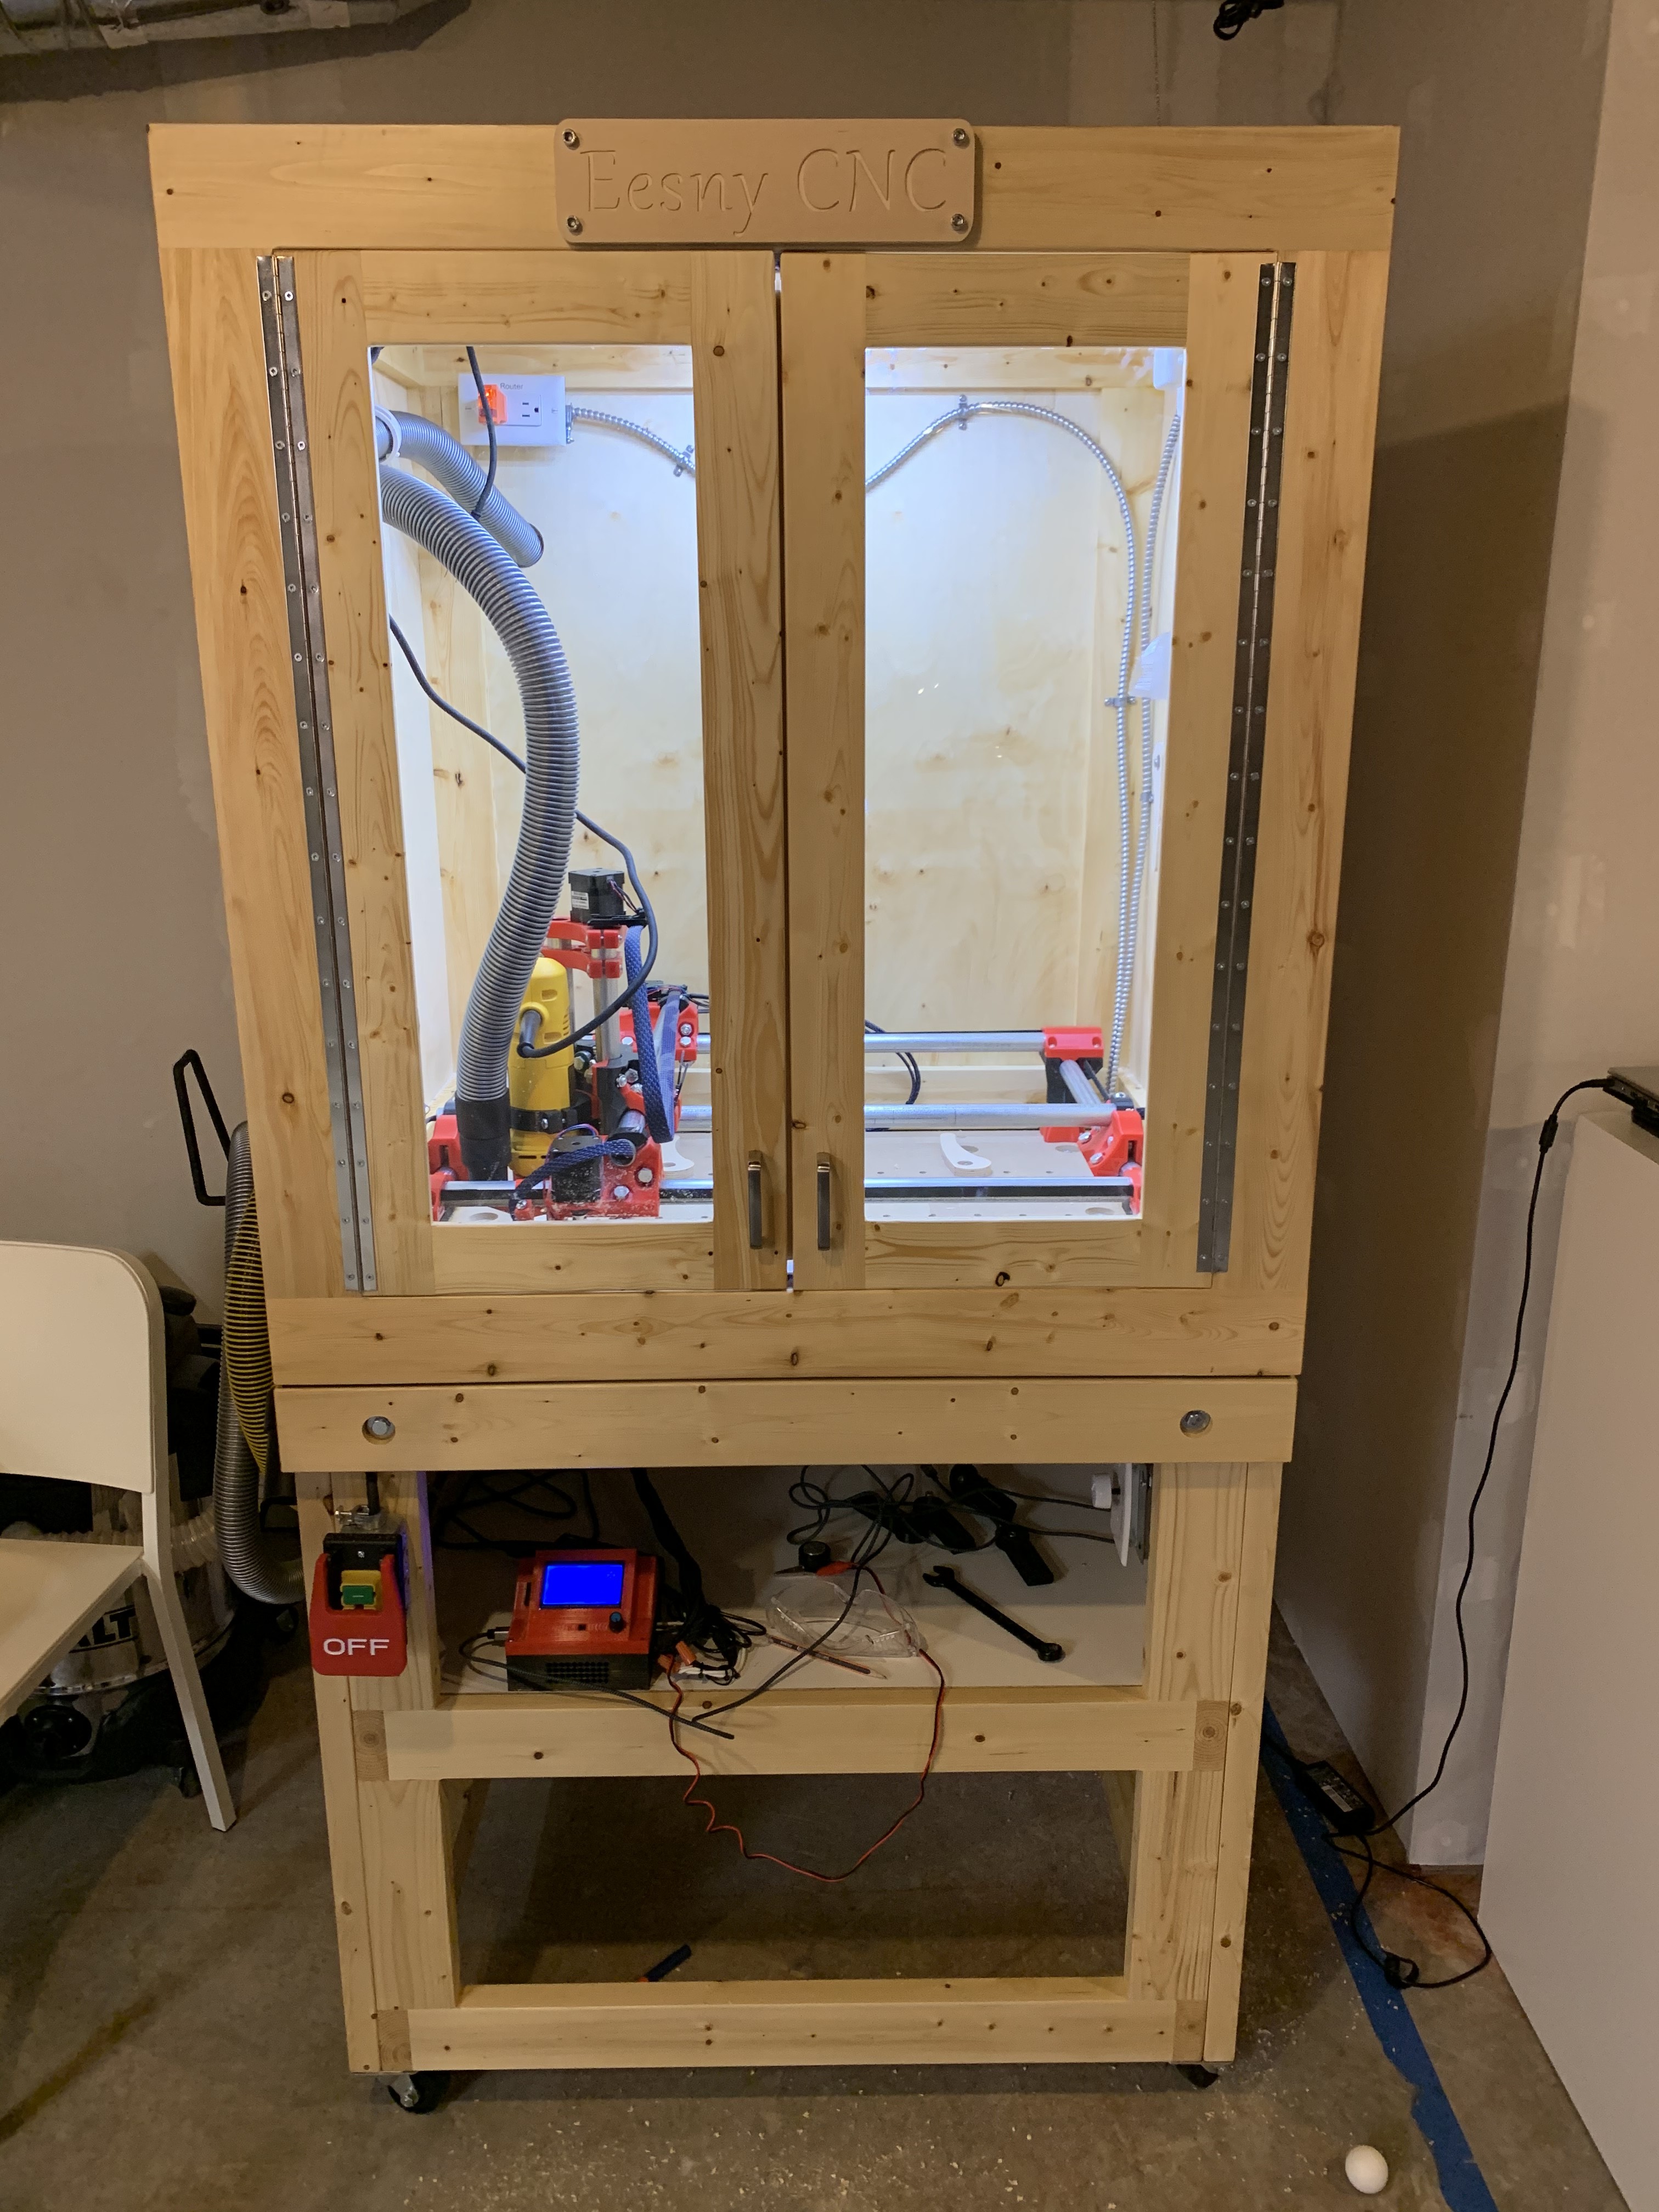
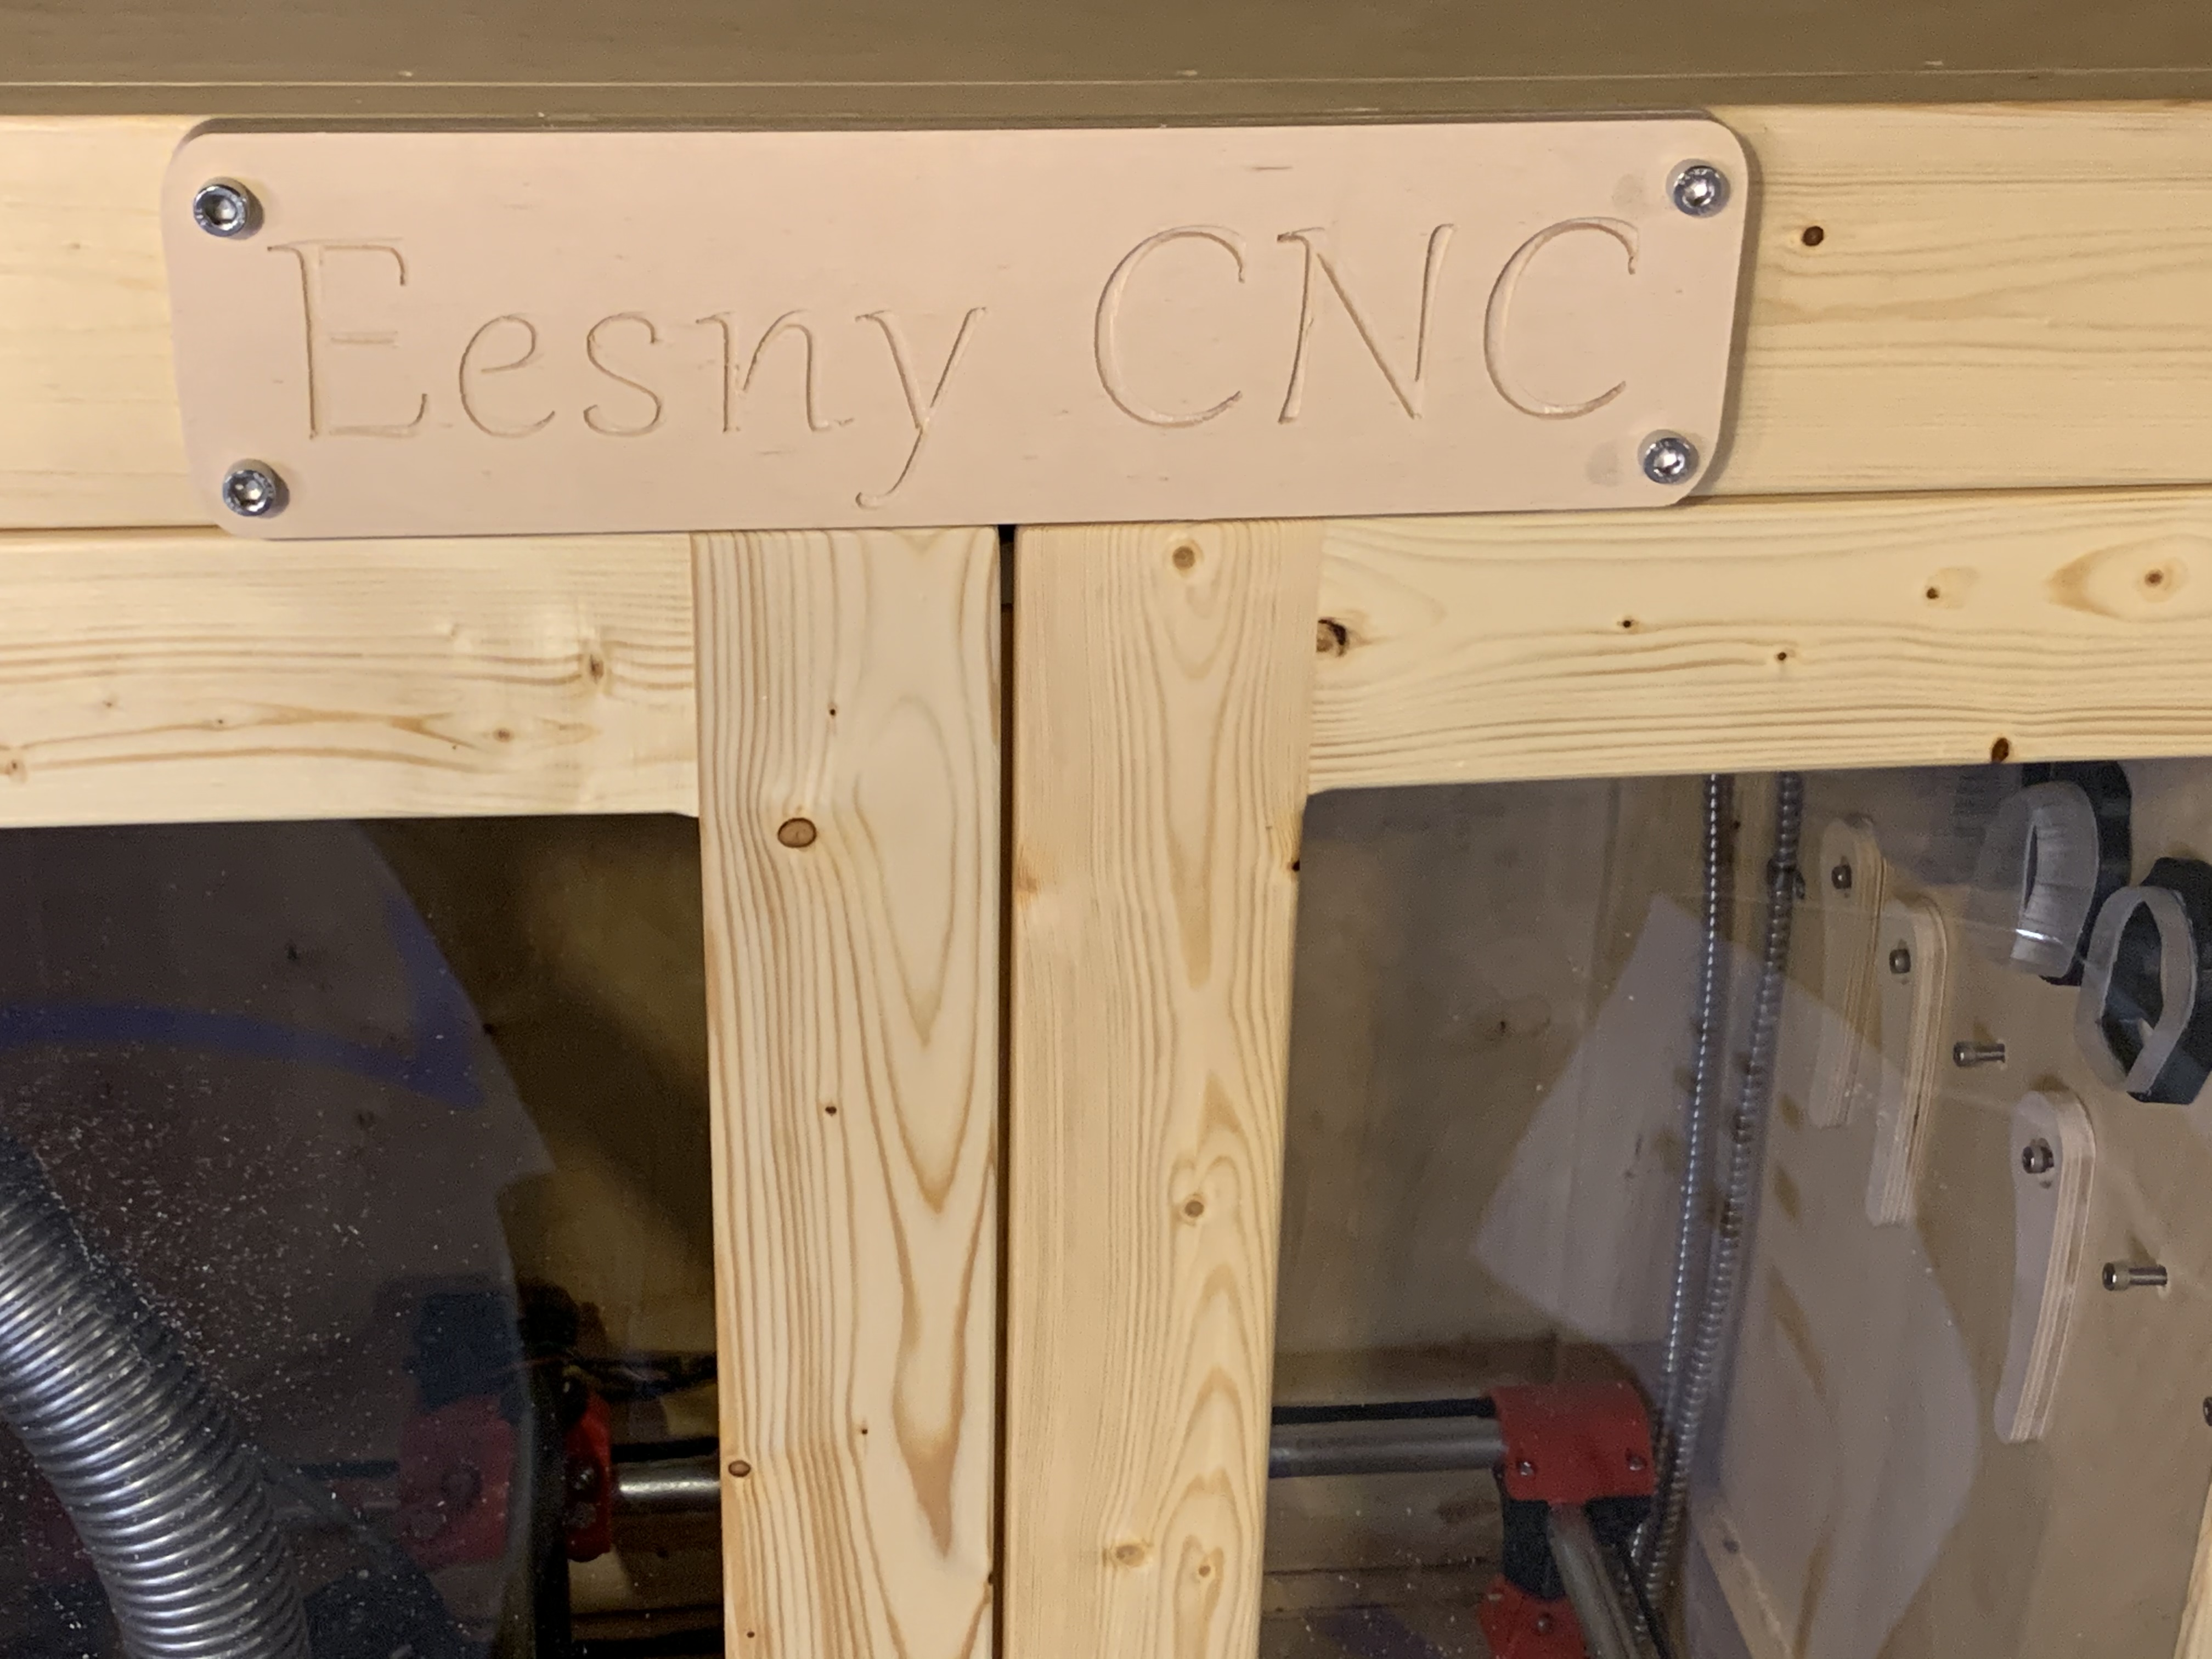
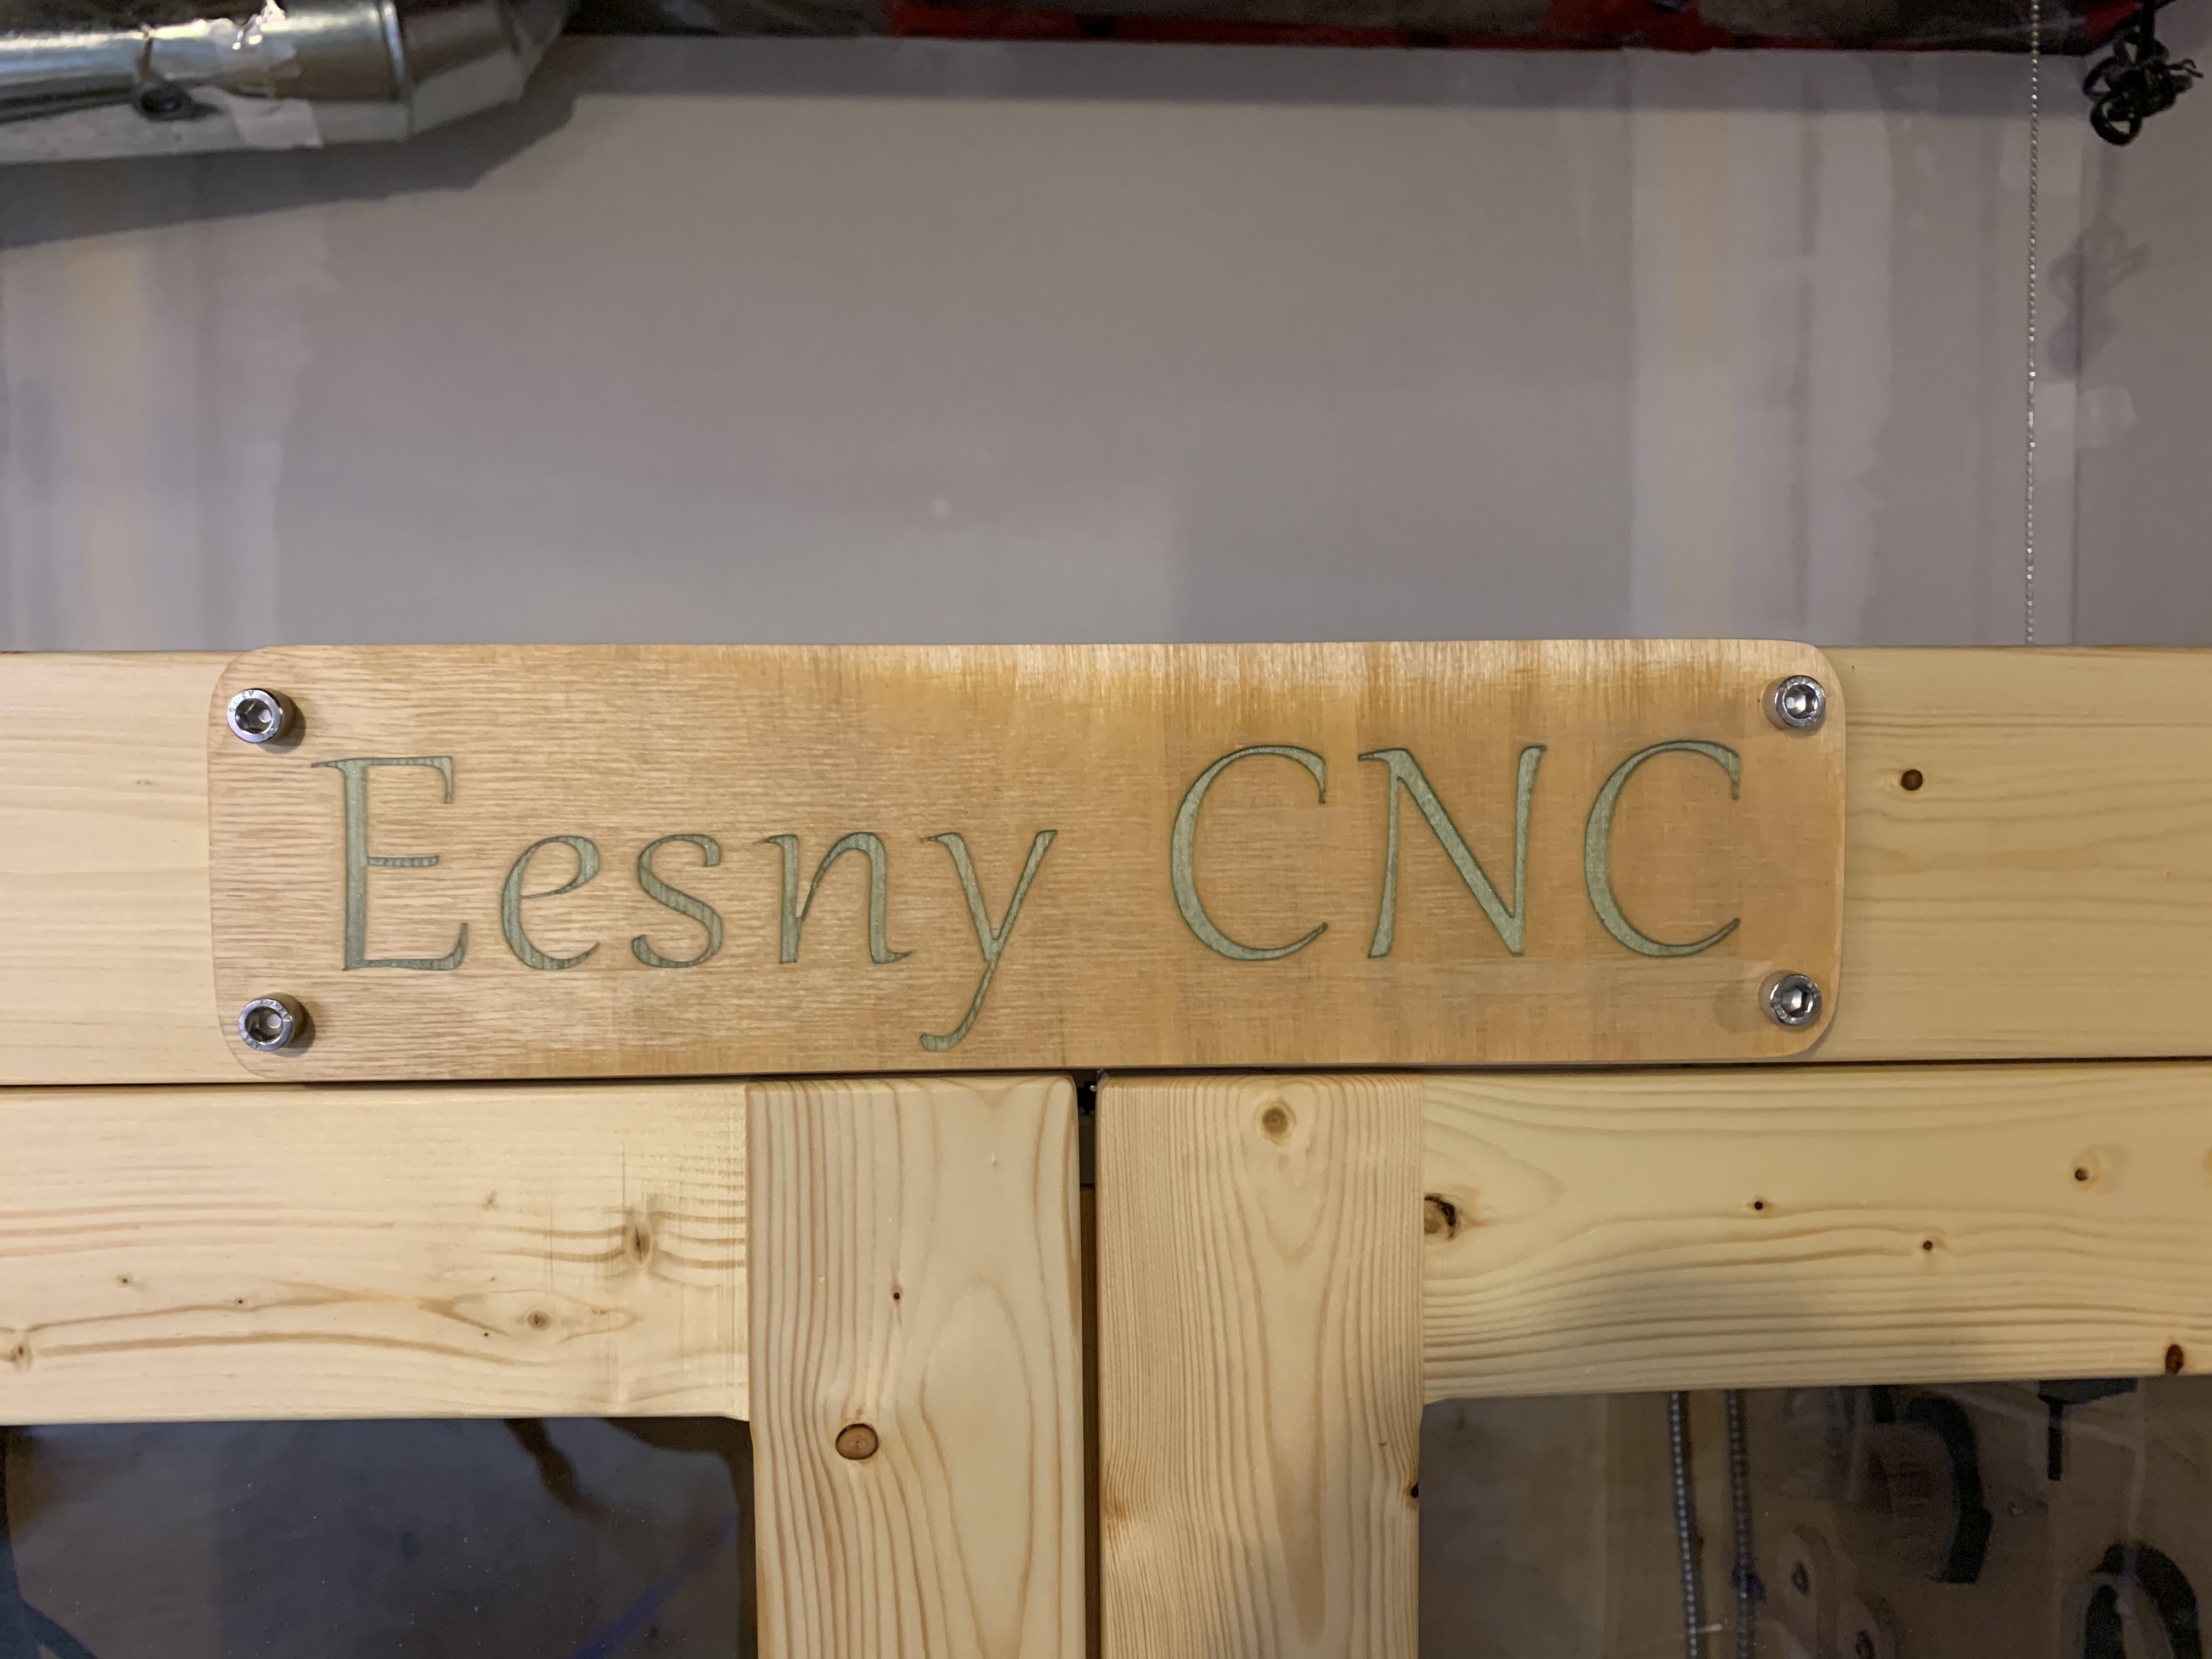
I decided to make a nameplate for my CNC. I polled for name ideas and a friend suggested “Eensy CNC”. As in “eensy weensy CNC”. So I very carefully drew up an outline in Inkscape, and set up text carving in Estlcam. I double checked everything I could think of: tool selection, feed rates, rpm, cut depth, clamping, X, Y, and Z zeroes. I made sure the collet nut was good and tight. Then I started the print!
The carving turned out great! And I carefully set up the part cut out, making sure I had enough holding tabs in the right places. I double checked all of the tool settings for my 1/4” spiral upcut bit. Then print! It turned out great!
I was pretty excited to show it off to my family, The first thing my son said when he saw it was: “what’s eesny?”. Oh no! I had a typo in the text! Oh well. it makes for a good story, so I kept it as is and attached it to my CNC enclosure. I think it’s pretty cool!
Looks great and good story. I went with my son and his Boy Scout troop to Philmont for 10 days of hiking in 2015. We had t-shirts made showing our trek, one highlight being Mt. Baldy.
The guy that designed them checked a few thousand times but after handing them out it took someone about 5 seconds to say “Mt. Badly?”
I used to joke with a friend of mine that I wished Ron Popeil of Ronco fame would quit fooling with the ‘Pocket Fisherman’ and chicken cookers and make an affordable home CNC machine. I guess I got real close by making a ‘Ryanco’ machine. I may have to make a nameplate.
I’d like to paint it, but not sure to do that without getting paint in the wrong places. Is there a technique that works well?
I have a build thread in the forum. I didn’t document each and every part of it though. I am considering doing a quick tour video of the features for my YouTube channel.
In MDF, I think it is easier than something like oak with a lot of texture.
The basic idea is to just paint everywhere and sand the paint off the top.
You can seal the wood first with something like polcrylic or shellac and then paint and the sanding should take the paint off the top easily. If you screw it up, you have learned a lesson in sign making, and have the tools to make another.
Another option is to cover the whole thing with masking before carving and then paint before removing the mask. Spraying clear can again help with bleeding.
Lastly, some people just will the paint in the right spot with a steady arm and a paint brush. I don’t know how humans can manage such feats of skill.
My first real business cards when I was 20 or so had a typo. I saved up all my money, had my friends and family check a dozen of designs I labored over for days. Went to the printers, checked the proofs, got the cards back “parkside ave” was “parside ave” I was devastated. Lesson not learned though. To this day I still get lost in the details and screw up the main idea. The Primo beta test was awesome, all the testers were printing for hundreds of hours, the first round four of the bearings were not even close to touching…and I have made at least 6 test builds at that point, never noticed.
Put a black sharpie in the CNC pen holder, define it as a 45 degree 3mm tool…
Personally, I paint in the grooved area, then sand. If I wanted to do something like pain the grooved letters black with the background white, I’d paint the black letters first, plus a little area outside the lines, then fill the letters with paraffin wax, scrape with a putty knife to remove MOST of the excess and sand to get to clean wood then paint the white background. A little heat to melt out the wax, and done.
Cheapest source for the wax is dollar store candles. You can use a heat gun to melt it, a 1500W hair dryer on max heat low fan will do it with patience. Controlling where it drips takes some patience. Practice away from your workpiece. If you get melted wax on bare MDF, it will probably wick into the material, which is why you paint outside the lines first. The paint will also wick in, but you’re covering it with more paint. Most paint won’t stick to the wax, so make sure you get it all off of the area to paint later.