Hello friends.
First of all, I want to start by thanking the creative designer, who I believe has achieved the dreams of thousands by publishing this beautiful, simple and executable design , anywhere, any time, even by anyone who may have the simplest experience in such projects.
Thank you so much Ryan.
I also want to thank everyone in this forum and in YouTube who have published their opinions and experiences on this wonderful project.
Thank you, super society.
I was not sure about sharing my experience in building the MPCNC where at first I thought that it would be only building a machine matching the rest of the previously builts without any additions or modifications or without anything important.
But when I started preparing and studying how to build and was following the videos of others in their builds and the more I followed and watched the more I benefited and clarified me points were vague in one of the videos or posts and then comes a video or some qestion of someone else shows those points and so on.
In the end, I decided to publish my experience, which might one day help someone build his machine.
And where you can find a better place to share this building than this wonderful place.
I started my journey more than a month ago, finished printing all the pieces, in addition to some things help in the adjustment and calibration.
I bought all other items from here and there , some arrived and some are still in the way.
I also designed a small part to tighten the belt, I don’t know now whether it works or not, I will publish it when I make sure it works well.
[attachment file=116551]
That’s it for now.
The pieces will remain under the couch waiting for the rest of the pieces to arrive and the most difficult task is to empty one room or find a better place to work more comfortably
as I am still working from the living room.
Best wishes for all.
Sorry about the language errors in this post and what comes next, that’s what I got from Google Translate.
I do not see how you are going to fit the assembled machine under that sofa, but I am willing to watch.
I suggest when you assemble, before starting to adjust the belts with your system, snug all the zip ties loops as tight as you can get them, so your tensioner isn’t working against the flexibility of the loop. I believe that will allow you better control over the belt tightness. Remember though that they don’t have to be very tight, just enough to keep them from slipping on the driven pulley.
Monte edilmiş makineye o kanepenin altına nasıl sığacağını anlamıyorum, ama izlemeye istekliyim.
Montajı yaparken, kayışları sisteminize göre ayarlamaya başlamadan önce, tüm fermuarlı halkaları mümkün olduğunca sıkı tutun, böylece gerginiz döngünün esnekliğine karşı çalışmaz. Kemerin sıkılığını daha iyi kontrol etmeni sağlayacağına inanıyorum. Çok sıkı olmaları gerekmediğini, ancak tahrik kasnağında kaymalarını engellemek için yeterli olduklarını unutmayın.
Hahahahaha
I’ll find a way to make it fit under the couch just like how i get it in the first place [attachment file=116568]
As for the belt tightening system, you are absolutely right.
I will work on standard assembly first and then, if necessary, make adjustments to it, to better capture problems if they occur.
I really don’t need to translate much when I read, but in writing I need translation to get my idea better.
However, thanks for the translation.
Welcome dear
I am fall in love of the 3D world since childhood
And some time ago I wanted to make a channel on YouTube interested in 3D , techniques and like stuff … But the project was not completed . at that time I designed this logo to be the logo of the channel.
My name and last name both start with the letter J so I added a third J to fit the 3D space.
And the cube is known to represent the three axes in this space .
thats all story.
By the way, when I start assembling my machine, I will upload videos to that channel that could be a start for that project.
Hello friends
I started building my machine about a week ago, depending on my time.
I have filmed videos for all the assembly steps as I will post them in a video series as a Beginners guide to building The MPCNC machine.
This is the first video link in the series and it is general and basic information such as the definition of the machine and the applications that can be used with it.
I would be very grateful if you subscribe to my channel and follow the videos and make comments, whether in the video comments or here.
For information, my YouTube channel is not profitable and I did not allow any ads, so if any ads appear while watching the video, please let me know.
Beginners guide to building The MPCNC machine Part 01
This is the Part02 of the same series
In this video:
First I’m showing everything I have prepared to build my machine,.
Then I am building the machine frame.
Hope you like it.
This is the Part03 of the same series.
In this video I will continue with the built ,where I will start assembling the Z-axis block then I will assemble the middle section.
Please if you can help me, to be specific if you can watch the video from this time 56:39 Cheking the perpendicularity of the X and Y tubes and doing some controling.
Am I doing anything wrong?
You ended it correctly, use it a bit, then come back to it.
When you do, it seems to be mostly opposite of what you are thinking. Your angle is too wide, so loose 1.5" bolts, snug on the 5", but also the 2.5" bolts play a huge part, if those are a bit too tight they can push it open as well.
After you use it, start with everything loose, get the 2.5" just snug enough not to let things wiggle and see where you are at. Sorry but I hope the next iteration is even easier to square, the burly is easier then the previous iterations.
I can’t thank you enough, dear.
This continuous support I do not think you will find except in this forum.
As for my machine:
Yes, I am currently running it as it is, I mean the angle is open.
But I want to mention here:
After putting the belts on, and before I installed the end stop the machine was working well and when I drew a square with dimensions of 200 mm the dimensions were, as expected, completely incorrect and the angle of course was not right-angled.
But after I installed the EndStops and calibrated the stop block as much as possible, things improved a lot.
I noticed that the measurements became so accurate that I drew a right-angled triangle with the dimensions of 600 X 800 the string came about 998, and this is a good thing as I think, is’t it?
Here is my question in the case that the angle is open between the X and Y axes, the motors facing a resistance when do narrowing the open angle and remain engaged and work to keep the angle upright.
Do I have to worry about the heat of the motors?
To be aware that the motors are 1.7 Amps and the value of the VREF should be 0.85 as they were calibrated at the first test run of the machine, and currently I have reduced the VREF to 0.75V.
I do not have a thermometer for such a situation, but when I touch it I do not find it hot, but I find it warm.
Hello friends
I had finished the electronics, the firmware and the wiring and ran the machine in the first successful test.
I discovered that the EndStops are not working as it is supposed to do.
and that was because an error in the logical status of the EndStops in the Firmware.
so I did changes to the logical status of the Endstops and re-upload marlin2 to the Arduino mega board.
and now the machine is working perfectly.
This is the video about that .
I hope it helps someone.
Another solution (if your switches are of decent quality): use the other set of contacts on the switches. Usually, good switches have three connectors. One is common, one is for NC operation, the other is for NO operation. So you can switch your switches behavior instead of messing with the firmware.
Not that changing the firmware is anything near “wrong”, just another solution for anyone running into the issue who might feel more comfortable with the electrical engineering vs the digital engineering…
You are absolutely right .
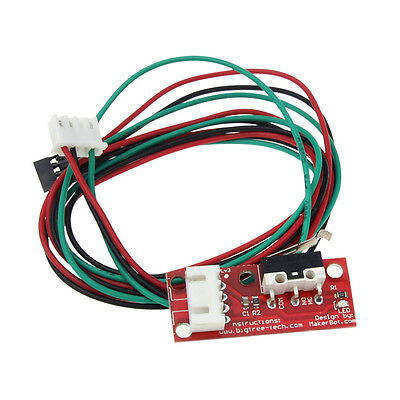
But in my case, just as you notice the Endstop Switch is from the kind that comes with its own board.
I did not want to change the places of the wires at the end of the connection.
So I changed the Firmware as in the video.